

The reason I like this so much is all the detail you've put in the rubble. You first imagined the building and then "deconstructed" it. Those elements are now seen laying on the ground. Parts of walls with the window frames still attached and even a part of a wall that has conformed to the rubble it lays on top of. Brilliant!
This is what creates the realism here as most dios I think show an impressionistic view of rubble and don't include the elements that bridge the gap between reality and impression.
This is also why your vehicles look so good.
Your dios always are a source of inspiration to me and as you can see by the other posters a lot of other folks as well.
Keep on keepin' on bubba!
J
Hosted by Darren Baker
Big Punch, Big Push

jrutman

Joined: April 10, 2011
KitMaker: 7,941 posts
Armorama: 7,934 posts
Posted: Monday, January 26, 2015 - 07:50 PM UTC
kurnuy

Joined: August 22, 2009
KitMaker: 1,491 posts
Armorama: 997 posts

Posted: Tuesday, January 27, 2015 - 12:19 AM UTC
If you say rubble in small scale , i say Nick ! Ow , i'm repeating myself....
Yeah man , you have that special flair to create small things and to make them very realistic.....
You blew me away mister and i loved it !
Kurt
Yeah man , you have that special flair to create small things and to make them very realistic.....
You blew me away mister
and i loved it ! Kurt
Stickframe

#362
Joined: December 01, 2013
KitMaker: 1,661 posts
Armorama: 1,202 posts

Posted: Monday, February 02, 2015 - 01:21 AM UTC
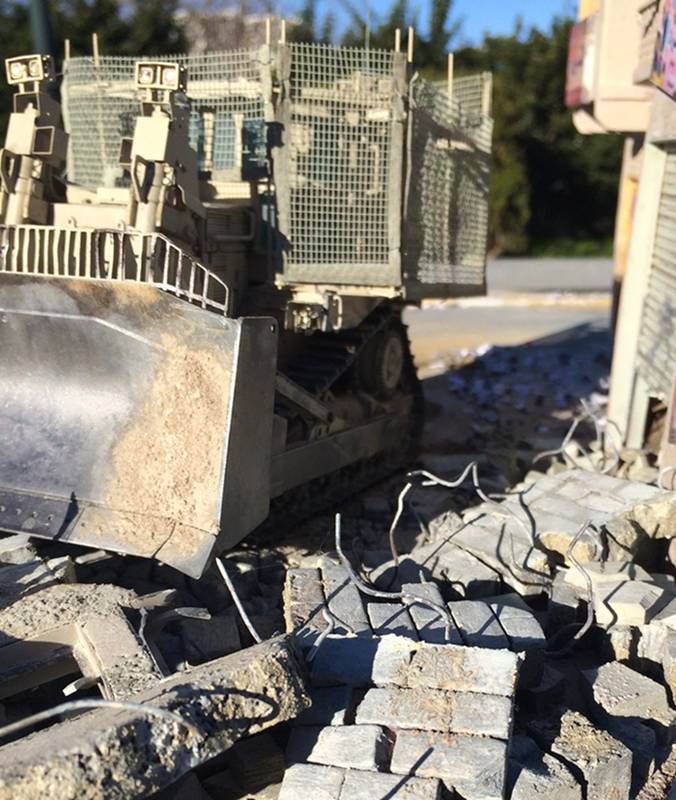
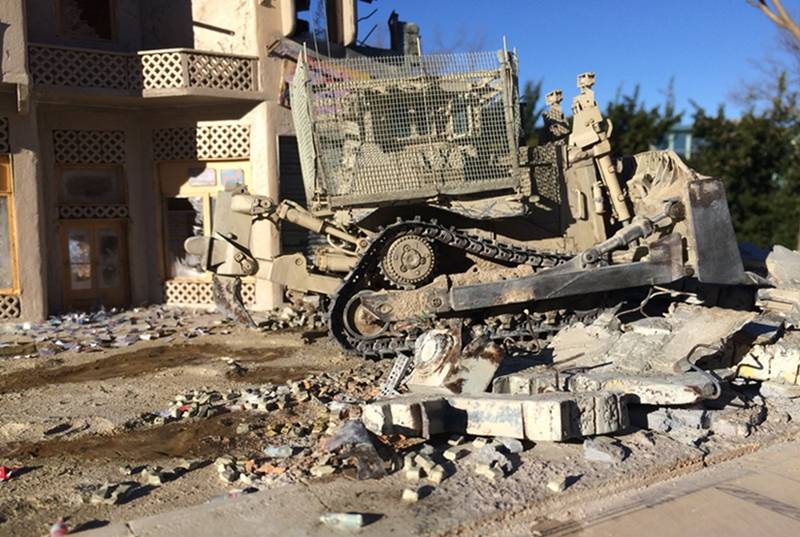
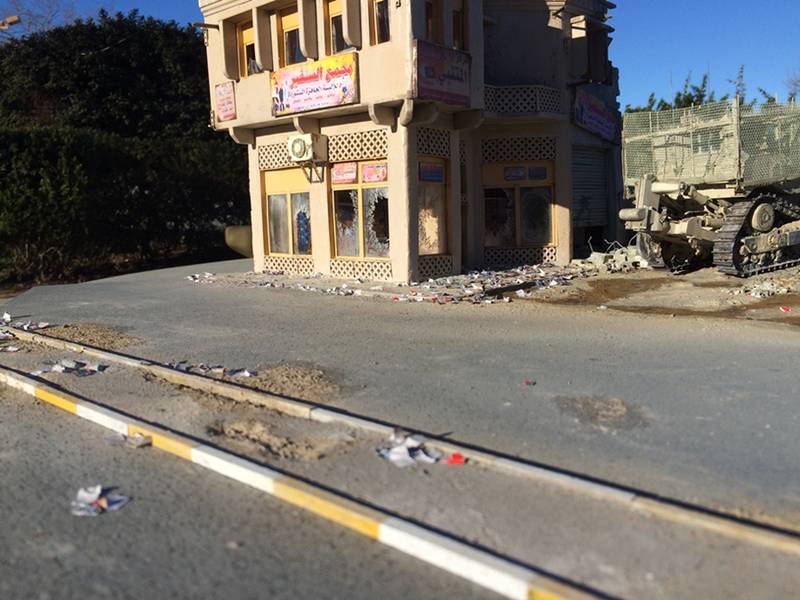
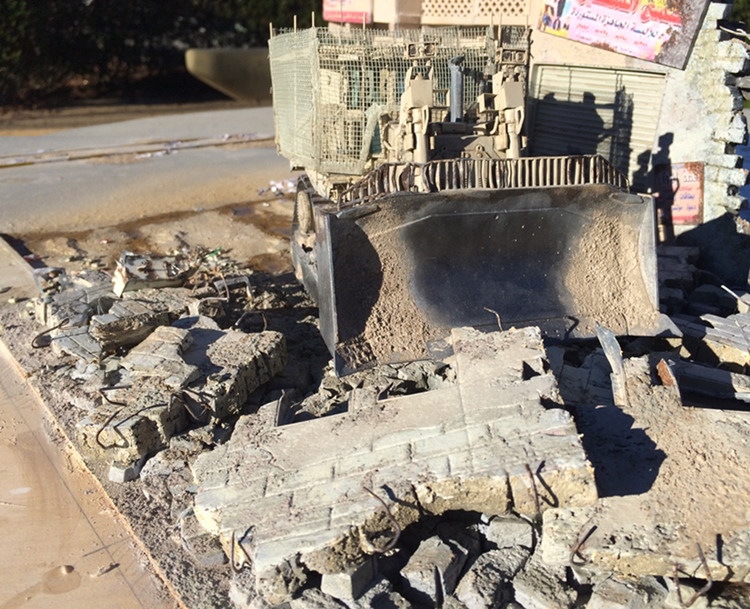
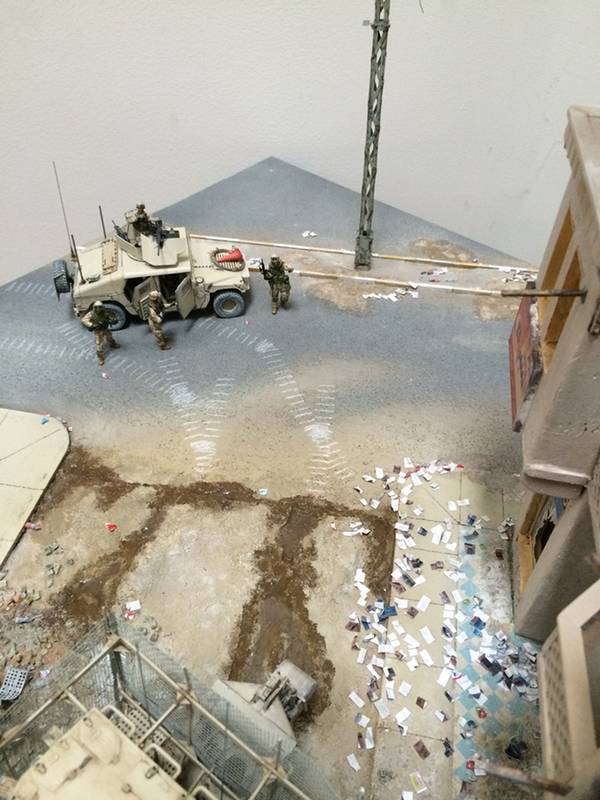
hey guys - an update on the dio - at this point, still a fair amount of debris and rubble getting worked on. That said, I think a lot of it is done. You'll see below, essentially each type of debris grew - more of everything, plus some extras - plastic bottles, aluminum wrap etc - and a bit more detailing done to the building. As always, the sun helps! you can actually see what's going on - OK, check it out:
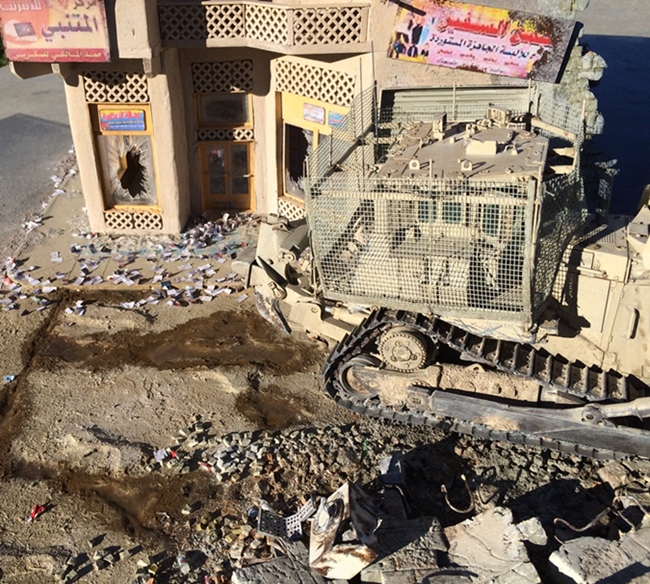
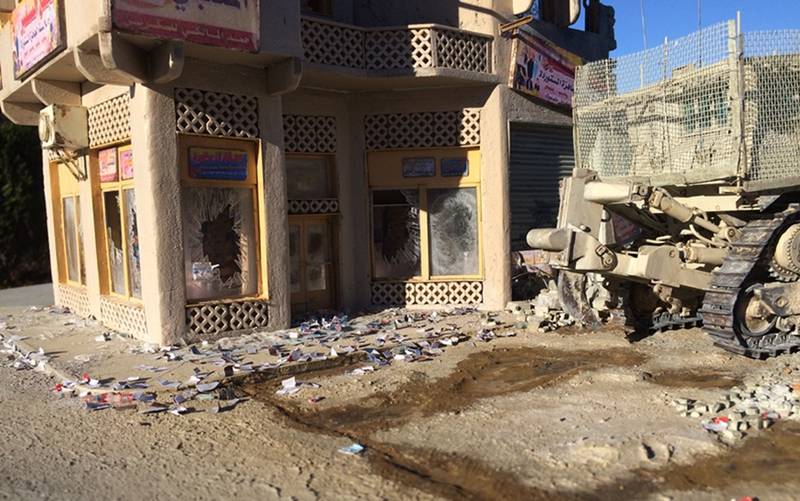

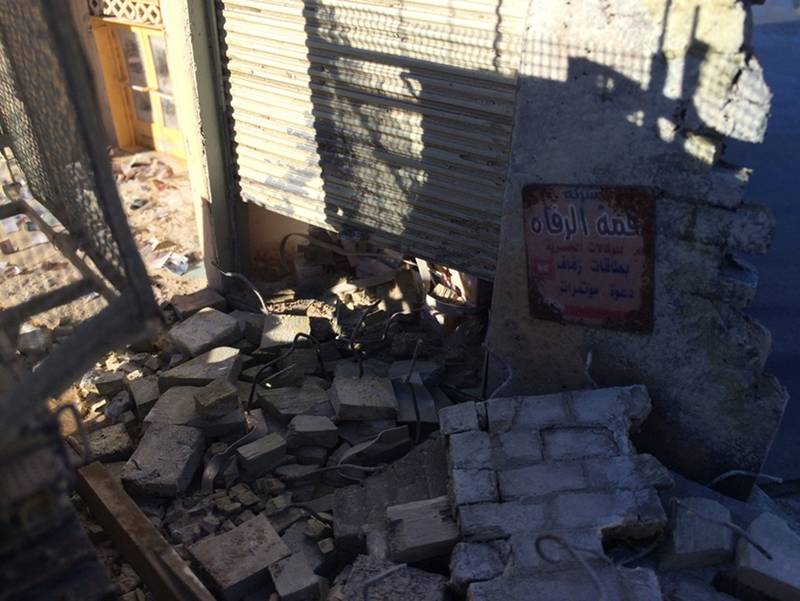
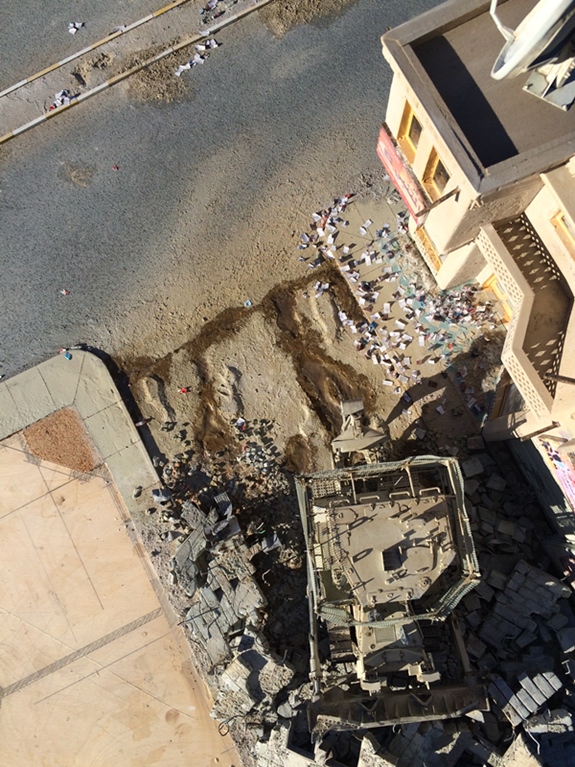
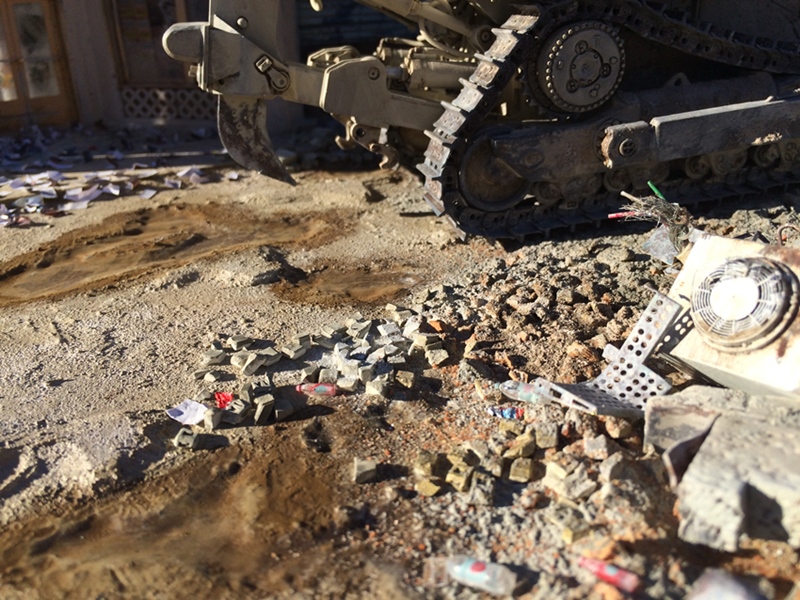
As you can see above, the ground plane is coming together, but still a long way for the dio itself -
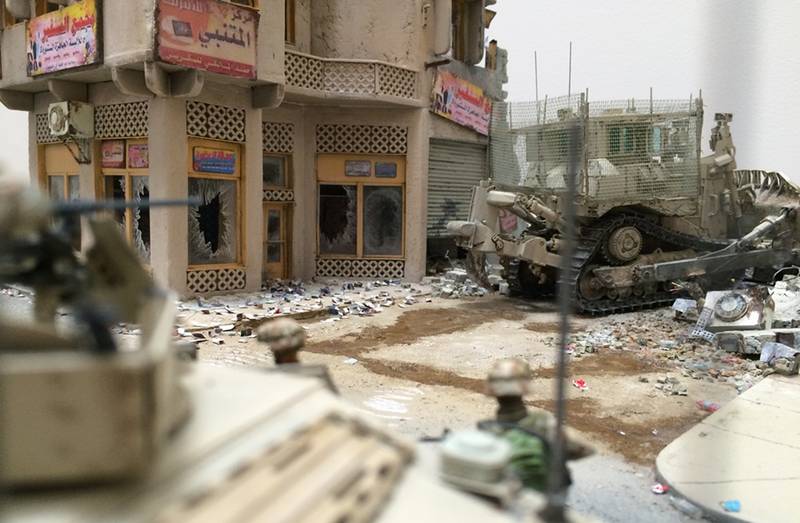
The idea is that the CAT is breaching a debris pile which the insurgents have set up/taken advantage of to both keep people out and fire from behind. The CAT is clearing the path for the team to sweep.
I think I've done enough micro-tedious tasks now to hold me over for a while (quite a LOT of individual nugget gluing occurred to complete the work shown above) now, I think I'll get onto one of the M1114's!
thanks for checking it out
Nick
As you can see above, the ground plane is coming together, but still a long way for the dio itself -
The idea is that the CAT is breaching a debris pile which the insurgents have set up/taken advantage of to both keep people out and fire from behind. The CAT is clearing the path for the team to sweep.
I think I've done enough micro-tedious tasks now to hold me over for a while (quite a LOT of individual nugget gluing occurred to complete the work shown above) now, I think I'll get onto one of the M1114's!
thanks for checking it out
Nick

justsendit
Joined: February 24, 2014
KitMaker: 3,033 posts
Armorama: 2,492 posts
Posted: Monday, February 02, 2015 - 03:04 AM UTC
Nick,
Such as the D9, you are unstoppable!!!
mike
Such as the D9, you are unstoppable!!!
mike
jrutman
Joined: April 10, 2011
KitMaker: 7,941 posts
Armorama: 7,934 posts
Posted: Monday, February 02, 2015 - 05:33 AM UTC
Frikken awesome as usual!!!
J
J
Stickframe
#362
Joined: December 01, 2013
KitMaker: 1,661 posts
Armorama: 1,202 posts
Posted: Monday, February 02, 2015 - 09:50 AM UTC
Hi guys, thanks for the comments!
I'll just keep building - that ground plane....ugh! But, worth it!
Cheers
Nick
I'll just keep building - that ground plane....ugh! But, worth it!
Cheers
Nick

matt
Joined: February 28, 2002
KitMaker: 5,957 posts
Armorama: 2,956 posts
Posted: Monday, February 02, 2015 - 05:12 PM UTC
The D9 is going to leave marks... even on the blacktop. Check out what this smaller dozer did:
http://www.postwtc.com/gbra-photos-02.html
http://www.postwtc.com/gbra-photos-02.html

Giovanni1508

Joined: April 17, 2014
KitMaker: 652 posts
Armorama: 600 posts

Posted: Monday, February 02, 2015 - 05:29 PM UTC
Quoted Text
The D9 is going to leave marks... even on the blacktop. Check out what this smaller dozer did:
http://www.postwtc.com/gbra-photos-02.html
Hi Matt, nice file. Very useful for reference
thanks
Stickframe
#362
Joined: December 01, 2013
KitMaker: 1,661 posts
Armorama: 1,202 posts
Posted: Monday, February 02, 2015 - 10:00 PM UTC
Hi Matt - yep, I'm assuming three different track marks - on the asphalt street - using both white pencil and maybe 20% grey; then, around the puddles - essentially mud splash; finally semi wet/faint tracks past the puddles. There just aren't enough hours in the day to do it all at once....
Thanks for you ref pics too - there were probably some on your nhood street -didn't they tear it up last year some time?
Ok - thanks, Matt - for now, off to work
Nick
Thanks for you ref pics too - there were probably some on your nhood street -didn't they tear it up last year some time?
Ok - thanks, Matt - for now, off to work
Nick

HeavyArty

Joined: May 16, 2002
KitMaker: 17,694 posts
Armorama: 13,742 posts
Posted: Tuesday, February 03, 2015 - 12:51 AM UTC
Looking good. I can't wait to see the HMMWVs and Bradley. Keep up the good work.
matt
Joined: February 28, 2002
KitMaker: 5,957 posts
Armorama: 2,956 posts
Posted: Tuesday, February 03, 2015 - 06:55 PM UTC
Quoted Text
Hi Matt - yep, I'm assuming three different track marks - on the asphalt street - using both white pencil and maybe 20% grey; then, around the puddles - essentially mud splash; finally semi wet/faint tracks past the puddles. There just aren't enough hours in the day to do it all at once....
Thanks for you ref pics too - there were probably some on your nhood street -didn't they tear it up last year some time?
Ok - thanks, Matt - for now, off to work
Nick
That they did... and still have work to do in the spring!
I remembered the excavators leaving makes on the pavement before the ripped it all up.

DaGreatQueeg

Joined: August 01, 2005
KitMaker: 1,049 posts
Armorama: 841 posts

Posted: Friday, February 06, 2015 - 04:18 AM UTC
Thanks for letting me know about this Nick, I'd somehow missed it. You're the modern engineering master lol Seriously though lots of great ideas and techniques on display here ....
Brent
Brent
Stickframe
#362
Joined: December 01, 2013
KitMaker: 1,661 posts
Armorama: 1,202 posts
Posted: Tuesday, February 10, 2015 - 10:47 PM UTC
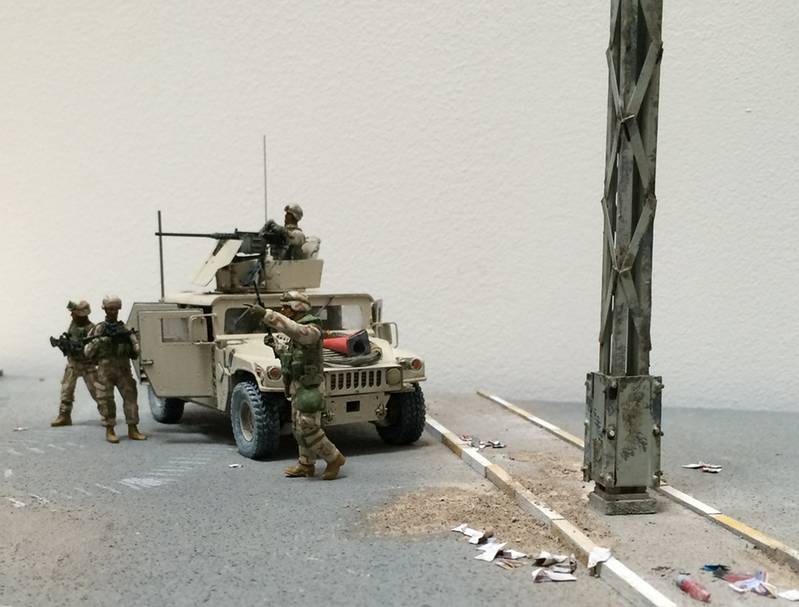
HI Model builders - I'll be doing a really quick post today - no time! I've spent the last week or so busy with work - and squeezing in some model time - the model highlights - a scratch built street light - yeah, sounds a bit dull and easy....it wasn't really either - it's all scratch built, lattice truss structure and all - and looks OK -
Next up, a Bronco M1114 up-armored - this should be one of the easier/better kits out there - in fact, I've built several of this - not this one!!!warped, and more warped...so, I guess the joke was on me! thought it would be the "easy" quick weekend build!! I was wrong - anyway, take a look:
Light post:
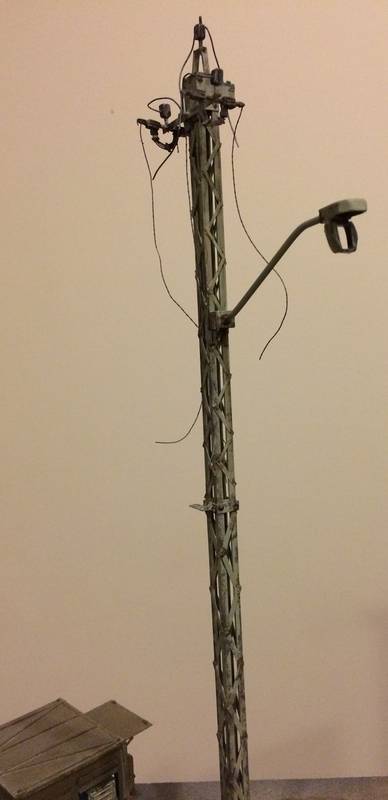
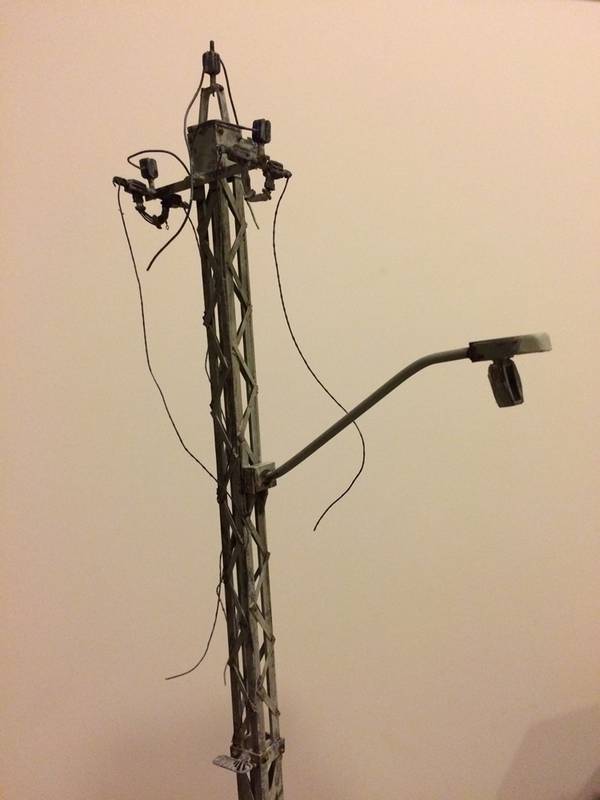
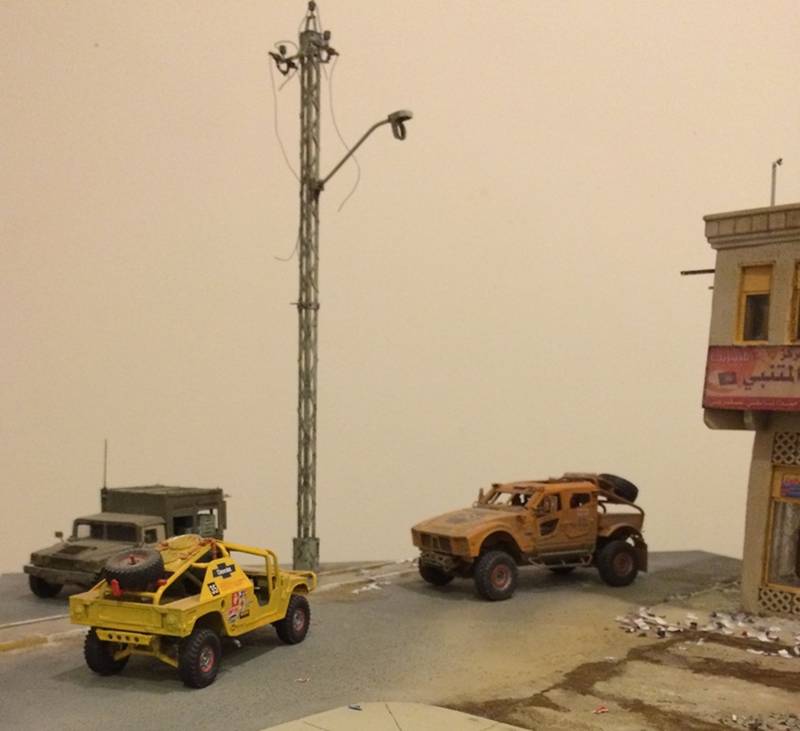
and there you have the light post - as you can see in the last pic...for a while I did other variants....for this dio, the M6 will be located where the MATV is - the M1114s, will be where the two in the pic are....
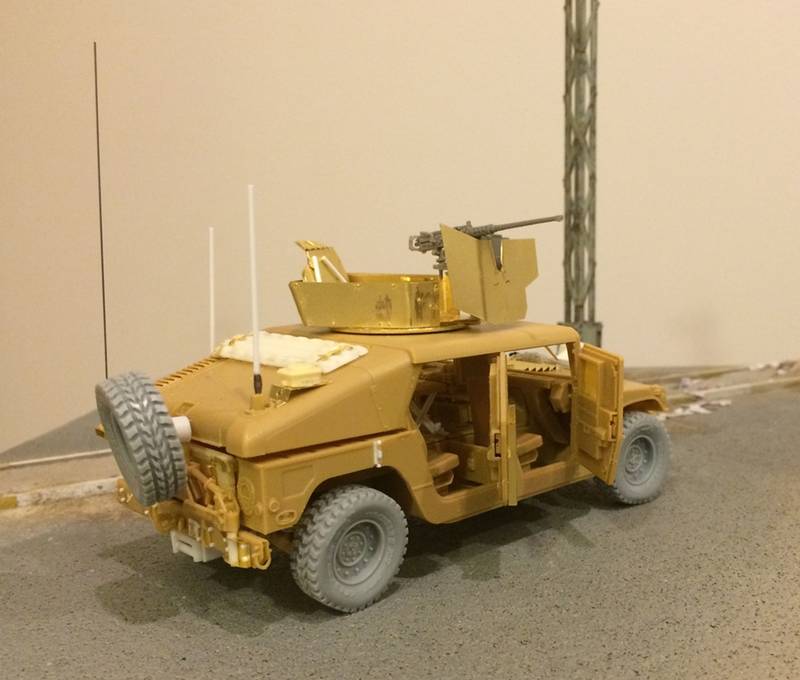
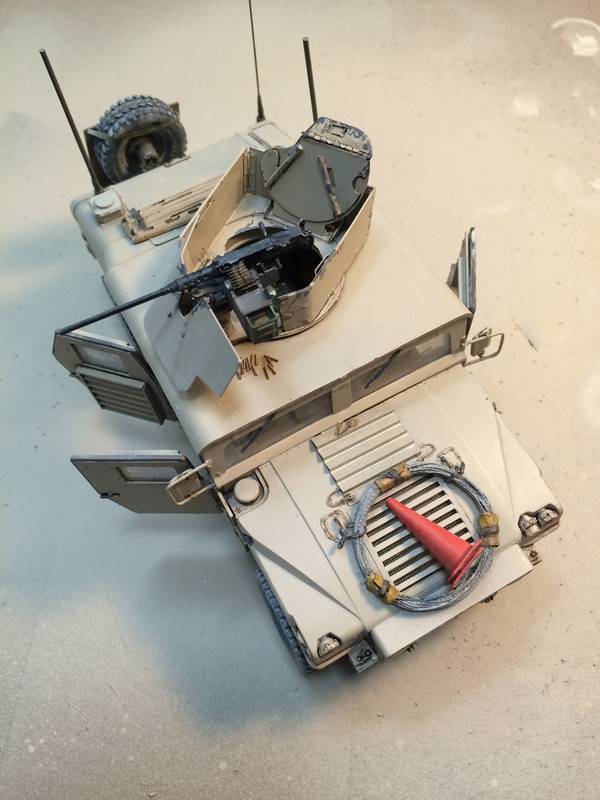
Speaking of the M1114....a photo summary is below - still a bit more to finish, but almost done:


Ok - need to get back to "real" work!!!
cheers
Nick
Next up, a Bronco M1114 up-armored - this should be one of the easier/better kits out there - in fact, I've built several of this - not this one!!!warped, and more warped...so, I guess the joke was on me! thought it would be the "easy" quick weekend build!! I was wrong - anyway, take a look:
Light post:
and there you have the light post - as you can see in the last pic...for a while I did other variants....for this dio, the M6 will be located where the MATV is - the M1114s, will be where the two in the pic are....
Speaking of the M1114....a photo summary is below - still a bit more to finish, but almost done:
Ok - need to get back to "real" work!!!
cheers
Nick
1stjaeger

Joined: May 20, 2011
KitMaker: 1,744 posts
Armorama: 1,727 posts

Posted: Tuesday, February 10, 2015 - 11:09 PM UTC
Absolutely jaw-dropping!!
Superb show Nick!!!!!
Cheers
Romain
justsendit
Joined: February 24, 2014
KitMaker: 3,033 posts
Armorama: 2,492 posts
Posted: Wednesday, February 11, 2015 - 12:02 AM UTC
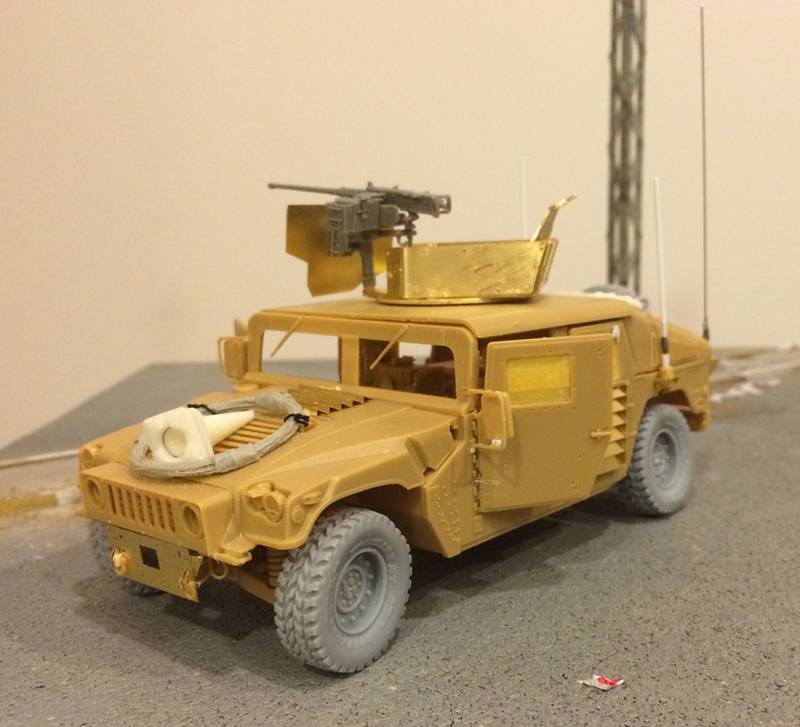
Nick, you do not disappoint! Nice light-post and I love the contrast of the bright orange traffic cones thrown on top of the M1114 hood! 
mike
mike

Youngun

Joined: November 10, 2010
KitMaker: 587 posts
Armorama: 550 posts

Posted: Wednesday, February 11, 2015 - 01:17 AM UTC
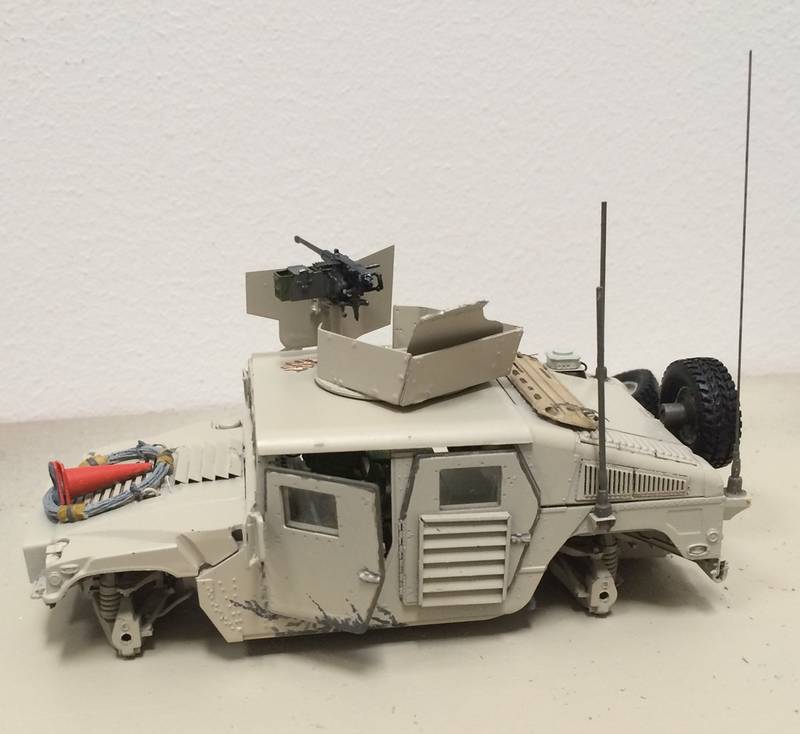
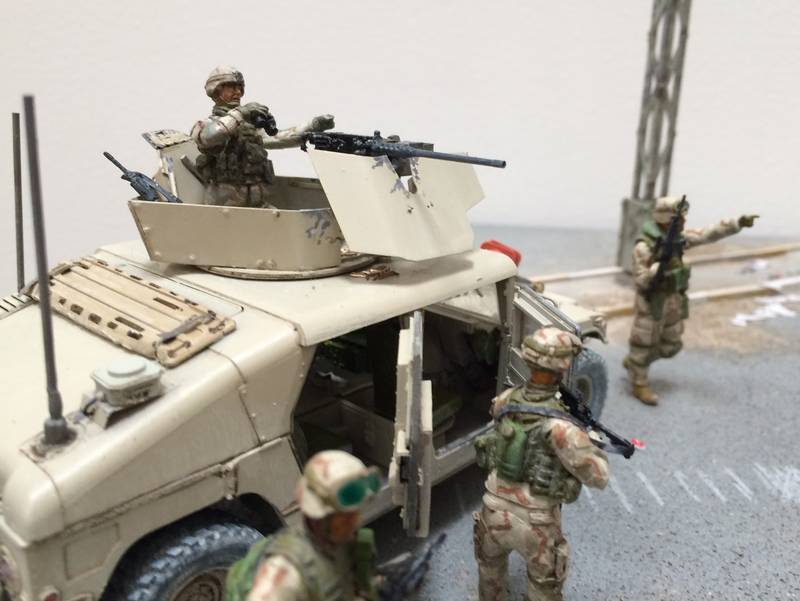
Great work on everything so far, but there seems to be some sort of issue with the HMMWV Turret. The gunner shield is angled the wrong way and seems to be to high. As well the barrel of the .50 cal looks crooked. Just two small issues on something otherwise near perfect.
jrutman
Joined: April 10, 2011
KitMaker: 7,941 posts
Armorama: 7,934 posts
Posted: Wednesday, February 11, 2015 - 02:33 AM UTC
As always you put up these awesome pics and I am left wondering how you build stuff that looks so good and yet so fast!
J
J
Stickframe
#362
Joined: December 01, 2013
KitMaker: 1,661 posts
Armorama: 1,202 posts
Posted: Wednesday, February 11, 2015 - 03:50 AM UTC
Hi Guys - thanks for checking it out!
Romain, thanks. I think it pays off when I apply your recommendations 😃😀😄😀
Hi Mike - yes, about the cone and other elements of that M--1114, I didn't want to go overboard with weathering or gear etc - from pics, the cone, barbed wire, spine board and CIP are pretty common - the three antennas are from one particular example - and yes, that one bit of color - I like it too...
And, Alex - yes - you are right!!! First, thanks, and glad you like the basic outcome, but, the GPK was a big headache - maybe too many kits/accessories at once? The Bronco, + voyager + Live resin.....yeah - something is wrong....tonight, I'll tear it apart -unhappily for me, to make it all work, it's pinned and glued together...good times ahead!!! Who knows what will happen? I'll try to get more slope out of the shield, and lower the MA2....or, just ruin it in the process and need to do it over again! Haha 😳😳
Hi Jerry - thanks - this is just a big escape from work!!! Lots more fun to build stuff than attend conf calls - etc!!
Thanks guys
Nick
Stickframe
#362
Joined: December 01, 2013
KitMaker: 1,661 posts
Armorama: 1,202 posts
Posted: Thursday, February 12, 2015 - 02:59 AM UTC
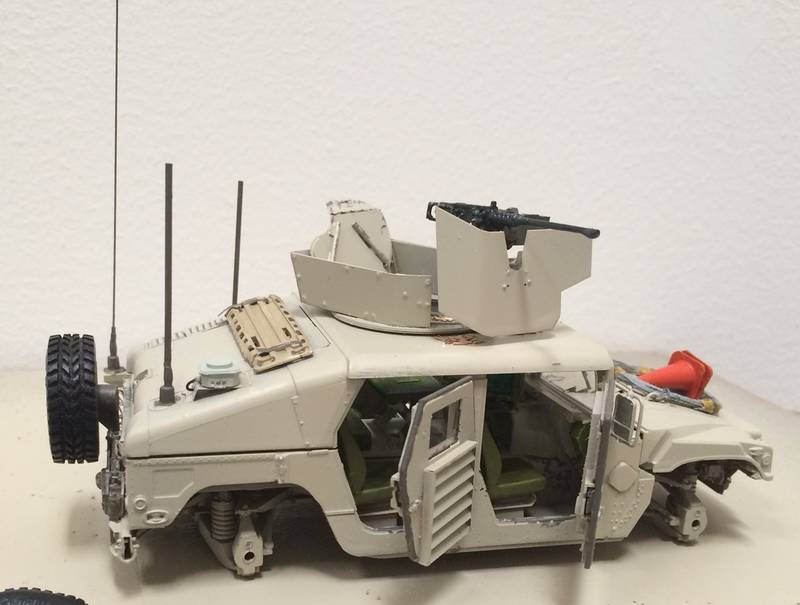
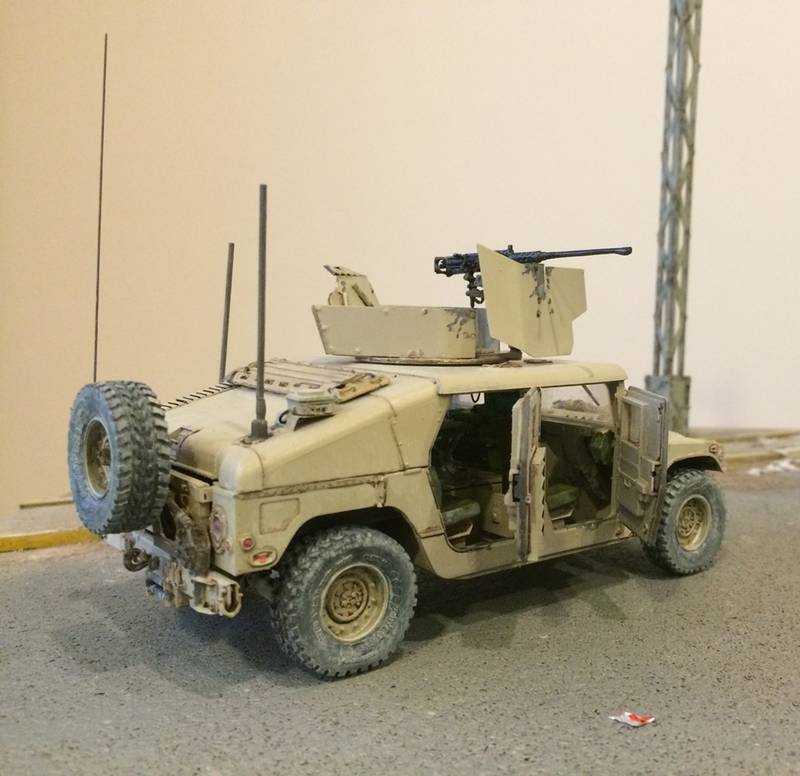
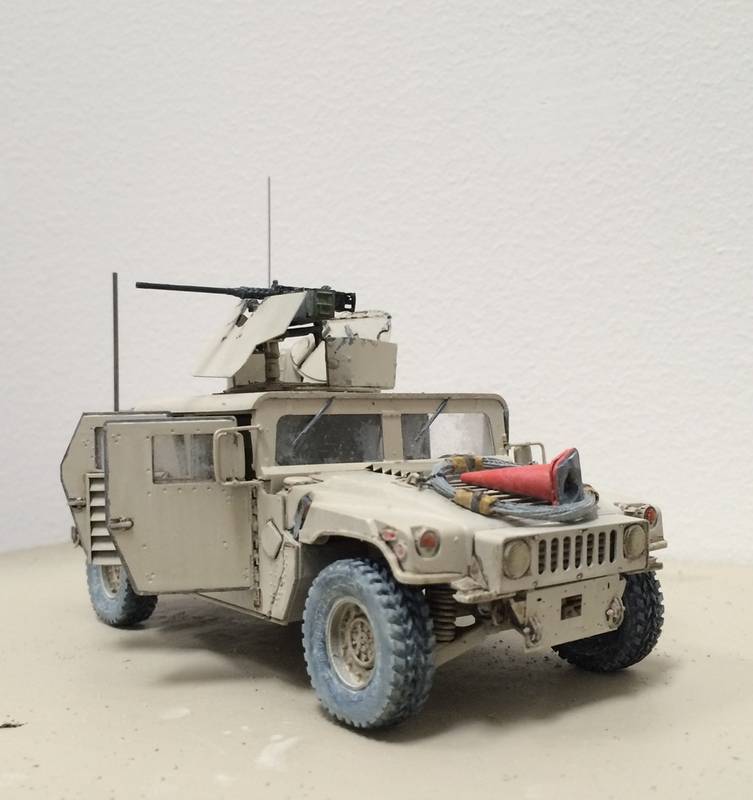
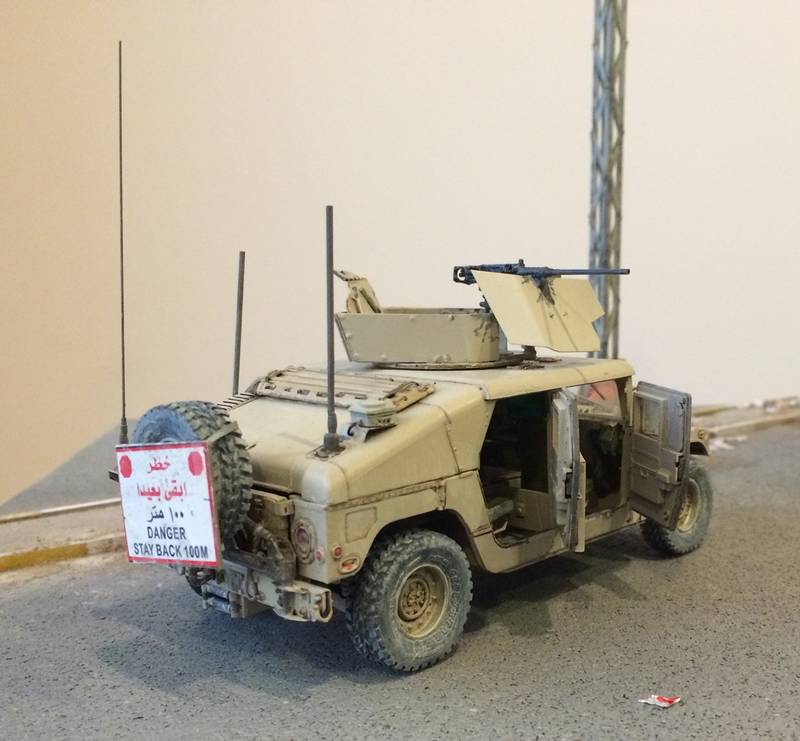
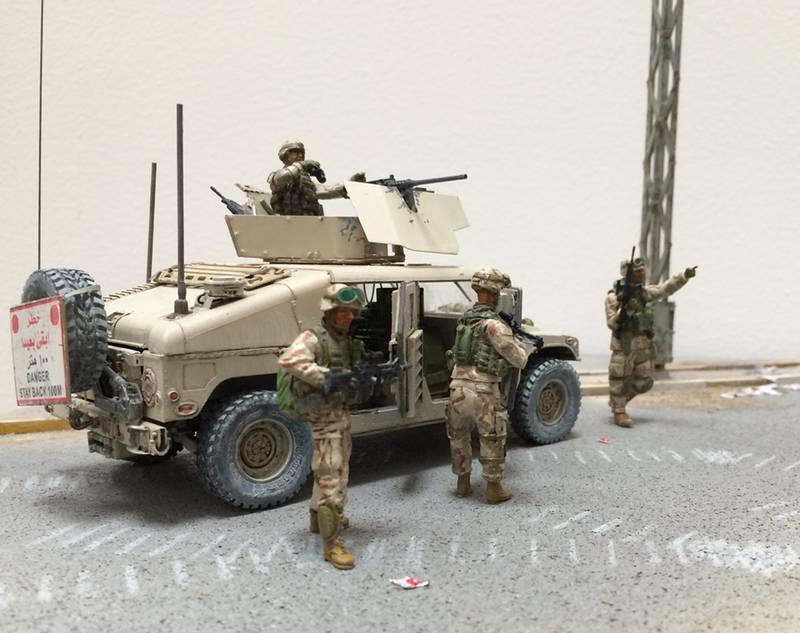
ok - I did it - tore off, and rebuilt the MG, the mount, and the shield...and, yes, it looks much better! Maybe I lucked out this time - rather than debating on whether to do it or not, when I got home last night, out came the xacto - and apart came the turret -
the key changes are: 1) I reduced the overall height of the stand by just over 1/8", but not 3/16". 2) - cut off the end of the live resin barrel and pinned and glued on the same from the Bronco kit, 3) pried the shield off the mount, and added three very small evergreen wedges between the mount and the shield to make the shield slope - piece of cake! - not really, but, it's fixed. Alex you were right - and it looks better!!
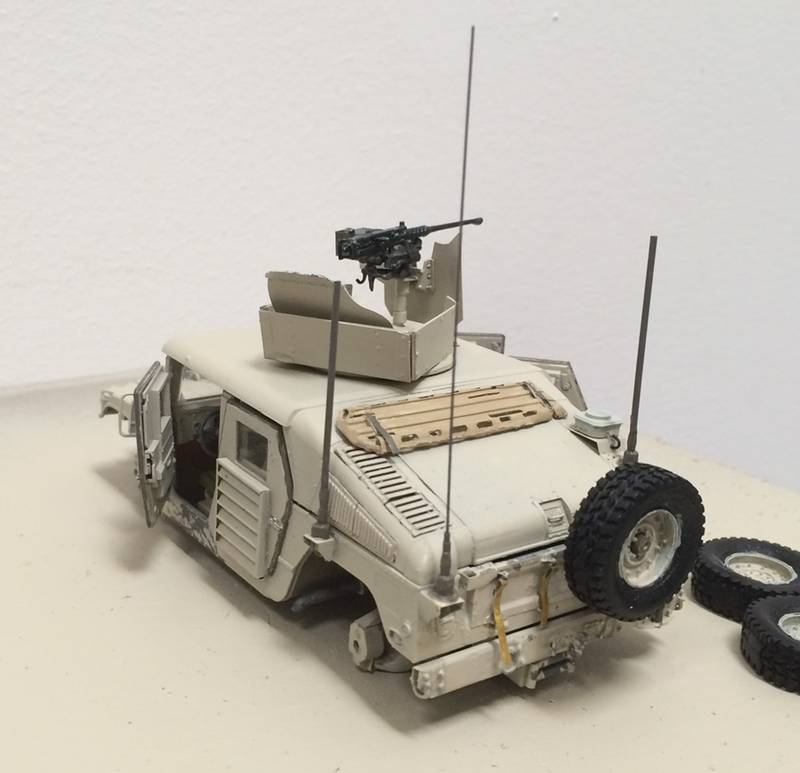
finally, I detailed some here and there, and hung the "stay back" sign on the spare - OK - take a look:
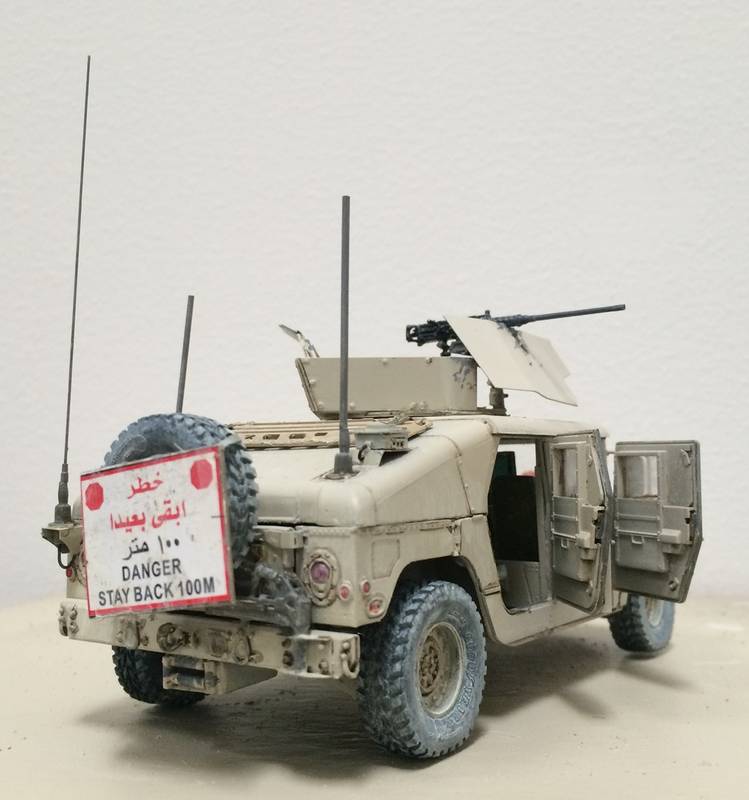
and that's where we are - next up, a guy with binoculars in the turret - easy for many of you, less so for me!!
ok - happy trails -
Nick
the key changes are: 1) I reduced the overall height of the stand by just over 1/8", but not 3/16". 2) - cut off the end of the live resin barrel and pinned and glued on the same from the Bronco kit, 3) pried the shield off the mount, and added three very small evergreen wedges between the mount and the shield to make the shield slope - piece of cake! - not really, but, it's fixed. Alex you were right - and it looks better!!
finally, I detailed some here and there, and hung the "stay back" sign on the spare - OK - take a look:
and that's where we are - next up, a guy with binoculars in the turret - easy for many of you, less so for me!!
ok - happy trails -
Nick
Youngun
Joined: November 10, 2010
KitMaker: 587 posts
Armorama: 550 posts
Posted: Thursday, February 12, 2015 - 04:31 AM UTC
Looks great Nick, the changes really alter the overall look of the M1114 as the turret is the first thing my eye is drawn to. Look forward to seeing more work.
Stickframe
#362
Joined: December 01, 2013
KitMaker: 1,661 posts
Armorama: 1,202 posts
Posted: Thursday, February 12, 2015 - 01:25 PM UTC
Hi Alex, thanks for calling it out - I saw it looked wrong, but was just tired of the kit! I'm glad it looks right now. I still have one more M1114 to build - same kit in fact. I haven't decided what to do with it yet - you know, relatively clean, or a bit more beaten up - in the mean time I'm fooling around with a guy for the cupola. I'm currently cutting up the Legend guy with binoculars. I'm not sure if he'll be the right guy - he needs to be looking over the shield but not standing upright. So, I'm bending his legs at the knees, and his torso - we'll see how that works out...
Cheers
Nick
Cheers
Nick
kurnuy
Joined: August 22, 2009
KitMaker: 1,491 posts
Armorama: 997 posts
Posted: Friday, February 13, 2015 - 04:20 AM UTC
Hi Nick ,
looking good , really good and succes with the conversion of the figure !
Looking forward to see more !
Kurt
looking good , really good and succes with the conversion of the figure !
Looking forward to see more !
Kurt
Stickframe
#362
Joined: December 01, 2013
KitMaker: 1,661 posts
Armorama: 1,202 posts
Posted: Monday, February 16, 2015 - 01:39 AM UTC
Hello -
Today's going to have to be a fast update! Not much in the text side - but, some pic updates - on M1114 and crew done - another, to start this week! Please have a look:
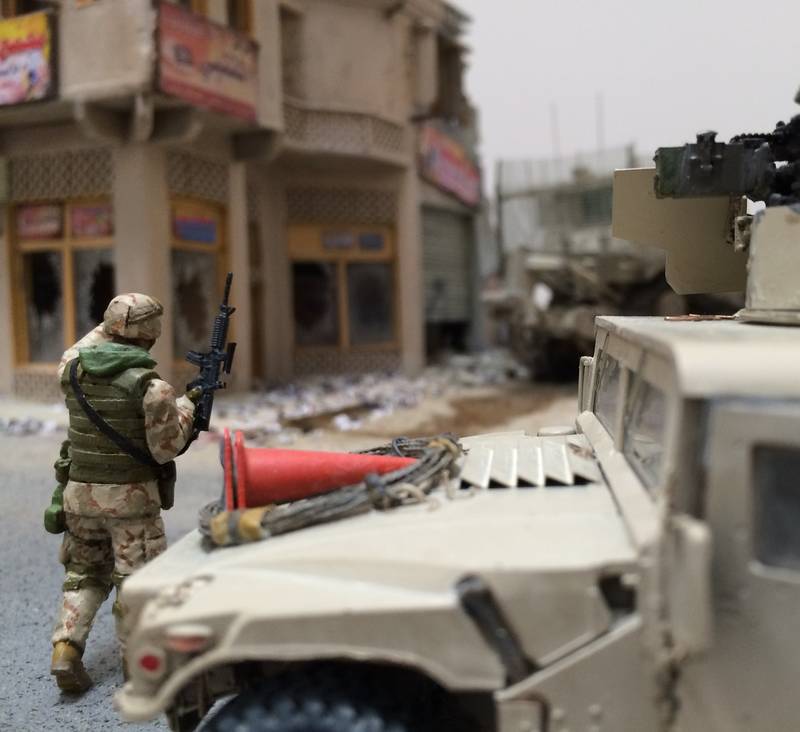
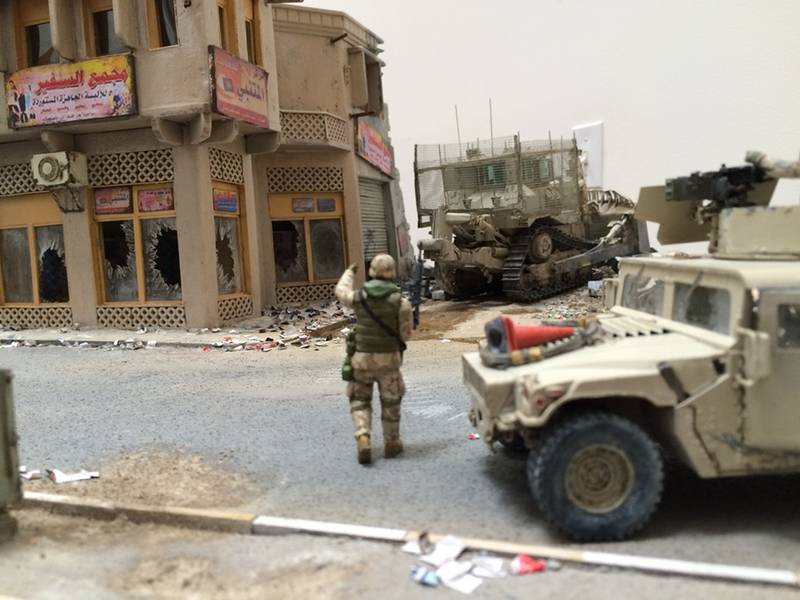
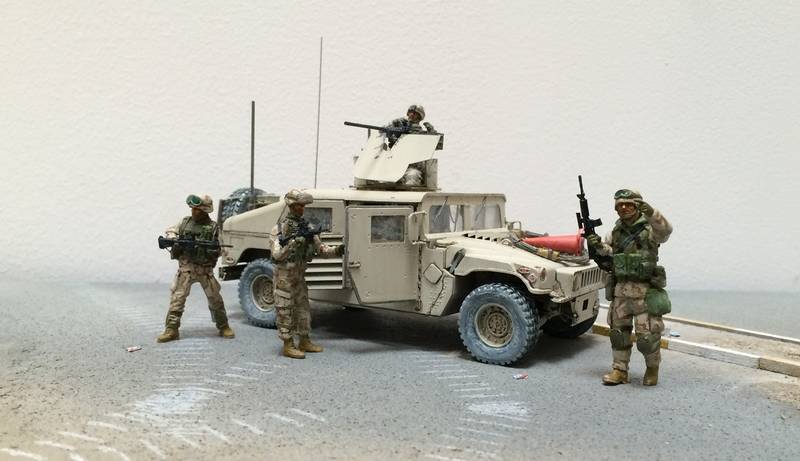
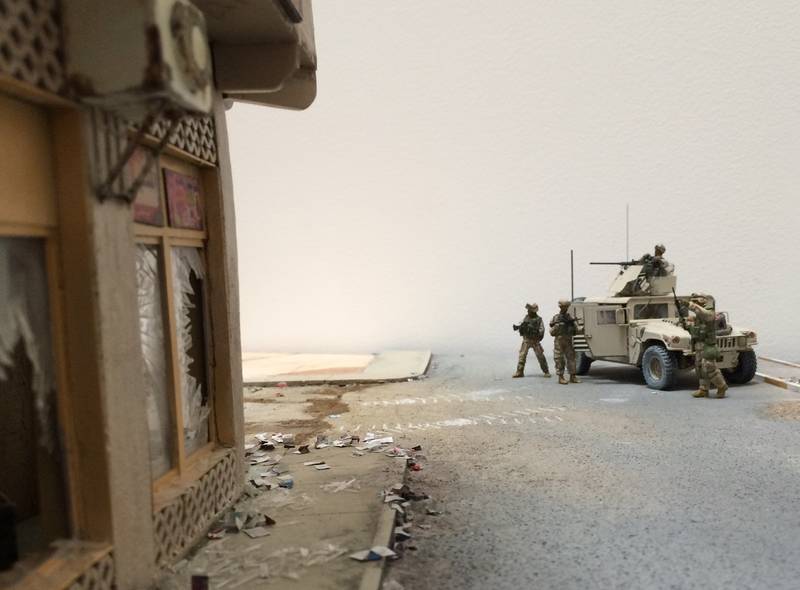
and there you have it! I haven't been following any particular process or order on this build, you know, vehicles then groundwork, then figs etc - just been building what seems interesting at the time - which is working out OK. Still a long way to go
thanks for checking it out -
Nick
Today's going to have to be a fast update! Not much in the text side - but, some pic updates - on M1114 and crew done - another, to start this week! Please have a look:
and there you have it! I haven't been following any particular process or order on this build, you know, vehicles then groundwork, then figs etc - just been building what seems interesting at the time - which is working out OK. Still a long way to go
thanks for checking it out -
Nick
HeavyArty
Joined: May 16, 2002
KitMaker: 17,694 posts
Armorama: 13,742 posts
Posted: Monday, February 16, 2015 - 04:08 AM UTC
Looking great so far. One comment on the figures though. The pointing guys with the hood doesn't fit with the others. He is wearing a JSLIST chemical suit while all the others are wearing standard DCUs. The JSLIST was worn during the initial invasion when there was a threat of chemical attack. They were taken off about 7 APR '03 and not put back on since they are really hot. No one really chooses to wear it if they don't have to.
1stjaeger
Joined: May 20, 2011
KitMaker: 1,744 posts
Armorama: 1,727 posts
Posted: Monday, February 16, 2015 - 04:20 AM UTC
Hej Nick,
that last picture is simply fantastic!!!
Congratulations Sir!!
Cheers
Romain
 |

WEB HOSTING BY


Copyright ©2021 Armorama and Kitmaker Network, a subsidiary of Silver Star Enterprises
All Rights Reserved. Please read our Conditions of Use and Privacy Policy.
All Rights Reserved. Please read our Conditions of Use and Privacy Policy.