

Hey Jerry,
You're right, things are a bit quiet, seem to have been so for a while now. Weird...
But, I know you're building stuff! And so am I!
Your point about the figures.....a good one...it never occurred to me! I thought they looked "about right" - funny enough, they do, except, I can count three groups of guys spaced almost exactly equally!! I couldn't have done it that way if I tried!!
I wish you'd have written yesterday! I went home last night, and cut the new figures free (they are glued + a wire) and revised their vests - added woodland camo - and, glued them back down, in the exact same places!!! So, maybe I'll add a couple of guys, to achieve some asymmetry! Maybe better painting too..
Thanks for your comments, Jerry -
Cheers
Nick
Hosted by Darren Baker
Big Punch, Big Push

Stickframe

#362

Joined: December 01, 2013
KitMaker: 1,661 posts
Armorama: 1,202 posts

Posted: Tuesday, March 03, 2015 - 09:54 PM UTC

white4doc
#429
Joined: October 14, 2003
KitMaker: 1,086 posts
Armorama: 964 posts

Posted: Tuesday, March 03, 2015 - 10:19 PM UTC
Nick, good to see you've been making progress. It's definitely looking good, and the woodland vests gives you a variety of colors which is always good. They did get muted pretty quick with the dust, I remember how faded mine looked until it got a good scrubbing at Matilda when my unit was waiting for our flight window to open in '03.

justsendit
Joined: February 24, 2014
KitMaker: 3,033 posts
Armorama: 2,492 posts
Posted: Tuesday, March 03, 2015 - 10:37 PM UTC
Quoted Text
... Your point about the figures.....a good one...it never occurred to me! I thought they looked "about right" - funny enough, they do, except, I can count three groups of guys spaced almost exactly equally!! I couldn't have done it that way if I tried!! ...
Ah, randomness! Ass said, not easy to achieve except in my commentaries!

I have a suggestion: I've been using 'FunTak' to dry-fit everything before gluing things down. However, there can be a negative effect ... gives me hours, days, weeks to contemplate, change things around and never get anything done!
On that note, I really respect your go-for-it approach, backed-up by your amazing skilz!
Keep up the great work!
mike
Stickframe
#362
Joined: December 01, 2013
KitMaker: 1,661 posts
Armorama: 1,202 posts
Posted: Tuesday, March 10, 2015 - 02:17 AM UTC
Hi guys - time for another of my now, all too common, lunch break fast posts. Time....I think we'd all like more of it!
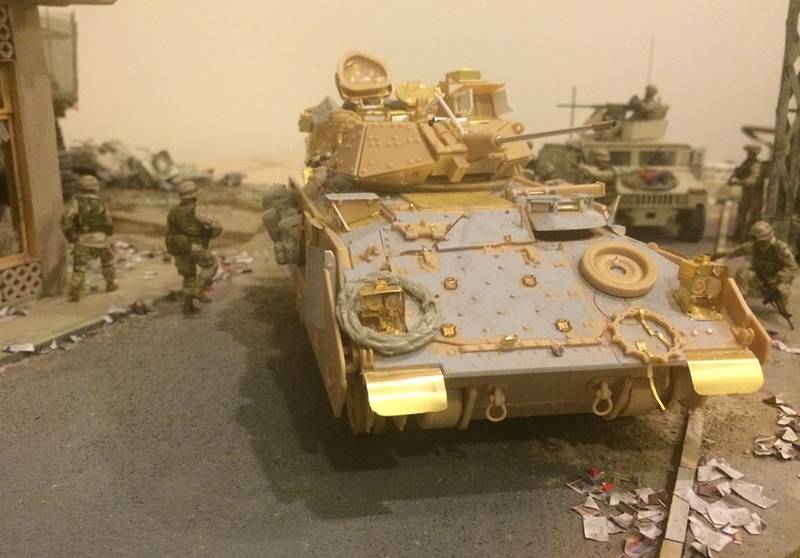
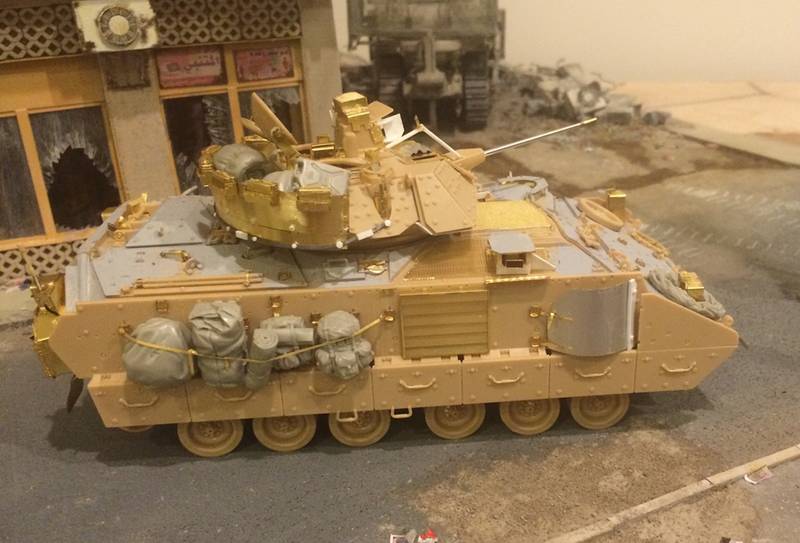
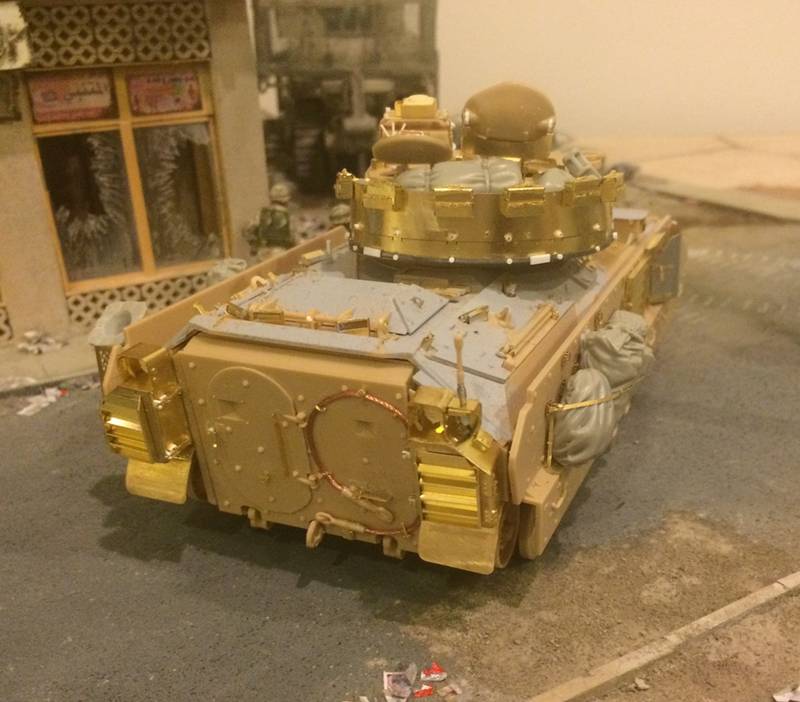
I've spent just over the last week working on the Academy version of the Bradley. This kit by itself doesn't even have that many parts which go together pretty easily (but, there are some big "gaps and generalizations" that I'm trying to address as I go.
Because the kit is pretty basic there's plenty of room for improvement and modification, and between a Voyager etch kit and some scratch work - I'm trying to improve it!
You'll also see in a few of the pics - I added the woodland camo to the vest, which looks better.
Sorry for the mediocre pics, but please check it out:
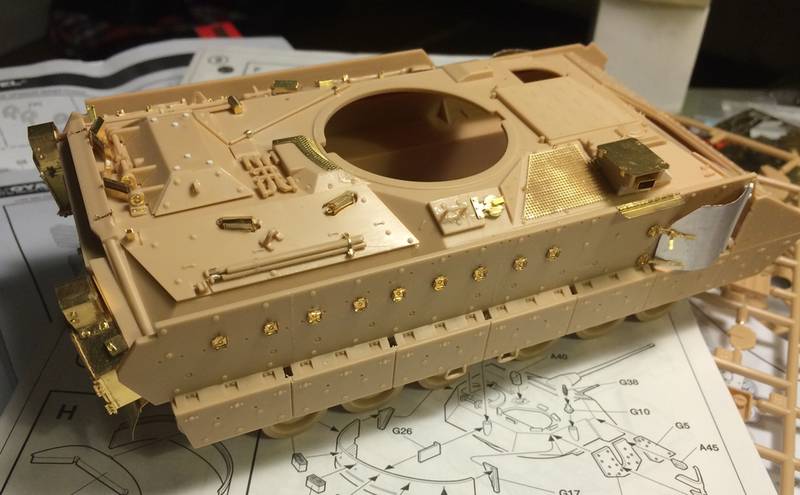
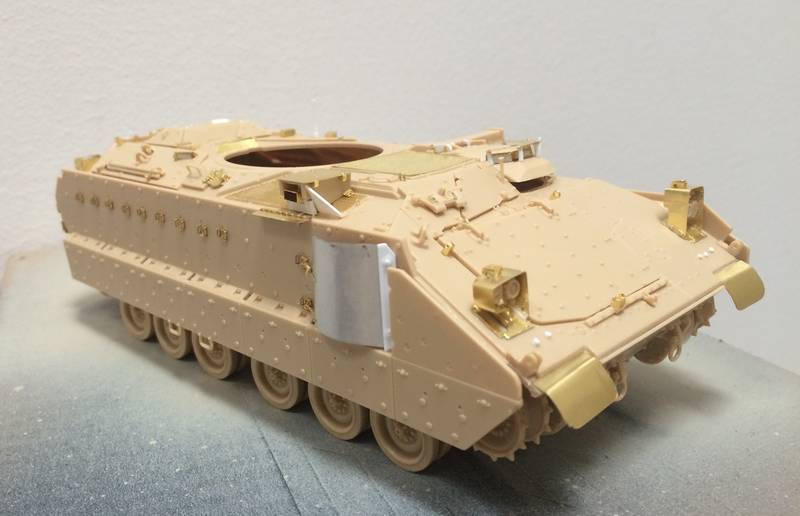
So there you have it - and a bit of a build chronology.
This has been a slow and tedious build - lots of little latches, straps, and tiny etch bits and pieces, in many cases, adapted to scratch built parts. That said, it has been a very interesting build - and adaptation, and hopefully transformation from a pretty modest kit into a really nice build. The non slip is my own concoction of Mr Surfacer 500 and Durhams wood putty - its ok - I've tried each separately before, but the combo seems to be the best.
Next up, finally building the Stinger launch system!
Ok, thanks for checking it out!
Cheers
Nick
I've spent just over the last week working on the Academy version of the Bradley. This kit by itself doesn't even have that many parts which go together pretty easily (but, there are some big "gaps and generalizations" that I'm trying to address as I go.
Because the kit is pretty basic there's plenty of room for improvement and modification, and between a Voyager etch kit and some scratch work - I'm trying to improve it!
You'll also see in a few of the pics - I added the woodland camo to the vest, which looks better.
Sorry for the mediocre pics, but please check it out:
So there you have it - and a bit of a build chronology.
This has been a slow and tedious build - lots of little latches, straps, and tiny etch bits and pieces, in many cases, adapted to scratch built parts. That said, it has been a very interesting build - and adaptation, and hopefully transformation from a pretty modest kit into a really nice build. The non slip is my own concoction of Mr Surfacer 500 and Durhams wood putty - its ok - I've tried each separately before, but the combo seems to be the best.
Next up, finally building the Stinger launch system!
Ok, thanks for checking it out!
Cheers
Nick
jrutman
Joined: April 10, 2011
KitMaker: 7,941 posts
Armorama: 7,934 posts
Posted: Tuesday, March 10, 2015 - 05:09 AM UTC
NicE!!!!!!!! That is one bad-ass bradly. I still get amazed when I see how fast oyu work and still keep up the quality.
J
J

HeavyArty

Joined: May 16, 2002
KitMaker: 17,694 posts
Armorama: 13,742 posts
Posted: Tuesday, March 10, 2015 - 08:29 AM UTC
Very nice. The Brad is looking good. Can't wait to see what you do with the Stinger system on it.

matt
Joined: February 28, 2002
KitMaker: 5,957 posts
Armorama: 2,956 posts
Posted: Tuesday, March 10, 2015 - 03:01 PM UTC
Looking sreat. I agree with Gino, I can;t wait to see how you tackle the Stinger system!
justsendit
Joined: February 24, 2014
KitMaker: 3,033 posts
Armorama: 2,492 posts
Posted: Wednesday, March 11, 2015 - 09:42 AM UTC
Enter the Beast! ... and it's loaded with lots of nice details! 
mike
mike
Stickframe
#362
Joined: December 01, 2013
KitMaker: 1,661 posts
Armorama: 1,202 posts
Posted: Thursday, March 12, 2015 - 12:32 AM UTC
ok - I cleverly deleted my first version of this response!!! 
So, less verbose this time!
Jerry - thanks!
Gino and Matt - please see below!
Mike - building thing I'm going both blind and nuts!!!
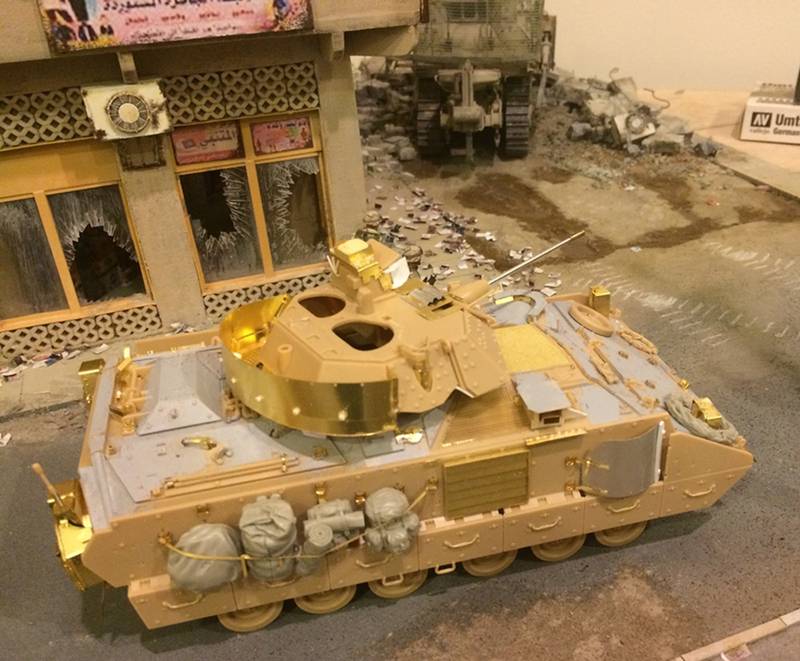
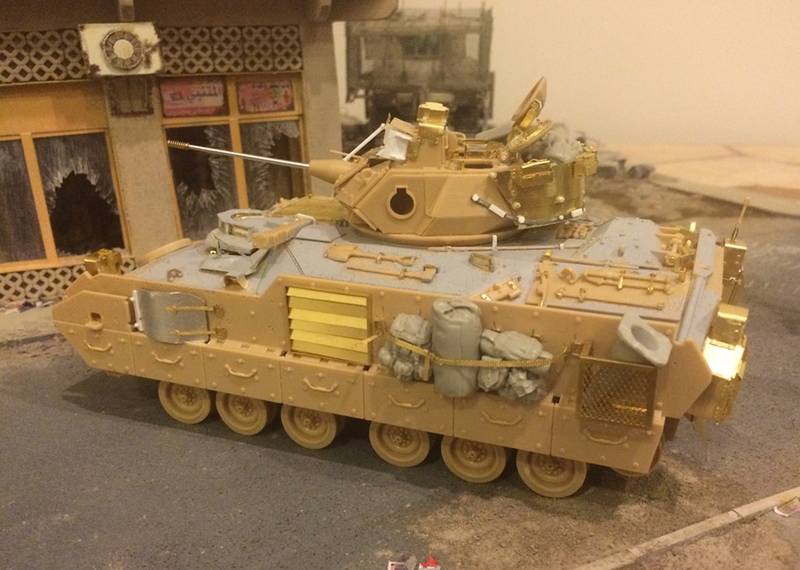
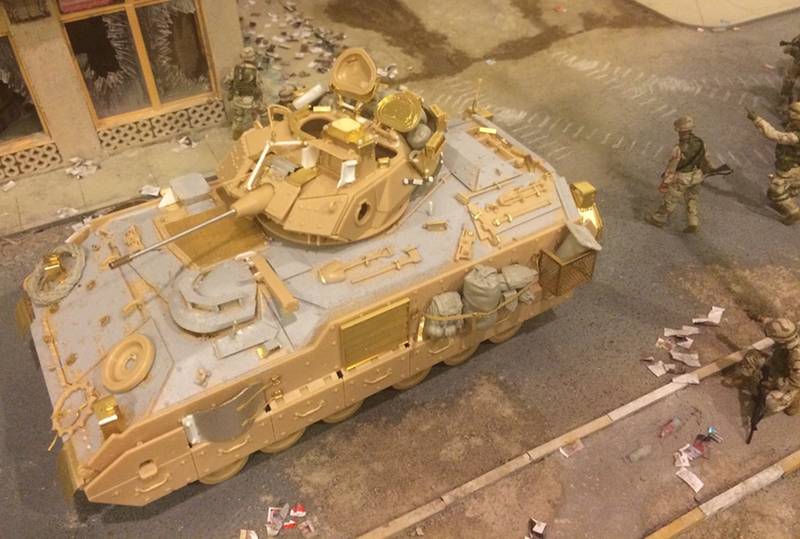
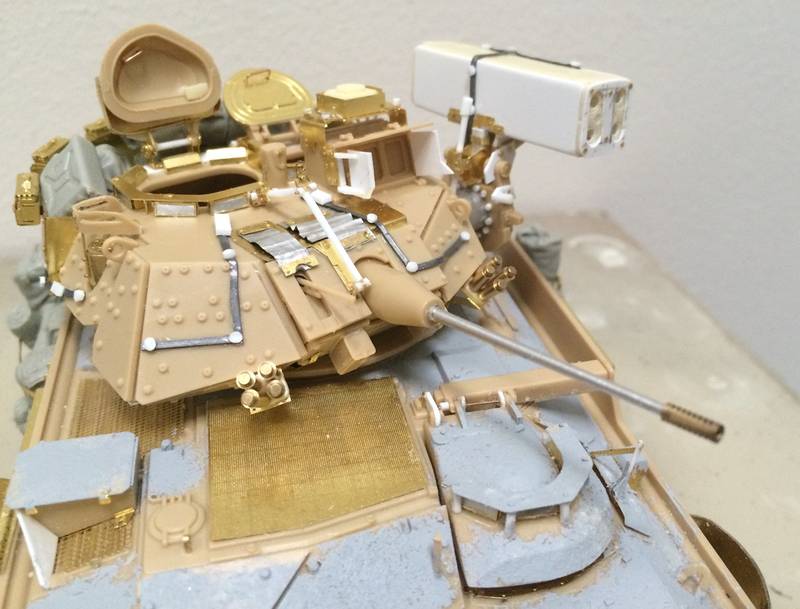
The key difference between the TOW and Stinger mount appears to be a shaft which separates the Stinger unit from the turret, a few bracket changes on the control arms, and the addition of an aligning rod. Like the rest of this, I've tried to add enough detail to make the build credible!
Have a look:
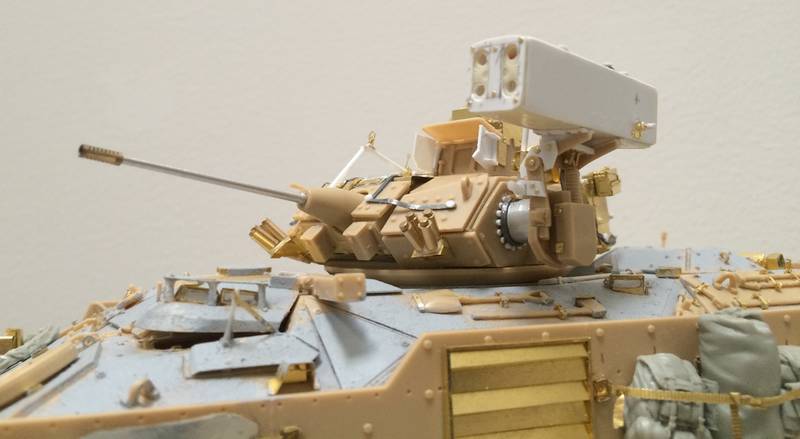
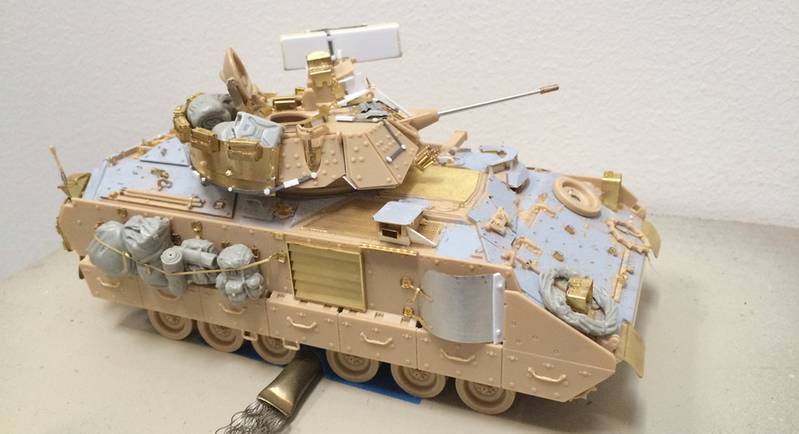

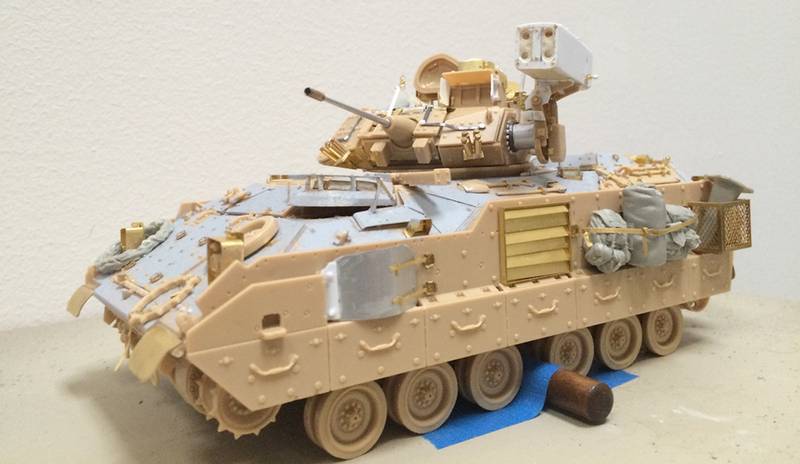
The heavy duty work seems to be about done - I need to make the tracks, I cant remember the brand right now, but they're correct, add antennas, a few little odds and ends, then paint!
ok - thanks for having a look - I need to run!
cheers
NIck
So, less verbose this time!
Jerry - thanks!
Gino and Matt - please see below!
Mike - building thing I'm going both blind and nuts!!!
The key difference between the TOW and Stinger mount appears to be a shaft which separates the Stinger unit from the turret, a few bracket changes on the control arms, and the addition of an aligning rod. Like the rest of this, I've tried to add enough detail to make the build credible!
Have a look:
The heavy duty work seems to be about done - I need to make the tracks, I cant remember the brand right now, but they're correct, add antennas, a few little odds and ends, then paint!
ok - thanks for having a look - I need to run!
cheers
NIck
jrutman
Joined: April 10, 2011
KitMaker: 7,941 posts
Armorama: 7,934 posts
Posted: Thursday, March 12, 2015 - 12:36 AM UTC
That is just gorgeous!
J
J
justsendit
Joined: February 24, 2014
KitMaker: 3,033 posts
Armorama: 2,492 posts
Posted: Thursday, March 12, 2015 - 01:28 AM UTC
To those who can't leave well enough alone ... we salute you! 
mike
mike
Stickframe
#362
Joined: December 01, 2013
KitMaker: 1,661 posts
Armorama: 1,202 posts
Posted: Thursday, March 12, 2015 - 05:03 AM UTC
right on Jerry! thanks - and glad you like it!
Mike thanks! yes....the pursuit of, well, whatever we think the right amount of "it" is..."I need more cowbell!!" or, styrene, brass, etc etc that does keep the hobby challenging!
thanks for checking it out guys!
NIck
Mike thanks! yes....the pursuit of, well, whatever we think the right amount of "it" is..."I need more cowbell!!" or, styrene, brass, etc etc that does keep the hobby challenging!
thanks for checking it out guys!
NIck
HeavyArty
Joined: May 16, 2002
KitMaker: 17,694 posts
Armorama: 13,742 posts
Posted: Thursday, March 12, 2015 - 05:14 AM UTC
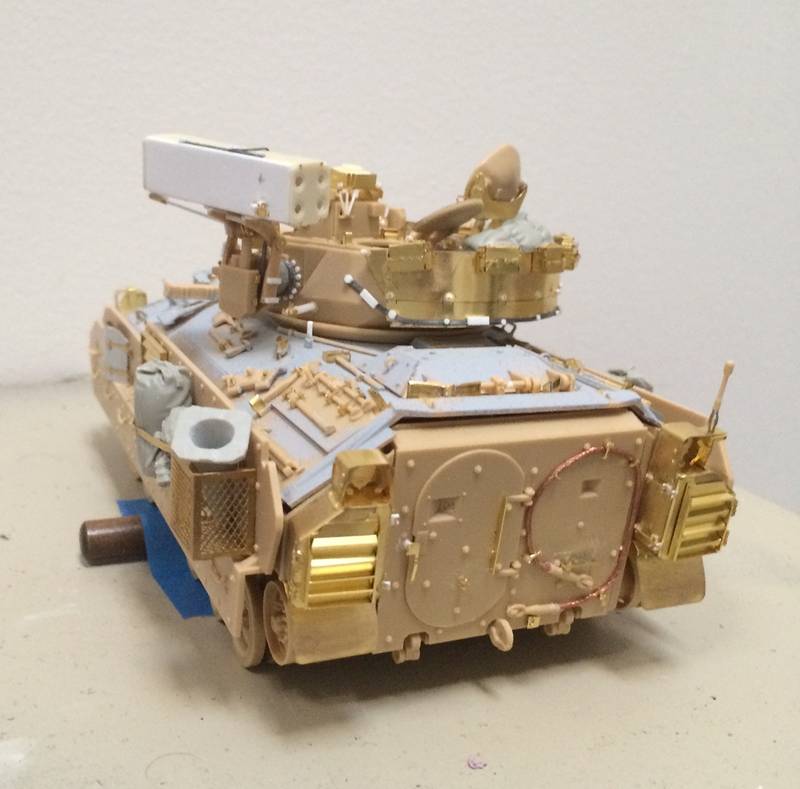
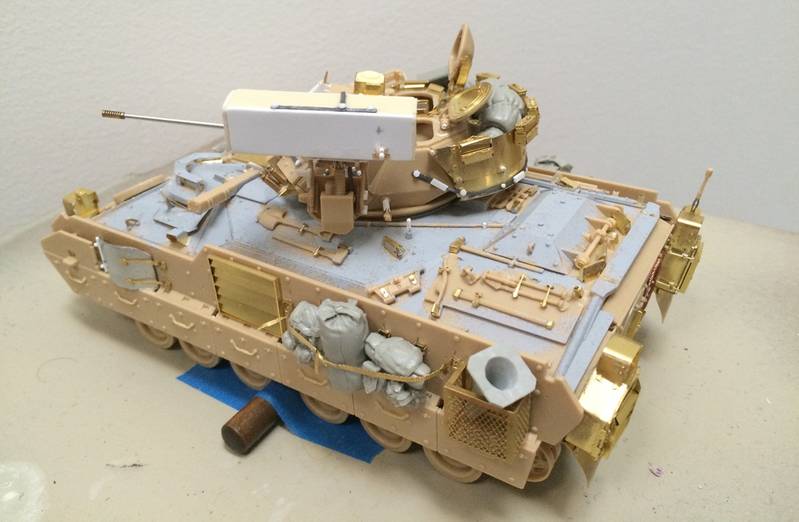
at Nick. Excellent job on the Stinger box. One item that still needs to be added is the IFF receiver box on the right front glacis in front of the BCs position. You can see it in the pics below. It is the rectangular box on the front slope of the turret.


Keep up the great work.
Keep up the great work.
Stickframe
#362
Joined: December 01, 2013
KitMaker: 1,661 posts
Armorama: 1,202 posts
Posted: Thursday, March 12, 2015 - 06:59 AM UTC
Ok, Gino - got it. I'll add the IFF box. Thanks
Nick
Nick
seanmcandrews
Joined: May 09, 2009
KitMaker: 561 posts
Armorama: 553 posts
Posted: Thursday, March 12, 2015 - 06:26 PM UTC
Nick,
the linebacker really does look great but are those MILES sensor belts on the turret ? Would they be appropriate for a vehicle in the field ?
Sean
the linebacker really does look great but are those MILES sensor belts on the turret ? Would they be appropriate for a vehicle in the field ?
Sean
jrutman
Joined: April 10, 2011
KitMaker: 7,941 posts
Armorama: 7,934 posts
Posted: Thursday, March 12, 2015 - 06:45 PM UTC
Quoted Text
Nick,
the linebacker really does look great but are those MILES sensor belts on the turret ? Would they be appropriate for a vehicle in the field ?
Sean
Yes,now that you mention it that is what they look like. Good eye!
J
matt
Joined: February 28, 2002
KitMaker: 5,957 posts
Armorama: 2,956 posts
Posted: Thursday, March 12, 2015 - 06:55 PM UTC
The Stinger pod looks great!! Something bothered me when I first saw it last night... and I think Sean figured out what it was....
HeavyArty
Joined: May 16, 2002
KitMaker: 17,694 posts
Armorama: 13,742 posts
Posted: Thursday, March 12, 2015 - 06:58 PM UTC
I missed them too. No, the MILES belts should not be there. The velcro for them should be there, but not the belts themselves. There would also be velcro on the hull along the tops of the skirts, across the back, and across the front glacis at the top.
Stickframe
#362
Joined: December 01, 2013
KitMaker: 1,661 posts
Armorama: 1,202 posts
Posted: Thursday, March 12, 2015 - 08:22 PM UTC
Hi Sean,
Thanks for checking it out and your comment. You're timing is good too - Nothing is painted, so, out comes the knife, and back to the hull I cut. Gino - I couldn't figure out what to use for Velcro (thin enough but still visible that is, not the Velcro part) - hence, the solution you see - or, should I say, "saw"
Jerry and Matt, thanks for checking in - yeah, the pursuit of a good model - well, all part of the fun!! Now - to be fixed!! Not now though, I'm off to work!
Have a good one!
Nick
Stickframe
#362
Joined: December 01, 2013
KitMaker: 1,661 posts
Armorama: 1,202 posts
Posted: Thursday, March 12, 2015 - 08:32 PM UTC
One more point - I might leave some portion of the "strap"'along the rack - in fact, this was the origin for the use of the strap to begin with. The seam of the etch looked just ok and was weak - the flat lead did a great job strengthening it up.
So - maybe downplay that segment, but probably not eliminate....ok. Now to work
Nick
So - maybe downplay that segment, but probably not eliminate....ok. Now to work
Nick
HeavyArty
Joined: May 16, 2002
KitMaker: 17,694 posts
Armorama: 13,742 posts
Posted: Thursday, March 12, 2015 - 08:35 PM UTC
Nick, for Velcro, I use masking tape, painted OD green, I think it looks the part. You can see it on my M7A2 BFIST I did for the 3 ID Museum.

Stickframe
#362
Joined: December 01, 2013
KitMaker: 1,661 posts
Armorama: 1,202 posts
Posted: Thursday, March 12, 2015 - 08:47 PM UTC
Gino - ok. Good idea. Nice build too....
Thanks
Nick
Thanks
Nick
ahandykindaguy

Joined: August 20, 2008
KitMaker: 1,295 posts
Armorama: 1,191 posts

Posted: Friday, March 13, 2015 - 06:06 AM UTC
Quoted Text
right on Jerry! thanks - and glad you like it!
Mike thanks! yes....the pursuit of, well, whatever we think the right amount of "it" is..."I need more cowbell!!" or, styrene, brass, etc etc that does keep the hobby challenging!
thanks for checking it out guys!
NIck
You can never, NEVER, have too much cowbell....

jrutman
Joined: April 10, 2011
KitMaker: 7,941 posts
Armorama: 7,934 posts
Posted: Friday, March 13, 2015 - 07:29 PM UTC
Quoted Text
Quoted Textright on Jerry! thanks - and glad you like it!
Mike thanks! yes....the pursuit of, well, whatever we think the right amount of "it" is..."I need more cowbell!!" or, styrene, brass, etc etc that does keep the hobby challenging!
thanks for checking it out guys!
NIck
You can never, NEVER, have too much cowbell....
It's the only thing that cures my fever!
J
Stickframe
#362
Joined: December 01, 2013
KitMaker: 1,661 posts
Armorama: 1,202 posts
Posted: Friday, March 13, 2015 - 10:10 PM UTC
Haha!
Right now, I need more patience....assembling the tracks.
I'm using the AFV club Big Foot kit. So the story here is these are basically pretty good, and fairly easy to use. For the tracks, about every other one has some tiny, but evident flash to be cut off. Next, about every 15th has too much plastic where the link is supposed to occur. So, the extra plastic is cut off, and a hole drilled for the pin.
For the pads, the only big discovery is that there is clearly an "up" and "down" facing surface. The difference between to two is very subtle, but, if you don't use the right side, the pad doesn't sit flush....ask me how I know....
More fun ahead....I'll eventually get into detail painting, but now, "stuck in my tracks"...(haha)
Happy weekend guys -
Nick
 |

WEB HOSTING BY


Copyright ©2021 Armorama and Kitmaker Network, a subsidiary of Silver Star Enterprises
All Rights Reserved. Please read our Conditions of Use and Privacy Policy.
All Rights Reserved. Please read our Conditions of Use and Privacy Policy.