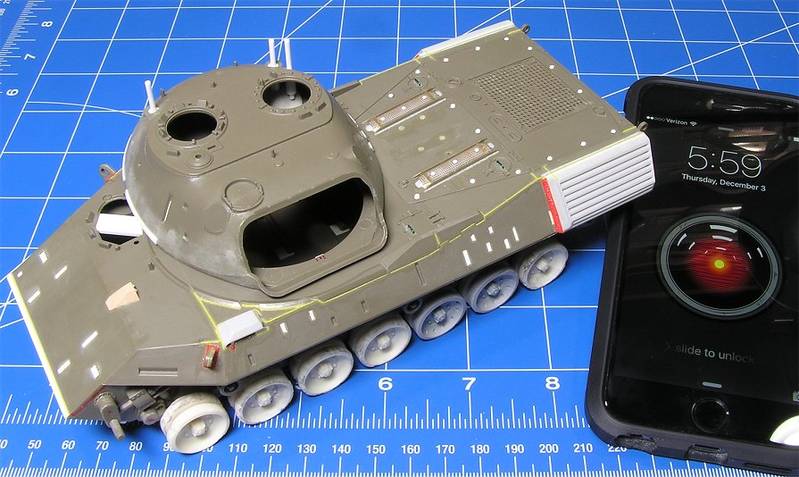
Here is my base kit for my entry and my "proof of life" for the campaign.
I am still not sure what I am going to build. My next update will be June 1, 2016!
Hosted by Richard S.
Leopardmania 50 replacement campaign
LeoCmdr
Alberta, Canada
Joined: January 19, 2005
KitMaker: 4,085 posts
Armorama: 3,917 posts
Joined: January 19, 2005
KitMaker: 4,085 posts
Armorama: 3,917 posts
Posted: Tuesday, December 01, 2015 - 07:36 AM UTC
bwiber
Washington, United States
Joined: August 03, 2008
KitMaker: 436 posts
Armorama: 320 posts
Joined: August 03, 2008
KitMaker: 436 posts
Armorama: 320 posts
Posted: Tuesday, December 01, 2015 - 10:37 AM UTC
Already some nice builds..... will be watching and noting all the new ways of doing things.
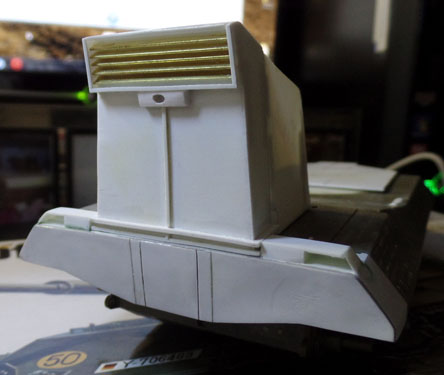
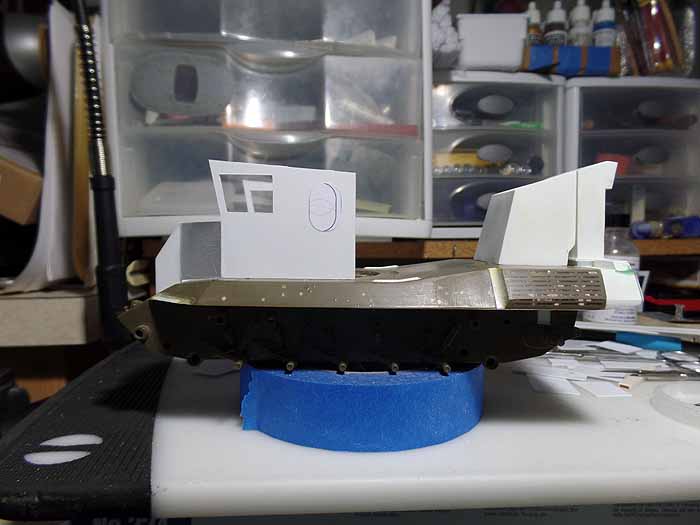
Mine is moving along..... This is the rear trunking that I built in the beginning along with the rear end modifications.
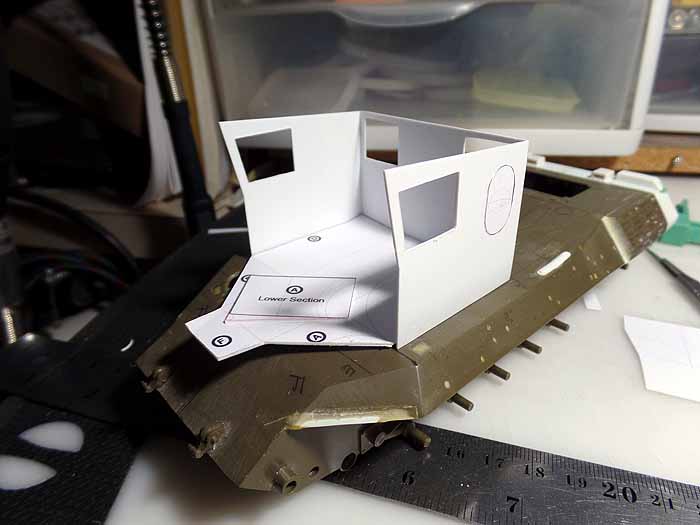
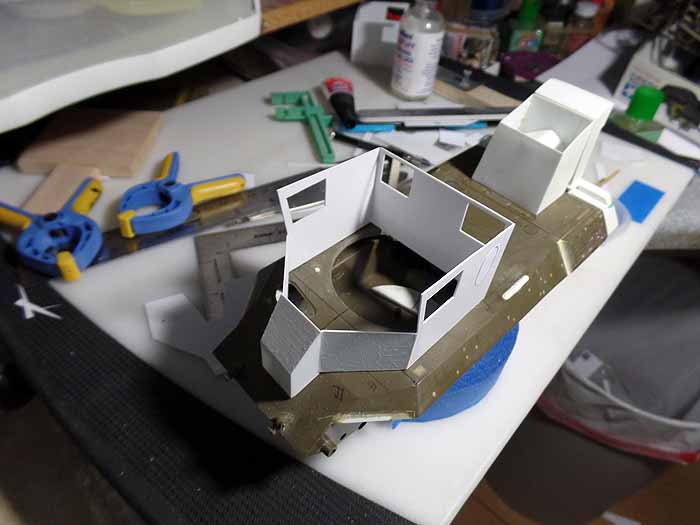
Spent part of the day today on starting to build the cabin. The issue is that because of the way the floor in the vehicle is I can't glue the walls to the floor that I have. It has to be modified so that the rear part of it is missing as you can get down into the hull.
However, it is starting to look like the cabin. I think that for now I need to figure out the floor and make it so that I can use it to build the nose of the vehicle. The nose extension you see is actually for the drivers feet...
Unfortunately you will have to get my build info here.... I quit doing FaceBook years ago....
Bob
bulivyf
Vendor
Praha, Czech Republic
Joined: April 03, 2006
KitMaker: 2,450 posts
Armorama: 2,409 posts
Joined: April 03, 2006
KitMaker: 2,450 posts
Armorama: 2,409 posts
Posted: Tuesday, December 01, 2015 - 12:57 PM UTC
mechaman
Alberta, Canada
Joined: November 18, 2003
KitMaker: 61 posts
Armorama: 57 posts
Joined: November 18, 2003
KitMaker: 61 posts
Armorama: 57 posts
Posted: Tuesday, December 01, 2015 - 08:51 PM UTC
Here is my Entry!
Canadian C1 "Pink Panther" from CAT '87
Nito74
Lisboa, Portugal
Joined: March 04, 2008
KitMaker: 5,386 posts
Armorama: 4,727 posts
Joined: March 04, 2008
KitMaker: 5,386 posts
Armorama: 4,727 posts
Posted: Tuesday, December 01, 2015 - 10:50 PM UTC
mshackleton
England - South East, United Kingdom
Joined: December 16, 2007
KitMaker: 559 posts
Armorama: 517 posts
Joined: December 16, 2007
KitMaker: 559 posts
Armorama: 517 posts
Posted: Tuesday, December 01, 2015 - 11:31 PM UTC
Sorry John - didn't realise. Thanks for pointing this out.
Everyone - PLEASE TAKE NOTE. Please load your start images into this Campaign gallery. You can also add basic notes of what you are building which will be quite useful.
I've just updated the rules to include this.
Gepardschrauber
Bayern, Germany
Joined: December 02, 2015
KitMaker: 5 posts
Armorama: 5 posts
Joined: December 02, 2015
KitMaker: 5 posts
Armorama: 5 posts
Posted: Wednesday, December 02, 2015 - 02:34 AM UTC
I'll take part in this campaign with the new Leopard Kit from Revell which arrived today. I do not have a picture with a starting date but I have the invoice that says that the kit was shipped on 1st of December.
Posted: Wednesday, December 02, 2015 - 07:21 PM UTC
Proof of Progress
I forgot to add this Photo in my last post back on 1 December..
mshackleton
England - South East, United Kingdom
Joined: December 16, 2007
KitMaker: 559 posts
Armorama: 517 posts
Joined: December 16, 2007
KitMaker: 559 posts
Armorama: 517 posts
Posted: Thursday, December 03, 2015 - 01:11 AM UTC
Great progress already Eric.
Armored76
Bayern, Germany
Joined: September 30, 2013
KitMaker: 1,615 posts
Armorama: 1,500 posts
Joined: September 30, 2013
KitMaker: 1,615 posts
Armorama: 1,500 posts
Posted: Thursday, December 03, 2015 - 11:42 PM UTC
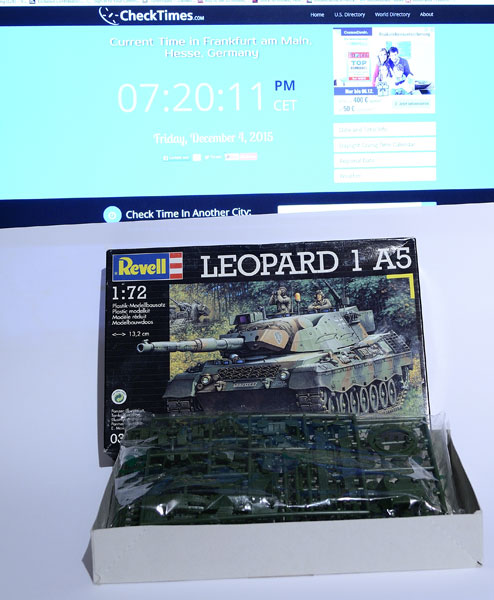
Here is my start image: Revel Leopard 1A5 in 1/72:
bwiber
Washington, United States
Joined: August 03, 2008
KitMaker: 436 posts
Armorama: 320 posts
Joined: August 03, 2008
KitMaker: 436 posts
Armorama: 320 posts
Posted: Friday, December 04, 2015 - 04:12 AM UTC
Well, the lower part of the cabin is finished. The reason I didn't glue it to the floor, which would have made things a lot easier, is so that I can build the interior on the floor and slide the walls over it. That's the plan anyway, and even if I have to put some of the interior on the walls it should be easier without the floor in place....
I still need to make the 3 front window panels. Should be interesting as they are all on angles.... However, I have something to build them on so that will be helpful...
The drivers hatch needs to be put into place pretty soon. I needed this built so that I would know where I could put the slots in the hatch. On the real vehicle the drivers area is free flooding. There are holes in the bottom of the hull to let the water in/out and slots in the drivers hatch to do the same with the air. Good thing it isn't front wheel drive....
jet
Alberta, Canada
Joined: December 30, 2002
KitMaker: 306 posts
Armorama: 295 posts
Joined: December 30, 2002
KitMaker: 306 posts
Armorama: 295 posts
Posted: Friday, December 04, 2015 - 07:11 AM UTC
I think I will change my mind and try and complete a Canadian Leopard 1A2 "Rent-a-Tank"that I started last April I think. Just the start- maybe 15%?
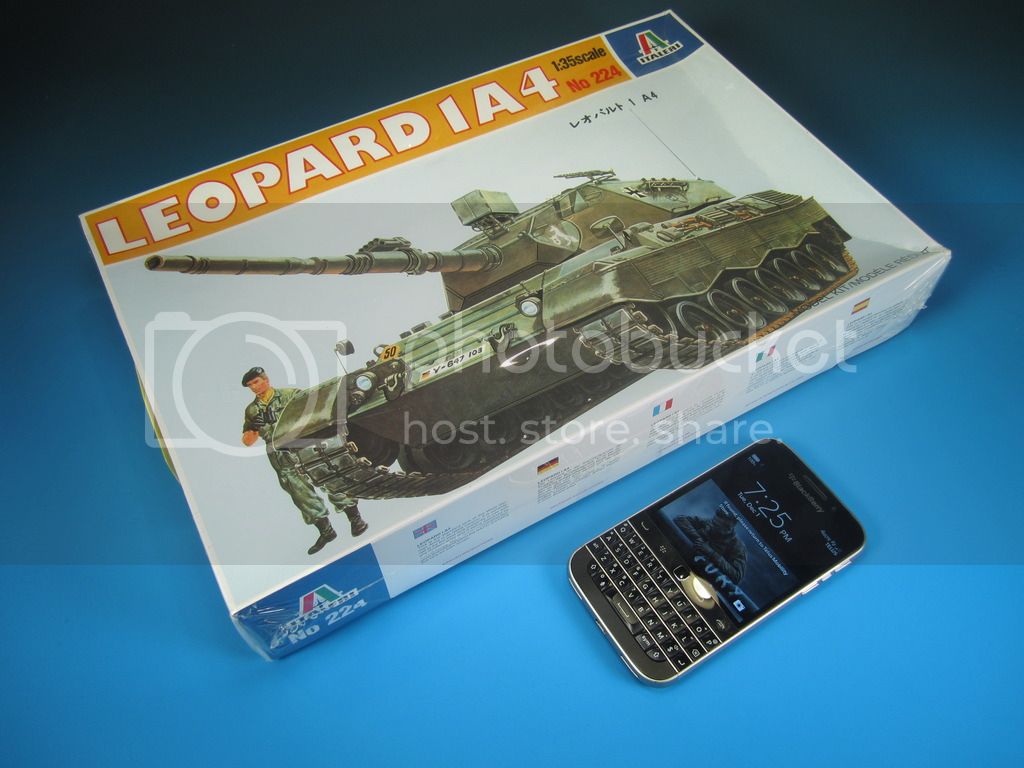
I will use the Italeri Leopard1 A4 kit, number 35224 for the lower hull.
The proper Leopard 1A2 turret will be provided by an aftermarket resin item from Perfect Scale Modellbau (#35073)
I will use the Italeri Leopard1 A4 kit, number 35224 for the lower hull.
The proper Leopard 1A2 turret will be provided by an aftermarket resin item from Perfect Scale Modellbau (#35073)
bwiber
Washington, United States
Joined: August 03, 2008
KitMaker: 436 posts
Armorama: 320 posts
Joined: August 03, 2008
KitMaker: 436 posts
Armorama: 320 posts
Posted: Friday, December 04, 2015 - 07:33 AM UTC
Quoted Text
I think I will change my mind and try and complete a Canadian Leopard 1A2 "Rent-a-Tank"that I started last April I think. Just the start- maybe 15%?
I will use the Italeri Leopard1 A4 kit, number 35224 for the lower hull.
The proper Leopard 1A2 turret will be provided by an aftermarket resin item from Perfect Scale Modellbau (#35073)
Nice. I have that one on the list also. Was going to do it for this build but I decided to finish the BARV.
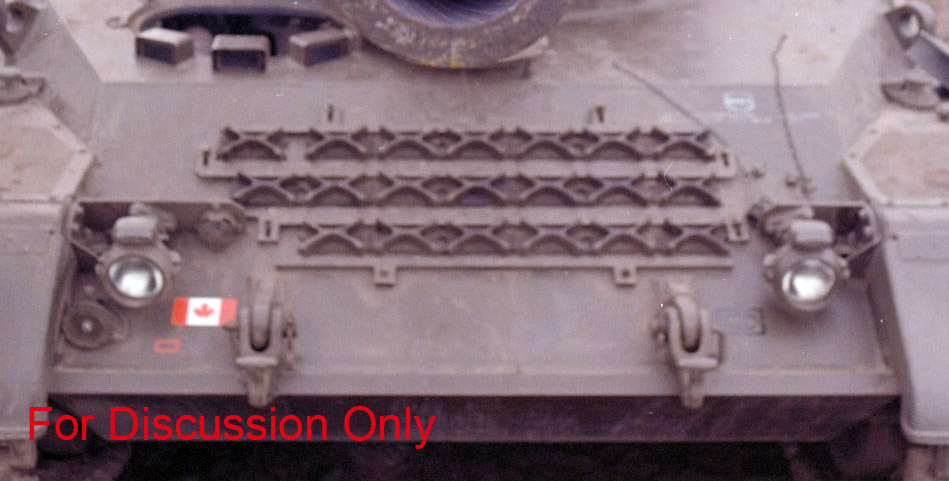
Does the one you are going to do have the text on the upper front plate? Upper right corner in the image below.....
If you have any information on the wording I would love to know so I can use it when I build mine.
Thanks and good luck with your build...
Bob
LeoCmdr
Alberta, Canada
Joined: January 19, 2005
KitMaker: 4,085 posts
Armorama: 3,917 posts
Joined: January 19, 2005
KitMaker: 4,085 posts
Armorama: 3,917 posts
Posted: Friday, December 04, 2015 - 08:20 AM UTC
If you need any assistance with your Canadian Leopard 1A2 let me know. I had a great time building mine.
http://www.network54.com/Forum/110741/thread/1380491056
Bob...I am fairly confident the unconfirmed text and logo on the glacis plate is manufacturing data.
http://www.network54.com/Forum/110741/thread/1380491056
Bob...I am fairly confident the unconfirmed text and logo on the glacis plate is manufacturing data.
Florence
New South Wales, Australia
Joined: November 29, 2015
KitMaker: 3 posts
Armorama: 3 posts
Joined: November 29, 2015
KitMaker: 3 posts
Armorama: 3 posts
Posted: Friday, December 04, 2015 - 05:01 PM UTC
My entry - Leopard AS1 of the Royal Australian Armoured Corps.
Tamiya kit. Armour Bits conversion. More research needed by me.
Apologies for poor pics. Will sort camera out ASAP.
Cheers,
David.
Tamiya kit. Armour Bits conversion. More research needed by me.
Apologies for poor pics. Will sort camera out ASAP.
Cheers,
David.
mshackleton
England - South East, United Kingdom
Joined: December 16, 2007
KitMaker: 559 posts
Armorama: 517 posts
Joined: December 16, 2007
KitMaker: 559 posts
Armorama: 517 posts
Posted: Friday, December 04, 2015 - 05:19 PM UTC
Welcome to the Campaign David. AS1 is always a colourful subject and the Tamiya kit is an interesting choice.
Posted: Saturday, December 05, 2015 - 12:02 AM UTC
Hi all
I have had a slight change of plan and offer the following pic as my proof of life shot. It will become one of the two Leo 1A5s converted to an Artillery Observation Vehicle, that were subsequently not ordered into production. I will still build the Fahrschule and tractor, but I am at a show tomorrow and this 1A5 kit is the only one to hand, so it jumps the queue!
Thanks to Italeri cutting grooves around the tools, I have a ton of filling/sanding ahead.
Should have mentioned that this show is ideal for building - good lighting, comfy seats, and a whole 6 hours of uninterrupted plastic-bashing fun!
jet
Alberta, Canada
Joined: December 30, 2002
KitMaker: 306 posts
Armorama: 295 posts
Joined: December 30, 2002
KitMaker: 306 posts
Armorama: 295 posts
Posted: Saturday, December 05, 2015 - 12:16 AM UTC
Quoted Text
If you need any assistance with your Canadian Leopard 1A2 let me know. I had a great time building mine.
http://www.network54.com/Forum/110741/thread/1380491056
Bob...I am fairly confident the unconfirmed text and logo on the glacis plate is manufacturing data.
Thanks. Maybe you can suggest marking decals needed? And do you know of any tanker figures that maybe appropriate fr the time and place?
LeoCmdr
Alberta, Canada
Joined: January 19, 2005
KitMaker: 4,085 posts
Armorama: 3,917 posts
Joined: January 19, 2005
KitMaker: 4,085 posts
Armorama: 3,917 posts
Posted: Saturday, December 05, 2015 - 12:30 AM UTC
Quoted Text
Quoted TextIf you need any assistance with your Canadian Leopard 1A2 let me know. I had a great time building mine.
http://www.network54.com/Forum/110741/thread/1380491056
Bob...I am fairly confident the unconfirmed text and logo on the glacis plate is manufacturing data.
Thanks. Maybe you can suggest marking decals needed? And do you know of any tanker figures that maybe appropriate fr the time and place?
Markings on the tanks were limited to the white outlined black Maple Leaf on the turret sides, Canadian flags on the front and rear hull, tactical symbols, and call signs on either a board on the turret bustle or in certain cases on the turret sides.
As far as figures you are likely going to have to scratch build a crew. There are no 1970s era Canadian crew figures. The crew would either worn the Canadian Combat Shirt and Pants or the Crew Suits.
Starting with US Vietnam era figures will give you the basic uniform but the shirts and pants will have to have the pockets, buttons, and epaulets modified or added.
mshackleton
England - South East, United Kingdom
Joined: December 16, 2007
KitMaker: 559 posts
Armorama: 517 posts
Joined: December 16, 2007
KitMaker: 559 posts
Armorama: 517 posts
Posted: Saturday, December 05, 2015 - 12:30 AM UTC
Although I have already promised myself that I will build a UN 1A5DK for this campaign, I am actually quite tempted to also knock Revell's new Leopard 1 into some sort of shape - either as a Batch 2 German machine or a Dutch 1NL (thank goodness for hull-side tool boxes!!).
I think I will be hitting the spares box and Leopard Workshop's catalogue quite heavily if I do.
bwiber
Washington, United States
Joined: August 03, 2008
KitMaker: 436 posts
Armorama: 320 posts
Joined: August 03, 2008
KitMaker: 436 posts
Armorama: 320 posts
Posted: Saturday, December 05, 2015 - 12:59 AM UTC
Thought I would share a couple little videos of the BARV running around....
Watch out for this one..... going over the high points in the sand looks like it is on the ocean. Almost makes you sea sick!
https://www.youtube.com/watch?v=GbYIEKthz9Y
This one is long, but it does show the BARV pushing landing craft off of the beach a couple times. Also, when you see the close up of it you can read the name....Titan. That makes evidence for the 4th one of these, and it has modifications I haven't seen on any of the others....
https://www.youtube.com/watch?v=7k8xLBd-wDg
Looks like it might be a fun little vehicle to play on the beach with.
Bob
jet
Alberta, Canada
Joined: December 30, 2002
KitMaker: 306 posts
Armorama: 295 posts
Joined: December 30, 2002
KitMaker: 306 posts
Armorama: 295 posts
Posted: Saturday, December 05, 2015 - 05:05 AM UTC
I'll just paste what I've done up to now.
The Italeri kit I am using is for the most part still pretty decent. I would even say that in some ways it is still better that the recent releases by Takom and MENG.
Step #1. calls for the gluing in of the two inside mounting brackets along the deck of the lower hull, into which the single piece suspension swing arms slot into and are glued in place. The other two more modern kits from the other companies have a different arrangement, opting for a length of thin plastic extending from the swing arm, which mimics the real torsion bar suspension.
Here is a side shot of the main hull tub.
closer look
the underside
1a and 2a in place
Be aware there are two types of swing arm, (12a and 10a are one type, and 11a and 13a the other) They need to be glued exactly into the places mentioned in the instructions.
I feel that the rendition of all the other suspension parts (4a, 5a, 6a, 7a, 8a and 9a) are better on this older kit.
the suspension arms
the two types, notice the little wheel?
these parts are pretty well represented, (the new Takom has them molded into the tub!!! and are not accurate because of that! #^( )
the other previously mentioned suspension parts going into position.
Step #2 is all about the wheels which are okay but some work is required. Such as the removal of the crosswise molded indentations in the tires. Not sure what Italeri was going for here but they got it wrong. These need to be sanded smooth. I also went further with some and using an Xacto knife, I ravage the rubber tire as seen in some photos of the real things.
An original and one that's been smoothed over.
in this picture, in the front, you can see the original tire with the "indentations"
the wheels cleaned up and chomped on.
This photo shows the improvements made to accuratize the sitting of the central hub
and some real ones to compare to,
the rear plate added, of which all of this will be sanded off and re-tweaked.
The Italeri kit has some pronounced edges that stick out on either side on the front lower armour- this needs to be sanded smooth.
junglejim
Alberta, Canada
Joined: February 18, 2003
KitMaker: 1,728 posts
Armorama: 1,629 posts
Joined: February 18, 2003
KitMaker: 1,728 posts
Armorama: 1,629 posts
Posted: Saturday, December 05, 2015 - 05:27 AM UTC
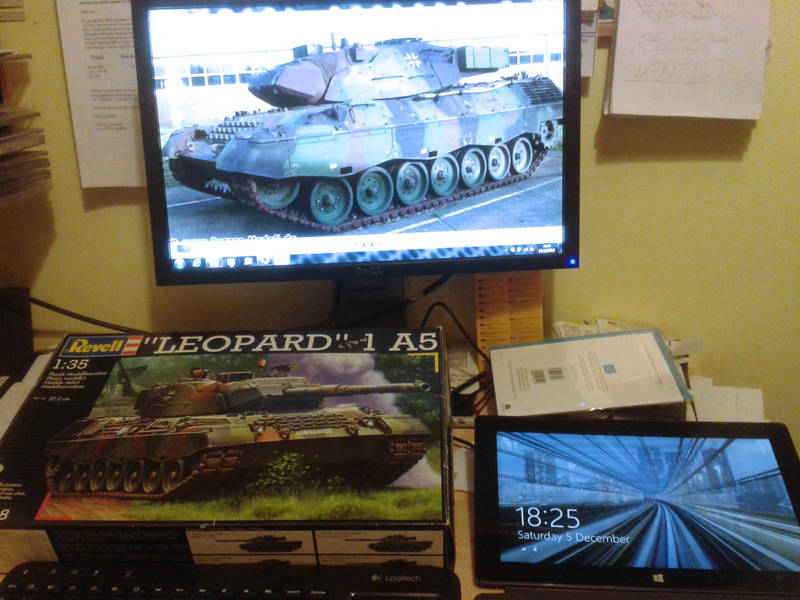
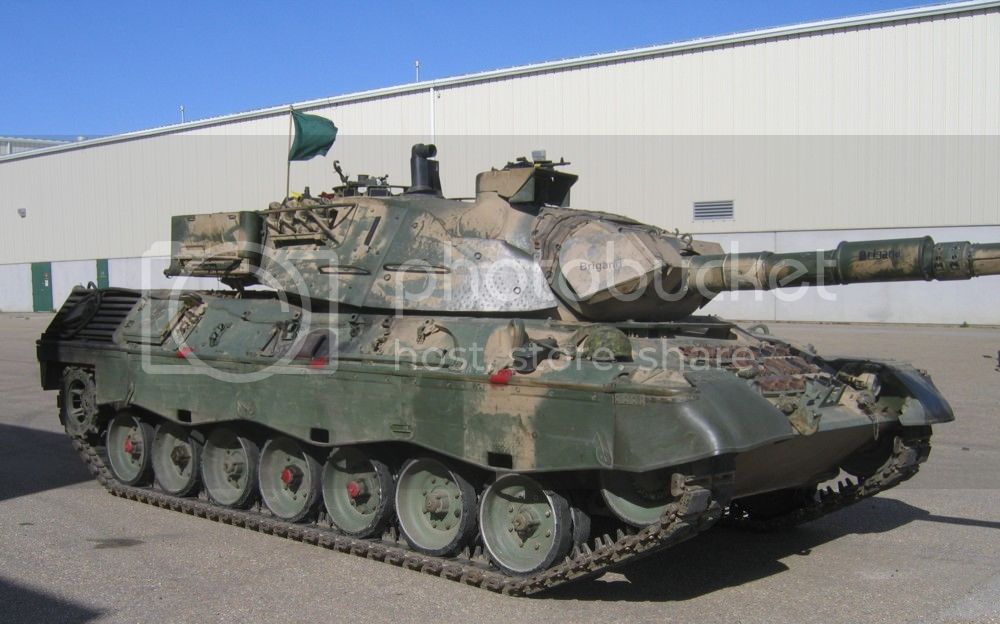
OK, here's what I got going. First, the subject I want to portray, Canadian Leopard C2 in 'OPFOR' colours:
And my goodies collected for the build (if you squint at the tablet it's Dec 4th, I didn't know how to make the date larger!):
Not sure if any OPFOR C2's used the blade (have to go through Anthony's disk, if not, won't be using it...)
Big thanks to Mike Shackleton for graciously sending me a new barrel as the first one was missing a couple of the shroud pieces! Hopefully will start this weekend.
Don't know why Photobucket thumbnailed the mobile pics, but just click on them to enlarge. My Internet speed is sucking right now...
Jim
LeoCmdr
Alberta, Canada
Joined: January 19, 2005
KitMaker: 4,085 posts
Armorama: 3,917 posts
Joined: January 19, 2005
KitMaker: 4,085 posts
Armorama: 3,917 posts
Posted: Saturday, December 05, 2015 - 06:21 AM UTC
Good choice Jim...lots of Cheeping!
junglejim
Alberta, Canada
Joined: February 18, 2003
KitMaker: 1,728 posts
Armorama: 1,629 posts
Joined: February 18, 2003
KitMaker: 1,728 posts
Armorama: 1,629 posts
Posted: Saturday, December 05, 2015 - 09:09 AM UTC
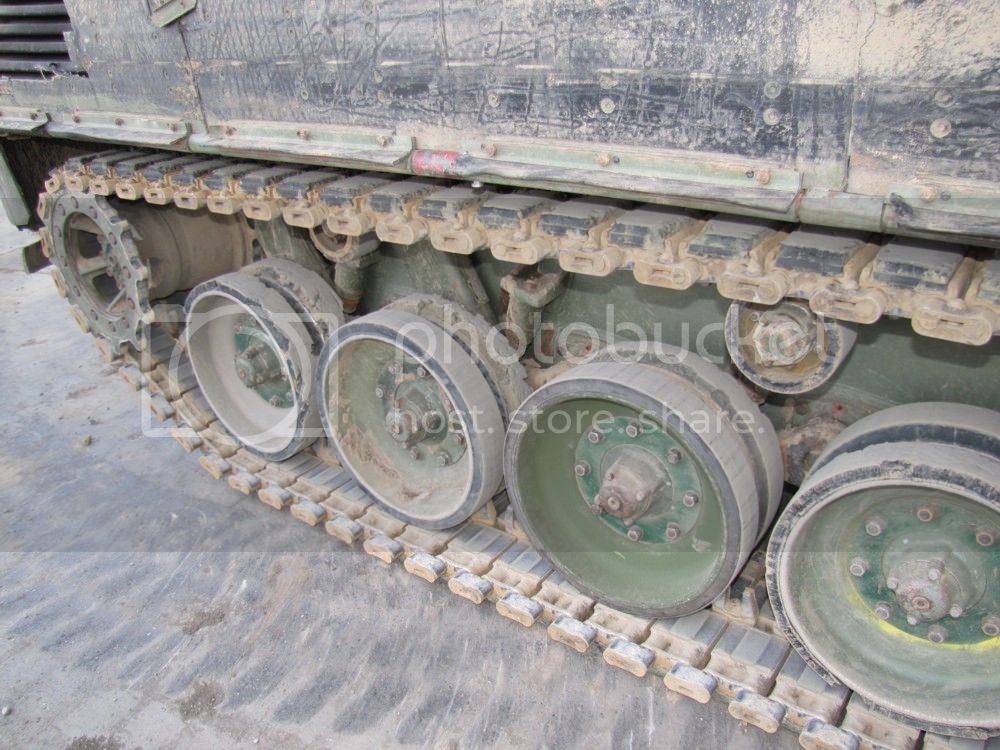
Cheeps with the method of hairspray, no? Should be a good exercise, just lookit all the variation in roadwheels alone!
Jim
Jim