

Hosted by Richard S.
Leopardmania 50 replacement campaign
jet

Joined: December 30, 2002
KitMaker: 306 posts
Armorama: 295 posts
Posted: Sunday, December 27, 2015 - 10:26 AM UTC
Thanks Jim , I'll post what I have as well

bwiber

Joined: August 03, 2008
KitMaker: 436 posts
Armorama: 320 posts
Posted: Wednesday, December 30, 2015 - 12:53 AM UTC
Finally some progress on the BARV.... I have the basic roof completed!!! 
The roof is a fun thing.... it slopes from front to back, the edges have handholds cut into them, the edges angle out at the bottom and for that added fun factor the bottom edge is level. I won't recount the various attempts, just show you the finished item...


The bottom of the overhang is located just above the top edge of the windows. More conditions to sizing them than I really wanted to deal with but in the end it seems to have come together.... and with the pipe added to the bottom edge....

Not sure what is next, but it has to be simpler.... Doesn't it???

Later,
Bob
The roof is a fun thing.... it slopes from front to back, the edges have handholds cut into them, the edges angle out at the bottom and for that added fun factor the bottom edge is level. I won't recount the various attempts, just show you the finished item...
The bottom of the overhang is located just above the top edge of the windows. More conditions to sizing them than I really wanted to deal with but in the end it seems to have come together.... and with the pipe added to the bottom edge....
Not sure what is next, but it has to be simpler.... Doesn't it???
Later,
Bob
barkingdigger

#013

Joined: June 20, 2008
KitMaker: 3,981 posts
Armorama: 3,403 posts
Posted: Wednesday, December 30, 2015 - 01:40 AM UTC
Wow Bob, that's really coming along! If you ever feel tempted to measure up all the parts and draw them out as scale cutting templates, I'd be first in line to buy a copy...
mshackleton

Joined: December 16, 2007
KitMaker: 559 posts
Armorama: 517 posts

Posted: Wednesday, December 30, 2015 - 02:32 AM UTC
I think the decking is going to try your patience, but you seem to have a lot of it if you have gotten this far. You are doing a great job, Bob.

bwiber
Joined: August 03, 2008
KitMaker: 436 posts
Armorama: 320 posts
Posted: Wednesday, December 30, 2015 - 03:19 AM UTC
Quoted Text
I think the decking is going to try your patience, but you seem to have a lot of it if you have gotten this far. You are doing a great job, Bob.
Michael, to be honest I think that the push assembly bracing is going to be a lot worse then the decking. In fact, I think it needs to be done prior to the decking so that I know where the decking can go up there.... Well, that kind of decides what comes next.....
Patience??? You say this to a guy that tossed a model over his shoulder because the track wouldn't go on right? Funny part is that the model bounced and came through the experience basically unscathed...
Later....
bwiber
Joined: August 03, 2008
KitMaker: 436 posts
Armorama: 320 posts
Posted: Wednesday, December 30, 2015 - 03:26 AM UTC
Quoted Text
Wow Bob, that's really coming along! If you ever feel tempted to measure up all the parts and draw them out as scale cutting templates, I'd be first in line to buy a copy...
Tom.... It would be easier to just send you the model and let you measure whatever you want.
 I do have some measurements but I tend to have to adjust them as I go... after all, according to your signature there is no dry fit!
Bob

SgtRam

#197
Joined: March 06, 2011
KitMaker: 3,971 posts
Armorama: 2,859 posts

Posted: Wednesday, December 30, 2015 - 07:27 AM UTC
More work getting done. I had some parts from a C2 Mexas update set, so I have replaced a few parts with resin and added some extra PE.


jet
Joined: December 30, 2002
KitMaker: 306 posts
Armorama: 295 posts
Posted: Wednesday, December 30, 2015 - 09:11 AM UTC
Wish my Leopard project was so straight forward! LOL. Anyways. I have been bogged down with the engine deck and screen for a few weeks. I basically cut and sanded the square hole to fit the screen with a tiny gap surround.I then decided to build a brass frame of some sort on the fly, that would give rigidity to the two screens on top. I fiddled with this for a while, and was making progress but at one point I could see it would not provide a good enough solution for my issues with the corners.


So I took a look at the MENG engine deck, and since I was going to use the MENG screen any ways, I decided to cast a mold of the MENG upper fuselage using the cast resin part to replace the area on the Italeri kit.

at one point I made the mold bigger for more control

This could be a good solution but the MENG kit and the Italeri kit are of course a little different in dimension so there is some issues with fit. But pretty good. I think next time I will extend the area of the mold to the outside perimeter of the upper deck and just replace the whole thing.
So it was at this point I thought, why not use the MENG kit to do the Leopard 1A1, but there would need to be a bit of work on the turret mounting point as the resin turret I have won't just drop into the MENG hole. It was designed for the Italeri kit.
In the end I again decided on something different, because in the mail today came my engine bay and engine set from Perfect Scale arrived, so I'm gonna put that into my Canadian rent a tank, just for fun.

I was hoping that someone out there may have some left over Italeri suspension arms. I seem to have broken off some and have lost the remnant along the way. I could maybe purchase a set of suspension parts from Leopard Club but kinda blew the budget on the engine!
ALSO, any engine bay and or engine photos would be appreciated. PM if you don't want to publish here, or have bigger files for me to peruse. Thanks!
So I took a look at the MENG engine deck, and since I was going to use the MENG screen any ways, I decided to cast a mold of the MENG upper fuselage using the cast resin part to replace the area on the Italeri kit.
at one point I made the mold bigger for more control
This could be a good solution but the MENG kit and the Italeri kit are of course a little different in dimension so there is some issues with fit. But pretty good. I think next time I will extend the area of the mold to the outside perimeter of the upper deck and just replace the whole thing.
So it was at this point I thought, why not use the MENG kit to do the Leopard 1A1, but there would need to be a bit of work on the turret mounting point as the resin turret I have won't just drop into the MENG hole. It was designed for the Italeri kit.
In the end I again decided on something different, because in the mail today came my engine bay and engine set from Perfect Scale arrived, so I'm gonna put that into my Canadian rent a tank, just for fun.
I was hoping that someone out there may have some left over Italeri suspension arms. I seem to have broken off some and have lost the remnant along the way. I could maybe purchase a set of suspension parts from Leopard Club but kinda blew the budget on the engine!
ALSO, any engine bay and or engine photos would be appreciated. PM if you don't want to publish here, or have bigger files for me to peruse. Thanks!
mshackleton
Joined: December 16, 2007
KitMaker: 559 posts
Armorama: 517 posts
Posted: Wednesday, December 30, 2015 - 01:52 PM UTC
I can do you a set of Italeri swing arms. PM me with your address.
As far as the powerpack is concerned you should fine everything you need here: http://leopardclub.ca/Spotlight/Leopard_1_Engine/DH1/
If you need anything else, PM me.
In fact, if anyone needs any help, do the same.
I used the Meng cast grille on my Revell (new tool) Leo 1 and the size was near perfect after the Revell grille was removed.
barkingdigger
#013
Joined: June 20, 2008
KitMaker: 3,981 posts
Armorama: 3,403 posts
Posted: Wednesday, December 30, 2015 - 03:55 PM UTC
Quoted Text
Tom.... It would be easier to just send you the model and let you measure whatever you want.
I'd much prefer it if you could send me a real one!

(That'd really trump my neighbour and the builder's van he leaves parked in front of my house...
 )
)
bm4247

Joined: December 29, 2014
KitMaker: 88 posts
Armorama: 60 posts

Posted: Thursday, December 31, 2015 - 12:22 AM UTC
Hi all.
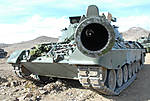
I managed to build five models this year in five campaigns. Not sure how that compares but this was my first year back to modelling after nearly 40 years off. I built 2 x 1/72 aircraft, a 1/48 helicopter, a 1/48 Jackal and a 1/35 Panther.
I dusted off the box for this campaign today and am looking forward to learning more in 2016. I have posted a start photo in the required gallery. Took a while then realised my .jpg files were too large so after re sizing etc. Here are some photos as a taster.


I am a newbie and wi9ll appreciate constructive criticism when I post update picks.
Have a fantastic 2016 everybody!!!
I managed to build five models this year in five campaigns. Not sure how that compares but this was my first year back to modelling after nearly 40 years off. I built 2 x 1/72 aircraft, a 1/48 helicopter, a 1/48 Jackal and a 1/35 Panther.
I dusted off the box for this campaign today and am looking forward to learning more in 2016. I have posted a start photo in the required gallery. Took a while then realised my .jpg files were too large so after re sizing etc. Here are some photos as a taster.
I am a newbie and wi9ll appreciate constructive criticism when I post update picks.
Have a fantastic 2016 everybody!!!
jet
Joined: December 30, 2002
KitMaker: 306 posts
Armorama: 295 posts
Posted: Thursday, December 31, 2015 - 12:53 AM UTC
Anyone know the thickness of the armour on the upper engine deck
mshackleton
Joined: December 16, 2007
KitMaker: 559 posts
Armorama: 517 posts
Posted: Thursday, December 31, 2015 - 02:43 AM UTC
Quoted Text
Anyone know the thickness of the armour on the upper engine deck
Upper engine deck was 20 mm.
jet
Joined: December 30, 2002
KitMaker: 306 posts
Armorama: 295 posts
Posted: Thursday, December 31, 2015 - 02:57 AM UTC
Thank you Michael
Any chance you could include the bumper stops as one of those seems to have gone missing
Any chance you could include the bumper stops as one of those seems to have gone missing
mshackleton
Joined: December 16, 2007
KitMaker: 559 posts
Armorama: 517 posts
Posted: Thursday, December 31, 2015 - 03:10 AM UTC
Aha! Now I know who you are. I will sort them over the weekend.
Happy New Year to you and to all of our Fellow Campaigners.
Happy New Year to you and to all of our Fellow Campaigners.
bwiber
Joined: August 03, 2008
KitMaker: 436 posts
Armorama: 320 posts
Posted: Thursday, December 31, 2015 - 04:13 AM UTC
Quoted Text
Quoted TextTom.... It would be easier to just send you the model and let you measure whatever you want.
I'd much prefer it if you could send me a real one!
(That'd really trump my neighbour and the builder's van he leaves parked in front of my house...
Tom.... I would love to be able to crawl all over a real one myself.
I think that the BARV wouldn't be the right version for you if you are wanting to deal with the neighbor. You might want to go with the ARV... Then you can gently move his builder's van from in front of your house onto the top of his.

jet
Joined: December 30, 2002
KitMaker: 306 posts
Armorama: 295 posts
Posted: Saturday, January 02, 2016 - 02:40 AM UTC
so got some work done yesterday. I bit of a hassle to take photos along the way and then pot them with descriptions but that's what these things are about LOL. First thing I did was to remove what remained of the upper armour on the back of the engine deck. I what to replace this with some nice clean plastic sheet. I have some plastic sheet that is .47 mm thickness. and with the real stuff being 20mm thick it was a bit shy of the required thickness so I added .10 mm piece as well.
http://scale-models.nl/scalc.html
Converted 20 mm 1/1 scale to 1/35th is 0.571428571 mm
also you can see in this pick, besides the removal of said plastic, I have begun to clear out all the stuff on the stock interior that will be in the way of adding the PSM engine bay.

What I did to help get the upper deck replacement part to scale was to use a file from Micheal's book which was printed directly onto the .47 mm stock. This was then cut out. to which a piece of .10 mm was added cut to shape and there you have it. This will remain off as it will help to have this area as open as possible for work on the engine bay. I had toyed with using brass sheet here but next time!


quick dry fit test as I sand and scrape.

http://scale-models.nl/scalc.html
Converted 20 mm 1/1 scale to 1/35th is 0.571428571 mm
also you can see in this pick, besides the removal of said plastic, I have begun to clear out all the stuff on the stock interior that will be in the way of adding the PSM engine bay.
What I did to help get the upper deck replacement part to scale was to use a file from Micheal's book which was printed directly onto the .47 mm stock. This was then cut out. to which a piece of .10 mm was added cut to shape and there you have it. This will remain off as it will help to have this area as open as possible for work on the engine bay. I had toyed with using brass sheet here but next time!
quick dry fit test as I sand and scrape.
jet
Joined: December 30, 2002
KitMaker: 306 posts
Armorama: 295 posts
Posted: Saturday, January 02, 2016 - 03:26 AM UTC
the next area of recreation was the three inspection plates on the rear armour plate.

I have decided that all the work needs to be completed on the rear before any work on the interior as I am doing a few things that need to be set before the resin interior pieces can be added.
so what I did was using progressively bigger drills I drilled out the molded on circles.

I used a punch set I have to get the discs that will go in these vacancies.


These things need to have a bolt added to their centers as well.
I have decided that all the work needs to be completed on the rear before any work on the interior as I am doing a few things that need to be set before the resin interior pieces can be added.
so what I did was using progressively bigger drills I drilled out the molded on circles.
I used a punch set I have to get the discs that will go in these vacancies.
These things need to have a bolt added to their centers as well.

LeoCmdr
Joined: January 19, 2005
KitMaker: 4,085 posts
Armorama: 3,917 posts

Posted: Saturday, January 02, 2016 - 04:22 AM UTC
Is your plan to simply replace the access plates with the disks or are you going to display them removed along with the power pack removed?
The access plates actually have short retention wires that attach on the inside of the hull to allow the plates to be removed and just left hanging.
As far as the bolts...the plate has a recessed center where the bolt heads sit. The kit part is correct it just lacks the bolt head detail.
Really nice work on your Leopard!
jet
Joined: December 30, 2002
KitMaker: 306 posts
Armorama: 295 posts
Posted: Sunday, January 03, 2016 - 03:12 AM UTC
Jason, not sure what the plan is for sure, maybe have the middle disc open as in the image below, which does show the retaining cable. I'm a bit of a loss to understand what the access discs are access two particularly on the bottom. Not sure what the middle one is up to but clearly the two lower ones do are not seen on the interior of the engine bay in any photos I have seen. What is their purpose?

I did some work like this on another C2 MEXAS build replacing the top middle disc and adding bolts.
The main reason I am doing this extra work on this build is mainly because I sanded away the one disc and needed to replace it, but the Italeri ones seem to have a somewhat exaggerated spacing as far as the width of the space between the hull and disc?
LeoCmdr
Joined: January 19, 2005
KitMaker: 4,085 posts
Armorama: 3,917 posts
Posted: Sunday, January 03, 2016 - 04:07 AM UTC
The two lower plates provide access to the brake systems. They do directly access to the inside of the hull. I am not sure why they can't be seen in your images. It almost looks like an additional internal cover plate is in place in your cutaway images.
The centre plate is only used when the powerpack is installed. I am pretty sure the hole aligns with the auxiliary power take off on the powerpack.
Keep up the excellent work!
The centre plate is only used when the powerpack is installed. I am pretty sure the hole aligns with the auxiliary power take off on the powerpack.
Keep up the excellent work!
jet
Joined: December 30, 2002
KitMaker: 306 posts
Armorama: 295 posts
Posted: Sunday, January 03, 2016 - 04:44 AM UTC
Yes I can see in some images I have seen online that they are directly behind brake drums.

LeoCmdr
Joined: January 19, 2005
KitMaker: 4,085 posts
Armorama: 3,917 posts
Posted: Sunday, January 03, 2016 - 06:31 AM UTC
The holes also serve very well when cleaning out the hull after the powerpack is removed to toss out dirt and other corruption!
jet
Joined: December 30, 2002
KitMaker: 306 posts
Armorama: 295 posts
Posted: Sunday, January 03, 2016 - 11:07 AM UTC
So I wanted to scratch make the tow pintle by carving some plastic stock. This would prove too time consuming for this build. I decided to make a mold of the MENG part. This will be cast and that casting attached to this kit.


jet
Joined: December 30, 2002
KitMaker: 306 posts
Armorama: 295 posts
Posted: Monday, January 04, 2016 - 07:47 AM UTC
Looking at other features of the rear end, I started to look at the mud flaps and was tempted to use the Leopard Workshop set with the real rubber but decided to continue with the Tetra parts. I soldered them together and they look great. The thickness of the brass is in keeping with the look of the real ones. I am not sure whether I will have the mud flaps folded up or just hanging but I will manipulate the brass to replicate rubber.


I needed to complete the rear light setups. These will utilize the Resin lenses from KP for the Leopard 1. In these images I have temporarily test fitted them, but will remove them for painting, reinserting them after.
There is lots of added weld beads in these pics, made wit Milliput, and is a little rough still, there will be some final finessing later.
I used some brass tubing for the circular outer stop light.
 |

WEB HOSTING BY


Copyright ©2021 Armorama and Kitmaker Network, a subsidiary of Silver Star Enterprises
All Rights Reserved. Please read our Conditions of Use and Privacy Policy.
All Rights Reserved. Please read our Conditions of Use and Privacy Policy.