

Hosted by Richard S.
DOG Campaign

Hudson29

#460

Joined: September 16, 2014
KitMaker: 1,156 posts
Armorama: 1,024 posts
Posted: Tuesday, November 01, 2016 - 06:20 AM UTC
Thanks for showing the masking. I always try to paint the wheels off the vehicle but sometimes that just will not fly. You just used paper disks?

tatbaqui

#040

Joined: May 06, 2007
KitMaker: 2,713 posts
Armorama: 2,451 posts

Posted: Tuesday, November 01, 2016 - 08:27 AM UTC
Yes Paul, they're just paper cutouts. I've seen folks use a circle template and spray on, but I just can't get the hang of it. I instead use the circle template to measure and draw the disks. A bit tedious in the cutting part, but so far it has worked for me. Cheers.
tatbaqui
#040
Joined: May 06, 2007
KitMaker: 2,713 posts
Armorama: 2,451 posts
Posted: Thursday, November 03, 2016 - 08:02 AM UTC
Hello,
I used staple wire to do the sag. The painting continues.

Cheers,
Tat
I used staple wire to do the sag. The painting continues.
Cheers,
Tat

ClaytonFromEllijay
#454
Joined: July 10, 2016
KitMaker: 1,273 posts
Armorama: 1,138 posts
Posted: Thursday, November 03, 2016 - 06:14 PM UTC
Looking very good, Tat!
tatbaqui
#040
Joined: May 06, 2007
KitMaker: 2,713 posts
Armorama: 2,451 posts
Posted: Friday, November 04, 2016 - 03:46 AM UTC
Thanks Clayton! The interior's close to bare, I thought of adding some stuff but decided otherwise as I may run out of time. It has been a fun build so far given that it's my first -- should get me prepped up for more complex half-tracks builds. 

Lakota
#123
Joined: November 17, 2008
KitMaker: 1,202 posts
Armorama: 635 posts
Posted: Friday, November 04, 2016 - 06:39 PM UTC
Great job Tat! I always had trouble with the wheels when I built that kit. I've built a least two of them that I can remember, including one mounting Tamiya's 3.7 cm AT gun. This kit is a true dog & you've done a bang up job making it look good.
Take care,
Don "Lakota"
Take care,
Don "Lakota"
Lakota
#123
Joined: November 17, 2008
KitMaker: 1,202 posts
Armorama: 635 posts
Posted: Saturday, November 05, 2016 - 01:40 AM UTC
Howdy Y'all 
I've done a little work on my model today, it's raining so I'm stuck inside.
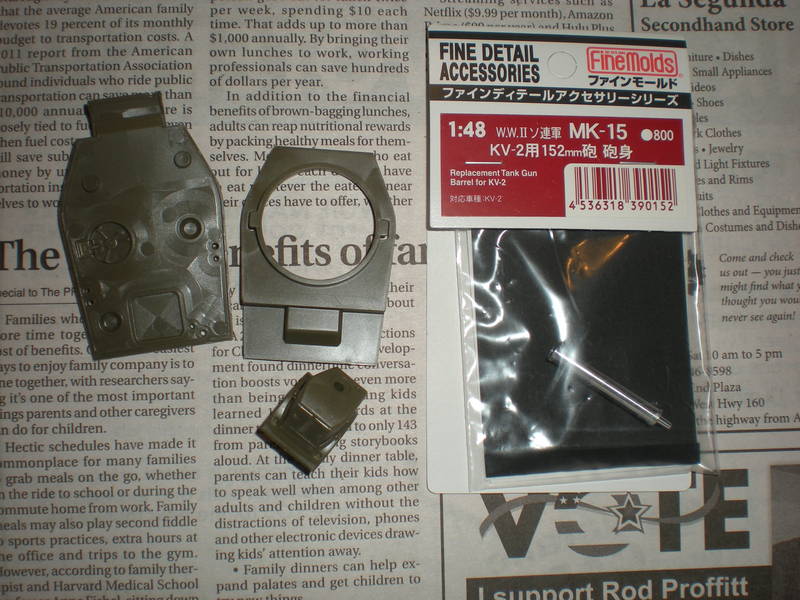
I had to order a metal barrel from Japan for this kit and that's where I lost my momentum. Hopefully I'll get this kit finished before the deadline. The original barrel (Aber) I had is for the HobbyBoss kit; just something to keep in mind if you plan on building one of the 1/48 KV-II kits. I didn't like the two piece barrel in the Tamiya kit, lost too much detail in trying to sand the seam.
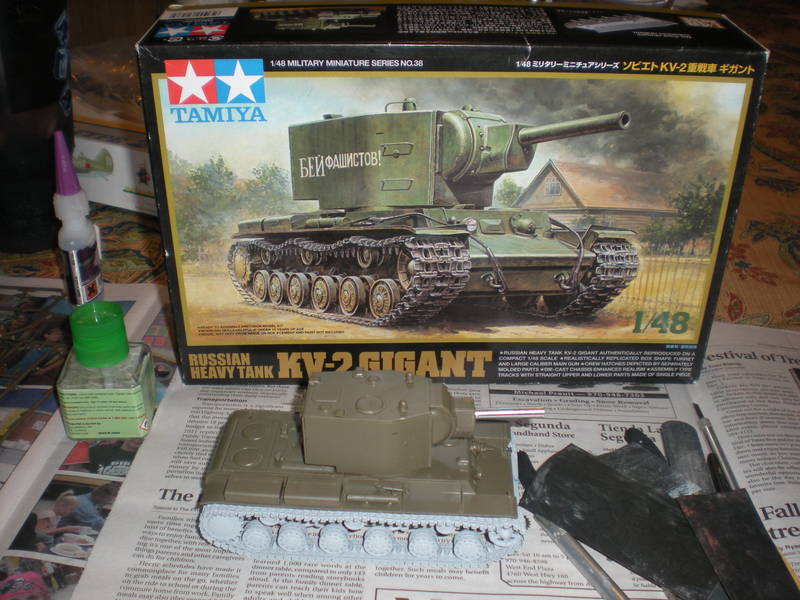
I've got the major sub-assemblies almost completed. I plan to paint each one separately, don't know if that's a good idea or not. Here's how it's looking so far; I can pop off some of the small pieces like the hatches and a fuel tank. I'll need access to screw the plastic part and the metal part together.
Next step-paint the lower hull and tracks black and work on the "string" cables for the kit. I've never had much luck cutting and gluing the string and plastic together but here goes nothing. I also need to find a part that's missing, either from my Tamiya KV-I kit or a spare Hobbyboss kit.
Take care,
Don "Lakota"
I've done a little work on my model today, it's raining so I'm stuck inside.
I had to order a metal barrel from Japan for this kit and that's where I lost my momentum. Hopefully I'll get this kit finished before the deadline. The original barrel (Aber) I had is for the HobbyBoss kit; just something to keep in mind if you plan on building one of the 1/48 KV-II kits. I didn't like the two piece barrel in the Tamiya kit, lost too much detail in trying to sand the seam.
I've got the major sub-assemblies almost completed. I plan to paint each one separately, don't know if that's a good idea or not. Here's how it's looking so far; I can pop off some of the small pieces like the hatches and a fuel tank. I'll need access to screw the plastic part and the metal part together.
Next step-paint the lower hull and tracks black and work on the "string" cables for the kit. I've never had much luck cutting and gluing the string and plastic together but here goes nothing. I also need to find a part that's missing, either from my Tamiya KV-I kit or a spare Hobbyboss kit.
Take care,
Don "Lakota"
tatbaqui
#040
Joined: May 06, 2007
KitMaker: 2,713 posts
Armorama: 2,451 posts
Posted: Saturday, November 05, 2016 - 03:37 AM UTC
Thanks for the kind words Don. For a dog of a kit, I found that the fit is quite nice. Add AM tracks, interior bits, killer paint job and I'd say it will still be a looker when lined up with newer kits. Good luck on your build -- still a couple of weeks left! Cheers, Tat
Hudson29
#460
Joined: September 16, 2014
KitMaker: 1,156 posts
Armorama: 1,024 posts
Posted: Monday, November 07, 2016 - 05:52 AM UTC
Quoted Text
Thanks Clayton! The interior's close to bare, I thought of adding some stuff but decided otherwise as I may run out of time. It has been a fun build so far given that it's my first -- should get me prepped up for more complex half-tracks builds.
What colors did you use for the interior? I'm working on a 250 for another campaign and am looking for info on what colors to use. It looks like a red primer floor? What about the walls? They look greenish in the photos. I had been thinking of using the dark yellow inside as well as on the outside.
tatbaqui
#040
Joined: May 06, 2007
KitMaker: 2,713 posts
Armorama: 2,451 posts
Posted: Tuesday, November 08, 2016 - 04:21 AM UTC
Quoted Text
Quoted TextThanks Clayton! The interior's close to bare, I thought of adding some stuff but decided otherwise as I may run out of time. It has been a fun build so far given that it's my first -- should get me prepped up for more complex half-tracks builds.
What colors did you use for the interior? I'm working on a 250 for another campaign and am looking for info on what colors to use. It looks like a red primer floor? What about the walls? They look greenish in the photos. I had been thinking of using the dark yellow inside as well as on the outside.
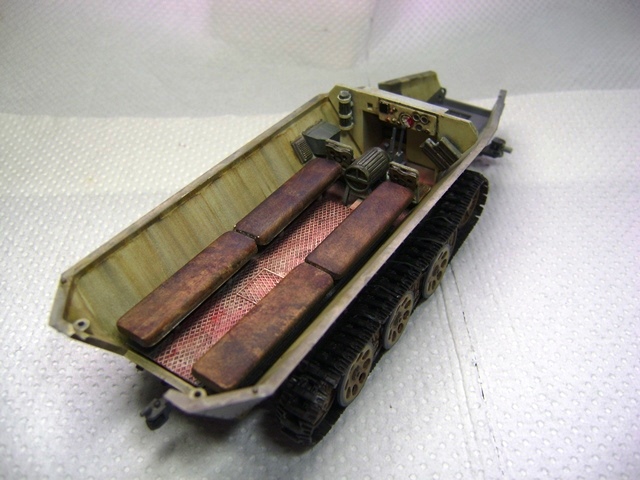
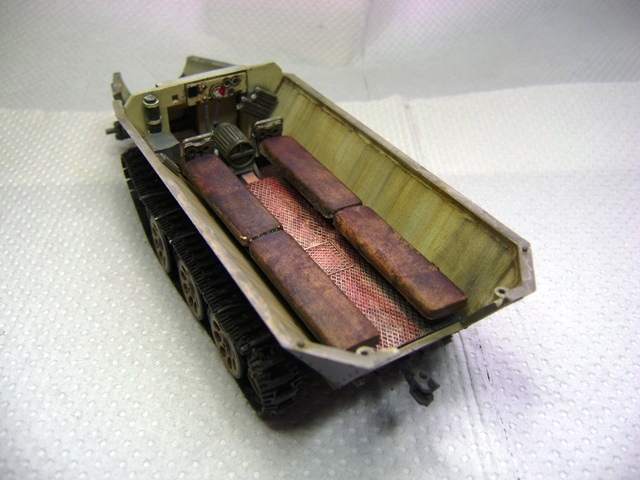
Paul, from what i read these open vehicles would typically have the same colors for interior and exterior.
What I did here would surely get no points in accuracy as I just put on what I have on hand. I wanted to do an interior that's a bit lighter than dunkelgeb so I first used a creamy white from a DIY store rattle can. I then weathered with oils -- naples yellow, burnt umber, payne's grey, and some white. No greens here, so maybe it's the lighting. I believe the floor should be the same as the interior walls, then again red primer looked cool, to me at least.
I've installed the fenders the other day but had a heck of a time correcting and doing putty work as mine seems to be warped. Hope to get started on the external paint work. Will use a dunkelgelb base. Googling around for a nice camo pattern.
Cheers,
Tat
Hudson29
#460
Joined: September 16, 2014
KitMaker: 1,156 posts
Armorama: 1,024 posts
Posted: Tuesday, November 08, 2016 - 04:35 AM UTC
Quoted Text
Paul, from what i read these open vehicles would typically have the same colors for interior and exterior.
What I did here would surely get no points in accuracy as I just put on what I have on hand. I wanted to do an interior that's a bit lighter than dunkelgeb so I first used a creamy white from a DIY store rattle can. I then weathered with oils -- naples yellow, burnt umber, payne's grey, and some white. No greens here, so maybe it's the lighting. I believe the floor should be the same as the interior walls, then again red primer looked cool, to me at least.
I've installed the fenders the other day but had a heck of a time correcting and doing putty work as mine seems to be warped. Hope to get started on the external paint work. Will use a dunkelgelb base. Googling around for a nice camo pattern.
Cheers,
Tat
OK, fair enough. I remember someone doing a bangup job on a Panzer III or IV and they had the floors in a a red primer. I thought that a bit odd, but I'm sure no expert. I'm inclined to go with the dark yellow myself as it make sense that the builders would use this color and it simplifies the build. By the time we add some dirt rust & dust the line will be less clear anyway.
I'm looking forward to seeing what you come up with for camo. I'll be trying to create a "late war hard edged three color" scheme as called for on the Archer transfer sheet. I sure wish they would have given more to go on . . .
Paul
brekinapez
Joined: July 26, 2013
KitMaker: 2,272 posts
Armorama: 1,860 posts
Posted: Tuesday, November 08, 2016 - 05:55 AM UTC
They did tend to paint the floor the exterior color in the open tops for the basic fact that the red primer might show against the ground when enemy aircraft were overhead.
Hudson29
#460
Joined: September 16, 2014
KitMaker: 1,156 posts
Armorama: 1,024 posts
Posted: Tuesday, November 08, 2016 - 10:16 PM UTC
Quoted Text
They did tend to paint the floor the exterior color in the open tops for the basic fact that the red primer might show against the ground when enemy aircraft were overhead.
Yes, this makes sense. What about the driver's compartment? I'm looking at some war time photos that seem to suggest a dark color, possibly grey or even black.
brekinapez
Joined: July 26, 2013
KitMaker: 2,272 posts
Armorama: 1,860 posts
Posted: Wednesday, November 09, 2016 - 02:48 AM UTC
I would think black to be too dark, and the gray might be the remains of an earlier Panzergrau paint job that got repainted later and they left the driver's compartment original. Most of the photos I've collected as reference show the interior all one color.
Hudson29
#460
Joined: September 16, 2014
KitMaker: 1,156 posts
Armorama: 1,024 posts
Posted: Thursday, November 10, 2016 - 03:49 AM UTC
Quoted Text
I would think black to be too dark, and the gray might be the remains of an earlier Panzergrau paint job that got repainted later and they left the driver's compartment original. Most of the photos I've collected as reference show the interior all one color.
Yes, that would explain why the factory photos look dark. They may well have been from early on in the production run. My 250 is the /9 model which I believe came out after the standard was changed to dark yellow. The DY will also simplify the build and I have to smile on that . . .
Lakota
#123
Joined: November 17, 2008
KitMaker: 1,202 posts
Armorama: 635 posts
Posted: Saturday, November 12, 2016 - 03:11 AM UTC
Howdy Y'all
A little more progress on my Tamiya KV-II. Added weld beads around the turrent edges with stretched spruce.
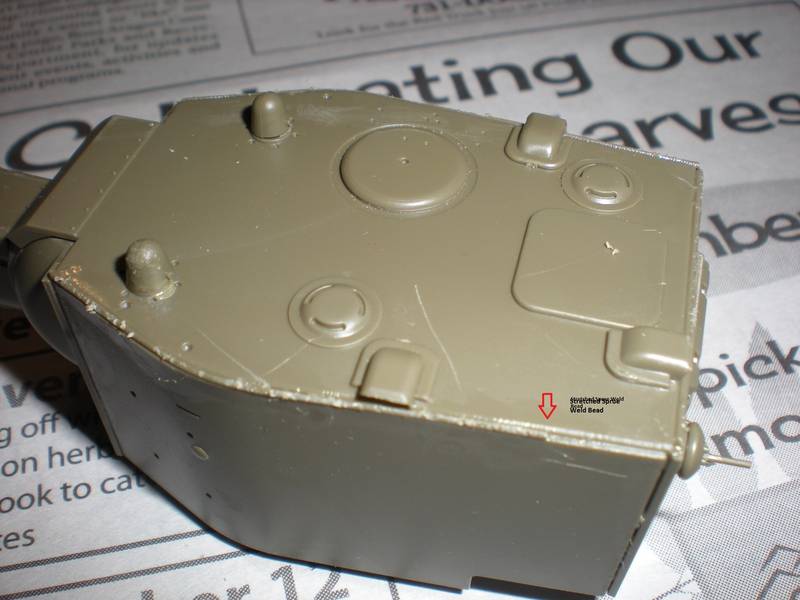
Worked on the tracks, first time using acrylic metallic paint:

Did a little weathering of the tracks but will do more as the build progresses. Painted everything with rattlecan Tamiya NATO Black.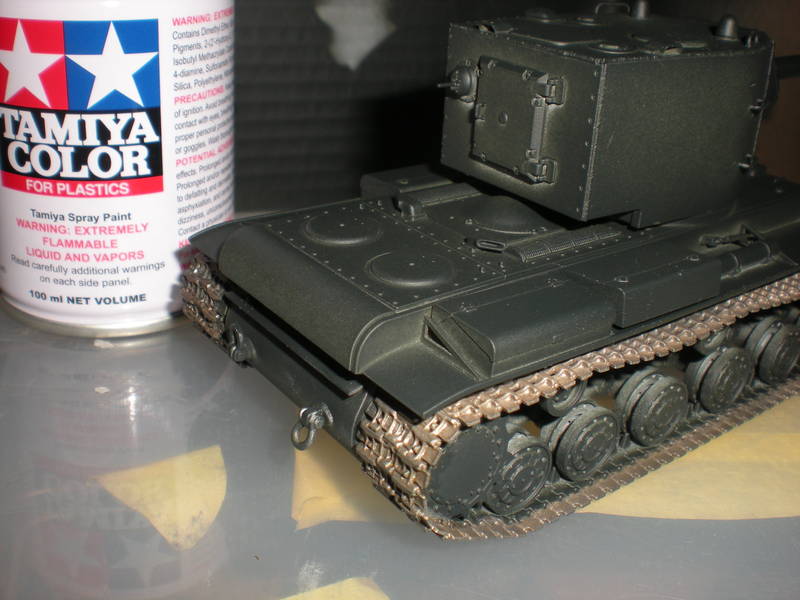
Take care,
Don "Lakota"
A little more progress on my Tamiya KV-II. Added weld beads around the turrent edges with stretched spruce.
Worked on the tracks, first time using acrylic metallic paint:
Did a little weathering of the tracks but will do more as the build progresses. Painted everything with rattlecan Tamiya NATO Black.
Take care,
Don "Lakota"
Hudson29
#460
Joined: September 16, 2014
KitMaker: 1,156 posts
Armorama: 1,024 posts
Posted: Monday, November 14, 2016 - 03:43 AM UTC
I'm surprised to see that a Tamiya kit needed things like weld beads. Maybe it is just the smaller scale? I'm looking forward to seeing your russian green. We all seem to have a different idea of what it should look like. My own Ruskies all have a different interpretation . . .
Lakota
#123
Joined: November 17, 2008
KitMaker: 1,202 posts
Armorama: 635 posts
Posted: Monday, November 14, 2016 - 06:15 AM UTC
Paul,
Remember, this is a Dog Campaign. This kit was among the first group of 1/48 armor kits released by Tamiya. It's a fun build and that's what it's all about for me. I'll use Vallejo BO4 paints for my "Russian Green."
Take care,
Don "Lakota"
Remember, this is a Dog Campaign. This kit was among the first group of 1/48 armor kits released by Tamiya. It's a fun build and that's what it's all about for me. I'll use Vallejo BO4 paints for my "Russian Green."
Take care,
Don "Lakota"
tatbaqui
#040
Joined: May 06, 2007
KitMaker: 2,713 posts
Armorama: 2,451 posts
Posted: Friday, November 18, 2016 - 07:01 PM UTC
Looking good Don -- I like the extra detail on the weld beads.
Well, here's my dog as of the moment.
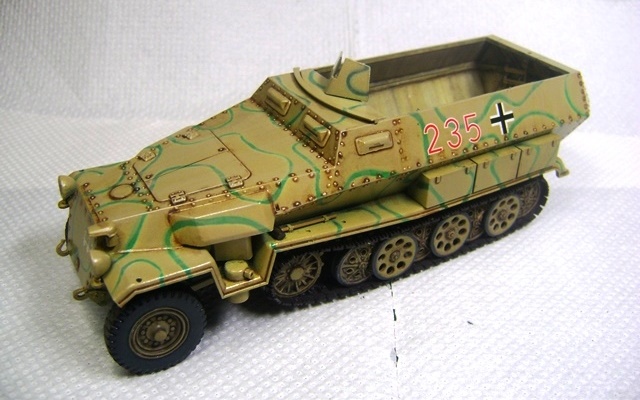
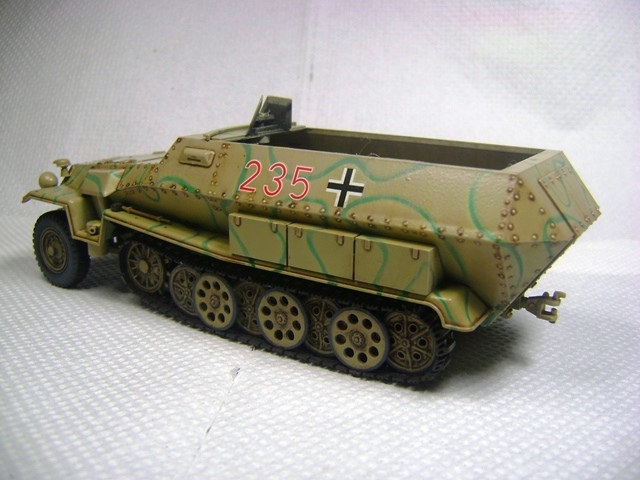
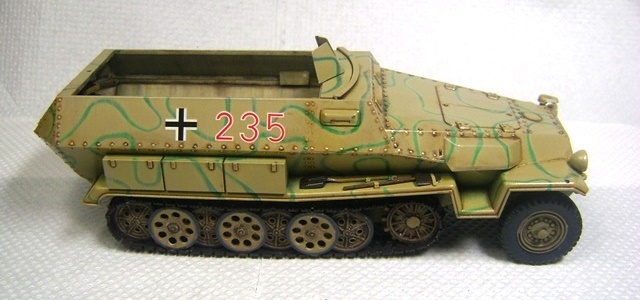
After googling around for camo inspiration I just settled for a simple green on yellow one, else I may just run out of time.
Mounted the decals, did the washes, and capped it off with a coat of dull clear from a DIY store rattlecan. Will give it a day to set, and then put on some oils to finish. Hope to make it on time.
Cheers,
Tat
Well, here's my dog as of the moment.
After googling around for camo inspiration I just settled for a simple green on yellow one, else I may just run out of time.
Mounted the decals, did the washes, and capped it off with a coat of dull clear from a DIY store rattlecan. Will give it a day to set, and then put on some oils to finish. Hope to make it on time.
Cheers,
Tat
ClaytonFromEllijay
#454
Joined: July 10, 2016
KitMaker: 1,273 posts
Armorama: 1,138 posts
Posted: Friday, November 18, 2016 - 07:35 PM UTC
Great looking paint job there, Tat, very precise!

ColinEdm


Joined: October 15, 2013
KitMaker: 1,355 posts
Armorama: 1,229 posts
Posted: Friday, November 18, 2016 - 10:54 PM UTC
That's a pretty damn good looking pup there Tat!

erichvon

Joined: January 17, 2006
KitMaker: 1,694 posts
Armorama: 1,584 posts

Posted: Friday, November 18, 2016 - 11:15 PM UTC
Tat, that's come out nicely considering the kit. Despite it's lack of detail it's a better kit to build than the DML 251's which are a lousy fit. Nice job there mate.
tatbaqui
#040
Joined: May 06, 2007
KitMaker: 2,713 posts
Armorama: 2,451 posts
Posted: Saturday, November 19, 2016 - 04:43 AM UTC
Thanks for the kind words Clayton, Colin, and Karl!
Am glad that I'm making this oldie come out better. At one point I thought of adding bits to fill the interior, but as I've started late I just let it be. I found the kit decals a bit thick though -- the setting solution just can't seem to work its magic on it. Anyways it was still a nice, stress-free build all along.
Cheers,
Tat
ClaytonFromEllijay
#454
Joined: July 10, 2016
KitMaker: 1,273 posts
Armorama: 1,138 posts
Posted: Saturday, November 19, 2016 - 06:22 AM UTC
Stress-free is really what it's all about, LOL

Geoboffin

Joined: March 05, 2016
KitMaker: 34 posts
Armorama: 28 posts
Posted: Saturday, November 19, 2016 - 08:06 PM UTC
Quoted Text
Signing up with the venerable 1977 Tamiya Panzer IVD, which my local Hobbycraft appears to think is not a dog. I shall use it as a test bed for painting and weathering techniques before I try them out on real models. Might go for a speed build to see how quickly I can get to the useful stuff.
So I tried 4 different winter camo techniques. Rear right is oils, front right is diluted oils, rear left is acrylics, front left is hairspray plus acrylics. I am confident I could put some extra oil weathering on top but I've no more time until this campaign finishes so thats the lot from me.


 |

WEB HOSTING BY


Copyright ©2021 Armorama and Kitmaker Network, a subsidiary of Silver Star Enterprises
All Rights Reserved. Please read our Conditions of Use and Privacy Policy.
All Rights Reserved. Please read our Conditions of Use and Privacy Policy.