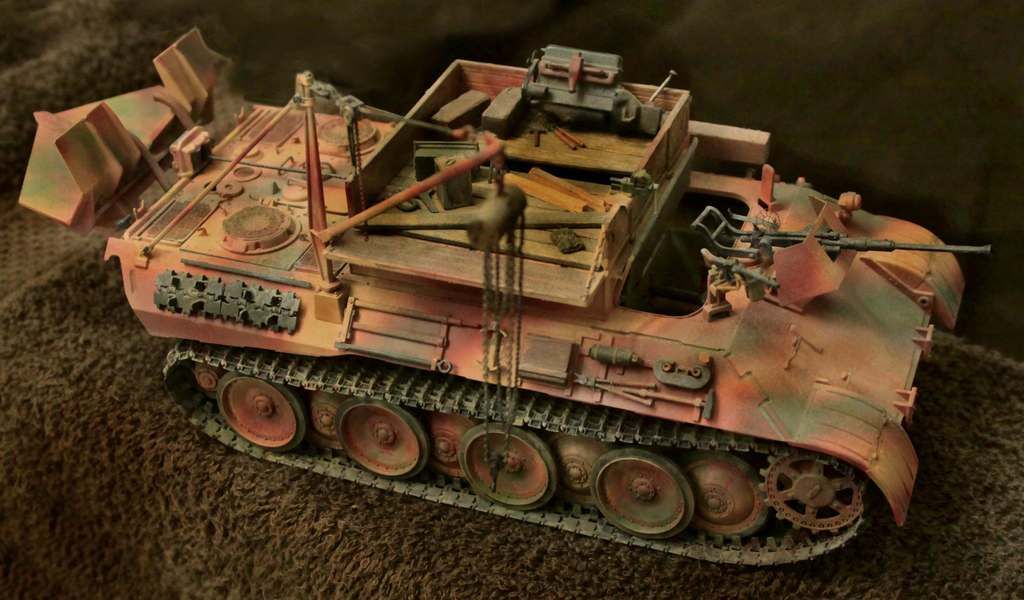
Chris this is some really inspiring work. Great detail I can't wait to see it completed.
Robert
Hosted by Darren Baker
Bergpanther D
Modelrob

Joined: October 20, 2015
KitMaker: 304 posts
Armorama: 293 posts

Posted: Saturday, March 12, 2016 - 03:13 PM UTC

varanusk


Joined: July 04, 2013
KitMaker: 1,288 posts
Armorama: 942 posts

Posted: Monday, March 14, 2016 - 01:08 PM UTC
This is looking great and all the wiring you have done is fantastic!
Keep posting please
Keep posting please

fuselier63

Joined: April 17, 2013
KitMaker: 45 posts
Armorama: 37 posts

Posted: Monday, March 14, 2016 - 02:18 PM UTC
Great built, keep those pictures coming.
One can never have enough reference if one is building/want to build a Bergepanther of his own
One can never have enough reference if one is building/want to build a Bergepanther of his own

M4A1Sherman

Joined: May 02, 2013
KitMaker: 4,403 posts
Armorama: 4,078 posts

Posted: Monday, March 14, 2016 - 04:25 PM UTC
Quoted Text
Hate to be impatient but at least it means I am very interested: de winch, de winch let's get to de winch!
Many moons ago I took two of the Italeri Berge kits and tried to build the most accurate model of this recovery vehicle that I could muster adding in some individual track links, some etch and a few scratch built parts!
VERY NICE, CHRIS!!!

This just goes to show what a beautiful model can be built without a "dedicated" kit of the Bergepanther. The New TMD Bergepanther Conversion kit is fully worthy of the DRAGON Panther D kit, along with Chris' talent!!!

PanzerLehr

Joined: February 11, 2009
KitMaker: 200 posts
Armorama: 149 posts

Posted: Tuesday, March 15, 2016 - 01:22 AM UTC
Thank you for the kind words guys! I was a little nervous about doing a build blog on one of my kits. Maybe I'll do another after this one is finished lol.
I haven't had much time to work on it this week so far...but as I do will keep taking pictures and posting them.
The only thing I managed to get put in place last sunday was the radio and drivers foot pedals. Hope to maybe get some pictures up tonight.....stay tuned! lol
I haven't had much time to work on it this week so far...but as I do will keep taking pictures and posting them.
The only thing I managed to get put in place last sunday was the radio and drivers foot pedals. Hope to maybe get some pictures up tonight.....stay tuned! lol
PanzerLehr

Joined: February 11, 2009
KitMaker: 200 posts
Armorama: 149 posts

Posted: Friday, March 18, 2016 - 06:56 AM UTC
Hi guys,
Sorry I haven't updated for a bit. Well I managed to get a couple of coats of primer red on some parts. Will need to put a few more.....


I used the Vallejo surface primer Rotbraun(red brown) #70.605. A few more coats of this then I will paint the "cream colour. Vallejo as well...Pale Sand #70.837.
More to come.....
Sorry I haven't updated for a bit. Well I managed to get a couple of coats of primer red on some parts. Will need to put a few more.....


I used the Vallejo surface primer Rotbraun(red brown) #70.605. A few more coats of this then I will paint the "cream colour. Vallejo as well...Pale Sand #70.837.
More to come.....
PanzerLehr

Joined: February 11, 2009
KitMaker: 200 posts
Armorama: 149 posts

Posted: Friday, March 18, 2016 - 09:20 PM UTC
Hi guys,
Got some detail painting done this morning. Torsion bars and mounts.


I am taking a break to post these lol. Going back in now to paint the lubrication lines.....
Got some detail painting done this morning. Torsion bars and mounts.


I am taking a break to post these lol. Going back in now to paint the lubrication lines.....
PanzerLehr

Joined: February 11, 2009
KitMaker: 200 posts
Armorama: 149 posts

Posted: Sunday, March 20, 2016 - 04:43 AM UTC
Hi guys,
Got back form a model show at the Canadian Warplane Heritage Museum (Heritage Con). Picked up some supplies and Takom's MK.V WW1 Heavy Battle Tank. Looking forward to starting that one. But don't worry I am still going to plow on with the Berg!
Anyhow...after I got back I did some weathering on the winch....


ahandykindaguy

Joined: August 20, 2008
KitMaker: 1,295 posts
Armorama: 1,191 posts

Posted: Sunday, March 20, 2016 - 05:54 AM UTC
Lookin mighty fine Chris! Keep er going, it's fun to watch. 

jrutman

Joined: April 10, 2011
KitMaker: 7,941 posts
Armorama: 7,934 posts

Posted: Sunday, March 20, 2016 - 06:23 PM UTC
The primer really made everything "pop". The winch is also really lookin the biz. NICE!!
PanzerLehr

Joined: February 11, 2009
KitMaker: 200 posts
Armorama: 149 posts

Posted: Tuesday, March 22, 2016 - 07:39 AM UTC
Evening all!
Thanks for the comments guys! Well I got a bit of weathering done tonight....all with Mig products....


Thanks for the comments guys! Well I got a bit of weathering done tonight....all with Mig products....


Bigred69

Joined: December 27, 2015
KitMaker: 290 posts
Armorama: 249 posts

Posted: Tuesday, March 22, 2016 - 11:42 PM UTC
What a great job you have done so far. Keep up the good work.

Unreality

Joined: November 04, 2010
KitMaker: 172 posts
Armorama: 145 posts

Posted: Tuesday, March 22, 2016 - 11:58 PM UTC
I think I can smell the grease!!
PanzerLehr

Joined: February 11, 2009
KitMaker: 200 posts
Armorama: 149 posts

Posted: Wednesday, March 23, 2016 - 12:57 AM UTC
Lol...I must be nose blind to it  . I will be painting the transmission tonight. And hoping to start the weathering on it as well...
 . I will be painting the transmission tonight. And hoping to start the weathering on it as well...
PanzerLehr

Joined: February 11, 2009
KitMaker: 200 posts
Armorama: 149 posts

Posted: Wednesday, March 23, 2016 - 06:26 AM UTC
Well guys...here is another post...
I got the transmission painted...but the chipping didn't work out like I wanted to...so I'll be starting over with it tomorrow.


But...that give me time to work on the rear wall some more...

After that I went onto the aux fuel tanks...


And a few more pics of the work so far...


Thanks for looking!

I got the transmission painted...but the chipping didn't work out like I wanted to...so I'll be starting over with it tomorrow.


But...that give me time to work on the rear wall some more...

After that I went onto the aux fuel tanks...


And a few more pics of the work so far...


Thanks for looking!

Modelrob

Joined: October 20, 2015
KitMaker: 304 posts
Armorama: 293 posts

Posted: Wednesday, March 23, 2016 - 02:01 PM UTC
Chris the weathering is coming out great. The fluid stains in the bottom of the hull is just right. I can't wait for the next update.
Robert
Robert
jrutman

Joined: April 10, 2011
KitMaker: 7,941 posts
Armorama: 7,934 posts

Posted: Wednesday, March 23, 2016 - 06:22 PM UTC
I smell the grease as well! Great job. That back wall really has the look of heavy machinery.
J
J

Plasticat

Joined: September 03, 2003
KitMaker: 448 posts
Armorama: 245 posts

Posted: Wednesday, March 23, 2016 - 09:48 PM UTC
WOW! You are doing some beautiful work on this thing!! 

fuselier63

Joined: April 17, 2013
KitMaker: 45 posts
Armorama: 37 posts

Posted: Wednesday, March 23, 2016 - 11:28 PM UTC
That is really inspiring painting.
Love it.
Only got one small question, in the pictures of the transmission there is a lever in front of the drivers instrument panel.
Does it belong there?
I think it should face downwards so the driver can see his dials.
Anyway, keep up the good work.
René
Love it.
Only got one small question, in the pictures of the transmission there is a lever in front of the drivers instrument panel.
Does it belong there?
I think it should face downwards so the driver can see his dials.
Anyway, keep up the good work.
René
fuselier63

Joined: April 17, 2013
KitMaker: 45 posts
Armorama: 37 posts

Posted: Wednesday, March 23, 2016 - 11:31 PM UTC
Maybe this is of some use.
http://www.track-link.com/forums/site_blogs/10417/flat
I use it a lot with my model.
René
http://www.track-link.com/forums/site_blogs/10417/flat
I use it a lot with my model.
René
PanzerLehr

Joined: February 11, 2009
KitMaker: 200 posts
Armorama: 149 posts

Posted: Thursday, March 24, 2016 - 01:21 AM UTC
Hi Rene,
You are right. The lever in question is a steering lever for the driver. I need to move it to the proper location.
You are right. The lever in question is a steering lever for the driver. I need to move it to the proper location.
fuselier63

Joined: April 17, 2013
KitMaker: 45 posts
Armorama: 37 posts

Posted: Thursday, March 24, 2016 - 02:20 AM UTC
Hi Chris,
no problem, would be a pity if it was in the wrong position for an otherwise great painted and assembled model.
René
no problem, would be a pity if it was in the wrong position for an otherwise great painted and assembled model.
René
PanzerLehr

Joined: February 11, 2009
KitMaker: 200 posts
Armorama: 149 posts

Posted: Thursday, March 24, 2016 - 08:47 PM UTC
Morning all,
Finished chipping and weathering the transmission. Finally got to install the assemblies......now for the small interior details......


Finished chipping and weathering the transmission. Finally got to install the assemblies......now for the small interior details......


PanzerLehr

Joined: February 11, 2009
KitMaker: 200 posts
Armorama: 149 posts

Posted: Monday, March 28, 2016 - 05:30 AM UTC
Hello all,
Sorry for not posting till now. busy weekend with Easter and all. But I did manage to get some work done.
I was able to get the Dragon upper hull cut and sanded to shape. Driver and radio op. seat painted and mounted. I am leaving the "jump" seat unattached. I will be leaving it inside the tank. Wanted to show off the back end of the transmission. Batteries in place and wired, fuel lines for the aux fuel tanks and the rest of the drivers control levers( Rene I put the right steer lever in the proper position lol)
Here are some pics of the work. I started on the drive sprockets and running gear this evening...


Modelrob

Joined: October 20, 2015
KitMaker: 304 posts
Armorama: 293 posts

Posted: Monday, March 28, 2016 - 03:33 PM UTC
Its coming along very nicely. Just love all the detail's.
Robert
Robert
 |


