Hosted by Richard S.
Big Cats Mk.IV

Tojo72

Joined: June 06, 2006
KitMaker: 4,691 posts
Armorama: 3,509 posts

Posted: Monday, August 22, 2016 - 06:16 AM UTC
Gary,Tat,and Clayton,thank you for your kind words.
Armored76

Joined: September 30, 2013
KitMaker: 1,615 posts
Armorama: 1,500 posts

Posted: Monday, August 22, 2016 - 10:06 AM UTC
Thank you all for your kind words!
@Anthony: The Tiger looks roaring good! The commander's pose really brings this to life.
Keep it coming, everyone!
@Anthony: The Tiger looks roaring good!
 The commander's pose really brings this to life.
Keep it coming, everyone!


Bluestab

Joined: December 03, 2009
KitMaker: 2,160 posts
Armorama: 1,906 posts

Posted: Monday, August 22, 2016 - 11:21 PM UTC
Progress continues on the Zvezda Panther D.
Moving ahead to try to wrap this one up. Miscellaneous fittings, rear stowage boxes, driver and hull gunner hatches, front $ rear plates.
Note the detail on the undersides of the driver and hull gunner's hatches.Also note the front plate is designed as a lay-over piece. Can you spot the issue?

Front assembled. Note the seams from the front panel. The fit was tight and the seams will need some work. Take care to not mess up the "real" seams...they look pretty good.
Hatches and side tool brackets added. A shame you cannot see the hatch undersides. The tool brackets really look good recessed like that.


Rear assembly wrapped up. You might be able to see the flaw with the side skirt brackets. hey fit perpendicular to the edge of the hull, not in a straight line.

Front assembly all done. Tools will be added after painting.

Paint time. I masked off the tracks and road-wheels since they had been painted. I use plastic wrap, held in place with tape. You'll also notice the black dots on the kit. Those are put there to help with painting on kits with plastic close in color to what I am painting them. That way I know the coverage is good.

A pretty simple paint job. I went with dark yellow for te base. For the secondary color I took a cheap plastic brush and crudely stabbed the paint on. I then took a issue and blotted up access paint.

The idea was to temporarily place this on a simple base until I build the work truck, figures, and a more permanent base. The temporary base was to help keep the pieces together and prevent the tracks from being knocked off. he temporary base idea didn't do well but here is an idea of what it would have been.
The side skirts are the kit ones. I cut them and sanded the edges to make them look thinner. The fender and skirting was removed with the idea that the repairs would need them out of the way. Again, this is more for the planned diorama down the road.
I also left off one pair of the Panther's spare tracks, these are used for the repair.
The tow cables are the molded kit supplied ones. I used them for this stage of the build but will replace them later.

Markings on and done.


And that's it. I am calling this one done...for now. All in all, the kit really has some nice detail and some interesting design ideas. Instructions can be vague. Alot of the added detail is wasted and Zvezda really could have put a little added detail attention to the hull interior. I think it could be a good place to start for a full interior build, unfortunately AM interiors would replace a lot of what the kit provides. All that said, I have to commend Zvezda in their improvements to their kits.
Moving ahead to try to wrap this one up. Miscellaneous fittings, rear stowage boxes, driver and hull gunner hatches, front $ rear plates.
Note the detail on the undersides of the driver and hull gunner's hatches.Also note the front plate is designed as a lay-over piece. Can you spot the issue?

Front assembled. Note the seams from the front panel. The fit was tight and the seams will need some work. Take care to not mess up the "real" seams...they look pretty good.
Hatches and side tool brackets added. A shame you cannot see the hatch undersides. The tool brackets really look good recessed like that.


Rear assembly wrapped up. You might be able to see the flaw with the side skirt brackets. hey fit perpendicular to the edge of the hull, not in a straight line.

Front assembly all done. Tools will be added after painting.

Paint time. I masked off the tracks and road-wheels since they had been painted. I use plastic wrap, held in place with tape. You'll also notice the black dots on the kit. Those are put there to help with painting on kits with plastic close in color to what I am painting them. That way I know the coverage is good.

A pretty simple paint job. I went with dark yellow for te base. For the secondary color I took a cheap plastic brush and crudely stabbed the paint on. I then took a issue and blotted up access paint.

The idea was to temporarily place this on a simple base until I build the work truck, figures, and a more permanent base. The temporary base was to help keep the pieces together and prevent the tracks from being knocked off. he temporary base idea didn't do well but here is an idea of what it would have been.
The side skirts are the kit ones. I cut them and sanded the edges to make them look thinner. The fender and skirting was removed with the idea that the repairs would need them out of the way. Again, this is more for the planned diorama down the road.
I also left off one pair of the Panther's spare tracks, these are used for the repair.
The tow cables are the molded kit supplied ones. I used them for this stage of the build but will replace them later.

Markings on and done.


And that's it. I am calling this one done...for now. All in all, the kit really has some nice detail and some interesting design ideas. Instructions can be vague. Alot of the added detail is wasted and Zvezda really could have put a little added detail attention to the hull interior. I think it could be a good place to start for a full interior build, unfortunately AM interiors would replace a lot of what the kit provides. All that said, I have to commend Zvezda in their improvements to their kits.
Posted: Tuesday, August 23, 2016 - 04:34 AM UTC
Nice work, I thought the paint job looks very good. I don't own an airbrush (yet?) and am always looking for new hand-painting styles and techniques. Very nice Cat!

supaderpa

Joined: March 28, 2016
KitMaker: 157 posts
Armorama: 140 posts

Posted: Tuesday, August 23, 2016 - 05:16 AM UTC
Alex, I used that brush stabbing technique on my Panther too, gives it a nice mottled look though my application was a bit thicker. Yours definitely looks better than how mine turned out. All in all, it looks very nice.
Posted: Tuesday, August 23, 2016 - 10:34 AM UTC
Alex,
Great job! I love the stabbed on camo and the exposed engine. Congrats on completion!
Gaz
Great job! I love the stabbed on camo and the exposed engine. Congrats on completion!
Gaz
Armored76

Joined: September 30, 2013
KitMaker: 1,615 posts
Armorama: 1,500 posts

Posted: Tuesday, August 23, 2016 - 11:06 AM UTC
The paint work looks really good! I was wondering how you achieved that frayed look on the green and would have never thought of a brush to do it.
Great job and congrats on the completion!
Great job and congrats on the completion!
Posted: Tuesday, August 23, 2016 - 11:18 AM UTC
 Hello friends!.
Nice works here!. I was retired of the hobby one year half because I had serious problems with y health, after of a surgery I am better. Now I am returning with a very old kit from Italieri: Tiger I, Ausf E/HA, Kit number 286; is "OOB" with some modifications. I started 1 week ago; I am feeling too slow maybe I am needing oil, hee,hee
I improvised the grills with mesh, styrene and screws of Lion Roar (Soon I will finish this part).

Wheels ready to assamble in the tank.

Regards!
Rodolfo

supaderpa

Joined: March 28, 2016
KitMaker: 157 posts
Armorama: 140 posts

Posted: Sunday, August 28, 2016 - 02:03 AM UTC
Welp, I'm essentially done. Weathering with oil paint probably isn't my strongest suite but I did it to the best of my abilities.
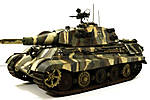
Hence, I hereby present the Tiger II/Standardpanzer-75. I kinda changed my mind about depicting a fresh vehicle and instead went for a one that has seen a fair bit of use - little bit of paint wear at the angles, fade spots and streaks. This tank will undoubtedly be used for a diorama which is still at planning at the moment.


Hence, I hereby present the Tiger II/Standardpanzer-75. I kinda changed my mind about depicting a fresh vehicle and instead went for a one that has seen a fair bit of use - little bit of paint wear at the angles, fade spots and streaks. This tank will undoubtedly be used for a diorama which is still at planning at the moment.


Posted: Sunday, August 28, 2016 - 02:40 AM UTC
Looks very good to me. Nice work!
Armored76

Joined: September 30, 2013
KitMaker: 1,615 posts
Armorama: 1,500 posts

Posted: Sunday, August 28, 2016 - 09:38 AM UTC
This look really-really nice, Bryan! Congrats on the finished build!
Armored76

Joined: September 30, 2013
KitMaker: 1,615 posts
Armorama: 1,500 posts

Posted: Sunday, August 28, 2016 - 09:40 AM UTC
I'm getting close to the finish line with my Leopard 2A7, as well. Some dusting and weathering is still to be done but all bits and pieces are in place now.
Oil dot streaking

Fenders and lights in place (just noticed, the fender needs more attention at the back)

Oil dot streaking

Fenders and lights in place (just noticed, the fender needs more attention at the back)

Posted: Sunday, August 28, 2016 - 10:47 AM UTC
Rodolfo,
Great start on the Tiger! My favorite tank!
Bryan,
That TigerII-Standardte PZ looks awesome! Excellent paint work!
Christian,
Love the subtle streaking on your leopard. I'm sure no Bundeswehr Panzer Soldier would allow his Leopard to get too dirty.
Gaz
Great start on the Tiger! My favorite tank!
Bryan,
That TigerII-Standardte PZ looks awesome! Excellent paint work!
Christian,
Love the subtle streaking on your leopard. I'm sure no Bundeswehr Panzer Soldier would allow his Leopard to get too dirty.
Gaz
Thirian24

Joined: September 30, 2015
KitMaker: 2,493 posts
Armorama: 2,344 posts

Posted: Sunday, August 28, 2016 - 11:40 AM UTC
Great work by everybody! Really awesome works in here. Keep up the great work fellas!
Cheers,
Dustin
Cheers,
Dustin
Armored76

Joined: September 30, 2013
KitMaker: 1,615 posts
Armorama: 1,500 posts

Posted: Sunday, August 28, 2016 - 12:30 PM UTC
Quoted Text
Christian,
Love the subtle streaking on your leopard. I'm sure no Bundeswehr Panzer Soldier would allow his Leopard to get too dirty.
Thanks, Gaz!
Depicting a real one wouldn't be much fun as these are kept very clean, at least according to reference photos. I imagine this applies even more for the "new car" in the family, the 2A7.
Posted: Sunday, August 28, 2016 - 05:11 PM UTC
Greetings all! There are some really great builds going on for this campaign so far. My contribution is the Dragon Panther F with the KwK 42 L/100. Ive added some anti-air armor, schurzen, and some IR equipment (the gunner sight was my own creation)
Im painting the Panther in a two tone scheme of 6011B and black.


Im painting the Panther in a two tone scheme of 6011B and black.
Posted: Sunday, August 28, 2016 - 11:14 PM UTC
Scipio,
That is a cool looking beast. Nice add-ons!
Gaz
That is a cool looking beast. Nice add-ons!
Gaz
Thirian24

Joined: September 30, 2015
KitMaker: 2,493 posts
Armorama: 2,344 posts

Posted: Monday, August 29, 2016 - 02:03 AM UTC
I really want to add a Panter F to my collection. Yours looks awesome and I really really like that camo scheme. Great job.

supaderpa

Joined: March 28, 2016
KitMaker: 157 posts
Armorama: 140 posts

Posted: Monday, August 29, 2016 - 07:56 AM UTC
Thanks for the comments guys.
Christian - That Leopard is looking real solid. Can't wait to see it finally put together.
Shawn - The Dragon Panther F was one kit that I had my eye on for a while. I managed to find one on Hobbyeasy for a reasonable price but held off because I think too much for my own good. The next day it was sold out Also eager to see how the final product turns out. I love Panthers.
Christian - That Leopard is looking real solid. Can't wait to see it finally put together.
Shawn - The Dragon Panther F was one kit that I had my eye on for a while. I managed to find one on Hobbyeasy for a reasonable price but held off because I think too much for my own good. The next day it was sold out
 Also eager to see how the final product turns out. I love Panthers.
 Armored76

Joined: September 30, 2013
KitMaker: 1,615 posts
Armorama: 1,500 posts

Posted: Monday, August 29, 2016 - 11:14 PM UTC
Nice camo, Shawn! I guess it was done using some sort of pre-cut masks. What kind of mask was it?
I've been working on my Leopard some more today and all of a sudden I remembered an old trick I've read somewhere to achieve the green hue armored glass: mixing gloss clear with some leaf green.
Here is the result. What do you think?

I've been working on my Leopard some more today and all of a sudden I remembered an old trick I've read somewhere to achieve the green hue armored glass: mixing gloss clear with some leaf green.
Here is the result. What do you think?

Thirian24

Joined: September 30, 2015
KitMaker: 2,493 posts
Armorama: 2,344 posts

Posted: Monday, August 29, 2016 - 11:38 PM UTC
Looks good to me Cristian.
Posted: Tuesday, August 30, 2016 - 02:32 AM UTC
Gaz - Thanks!
Dustin - Thanks, it was a really easy build and the L/100 is pretty impressive.
Bryan - The Panther family is very eye appealing for sure. BTW, really love that E-75 of yours. I was considering doing a similar tri-tonal scheme for my E-100, and now I definitely will.
Cristian - Thanks, the disc camo was indeed a mask. I purchased the DN Models mask from a Bulgarian vendor on Ebay. They worked really well, but they did remove some of the base coat all the way to the plastic/metal. I love the Leopard you built for this campaign!
cant wait to see more from you all.

LinusB

Joined: March 21, 2016
KitMaker: 247 posts
Armorama: 126 posts

Posted: Tuesday, August 30, 2016 - 06:21 AM UTC
Am starting on my "Cougar"


Posted: Tuesday, August 30, 2016 - 06:26 AM UTC
Linus,
Cool. Never seen one of those before.
Gaz
Cool. Never seen one of those before.
Gaz

supaderpa

Joined: March 28, 2016
KitMaker: 157 posts
Armorama: 140 posts

Posted: Tuesday, August 30, 2016 - 06:27 AM UTC
Ach! What is that? Since when did tanks have wings?? 
Jokes aside, welcome flyboys. I don't think we have any Gepard builds here so you're safe from flak.

Jokes aside, welcome flyboys. I don't think we have any Gepard builds here so you're safe from flak.
 |


