Campaigns: Completed Campaigns
Campaigns that are completed should be grouped here.
Hosted by Richard S.
Big Cats Mk.IV
Tojo72
Visit this Community
North Carolina, United States
Joined: June 06, 2006
KitMaker: 4,691 posts
Armorama: 3,509 posts
Posted: Saturday, July 16, 2016 - 04:56 AM UTC

Quoted Text

Thanks for the comments guys. Am giving the rubbber-band tracks extra time to set before mounting them.

I echo what the others said Anthony -- looking forward to seeing its warpaint.

Gaz, am now now building a Pz IV for the 500+ campaign. I already racked up 300 parts just to get roadwheels + suspension assembled. Put in another 200 or so for the indy links

Cheers,

Tat


Thanks Tat,are you building the Dragon Vorpanzer IV,that is an awesome kit.
tatbaqui
Staff MemberNews Writer
ARMORAMA
#040
Visit this Community
Metro Manila, Philippines
Joined: May 06, 2007
KitMaker: 2,713 posts
Armorama: 2,451 posts
Posted: Saturday, July 16, 2016 - 07:15 AM UTC

Quoted Text


Quoted Text

Thanks for the comments guys. Am giving the rubbber-band tracks extra time to set before mounting them.

I echo what the others said Anthony -- looking forward to seeing its warpaint.

Gaz, am now now building a Pz IV for the 500+ campaign. I already racked up 300 parts just to get roadwheels + suspension assembled. Put in another 200 or so for the indy links

Cheers,

Tat


Thanks Tat,are you building the Dragon Vorpanzer IV,that is an awesome kit.


I planned but chickened out on that Anthony -- went for the Panzer IV A instead, thinking it will be a lesser pain. As it turned out, it's not. Will surely follow Gaz' wisdom -- no two Pz IVs in a row (I mean, those superkits)!
GazzaS
#424
Visit this Community
Queensland, Australia
Joined: April 23, 2015
KitMaker: 4,648 posts
Armorama: 2,248 posts
Posted: Saturday, July 16, 2016 - 07:41 AM UTC
Christian,
Your build makes me want to learn about the Leopard. Those wings on the turret make me very curious.

Gaz
Thirian24
Visit this Community
Oklahoma, United States
Joined: September 30, 2015
KitMaker: 2,493 posts
Armorama: 2,344 posts
Posted: Saturday, July 16, 2016 - 09:02 AM UTC
Looking good Shell! Looking forward to seeing your camo.
Armored76
Visit this Community
Bayern, Germany
Joined: September 30, 2013
KitMaker: 1,615 posts
Armorama: 1,500 posts
Posted: Saturday, July 16, 2016 - 12:05 PM UTC
I was very intrigued by those "side doors" myself but the explanations I found so far are rather speculations. The general tenor seems to be that these are add-on armor modules (which is very logical) and that these are moveable to allow the maintenance team to access the hatches.

Looking at the kit, the inside of these plates is also used as storage space for the crew.
Thirian24
Visit this Community
Oklahoma, United States
Joined: September 30, 2015
KitMaker: 2,493 posts
Armorama: 2,344 posts
Posted: Sunday, July 17, 2016 - 07:07 AM UTC
Thank you for the explanation of those doors. Makes sense.

I have the tracks on and a base coat on them.

tatbaqui
Staff MemberNews Writer
ARMORAMA
#040
Visit this Community
Metro Manila, Philippines
Joined: May 06, 2007
KitMaker: 2,713 posts
Armorama: 2,451 posts
Posted: Sunday, July 17, 2016 - 05:55 PM UTC
Dustin, these are the kit-supplied tracks, right? It sits nicely, did you do anything special to make it that way? Cheers, Tat
Thirian24
Visit this Community
Oklahoma, United States
Joined: September 30, 2015
KitMaker: 2,493 posts
Armorama: 2,344 posts
Posted: Sunday, July 17, 2016 - 07:20 PM UTC
Tat - Yes these are the kit tracks. They were length and link. So they had the sag build in already.
tatbaqui
Staff MemberNews Writer
ARMORAMA
#040
Visit this Community
Metro Manila, Philippines
Joined: May 06, 2007
KitMaker: 2,713 posts
Armorama: 2,451 posts
Posted: Monday, July 18, 2016 - 04:03 AM UTC
Link and lengths are cool! A good compromise between rubber band and indy.
supaderpa
Visit this Community
Malaysia
Joined: March 28, 2016
KitMaker: 157 posts
Armorama: 140 posts
Posted: Wednesday, July 20, 2016 - 04:27 PM UTC
So lookey what came in the mail today. Stuff! Gonna slap these on ol' Tiggy.


Bluestab
Visit this Community
South Carolina, United States
Joined: December 03, 2009
KitMaker: 2,160 posts
Armorama: 1,906 posts
Posted: Friday, July 22, 2016 - 08:34 AM UTC
Back to work on the Zvezda Panther D.

I decided to compromise on the turret and give it a very basic paint-job, basically following the instructions. There's a lot of turret detail here, bt you'd really need to add more...and you won't see any of it any way.


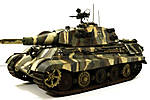
Turret assembled. The gun is a little loose but stays elevated okay.


Another view. The pistol ports are not open-able. The opening are closed and the details are all facades/ Same for the small hatch under the cupola. You can see the rear hatch...it's open as far as it will go.
BTW you can see some of Zvezda's engineering. See the tool bracket spot on the hull side. Zvezda heavily recessed the location spot so the part can be added and look as thin as PE.


Speaking of Zvezda engineering...they did something neat with the turret ring. By the way look at the detail on the hull turret ring...won't see any of it. Instead of two small notches on the ring opposite of each other to accept tabs on the turret. Zvezda made one wide notch (yellow arrows).


Flip the upper hull over. Instead of tabs on the turret, Zvezda uses part of the turret basket (red arrows). The fit is snug...no play...and the turret rotates smooth and free.


I went ahead and painted the roadwheels and got it ready for track assembly. The way this is designed, it would probably be a pain to try to add them with the fenders, skirt brackets, and upper hull all added.


Running gear added. The kit comes with only four of the early outer wheels with the fewer number of rim bolts. They send 8 revised outer wheels with the added rim bolts.


Time for the tracks. The kit comes with four sprues of indie tracks...each link is two-pieces. Zvezda also sends four "assembled" runs for the bottom. Zvezda has molded an insert for each length to hold the guide teeth...they are open. You probably could use a lot of care and assemble these as working.
The guide teeth pieces can be placed in reverse very easily...note the bottom run with the teeth added. The instructions for the tracks are pretty vague...but not impossible to figure out. Add two of the track segments to the bottom them finish each side with 58 links.
Another oddity, Zvezda sends 4 sprues of the indie links. You could ignore the lengths of track ad just use the indie links. If I had realized this when I was assembling the suspension...it would have changed the whole build...I would have this Panther crashing through a wooden bridge.


Track assembly is well-underway. It actually goes pretty fast. What I did was tacked the links together, then added the teeth pieces in order so the track pins are in their slot. Again, it's easy to put them in reversed.


One side assembled and ready for paint.Where the segments join I cut away the trackpins. If you don't the track links are closed and there's no way to connect them.


For the other side, I decided to do something different. I already have a Dragon early Panther D finished and on the shelf. Instead of having another one, I decided to have this one with a thrown track being repaired. I've got a field maintenance truck half built that I can use. At some point I'll build a diorama for the wounded Panther, adding the mechanics' truck.
I'll have the skirts removed, which means I'll leave off the kit's supplied one-piece skirt section and make my own. For the thrown side, I'll have these skirt sections removed and piled on the ground.
Anyway, I started on the thrown track. My plan is to have it repaired and the mechanics getting the track ready to cable together.


And that's where I am now. If time allows I'll try to get the mechanics and diorama all together for this campaign. I have a Miniart Base set that would be perfect but I don't think I'll have the time to add it. If not, I may compromise with a simpler base and have some mechanic figures working. I also have an engine in spares I want to add. So I might have one messing with the engine while the others work on the track. We'll see how it goes. I'm pretty enthused at how this project has shifted.
Armored76
Visit this Community
Bayern, Germany
Joined: September 30, 2013
KitMaker: 1,615 posts
Armorama: 1,500 posts
Posted: Friday, July 22, 2016 - 09:21 AM UTC
Some progress on my Leopard 2A7.

The wheels have been painted and assembled, the PE parts primed for better paint adhesion and the base bronze green has been put on:


Comments as always, very welcome!
GazzaS
#424
Visit this Community
Queensland, Australia
Joined: April 23, 2015
KitMaker: 4,648 posts
Armorama: 2,248 posts
Posted: Friday, July 22, 2016 - 10:43 AM UTC
Alex,
Nice going with your Panther so far! Thanks for the warning about indie links. I like to show movement of the suspension just for interests sake.

Gaz
GazzaS
#424
Visit this Community
Queensland, Australia
Joined: April 23, 2015
KitMaker: 4,648 posts
Armorama: 2,248 posts
Posted: Friday, July 22, 2016 - 10:45 AM UTC
Christian,
Your Leopard looks great! Can't wait to see it all painted and marked up.

Gaz
Thirian24
Visit this Community
Oklahoma, United States
Joined: September 30, 2015
KitMaker: 2,493 posts
Armorama: 2,344 posts
Posted: Friday, July 22, 2016 - 11:46 AM UTC
Looking good Alex!

Looking real nice Cristian! One of these are on my list to build.
brekinapez
Visit this Community
Georgia, United States
Joined: July 26, 2013
KitMaker: 2,272 posts
Armorama: 1,860 posts
Posted: Friday, July 22, 2016 - 03:00 PM UTC
Finally got the paint down on the cat and her pals. Next stop is sealing this up then moving on to decals and then weathering. Kind of a late war tricolor. This is a post-zim G.


Thirian24
Visit this Community
Oklahoma, United States
Joined: September 30, 2015
KitMaker: 2,493 posts
Armorama: 2,344 posts
Posted: Friday, July 22, 2016 - 03:39 PM UTC
Looking real nice, Shell
Armored76
Visit this Community
Bayern, Germany
Joined: September 30, 2013
KitMaker: 1,615 posts
Armorama: 1,500 posts
Posted: Friday, July 22, 2016 - 04:09 PM UTC
Thank you Gaz and Dustin! It is a great kit and fun to build.

Nice camo, Shell! Was it done freehand?
brekinapez
Visit this Community
Georgia, United States
Joined: July 26, 2013
KitMaker: 2,272 posts
Armorama: 1,860 posts
Posted: Friday, July 22, 2016 - 10:47 PM UTC

Quoted Text

Thank you Gaz and Dustin! It is a great kit and fun to build.

Nice camo, Shell! Was it done freehand?


Yes. I originally was planning a hard-edged tricolor but I was having trouble getting the mask to lay down flat enough so I went rogue.
GazzaS
#424
Visit this Community
Queensland, Australia
Joined: April 23, 2015
KitMaker: 4,648 posts
Armorama: 2,248 posts
Posted: Saturday, July 23, 2016 - 01:51 AM UTC
Shell,
Love that scheme! If you want hard-edge on something like this there is a product called Panzer Putty that you can shape, tear, stretch, or cut and mask your model.

Better yet, once you lay it, it sinks down into your detail, yets pulls up easily without lifting tools or paint. It absorbs the paint that gets sprayed on it and is re-usable. It doesn't stick to your hands like blue-tack or tape. It doesn't leave residue, either.

There are a couple of Youtube videos on it. I've been using it on both armor and aircraft.

Gaz

brekinapez
Visit this Community
Georgia, United States
Joined: July 26, 2013
KitMaker: 2,272 posts
Armorama: 1,860 posts
Posted: Saturday, July 23, 2016 - 02:47 AM UTC
I'm aware of Panzer Putty; just didn't have any. It also wouldn't have given me the long straight edges the camo I was wanting required; the putty edge is too "random", I guess. Probably was a good case for painting before attaching tools and such.
GazzaS
#424
Visit this Community
Queensland, Australia
Joined: April 23, 2015
KitMaker: 4,648 posts
Armorama: 2,248 posts
Posted: Saturday, July 23, 2016 - 08:31 AM UTC

Quoted Text

I'm aware of Panzer Putty; just didn't have any. It also wouldn't have given me the long straight edges the camo I was wanting required; the putty edge is too "random", I guess. Probably was a good case for painting before attaching tools and such.


Straight lines isn't a test I've put to it, yet. But I will try. I'm not afiliated with it or selling it. I bought it originally because it get's so warm here in the summer months that many tapes and blue tack get extra tacky.

Cheers,

Gaz
brekinapez
Visit this Community
Georgia, United States
Joined: July 26, 2013
KitMaker: 2,272 posts
Armorama: 1,860 posts
Posted: Monday, July 25, 2016 - 05:51 AM UTC
Applied markings after a coat of Future. Markings are fictional, but are meant to represent a generic panther of the 1st Pz Div circa December 1944. The kit decals were wrecked, so I scavenged up some but the numbers seemed to be on a thick backing paper as it is noticeable. Hopefully after the wash and other weathering that will diminish a bit.


I have an online final on Friday but otherwise I have nothing but this to work on all week. Weathering will be minimal as I might decide to put this in a diorama later and want to leave my final options open as to time and place.
GazzaS
#424
Visit this Community
Queensland, Australia
Joined: April 23, 2015
KitMaker: 4,648 posts
Armorama: 2,248 posts
Posted: Monday, July 25, 2016 - 10:48 AM UTC
Shell,
Looks sweet!

Gaz
supaderpa
Visit this Community
Malaysia
Joined: March 28, 2016
KitMaker: 157 posts
Armorama: 140 posts
Posted: Monday, July 25, 2016 - 11:44 AM UTC
Really sweet-ass Panther you got there. But yeah that number decal really sticks out too much. Not sure if weathering is enough to mask it completely though, washes and filters doesn't really get rid of the silvering in my experience unless you go overboard on the makeup.

If you've got a steady hand, you could slop over some decal softener then gently and carefully scrape away the edges with a hobby knife so that only the numbers remain.