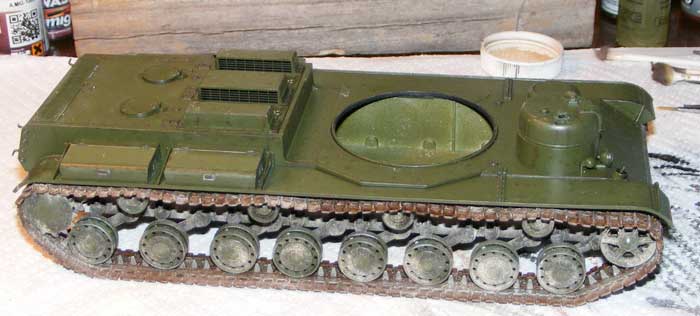
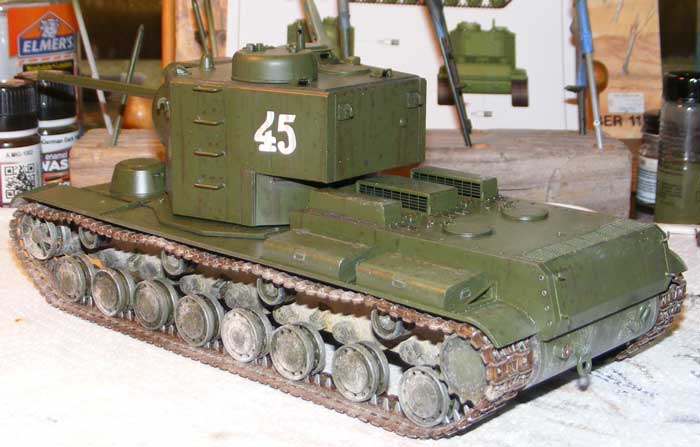
Thanks for the kind comments fellas.
I'm 100% done with assembly. Unfortunately I'll have to wait until my next days off before I can't paint.
I used jewelers wire for the tow cable.
Cheers,
Dustin
Hosted by Richard S.
Tank Hunters Campaign
Thirian24
Oklahoma, United States
Joined: September 30, 2015
KitMaker: 2,493 posts
Armorama: 2,344 posts
Joined: September 30, 2015
KitMaker: 2,493 posts
Armorama: 2,344 posts
Posted: Thursday, October 06, 2016 - 04:17 AM UTC
Posted: Thursday, October 06, 2016 - 04:18 AM UTC
Loving all the progress photos guys!!!!!Lions and Tigers and Elephants Oh my LOL
supaderpa
Malaysia
Joined: March 28, 2016
KitMaker: 157 posts
Armorama: 140 posts
Joined: March 28, 2016
KitMaker: 157 posts
Armorama: 140 posts
Posted: Thursday, October 06, 2016 - 08:17 AM UTC
It's been a while since I had last posted here. There is certainly no shortage of awesome builds going on.
My E-25 is now officially done. Stowage and sideskirts are scratchbuilt from sheet styrene and from the spares box. There's a fair bit of chipping going around to represent a proud, war battered vehicle that had been out in the elements for a lengthy amount of time.
Hope you like it.
My E-25 is now officially done. Stowage and sideskirts are scratchbuilt from sheet styrene and from the spares box. There's a fair bit of chipping going around to represent a proud, war battered vehicle that had been out in the elements for a lengthy amount of time.
Hope you like it.
Posted: Thursday, October 06, 2016 - 11:50 AM UTC
Quoted Text
I have been working hammer & tong on the Trumpeter KV-5 "Tiger Hunter." A couple of modeling pals have been sharing the delights of entering a model contest at this coming weekend's OrangeCon. I have never entered a contest before even when I was a kid so this is something new. I understand there is even a category for folks with more modest skills like myself. "We" selected two of my recent builds and this KV-5 project.
So the hurry is on and I have been burning the midnight oil to get it done. The biggest single issue outside of finding the time to work is drying time for the various paints and glues. Some things just need time before you can move on to the next step. If I do make it, it will be less than three weeks from soup to nuts. We'll just have to see how it goes in the two remaining evenings left to work . . .
Paul,
You've really got a lot done in a short amount of time. And, it looks great! Any chance of a couple of figures to give some scale to that monster?
Gaz
Posted: Thursday, October 06, 2016 - 11:53 AM UTC
Quoted Text
I finished building the Jagdpanzer E-100 earlier today. I need to finish up some sanding and putty work before I paint, but the construction is done. I will also add some texture to the surfaces. I added a few items (to include the MG turret) but its pretty much out of the box.
Still debating on a paint scheme. I was considering a tri tone of Black, RAL 7028 DG I, and RAL 6011 B.
Shawn,
Wow, what an indestructible looking beast! Can't wait to see the scheme you come up with.
Gaz
Posted: Thursday, October 06, 2016 - 11:55 AM UTC
Dustin,
Real cable looks so much better than any kind of imitation. Looking forward to some color!
Gaz
Real cable looks so much better than any kind of imitation. Looking forward to some color!
Gaz
Posted: Thursday, October 06, 2016 - 11:58 AM UTC
Bryan,
Congratulations! You're the first to complete their build. And it's smashing, too! The extra details you added make it look like a predator that has evolved from the Hetzer series. Nice weathering and I really dig the slight bends you've put into the fenders.
Purely Excellent!
Gaz
Congratulations! You're the first to complete their build. And it's smashing, too! The extra details you added make it look like a predator that has evolved from the Hetzer series. Nice weathering and I really dig the slight bends you've put into the fenders.
Purely Excellent!
Gaz
Silantra
Putrajaya, Malaysia
Joined: March 04, 2004
KitMaker: 2,511 posts
Armorama: 913 posts
Joined: March 04, 2004
KitMaker: 2,511 posts
Armorama: 913 posts
Posted: Thursday, October 06, 2016 - 12:35 PM UTC
Quoted Text
It's been a while since I had last posted here. There is certainly no shortage of awesome builds going on.
My E-25 is now officially done. Stowage and sideskirts are scratchbuilt from sheet styrene and from the spares box. There's a fair bit of chipping going around to represent a proud, war battered vehicle that had been out in the elements for a lengthy amount of time.
Hope you like it.
wow...very nicely finished. Congrats
Posted: Thursday, October 06, 2016 - 06:13 PM UTC
Great job, love your rust!
Posted: Thursday, October 06, 2016 - 09:54 PM UTC
Quoted Text
Paul,
You've really got a lot done in a short amount of time. And, it looks great! Any chance of a couple of figures to give some scale to that monster?
Gaz
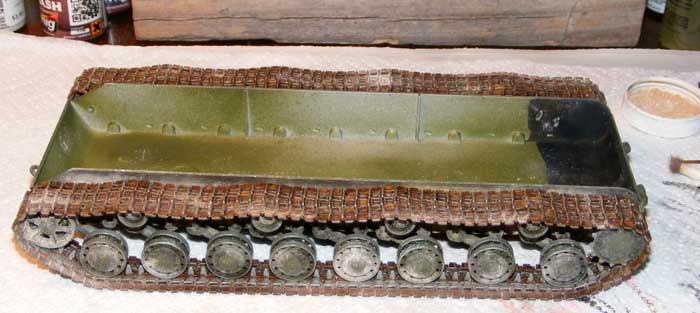
It does need something to give scale but figures are way beyond my skill level now. I'll shoot some pics of this beast next to some other vehicles next week. Too bad I have never (yet) built a Tiger, this KV-5s intended prey. It will have to be something else.
Here are some pics of last night's progress:
Posted: Thursday, October 06, 2016 - 10:32 PM UTC
That E-25 is a pip. The small size would have made it hard to hit and the camo is effective enough to make it hard to spot. It would have been formidable!
Thirian24
Oklahoma, United States
Joined: September 30, 2015
KitMaker: 2,493 posts
Armorama: 2,344 posts
Joined: September 30, 2015
KitMaker: 2,493 posts
Armorama: 2,344 posts
Posted: Thursday, October 06, 2016 - 10:36 PM UTC
That E-25 is awesome
Question; Should I give my toe cables a bit of bends and what not to make them look like they've been used and abused? Or do they look just right?
Posted: Thursday, October 06, 2016 - 11:28 PM UTC
I would think a couple of kinks would look proper, but not too much, as they'd try to replace them...;-)
Posted: Friday, October 07, 2016 - 01:44 AM UTC
Dustin,
Those cables are like two inches thick. They'd be hard to kink, and very, very heavy. I would try to get them to connect with the running boards in a couple places to simulate that weight.
They would have some semi-permanent bends in them, like yours do now.
If you go over to Tigers im Focus and look at pictures of SPzAbt. 506 you'll see how long, heavy cables look on Tiger I's when not held in the usual brackets.
Gaz
Posted: Friday, October 07, 2016 - 02:16 AM UTC
You are right, Gary, the word "kink" was the wrong word to use, maybe "sag" or "distortion" to mean less than a straight and smooth cable...
Paul- Looking very good, I love rust...;-)
Posted: Friday, October 07, 2016 - 04:34 AM UTC
See some nice work. So paint on, decals on, did a little chipping, now onto so pin washes before the rest of the weathering and details are painted.
Thirian24
Oklahoma, United States
Joined: September 30, 2015
KitMaker: 2,493 posts
Armorama: 2,344 posts
Joined: September 30, 2015
KitMaker: 2,493 posts
Armorama: 2,344 posts
Posted: Friday, October 07, 2016 - 04:46 AM UTC
Thanks for the ideas fellas.
Posted: Friday, October 07, 2016 - 05:35 AM UTC
Paul,
The weathering looks great on your KV. My modelling club meeting las week, somebody brought in the chassis of the beast. Face to face, just can't believe how ling it is.
Posted: Friday, October 07, 2016 - 05:37 AM UTC
Kevin,
Your Su looks great! Like the way you've worn the paint.
Gaz
Your Su looks great! Like the way you've worn the paint.
Gaz
Pave-Hawk
Western Australia, Australia
Joined: May 05, 2006
KitMaker: 900 posts
Armorama: 510 posts
Joined: May 05, 2006
KitMaker: 900 posts
Armorama: 510 posts
Posted: Friday, October 07, 2016 - 05:02 PM UTC
Posted: Friday, October 07, 2016 - 07:07 PM UTC
Bryan - Love the E-25. I always enjoy seeing your paper panzer builds, a man after my own heart. What MG barrel did you use on the turret?
Gaz - Thanks, this thing makes my T-34/76 on the bench look like a childs toy.
Paul - That KV-5 is very impressive, looks like a solid kit. I might be adding that to my stash here soon.
Gaz - Thanks, this thing makes my T-34/76 on the bench look like a childs toy.
Paul - That KV-5 is very impressive, looks like a solid kit. I might be adding that to my stash here soon.
supaderpa
Malaysia
Joined: March 28, 2016
KitMaker: 157 posts
Armorama: 140 posts
Joined: March 28, 2016
KitMaker: 157 posts
Armorama: 140 posts
Posted: Friday, October 07, 2016 - 08:12 PM UTC
Thanks for the compliments, it sure does give you the motivation to keep trying harder and learn a bunch of cool new stuff in the process.
Shawn - the mg barrel was from the bronco german infrared device kit. The box has enough parts to build 4 devices along with 2 sets of mg34 and mg42 and is stupid cheap to boot.
Kevin - Your SU-76i is looking mighty fine. The Russian Stug is a really intriguing subject.
Paul - That thing is huge. I could imagine the German panzer crews shrieking in terror when it approached...which was unfortunately never...
Dustin - Can't wait to see that mammoth all painted and and weathered.
Man, reading this thread makes me wanna build some of the big stuff but.......I'm running out of places to put them
Silantra
Putrajaya, Malaysia
Joined: March 04, 2004
KitMaker: 2,511 posts
Armorama: 913 posts
Joined: March 04, 2004
KitMaker: 2,511 posts
Armorama: 913 posts
Posted: Friday, October 07, 2016 - 10:42 PM UTC
Guys..
My second entry for this build.. the miniart su122 will be completed when this 2nd entry finished.
This second kit is an old classic kit from tamiya 1/25 series..
This kit was made in 1972 but the one that i bought is reissue in 2010 but all the parts are still original 1972 classic with the removal of the RC parts. It also come with a new partial instruction manuals and the original manuals(in japanese n english).
I will pretend to be innocent with this kit and ignore all the inaccuracies in this kit. Although i will try to improve it to the minimal. Here it goes.. progress was 3 days old.
The kit did not supply periscopes. With this large scale the empty periscope opening is too noticeable.
So using 2x4mm strip..i scratchbuild 4 of them. Very basic shape.
Then i cut an old film negative for the periscope 'lens'.
The gun mantlet are smooth so replicate the cast steel effect with mr.surfacer 500.
Add rust texture to the exhaust pipe too.
This kit is an open sponson kit...so i will cover the opening with styrene sheet ..
This is the progress so far
Very huge beast...
Thanks for looking
Sil
Posted: Saturday, October 08, 2016 - 02:20 AM UTC
Zaidi,
Amitious, two builds at once! I like your method for replacing periscopes.
Gaz
Amitious, two builds at once! I like your method for replacing periscopes.
Gaz
Posted: Saturday, October 08, 2016 - 03:49 AM UTC
Awesome kit Sil I've toyed with the idea of building it myself. Is the suspension fully working? And are the tracks rubber bands? It was designed originally for remote control as you said.
Dustin great work with the Elefant. Isn't the Tamiya Zimmerit just the shiz? Just love the jeweler's wire for tow cables! Looking forward to seeing her with a coat of paint.
Bryan love the E-25 interesting camo scheme it certainly is eye catching. And the IR gear looks truly deadly!
Paul great work on the KV it certainly is BIG! I can't wait to see what you put it next to to give an idea of it's size and bulk.
Okay so I started work on my wingy thing and here is where I'm at after two days. This kit has photo-etch in two thicknesses the I.P is made from stainless steel close to a mm thick and it's totally next level in terms of detail. It does need undercoating though because I didn't and the paint literally just wipes off it. There are also parts to make the headrest. The harness is around .25 of a mm and has aerials and the band for the drop tank.
The kit would lend itself to have an aftermarket resin engine quite well as the cowling is a multi part affair. Being multipart though does create some complex joins that require quite a bit of finesse to get them to meet up. I built the engine cowl, the fuselage and the wings as separate assemblies. I then joined the wings and the fuselage together got it to fit reasonably well let it cure for a couple of hours and then attached the cowl. The bottom of the cowl where it meets the wings and fuselage was a definite challenge. The armoured ring that goes around the oil cooler at the front also has a representation of the front of the BMW801-D reduction gear ignition harness ring which will look good behind the cooling fan.
I'm enjoying this kit quite a bit I built the Fw190-D version of it in the promodeler boxing but it didn't have the etch that this does and it was the inline engine not the radial. (Wonders if he's just lost the armor fraternity)
For you guys that like aviation subjects as well, looks at Gary, if you get the chance to build this kit I humbly suggest you do. The wheel wells are a mini kit in themselves, with bracing and barrels for the MG-151 eight separate pieces in all. The landing gear is also very nicely detailed with an accurate depiction of the mounting of the gear doors ( to me at least). Anyway enough waffling onto the pics!