Queensland, Australia
Joined: August 06, 2005
KitMaker: 3,353 posts
Armorama: 3,121 posts
Posted: Monday, April 10, 2017 - 12:08 AM UTC
How did they get such a big bridge on a little Renault?

I agree looking good so far.
On the Bench:
Dust, styrene scraps, paint splotches and tears.

#454
Georgia, United States
Joined: July 10, 2016
KitMaker: 1,273 posts
Armorama: 1,138 posts
Posted: Monday, April 10, 2017 - 12:24 AM UTC
It must have been very well balanced

"I can make armored cars, safe and unassailable...and behind these our infantry will be able to follow quite unharmed and without any opposition."
-Leonardo da Vinci, 1487
Namabiiru
 Associate Editor
#399
Rhode Island, United States
Joined: March 05, 2014
KitMaker: 2,888 posts
Armorama: 1,920 posts
Posted: Monday, April 10, 2017 - 01:56 AM UTC
LOL. Well, the Renault is just for scale comparison in the photo. In fact, the Renault is actually too small to even go over it!

Myanmar
Joined: March 05, 2004
KitMaker: 4,011 posts
Armorama: 1,498 posts
Posted: Monday, April 10, 2017 - 06:04 AM UTC
Quoted Text
Quoted Text
I agree. I've built that IT-28 Bridgelayer several years ago and had a lot of fun.

Namabiiru -
I found your blog on another site as I was searching for reference photos. I hope mine turns out half as nice as yours. The bridge has been something of a challenge to this point, but the chassis seems to be going together smoothly enough.

Thanks, my kit went together pretty well. The lower hull was slightly warped and I couldn't figure out the rear, engine fan doors, based on the instructions. They seemed to describe it backwards or something like that. Anyway I glued them in and walked away to the next step.
The mold release material they used on my kit was thick enough to scrape off with a slotted screwdriver, though
Quoted Text
Petbat -
How did they get such a big bridge on a little Renault? 
I agree looking good so far.
Haha

i watched a scale plastic figure crawl along the edge . . . of an exacto blade . . . that's my dream , it's my nightmare . . . . . . . crawling , slithering . . . . . along the edge . . . . . . of an exacto . . . . . blade . . . . and surviving
Namabiiru
 Associate Editor
#399
Rhode Island, United States
Joined: March 05, 2014
KitMaker: 2,888 posts
Armorama: 1,920 posts
Posted: Monday, April 10, 2017 - 04:21 PM UTC
Yeah, the mold release agent on this thing was nuts! It was sticky and thick like resin. Had to soak everything in Simple Green to get it off.


#152
Texas, United States
Joined: December 07, 2002
KitMaker: 487 posts
Armorama: 441 posts
Posted: Friday, April 14, 2017 - 05:28 AM UTC
I would like to change to the Rye Field Model BergeTiger.
Is that okay?
Long time modeller. Starting when I was a teenager, then I found out about girls and college and work and kids. But now that I have one girl, no school, no work and the kids are grown, I'm back to full time modelling. My prime area of interest is armor, b

#454
Georgia, United States
Joined: July 10, 2016
KitMaker: 1,273 posts
Armorama: 1,138 posts
Posted: Friday, April 14, 2017 - 06:34 PM UTC
No problem, should be a very nice build, looking forward to it, Tom!
"I can make armored cars, safe and unassailable...and behind these our infantry will be able to follow quite unharmed and without any opposition."
-Leonardo da Vinci, 1487
Washington, United States
Joined: August 03, 2008
KitMaker: 436 posts
Armorama: 320 posts
Posted: Saturday, April 15, 2017 - 12:15 AM UTC
Am constantly impressed by the builds going on here, as well as the selection of kits. Kind of makes my bumbling along seem out of place, but for whatever it is worth here is the latest update....

Starting to make the push pads. The fancy ones are for the sides and the simple one is on the center. You can see my lights in progress. Basically thick clear plastic, tin foil and in the case of the marker light... Tamiya Clear Orange.

You can see the light setup in the one side push pad. Didn't figure that I would be able to do a decent job painting it all after it was built so I did it now.

The center push pad sort of in place. I have gotten pretty good at stacking stuff to hold things like the push pads in place.

The three push pads hanging in place. I need to do a bit of adjustment and then I will glue them solid. The support system is a modification of the one shown in the Leopard Trilogy books.... as that shows an early configuration, and I am modeling a later one.
Next back to the work deck frame. This will also include the tow points that come up through the work deck at the front.
Later, Bob
Namabiiru
 Associate Editor
#399
Rhode Island, United States
Joined: March 05, 2014
KitMaker: 2,888 posts
Armorama: 1,920 posts
Posted: Saturday, April 15, 2017 - 01:38 AM UTC
I don't know what you mean by 'bumbling along'; your scratch-built conversion is amazing!


#454
Georgia, United States
Joined: July 10, 2016
KitMaker: 1,273 posts
Armorama: 1,138 posts
Posted: Saturday, April 15, 2017 - 01:44 AM UTC
I concur, you are far along,

"I can make armored cars, safe and unassailable...and behind these our infantry will be able to follow quite unharmed and without any opposition."
-Leonardo da Vinci, 1487
Queensland, Australia
Joined: August 06, 2005
KitMaker: 3,353 posts
Armorama: 3,121 posts
Posted: Saturday, April 15, 2017 - 06:23 AM UTC
Bumbling along Bob? You scratch build faster than I unbox a kit!
That is a lot of fine looking plastic hanging off that beast.
Love the way you created the lights.
On the Bench:
Dust, styrene scraps, paint splotches and tears.

#152
Texas, United States
Joined: December 07, 2002
KitMaker: 487 posts
Armorama: 441 posts
Posted: Monday, April 17, 2017 - 08:07 AM UTC
Here is my start up photo Of the BergeTiger by Rye.
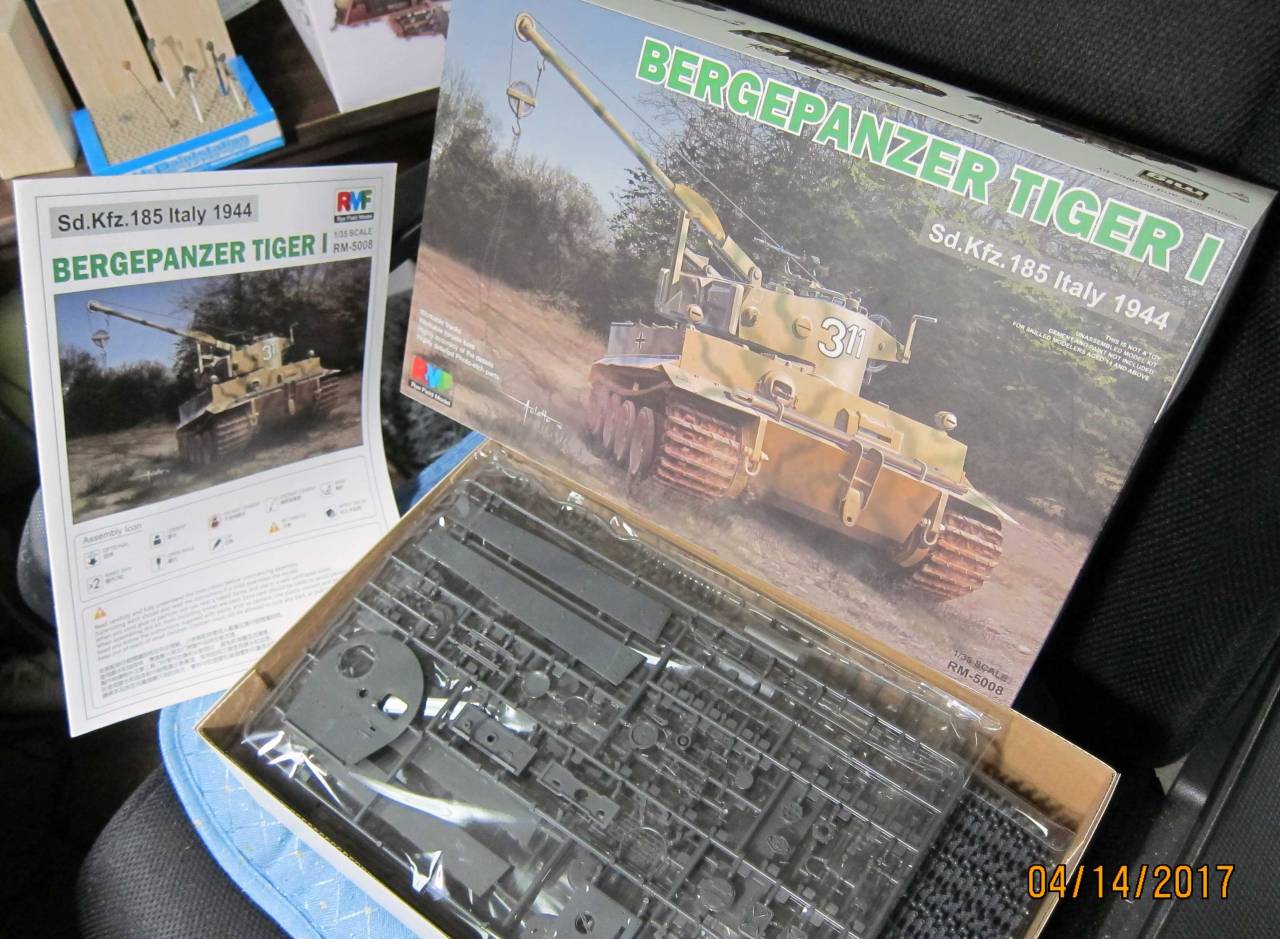
Tom
Long time modeller. Starting when I was a teenager, then I found out about girls and college and work and kids. But now that I have one girl, no school, no work and the kids are grown, I'm back to full time modelling. My prime area of interest is armor, b

#152
Texas, United States
Joined: December 07, 2002
KitMaker: 487 posts
Armorama: 441 posts
Posted: Thursday, April 27, 2017 - 12:29 AM UTC
Here is my in progress photo.
Base coat of paint is on, now on to weathering.
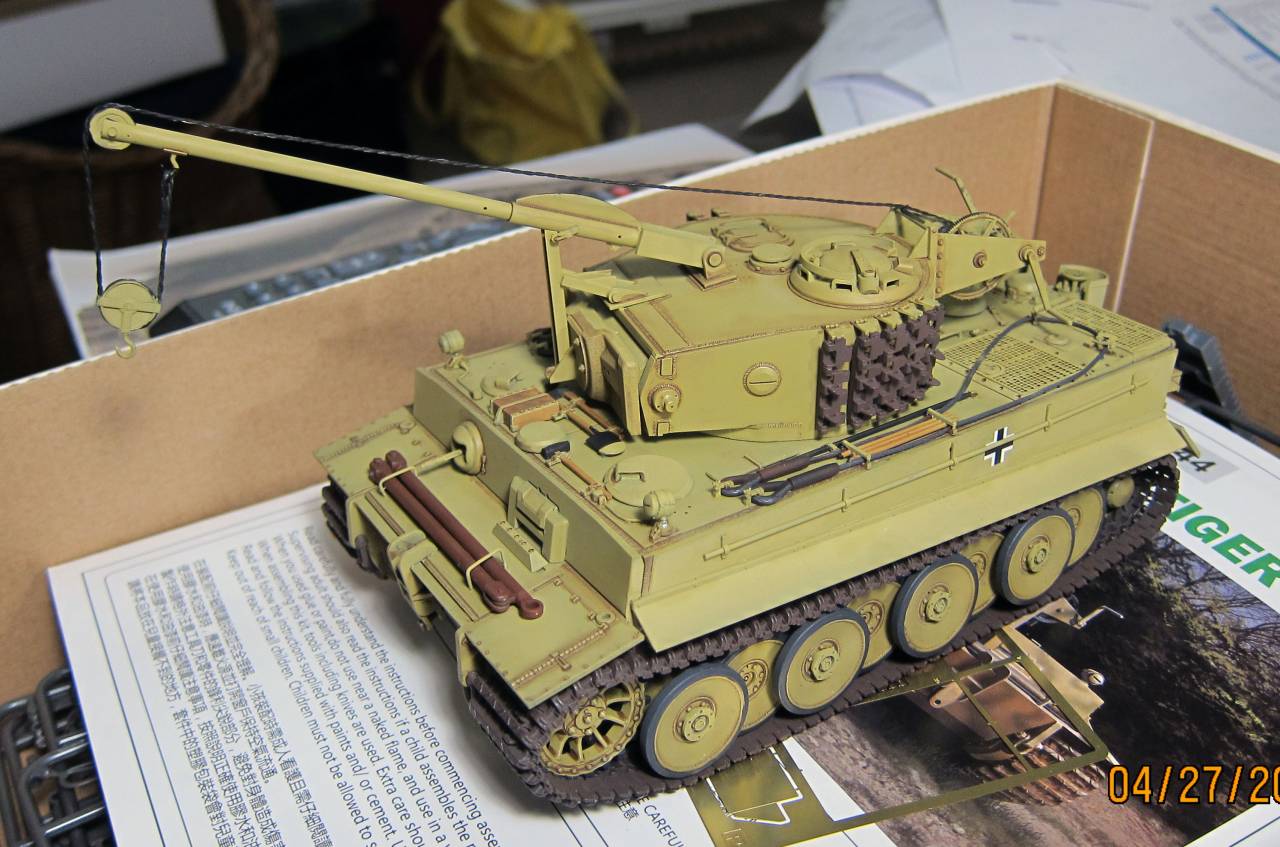
Long time modeller. Starting when I was a teenager, then I found out about girls and college and work and kids. But now that I have one girl, no school, no work and the kids are grown, I'm back to full time modelling. My prime area of interest is armor, b

#454
Georgia, United States
Joined: July 10, 2016
KitMaker: 1,273 posts
Armorama: 1,138 posts
Posted: Thursday, April 27, 2017 - 12:54 AM UTC
That's looking great Tom, another one of my must-haves!
"I can make armored cars, safe and unassailable...and behind these our infantry will be able to follow quite unharmed and without any opposition."
-Leonardo da Vinci, 1487
Myanmar
Joined: March 05, 2004
KitMaker: 4,011 posts
Armorama: 1,498 posts
Posted: Thursday, April 27, 2017 - 06:02 AM UTC
Bob,
Tom, Looking good!

i watched a scale plastic figure crawl along the edge . . . of an exacto blade . . . that's my dream , it's my nightmare . . . . . . . crawling , slithering . . . . . along the edge . . . . . . of an exacto . . . . . blade . . . . and surviving
Namabiiru
 Associate Editor
#399
Rhode Island, United States
Joined: March 05, 2014
KitMaker: 2,888 posts
Armorama: 1,920 posts
Posted: Thursday, April 27, 2017 - 04:21 PM UTC
Nice B.Panzer, Tom!

Queensland, Australia
Joined: August 06, 2005
KitMaker: 3,353 posts
Armorama: 3,121 posts
Posted: Friday, April 28, 2017 - 06:42 AM UTC
That was a fast build Tom. Must be a fairly decent kit to build. Any issues with fit or anything?
On the Bench:
Dust, styrene scraps, paint splotches and tears.
Namabiiru
 Associate Editor
#399
Rhode Island, United States
Joined: March 05, 2014
KitMaker: 2,888 posts
Armorama: 1,920 posts
Posted: Saturday, May 06, 2017 - 07:55 PM UTC
Got the bridge span planked, painted, and distressed:
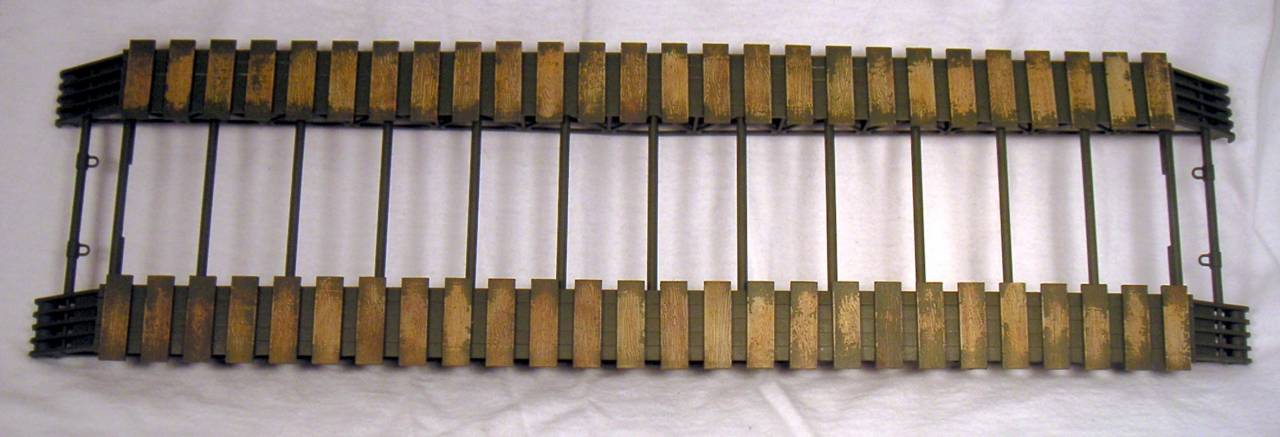
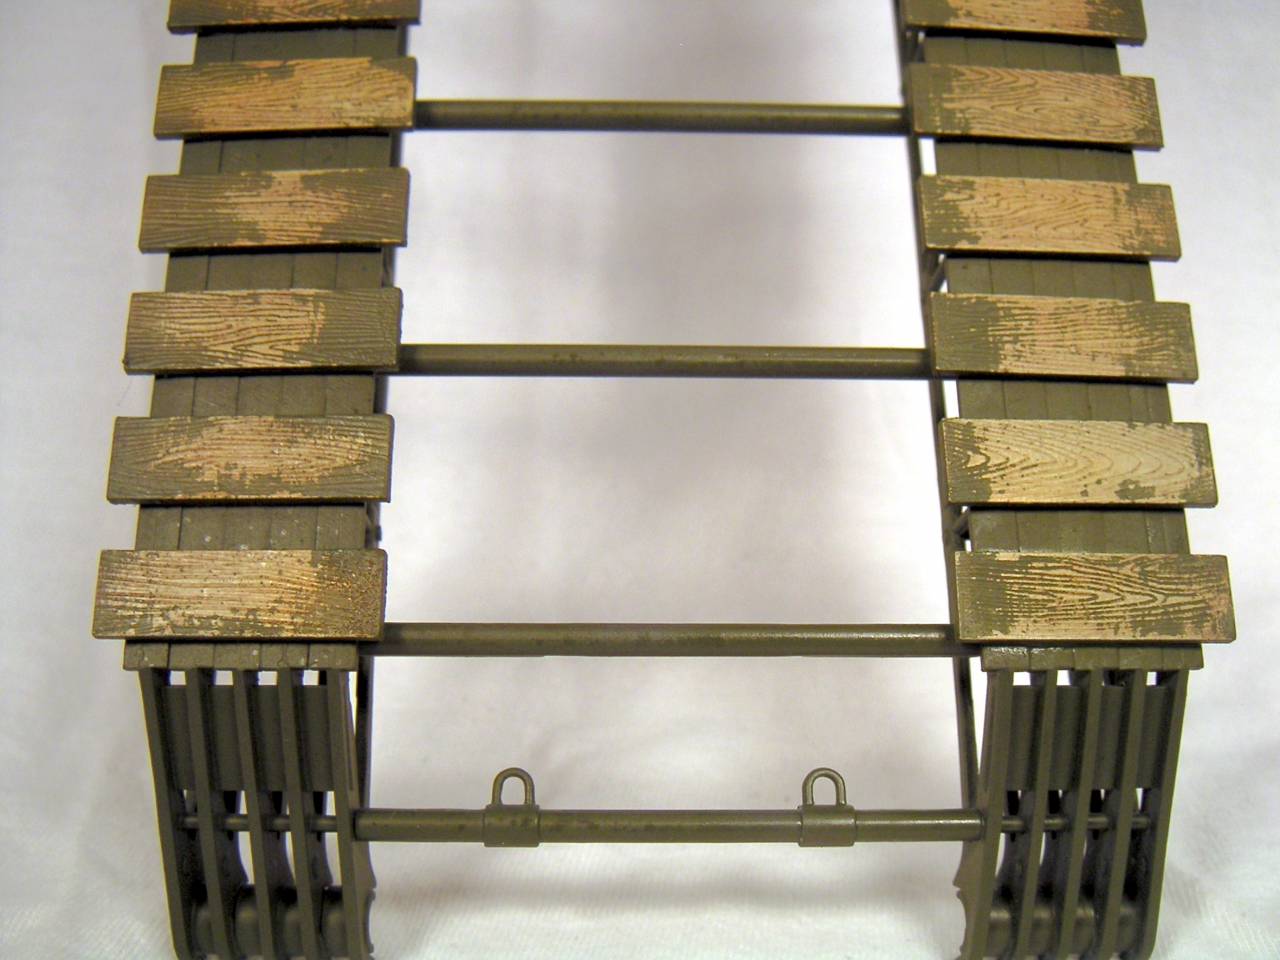
Still need to distress the steel parts in order to start bringing it together.


#454
Georgia, United States
Joined: July 10, 2016
KitMaker: 1,273 posts
Armorama: 1,138 posts
Posted: Saturday, May 06, 2017 - 08:46 PM UTC
Looking pretty authentic there, Mark!

"I can make armored cars, safe and unassailable...and behind these our infantry will be able to follow quite unharmed and without any opposition."
-Leonardo da Vinci, 1487
Namabiiru
 Associate Editor
#399
Rhode Island, United States
Joined: March 05, 2014
KitMaker: 2,888 posts
Armorama: 1,920 posts
Posted: Thursday, May 11, 2017 - 02:14 AM UTC
Hope I can finish this one in time. Just found out I'm moving to different job in a different part of the country in June or July. Going to be tight!

Myanmar
Joined: March 05, 2004
KitMaker: 4,011 posts
Armorama: 1,498 posts
Posted: Thursday, May 11, 2017 - 06:25 AM UTC
That is the look I was only trying to achieve. That looks super realistic! This is going to be a fantastic looking bridgelayer.

i watched a scale plastic figure crawl along the edge . . . of an exacto blade . . . that's my dream , it's my nightmare . . . . . . . crawling , slithering . . . . . along the edge . . . . . . of an exacto . . . . . blade . . . . and surviving
Queensland, Australia
Joined: August 06, 2005
KitMaker: 3,353 posts
Armorama: 3,121 posts
Posted: Thursday, May 11, 2017 - 08:24 AM UTC
On the Bench:
Dust, styrene scraps, paint splotches and tears.
Namabiiru
 Associate Editor
#399
Rhode Island, United States
Joined: March 05, 2014
KitMaker: 2,888 posts
Armorama: 1,920 posts
Posted: Thursday, May 11, 2017 - 06:15 PM UTC
Quoted Text
That is the look I was only trying to achieve. That looks super realistic! This is going to be a fantastic looking bridgelayer.

Are you kidding me?! I'm using your build as the benchmark I'm aiming for! I don't think I'll come close, but at least you've shown me what it SHOULD look like!
Thanks for the comments, everyone!

Namabiiru
 Associate Editor
#399
Rhode Island, United States
Joined: March 05, 2014
KitMaker: 2,888 posts
Armorama: 1,920 posts
Posted: Friday, May 12, 2017 - 06:20 PM UTC
KoSprueOne,
Did you find that nothing on this kit fits the way it is supposed to? Every hole is a little too small for whatever is supposed to go in it, and the "turret" and lift arm supports don't fit on the raised alignment marks without major trimming. Crazy! But, then, what did I expect from a Russian kit?

Myanmar
Joined: March 05, 2004
KitMaker: 4,011 posts
Armorama: 1,498 posts
Posted: Friday, May 12, 2017 - 09:12 PM UTC
yes, yes, yeah, and yup. Some of the grab handles were either numbered incorrectly on the I-Sheets or they didn't fit. The engine deck access panel had to be shaved down a little to fit, etc.

i watched a scale plastic figure crawl along the edge . . . of an exacto blade . . . that's my dream , it's my nightmare . . . . . . . crawling , slithering . . . . . along the edge . . . . . . of an exacto . . . . . blade . . . . and surviving


