

Hosted by Richard S.
Landships Campaign

Hudson29

#460

Joined: September 16, 2014
KitMaker: 1,156 posts
Armorama: 1,024 posts
Posted: Monday, December 26, 2016 - 06:39 AM UTC
Great choice! I had one of the old Emhar Whippet kits and sold it hoping to upgrade to the Meng version. The Emhar kit had one of my pals talking to himself before he finally relegated it to the scrap heap. I look forward to your progress shots!

XavierB

Joined: August 13, 2016
KitMaker: 15 posts
Armorama: 14 posts
Posted: Monday, December 26, 2016 - 12:07 PM UTC
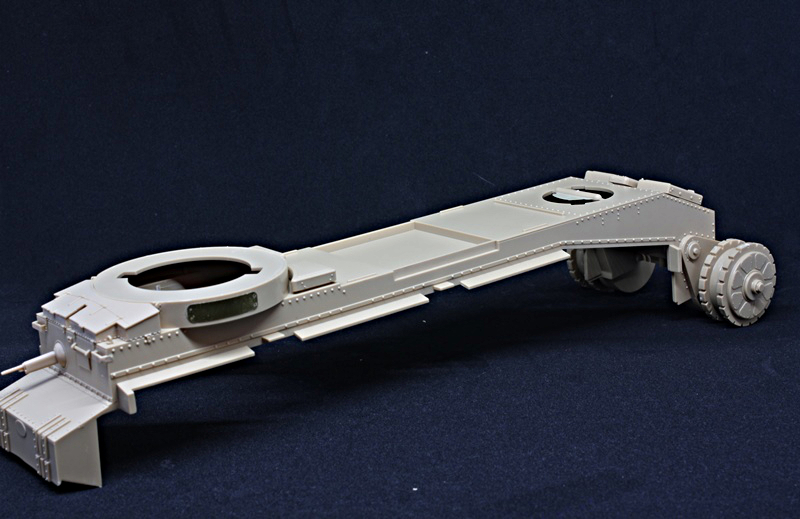
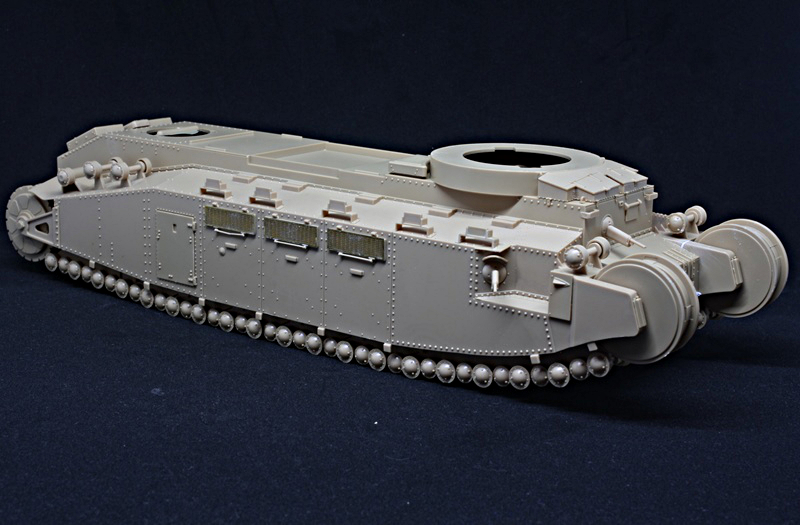
Had some great time at the bench yesterday.
I completed the road wheels and the left hull.
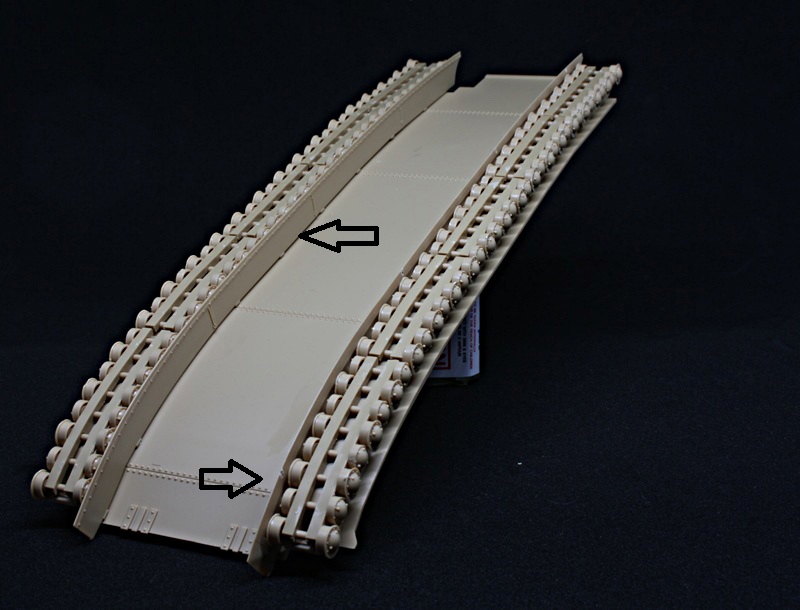
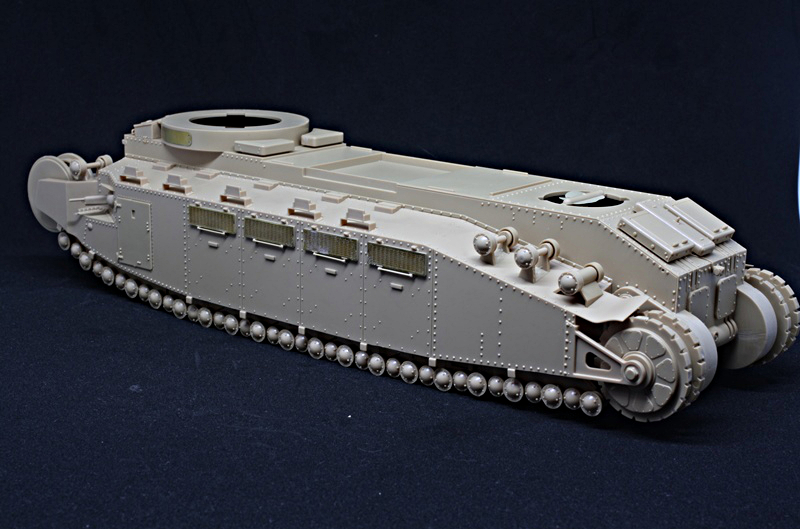
I must remove the skirts next to the road wheels (third pic), they were not installed on my version.
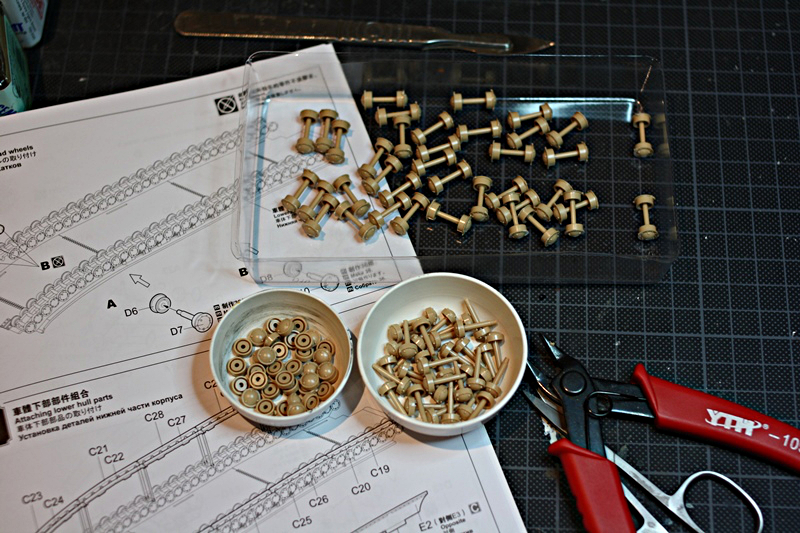
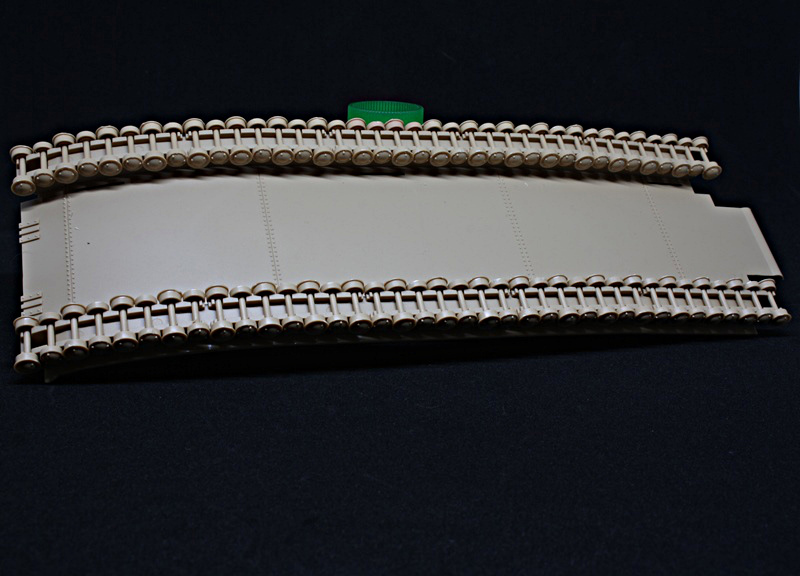
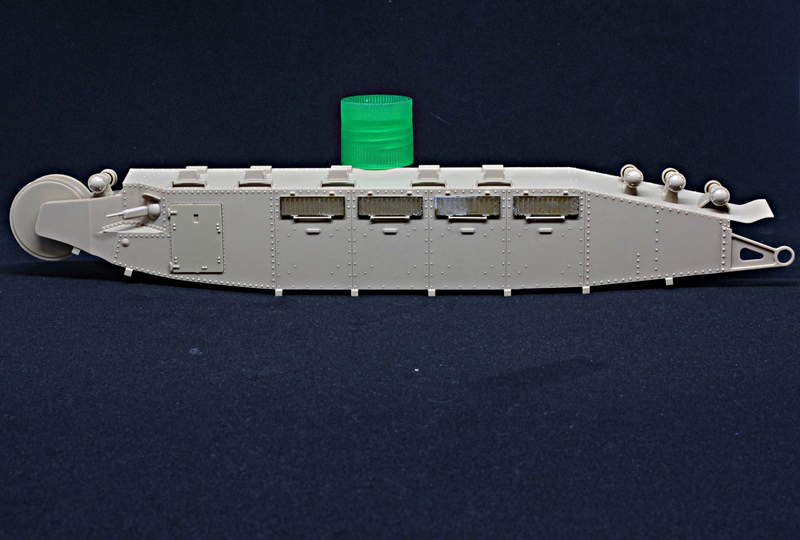
A really enjoyable and relaxing build so far. Assembly of the wheels was quite repetitive indeed (74 to be done !), but quick and easy.
Happy modelling guys !
Xavier
I completed the road wheels and the left hull.
I must remove the skirts next to the road wheels (third pic), they were not installed on my version.
A really enjoyable and relaxing build so far. Assembly of the wheels was quite repetitive indeed (74 to be done !), but quick and easy.
Happy modelling guys !
Xavier
Hudson29
#460
Joined: September 16, 2014
KitMaker: 1,156 posts
Armorama: 1,024 posts
Posted: Tuesday, December 27, 2016 - 12:39 AM UTC
X - It is exciting to see this Landship going together. Your pictures are wonderful, by the way. With them you make it easy to see what is going together. One part I was not clear on. You are removing a skirt? Which part is this?
Hudson29
#460
Joined: September 16, 2014
KitMaker: 1,156 posts
Armorama: 1,024 posts
Posted: Tuesday, December 27, 2016 - 05:24 AM UTC
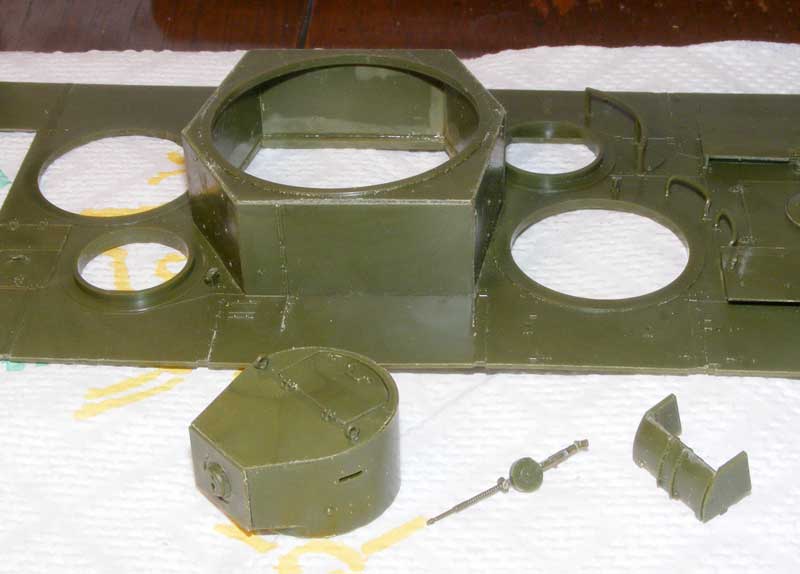
After the holiday crush it was finally time to get back to the workbench. This session included adding more bits to the upper deck. I'm leaving off the tools until after painting. Also, the first of 5 turrets was built less the MG which will be painted and added after everything else it done.
I did run into one issue with the fit. The curved armored cover that protects the exhaust did not fit the way I thought the destructions laid it out. I ended up carving away portions of the back of the air scoops and removing sections of the forward wall to make everything fit.
It is possible I assembled something wrong . . .
XavierB
Joined: August 13, 2016
KitMaker: 15 posts
Armorama: 14 posts
Posted: Tuesday, December 27, 2016 - 05:08 PM UTC
Quoted Text
X - It is exciting to see this Landship going together. Your pictures are wonderful, by the way. With them you make it easy to see what is going together. One part I was not clear on. You are removing a skirt? Which part is this?
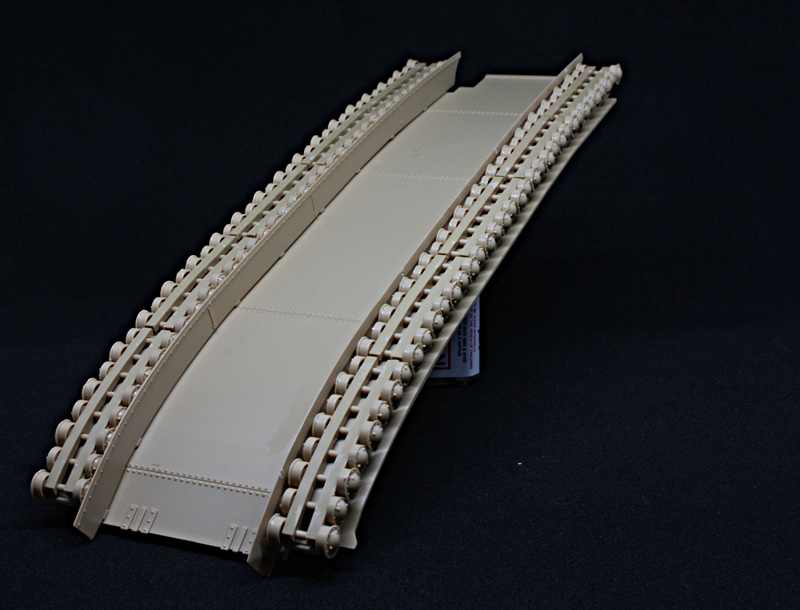
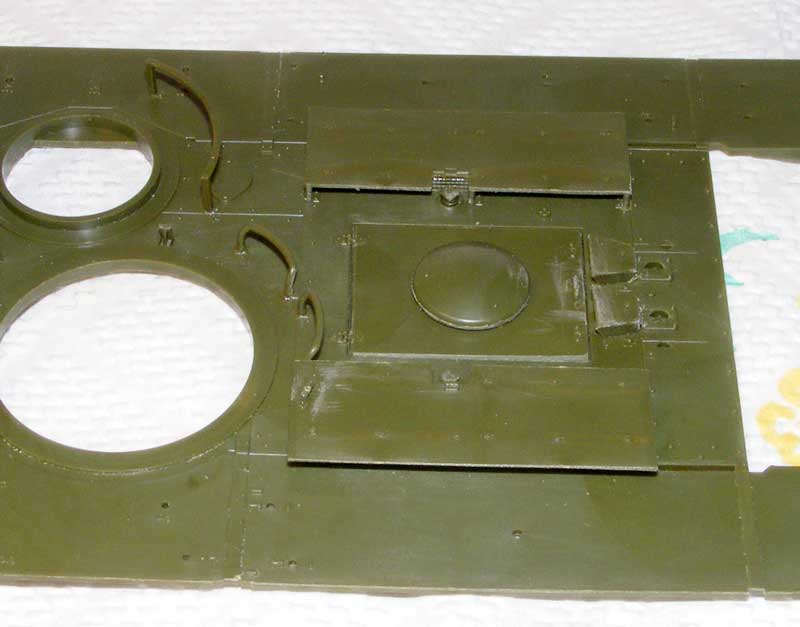
This part :
I am not sure "skirt" is the right term. Those parts cover the wheels on both sides. I went too fast et only saw later on that they were not installed on the "Alsace" (as mentionned in the instructions). Had no problem removing them, tought.
Great work on your T-35. Five turrets... What were they thinking.

Zhivago
Joined: December 02, 2014
KitMaker: 109 posts
Armorama: 97 posts
Posted: Wednesday, December 28, 2016 - 12:38 AM UTC
Okay everybody, please bear with me. This is my first EVER attempt to post a picture (drum roll, please...) 

With any luck, this will show my Neubaufahrzeug kit in its unassembled state. I started on 01DEC16. If this works, I've got a few shots of my progress thus far. If it doesn't work, well, I'llduck some rotten fruits and vegetables from less-than-amused onlookers.
With any luck, this will show my Neubaufahrzeug kit in its unassembled state. I started on 01DEC16. If this works, I've got a few shots of my progress thus far. If it doesn't work, well, I'llduck some rotten fruits and vegetables from less-than-amused onlookers.
Hudson29
#460
Joined: September 16, 2014
KitMaker: 1,156 posts
Armorama: 1,024 posts
Posted: Wednesday, December 28, 2016 - 12:41 AM UTC
OK, I see now. Did you have a photo showing Alsace without these shirts or Meng thoughtfully mentioned that in the booklet? Once again, your pics are excellent and it is easy to follow along with you.
I did a bit more work on the T-35. The 45mm barrels are made in three sections. The plastic is soft and grainy which means it does not sand clean. Even worse, after the liquid cent it looses all stiffness and the parts have to be aligned by the old eyeball. They did not come out very well and I'm thinking of ordering the metal set to replace them.
I did a bit more work on the T-35. The 45mm barrels are made in three sections. The plastic is soft and grainy which means it does not sand clean. Even worse, after the liquid cent it looses all stiffness and the parts have to be aligned by the old eyeball. They did not come out very well and I'm thinking of ordering the metal set to replace them.
Zhivago
Joined: December 02, 2014
KitMaker: 109 posts
Armorama: 97 posts
Posted: Wednesday, December 28, 2016 - 01:09 AM UTC


Hudson29
#460
Joined: September 16, 2014
KitMaker: 1,156 posts
Armorama: 1,024 posts
Posted: Wednesday, December 28, 2016 - 01:16 AM UTC
Karl - That looks really cool! I see white inside, does this kit have an interior?

ComradeMP

#0
Joined: July 31, 2011
KitMaker: 472 posts
Armorama: 453 posts
Posted: Thursday, December 29, 2016 - 11:27 AM UTC
This is where I am at now:

As far as the turret hitting the little mg turret, it's pretty close.

There's a small gap , so not it doesn't hit.

As far as the turret hitting the little mg turret, it's pretty close.

There's a small gap , so not it doesn't hit.
Bravo1102
Joined: December 08, 2003
KitMaker: 2,864 posts
Armorama: 2,497 posts

Posted: Thursday, December 29, 2016 - 11:53 AM UTC
What's a little scraped paint between turrets? A tiny gap like that would be more than enough in 1/1. But woe to the gunner who depressed the main gun into an auxiliary turret! Or who snapped off the barrel of a machine gun by traversing too far.
Looking great. Most combat records for these monsters show the auxiliary turrets were left unmanned. They even did that in the Crusader!
Looking great. Most combat records for these monsters show the auxiliary turrets were left unmanned. They even did that in the Crusader!
Hudson29
#460
Joined: September 16, 2014
KitMaker: 1,156 posts
Armorama: 1,024 posts
Posted: Friday, December 30, 2016 - 01:14 AM UTC
Comrade - Your kit is better than the Trumpy kit in that regard. Does the main turret bustle clear as well? I was able to "adjust" the front to make everything clear by just a smidge as yours does but there was nothing I could do about the rear overhang, it SOLIDLY clouts the MG turret. No way the main turret could rotate 360°. I have the turret facing forward so the defect is not obvious . . .
ComradeMP
#0
Joined: July 31, 2011
KitMaker: 472 posts
Armorama: 453 posts
Posted: Friday, December 30, 2016 - 08:09 AM UTC
Quoted Text
Comrade - Your kit is better than the Trumpy kit in that regard. Does the main turret bustle clear as well? I was able to "adjust" the front to make everything clear by just a smidge as yours does but there was nothing I could do about the rear overhang, it SOLIDLY clouts the MG turret. No way the main turret could rotate 360°. I have the turret facing forward so the defect is not obvious . . .
I just checked (hadn't thought about the overhang) and it just clears the top of the mg turret, but the periscopes and such on the mg turret roof are in the way. No 360 rotation.
Hudson29
#460
Joined: September 16, 2014
KitMaker: 1,156 posts
Armorama: 1,024 posts
Posted: Friday, December 30, 2016 - 08:22 AM UTC
Quoted Text
I just checked (hadn't thought about the overhang) and it just clears the top of the mg turret, but the periscopes and such on the mg turret roof are in the way. No 360 rotation.
Better, but not enough to make any difference. It does seem odd that the model makers didn't catch this. Is it possible that the Soviets didn't either? It SEEMS to be pretty basic stuff . . .

hofpig

Joined: March 04, 2007
KitMaker: 1,330 posts
Armorama: 1,017 posts

Posted: Friday, December 30, 2016 - 09:22 PM UTC
Firstly sorry for the bad start pic (had to use my tablet in less than great light) as my camera has vanished.....

Still now I can get on!
Paul
Still now I can get on!
Paul

Hudson29
#460
Joined: September 16, 2014
KitMaker: 1,156 posts
Armorama: 1,024 posts
Posted: Saturday, December 31, 2016 - 01:06 AM UTC
More than good enough for a start. We do want to see good snaps of your progress. With the Great War 100 years past your Landship is perfect for this campaign.
Zhivago
Joined: December 02, 2014
KitMaker: 109 posts
Armorama: 97 posts
Posted: Monday, January 02, 2017 - 05:48 PM UTC
Quoted Text
Karl - That looks really cool! I see white inside, does this kit have an interior?
No sir, unfortunately it doesn't. Probably just as well--judging from the amount of time I've spent building and adding the accessories on ONE fender, it would take the whole nine months of this campaign to build the model! There's a lot of PE. I'm really enjoying this build, though. More pictures to follow...
XavierB
Joined: August 13, 2016
KitMaker: 15 posts
Armorama: 14 posts
Posted: Tuesday, January 03, 2017 - 04:33 PM UTC
Comrade - good work on your KV-5 !
Paul - great choice !
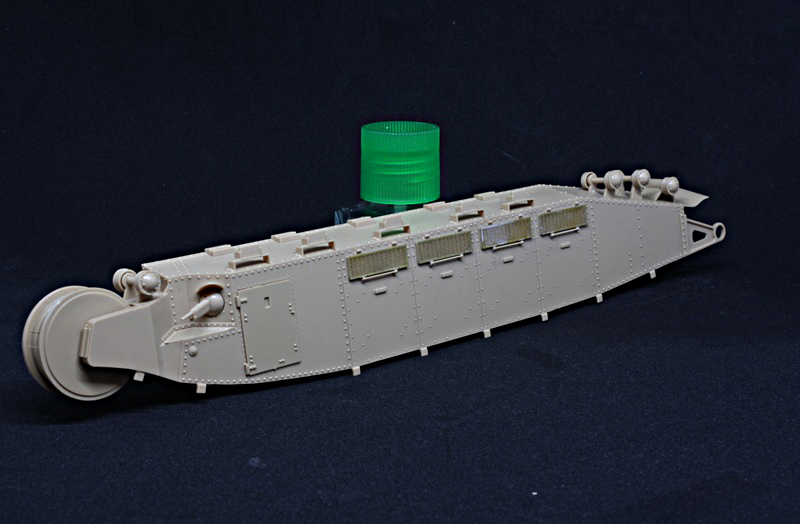
I have glued the left and right sections of the hull to the main body. The fit is, again, excellent. Only a small amount of putty was needed in the front.
Next step : the engine compartment.
Happy new year guys !
Paul - great choice !
I have glued the left and right sections of the hull to the main body. The fit is, again, excellent. Only a small amount of putty was needed in the front.
Next step : the engine compartment.
Happy new year guys !

steve-o
Joined: February 05, 2004
KitMaker: 545 posts
Armorama: 295 posts

Posted: Tuesday, January 03, 2017 - 09:57 PM UTC
I'm excited to get this one off the shelf (and have it join the plethora of unfinished projects on the desk).


Zhivago
Joined: December 02, 2014
KitMaker: 109 posts
Armorama: 97 posts
Posted: Tuesday, January 03, 2017 - 11:36 PM UTC


Okay, here's a few more of the Neubaufahrzeug. It's been slow work but pleasant. My only issue with the Amusing Hobby kit thus far has been the directions; should anyone build this model in the future--and I would highly recommend the kit--do yourself a favor and go over the directions thoroughly. They can be confusing in that there are options for several of the steps: for example, I built a partial suspension without realizing that a full suspension option was also included (and I would have preferred to build the full suspension). Not a huge issue, but potentially aggravating to potential builders. The overall quality of the kit more than makes up for this deficiency, in any case.
Zhivago
Joined: December 02, 2014
KitMaker: 109 posts
Armorama: 97 posts
Posted: Tuesday, January 03, 2017 - 11:40 PM UTC
[
Next step : the engine compartment.
Happy new year guys ![/quote]
I'm reliving my Char 2C build through these pictures (built mine about a year ago)! Nice work so far. Great kit!
Next step : the engine compartment.
Happy new year guys ![/quote]
I'm reliving my Char 2C build through these pictures (built mine about a year ago)! Nice work so far. Great kit!

JSSVIII
Joined: March 28, 2007
KitMaker: 1,169 posts
Armorama: 1,067 posts
Posted: Wednesday, January 04, 2017 - 01:27 AM UTC
Hi Karl, nice work! I was just wondering, why would you have rather built the full suspension, would any of it be visible?
Zhivago
Joined: December 02, 2014
KitMaker: 109 posts
Armorama: 97 posts
Posted: Wednesday, January 04, 2017 - 02:11 AM UTC
Quoted Text
Hi Karl, nice work! I was just wondering, why would you have rather built the full suspension, would any of it be visible?
Mostly to appease my raging OCD! Honestly, the casual viewer would likely see only a fraction (basically, what the partial suspension shows)of the suspension, so it wouldn't be built for him or her. I'd build it just to satisfy my curiosity and get a fuller appreciation for how a thing goes together, how it works. I think that's something that most scale modelers understand.
Hudson29
#460
Joined: September 16, 2014
KitMaker: 1,156 posts
Armorama: 1,024 posts
Posted: Wednesday, January 04, 2017 - 04:43 AM UTC
Xavier - Your Char is really impressive! It looks like nothing else I have seen. Great to hear it is going together so well.
Hudson29
#460
Joined: September 16, 2014
KitMaker: 1,156 posts
Armorama: 1,024 posts
Posted: Wednesday, January 04, 2017 - 04:45 AM UTC
Steve - What a great choice, a Landship that actually saw service. I have the Dragon kit on the shelf but have not attempted it yet. How is the Trumpy version?
 |

WEB HOSTING BY


Copyright ©2021 Armorama and Kitmaker Network, a subsidiary of Silver Star Enterprises
All Rights Reserved. Please read our Conditions of Use and Privacy Policy.
All Rights Reserved. Please read our Conditions of Use and Privacy Policy.