Glad you found it useful. This kit is one that really highlights the usefulness of extremely sharp and thin spruce cutters. My old Xuron cutters cause too much flex and breakage on the fragile parts, so I been using some of my single sided cutters to cut the sprues instead of just clipping the gates.
Hosted by Darren Baker
MiniArt Grant w/interior build log interest?

PRH001

Joined: June 16, 2014
KitMaker: 681 posts
Armorama: 603 posts

Posted: Monday, October 07, 2019 - 04:17 AM UTC

PRH001

Joined: June 16, 2014
KitMaker: 681 posts
Armorama: 603 posts

Posted: Saturday, October 12, 2019 - 02:50 PM UTC
Back to work on the engine for the Grant. The kit has good detail but it has some challenges to work through. The attachment points for the intake runners are a lot of work to clean up. Mold seams are also pretty substantial on the part so be ready for some extensive cleanup.
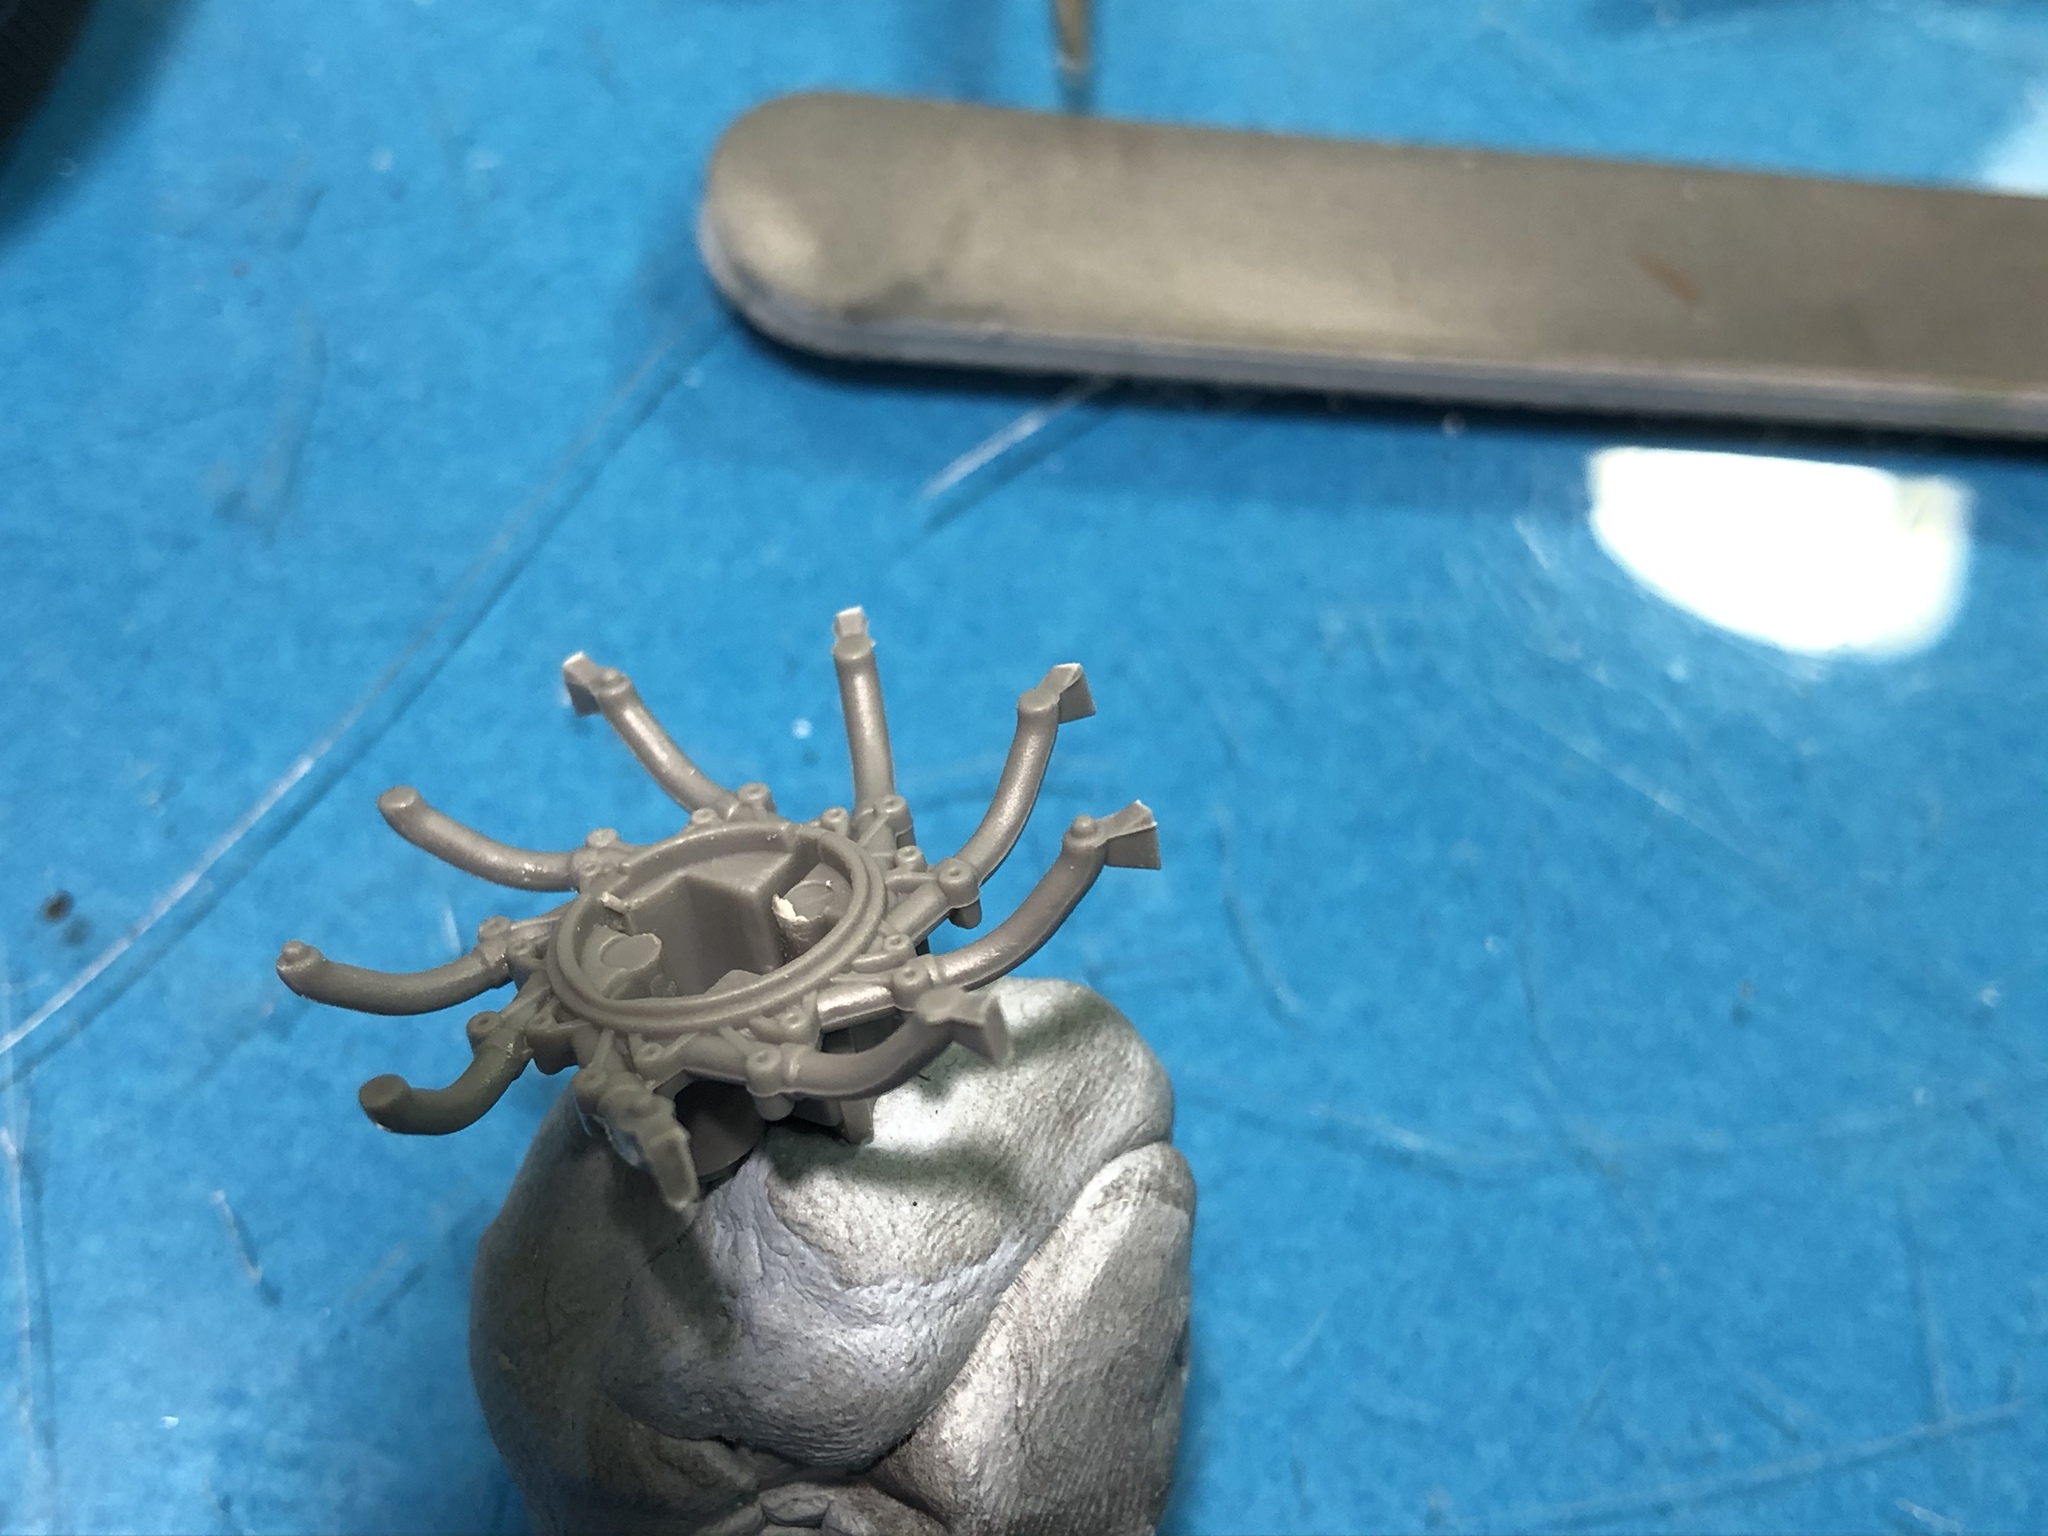
The are also some pretty serious sink marks on the part that need to be taken care of.
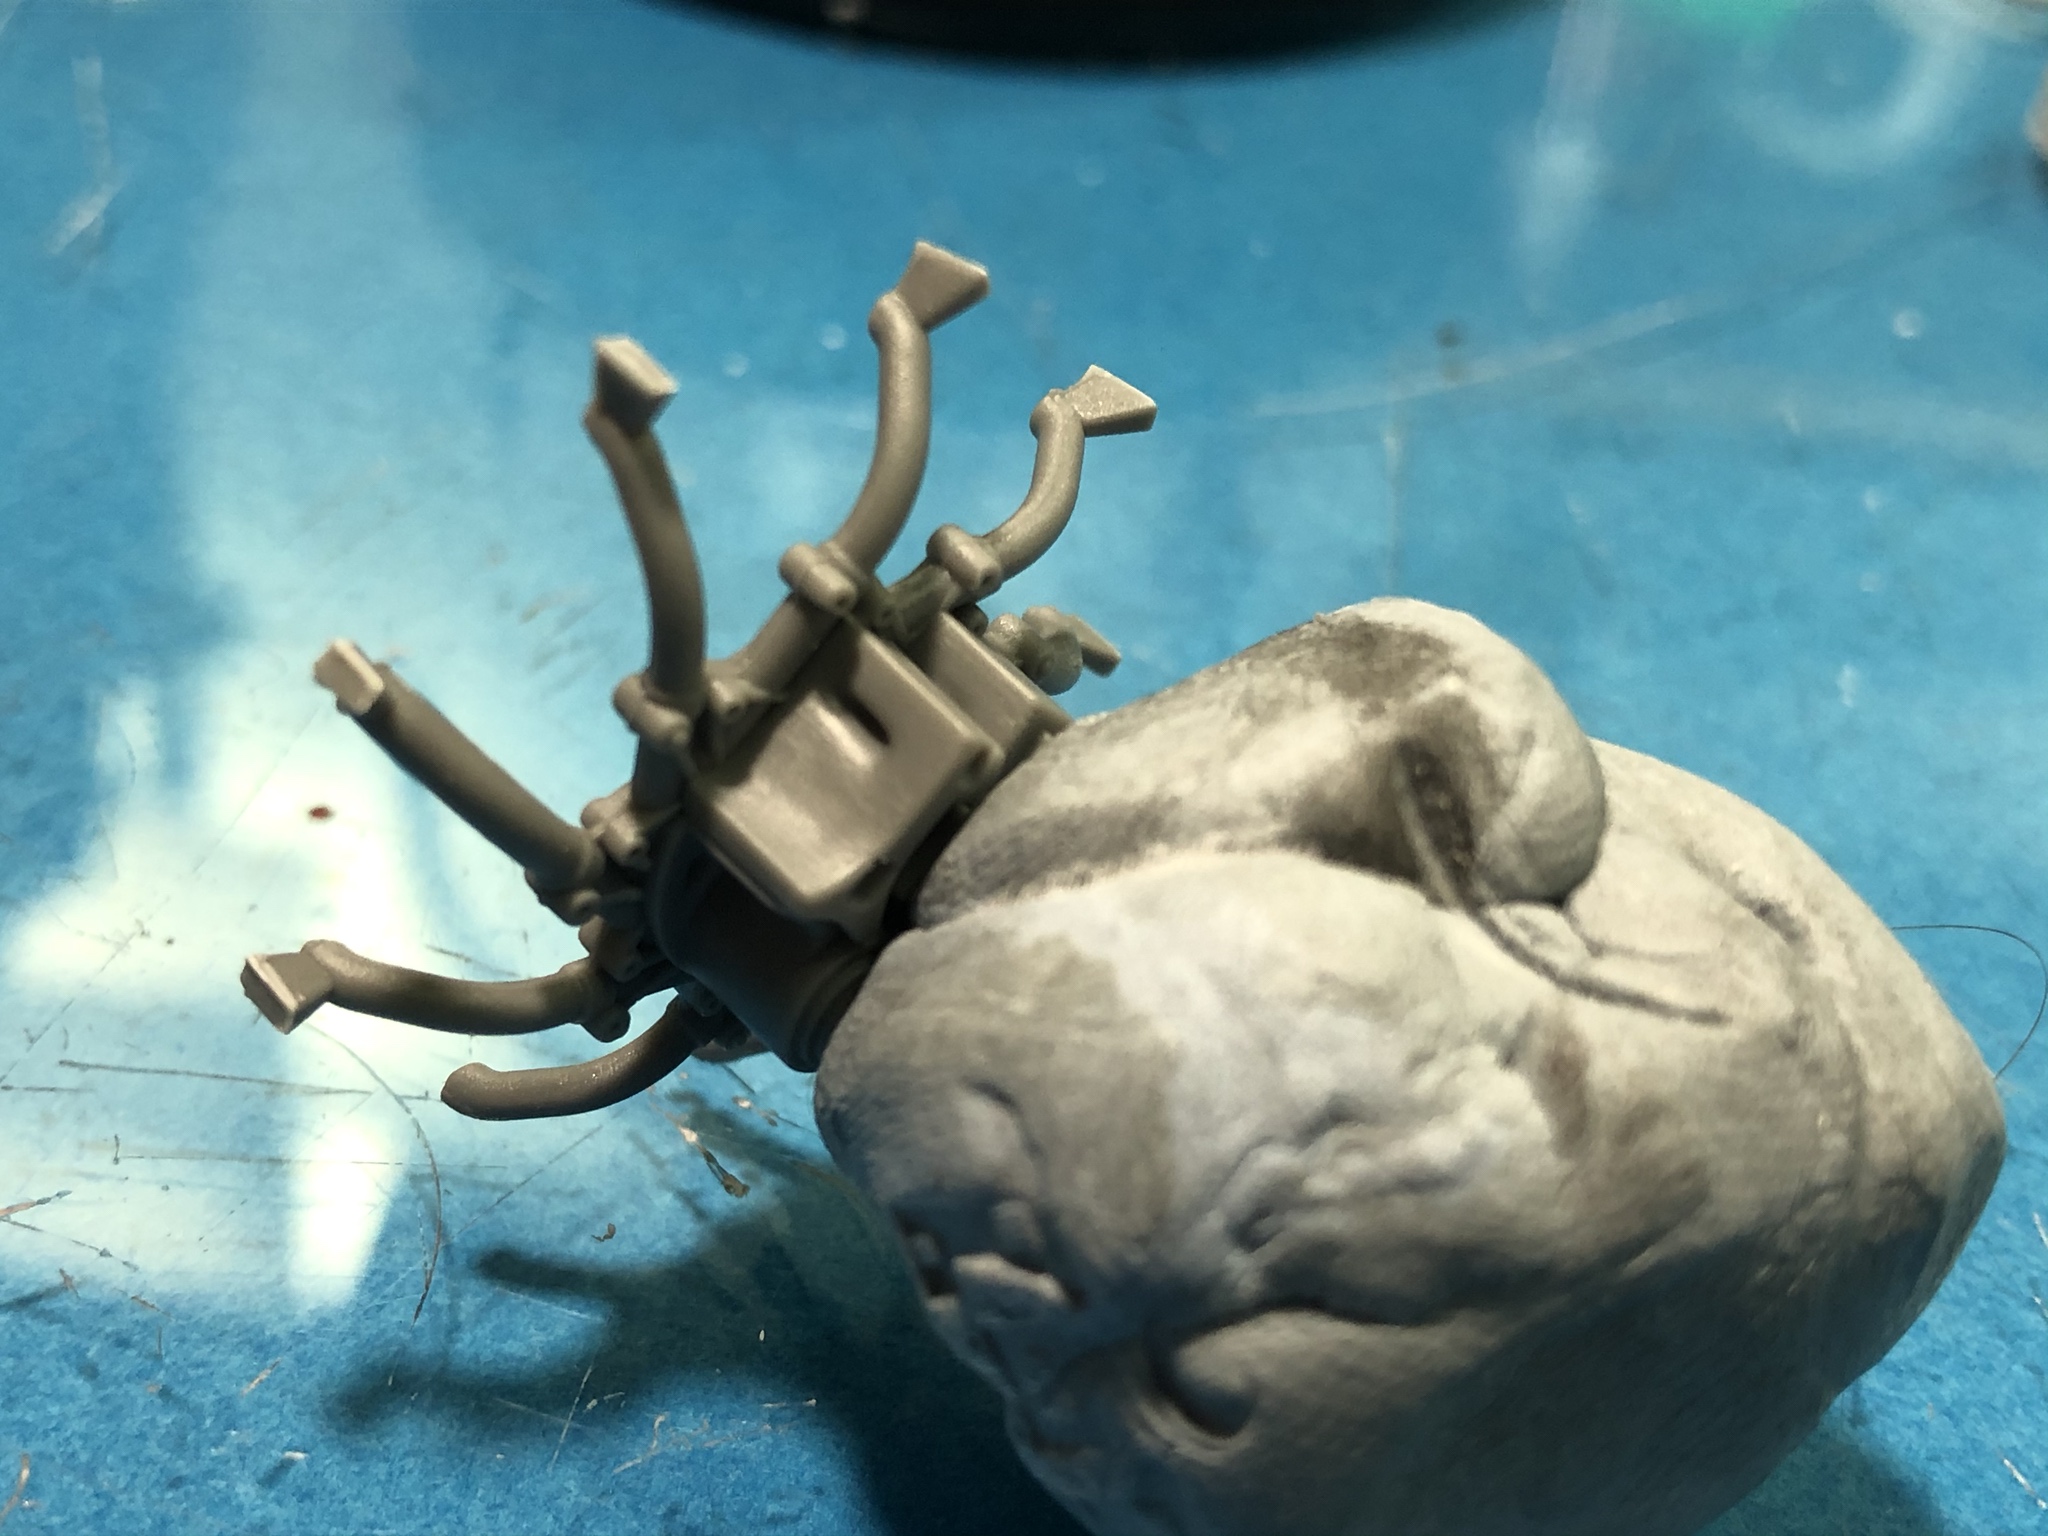
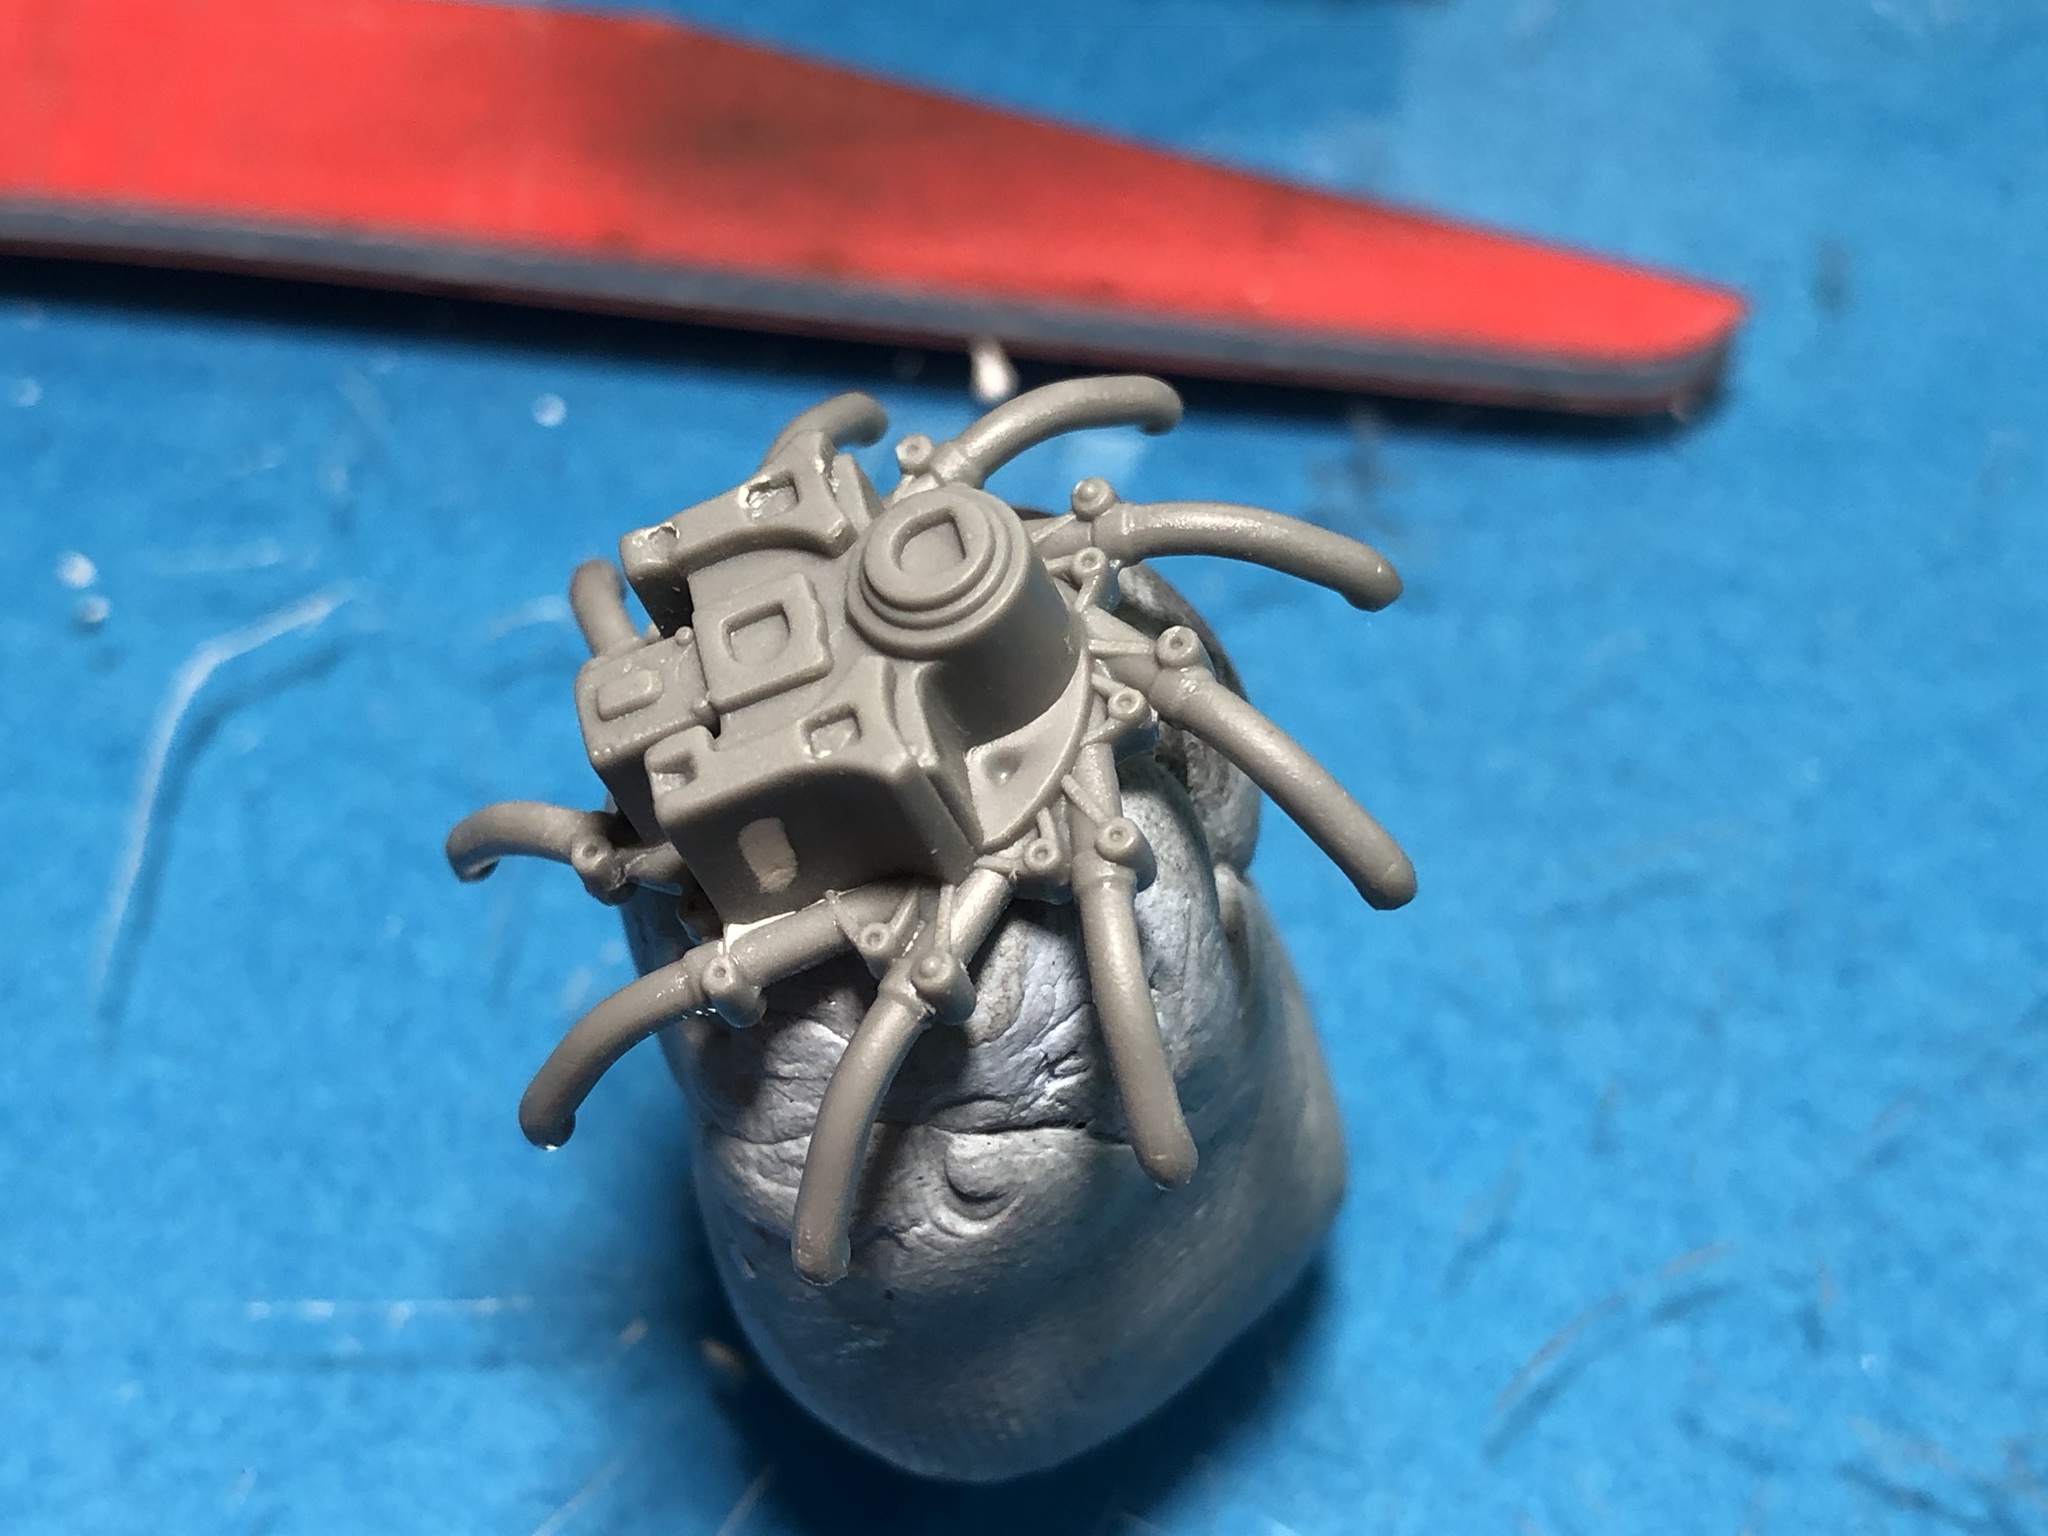
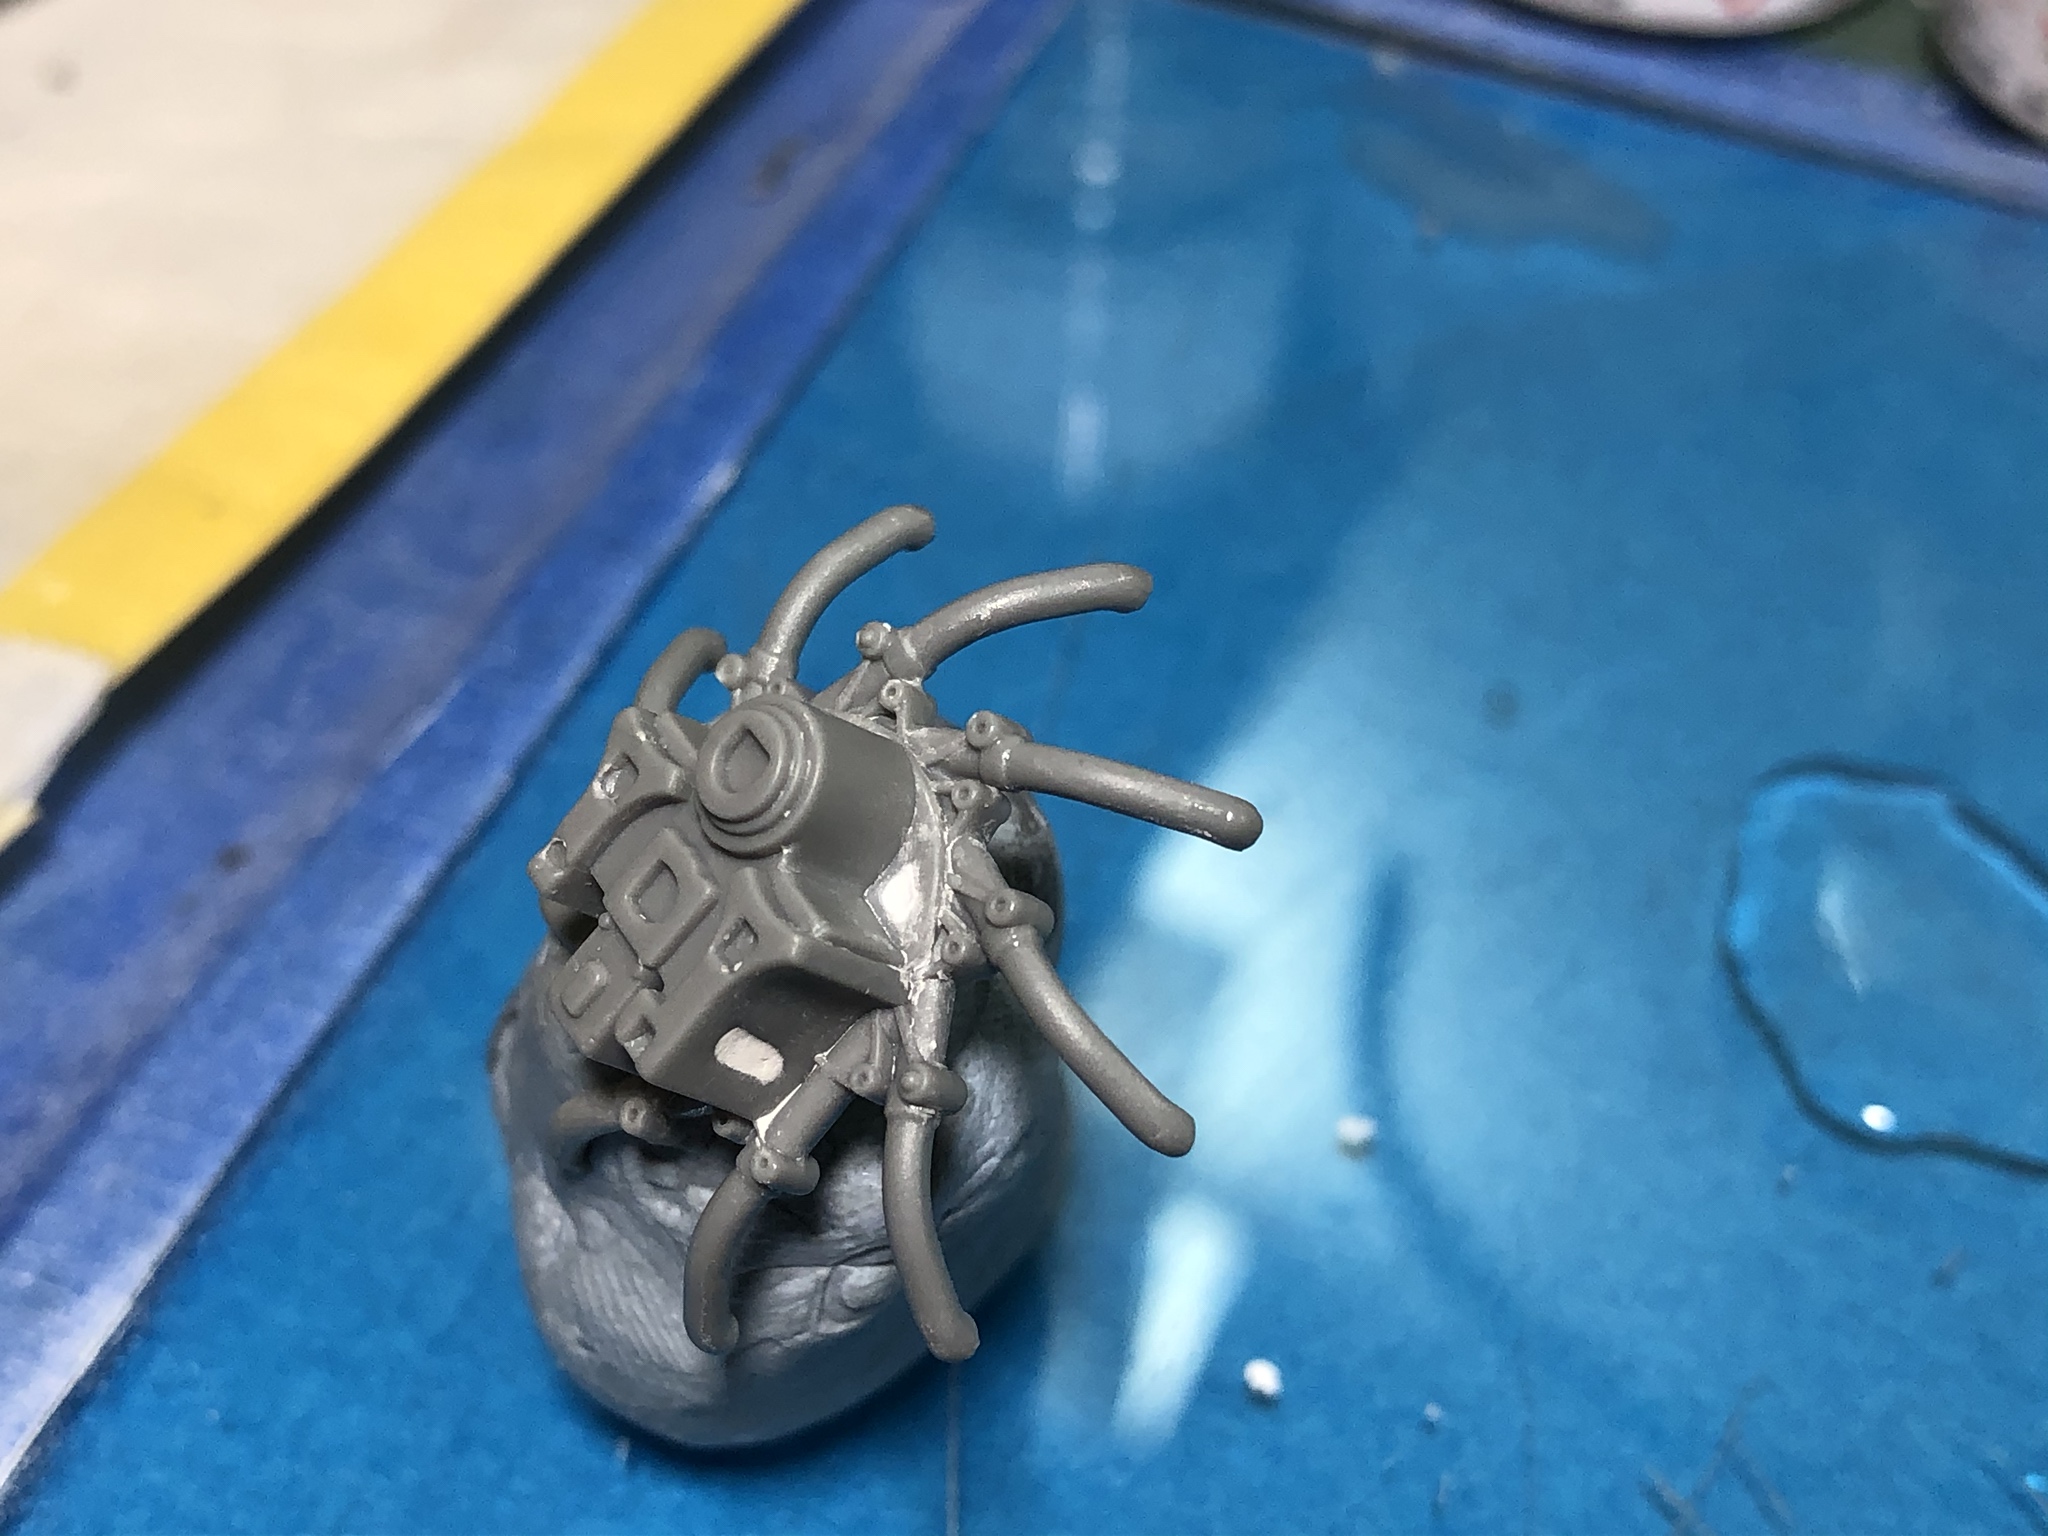
Exhaust manifolds are also a lot of work to clean up. Large attachment points, and significant offset on some areas of the part.
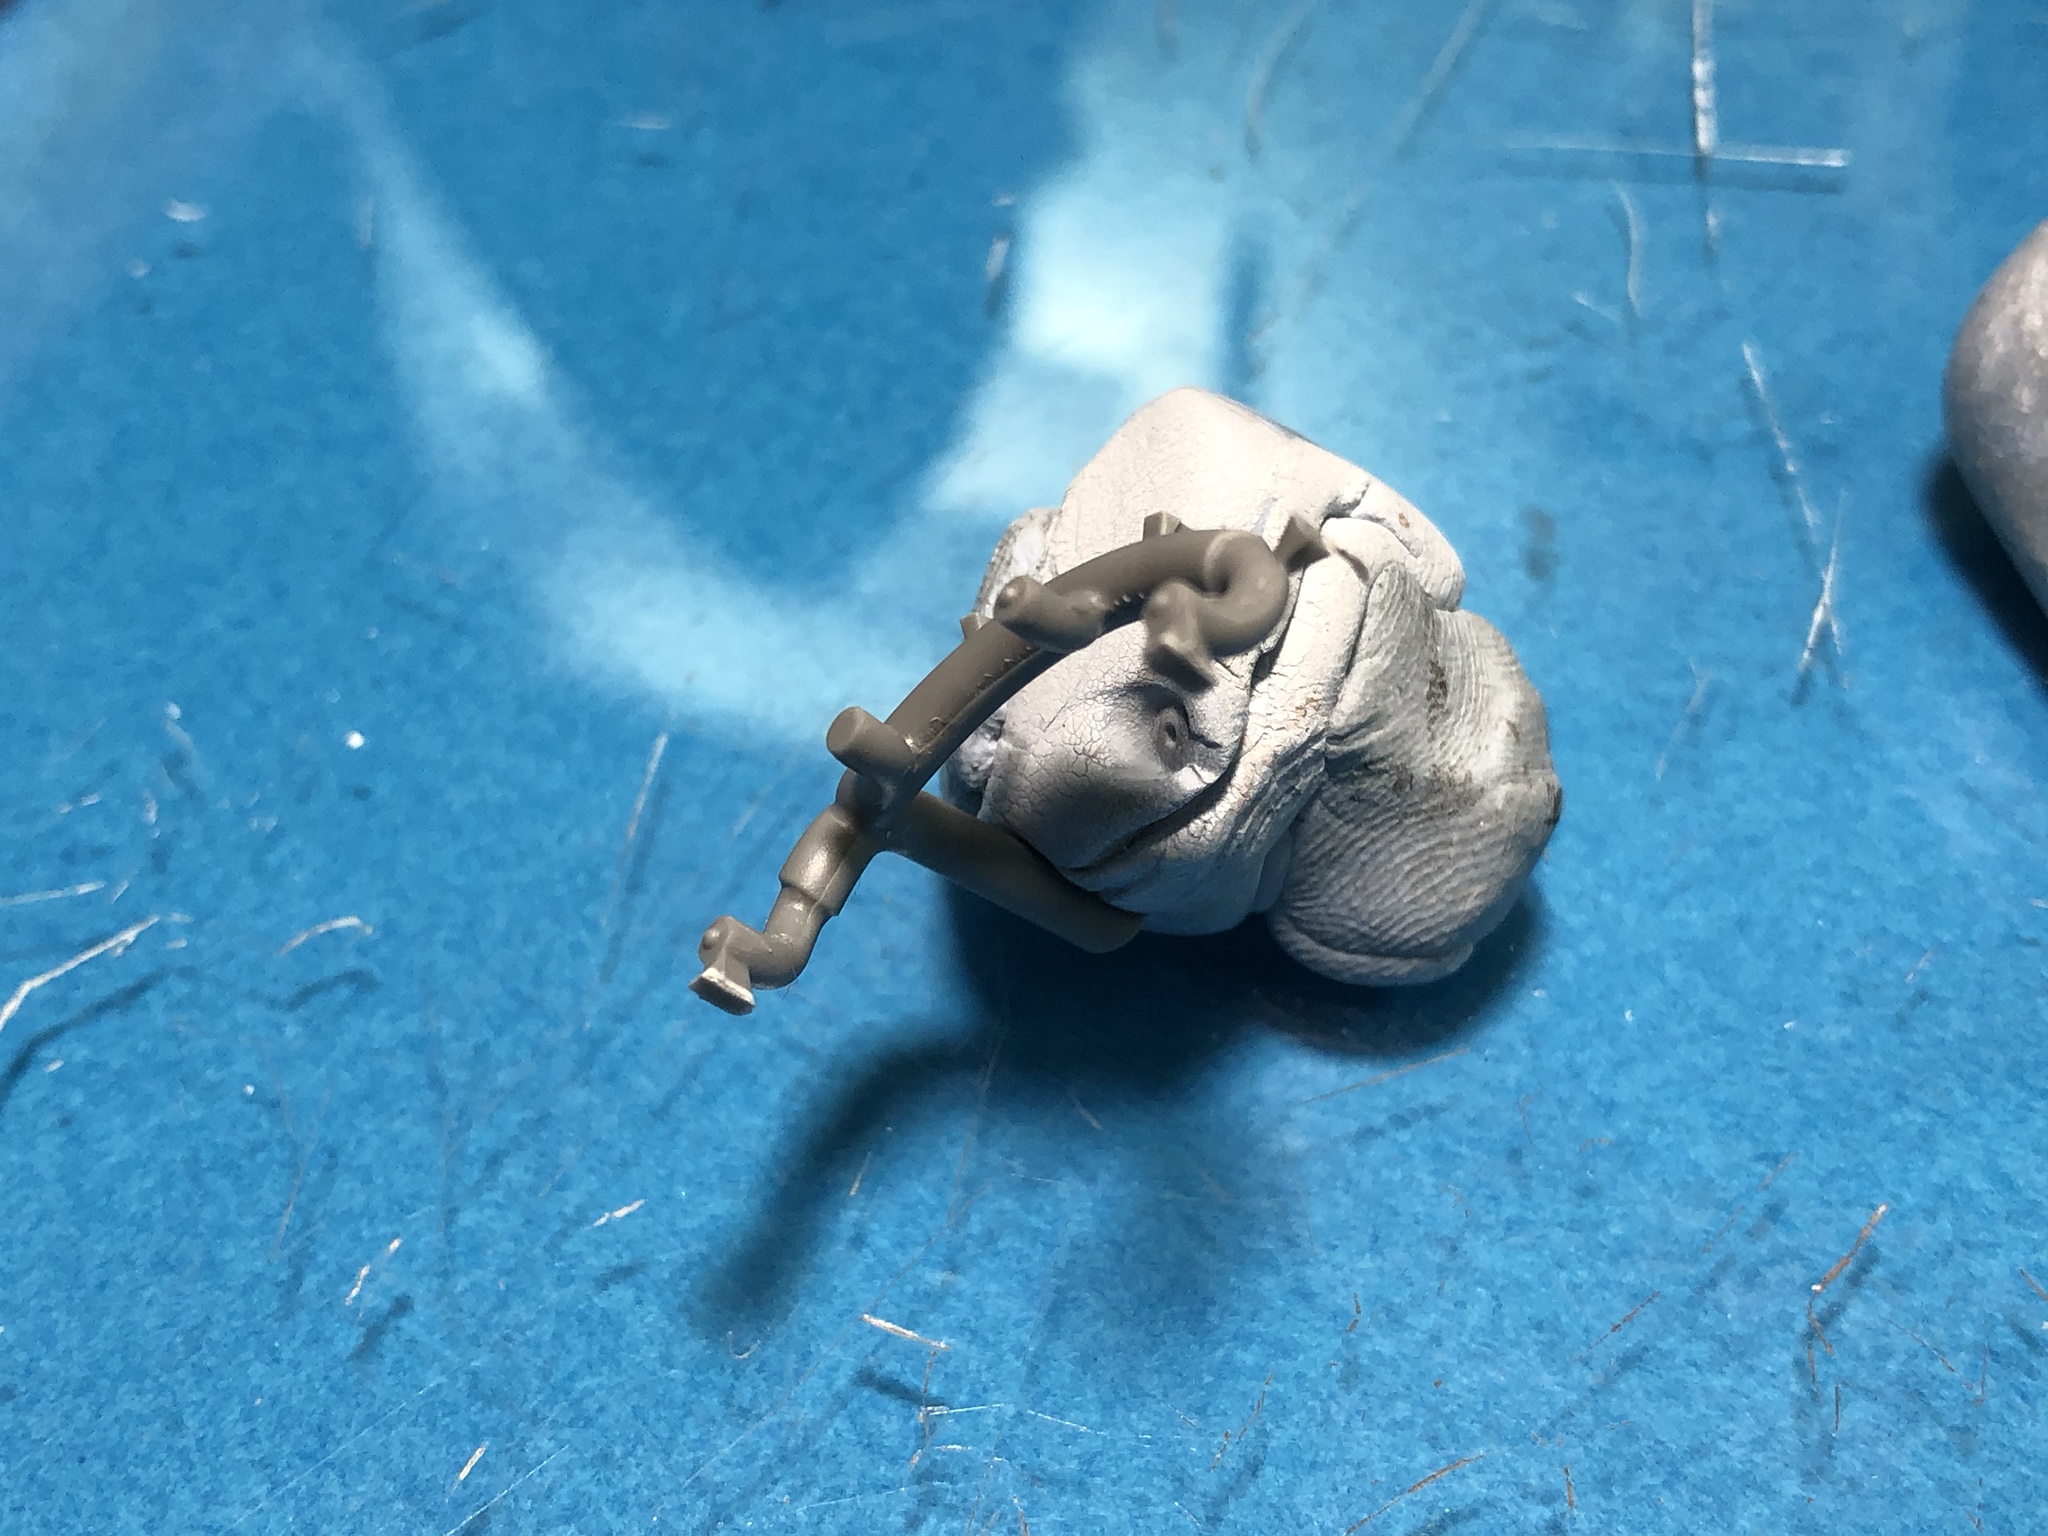
Here is one of the exhaust manifolds after cleanup.
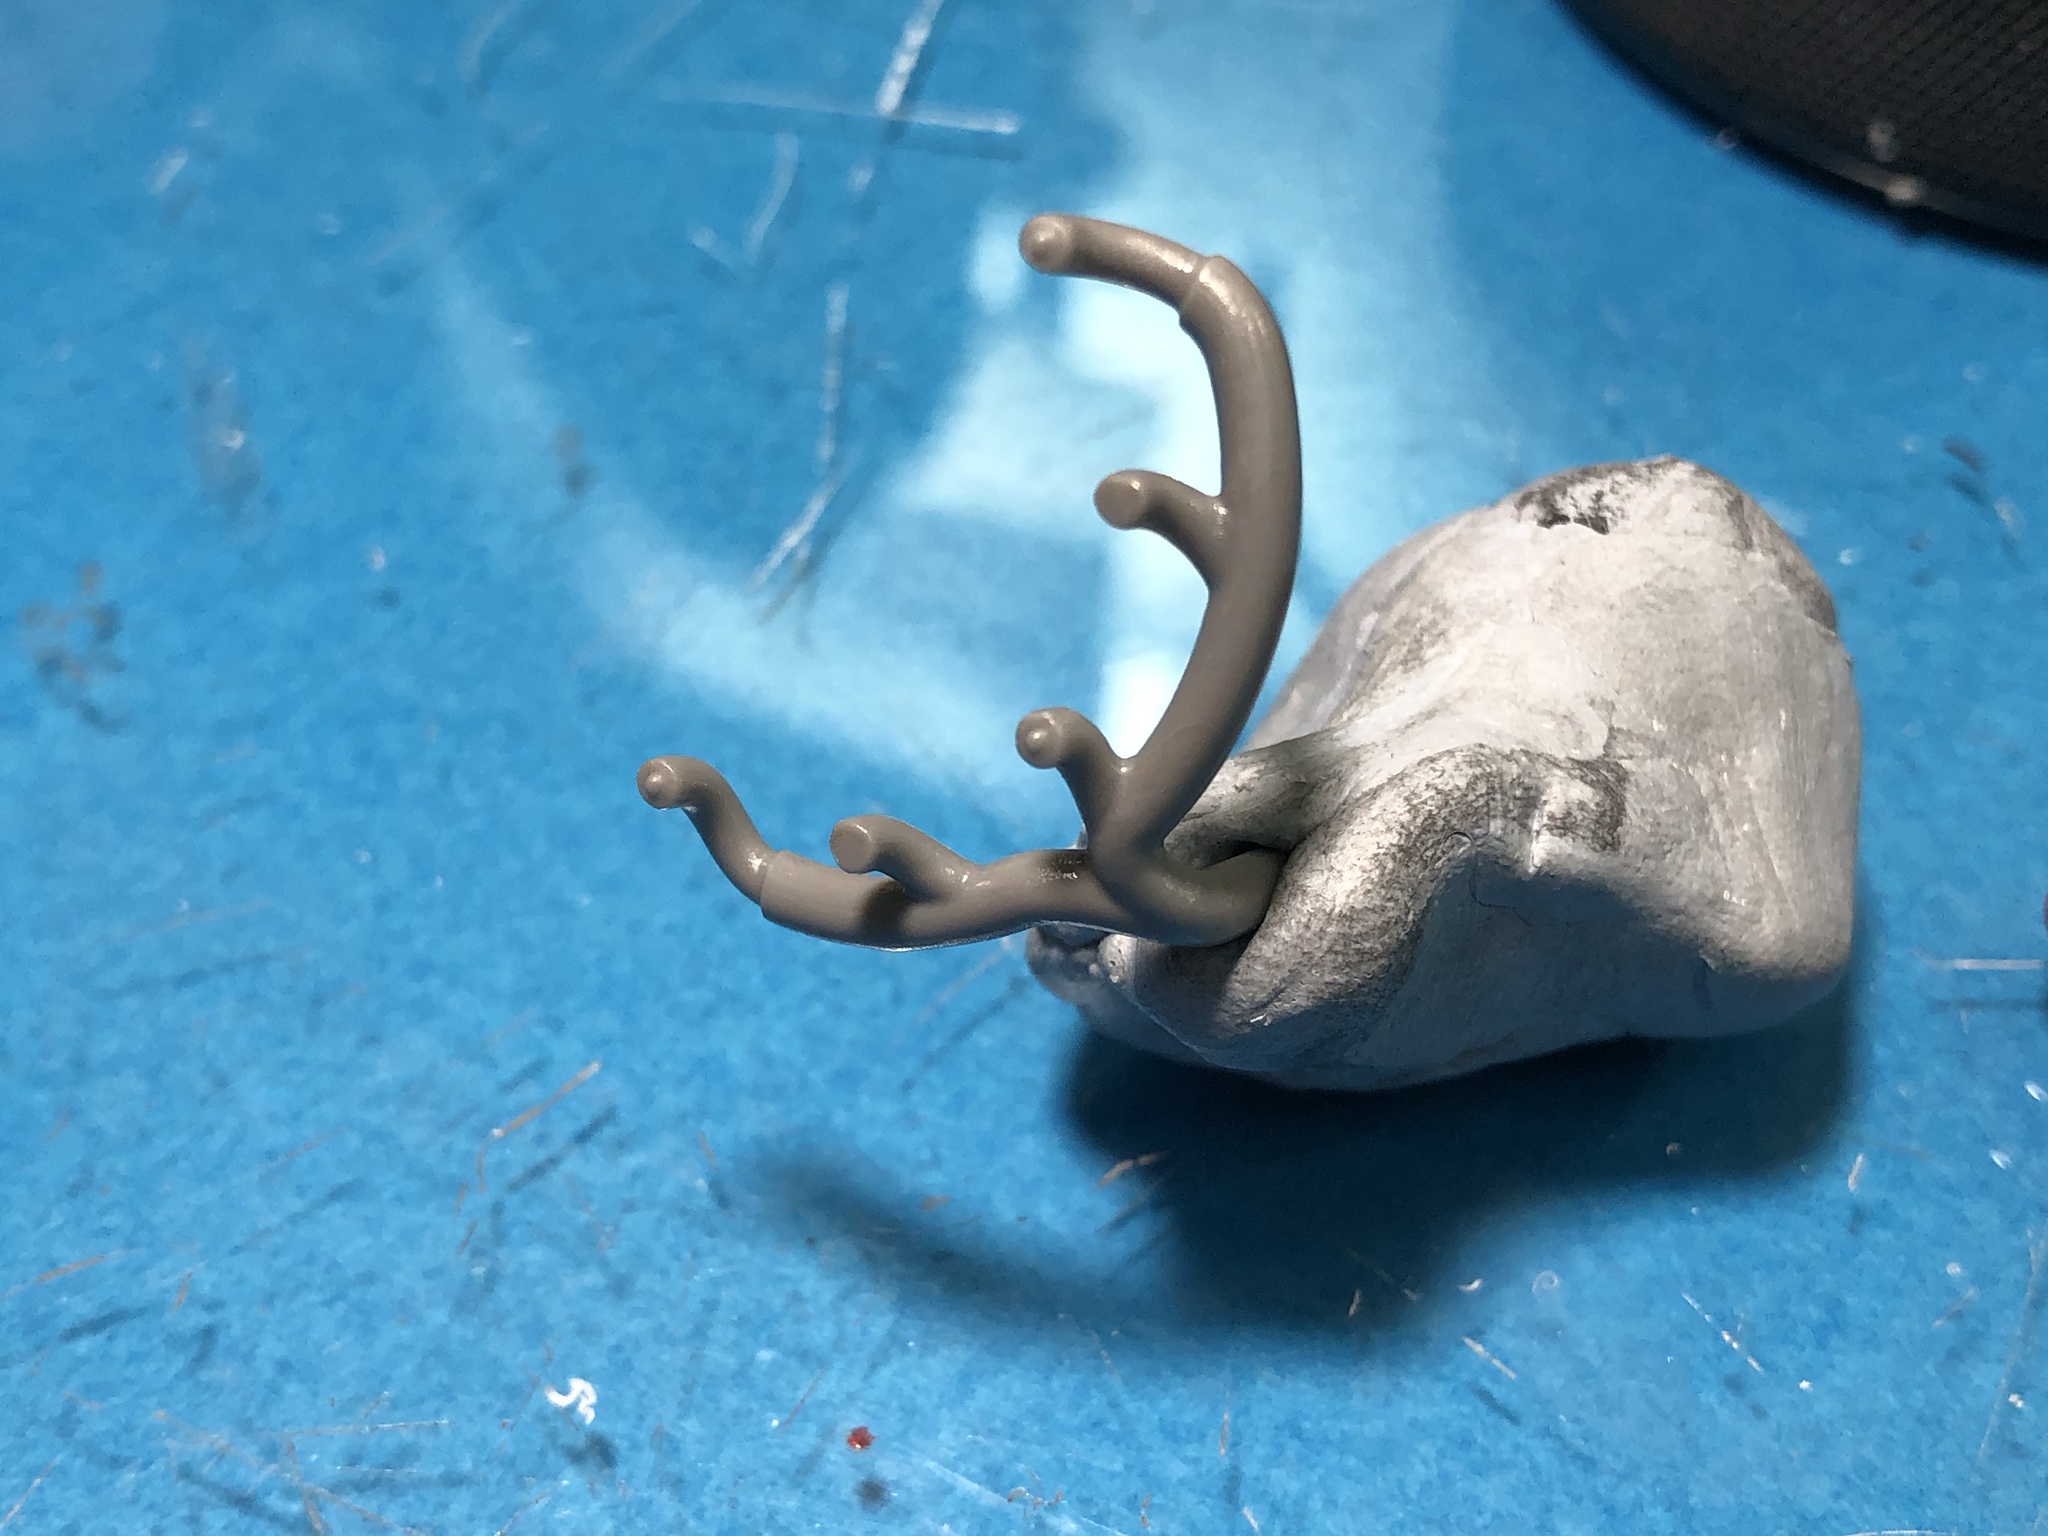
Here are some good pictures to see how much mold offset some of these parts have.
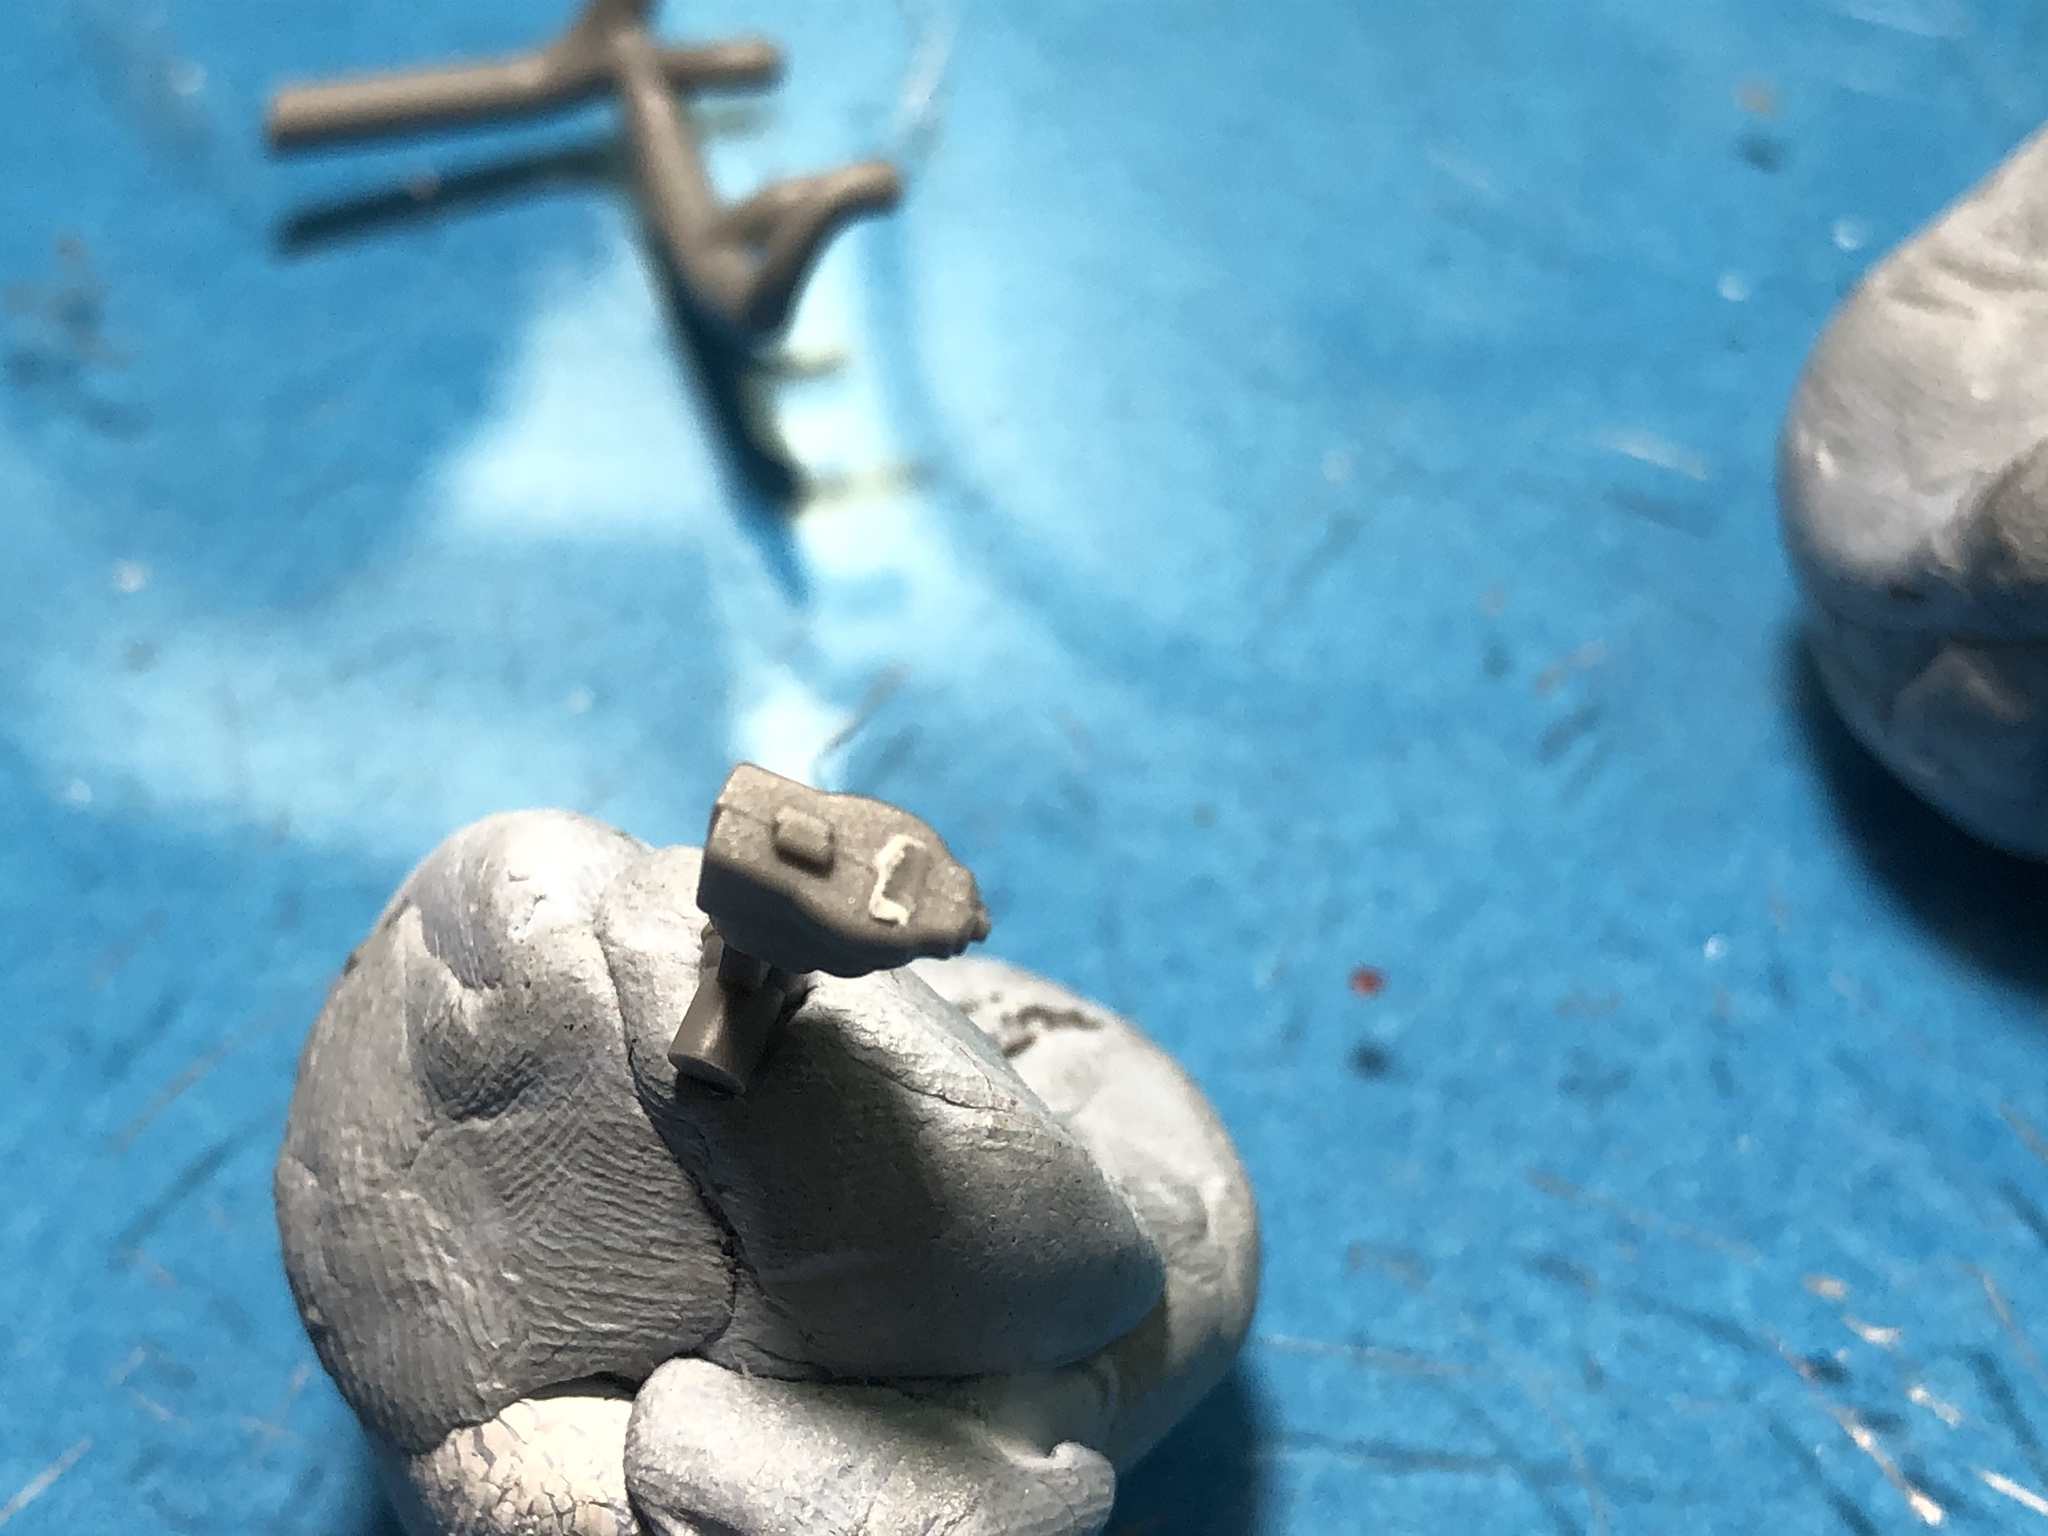
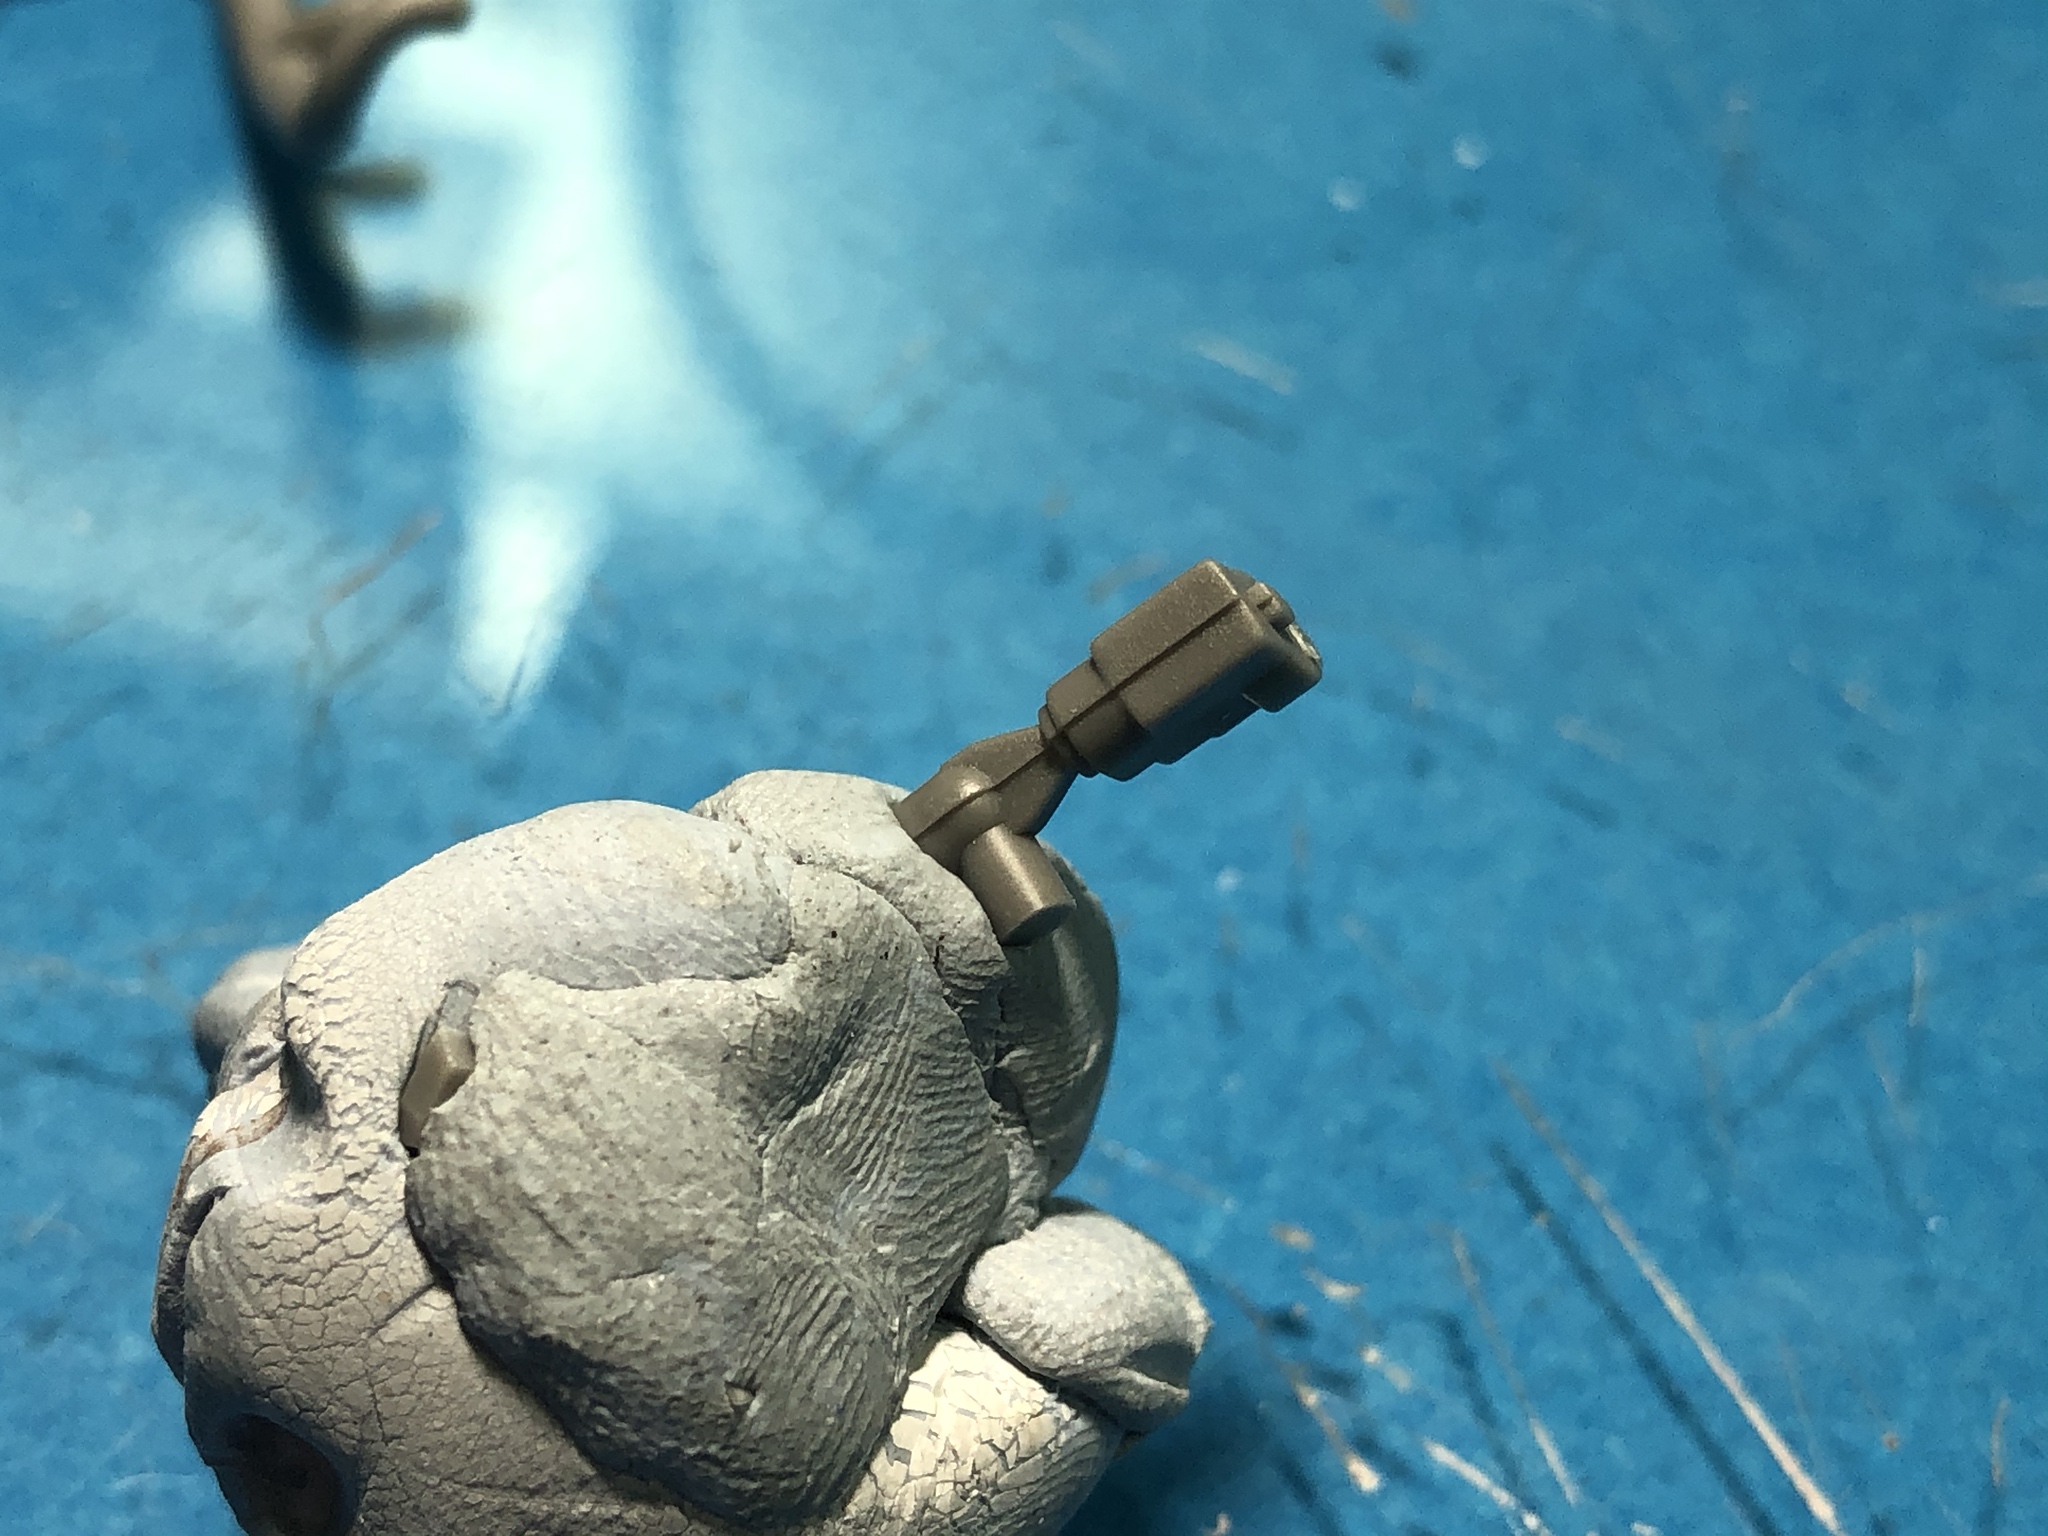
Paint drying before handling for assembly...
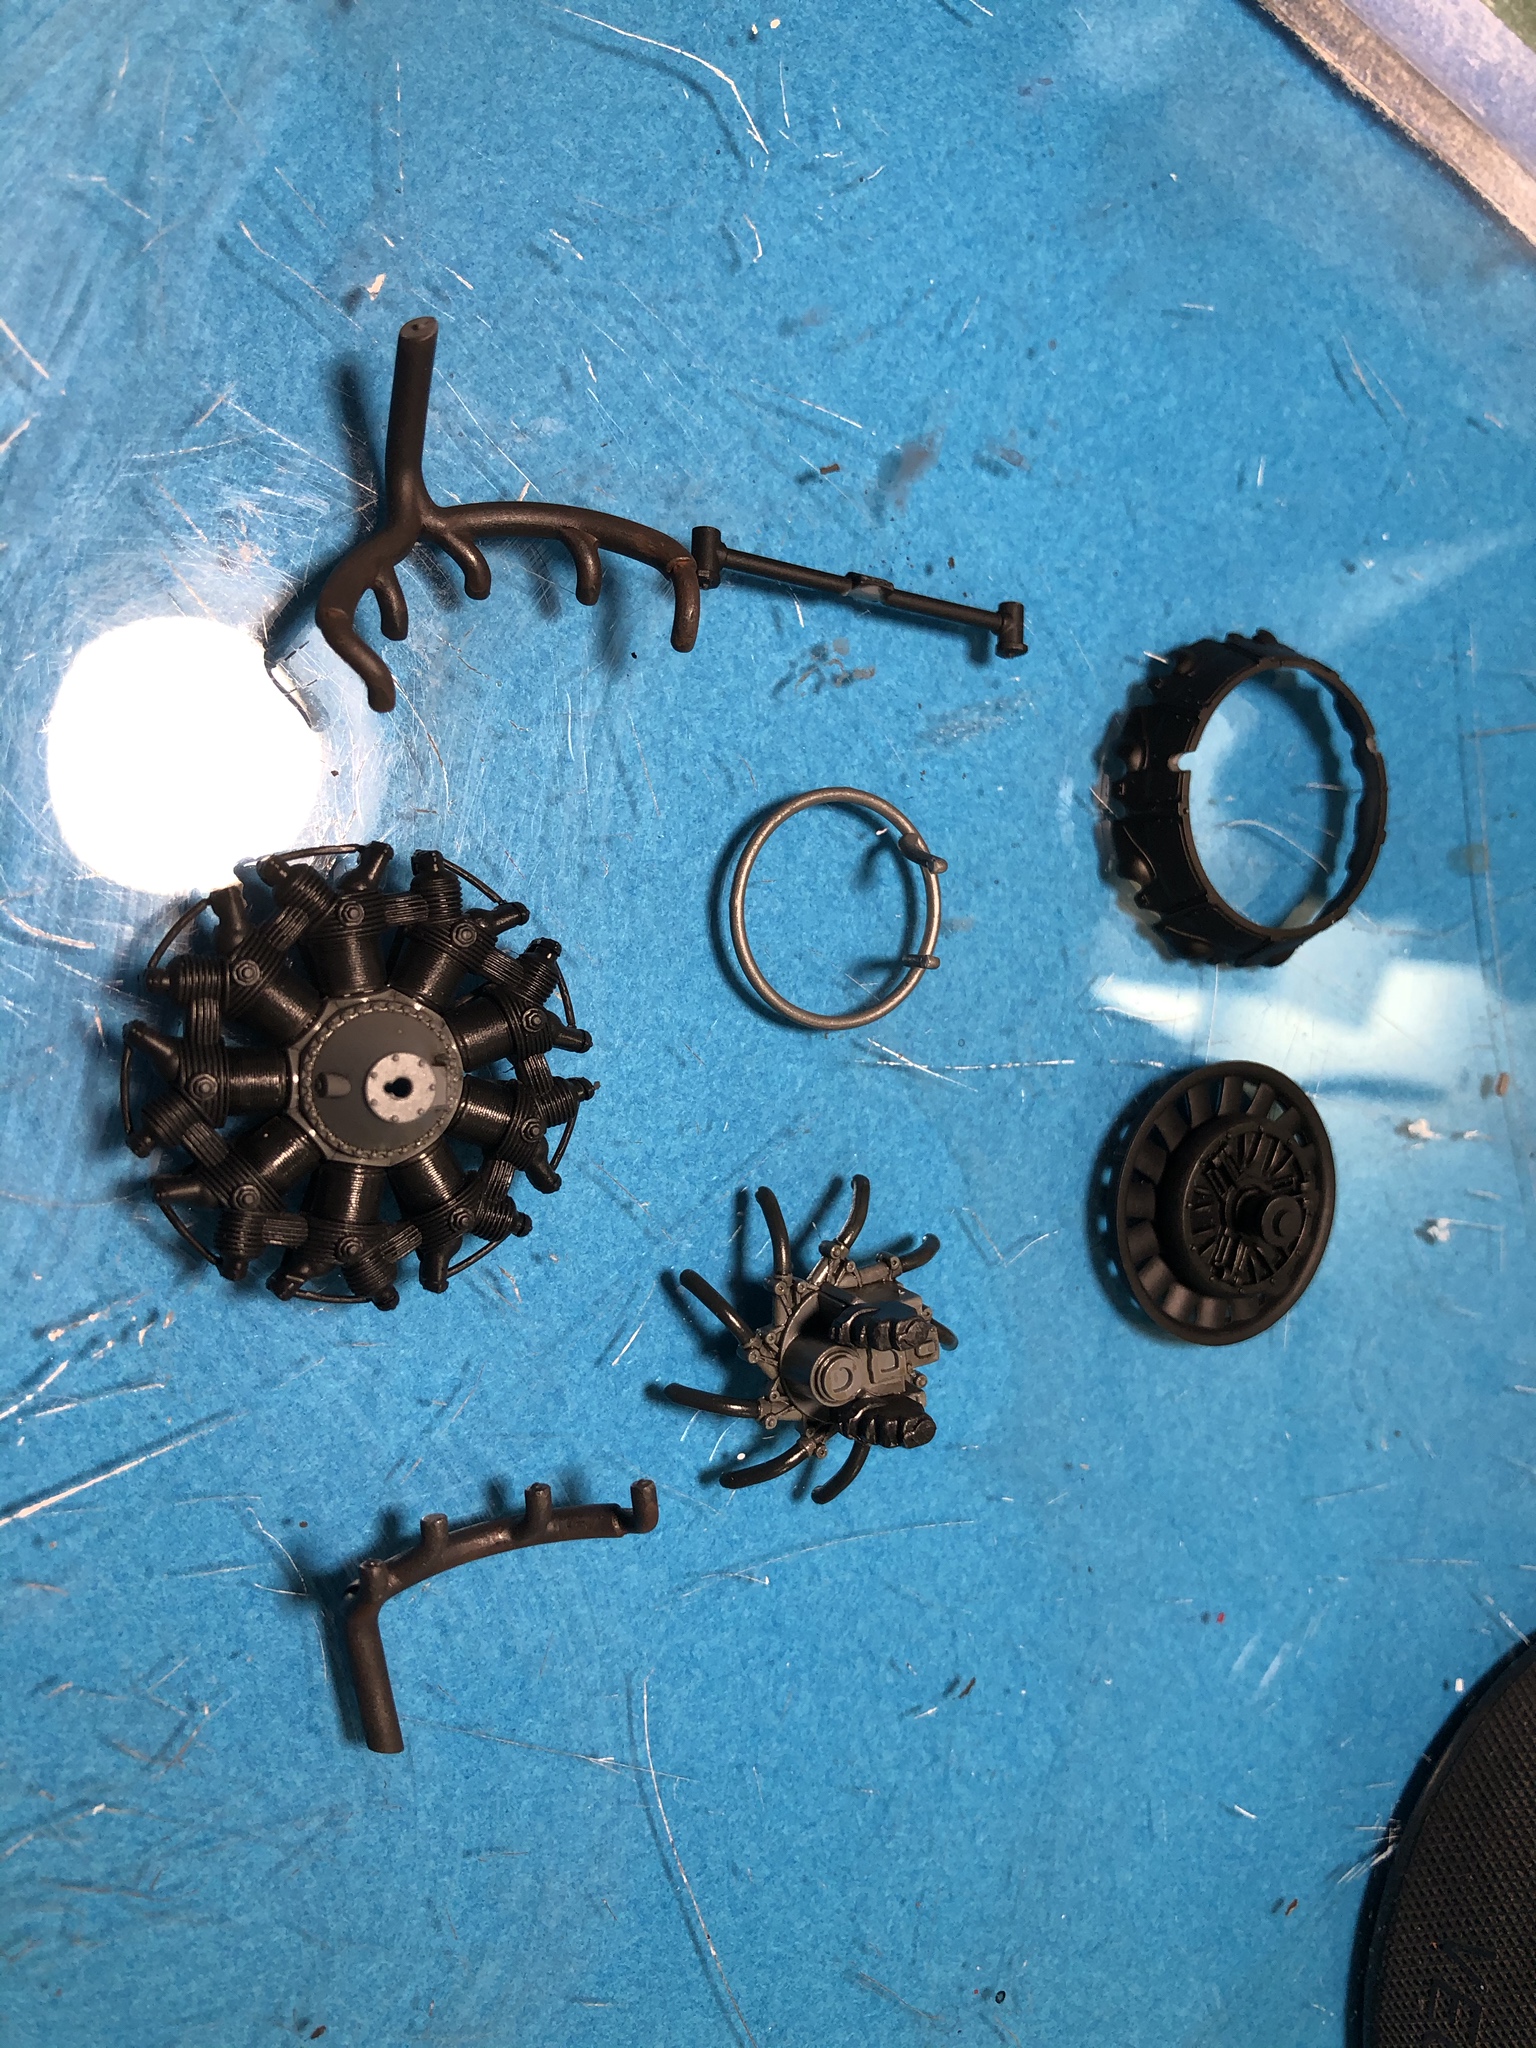
Color notes:
Carburetor- Tamiya Dark Sea Grey w/ clear gloss mixed in
Intake runners- Vallejo Black Grey w/ satin overcoat
Engine cylinders fan and shroud- Tamiya NATO Black w/ clear gloss mixed in
Exhaust- Tamiya NATO Black with AK Interactive Dark Aluminum dry-brushed on for metallics sheen then washed with Vallejo Dark Rust and Light Rust
Ignition Harness- Tamiya Dark Sea Grey w/ AK Dark Aluminum dry-brushed over it for sheen

The are also some pretty serious sink marks on the part that need to be taken care of.


Exhaust manifolds are also a lot of work to clean up. Large attachment points, and significant offset on some areas of the part.

Here is one of the exhaust manifolds after cleanup.

Here are some good pictures to see how much mold offset some of these parts have.


Paint drying before handling for assembly...

Color notes:
Carburetor- Tamiya Dark Sea Grey w/ clear gloss mixed in
Intake runners- Vallejo Black Grey w/ satin overcoat
Engine cylinders fan and shroud- Tamiya NATO Black w/ clear gloss mixed in
Exhaust- Tamiya NATO Black with AK Interactive Dark Aluminum dry-brushed on for metallics sheen then washed with Vallejo Dark Rust and Light Rust
Ignition Harness- Tamiya Dark Sea Grey w/ AK Dark Aluminum dry-brushed over it for sheen

PRH001

Joined: June 16, 2014
KitMaker: 681 posts
Armorama: 603 posts

Posted: Sunday, October 13, 2019 - 01:49 PM UTC
Beginning assembly of the engine package components. The shroudís only attachment is the bar attaching the shroud to the engine front. Fit is good and itís solid enough once the cement dries.
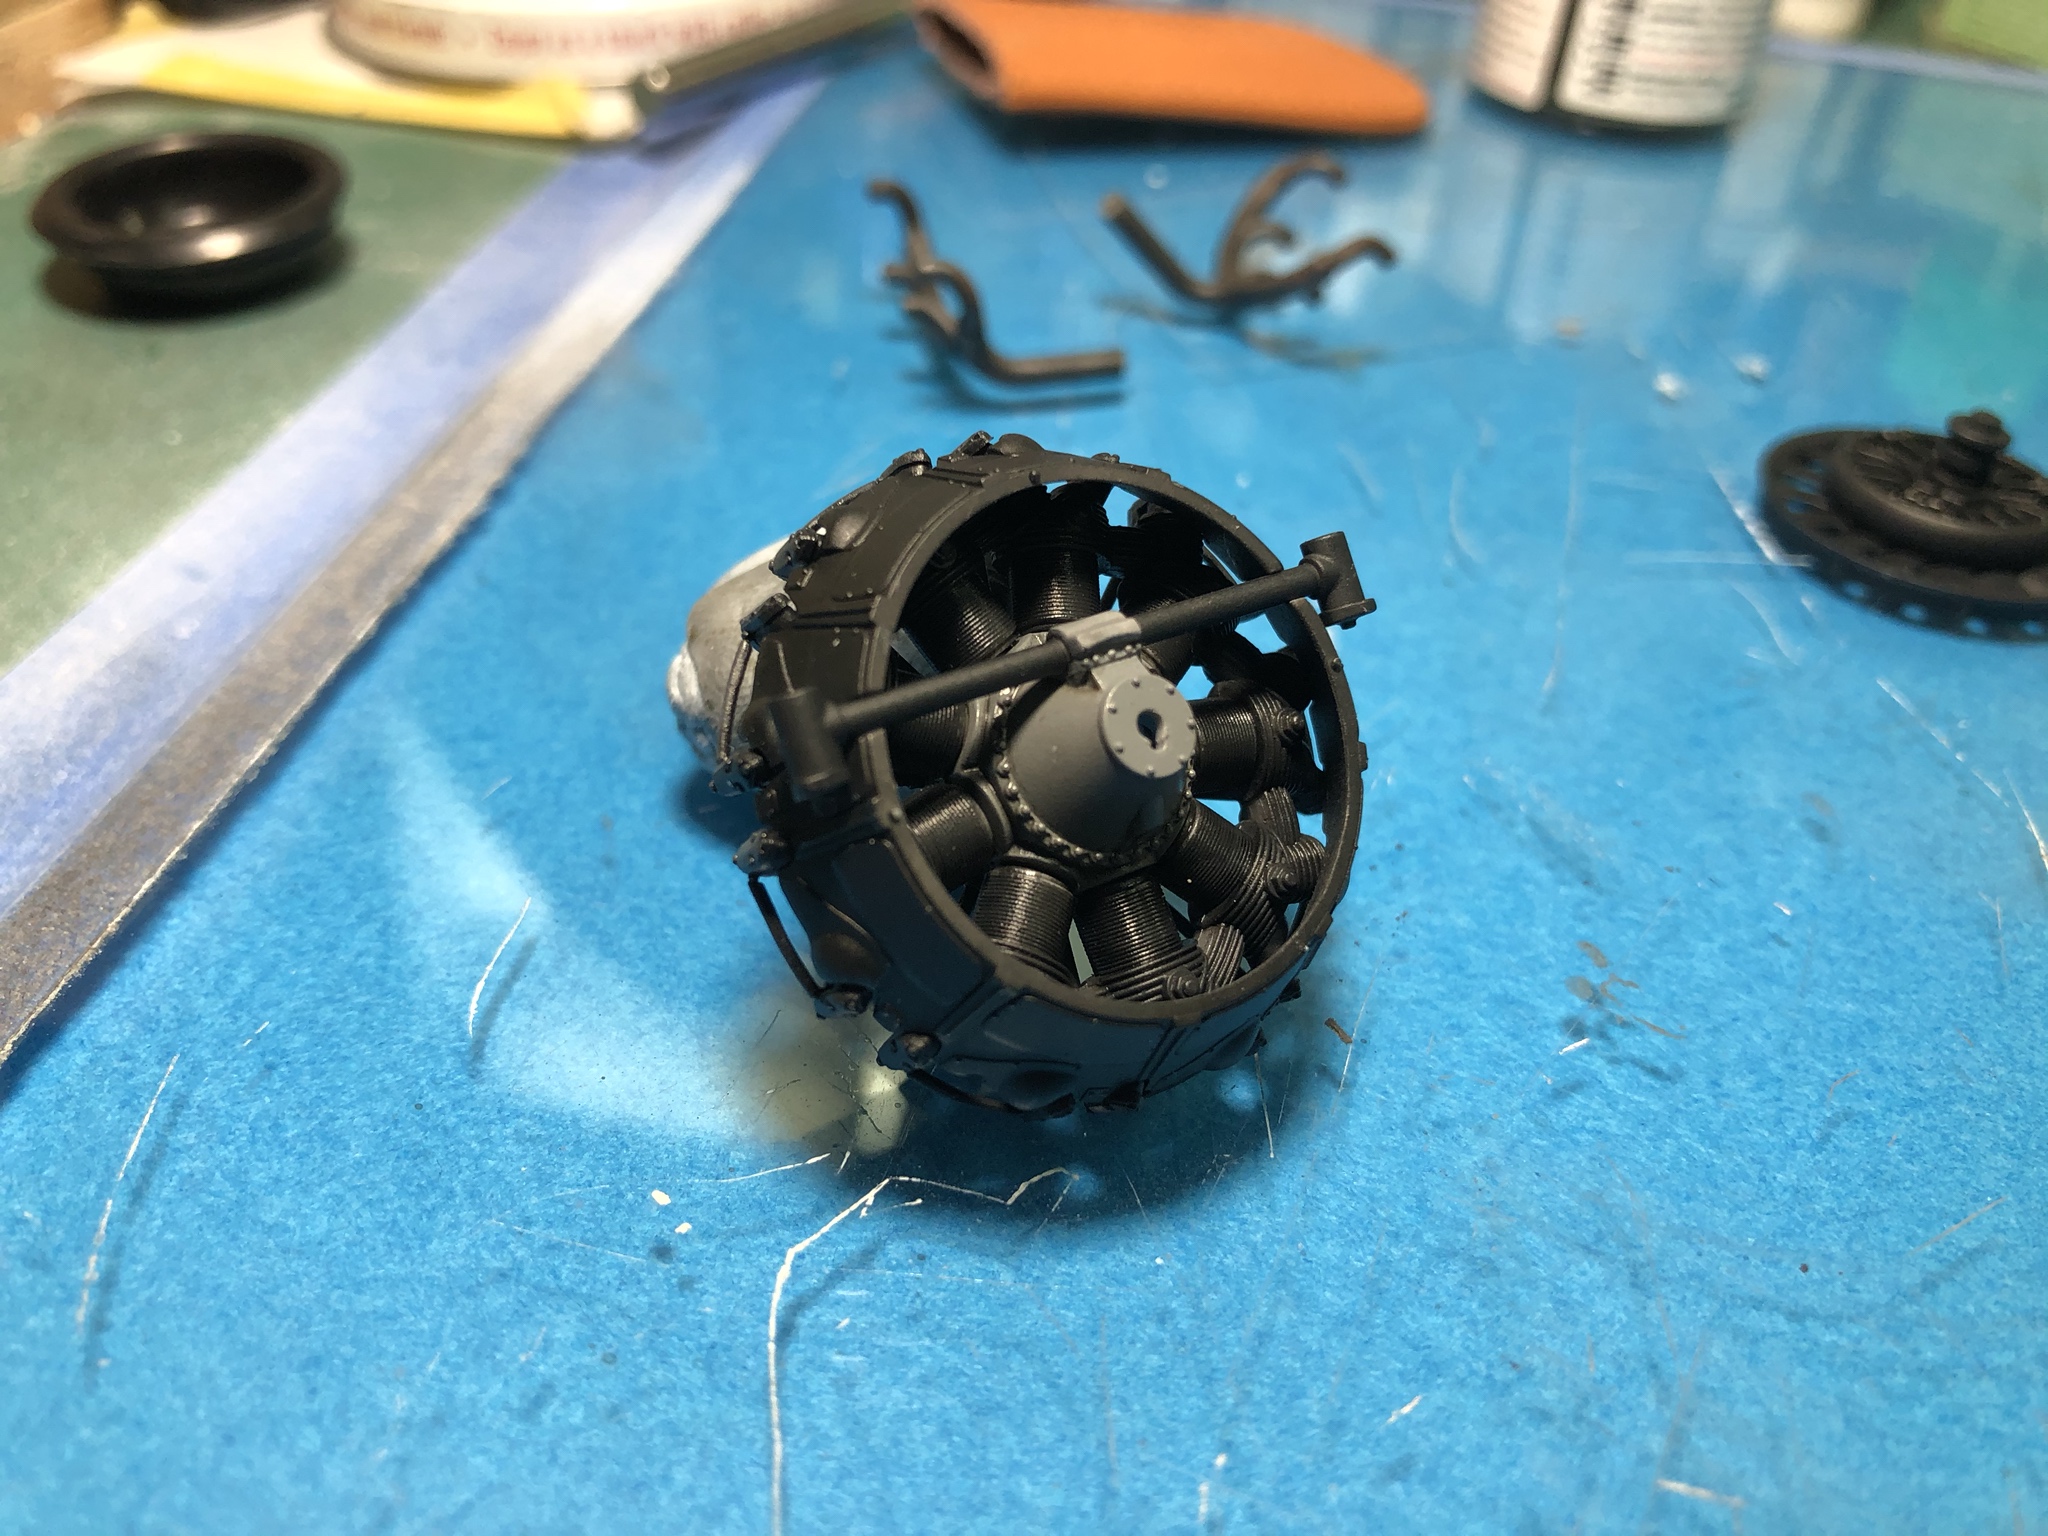
The clutch and fan assembly fit together well and fit easily to the shroud. There are very small pips that align the fan to the shroud so it only fits one way.
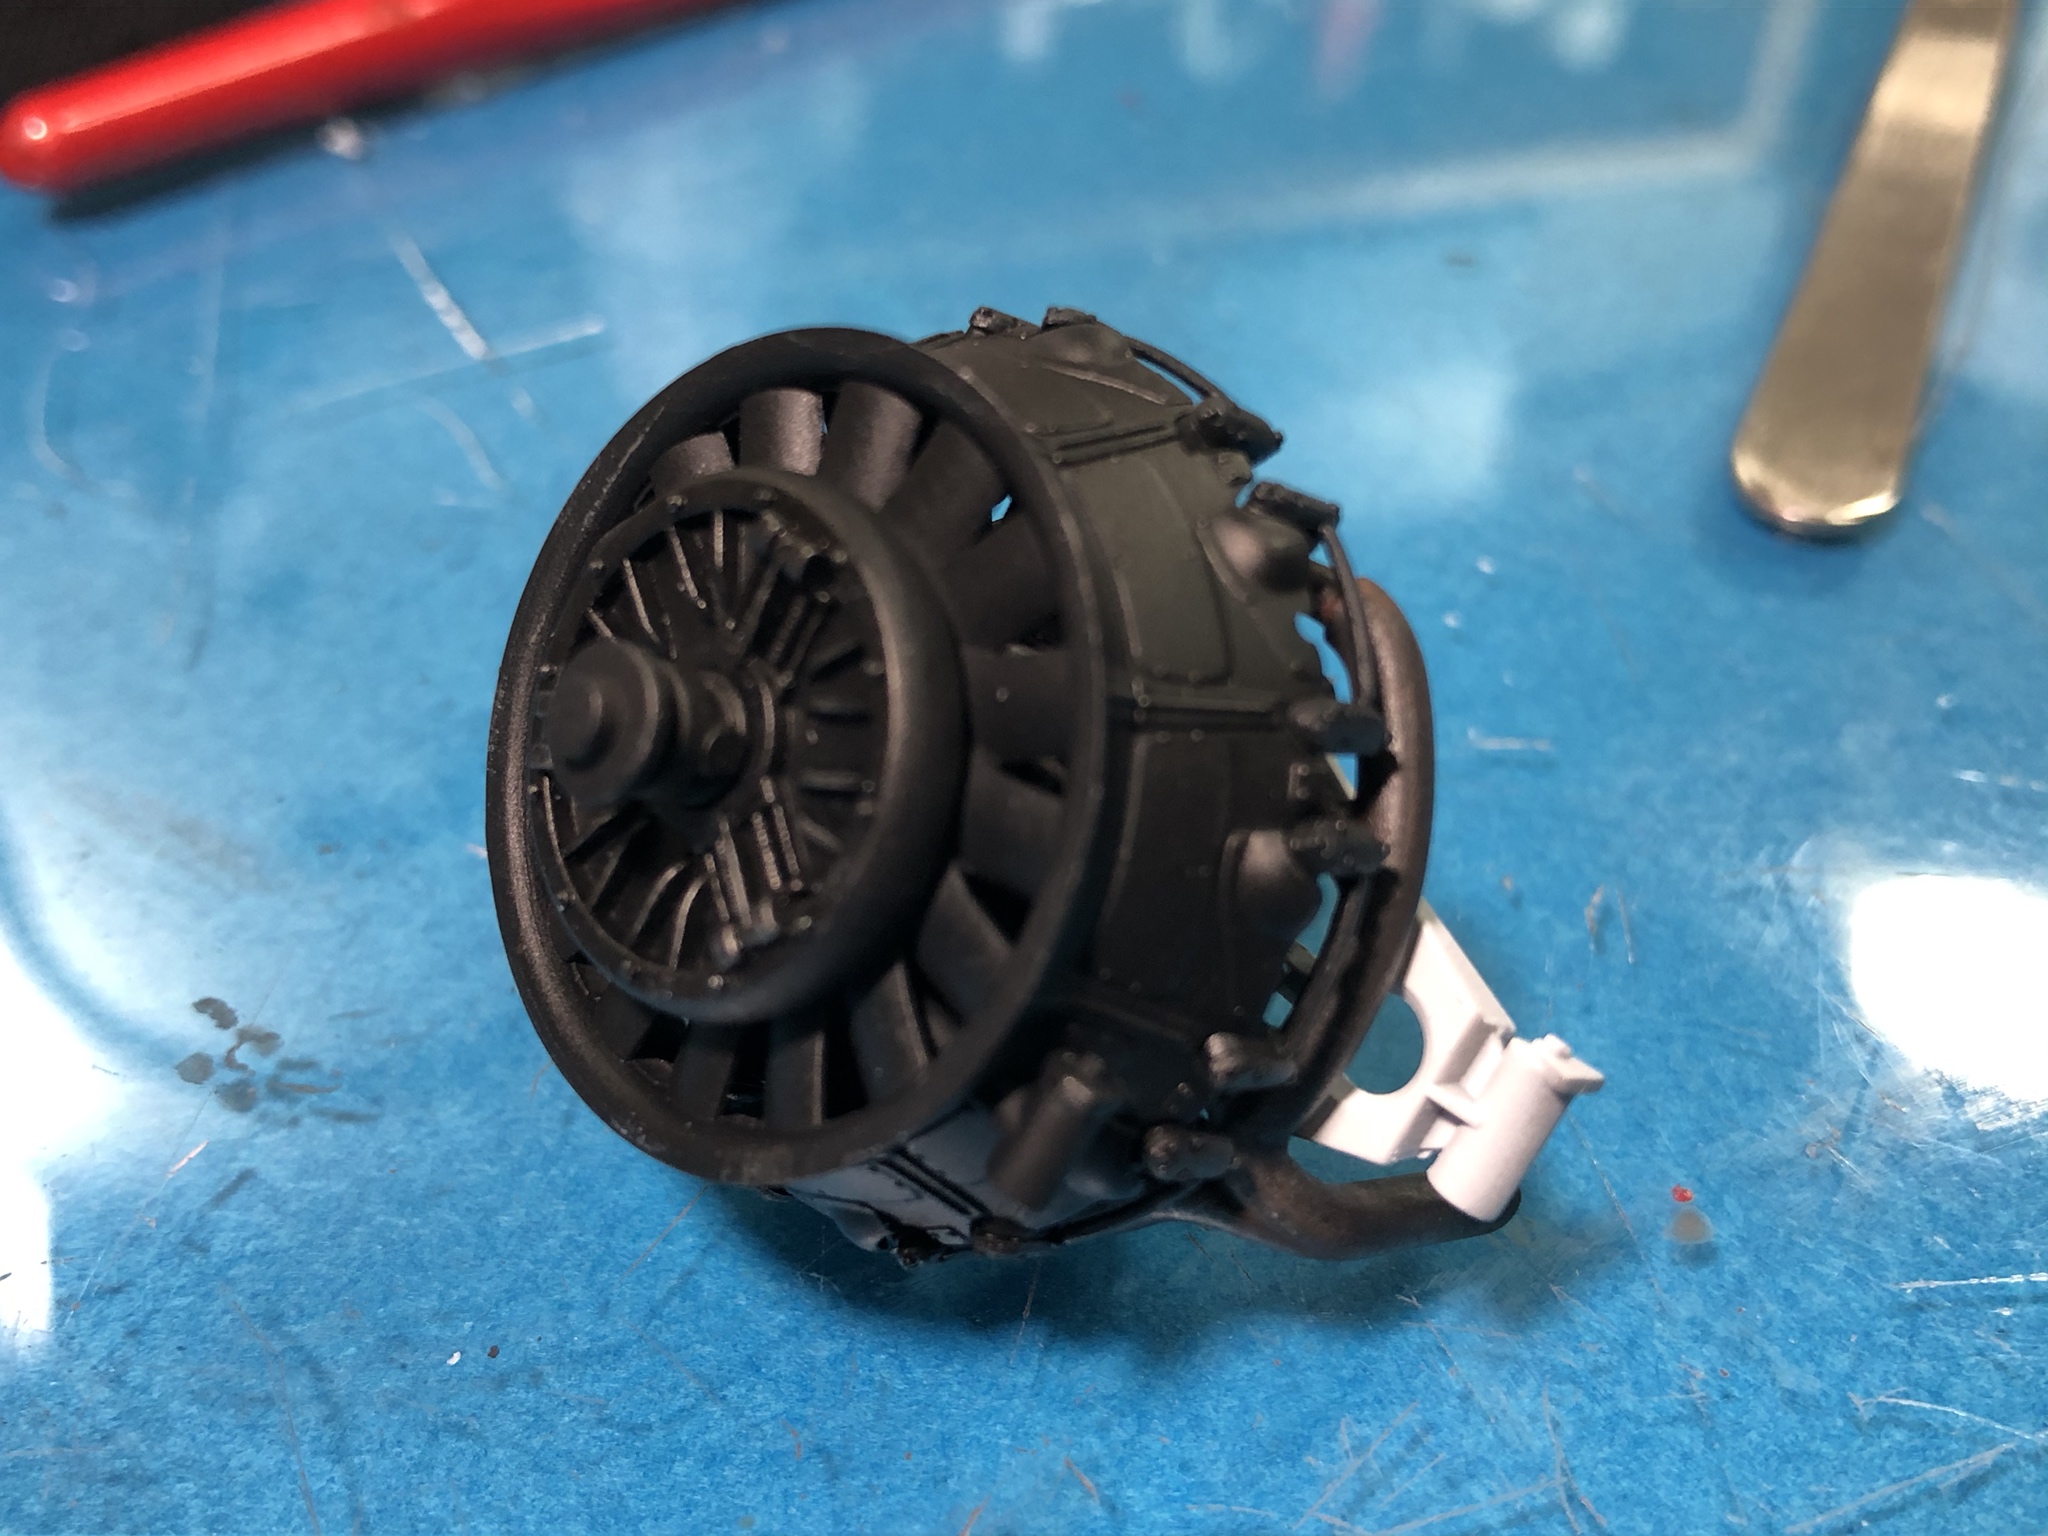
The fit of the ignition harness is good but only has the attachments to the magnetos to locate it. The carburetor/intake runner assembly is the attached to the rear side of the engine. The exhaust manifolds fit perfectly with minimal fuss.
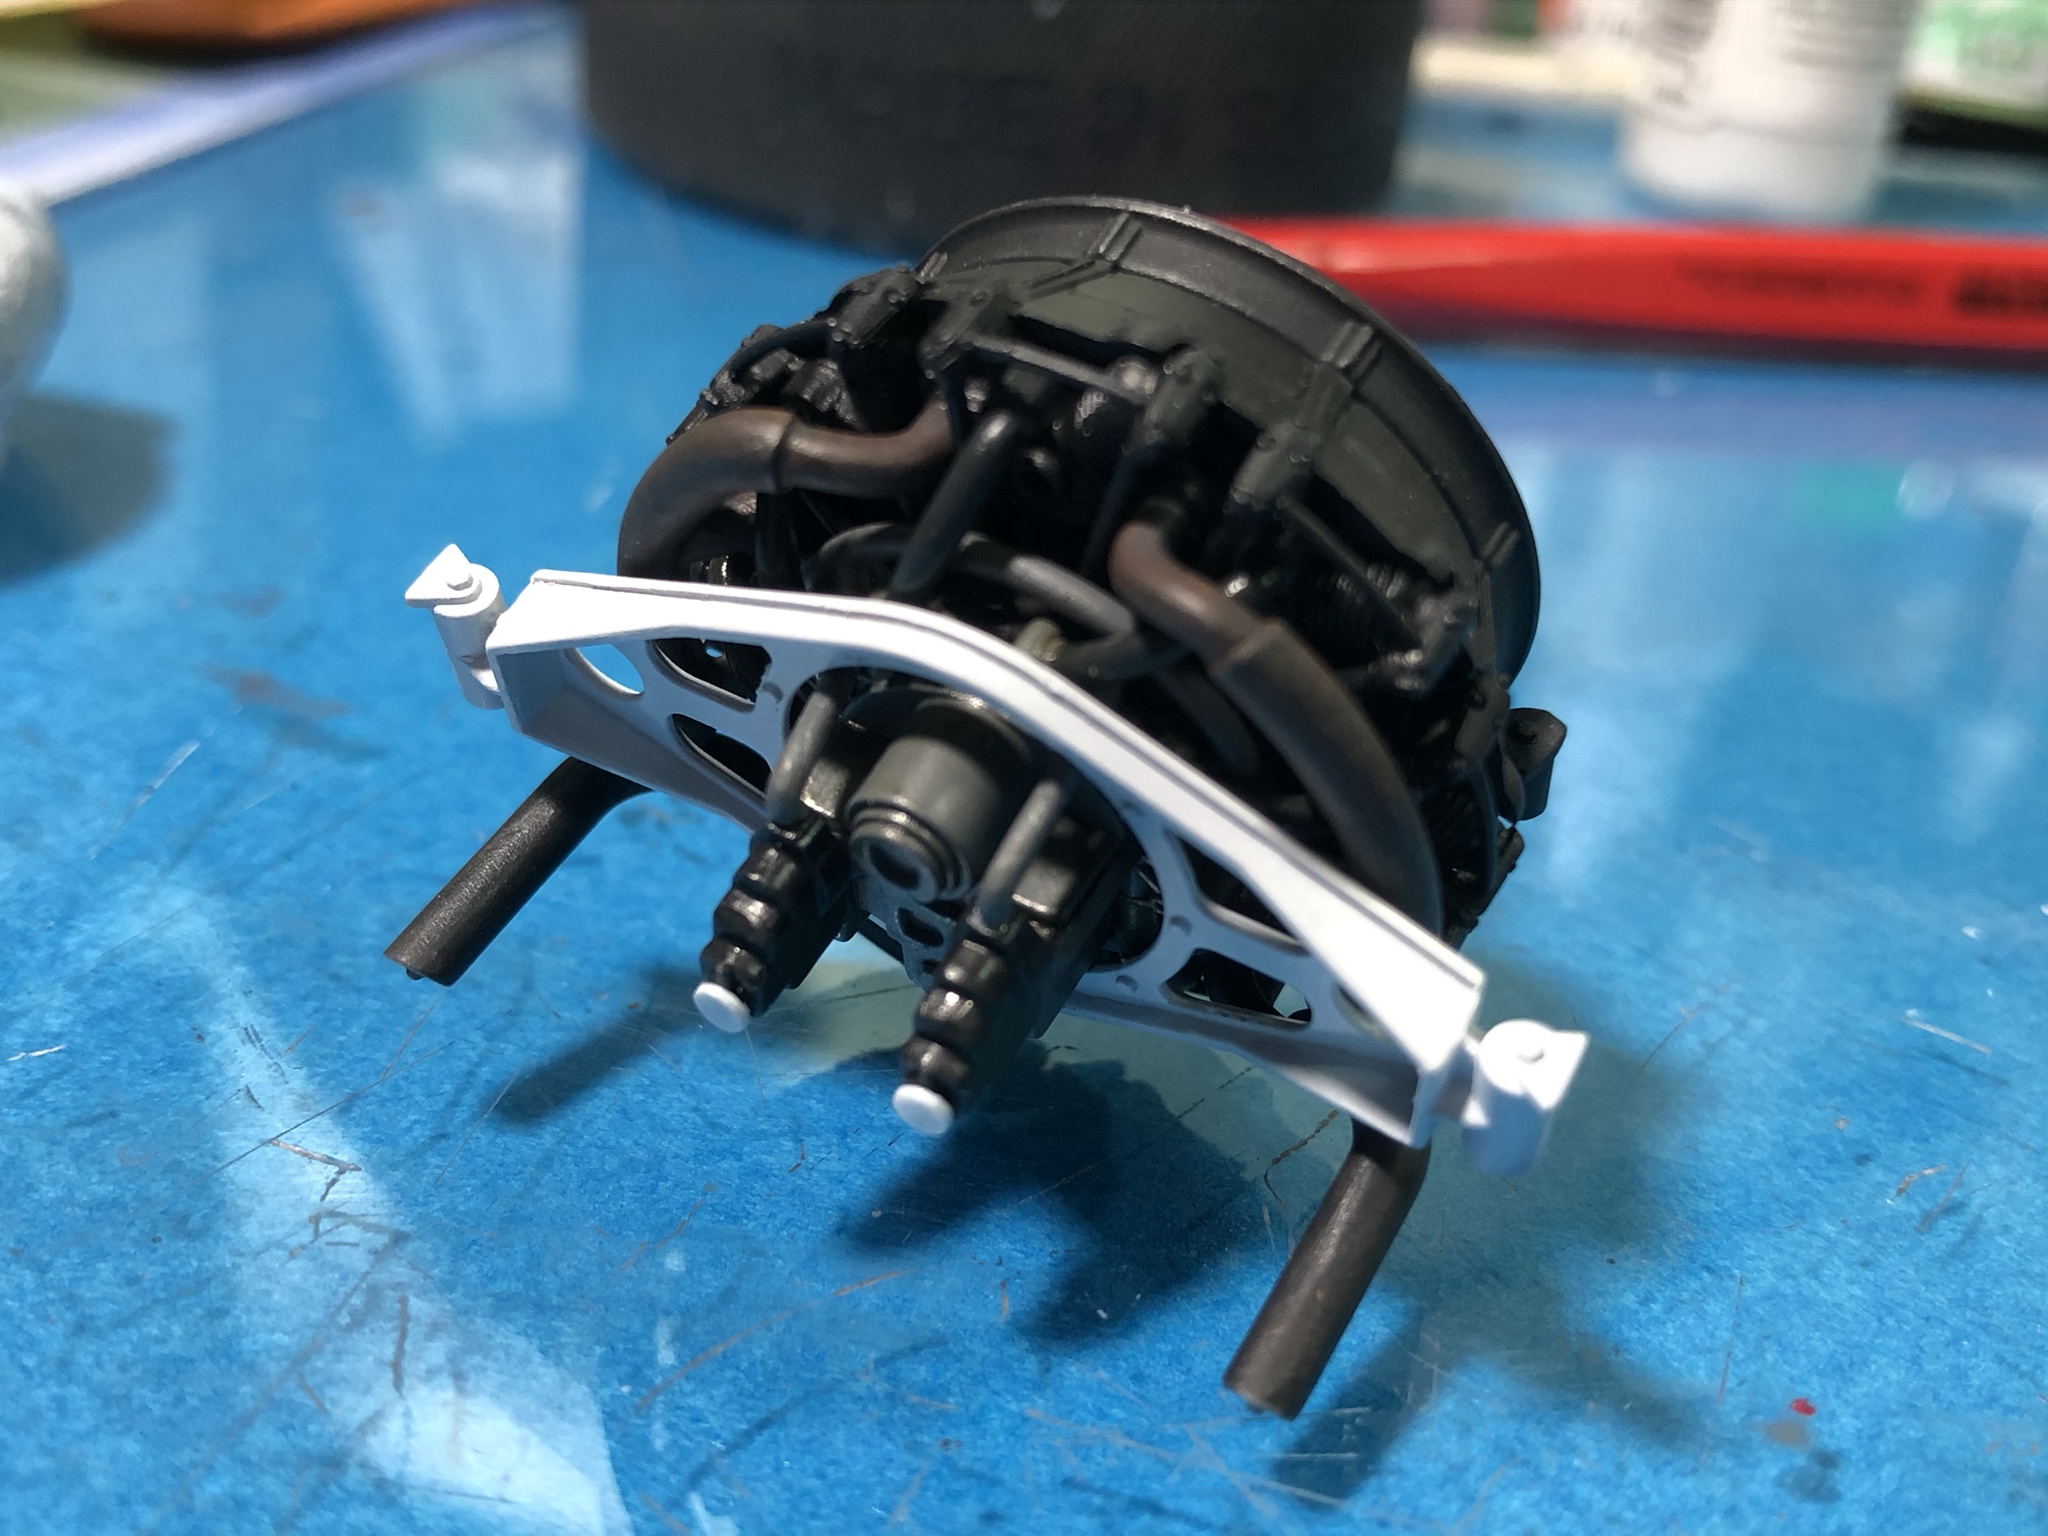
The engine mount has pads and holes that align with pips on the carburetor assembly. There is not a lot of room to make these joints, so thicker cement that doesnít evaporate quickly is recommended. The white circles on the magnetos are replacing detail that was too offset to leave since the area will be visible with the rear doors open.

The clutch and fan assembly fit together well and fit easily to the shroud. There are very small pips that align the fan to the shroud so it only fits one way.

The fit of the ignition harness is good but only has the attachments to the magnetos to locate it. The carburetor/intake runner assembly is the attached to the rear side of the engine. The exhaust manifolds fit perfectly with minimal fuss.

The engine mount has pads and holes that align with pips on the carburetor assembly. There is not a lot of room to make these joints, so thicker cement that doesnít evaporate quickly is recommended. The white circles on the magnetos are replacing detail that was too offset to leave since the area will be visible with the rear doors open.
nikon1

Joined: April 11, 2005
KitMaker: 622 posts
Armorama: 605 posts

Posted: Sunday, October 13, 2019 - 02:07 PM UTC
She's coming along nicely. Keep us posted on the build. Also like the use of the hockey puck.
Cheers
Charlie
Cheers
Charlie

PRH001

Joined: June 16, 2014
KitMaker: 681 posts
Armorama: 603 posts

Posted: Sunday, October 13, 2019 - 05:46 PM UTC
Yep, that worn hockey puck is an essential modeling tool for me. A friend of mine gave it to me about 15 years ago, and I use it all of the time for trimming fragile parts. Itís hard enough to keep parts from bending as you trim and soft enough to keep from ruining blades like glass or acrylic will. Also, the parts tend to stand out really well on the black background so you can see when you still have more trimming to do.
Here Iím using it to trim up sprue attachment points on engine bay lines.
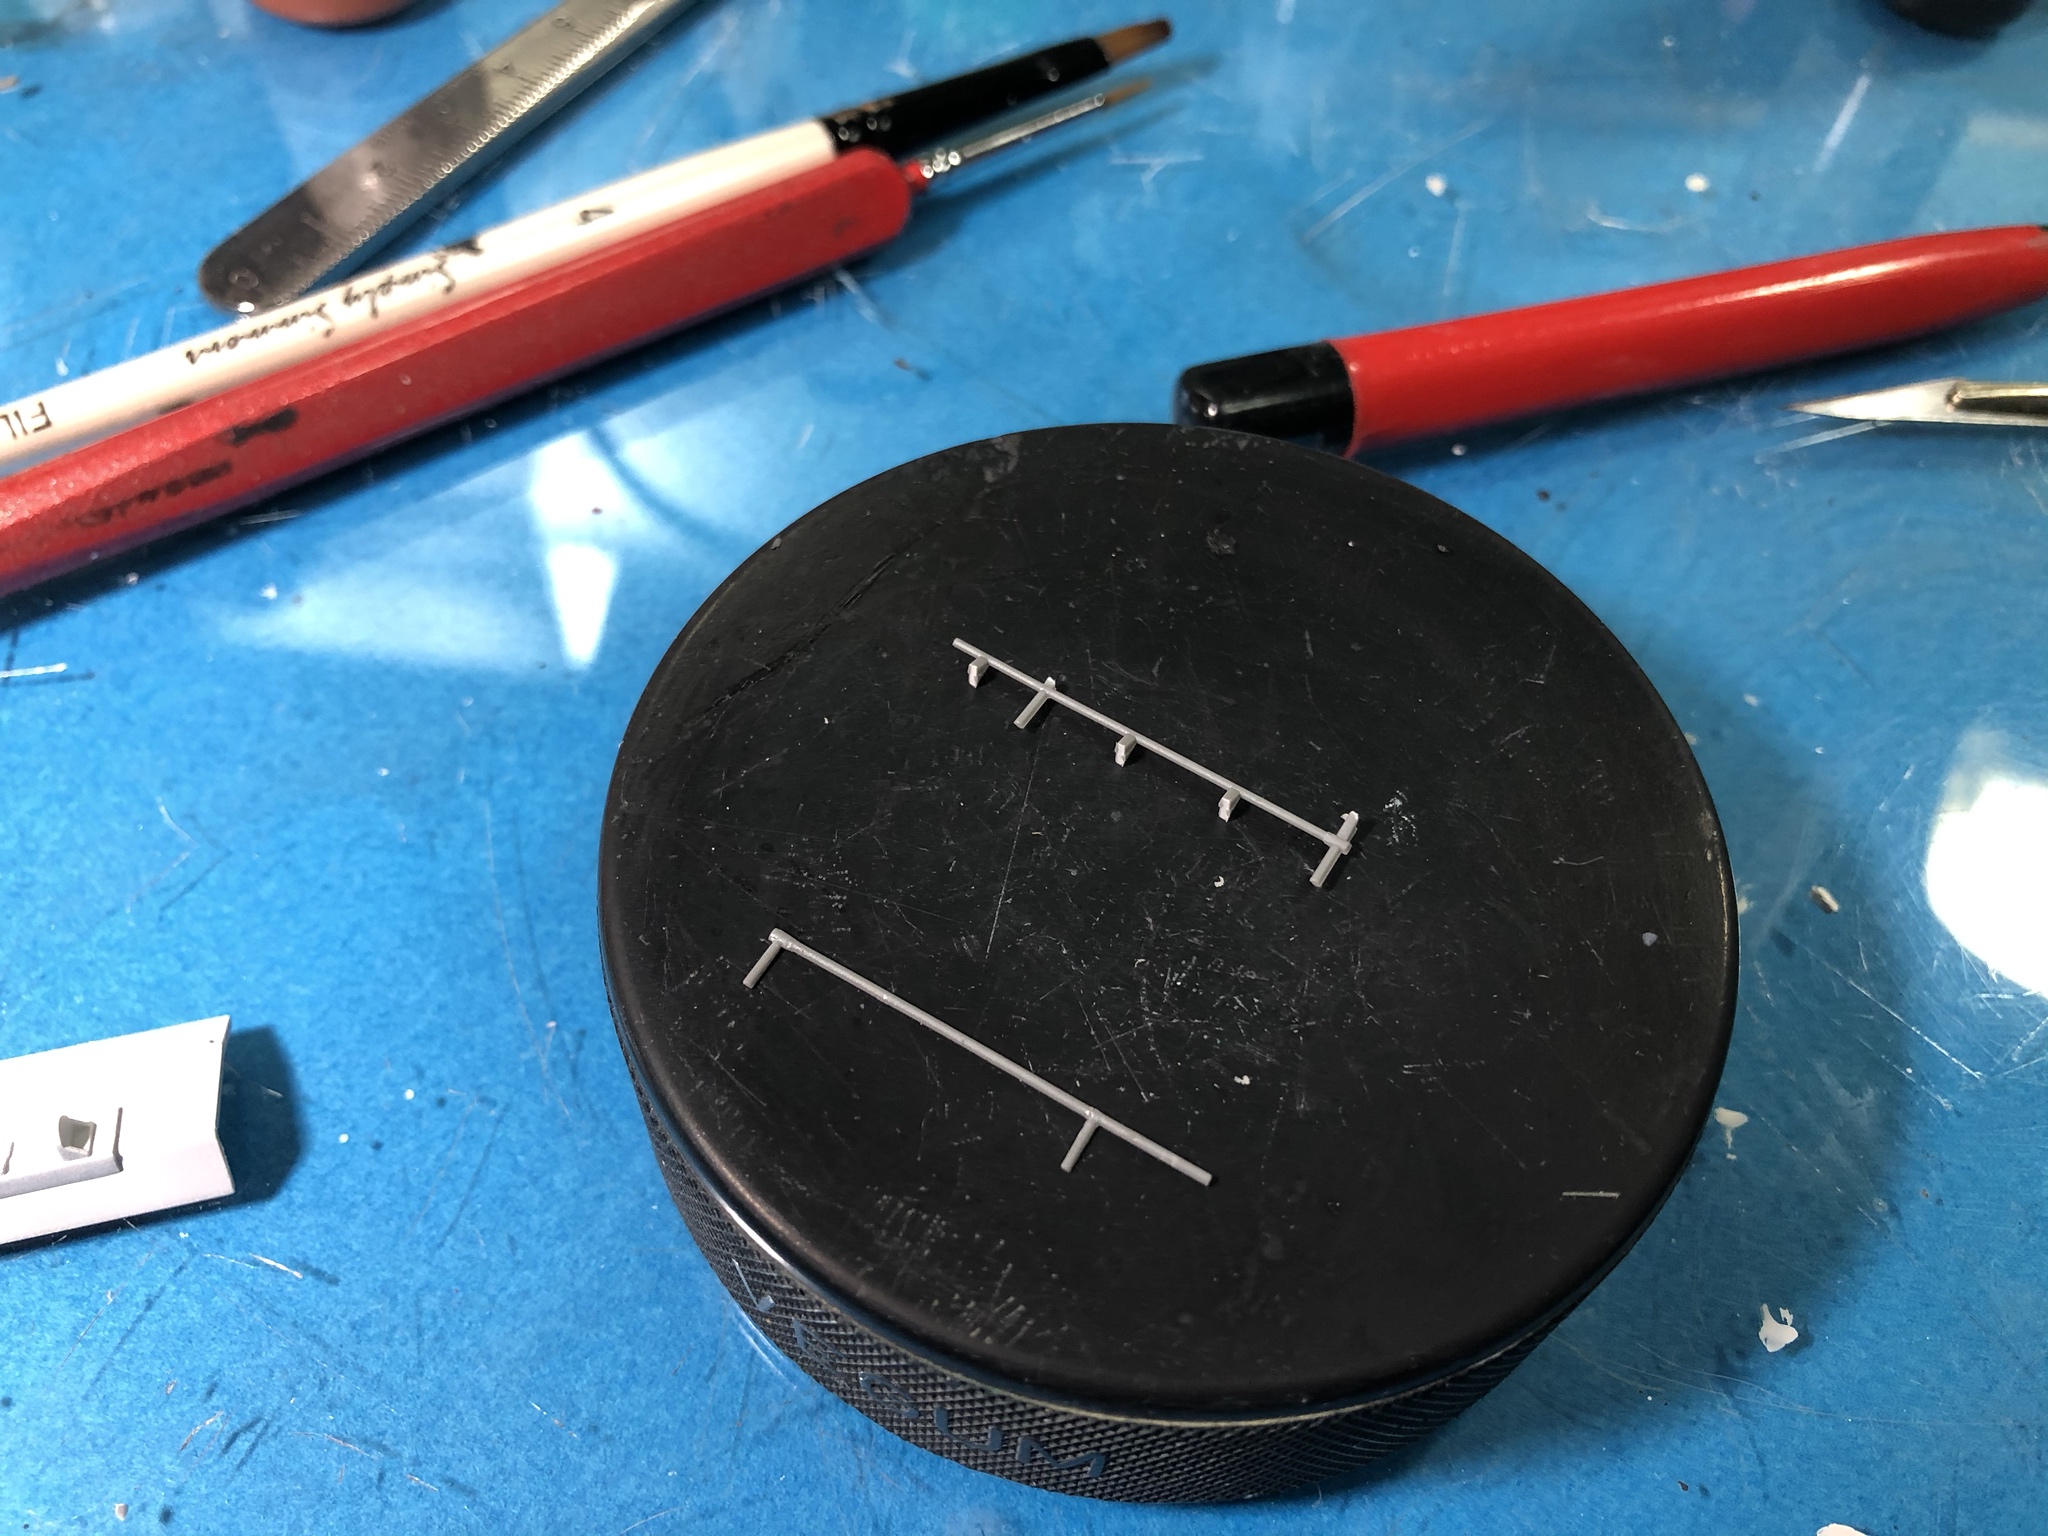
I use a chisel tip blade and shave the nubs off of the lines.
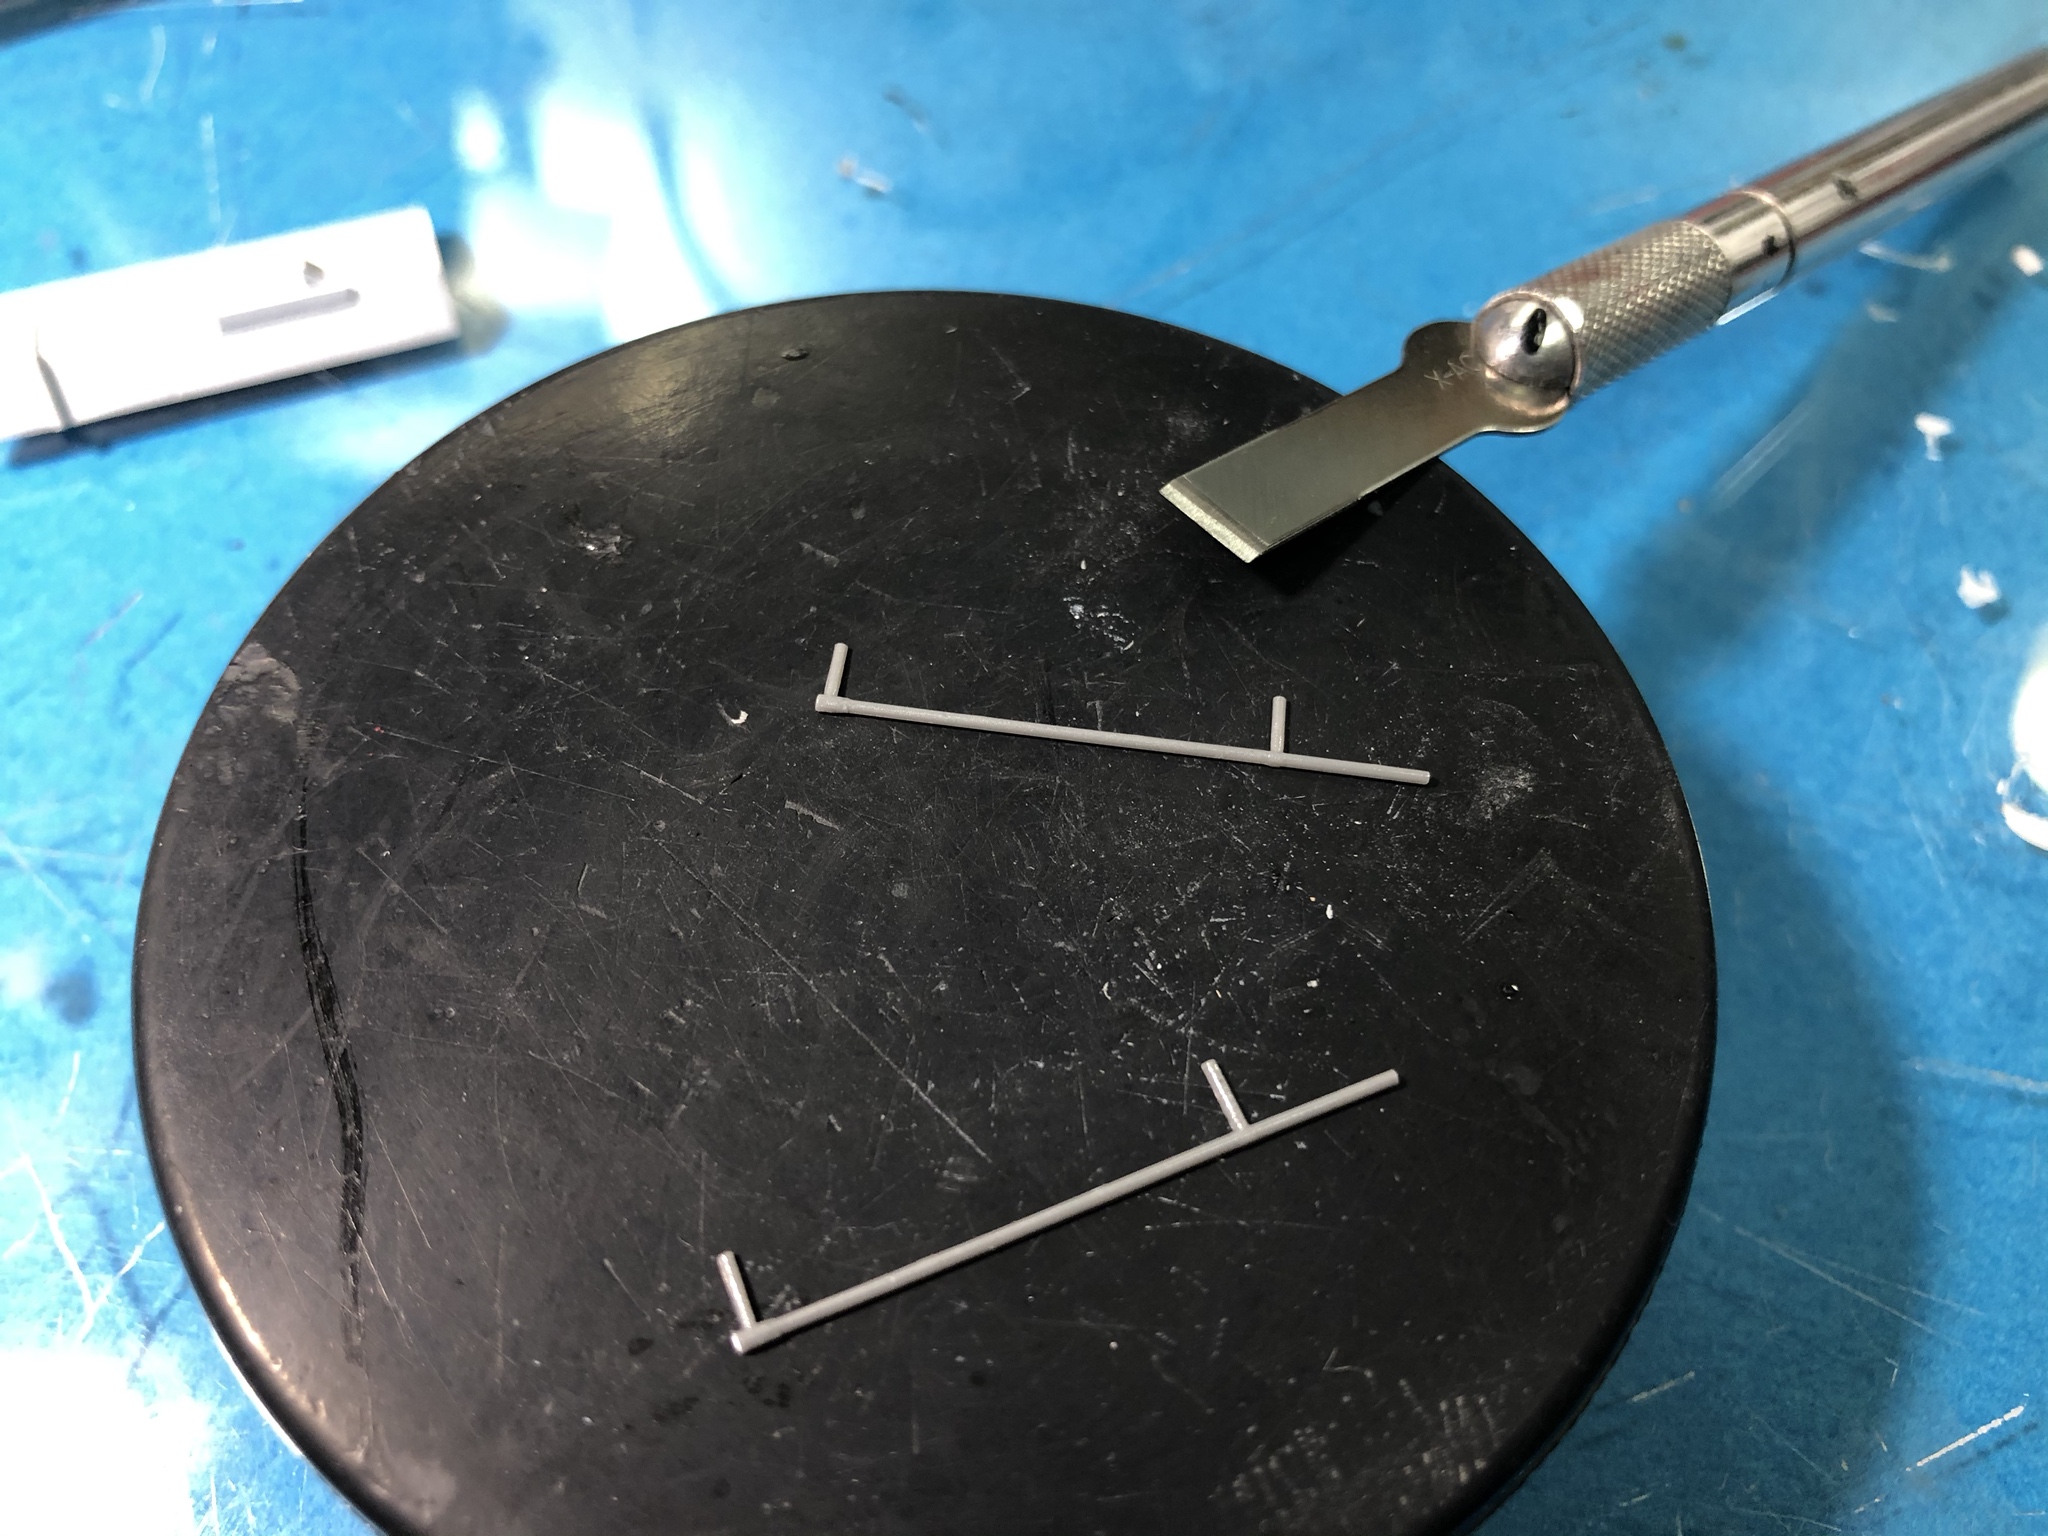
It also serves as an easily movable parts painting and drying area so that I can paint and then move the parts without handling them too much. Wipe off the paint with the appropriate thinner and itís back to its old high contrast self.
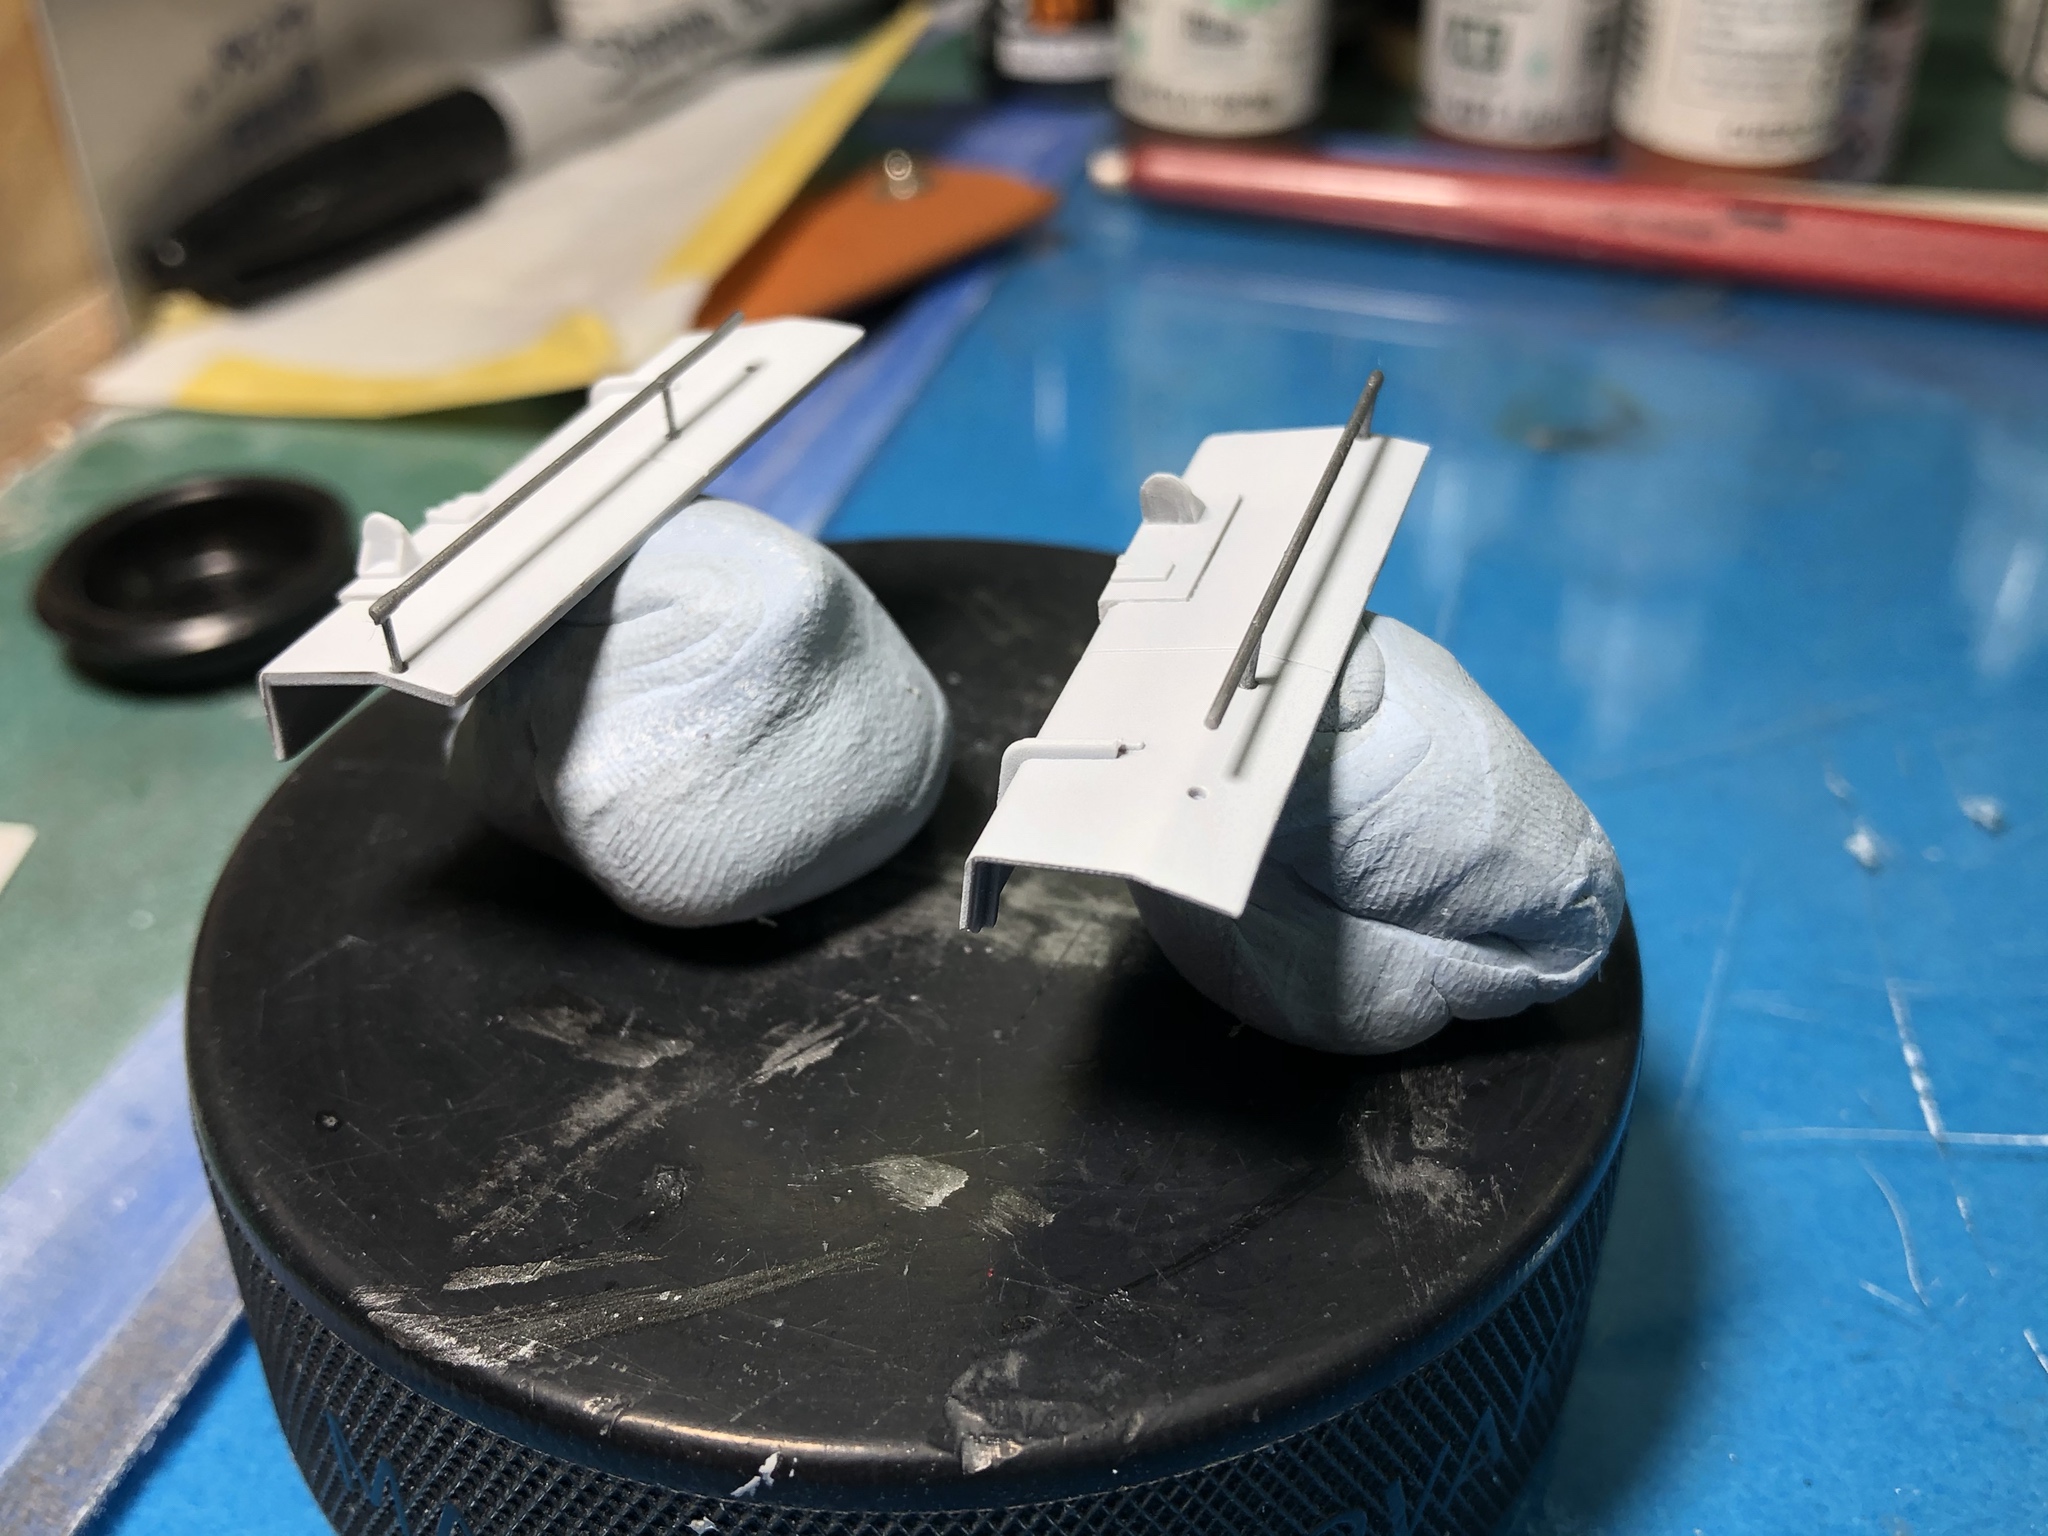
Here Iím using it to trim up sprue attachment points on engine bay lines.

I use a chisel tip blade and shave the nubs off of the lines.

It also serves as an easily movable parts painting and drying area so that I can paint and then move the parts without handling them too much. Wipe off the paint with the appropriate thinner and itís back to its old high contrast self.

rfbaer

Joined: June 12, 2007
KitMaker: 1,866 posts
Armorama: 1,696 posts

Posted: Monday, October 14, 2019 - 02:37 PM UTC
Good build log, and I'm gonna go get a hockey puck. Oddly enough, with a hole drilled through the middle, they also make great body mount bushings on Jeeps.

PRH001

Joined: June 16, 2014
KitMaker: 681 posts
Armorama: 603 posts

Posted: Monday, October 14, 2019 - 03:35 PM UTC
Managed to get the accessory section cleaned up, painted and installed. For me it was easier to cut the circular detail off and replace it with punched discs than to try and get symmetrical shapes via cleanup.
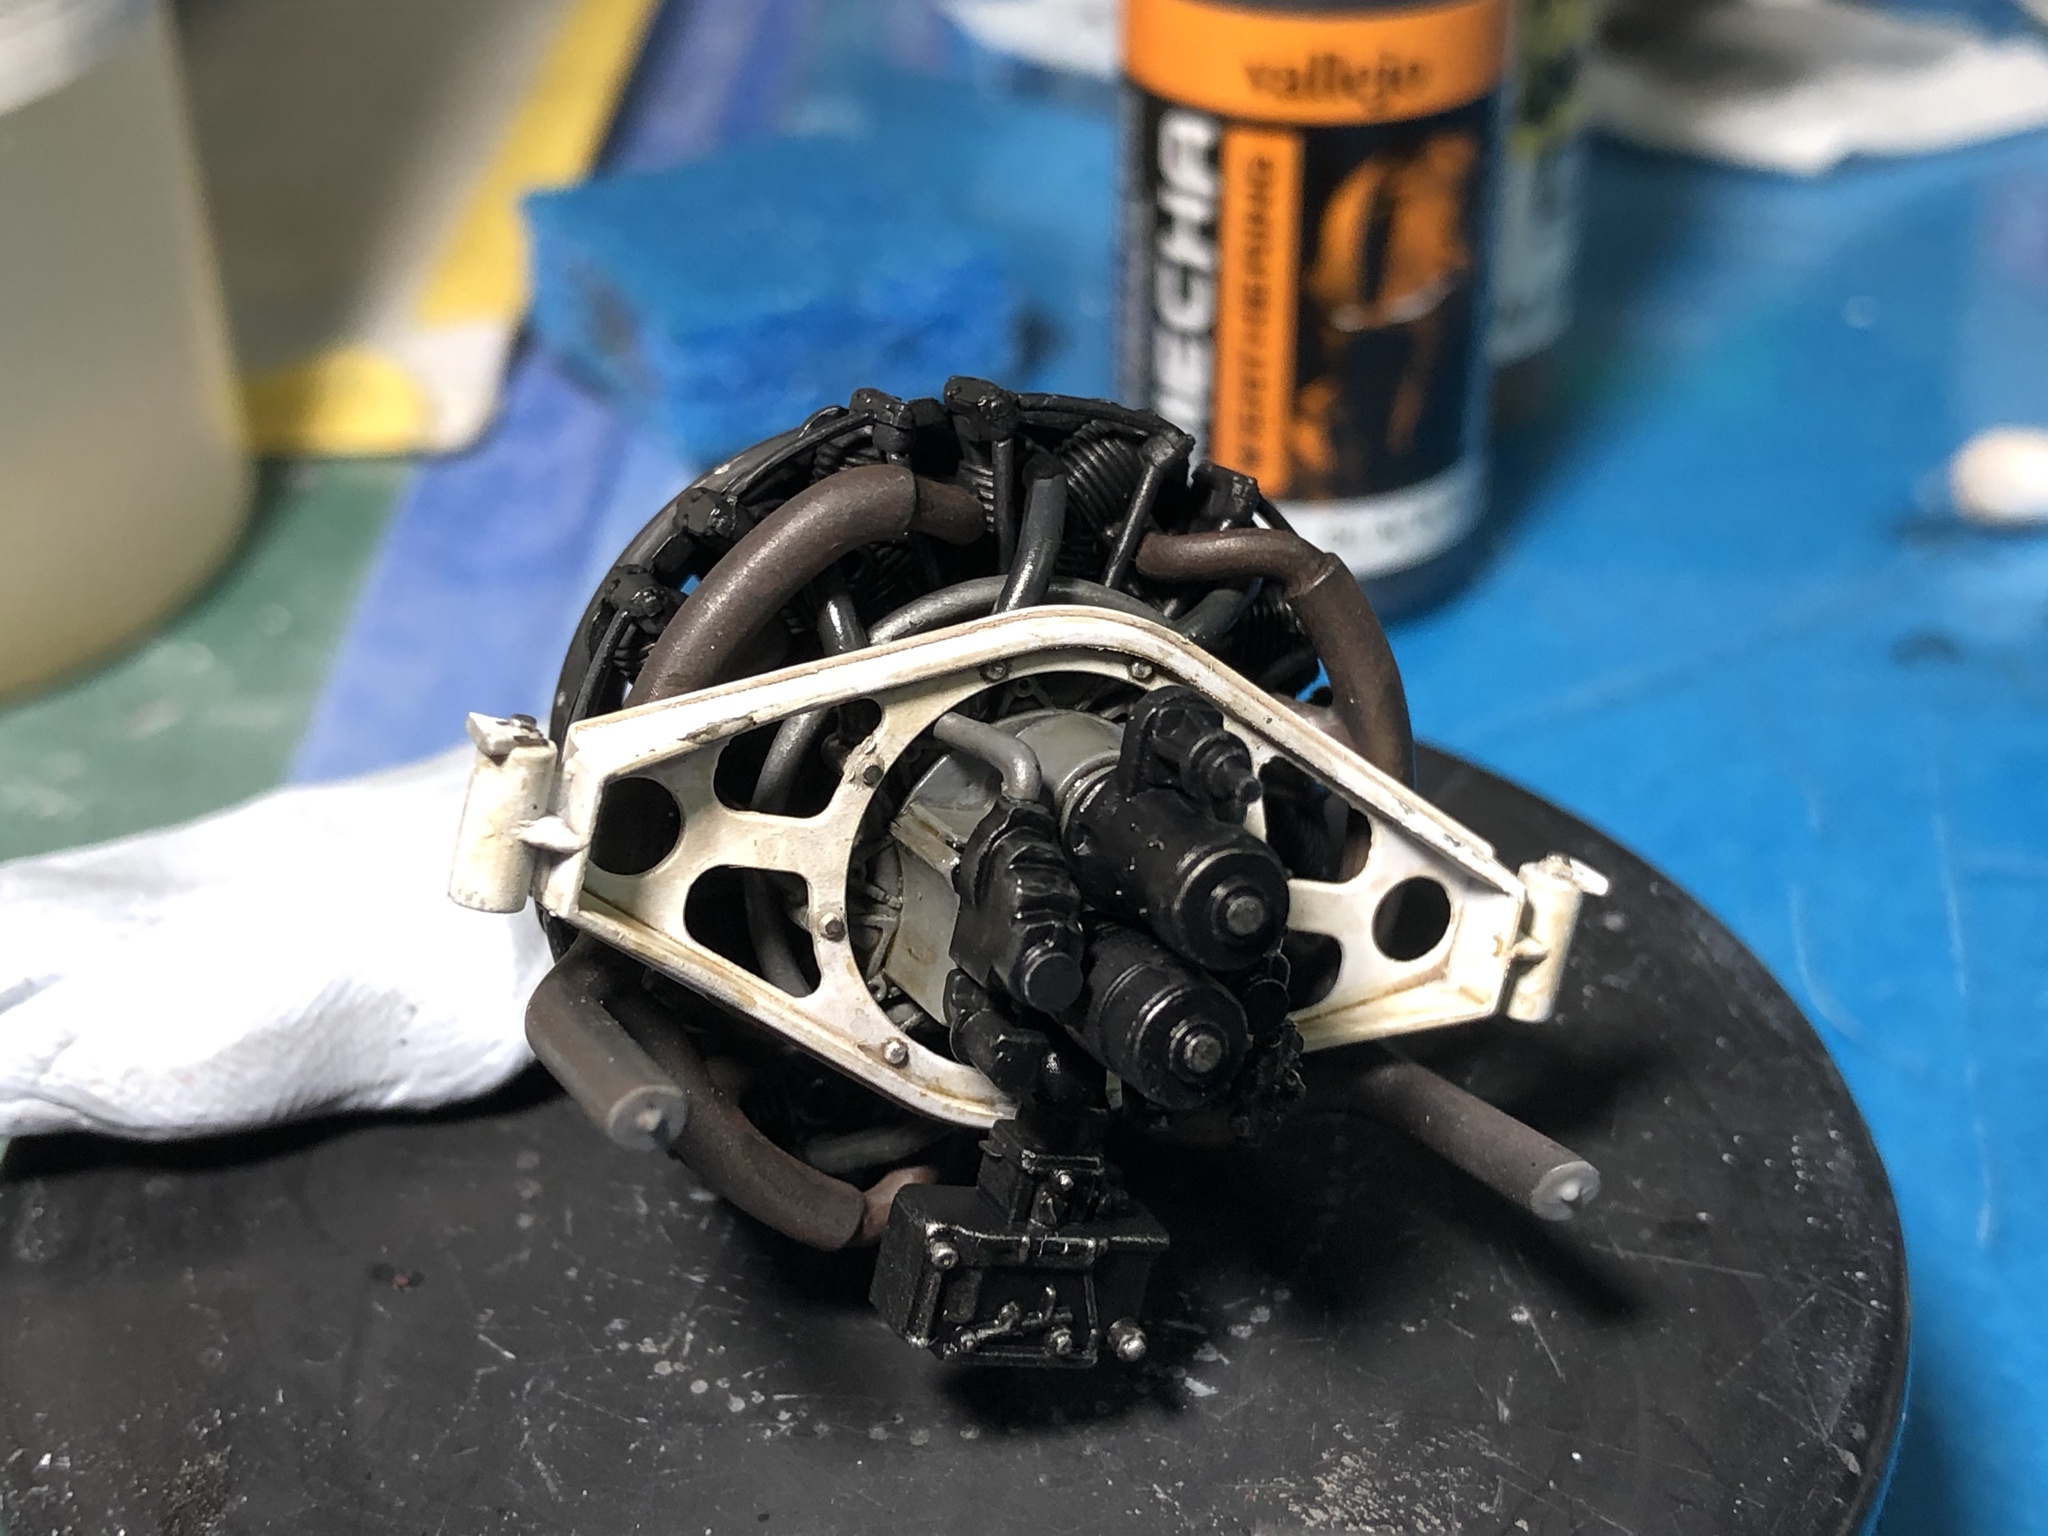
The fuel tank covers were installed and the large hose molded into the floor required a section removed to clear the fuel line on the right side if the bay. The engine was then put in place. The forward mounts needed a good bit of trimming on the sides to get the engine to sit in the correct location.
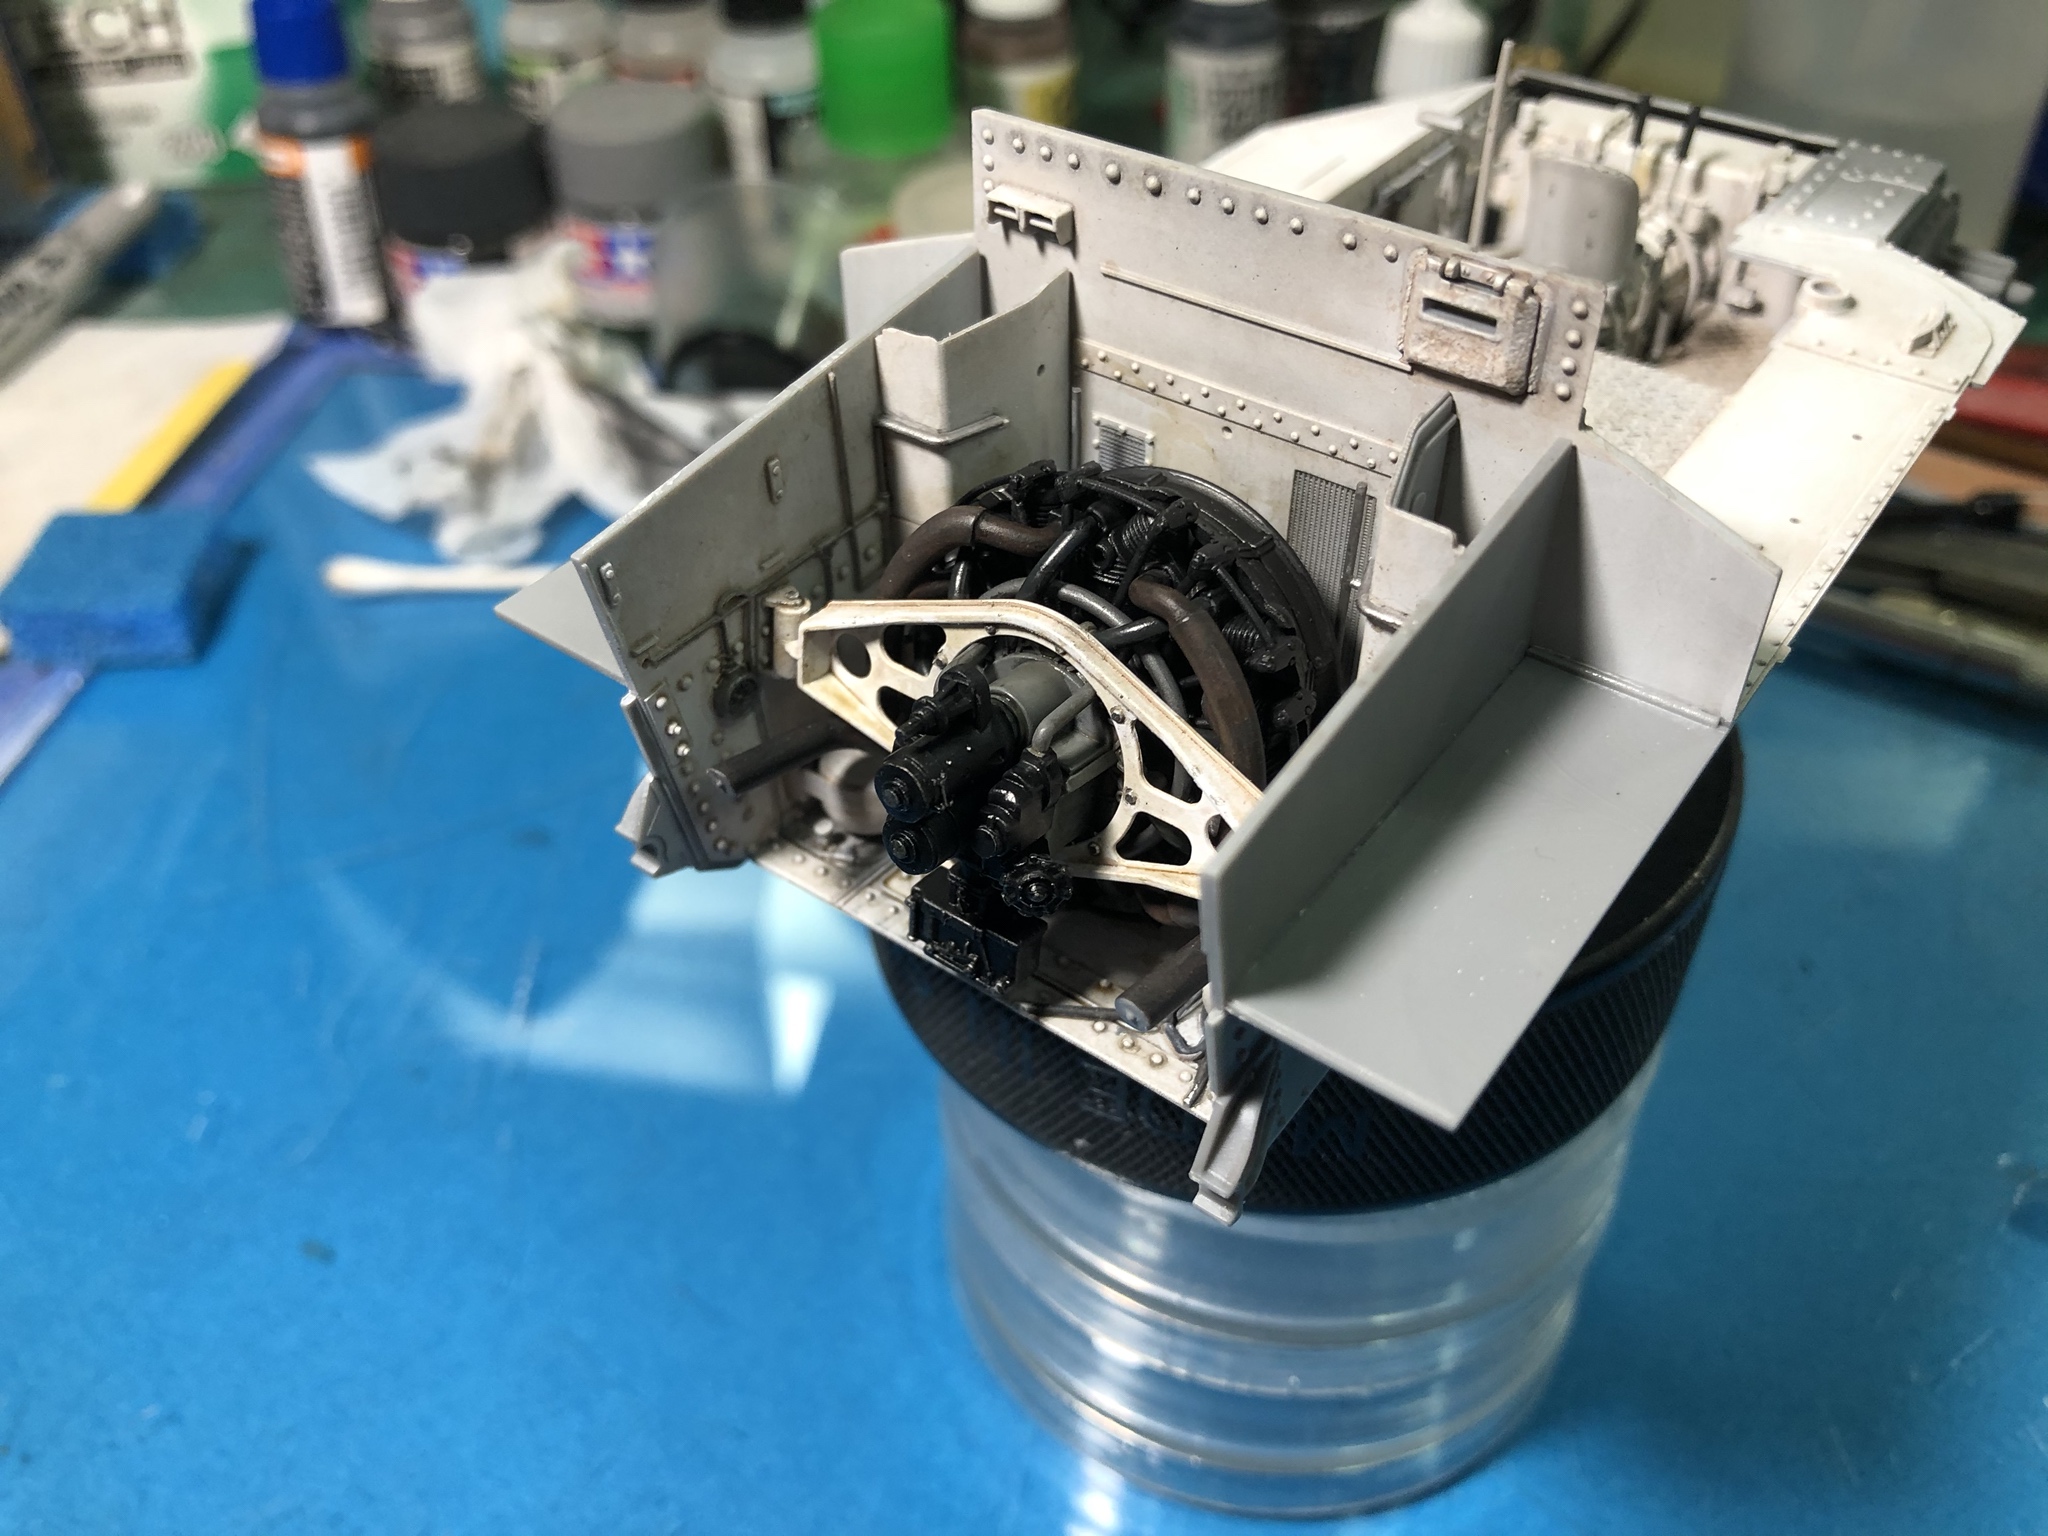
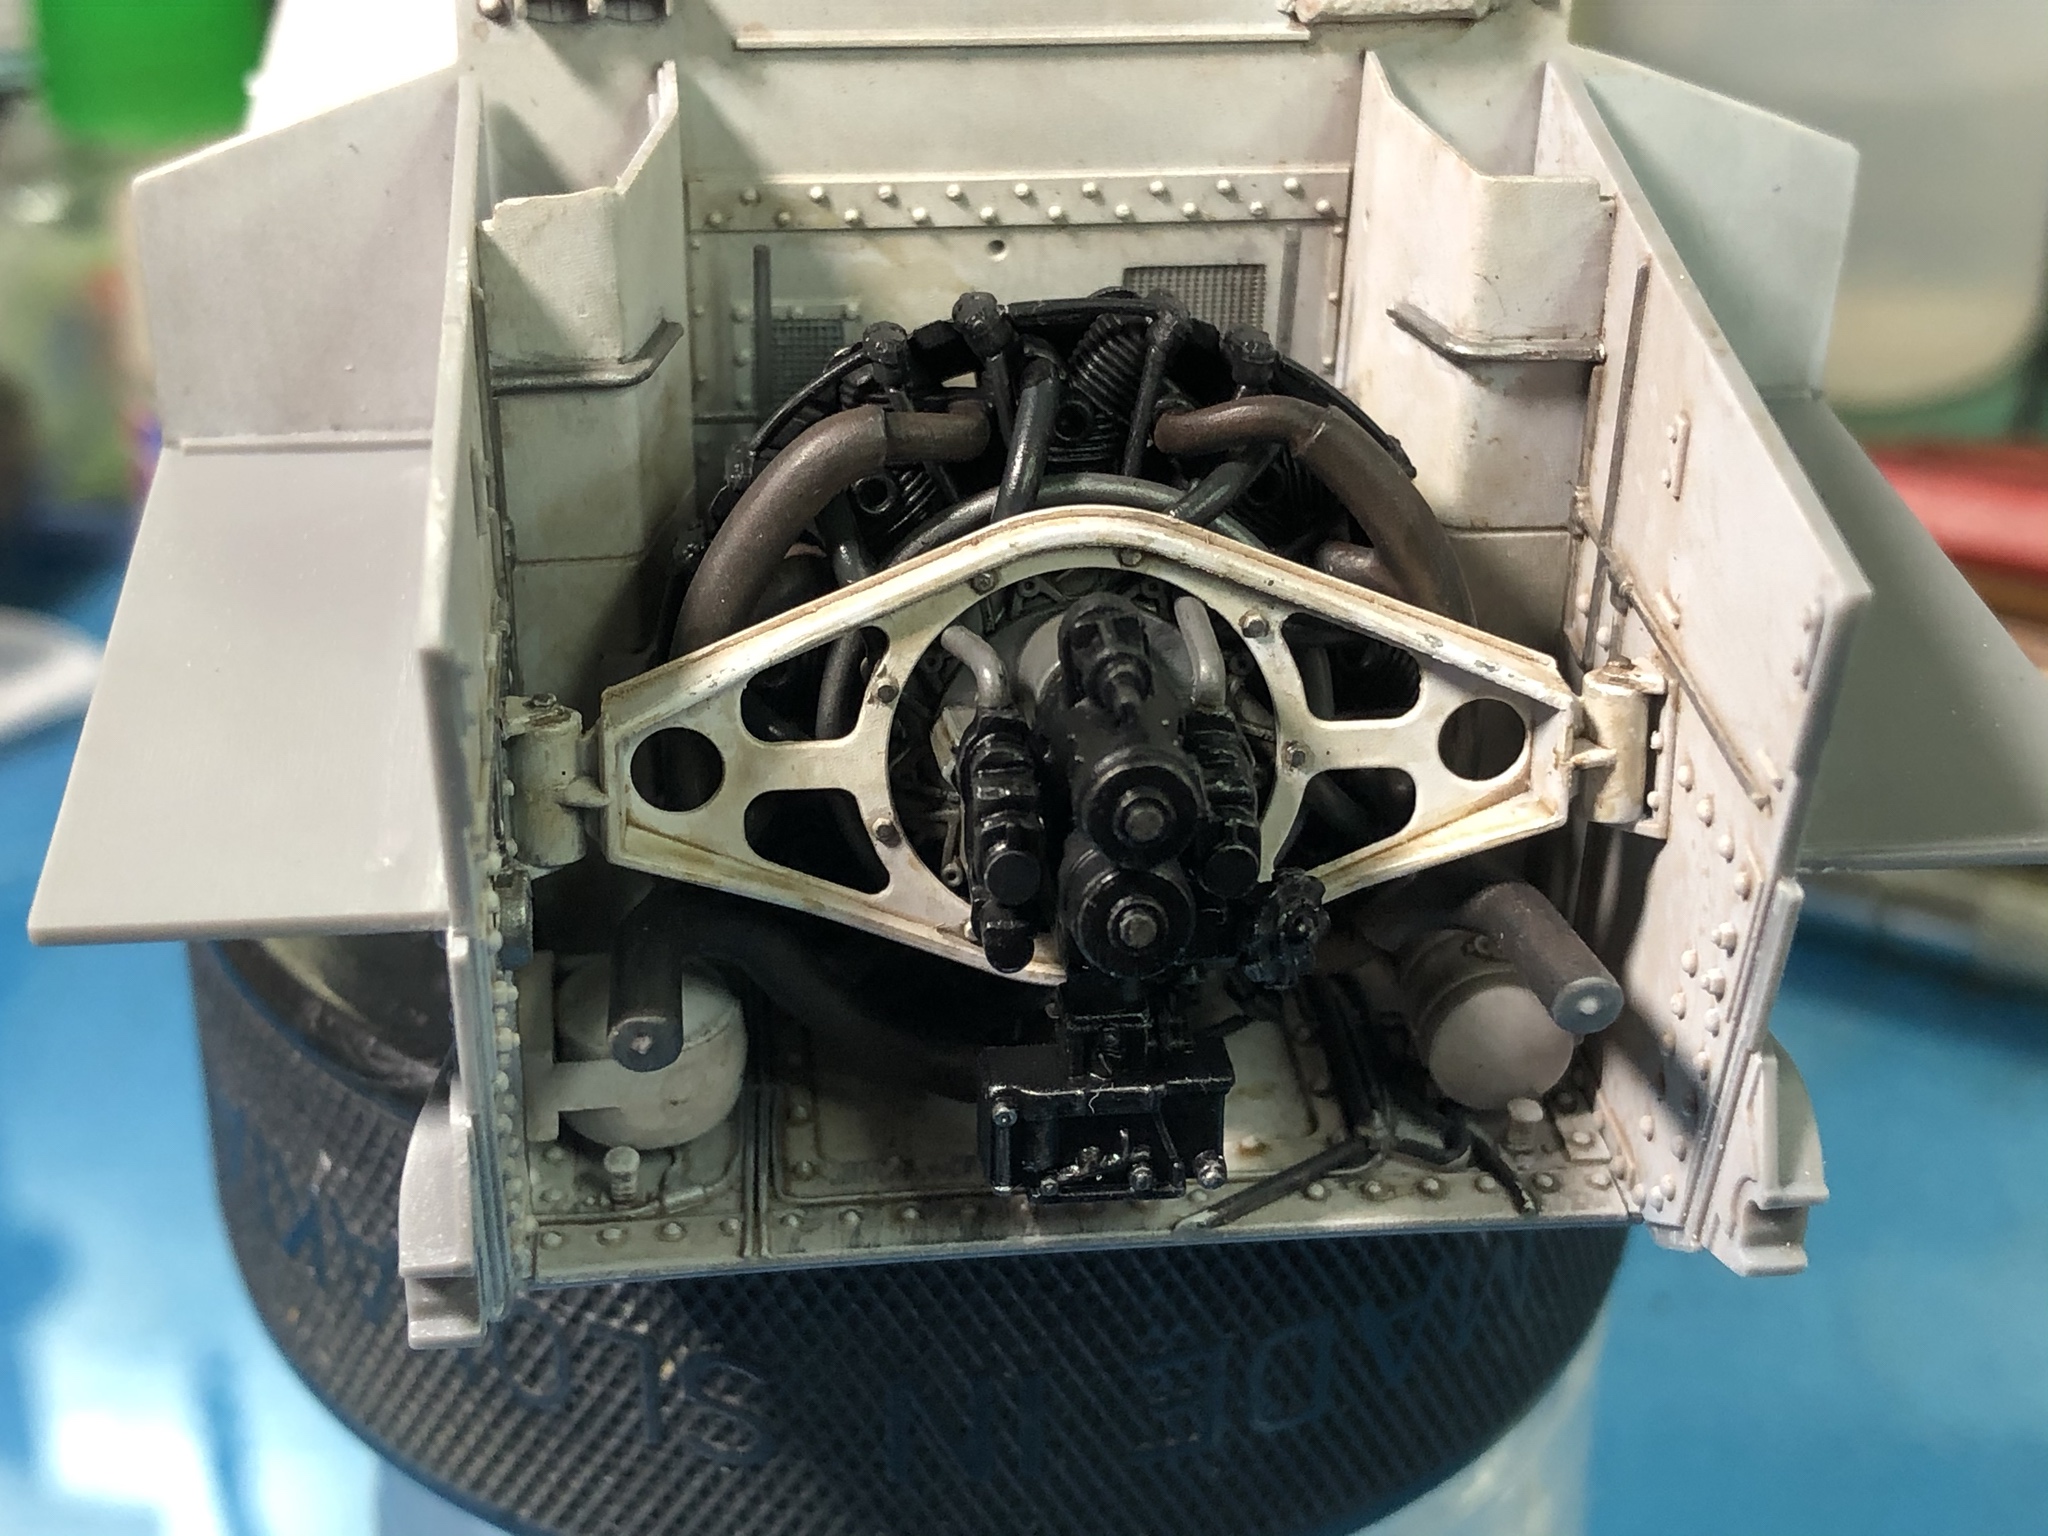
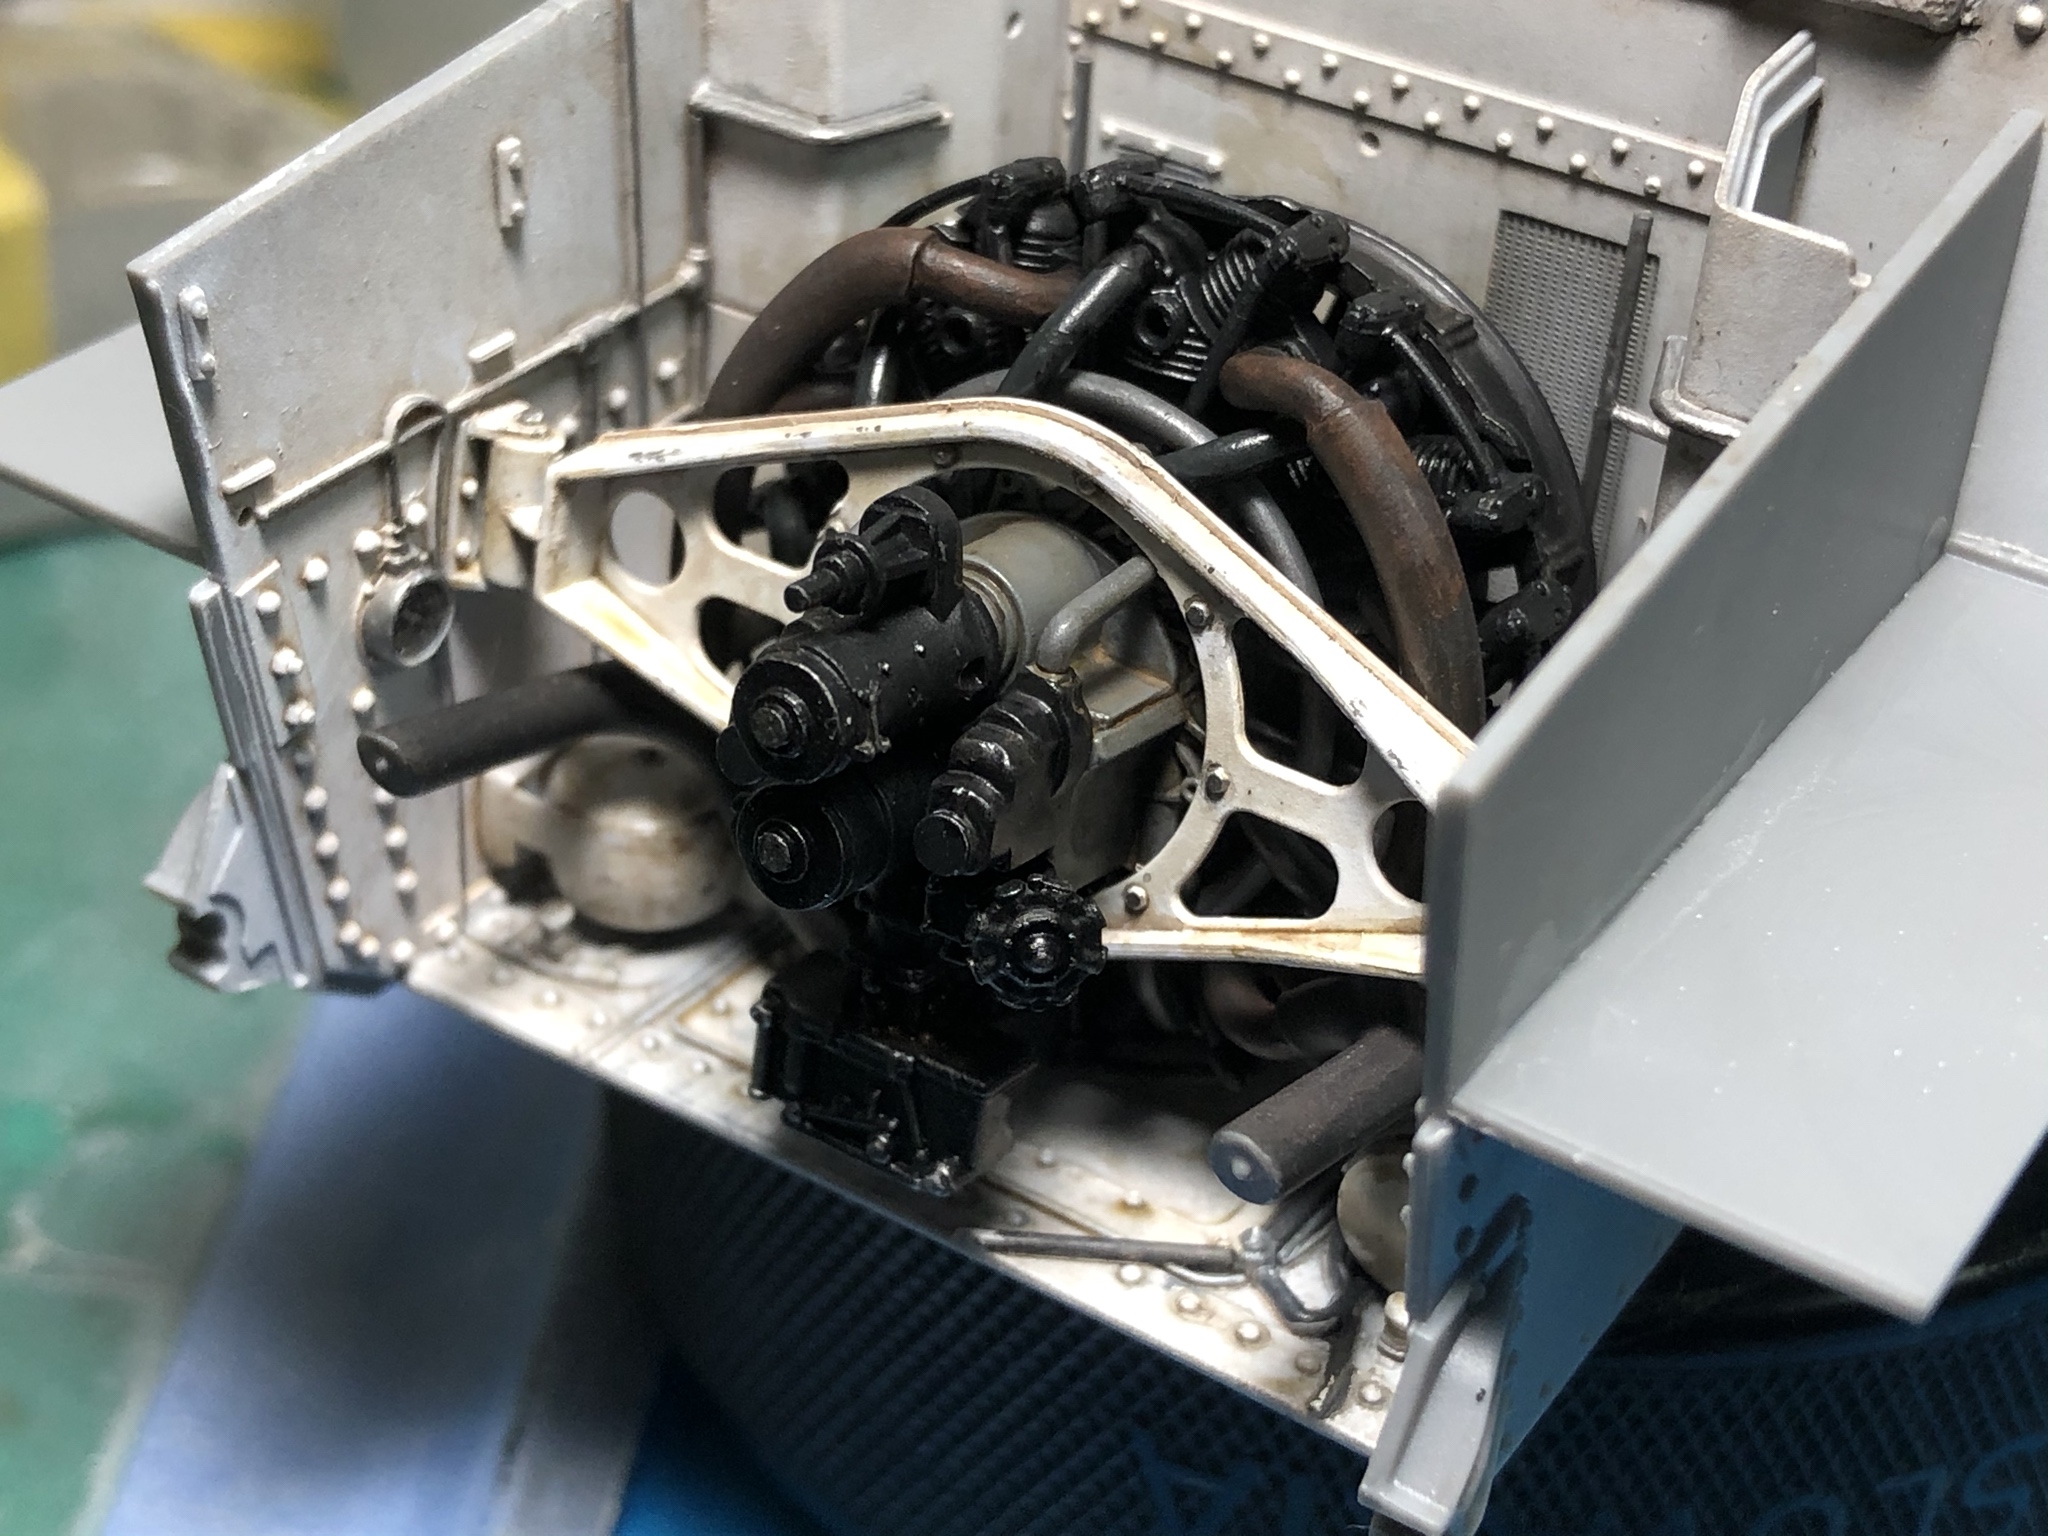
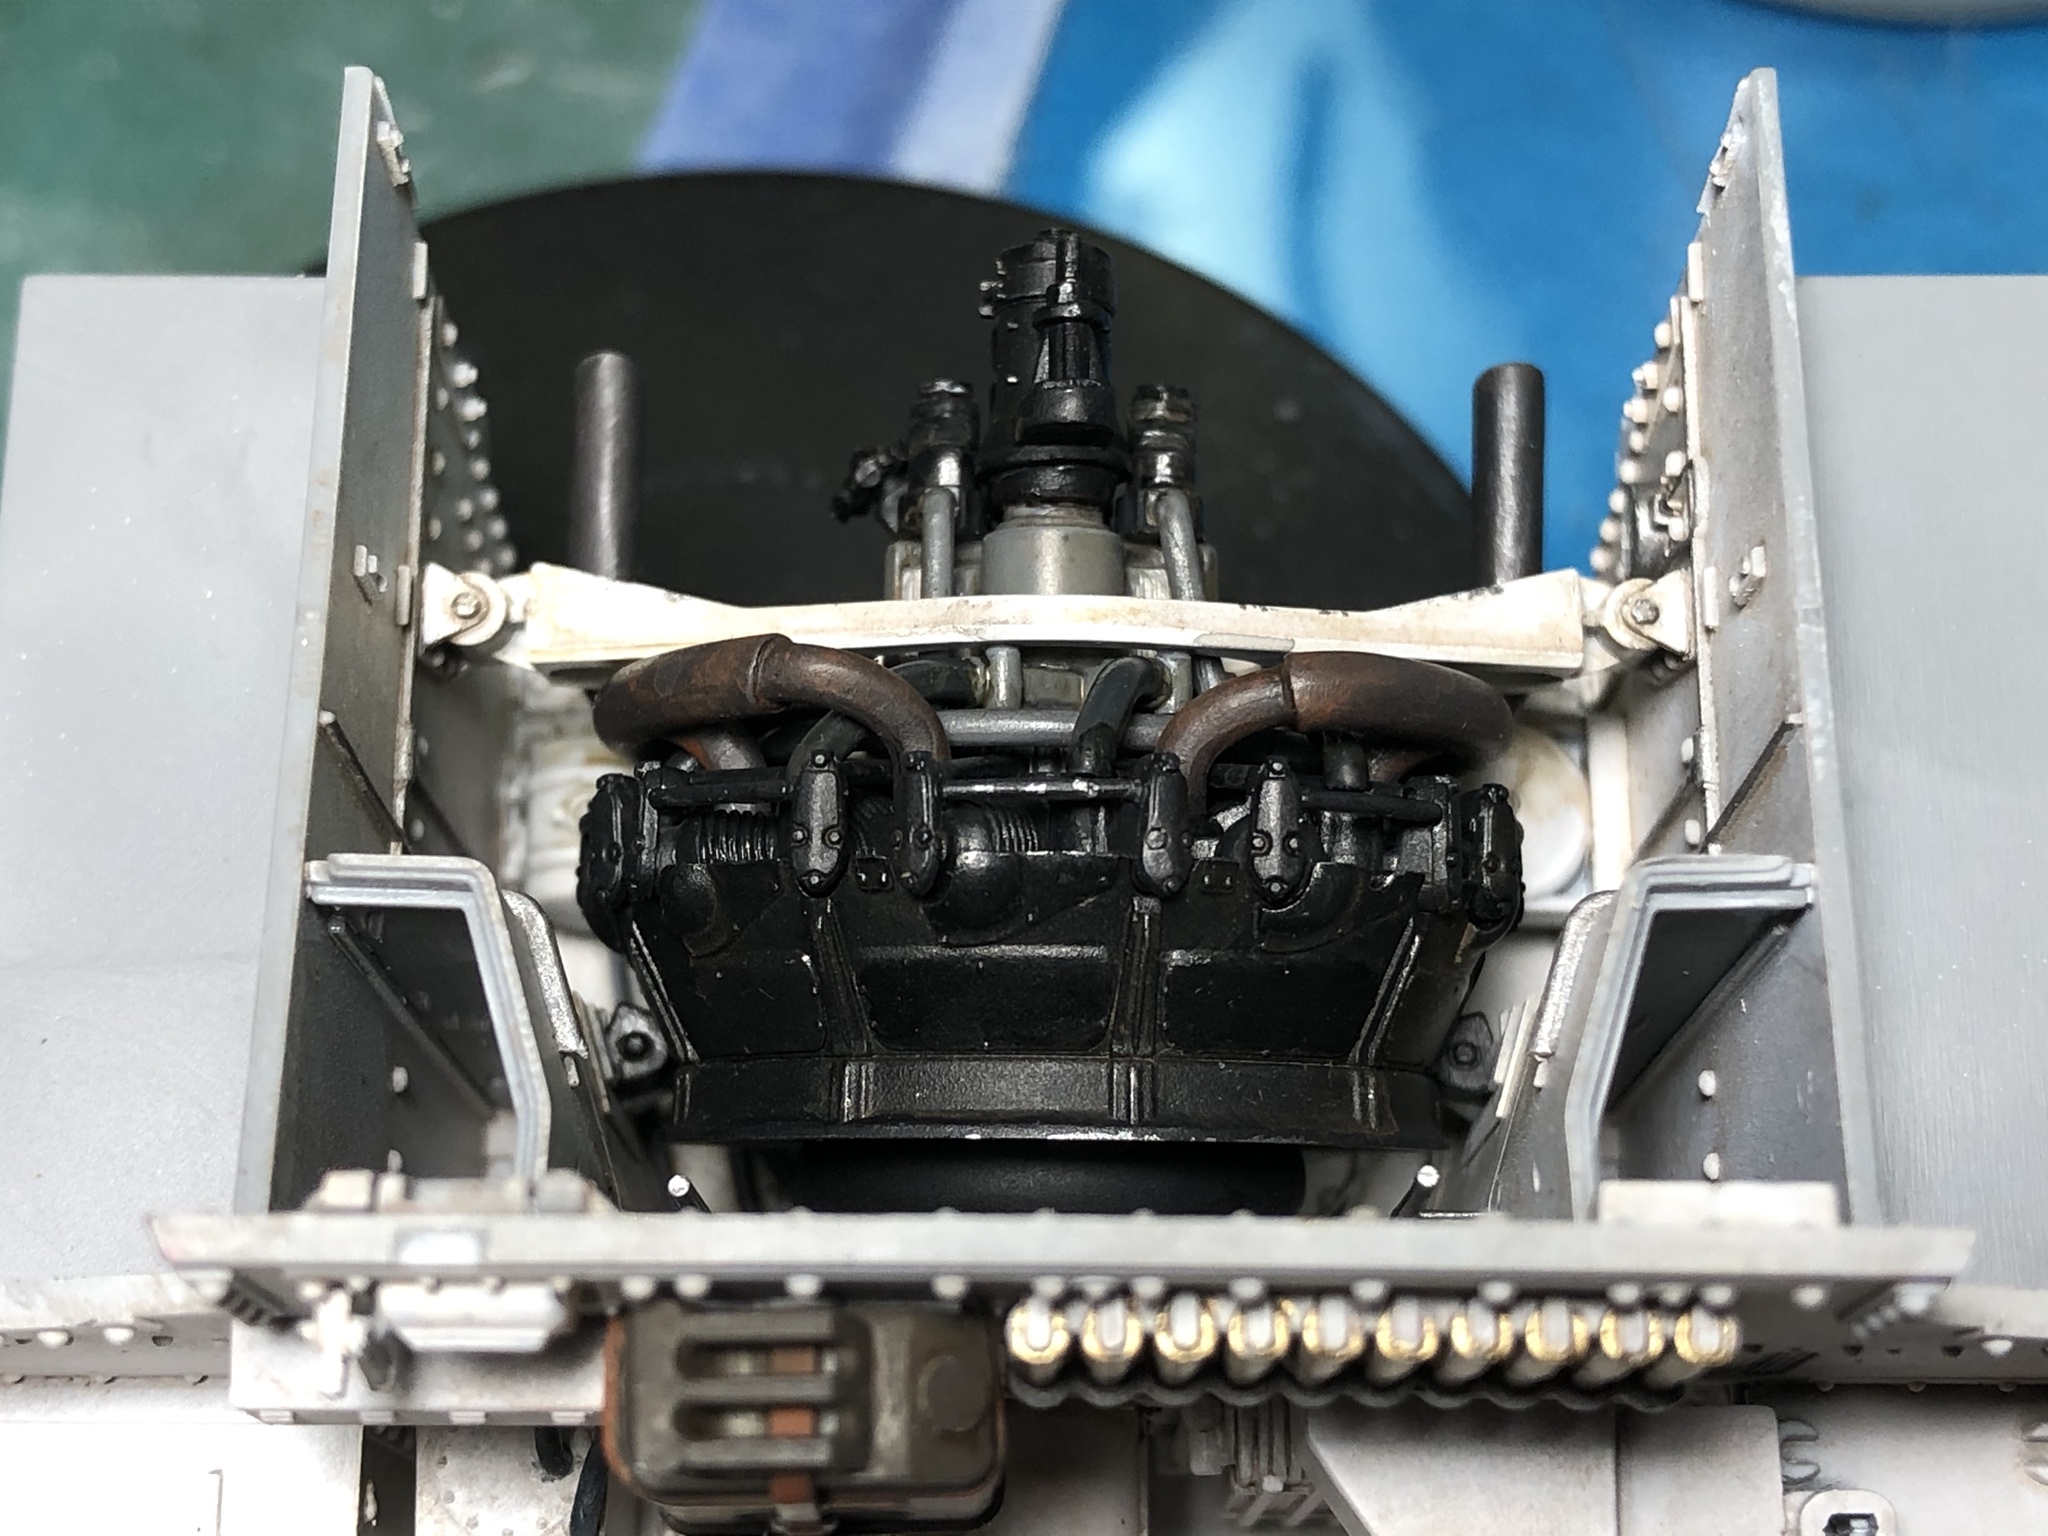
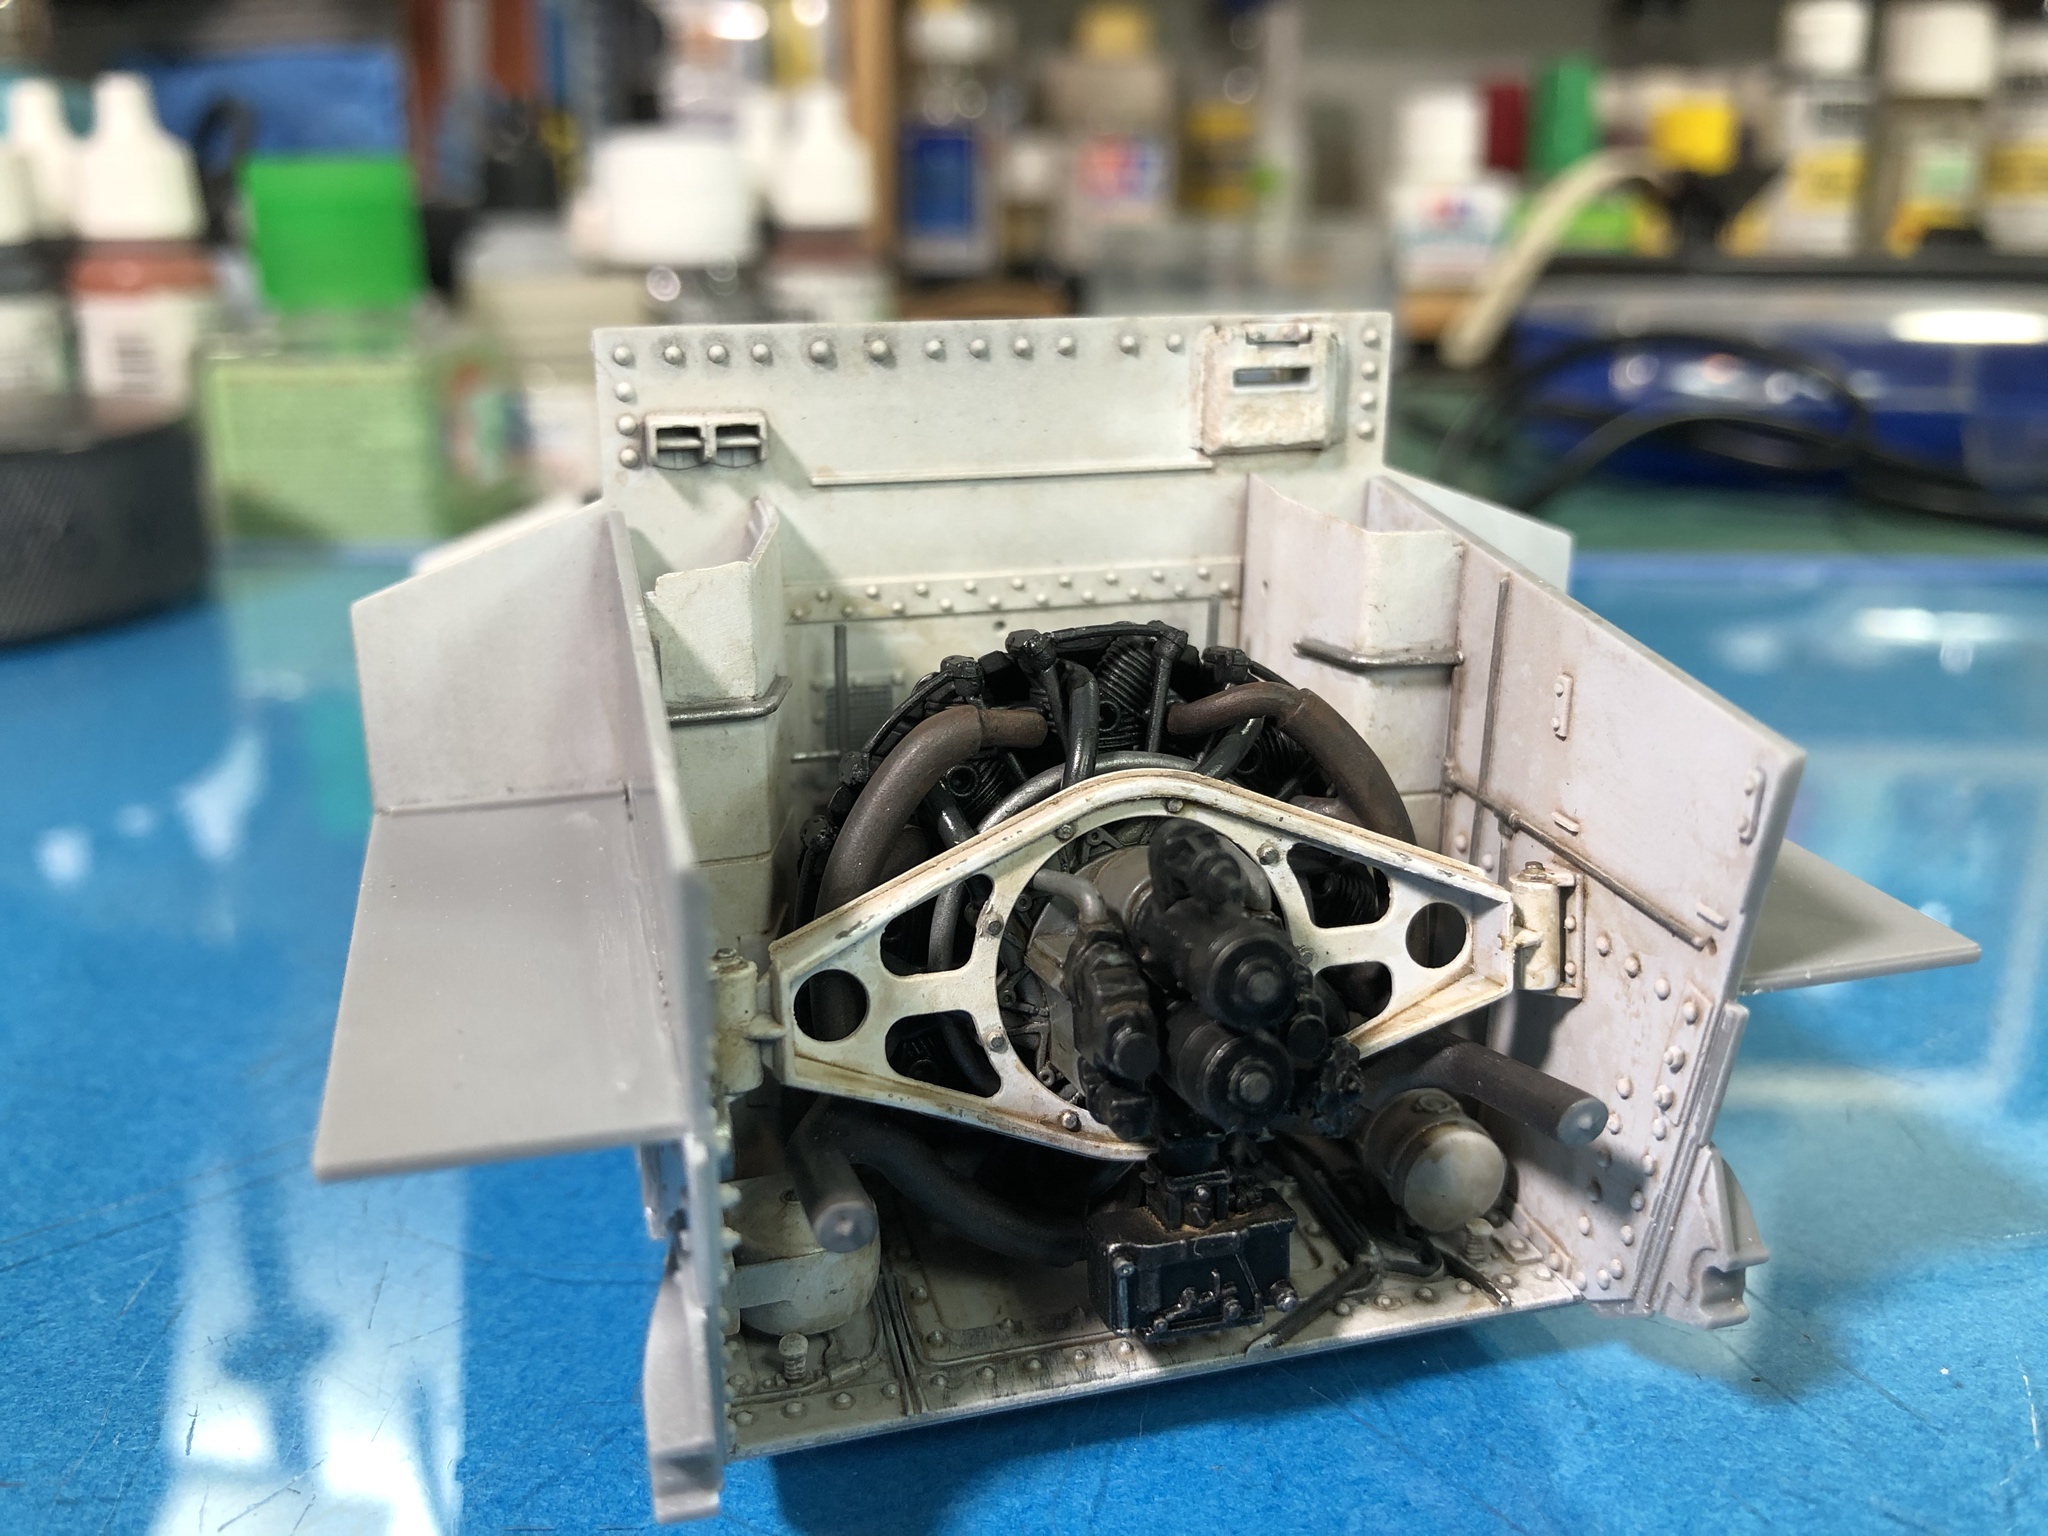
I also got the sides of the crew compartment painted to match the rest of the interior.
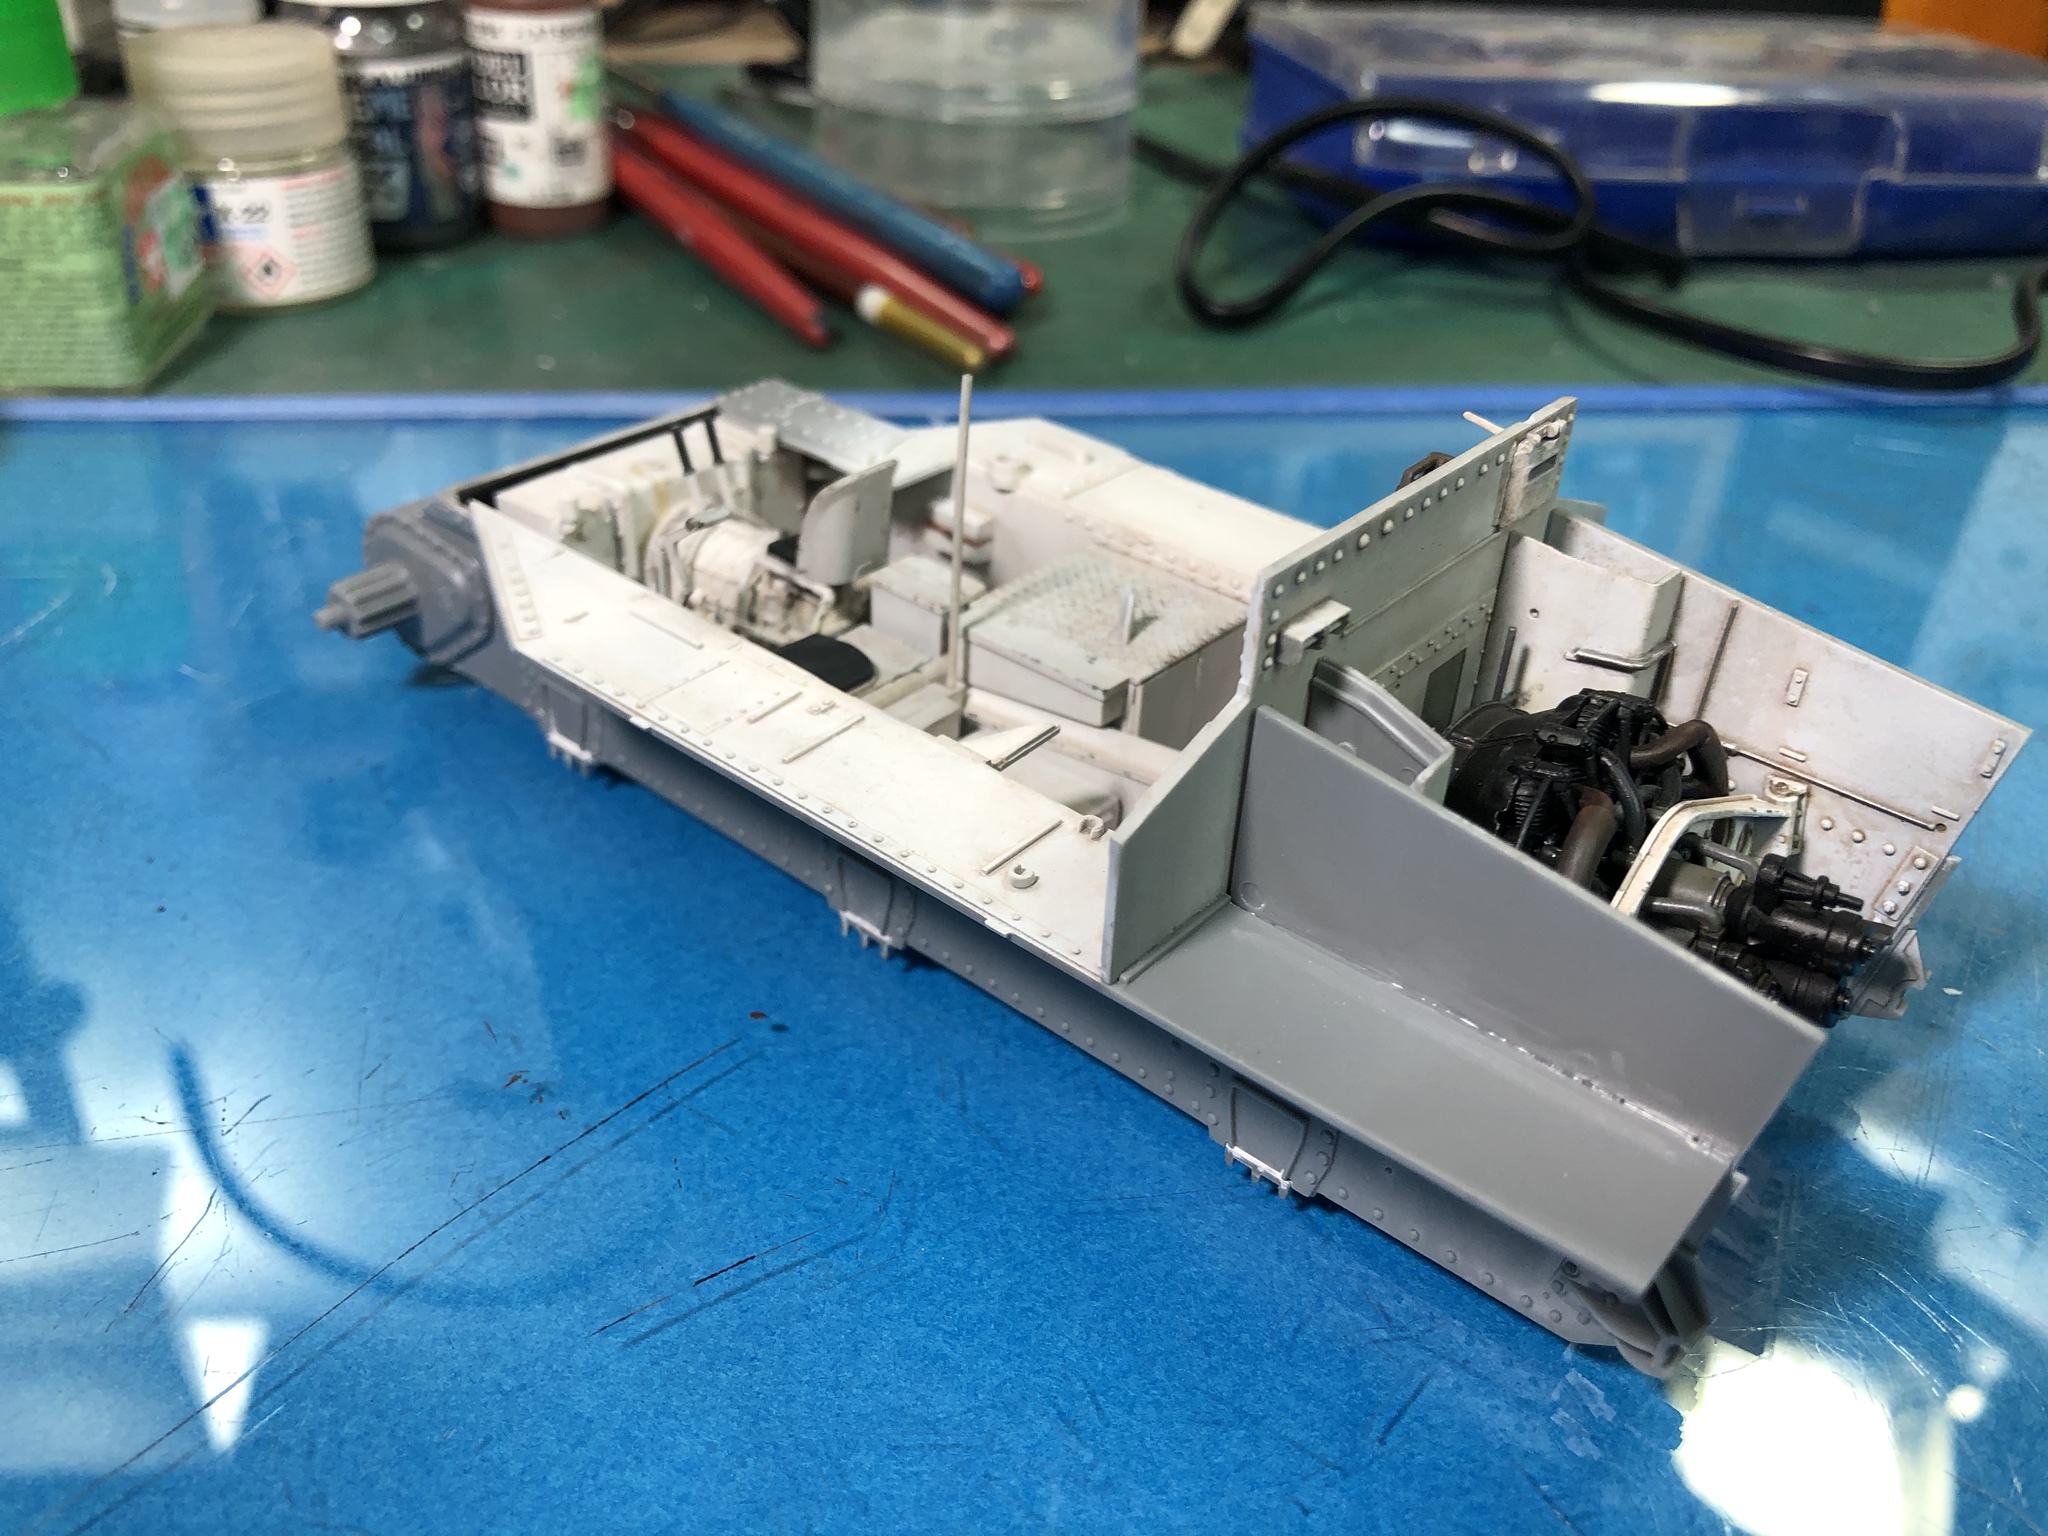
Overall, not too bad as far as progress goes this weekend...
No new colors were introduced in this post. Same white with brown wash technique discussed before and one of the previous posts covered the engine itself.
Hope this info helps other folks take on this kit. So far, itís been an enjoyable build.

The fuel tank covers were installed and the large hose molded into the floor required a section removed to clear the fuel line on the right side if the bay. The engine was then put in place. The forward mounts needed a good bit of trimming on the sides to get the engine to sit in the correct location.


I also got the sides of the crew compartment painted to match the rest of the interior.

Overall, not too bad as far as progress goes this weekend...
No new colors were introduced in this post. Same white with brown wash technique discussed before and one of the previous posts covered the engine itself.
Hope this info helps other folks take on this kit. So far, itís been an enjoyable build.

PRH001

Joined: June 16, 2014
KitMaker: 681 posts
Armorama: 603 posts

Posted: Monday, October 14, 2019 - 03:42 PM UTC
Quoted Text
Good build log, and I'm gonna go get a hockey puck. Oddly enough, with a hole drilled through the middle, they also make great body mount bushings on Jeeps.
I checked Amazon and found all kinds of hockey pucks for sale. I may have to order a couple more just to have a spare on hand when Iím working on multiple subassemblies. Love the note about the Jeep body mount bushings!


PRH001

Joined: June 16, 2014
KitMaker: 681 posts
Armorama: 603 posts

Posted: Sunday, October 20, 2019 - 12:40 PM UTC
So, here is the little bit of progress I made this weekend. Cleaning up and installing the interior air cleaner boxes, the intake ducting, the fuel tank tops and various engine lines.
The lines are fragile of course, but my kit also had several broken parts on the sprue. Because of the specific geometry of the lines and the exacting way they needed to fit in place, I had to repair them while still on those sprues. The runners were cut slightly to allow me to position the two ends of the broken parts back together and cement was applied. This was a slow process, but it worked well and kept me from having to drill and fit new lines which would have taken even longer.
Here are pics of where the build is currently:
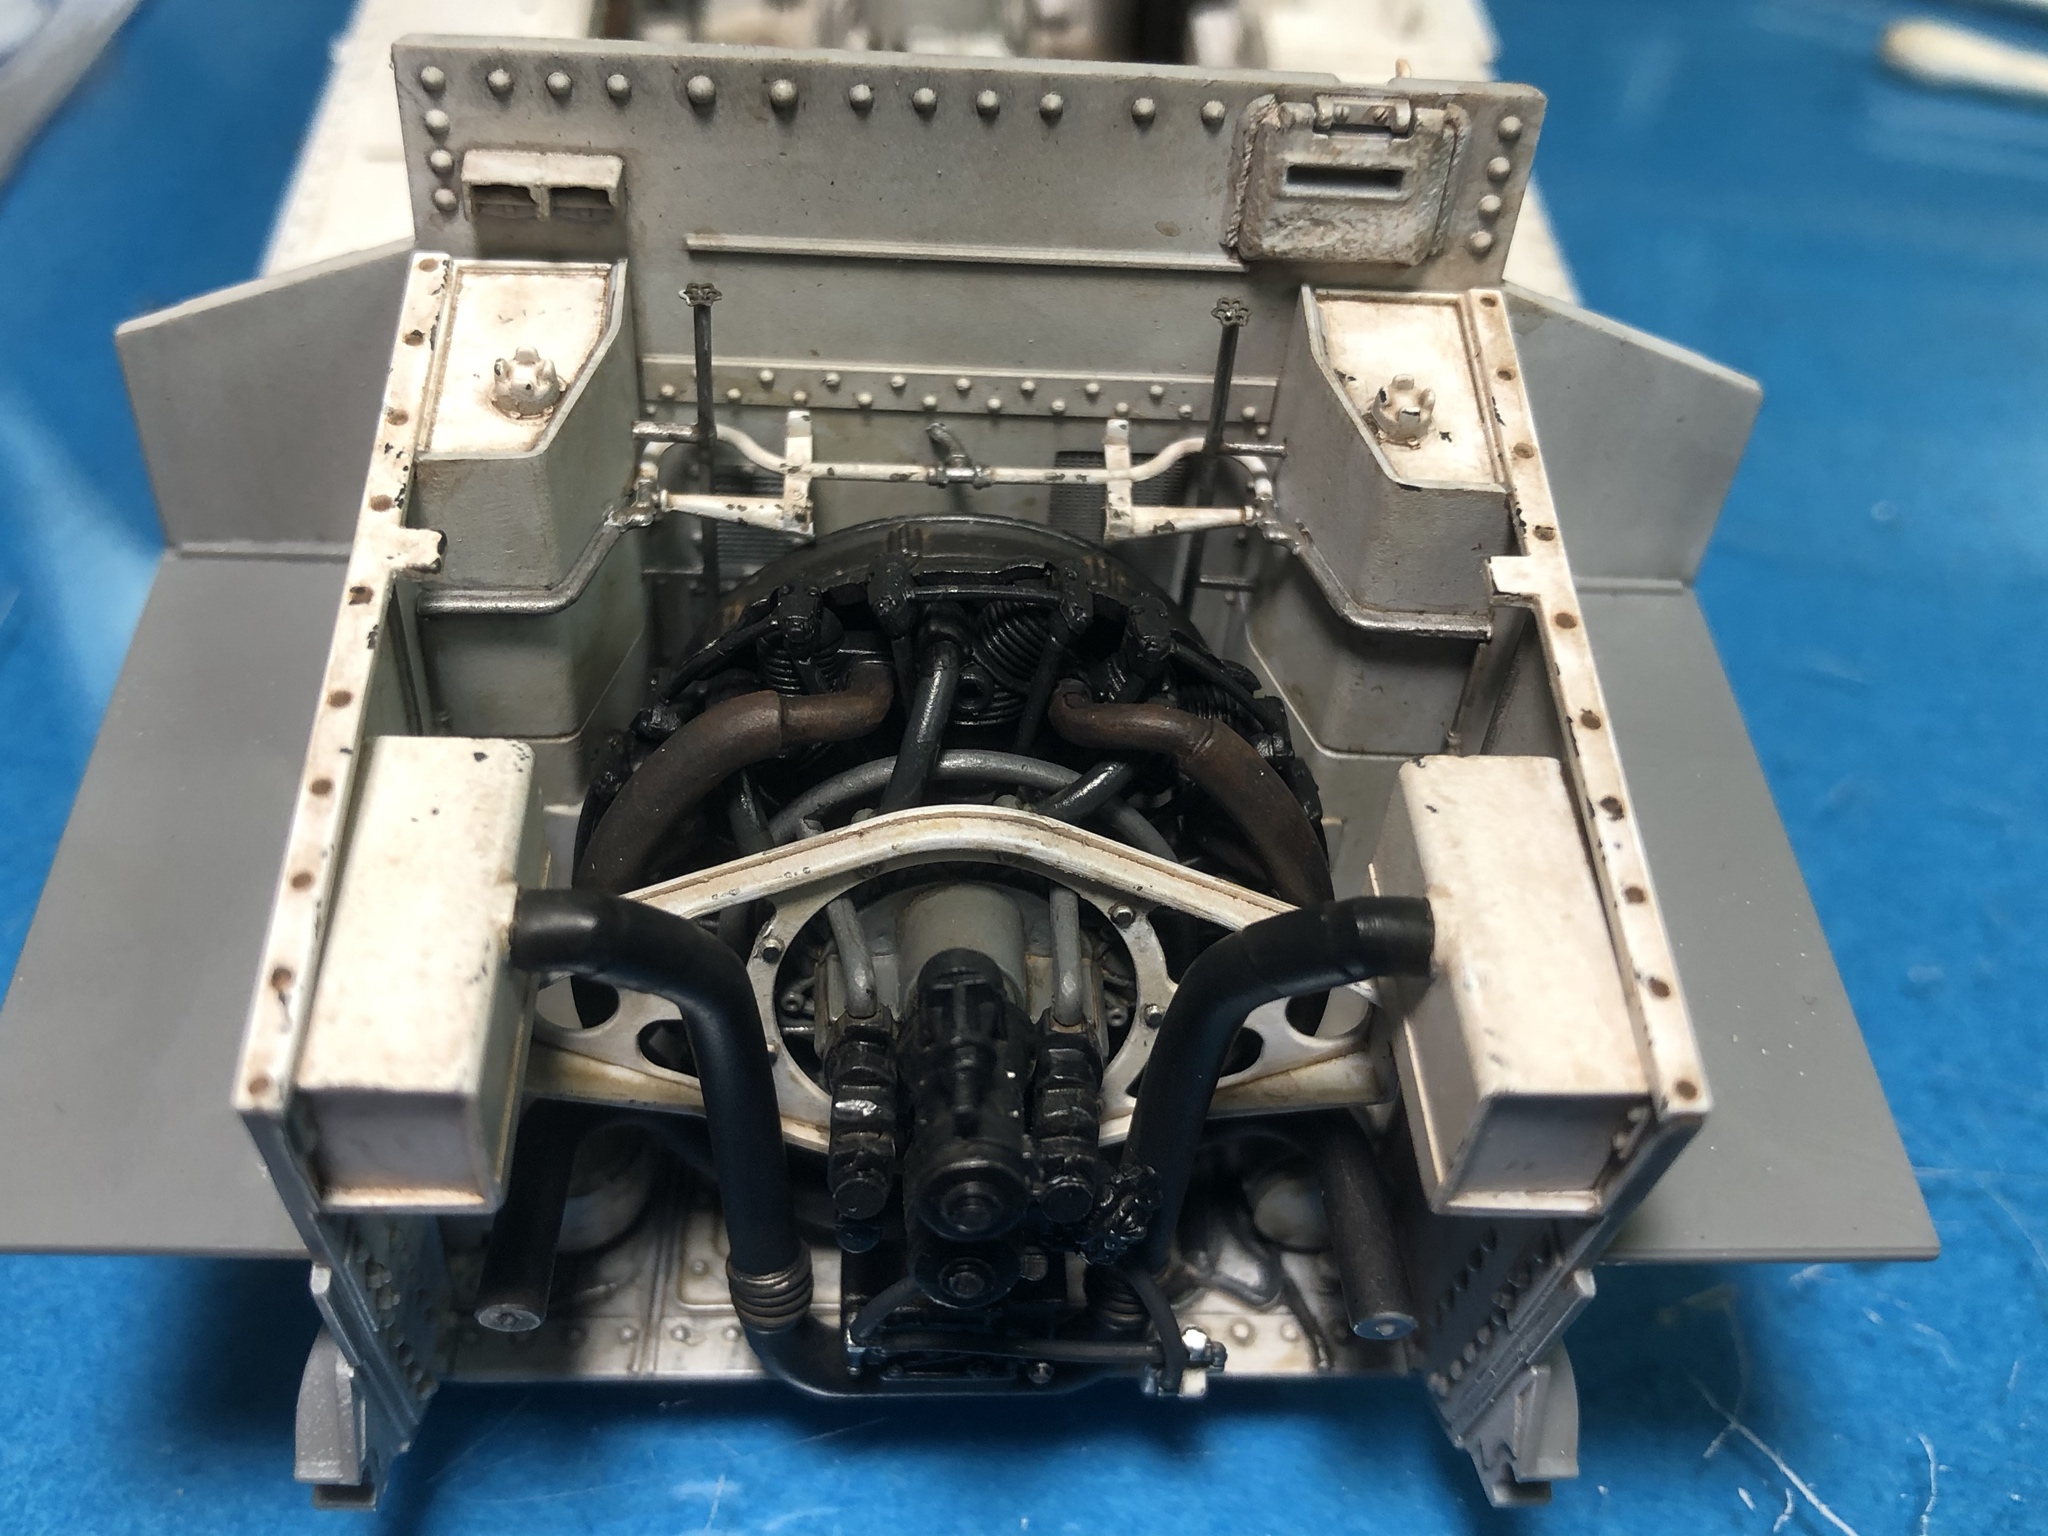
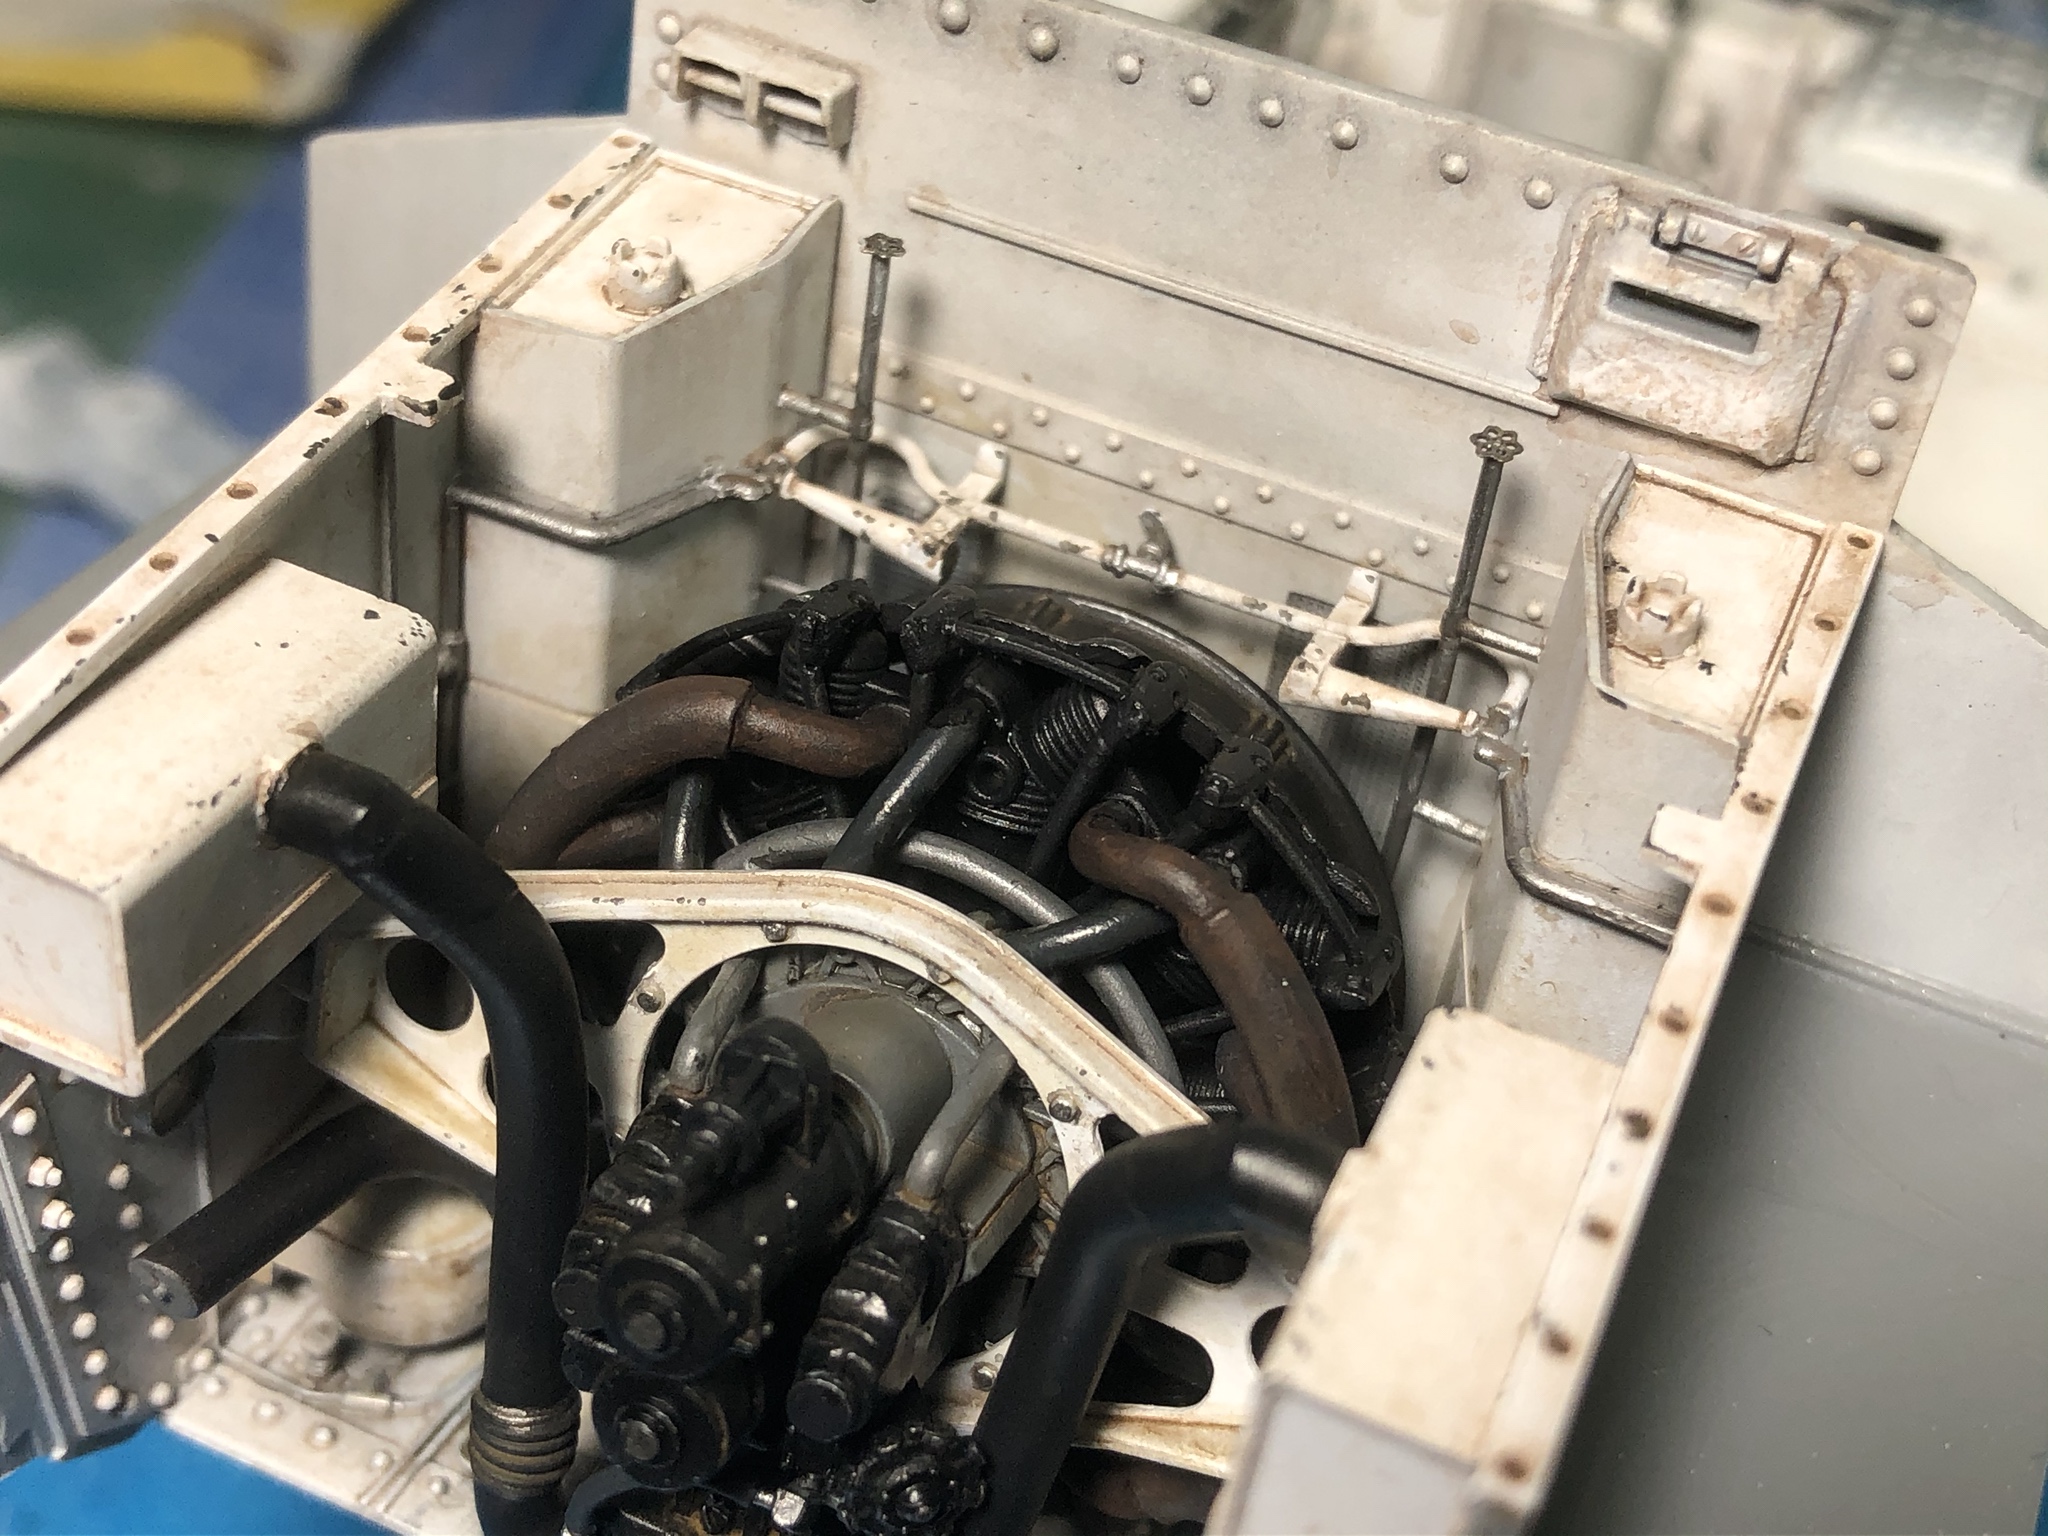
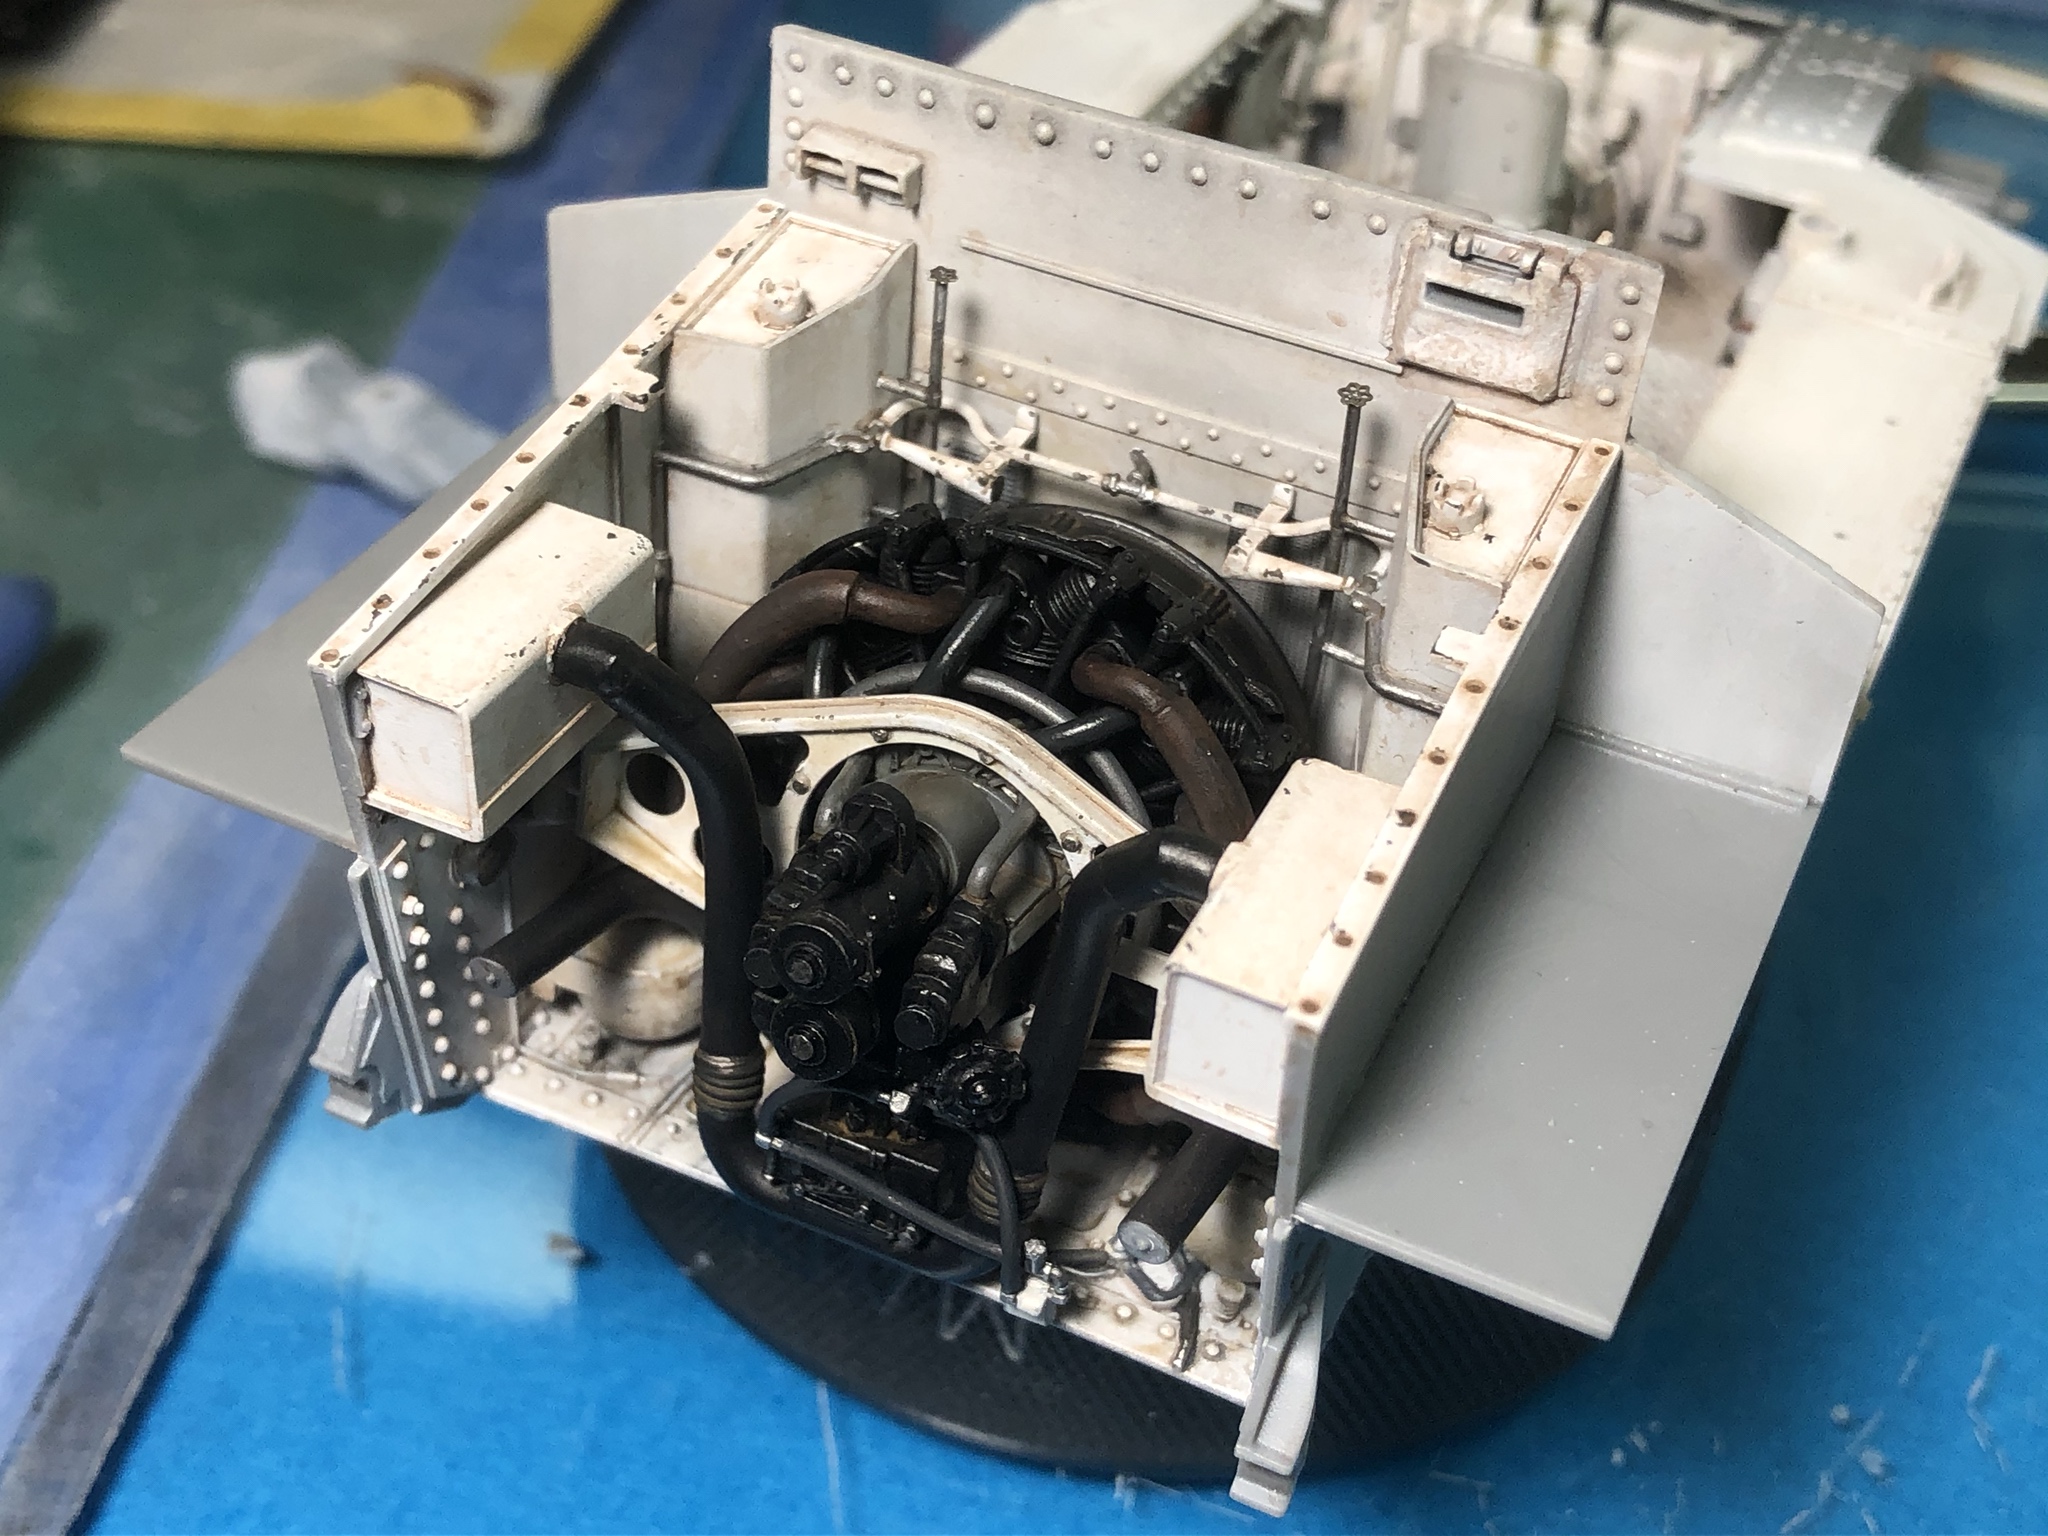
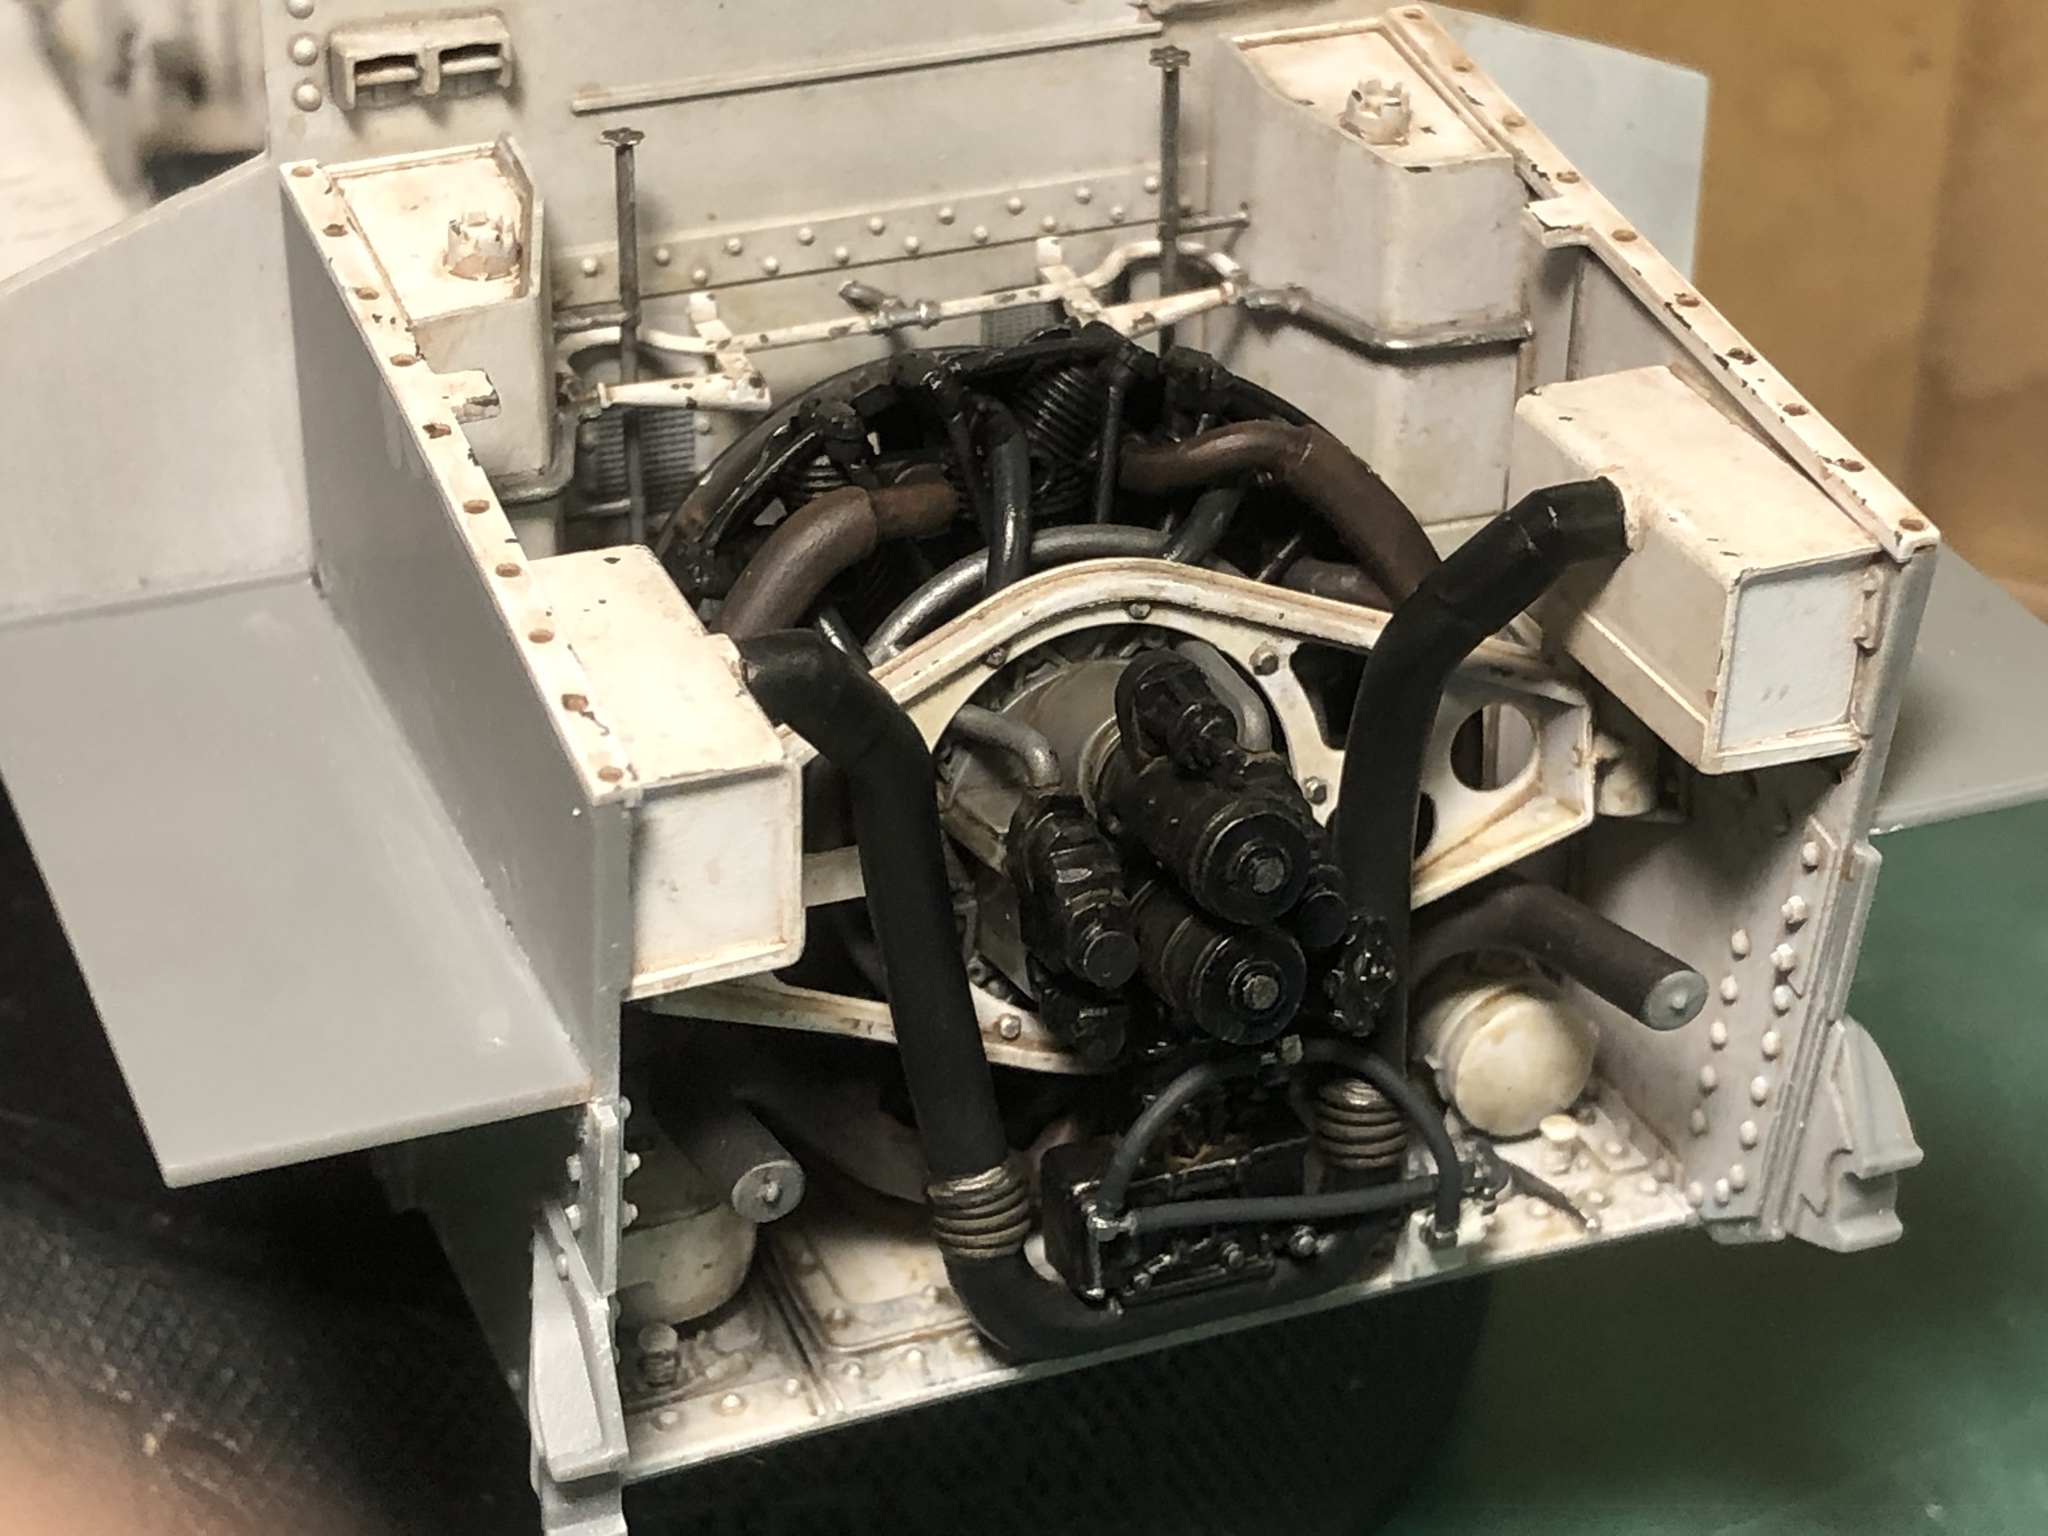
Color notes:
Air boxes and while line assemblies - Tamiya primer white
Intake ducting - Tamiya NATO Black w/ Vallejo semi gloss clear and a Vallejo flat earth wash
Intake ducting flex hose areas and the rear engine lines - Vallejo black grey w/ AK Interactive Xtreme dark aluminum
Iíve seen the lines on the rear of the engine colored a dull red, but this was on a museum piece and those lines are probably modern replacement pieces.
Again, the fit on this model has been good overall, but failure to follow the build sequence shown in the instructions could prevent key items being installed later.
Hope this helps someone...
The lines are fragile of course, but my kit also had several broken parts on the sprue. Because of the specific geometry of the lines and the exacting way they needed to fit in place, I had to repair them while still on those sprues. The runners were cut slightly to allow me to position the two ends of the broken parts back together and cement was applied. This was a slow process, but it worked well and kept me from having to drill and fit new lines which would have taken even longer.
Here are pics of where the build is currently:


Color notes:
Air boxes and while line assemblies - Tamiya primer white
Intake ducting - Tamiya NATO Black w/ Vallejo semi gloss clear and a Vallejo flat earth wash
Intake ducting flex hose areas and the rear engine lines - Vallejo black grey w/ AK Interactive Xtreme dark aluminum
Iíve seen the lines on the rear of the engine colored a dull red, but this was on a museum piece and those lines are probably modern replacement pieces.
Again, the fit on this model has been good overall, but failure to follow the build sequence shown in the instructions could prevent key items being installed later.
Hope this helps someone...
ivanhoe6

Joined: April 05, 2007
KitMaker: 2,023 posts
Armorama: 1,234 posts

Posted: Monday, October 21, 2019 - 01:01 AM UTC
Paul, I'll be following even more closely now. A funny thing happened on the way to the LHS to buy paint. A Grant jumped into my basket!! Inspired by your build log it HAD to come home with me. Looking at all that grey plastic I can't wait to get busy!
Any display ideas ?
Thanks again for all of your efforts and sharing with us !


3 out of 3 beer rating for both skills and effort!!!
Any display ideas ?
Thanks again for all of your efforts and sharing with us !


3 out of 3 beer rating for both skills and effort!!!
raivo74

Joined: November 09, 2009
KitMaker: 132 posts
Armorama: 109 posts

Posted: Monday, October 21, 2019 - 03:21 AM UTC
Good job, Paul. Have you tried to dry fit the back wall and engine bay covers?

PRH001

Joined: June 16, 2014
KitMaker: 681 posts
Armorama: 603 posts

Posted: Monday, October 21, 2019 - 04:14 AM UTC
Those kits that hop into your cart and follow you home are the best ones!
I know Iíve enjoyed this build so far... Plan on spending the time to do good mold line removal because if it is done right, most pieces are a very good fit.
Glad to hear someone is finding this build log useful.
I know Iíve enjoyed this build so far... Plan on spending the time to do good mold line removal because if it is done right, most pieces are a very good fit.
Glad to hear someone is finding this build log useful.


PRH001

Joined: June 16, 2014
KitMaker: 681 posts
Armorama: 603 posts

Posted: Monday, October 21, 2019 - 04:22 AM UTC
Quoted Text
Good job, Paul. Have you tried to dry fit the back wall and engine bay covers?
I have done a quick test fit of the rear bulkhead. That appeared to fit very well, but there are still some additional lines to install that could impact that. No test fit of the engine cover as of yet. Iíve been spending all of my modeling time doing small parts cleanup and mini spray sessions. This is to minimize possibilities for lost or overlooked parts.
So far, the instructions have provided enough detail for accurate placement without too much hassle.

PRH001

Joined: June 16, 2014
KitMaker: 681 posts
Armorama: 603 posts

Posted: Monday, October 21, 2019 - 03:54 PM UTC
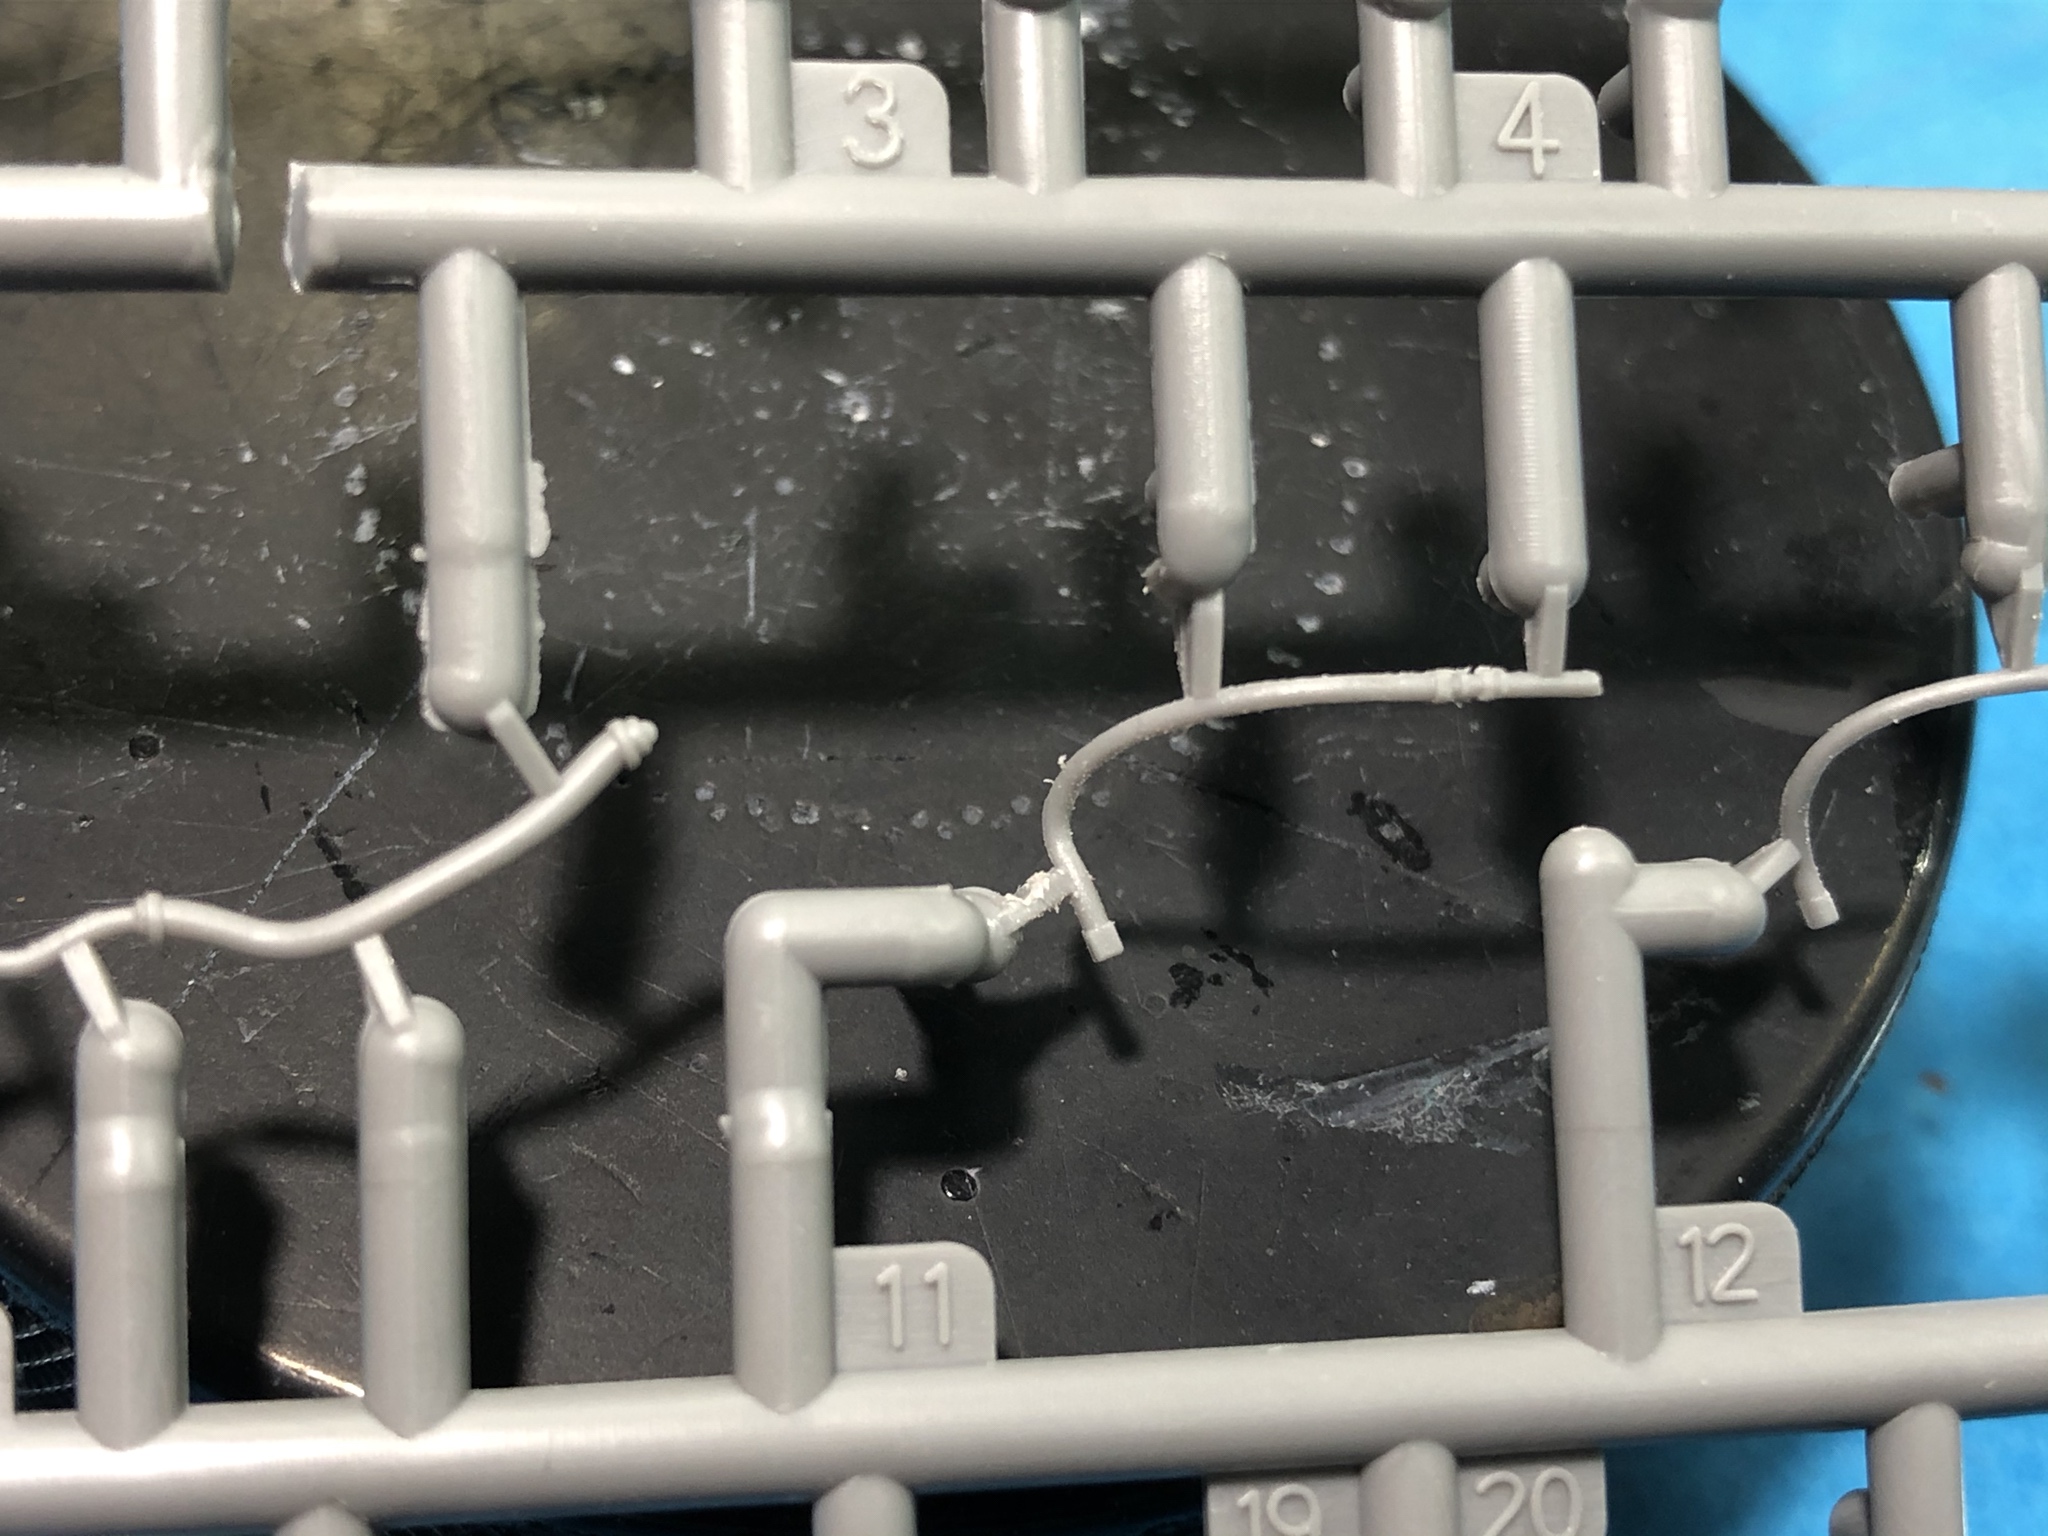
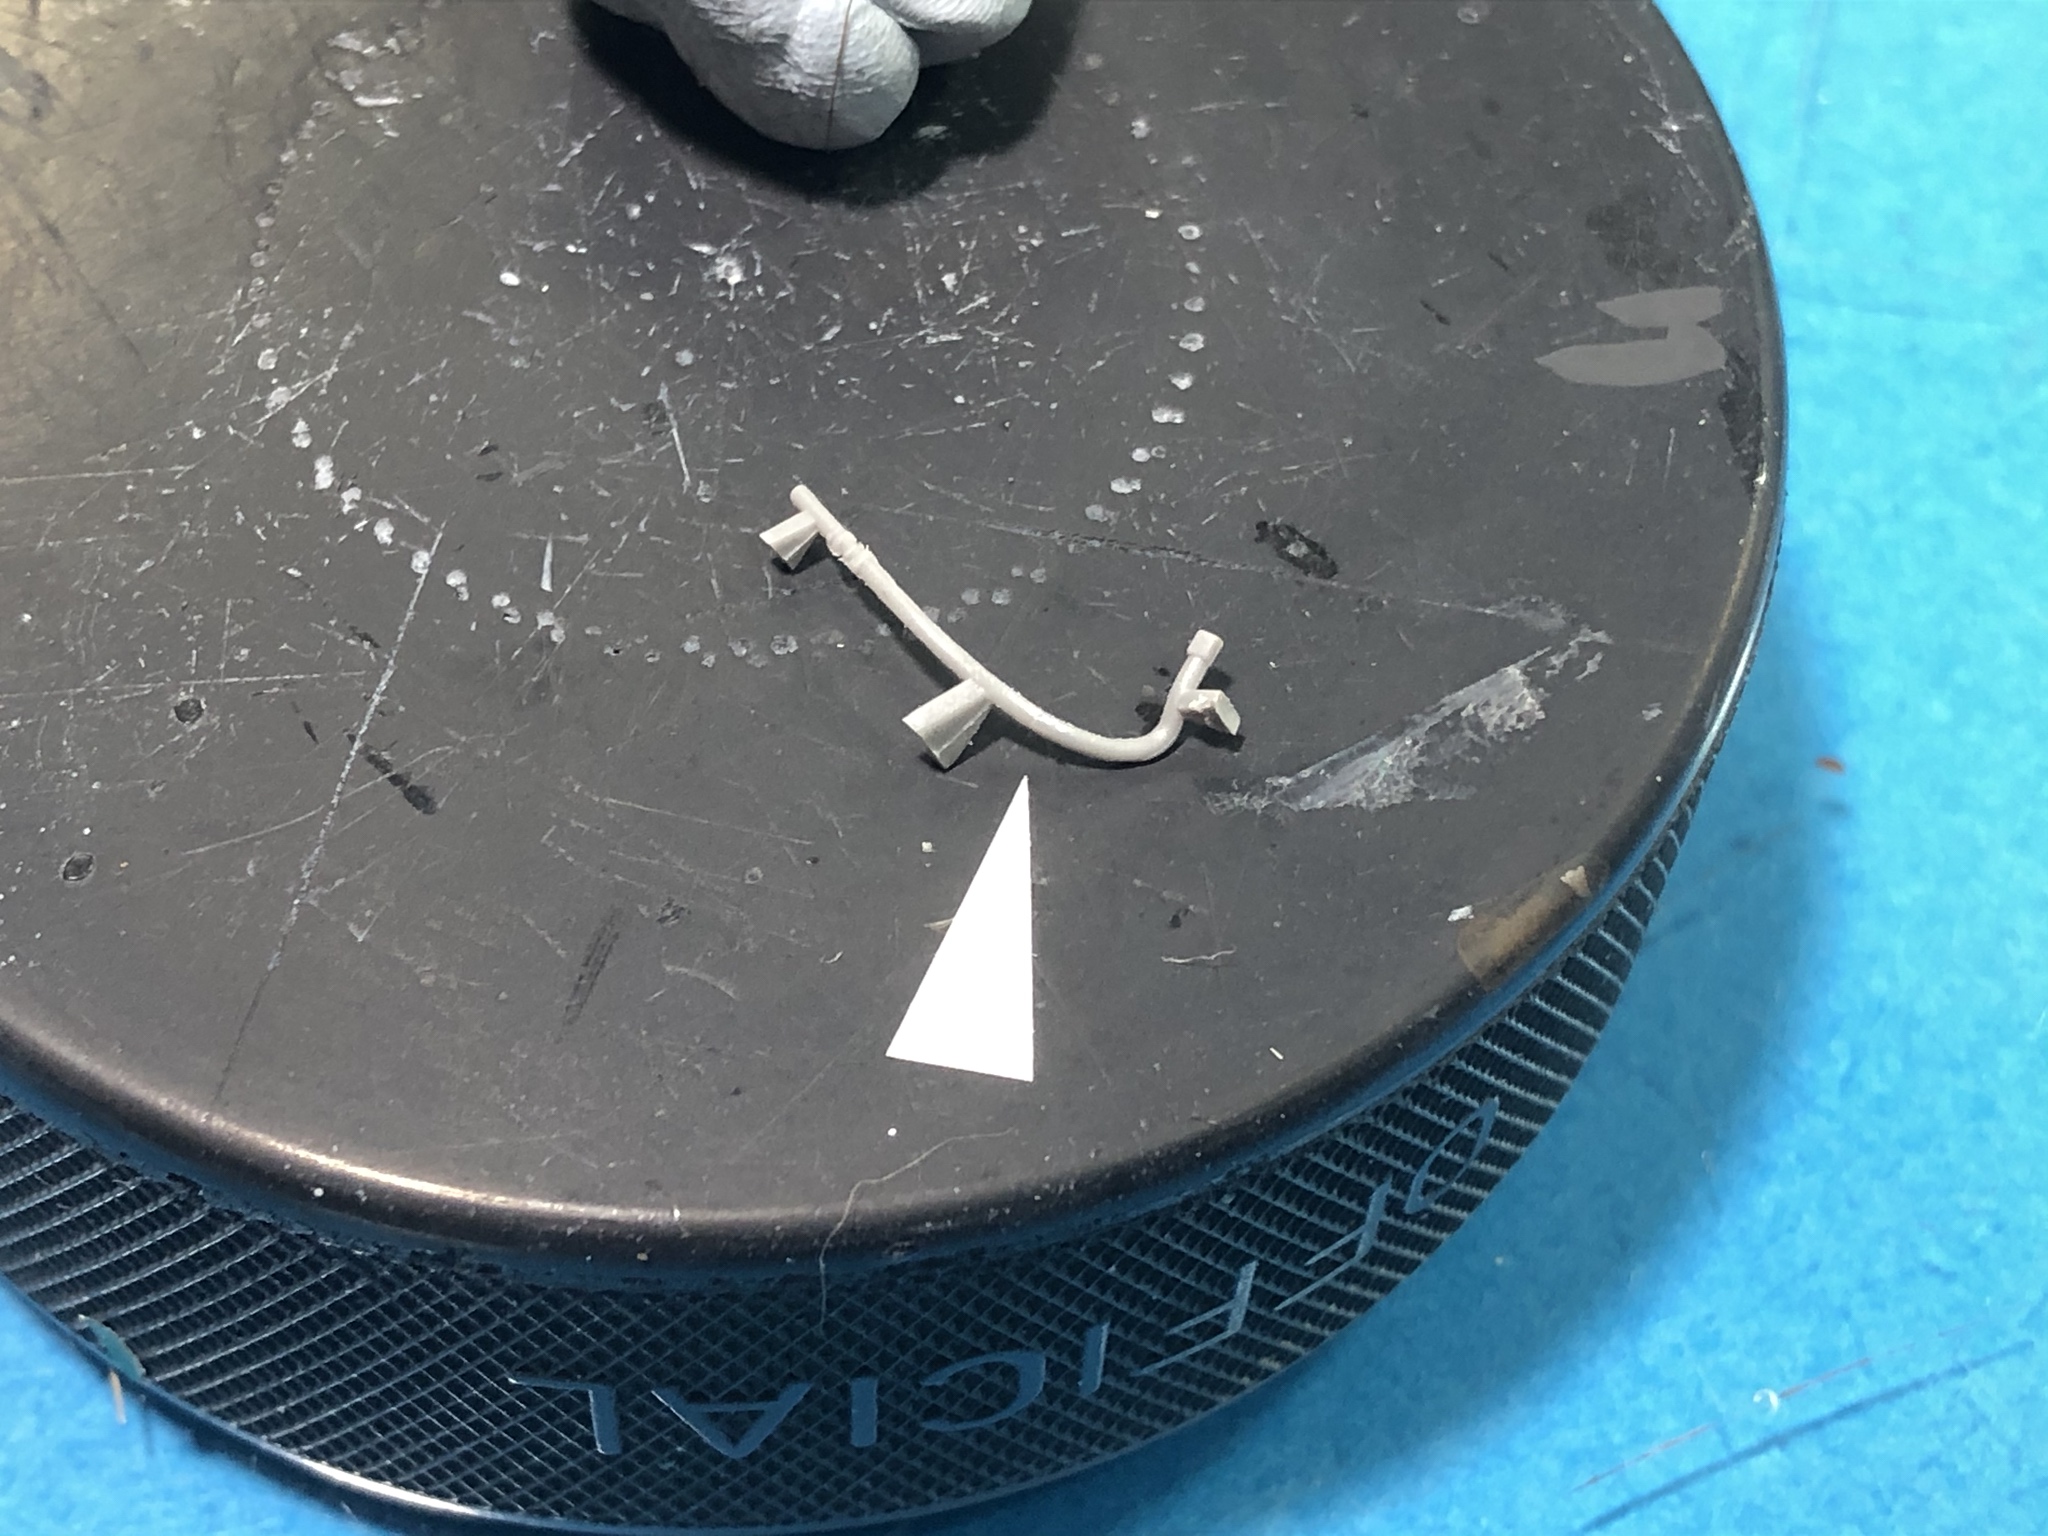
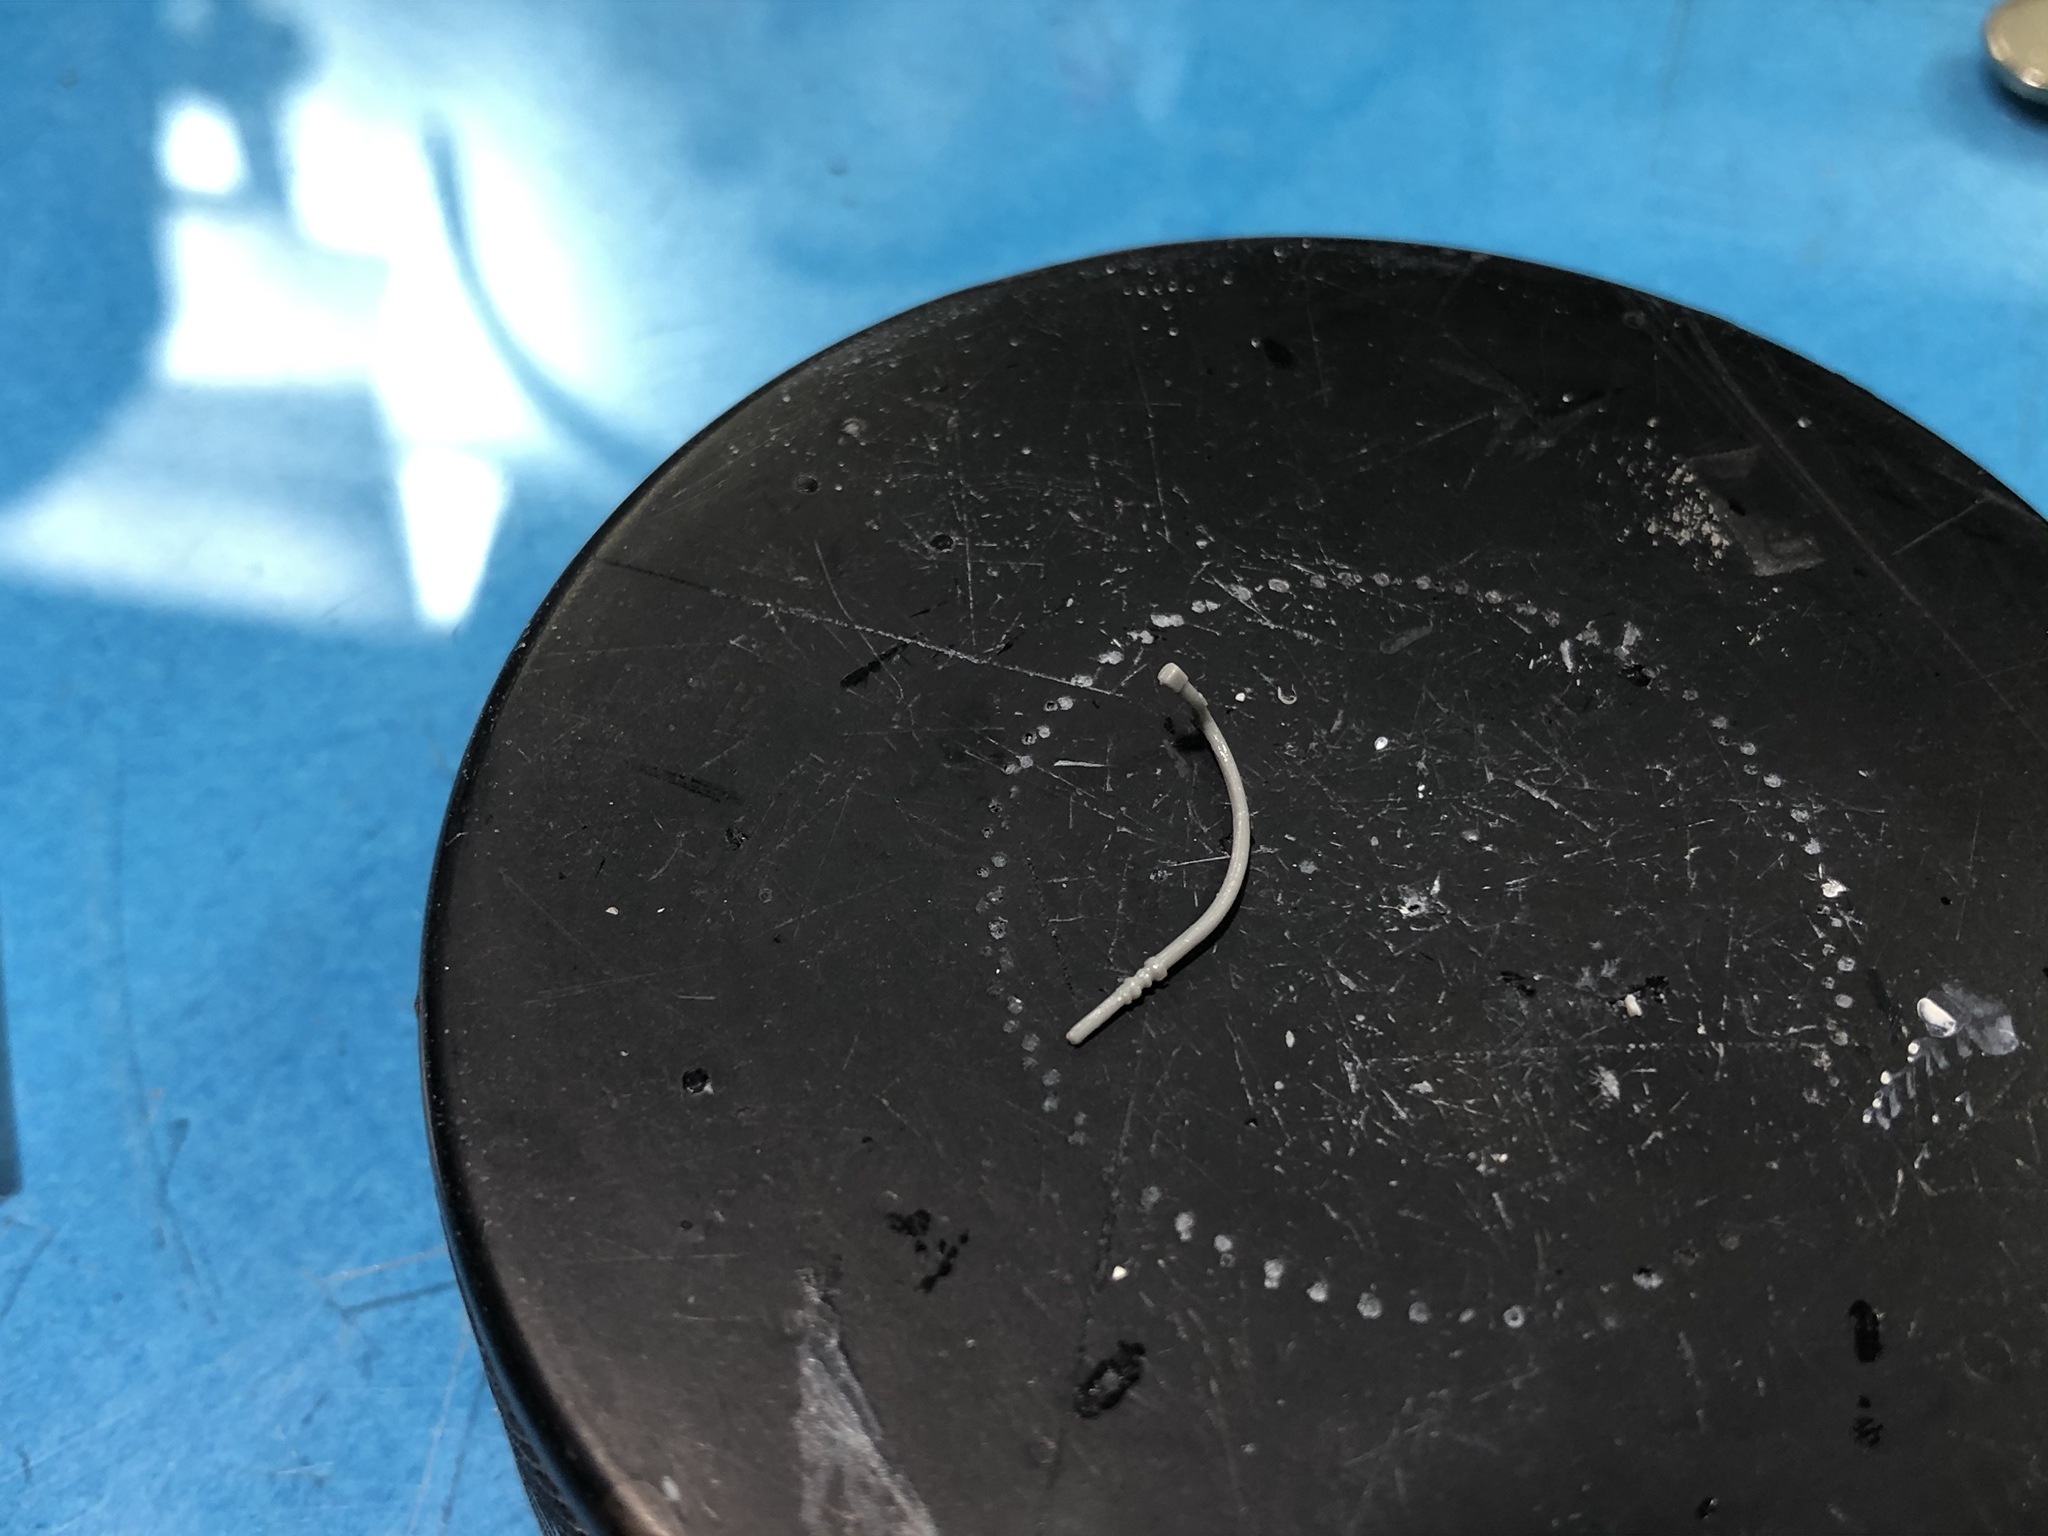
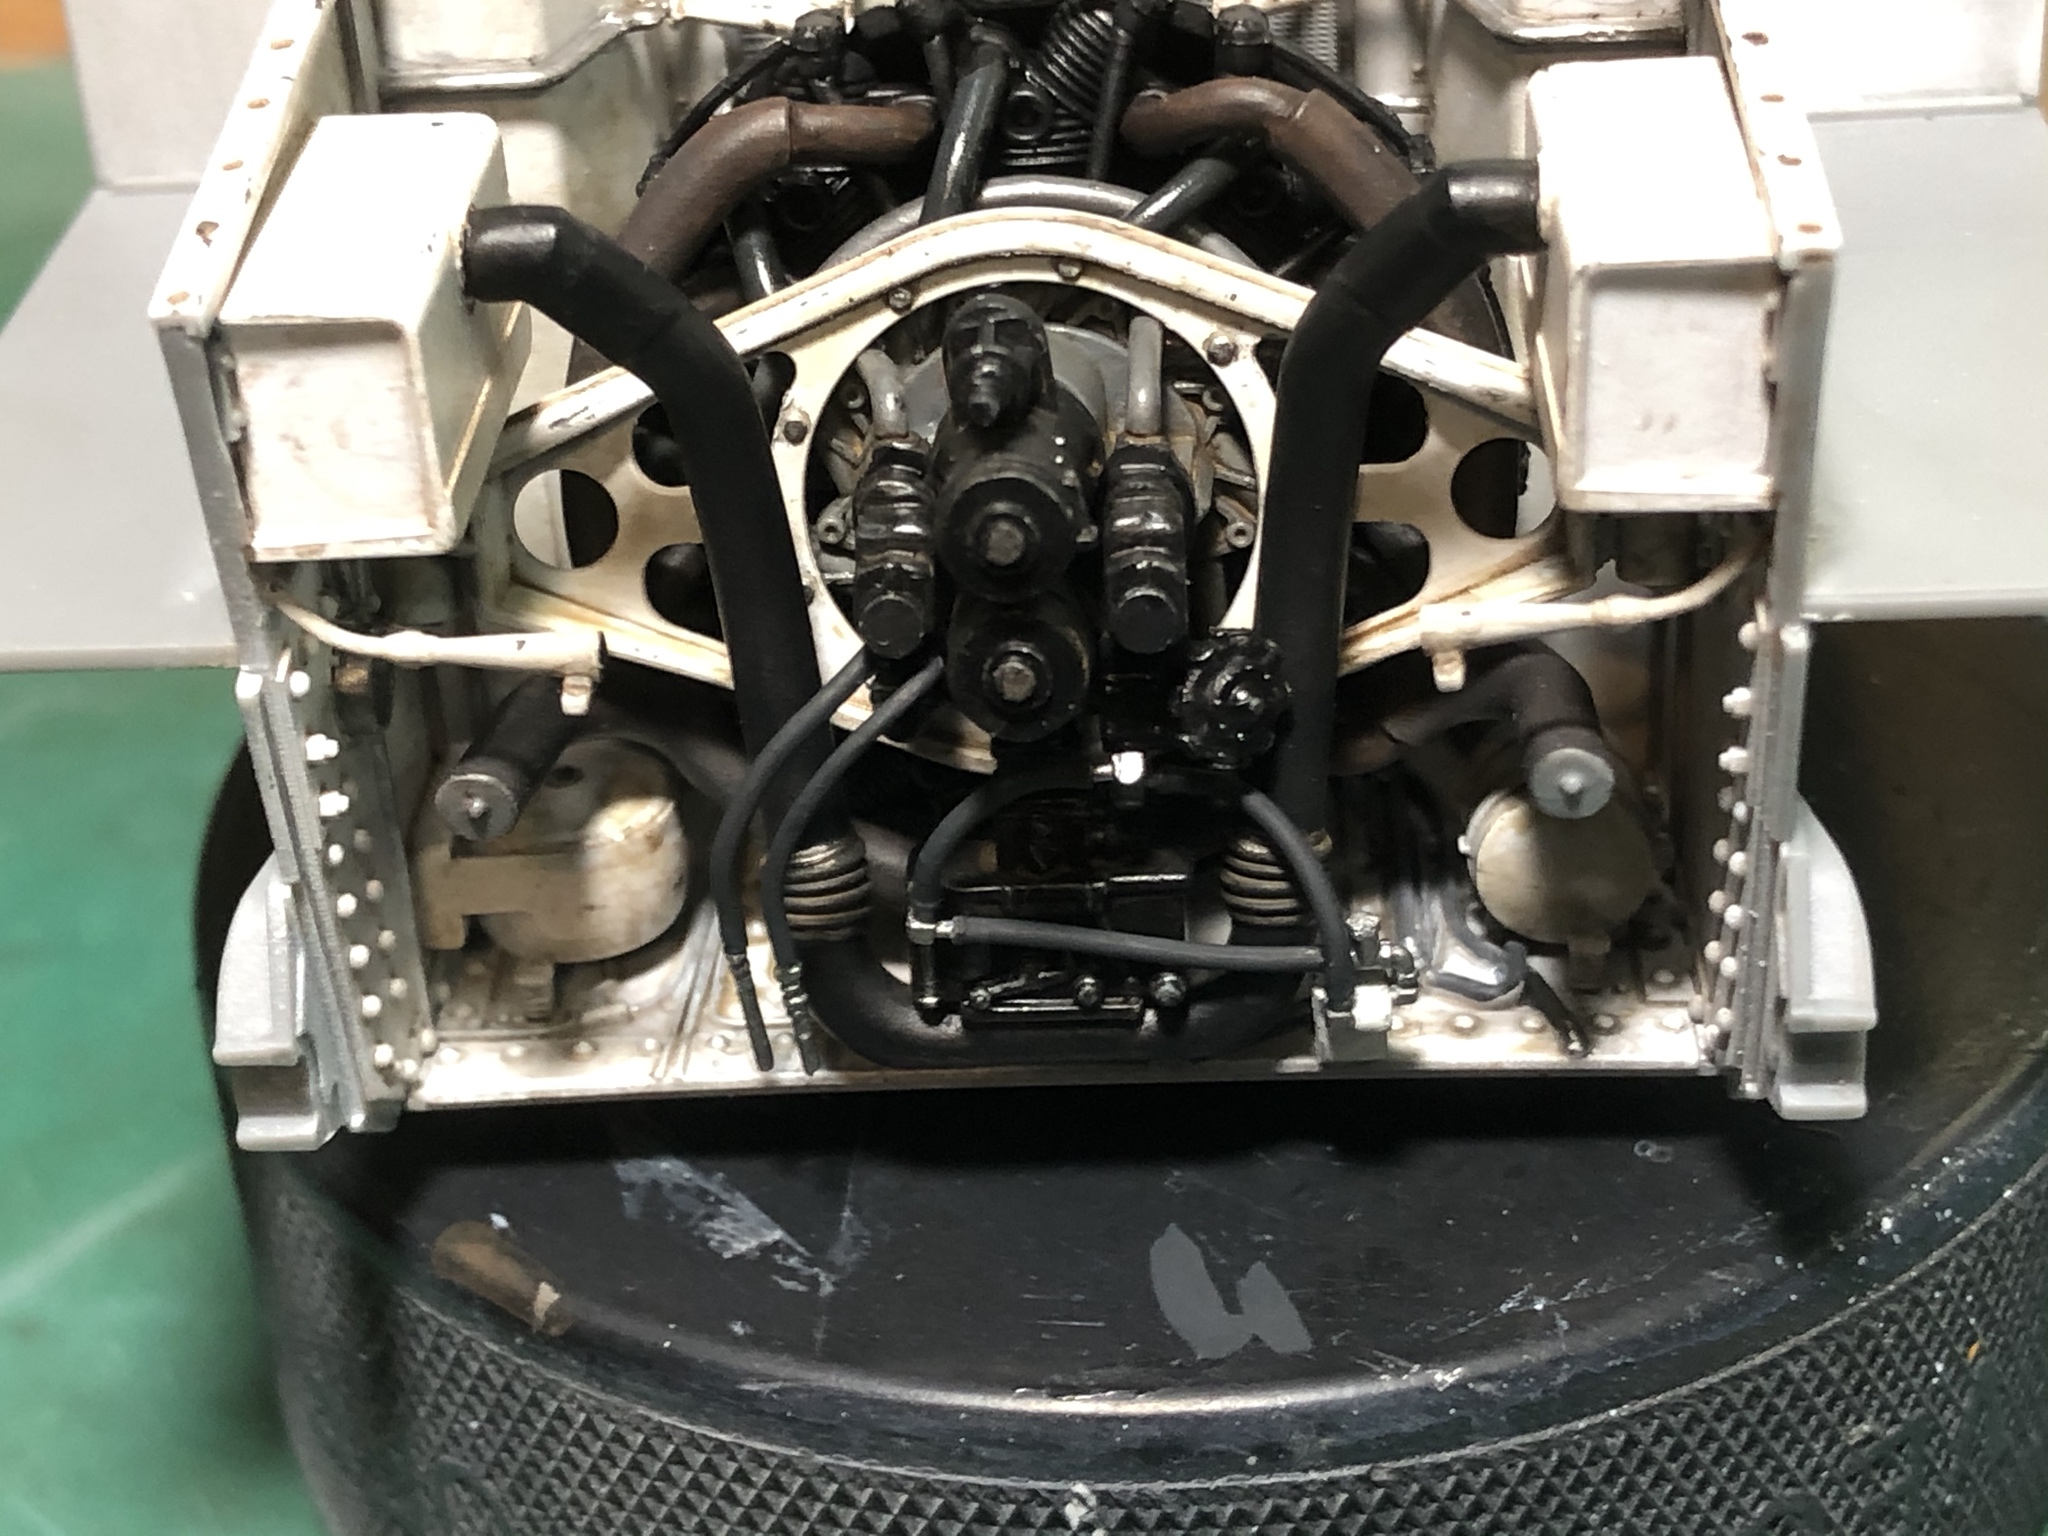
It occurred to me that my description of the repairs for the engine lines might not have been clear. Since I needed to do more, here area few pics to show what I was talking about.
One of the lines broken on the sprue...
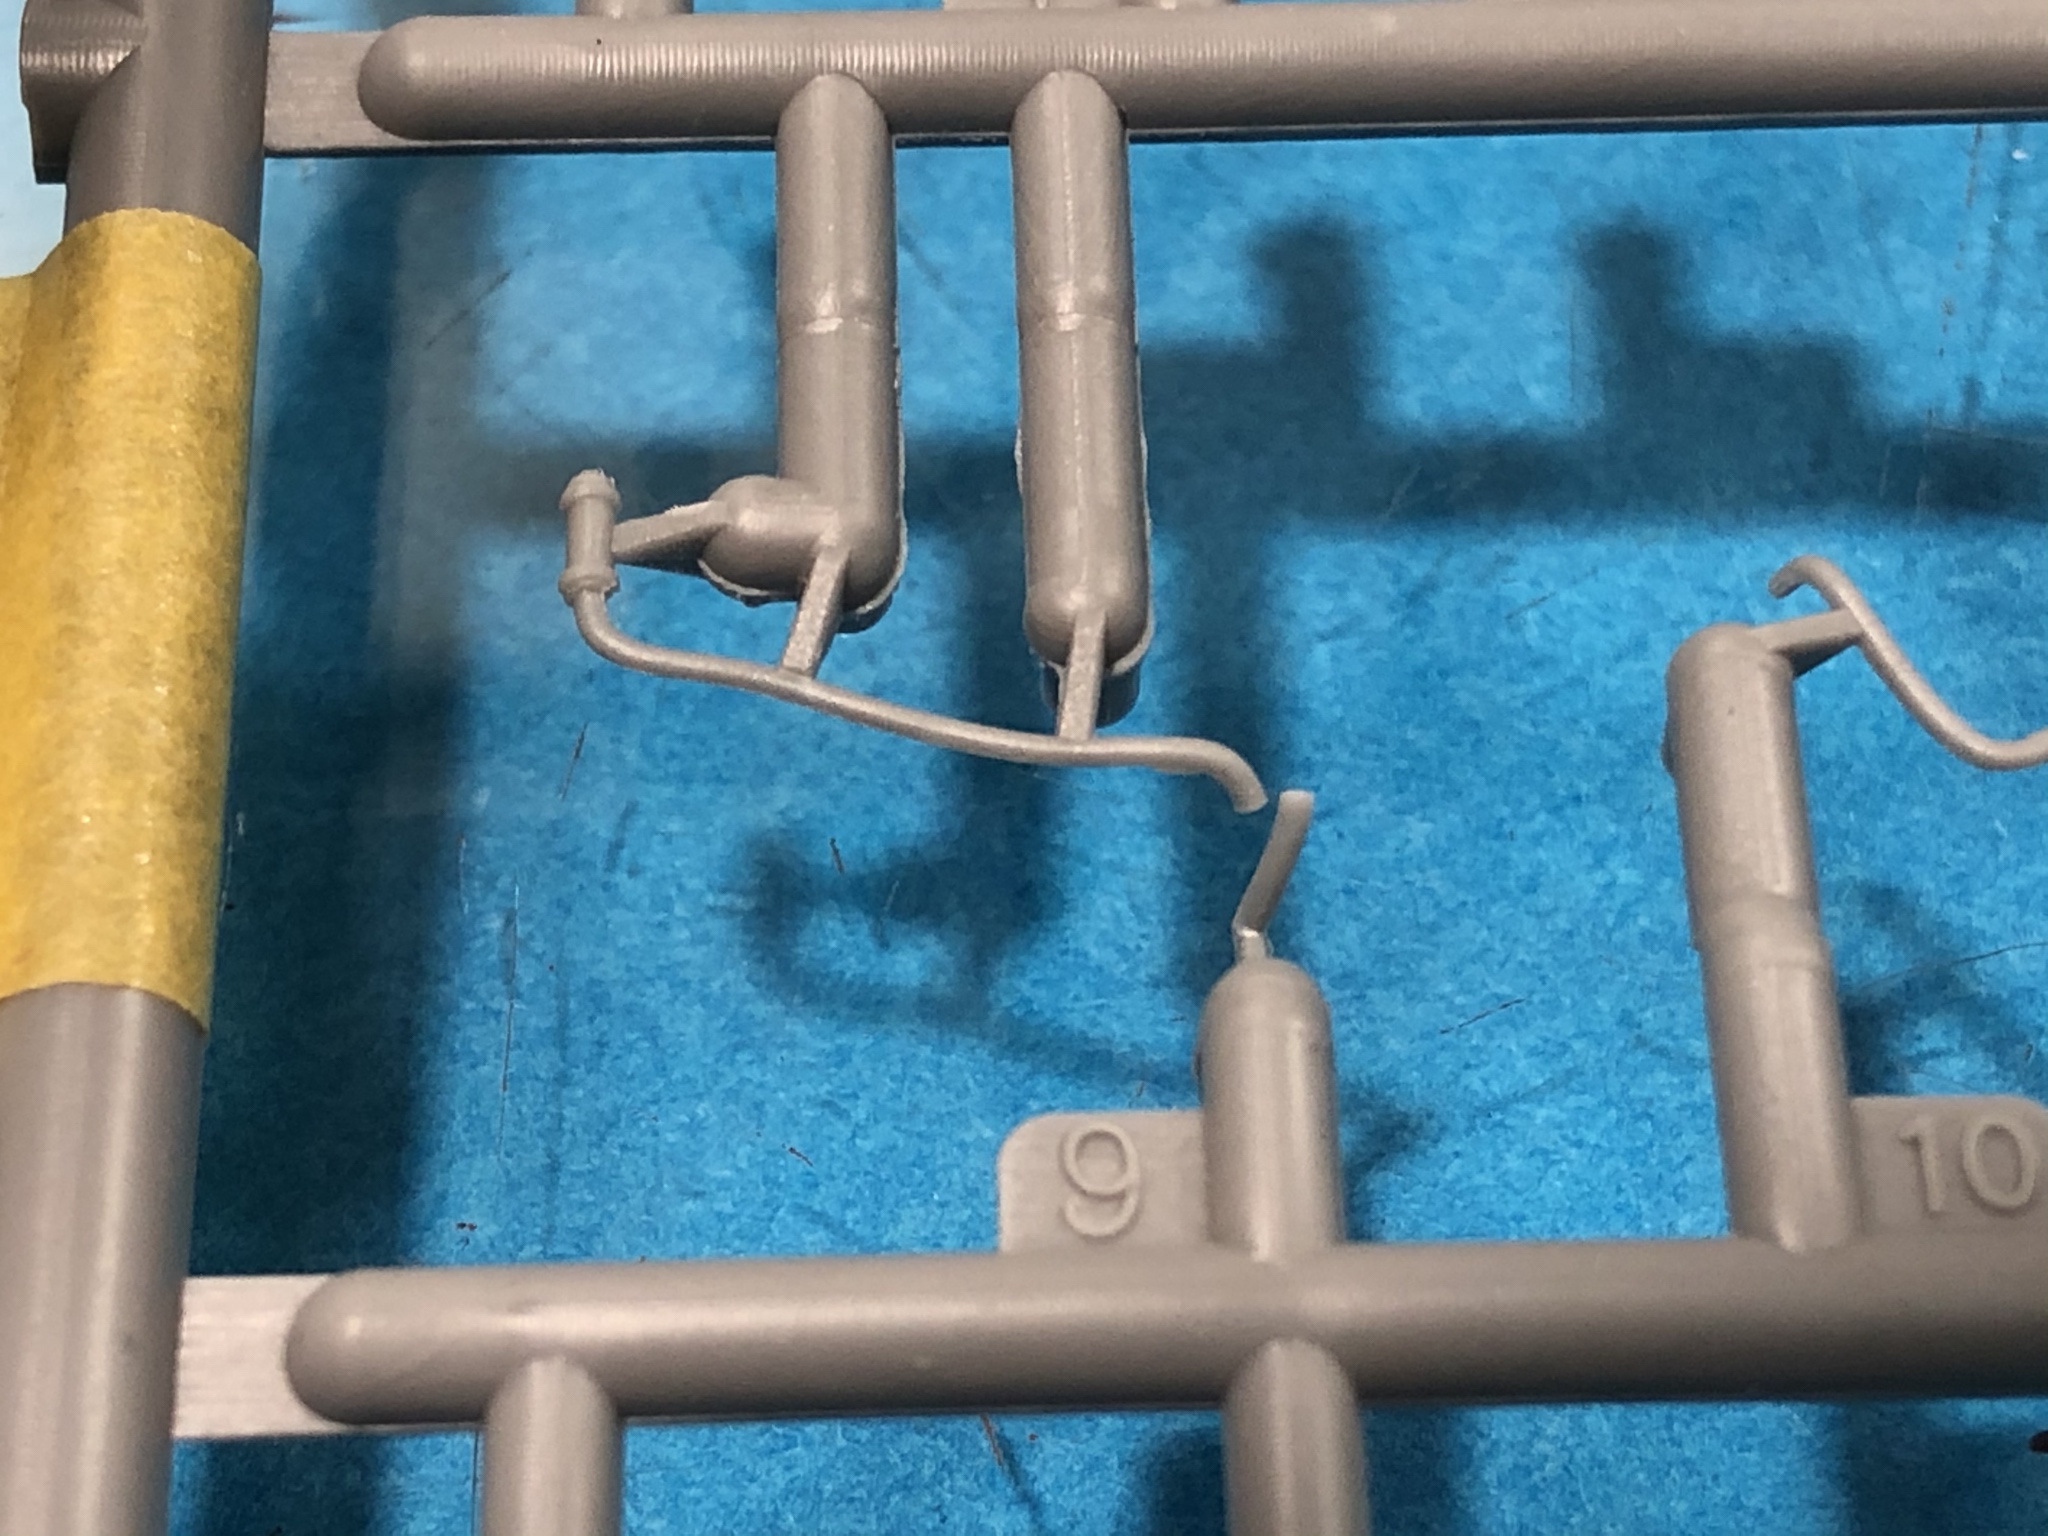
Here is the one that had the sprue attachment point cut/weakened to allow realignment of the broken area with the rest of the part and then was cemented together...
Here is the repaired part removed from the sprue. The plastic arrow points to the repair...
Here is the part after attachment point and mold line removal...
The lines on left rear of the engine are the ones done in this manner.
The bell-mouthed fire extinguisher nozzles were also drilled out and installed.
Thatís enough fun to consume all of my modeling time for the evening.
Cheers,
Paul H
One of the lines broken on the sprue...

Here is the one that had the sprue attachment point cut/weakened to allow realignment of the broken area with the rest of the part and then was cemented together...

Here is the repaired part removed from the sprue. The plastic arrow points to the repair...

Here is the part after attachment point and mold line removal...

The lines on left rear of the engine are the ones done in this manner.

The bell-mouthed fire extinguisher nozzles were also drilled out and installed.

Thatís enough fun to consume all of my modeling time for the evening.
Cheers,
Paul H
TankManNick

Joined: February 01, 2010
KitMaker: 551 posts
Armorama: 543 posts

Posted: Monday, October 21, 2019 - 03:59 PM UTC
That's coming together nicely! Good save on the broken parts. Hopefully they are not all like that! All the packaged models I mean.

PRH001

Joined: June 16, 2014
KitMaker: 681 posts
Armorama: 603 posts

Posted: Monday, October 21, 2019 - 04:13 PM UTC
I seriously doubt that all of these kits are damaged. The kit is well packaged overall. The box my kit came in looked like it had seen some rough handling. One corner was crushed pretty thoroughly. I did a quick look through of things when I bought it at ithe Austin AMPS show and things seemed okay.
Again, itís nothing that a little time and patience canít take care of.
Again, itís nothing that a little time and patience canít take care of.
Violetrock

Joined: March 09, 2003
KitMaker: 831 posts
Armorama: 791 posts

Posted: Thursday, October 24, 2019 - 07:31 AM UTC
Thank you for this excellent build and the most useful hints and the info on the paint ued in each step!

PRH001

Joined: June 16, 2014
KitMaker: 681 posts
Armorama: 603 posts

Posted: Thursday, October 24, 2019 - 02:34 PM UTC
Quoted Text
Thank you for this excellent build and the most useful hints and the info on the paint ued in each step!
Thanks Thomas, I appreciate the feedback!

PRH001

Joined: June 16, 2014
KitMaker: 681 posts
Armorama: 603 posts

Posted: Thursday, October 24, 2019 - 03:05 PM UTC
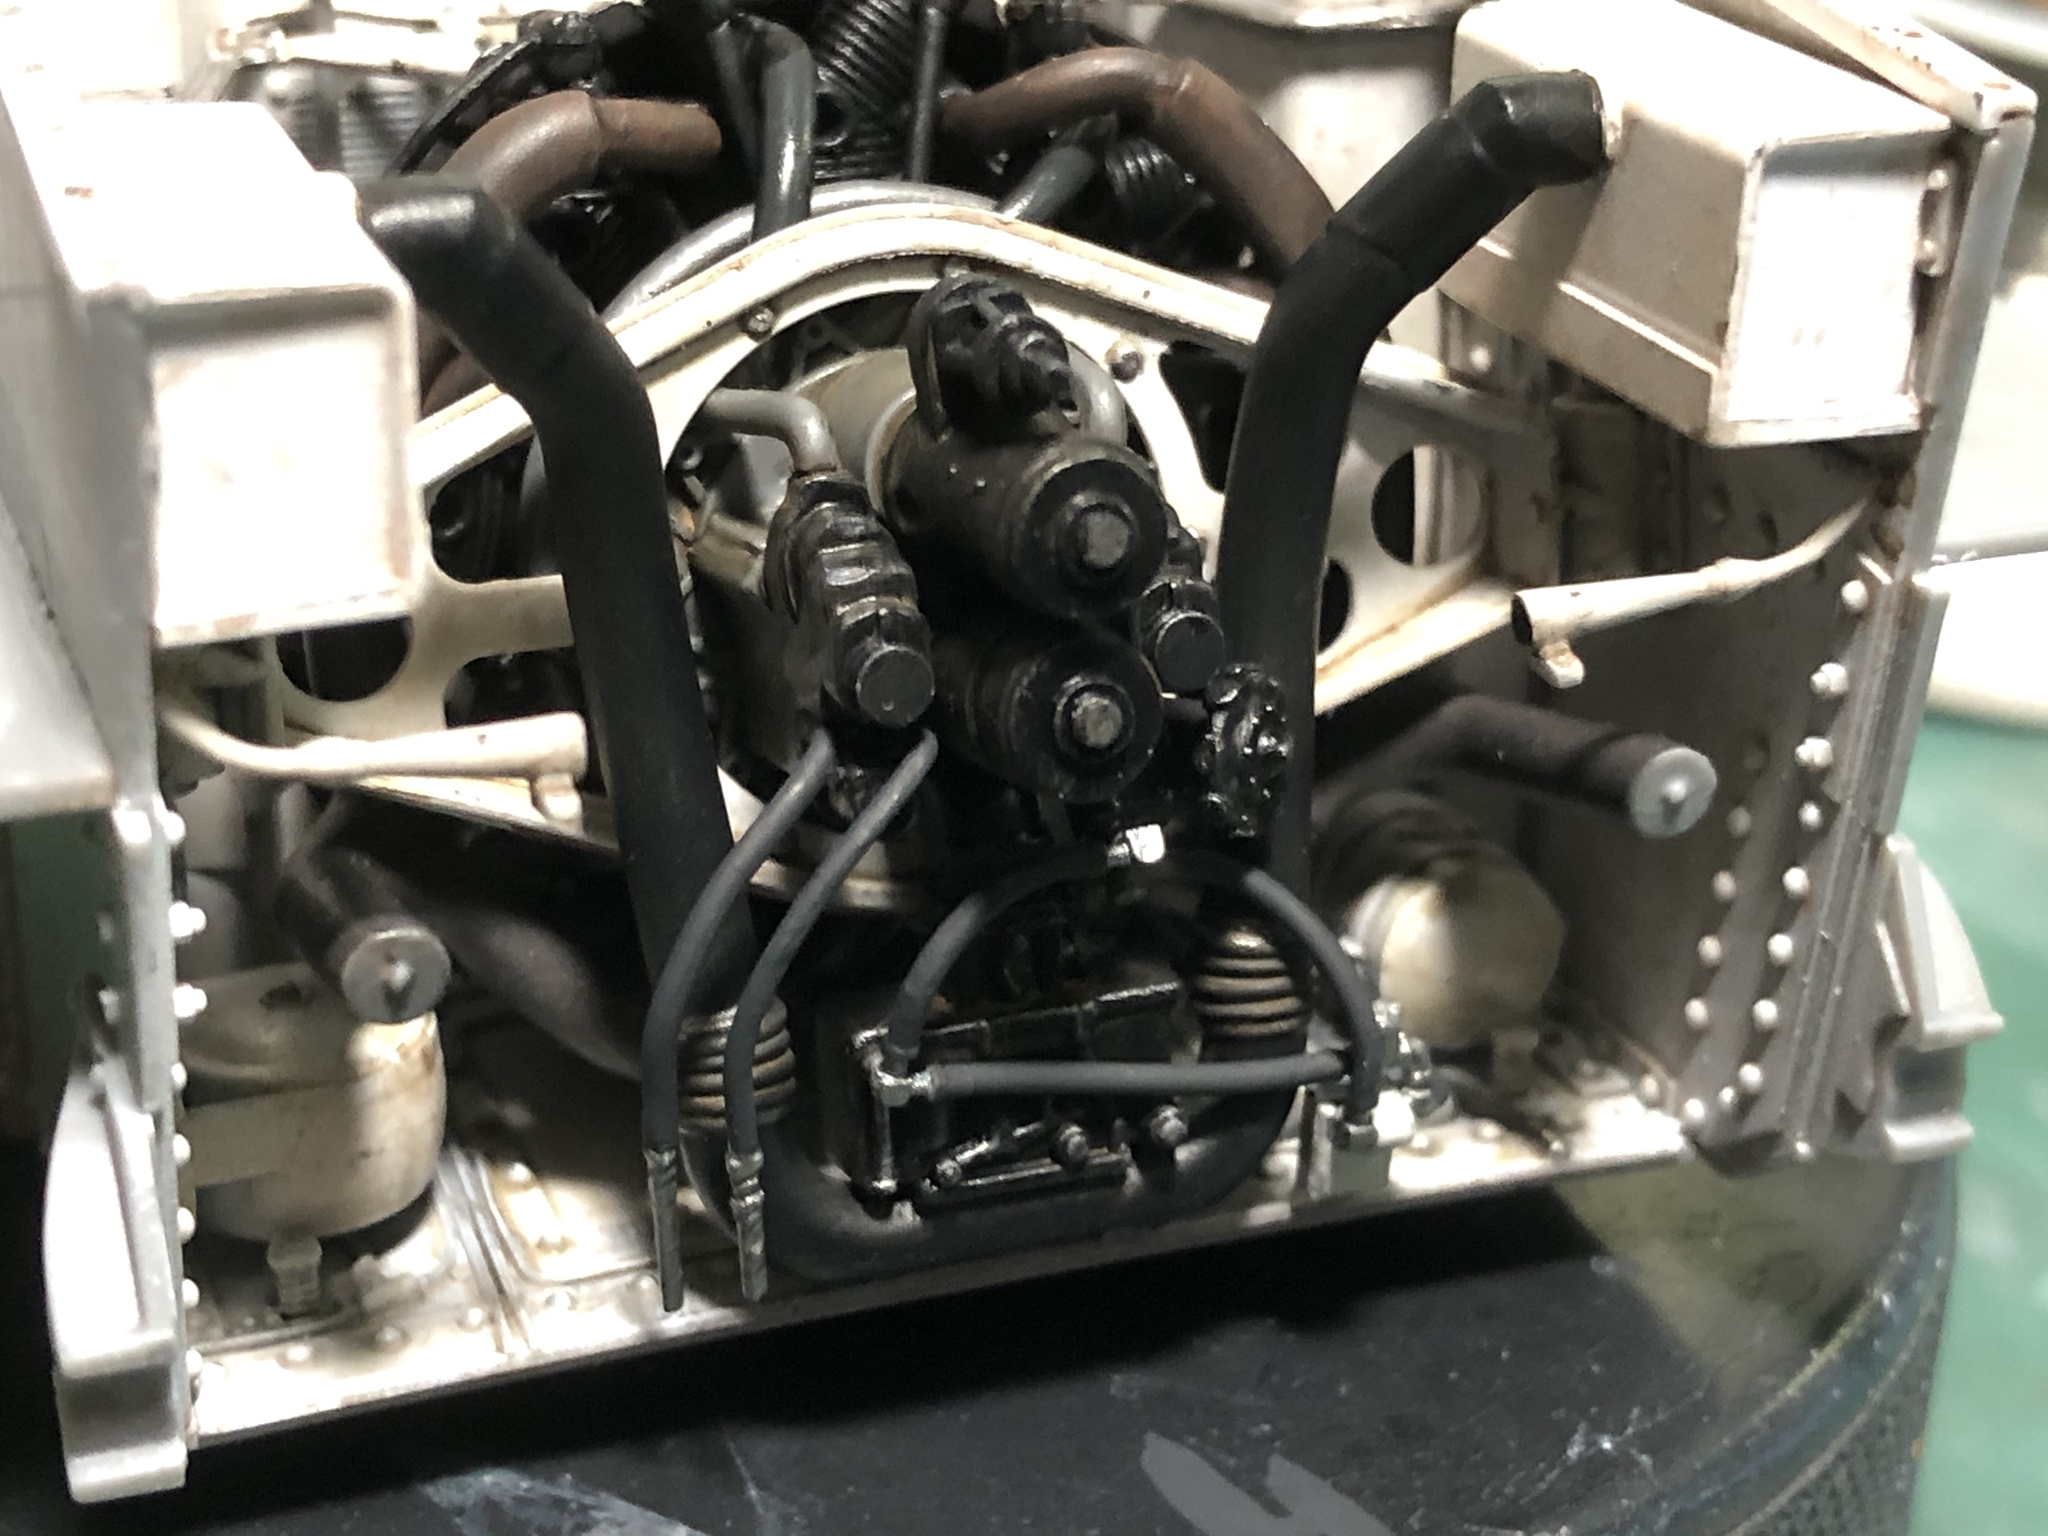
I finished up the engine bay plumbing in preparation for the installation of the rear bulkhead.
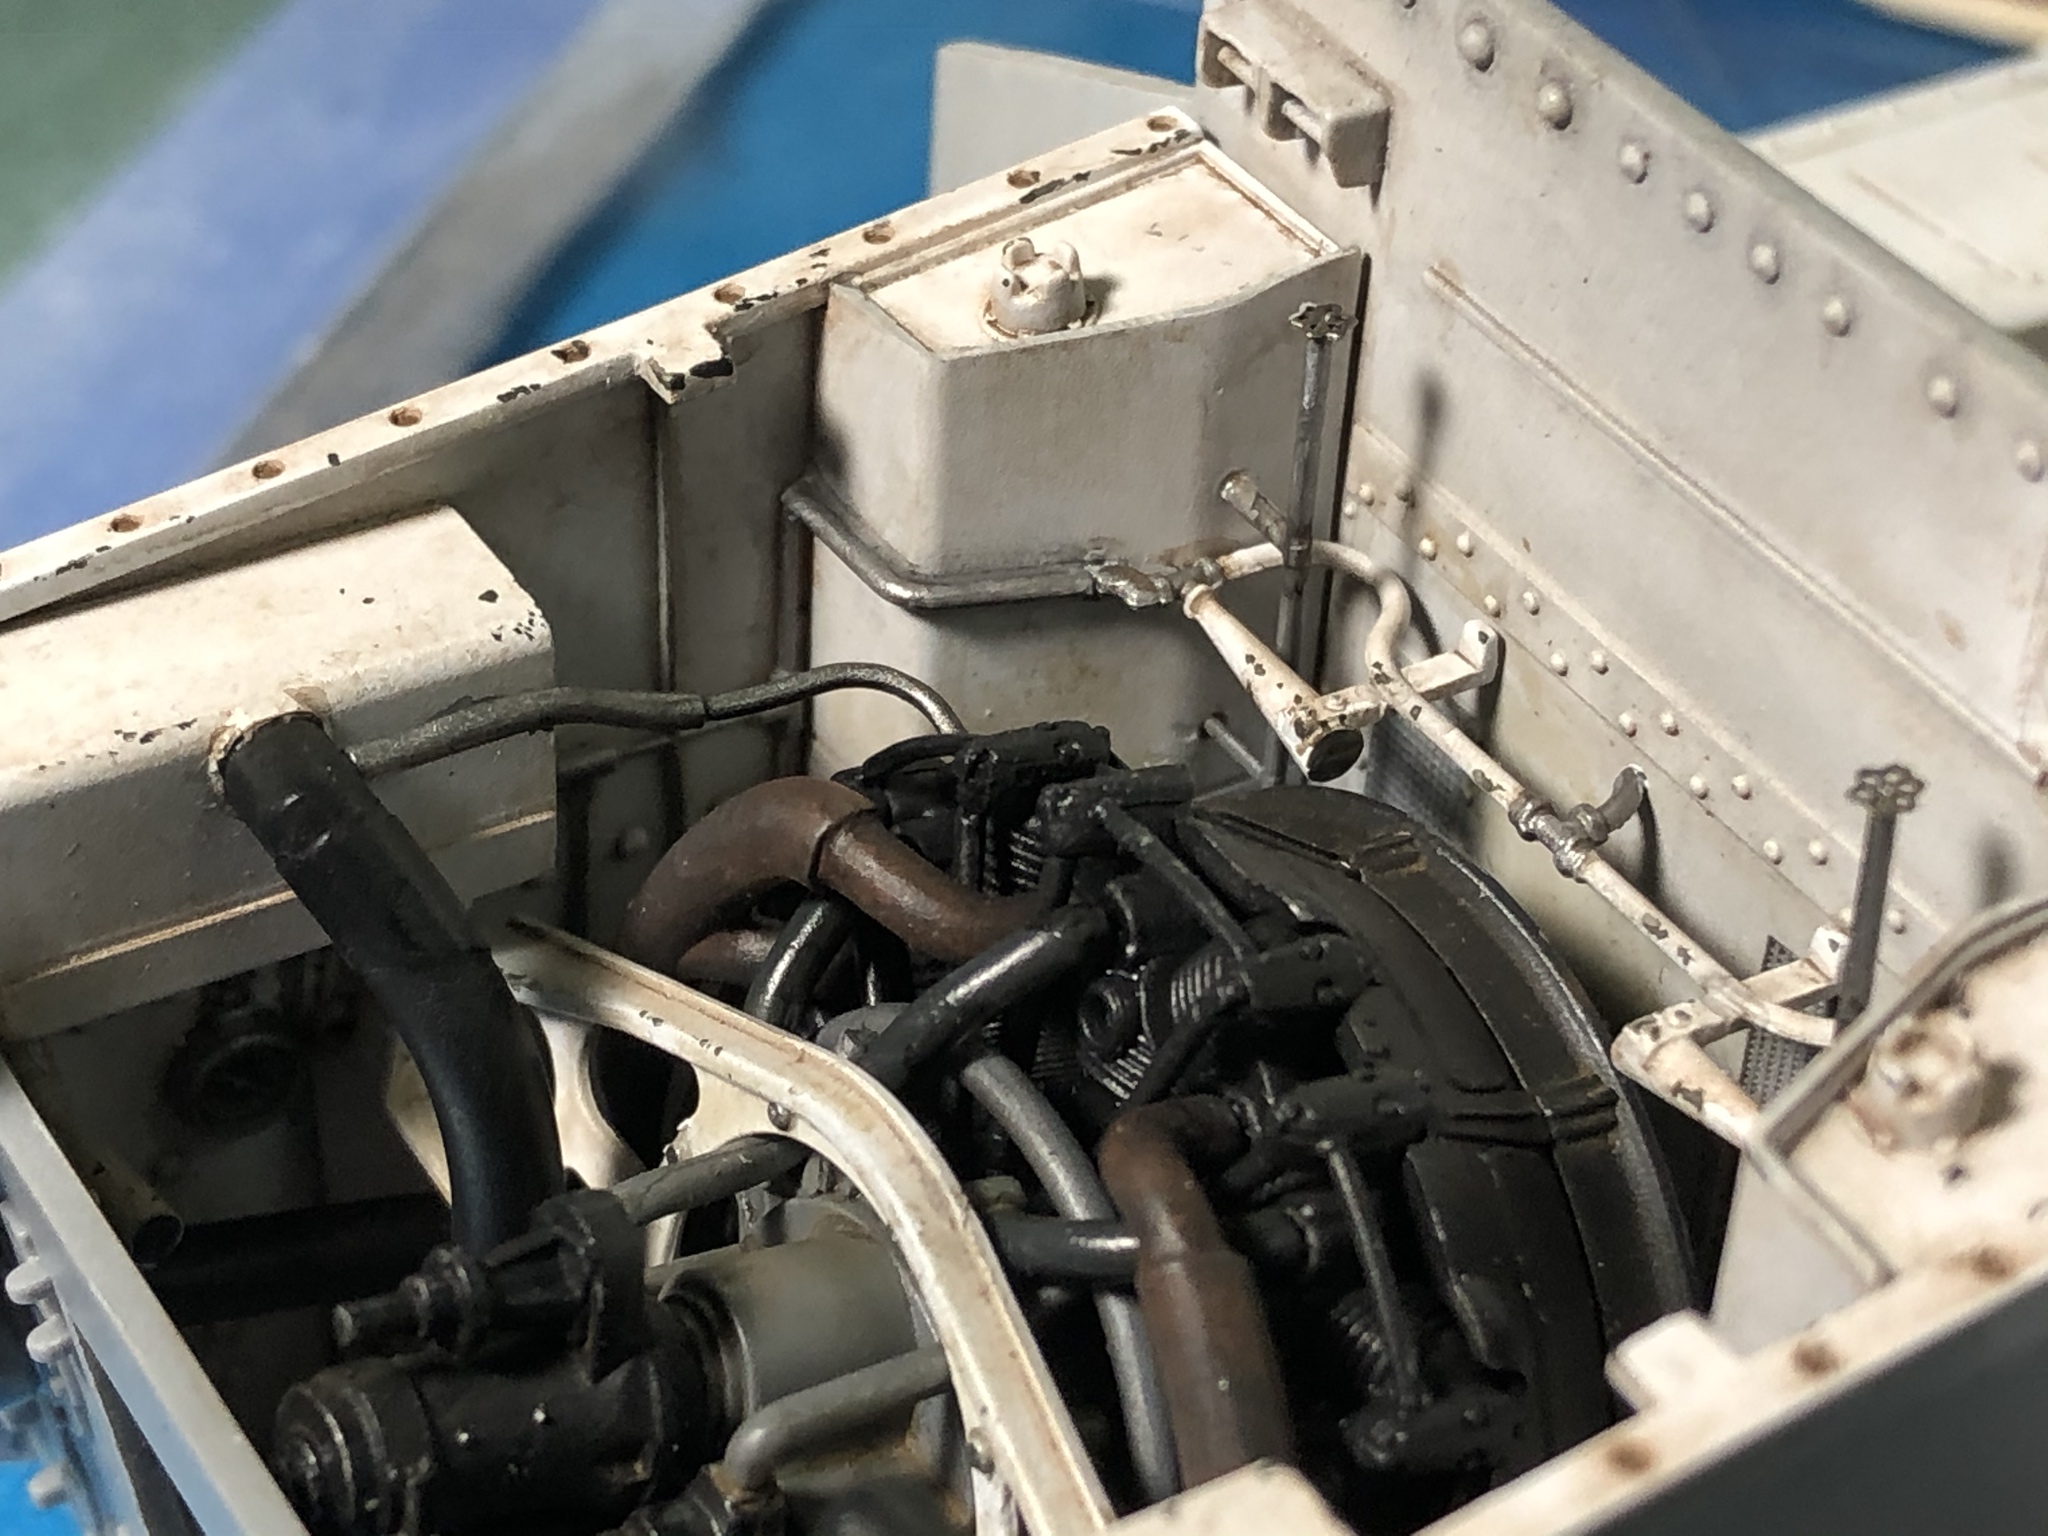
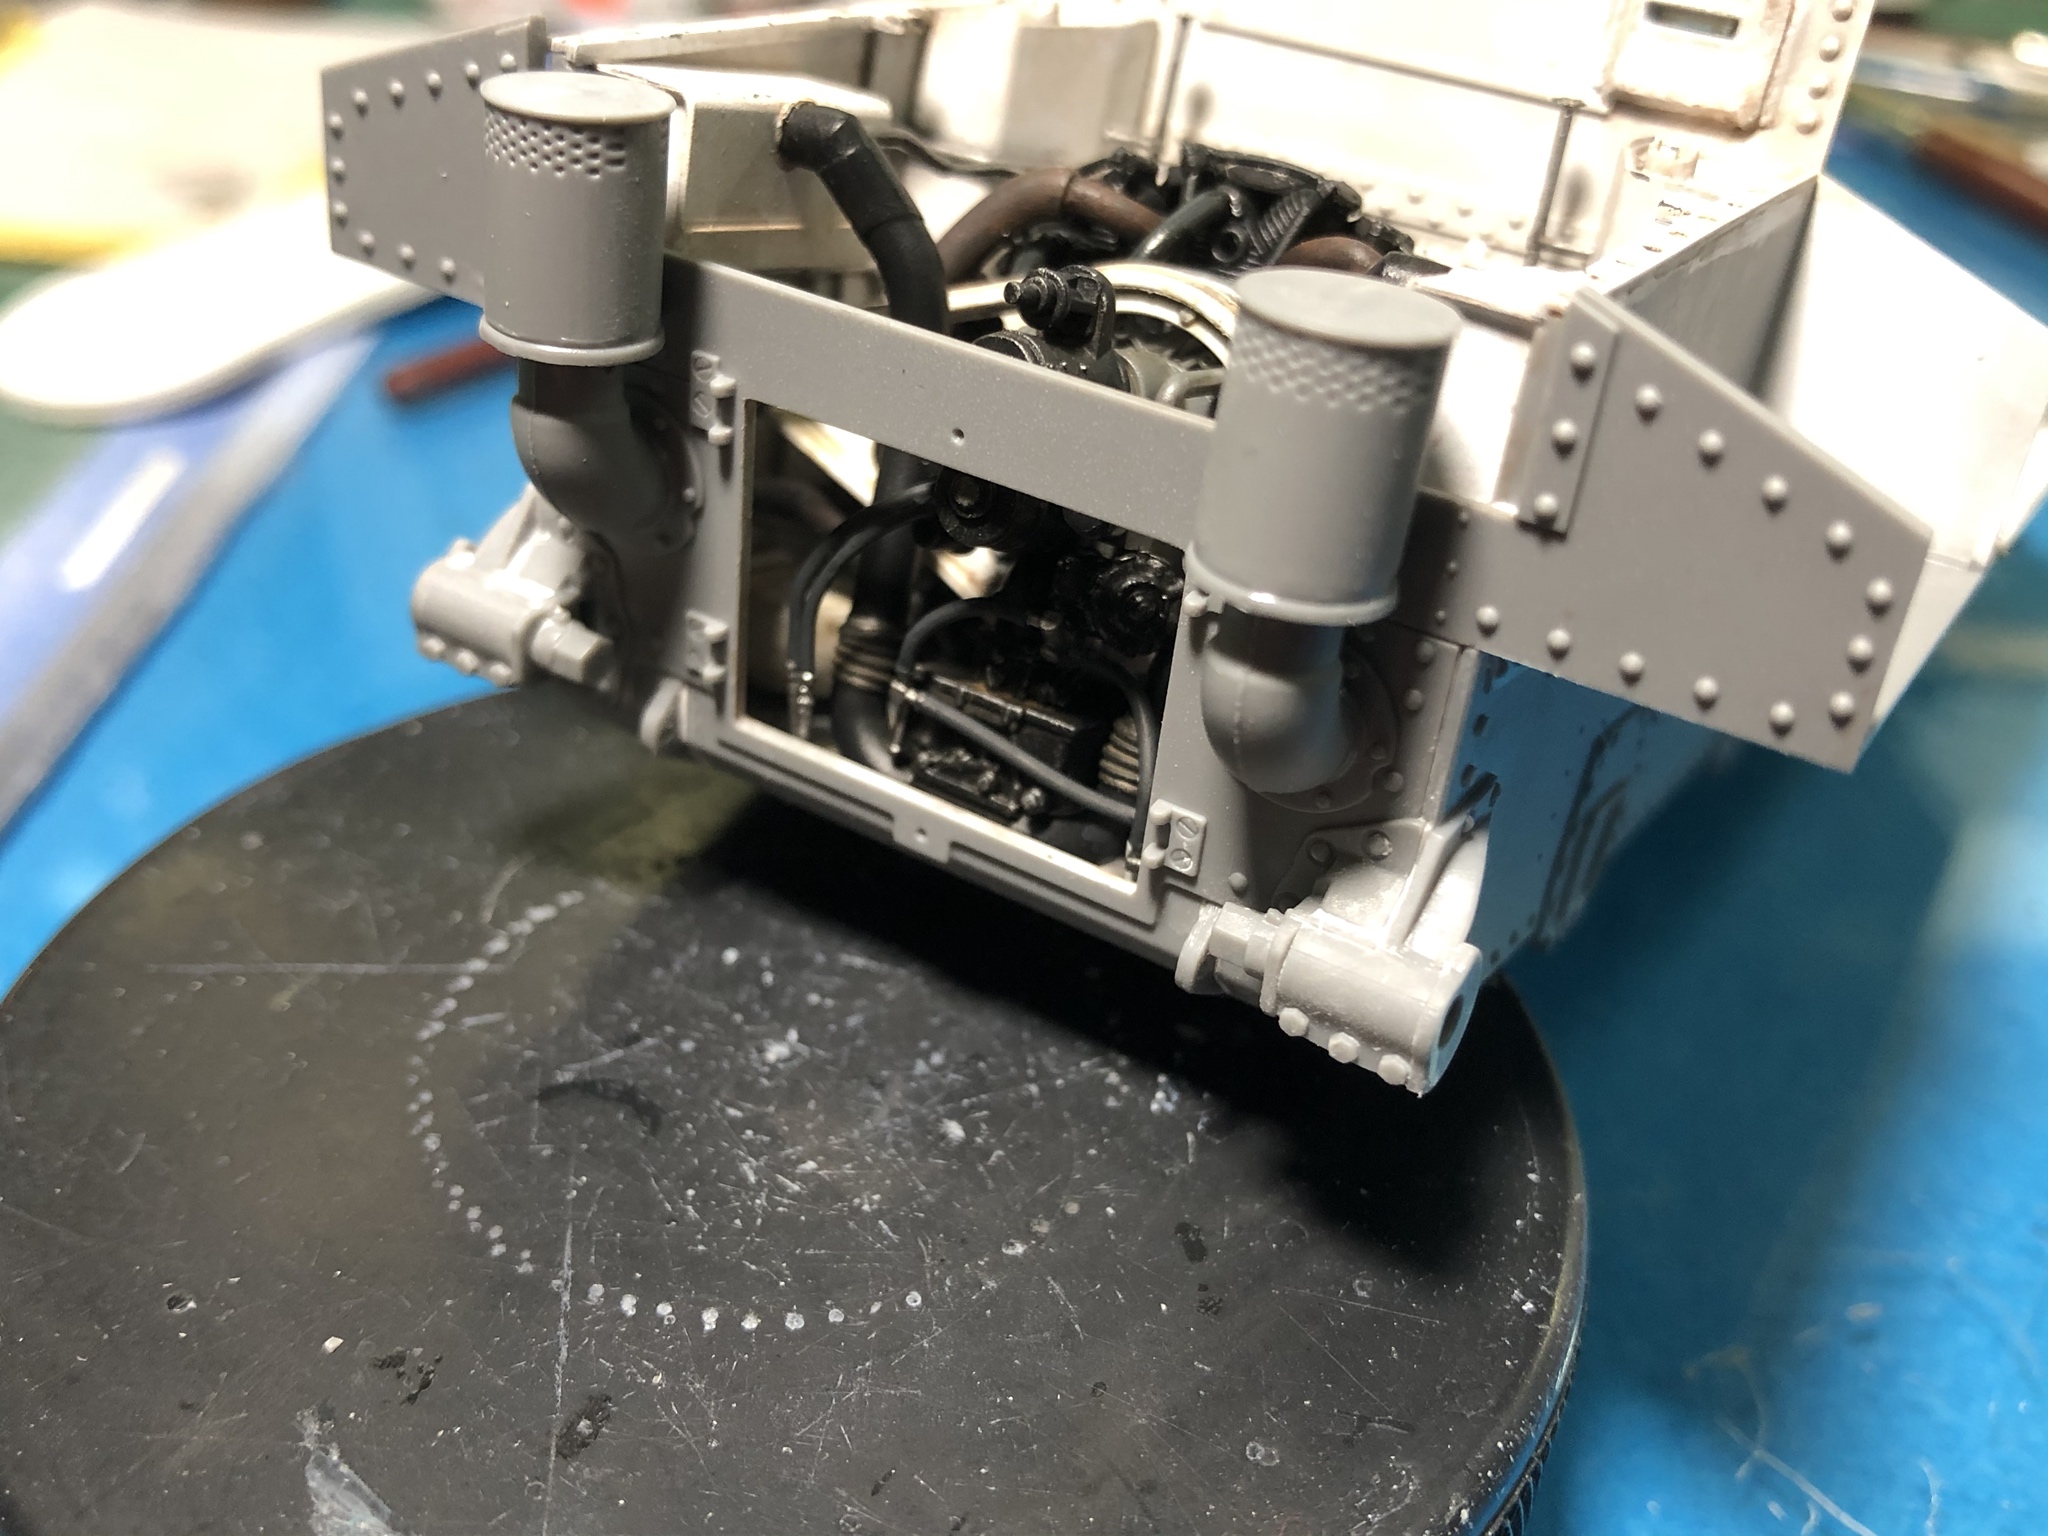
The cleanup and assembly of the exhaust assemblies took awhile. The parts fit well, but distortion caused by large attachment points meant some of the seams needed super glue as a filler. Not a problem, just pointing it out.
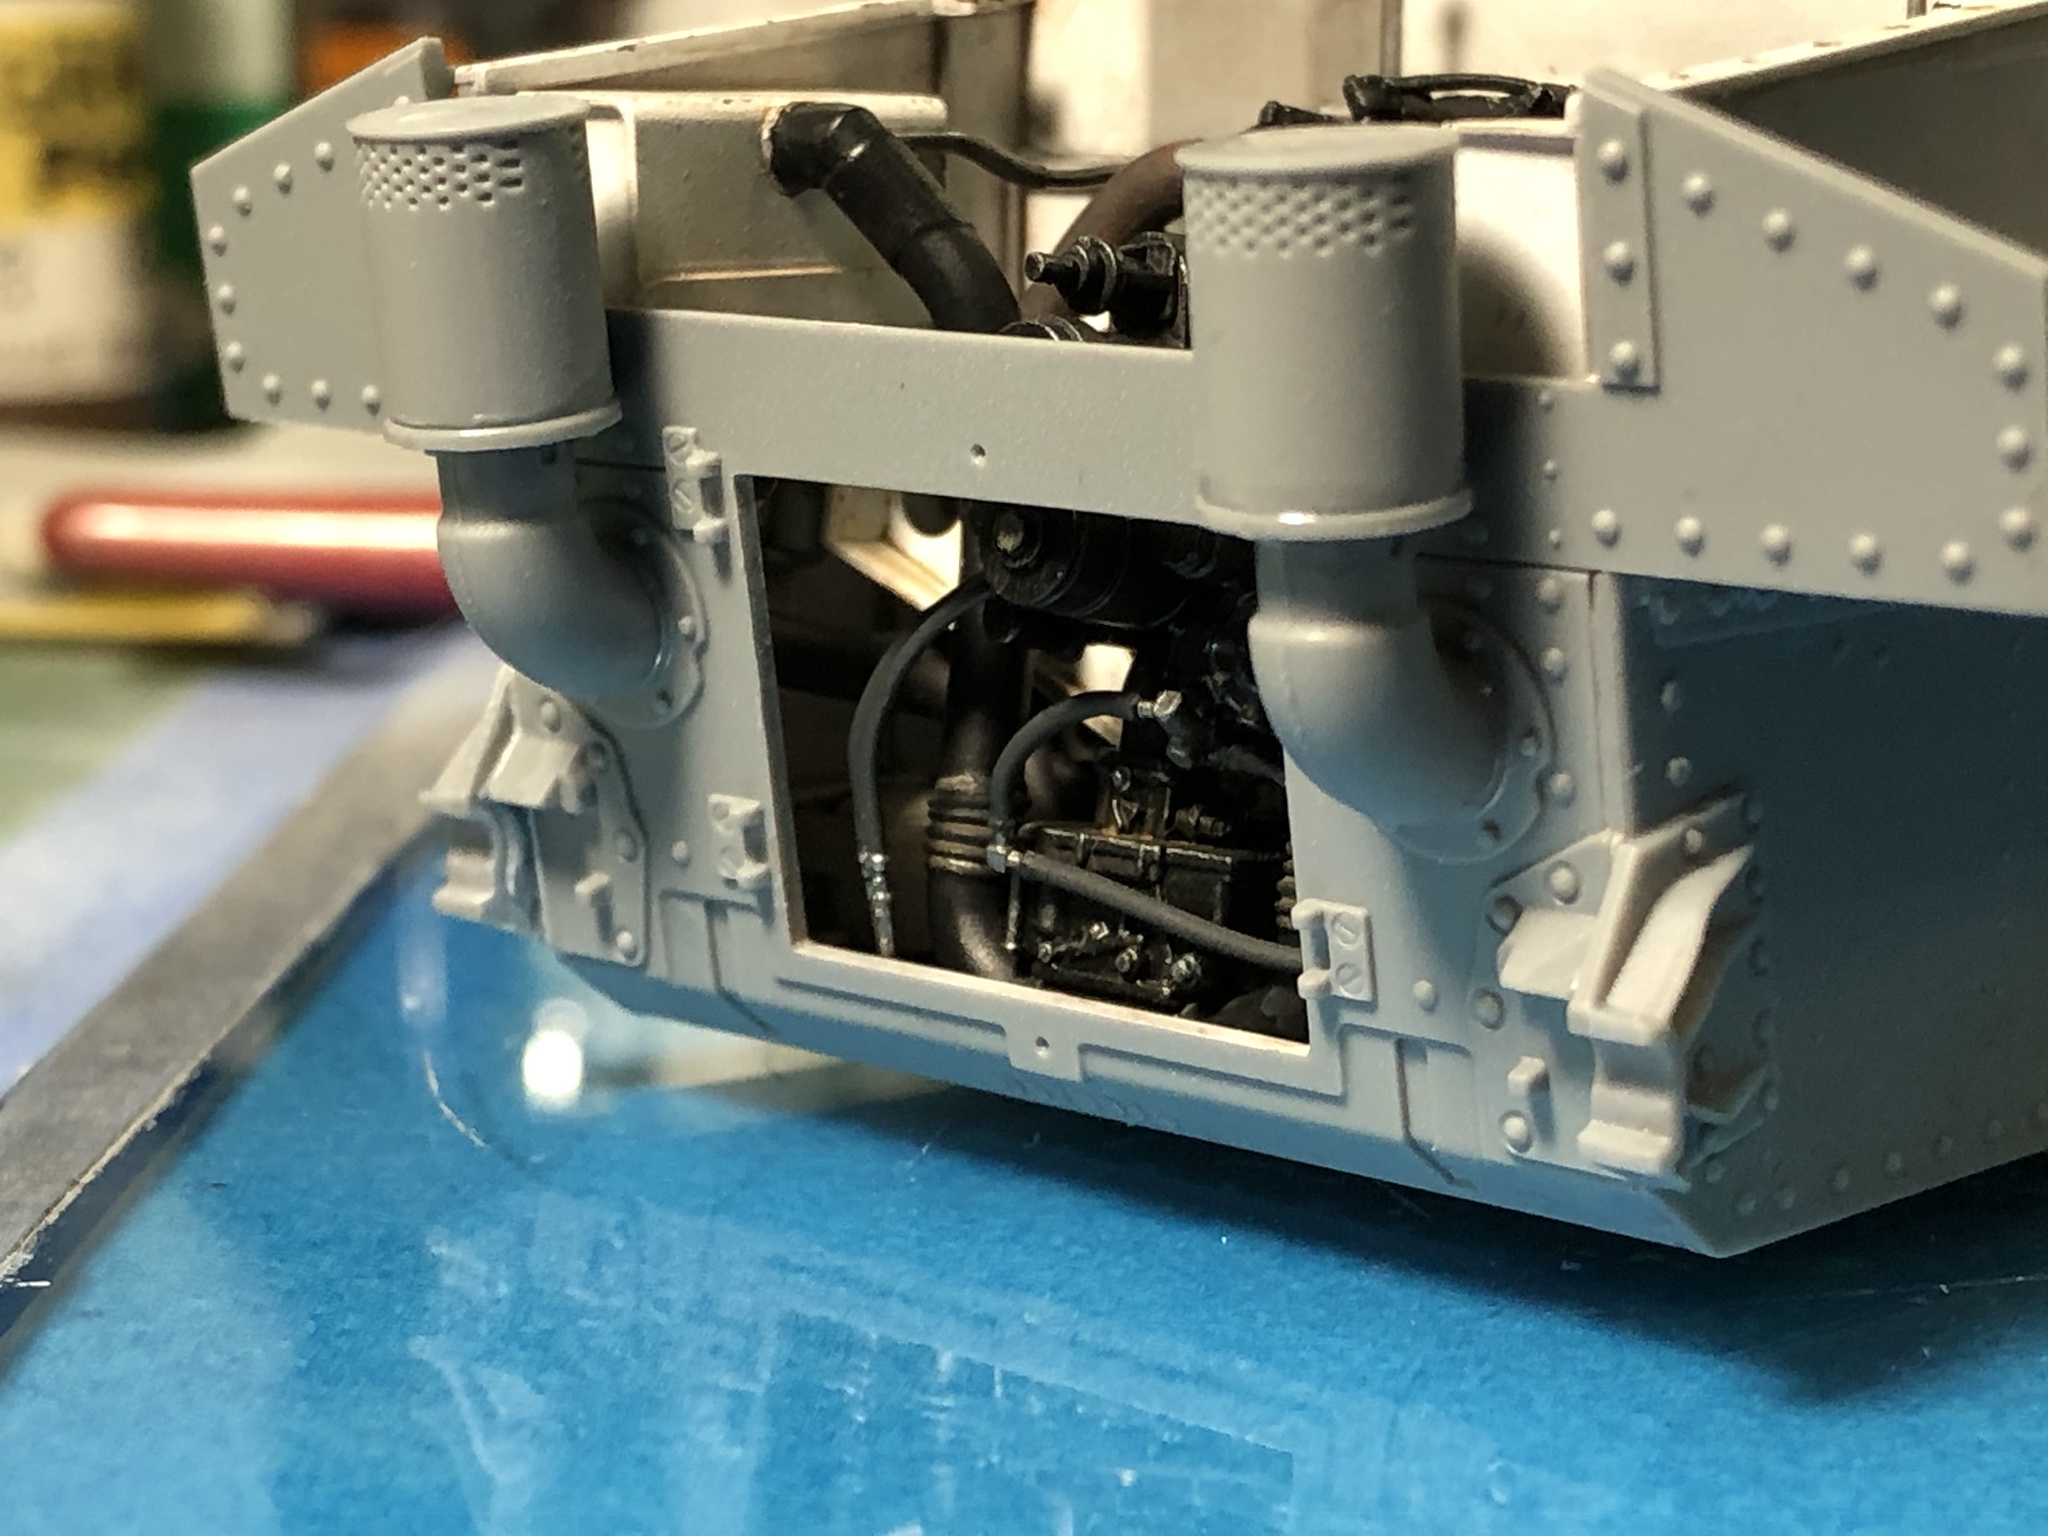
Those were installed after I painted and attached the rear bulkhead. The fit of the bulkhead was good but it uses butt joints on the sponsons and I decided to reinforce them with .010 styrene strip.
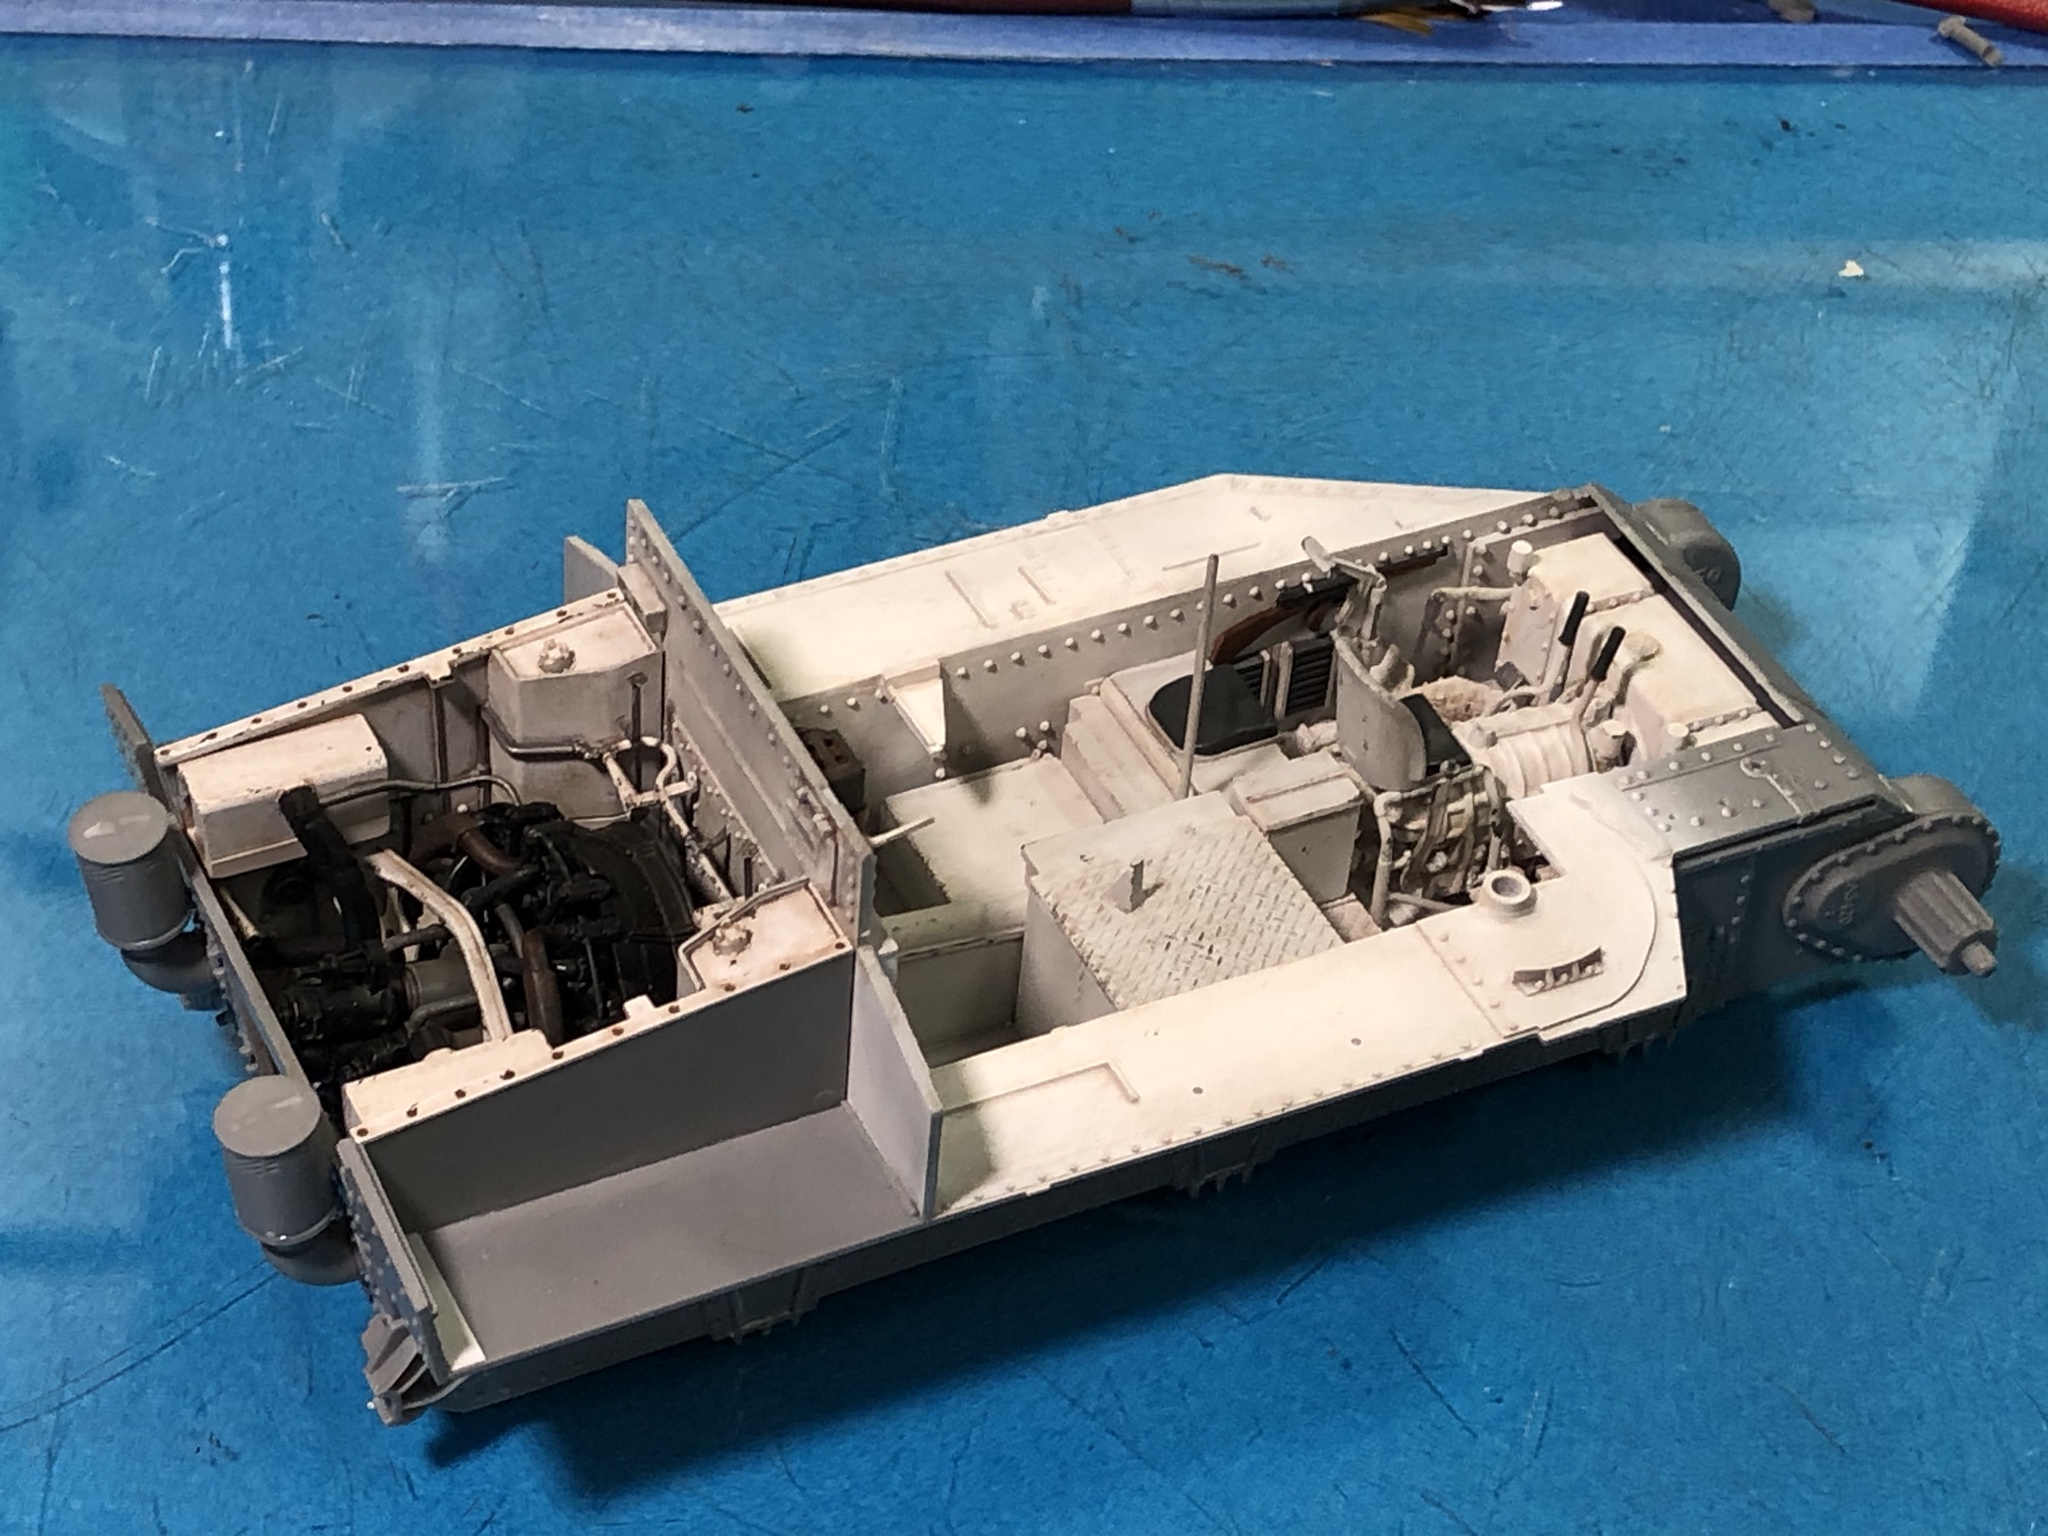
I just want to stress this point. I canít see a way to have the detail visible and paint parts after assembly and achieve a good finish. The spaces are so cluttered, anyone who tries to do that is going to have a very hard time trying to figure out angles to accomplish the task. Iíll just say that it is absolutely beyond my meager skill set.
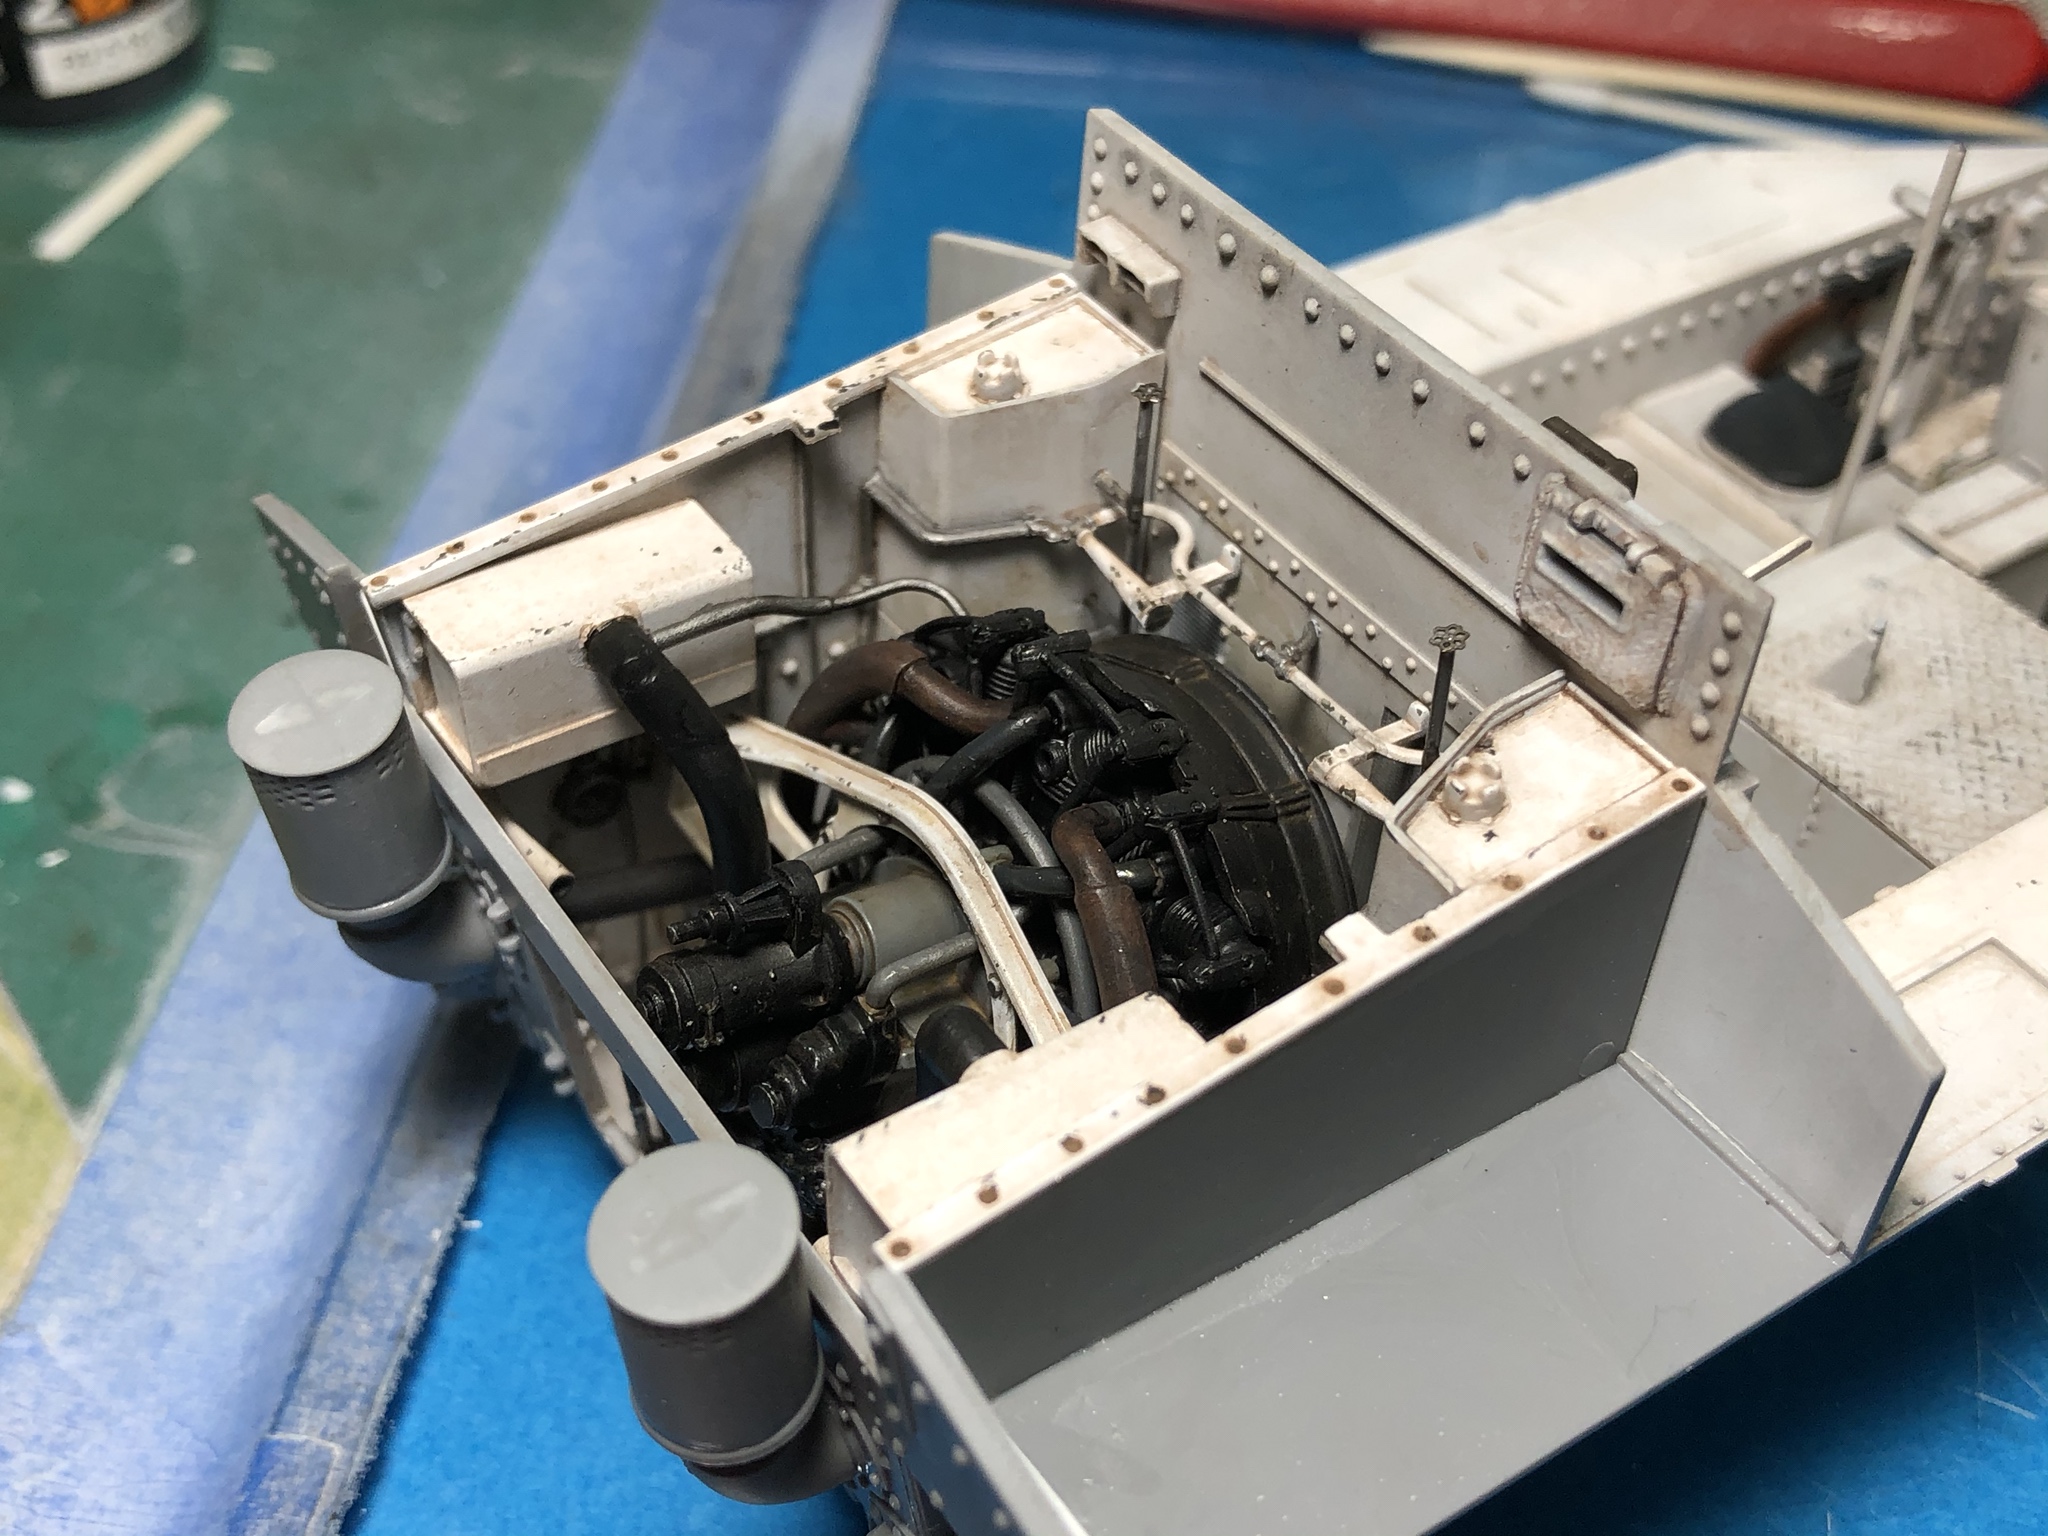
Painting individual parts, scraping mating surfaces and then installing the parts means that this is not going to be a quick build. What you see in the picture above represents completion of 38 out of 130 assembly steps...
Miniart has done a great job on the kit, the assembly order and the instructions so far and if things continue in the same fashion, this might be my favorite armor kit ever.

The cleanup and assembly of the exhaust assemblies took awhile. The parts fit well, but distortion caused by large attachment points meant some of the seams needed super glue as a filler. Not a problem, just pointing it out.

Those were installed after I painted and attached the rear bulkhead. The fit of the bulkhead was good but it uses butt joints on the sponsons and I decided to reinforce them with .010 styrene strip.

I just want to stress this point. I canít see a way to have the detail visible and paint parts after assembly and achieve a good finish. The spaces are so cluttered, anyone who tries to do that is going to have a very hard time trying to figure out angles to accomplish the task. Iíll just say that it is absolutely beyond my meager skill set.

Painting individual parts, scraping mating surfaces and then installing the parts means that this is not going to be a quick build. What you see in the picture above represents completion of 38 out of 130 assembly steps...
Miniart has done a great job on the kit, the assembly order and the instructions so far and if things continue in the same fashion, this might be my favorite armor kit ever.
ivanhoe6

Joined: April 05, 2007
KitMaker: 2,023 posts
Armorama: 1,234 posts

Posted: Thursday, October 24, 2019 - 09:43 PM UTC
Looking good Paul !!!
Some powerful words...."this might be my favorite kit ever"
For sure, you've taken a pile of grey plastic and turned it into a museum quality piece of work!


3 out of 3 beer rating for a very realistic engine compartment !
Thanks again for sharing all of your hard work & insights & tips Paul !!!
Some powerful words...."this might be my favorite kit ever"
For sure, you've taken a pile of grey plastic and turned it into a museum quality piece of work!


3 out of 3 beer rating for a very realistic engine compartment !
Thanks again for sharing all of your hard work & insights & tips Paul !!!

PRH001

Joined: June 16, 2014
KitMaker: 681 posts
Armorama: 603 posts

Posted: Friday, October 25, 2019 - 02:22 AM UTC
Your feedback is very much appreciated! I guess weíll find if it turns out well or not... 


PRH001

Joined: June 16, 2014
KitMaker: 681 posts
Armorama: 603 posts

Posted: Saturday, October 26, 2019 - 12:45 PM UTC
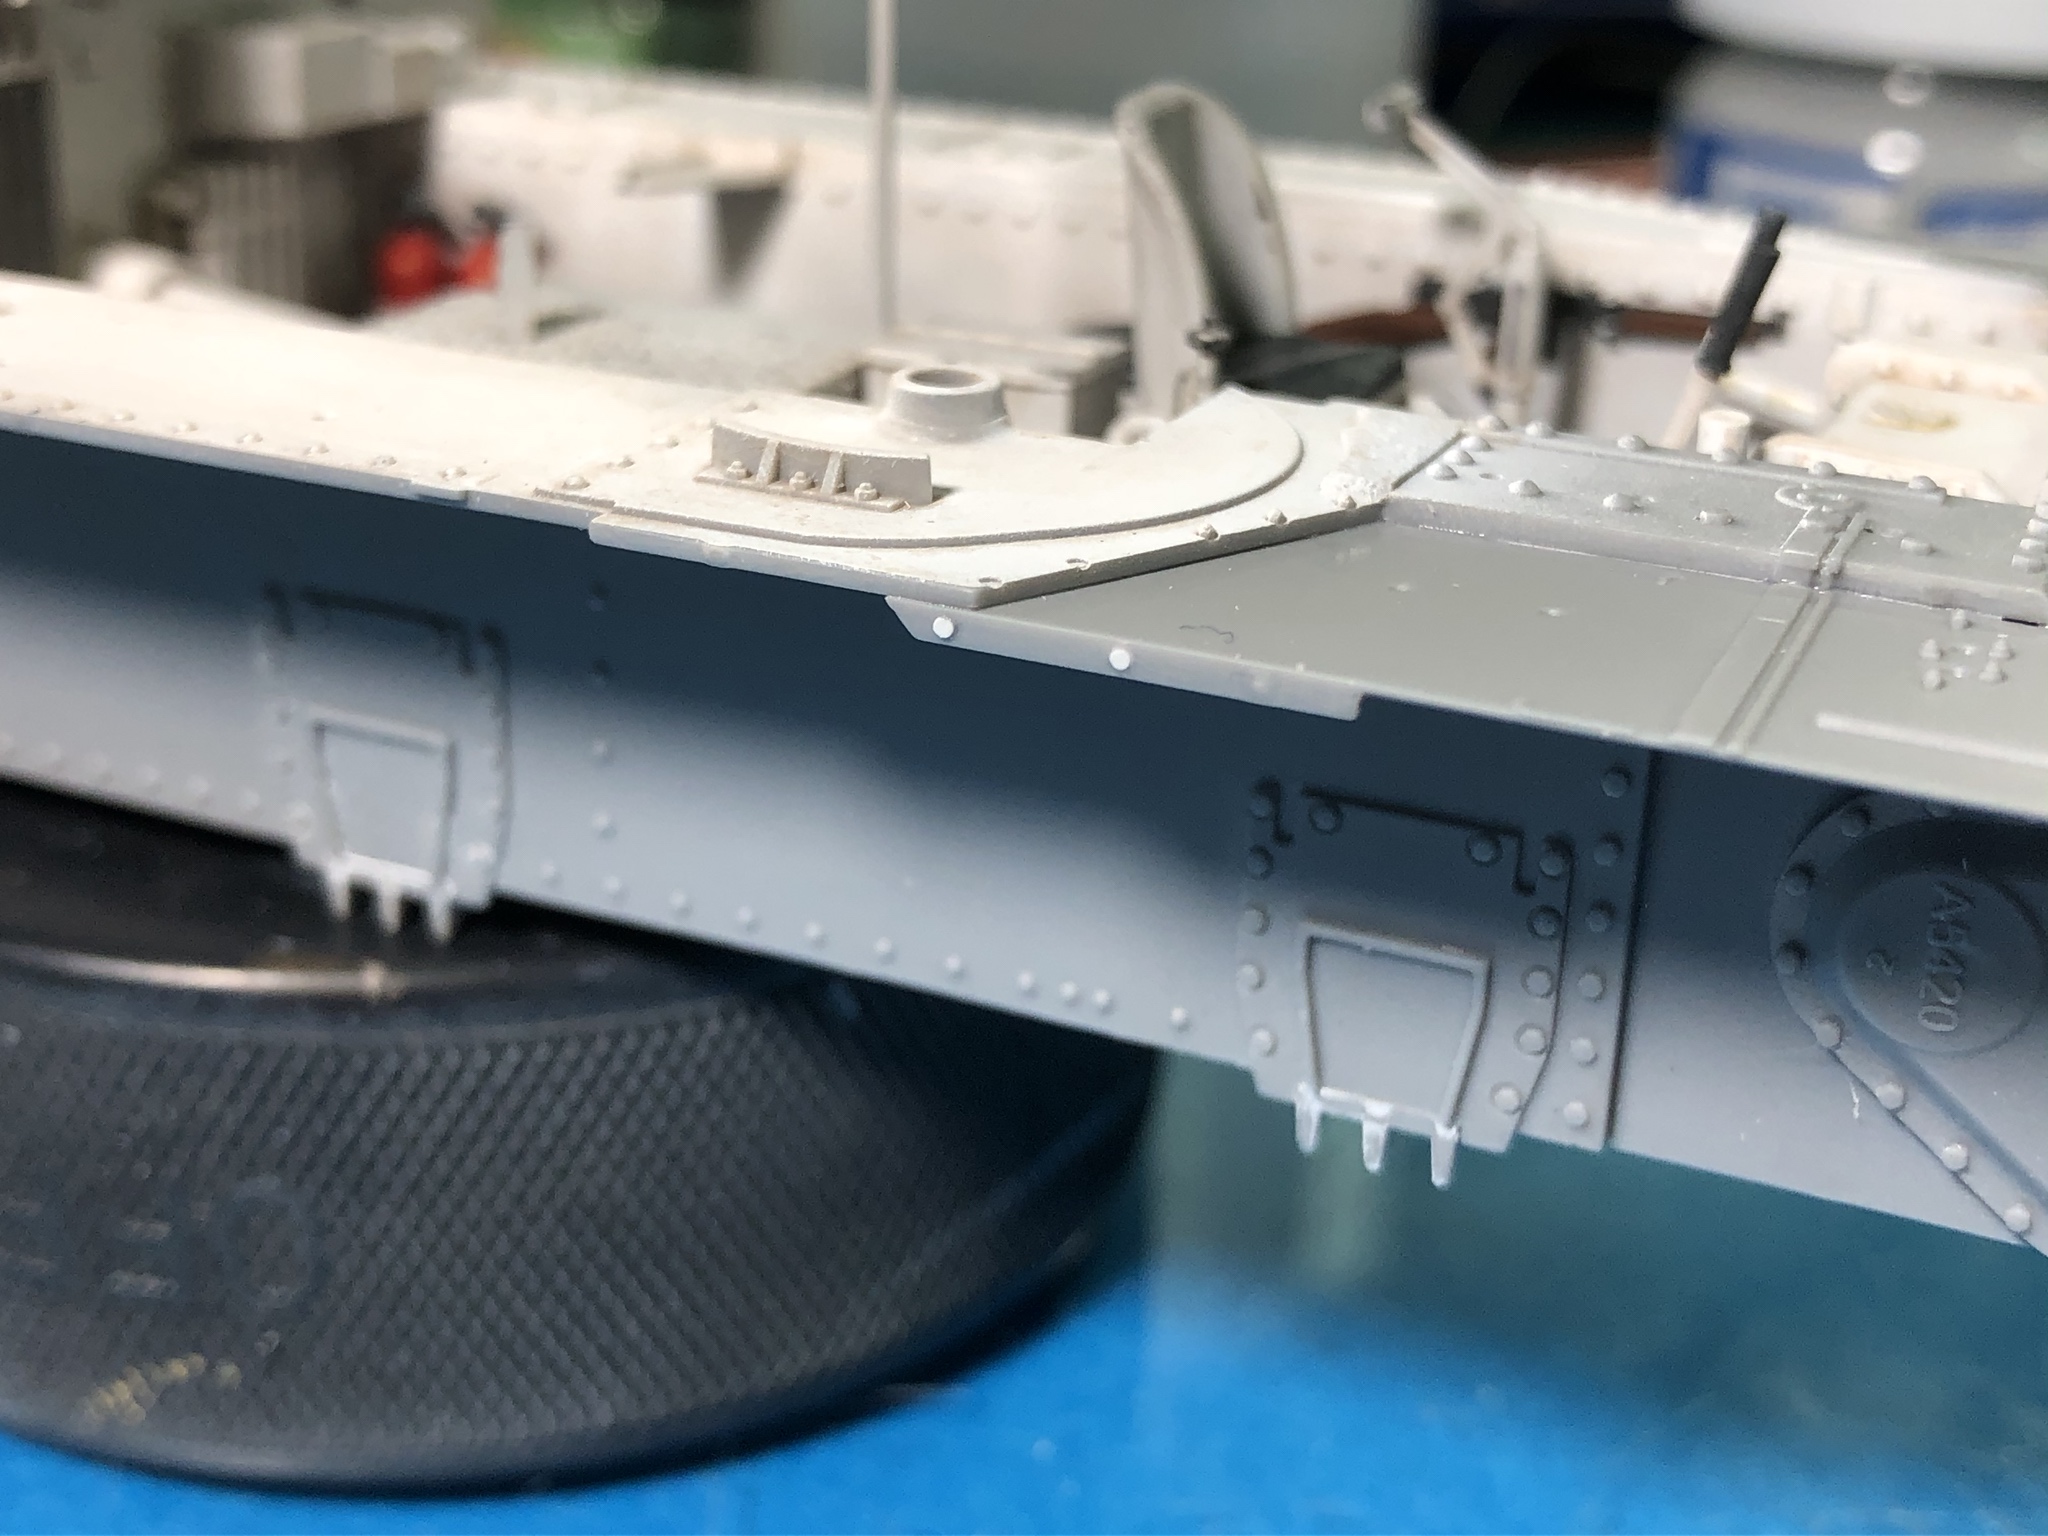
With the engine compartment to a pretty good stopping point, some of the exterior fittings are next. This is one area that I will deviate from the instructions by leaving the rear doors off for painting.
The fenders have lovely detail. There is however a mold seam and a sprue attachment point on the side of both that crosses some rivet detail. Those lines were sanded off and the detail was replaced with disks punched from .005 styrene.
The fenders are installed and the drive housings were reworked to put some casting texture on that matches the detail on the transmission housing.
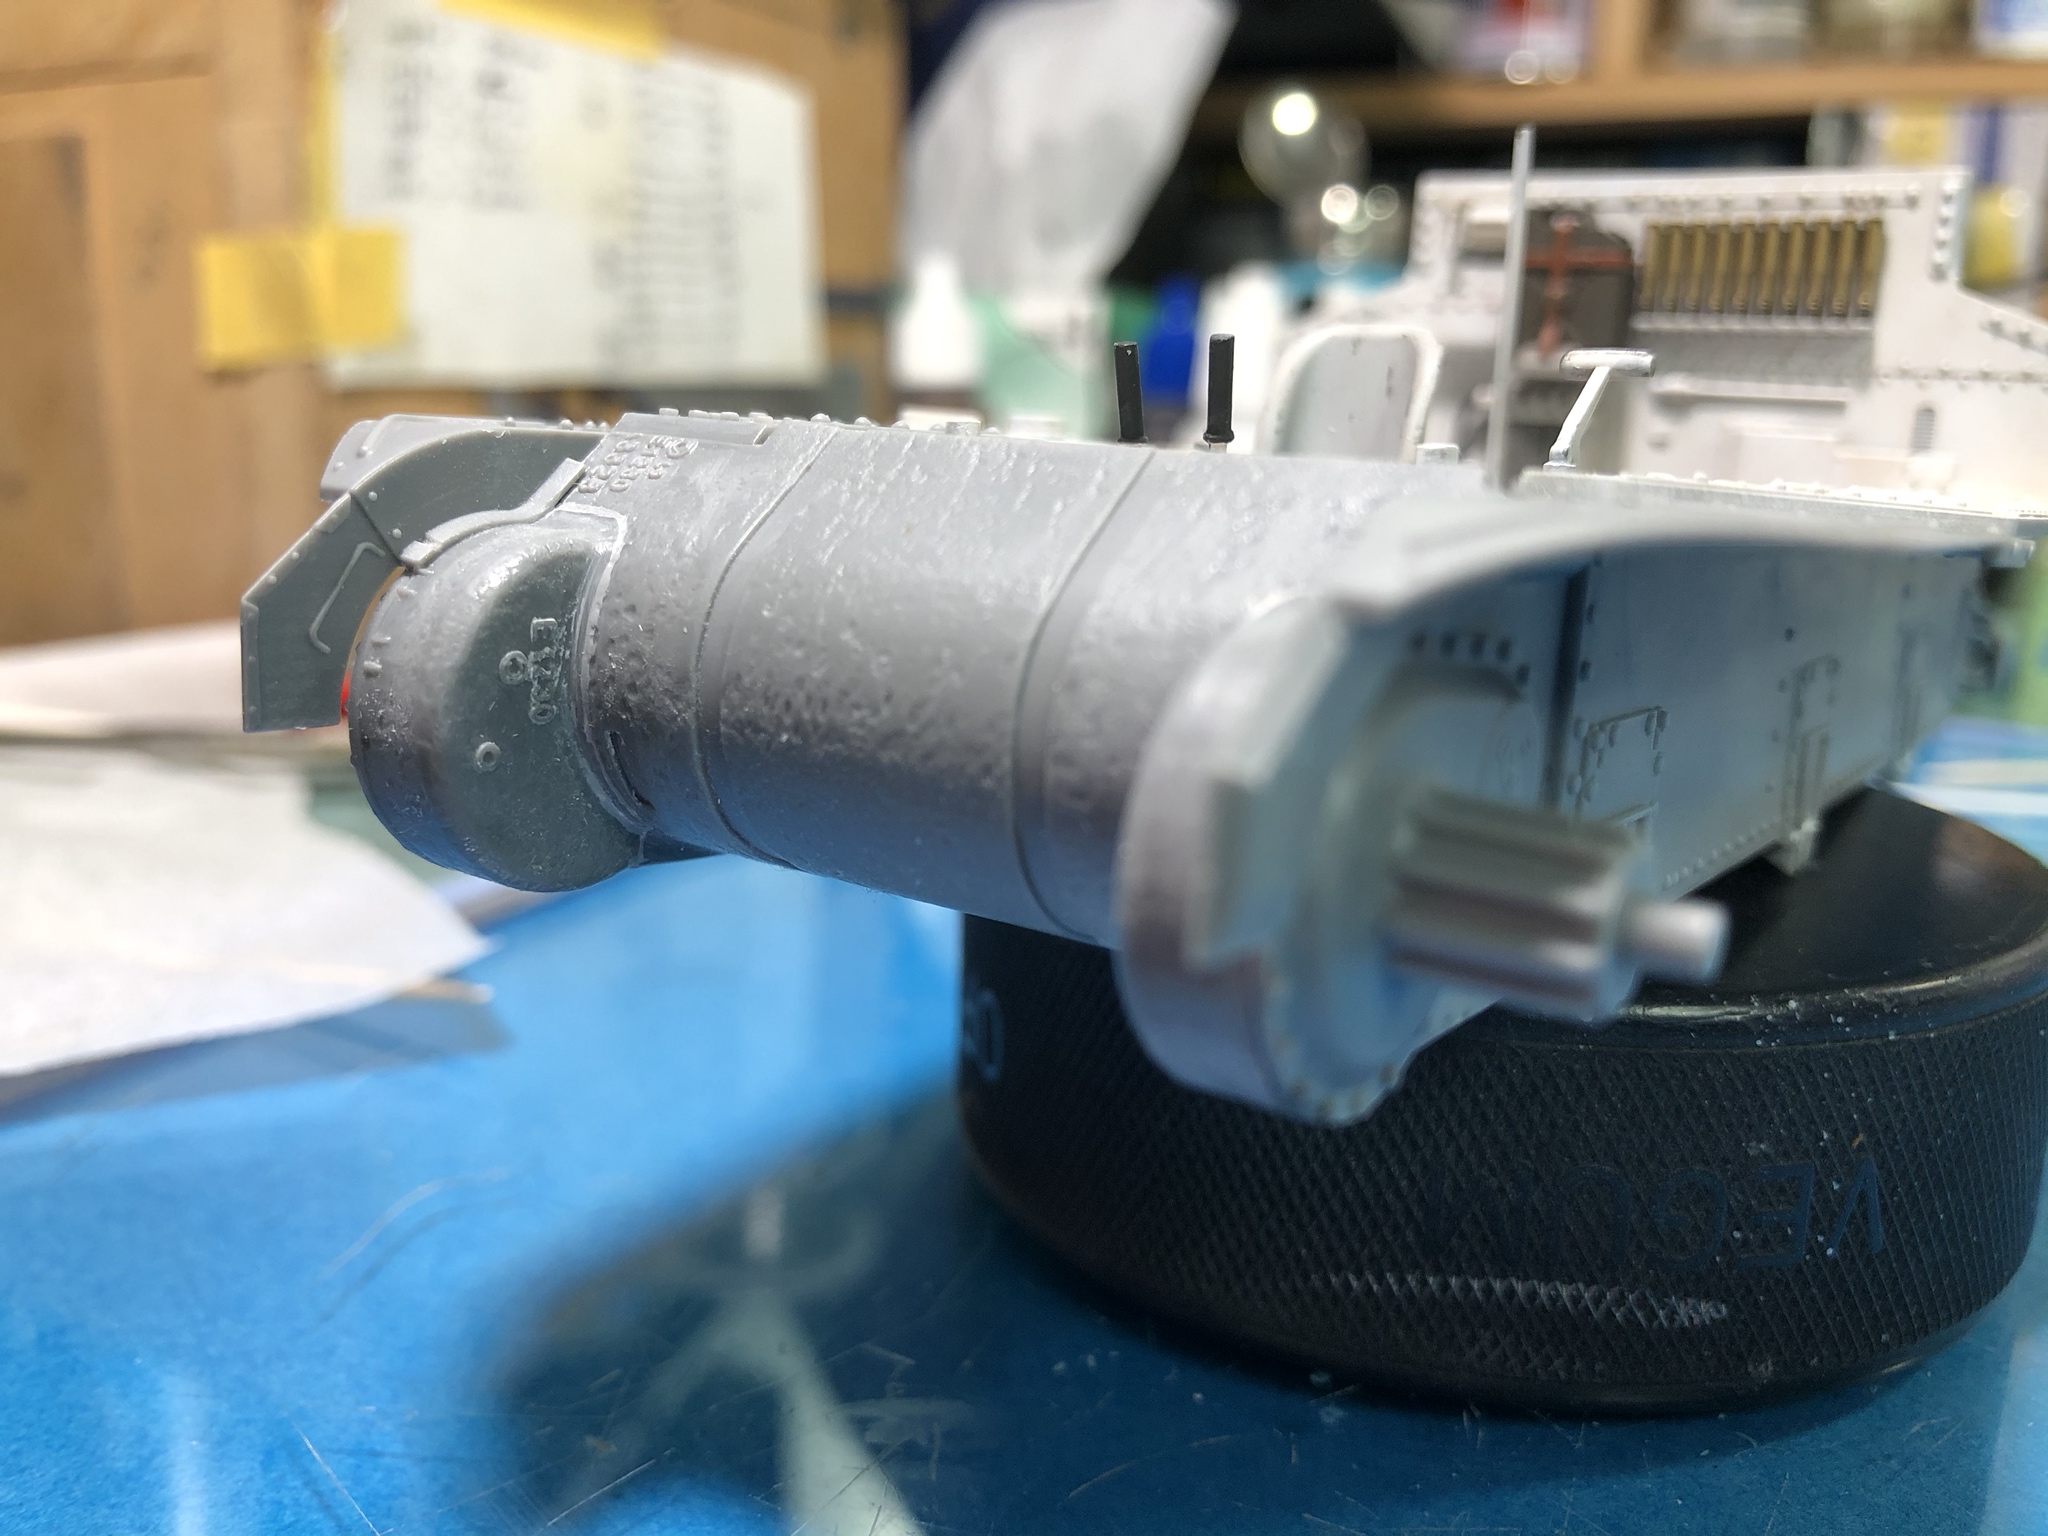
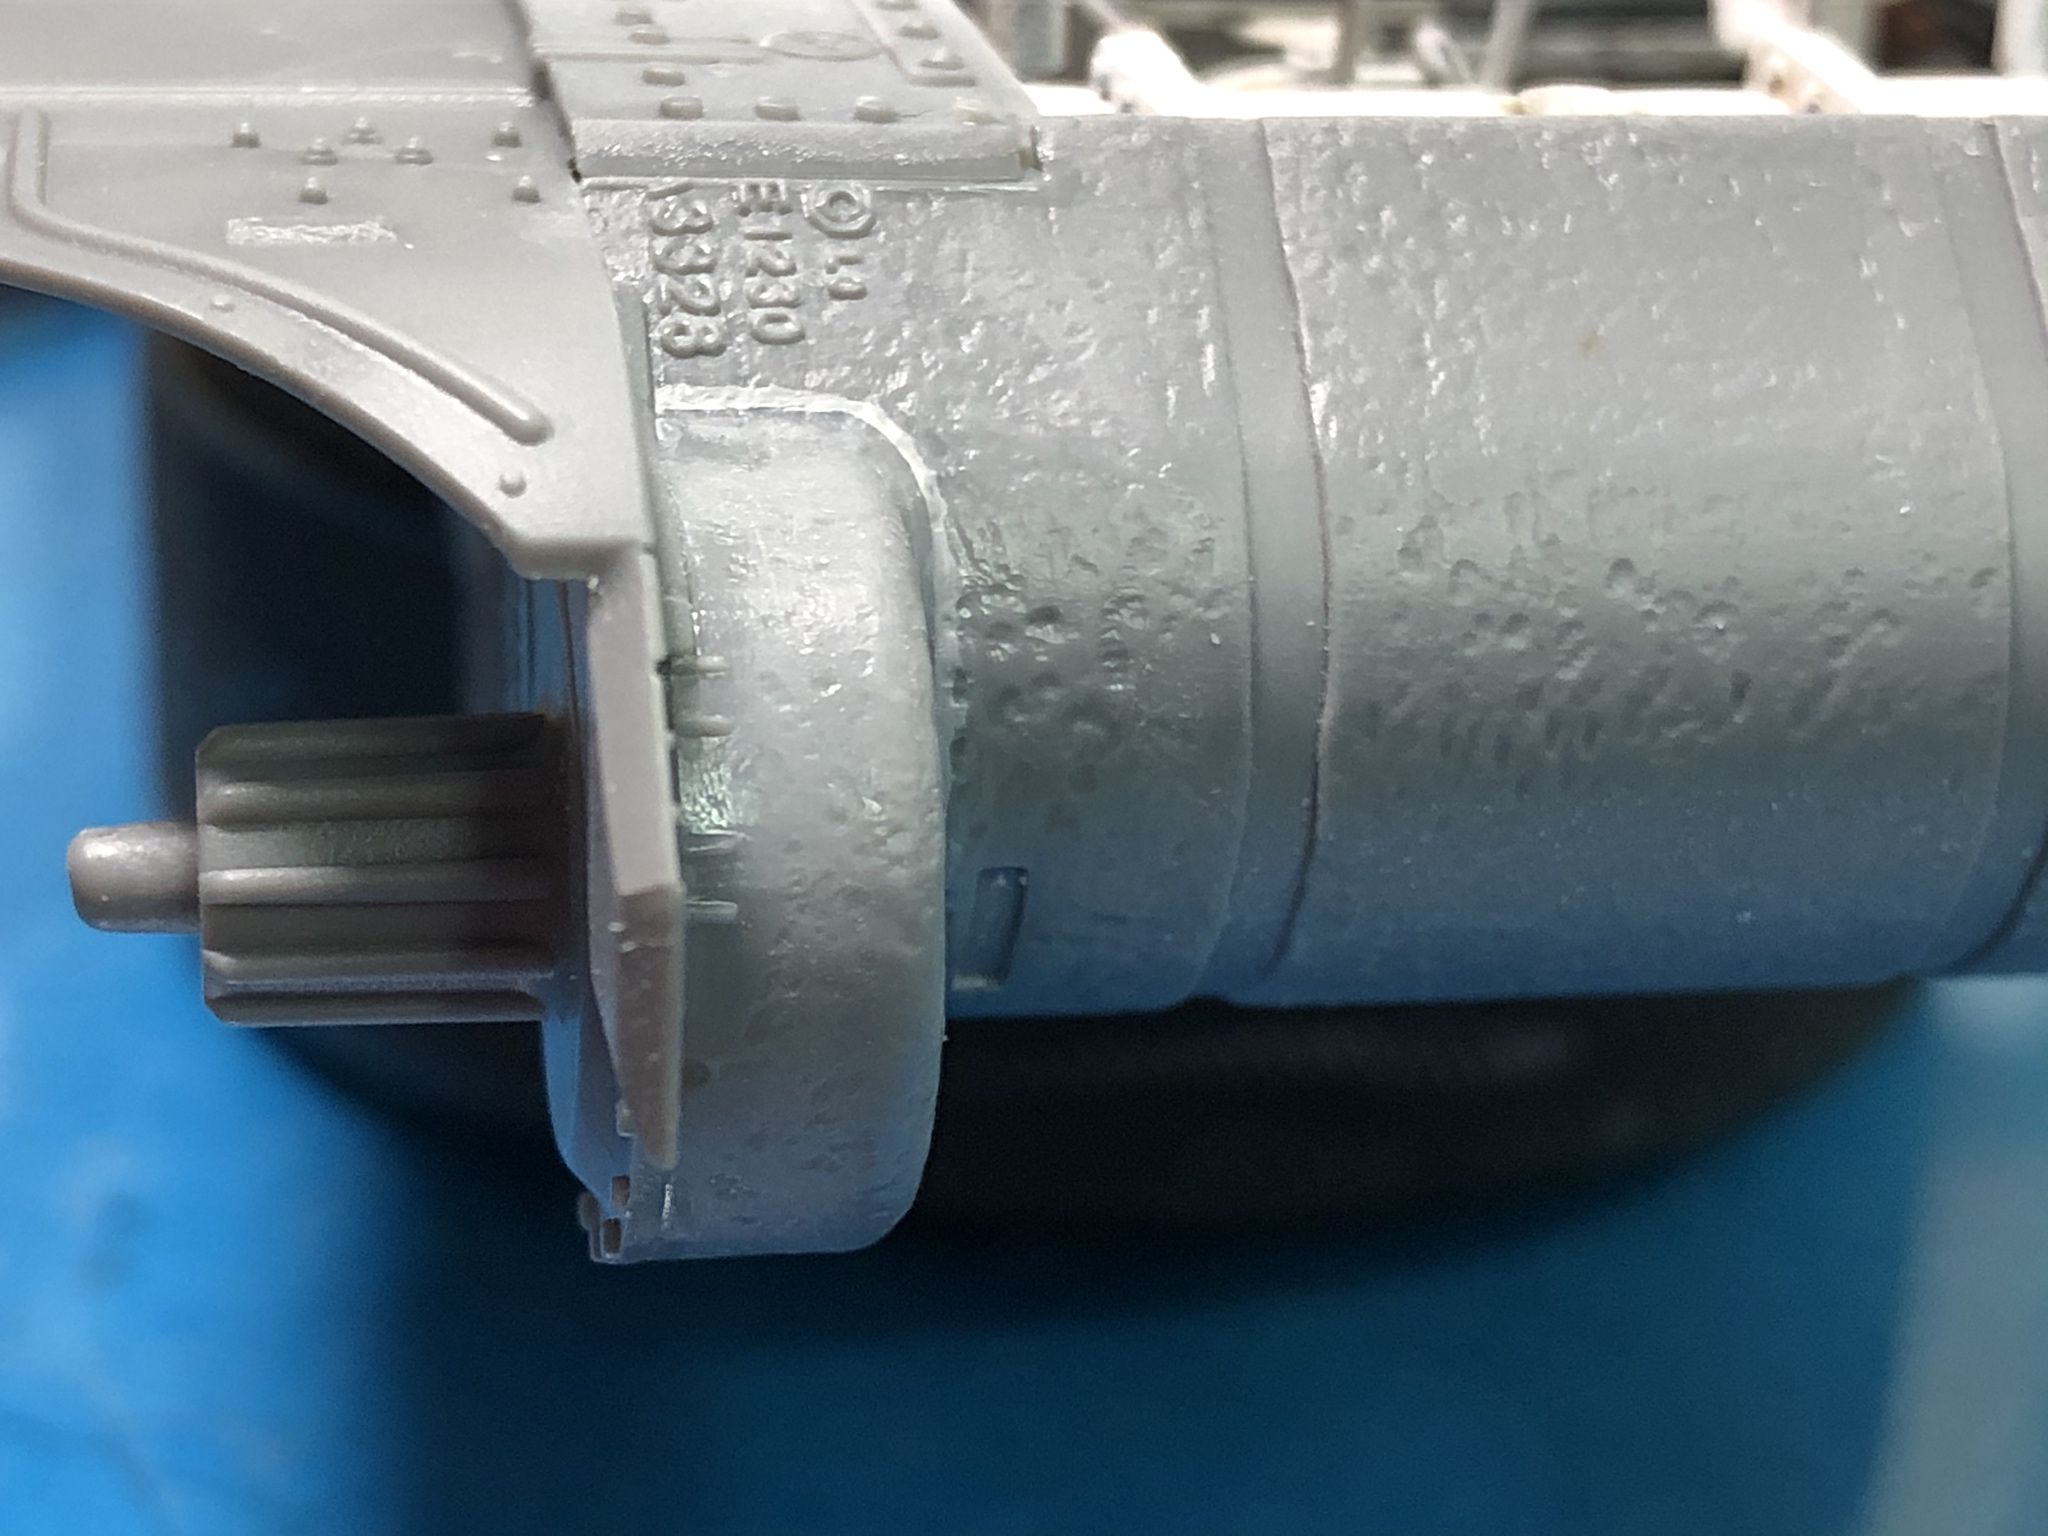
This seam work will be checked again using primer before painting.
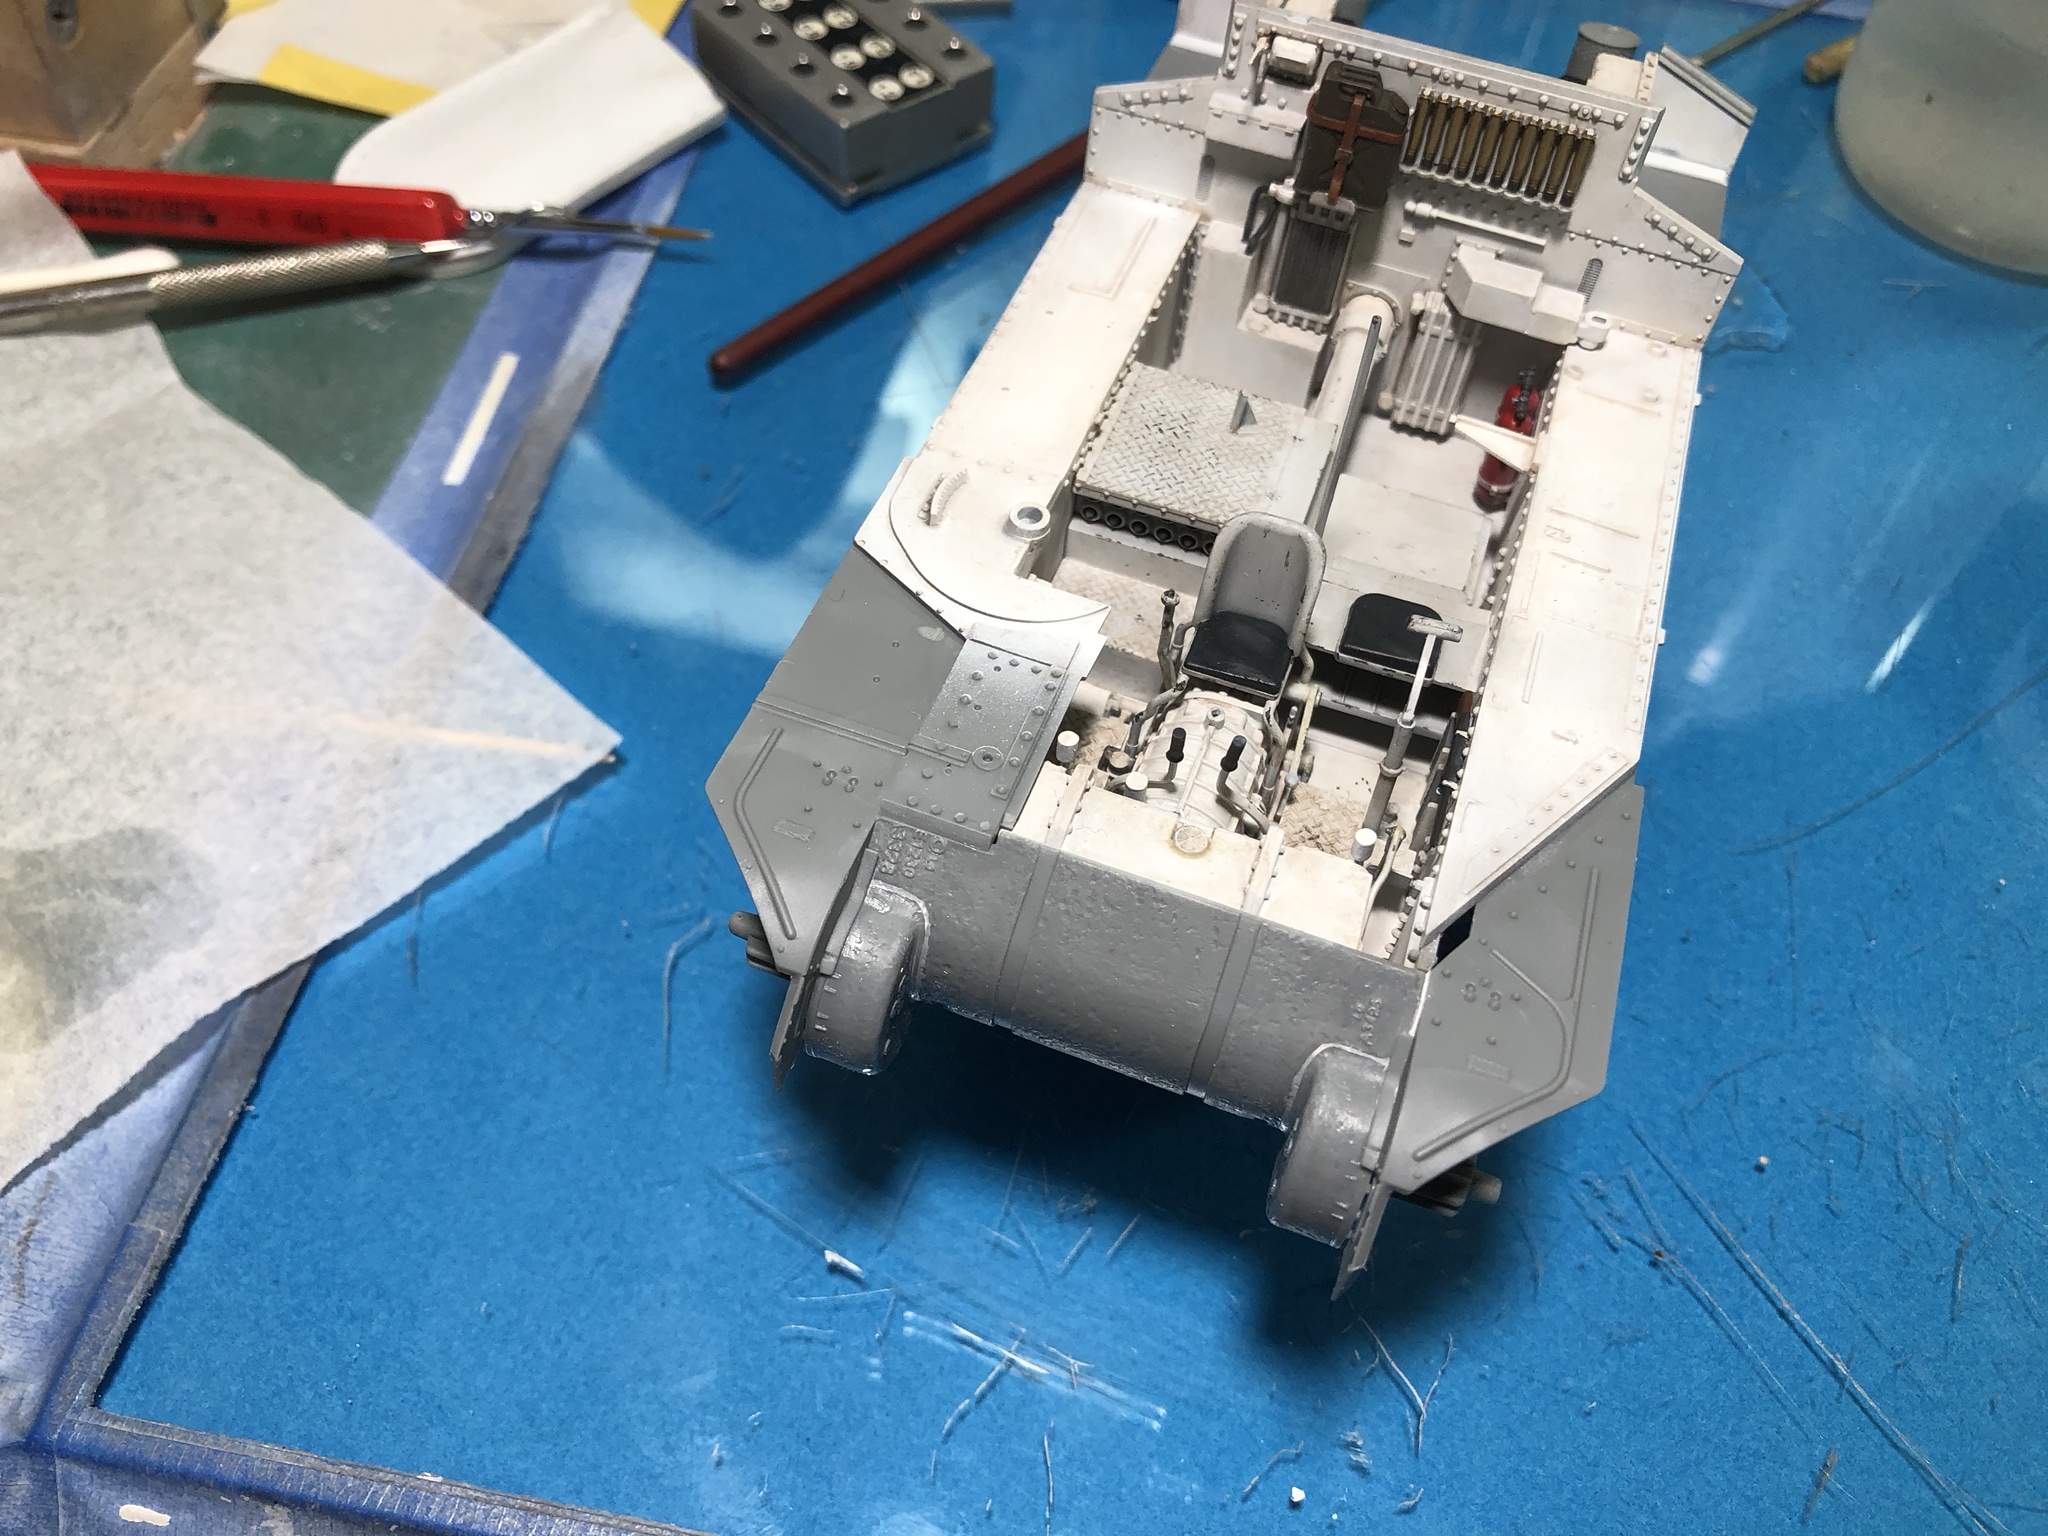

The fenders have lovely detail. There is however a mold seam and a sprue attachment point on the side of both that crosses some rivet detail. Those lines were sanded off and the detail was replaced with disks punched from .005 styrene.

The fenders are installed and the drive housings were reworked to put some casting texture on that matches the detail on the transmission housing.


This seam work will be checked again using primer before painting.


PRH001

Joined: June 16, 2014
KitMaker: 681 posts
Armorama: 603 posts

Posted: Sunday, October 27, 2019 - 02:17 PM UTC
Not much progress to show. Most of my time was spend cleaning up parts for the interior and getting them ready to spray. Regardless, I did get the screen that goes on the rear of the hull blackened, painted and installed.
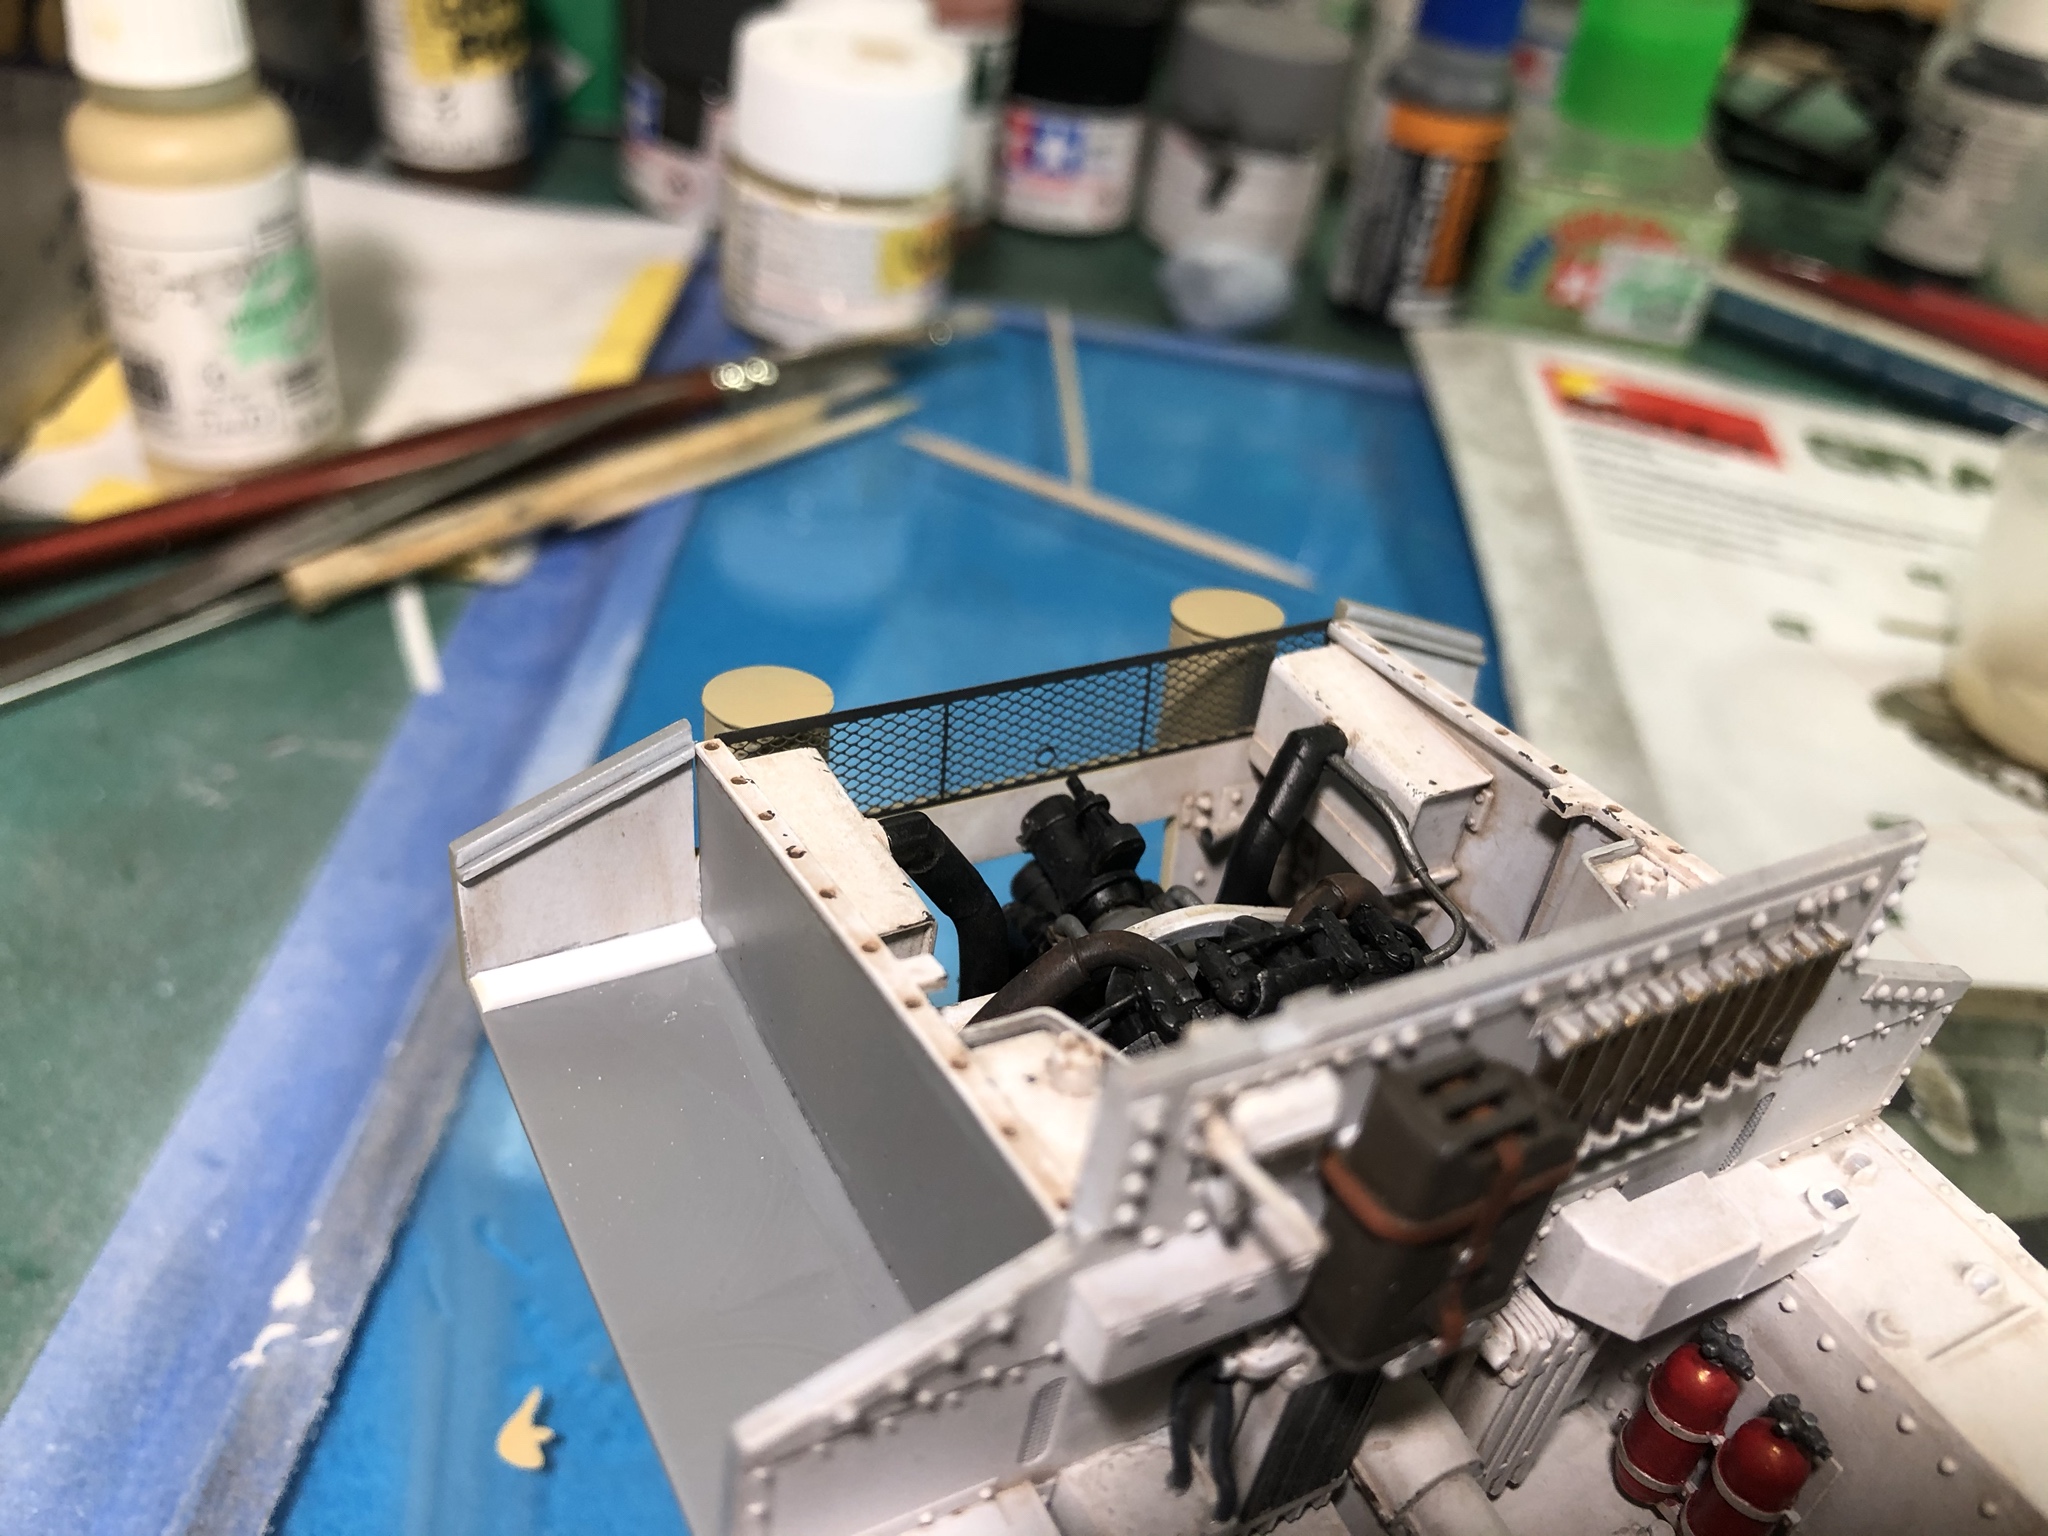
I went ahead and sprayed a 30% lightened coat of Tamiya Buff on the rear areas as a base for the later actual color coat since the area will be hard to reach once the upper hull is in place.
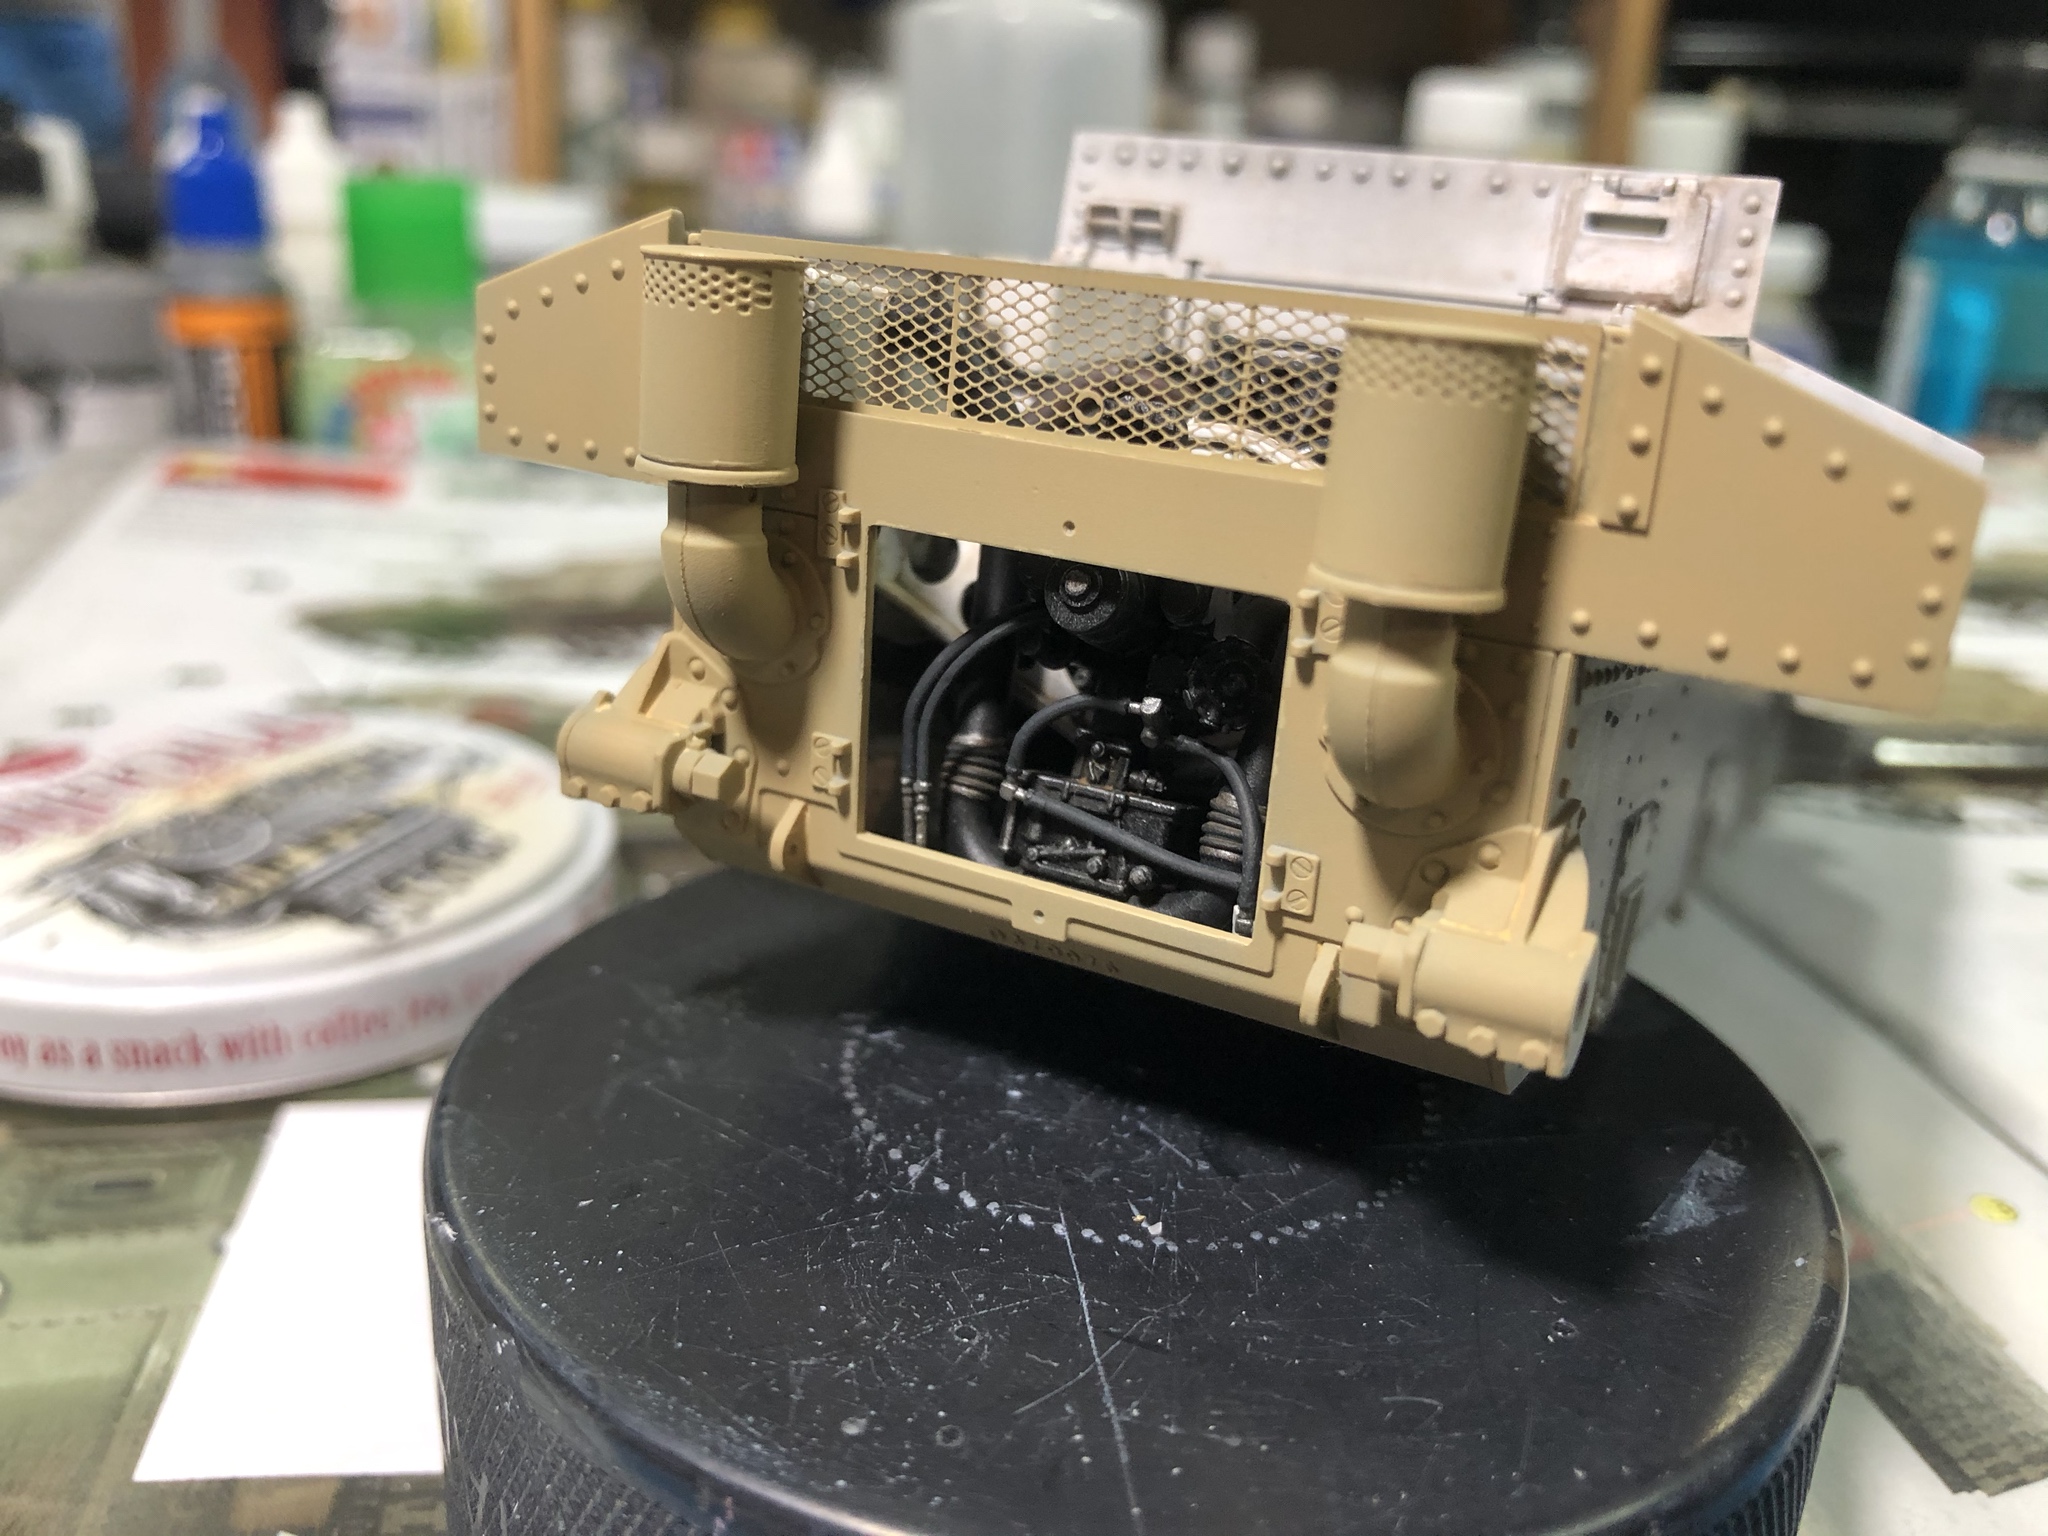

I went ahead and sprayed a 30% lightened coat of Tamiya Buff on the rear areas as a base for the later actual color coat since the area will be hard to reach once the upper hull is in place.


PRH001

Joined: June 16, 2014
KitMaker: 681 posts
Armorama: 603 posts

Posted: Saturday, November 02, 2019 - 01:59 PM UTC
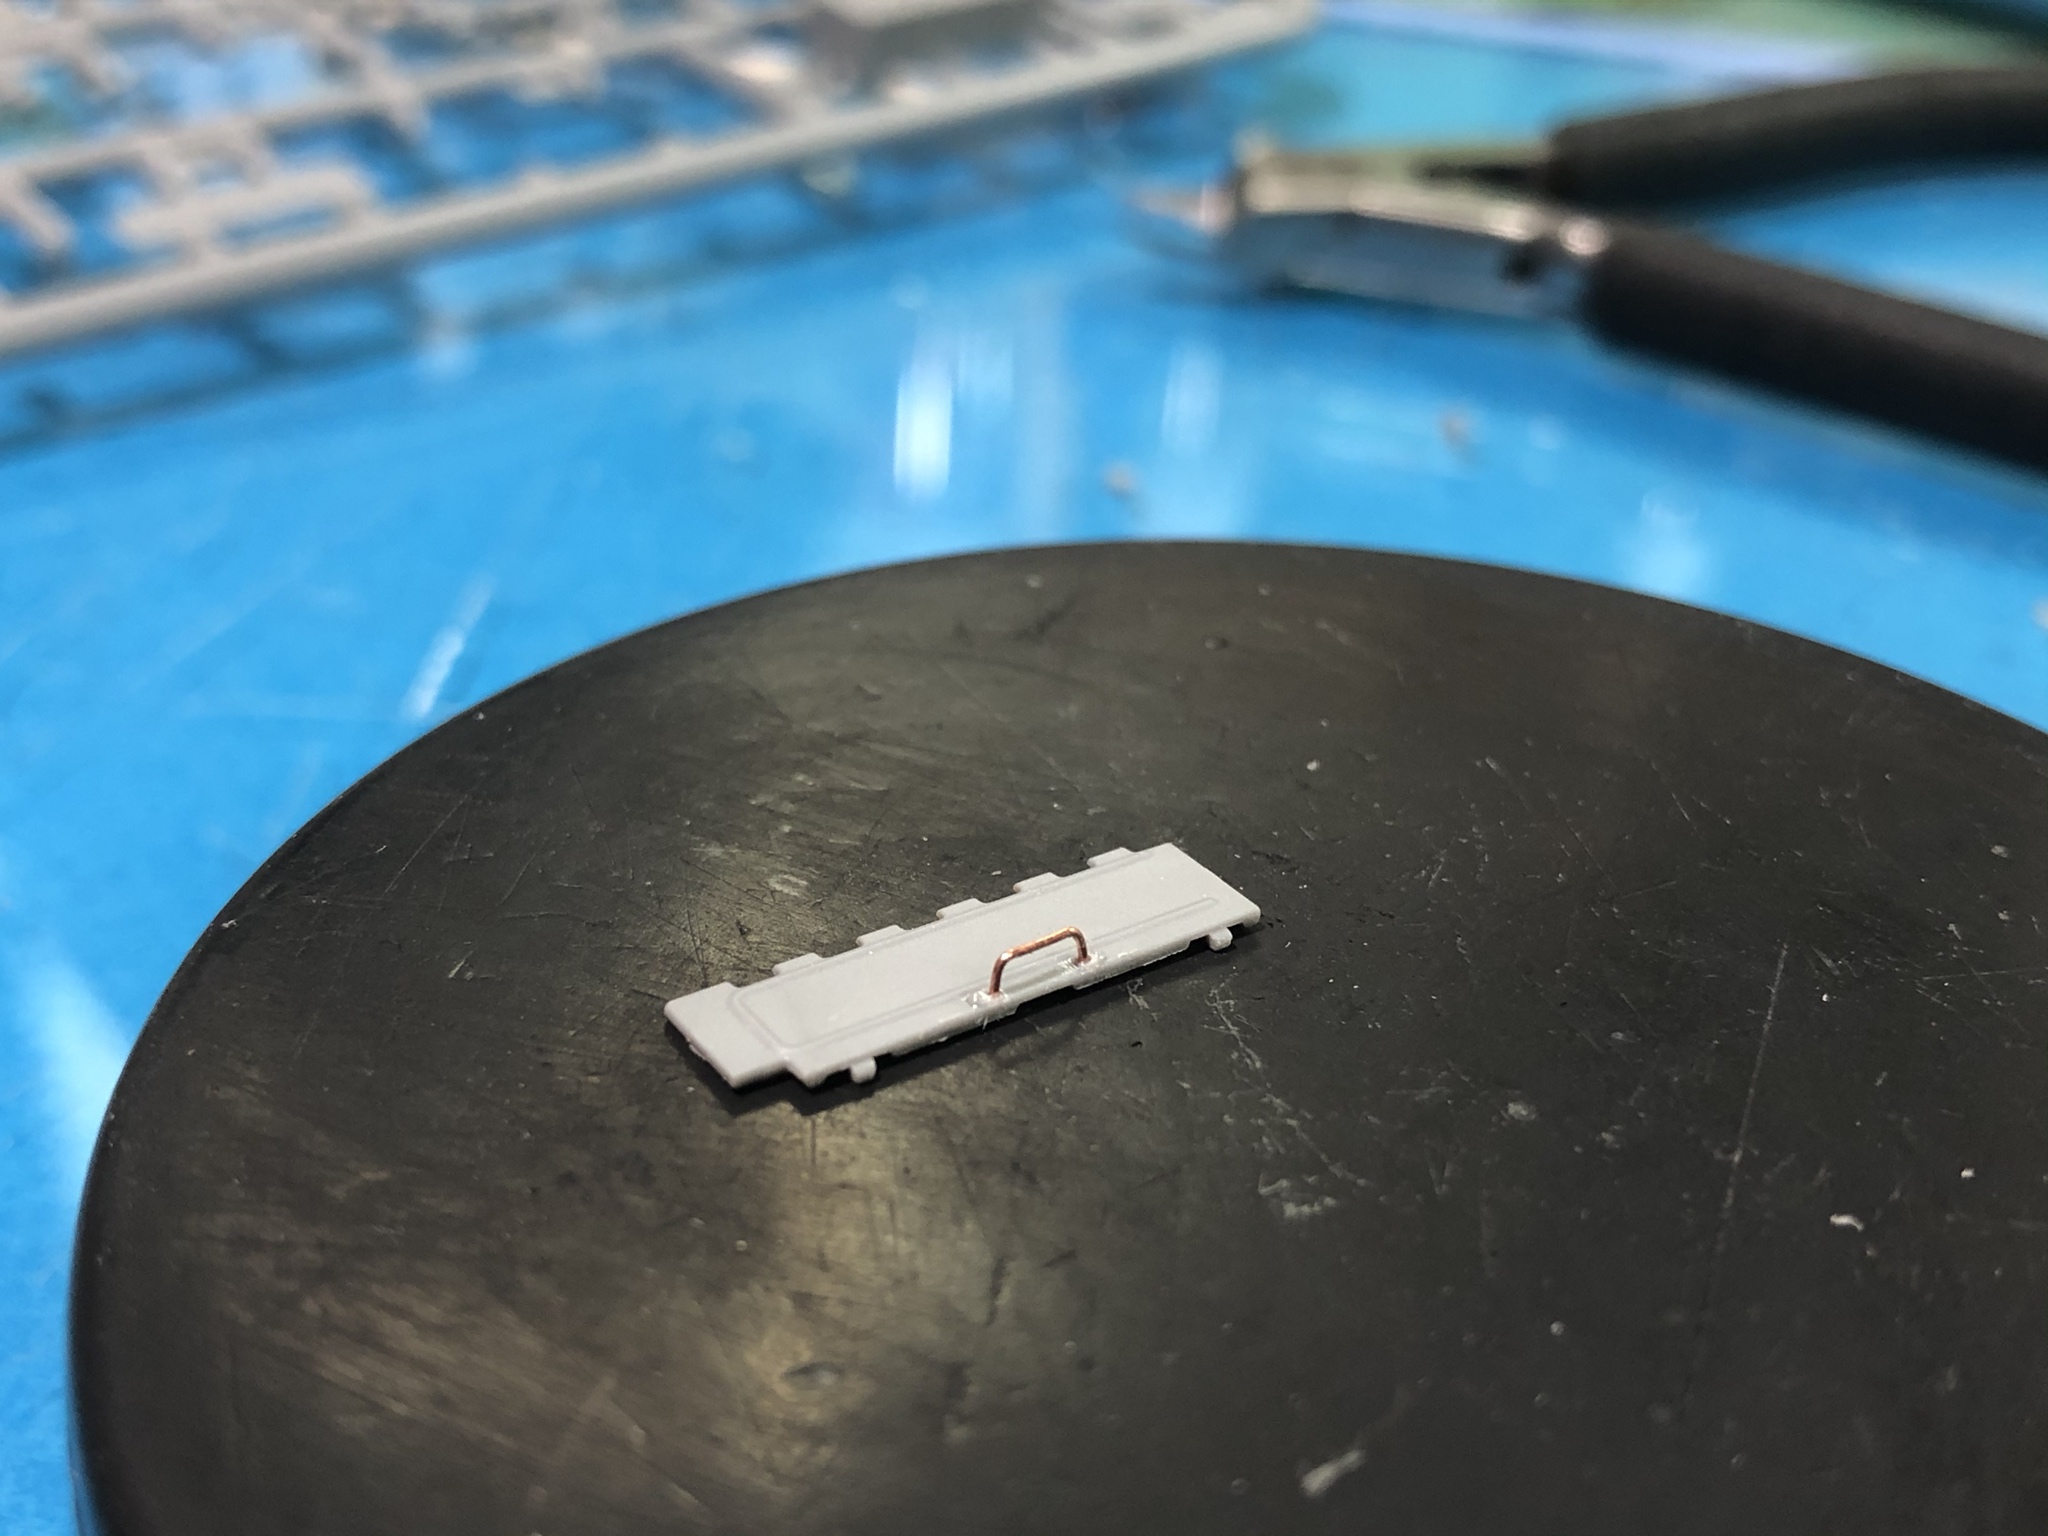
Working on the second round of interior fittings. Replaced the handle on the ammo cabinet with wire handle. The kit part was usable, but I thought the wire would look better.
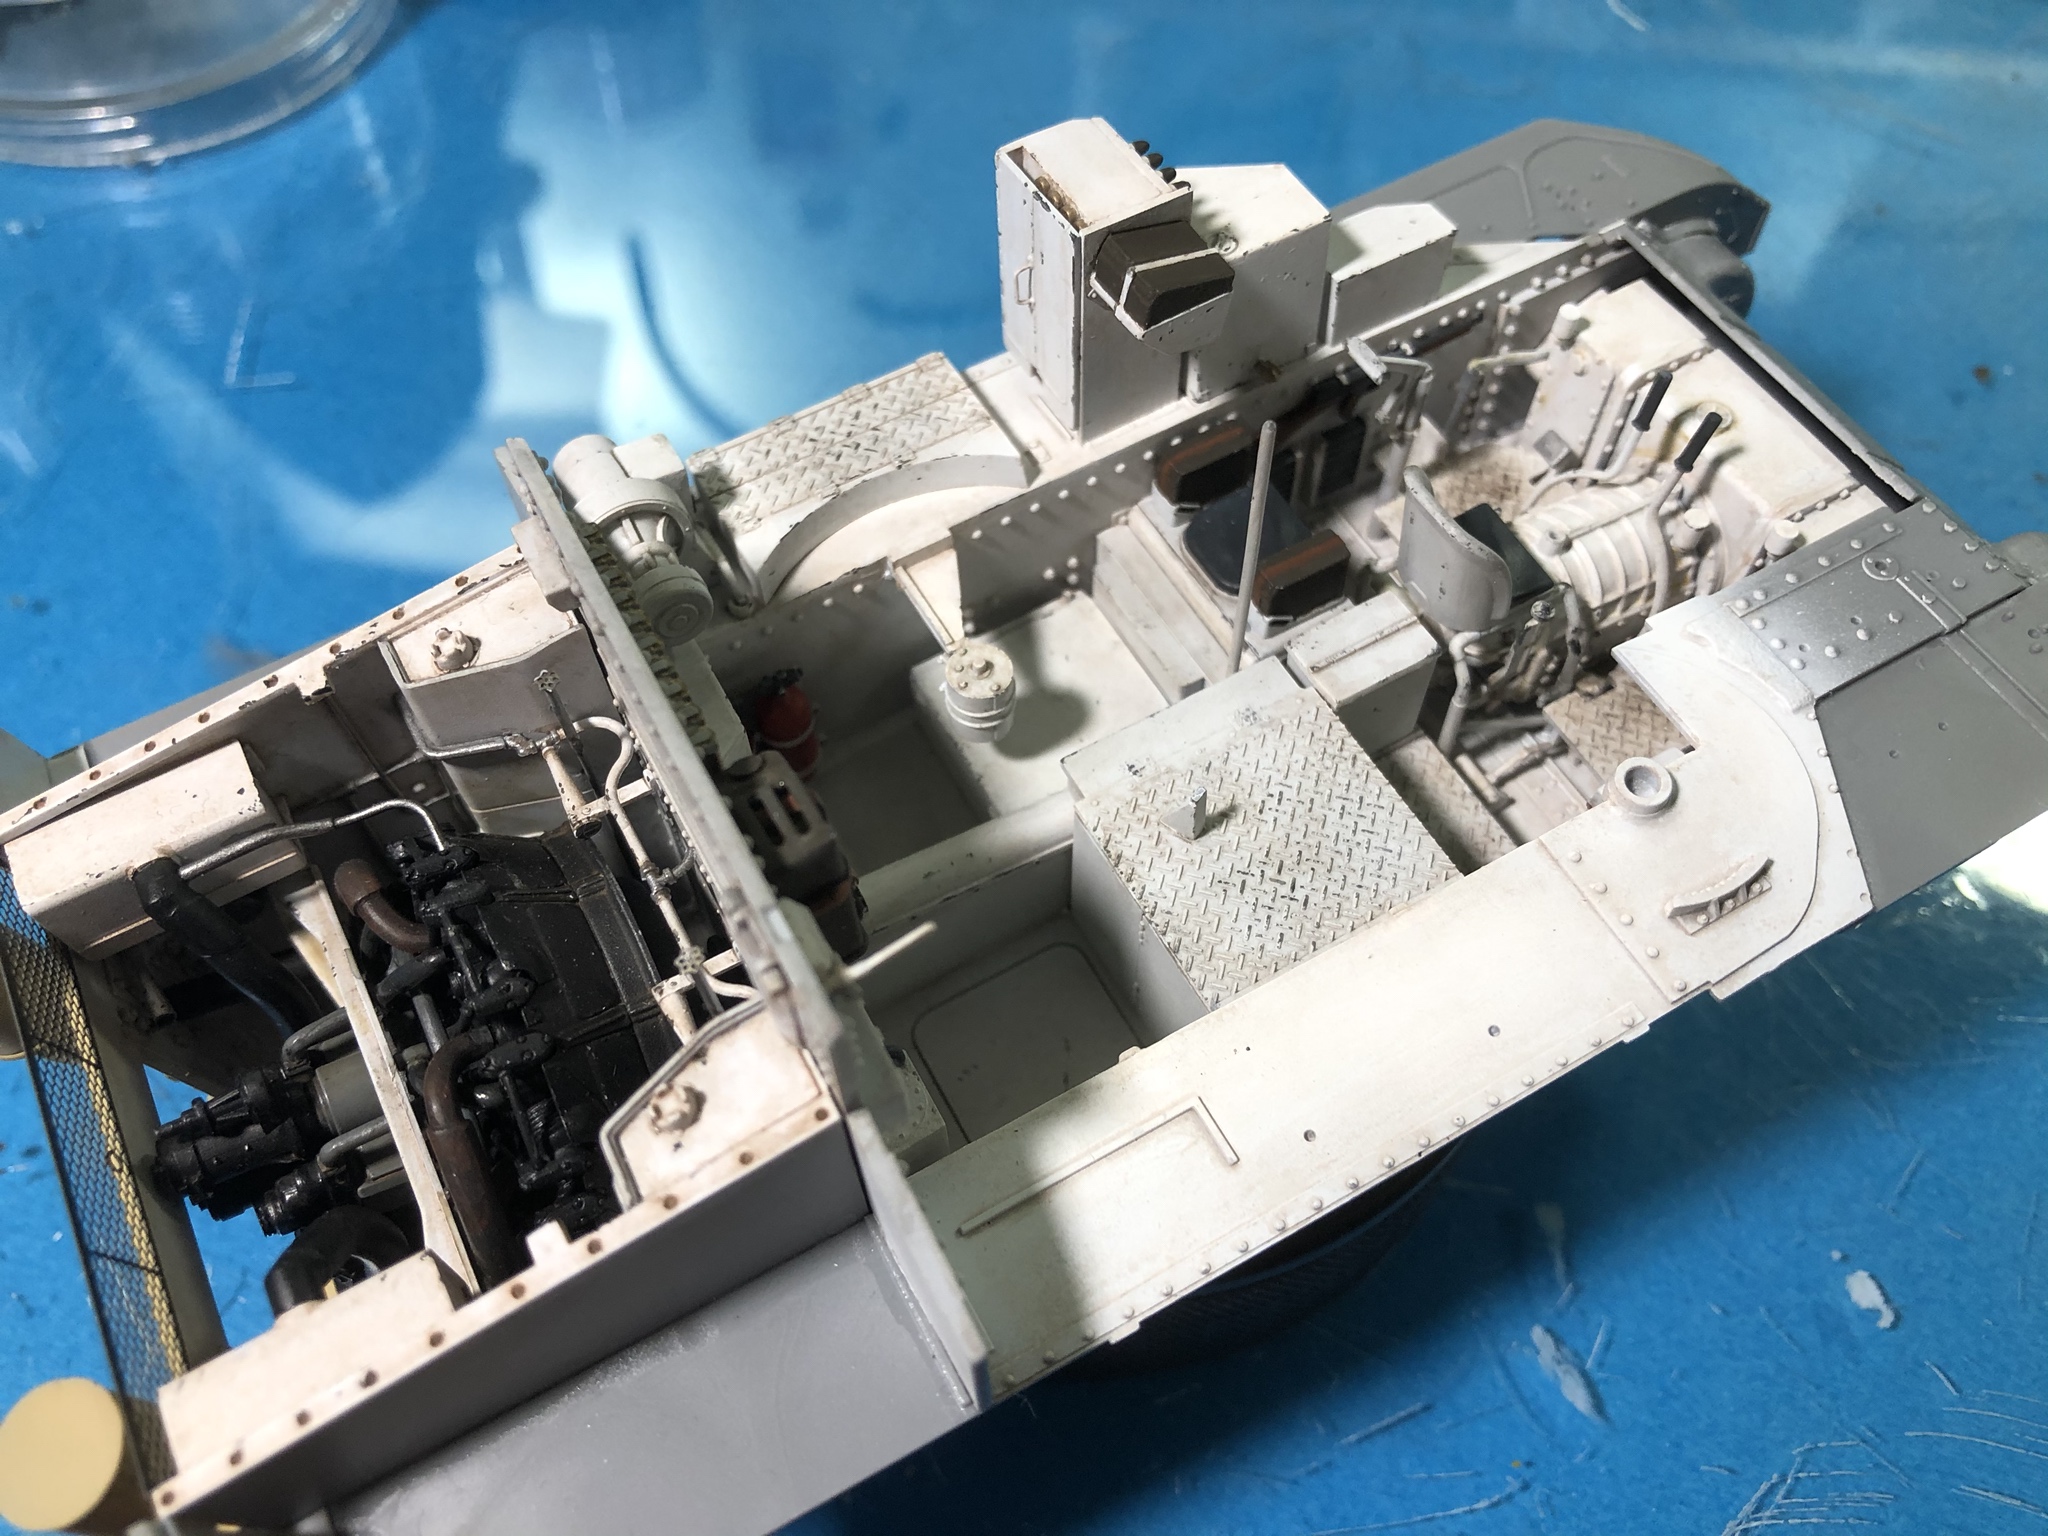
Painted, weathered and installed the left side fittings.
The fit of all these items was good, so no real issues. I would have liked to see just a bit more refinement on the ammo storage locker since the rounds had very little variation between the rounds and the cabinet.
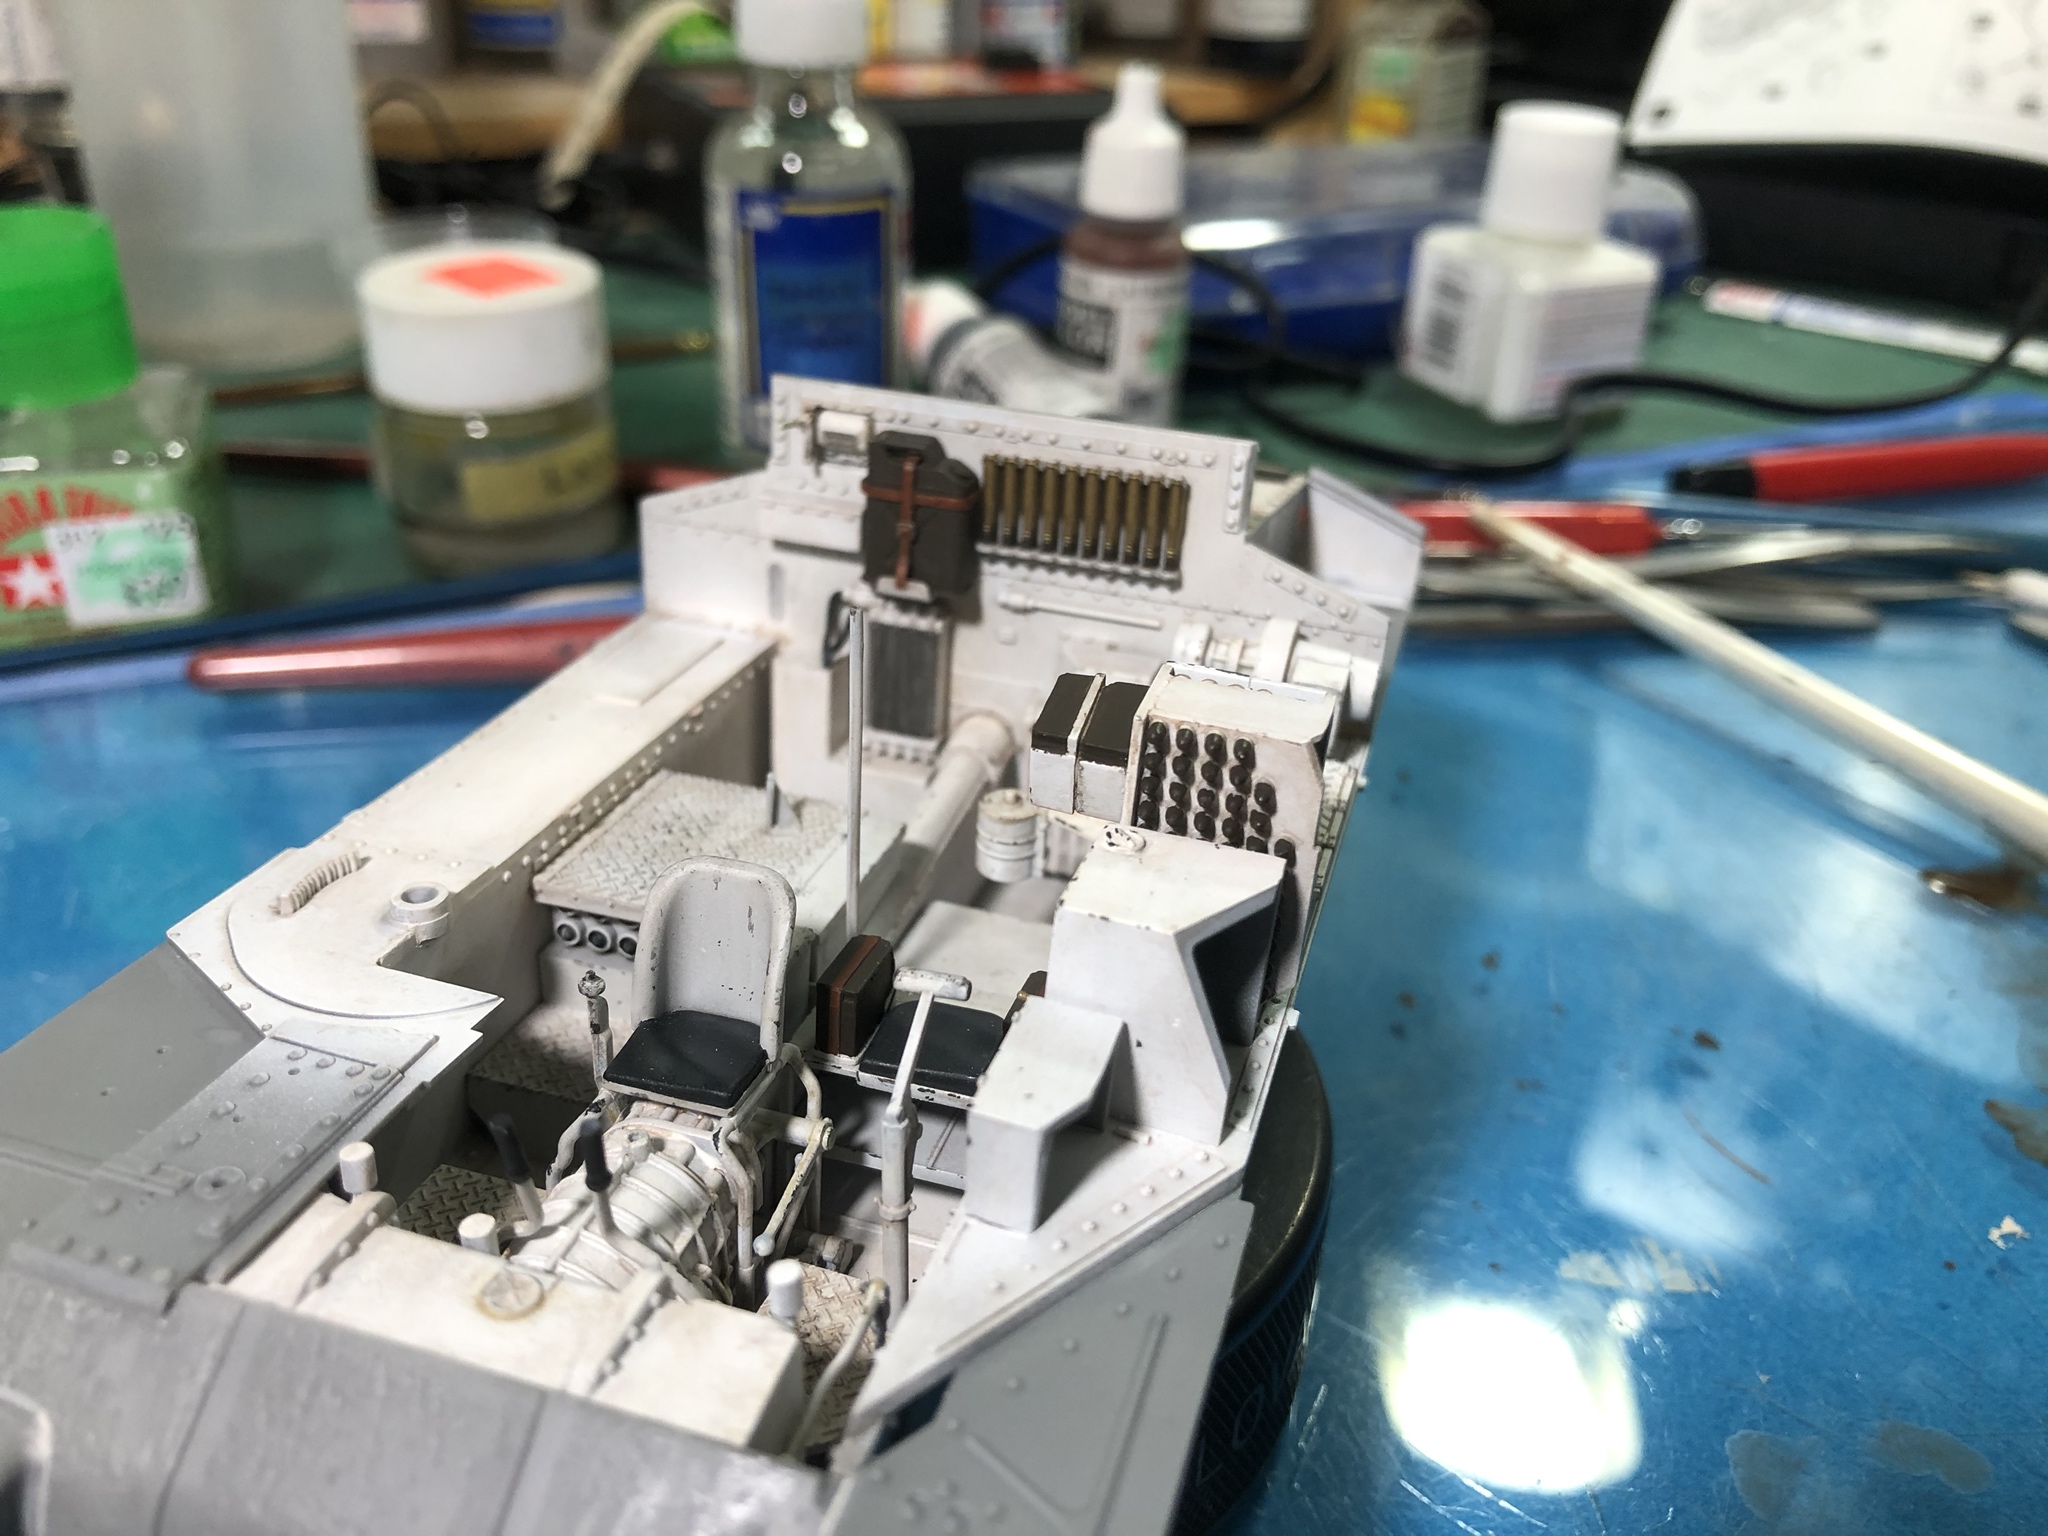
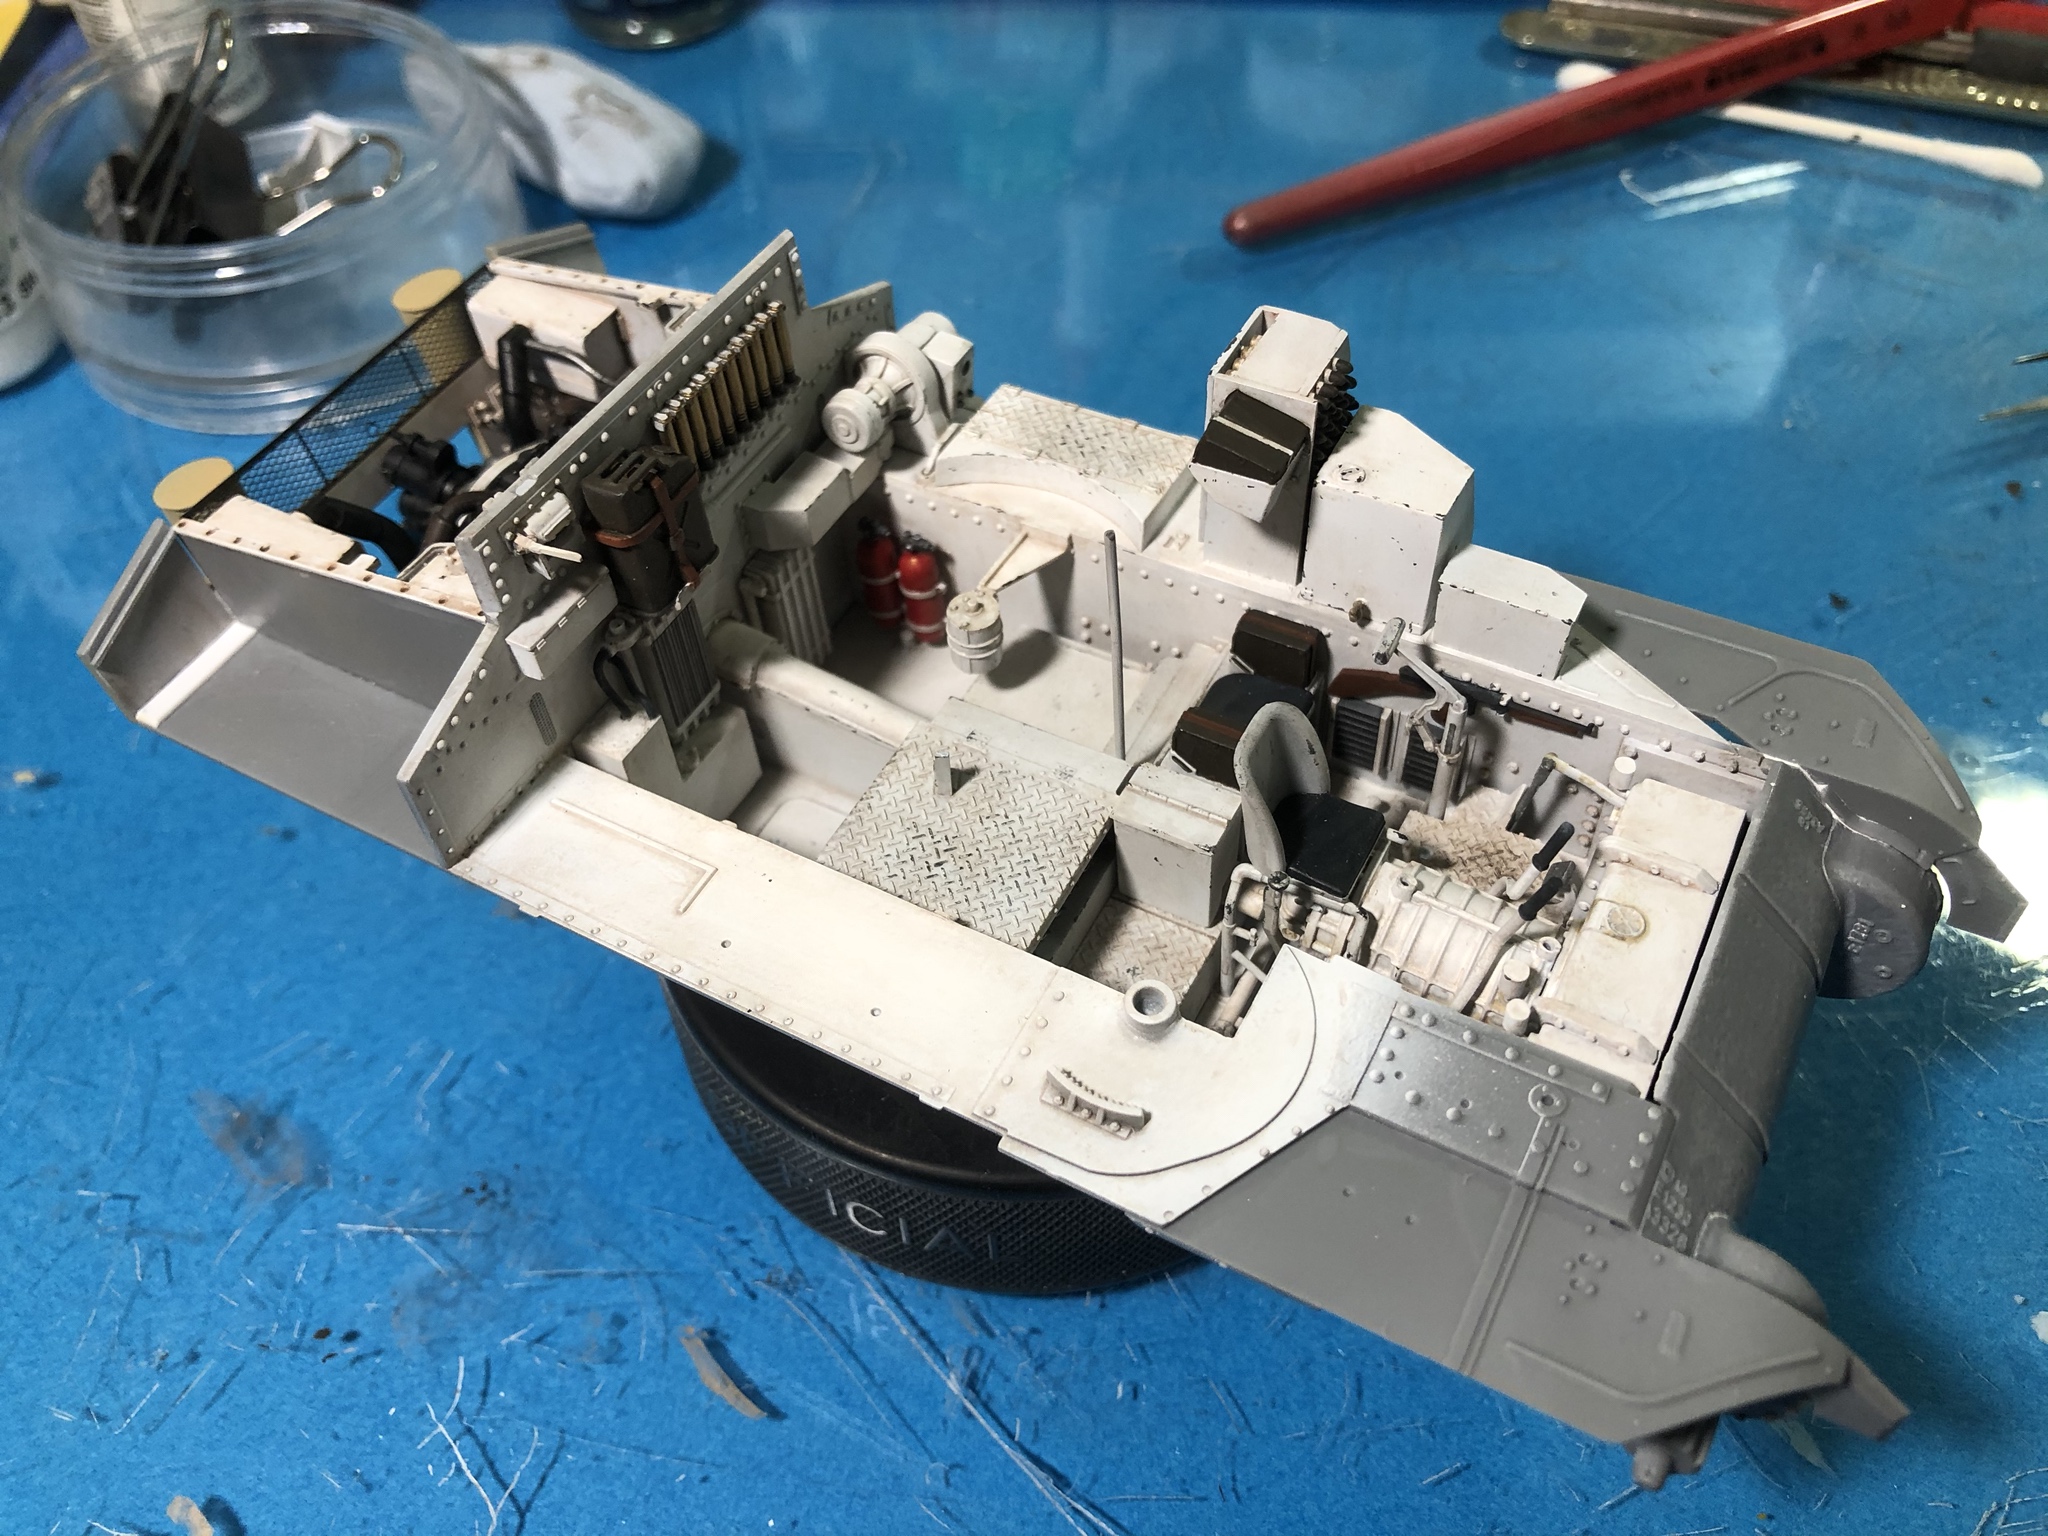
Next build step is the breach assembly for the 75mm main gun.
Colors used were as before:
Tamiya white primer, Vallejo Flat Earth wash and Vallejo Black Grey for chipping. Ammo boxes and projectiles were painted Vallejo US Olive Green and the shell casings and the spigot on the water can were painted AK Interactive Brass.

Painted, weathered and installed the left side fittings.

The fit of all these items was good, so no real issues. I would have liked to see just a bit more refinement on the ammo storage locker since the rounds had very little variation between the rounds and the cabinet.


Next build step is the breach assembly for the 75mm main gun.
Colors used were as before:
Tamiya white primer, Vallejo Flat Earth wash and Vallejo Black Grey for chipping. Ammo boxes and projectiles were painted Vallejo US Olive Green and the shell casings and the spigot on the water can were painted AK Interactive Brass.

PRH001

Joined: June 16, 2014
KitMaker: 681 posts
Armorama: 603 posts

Posted: Sunday, November 03, 2019 - 04:38 PM UTC
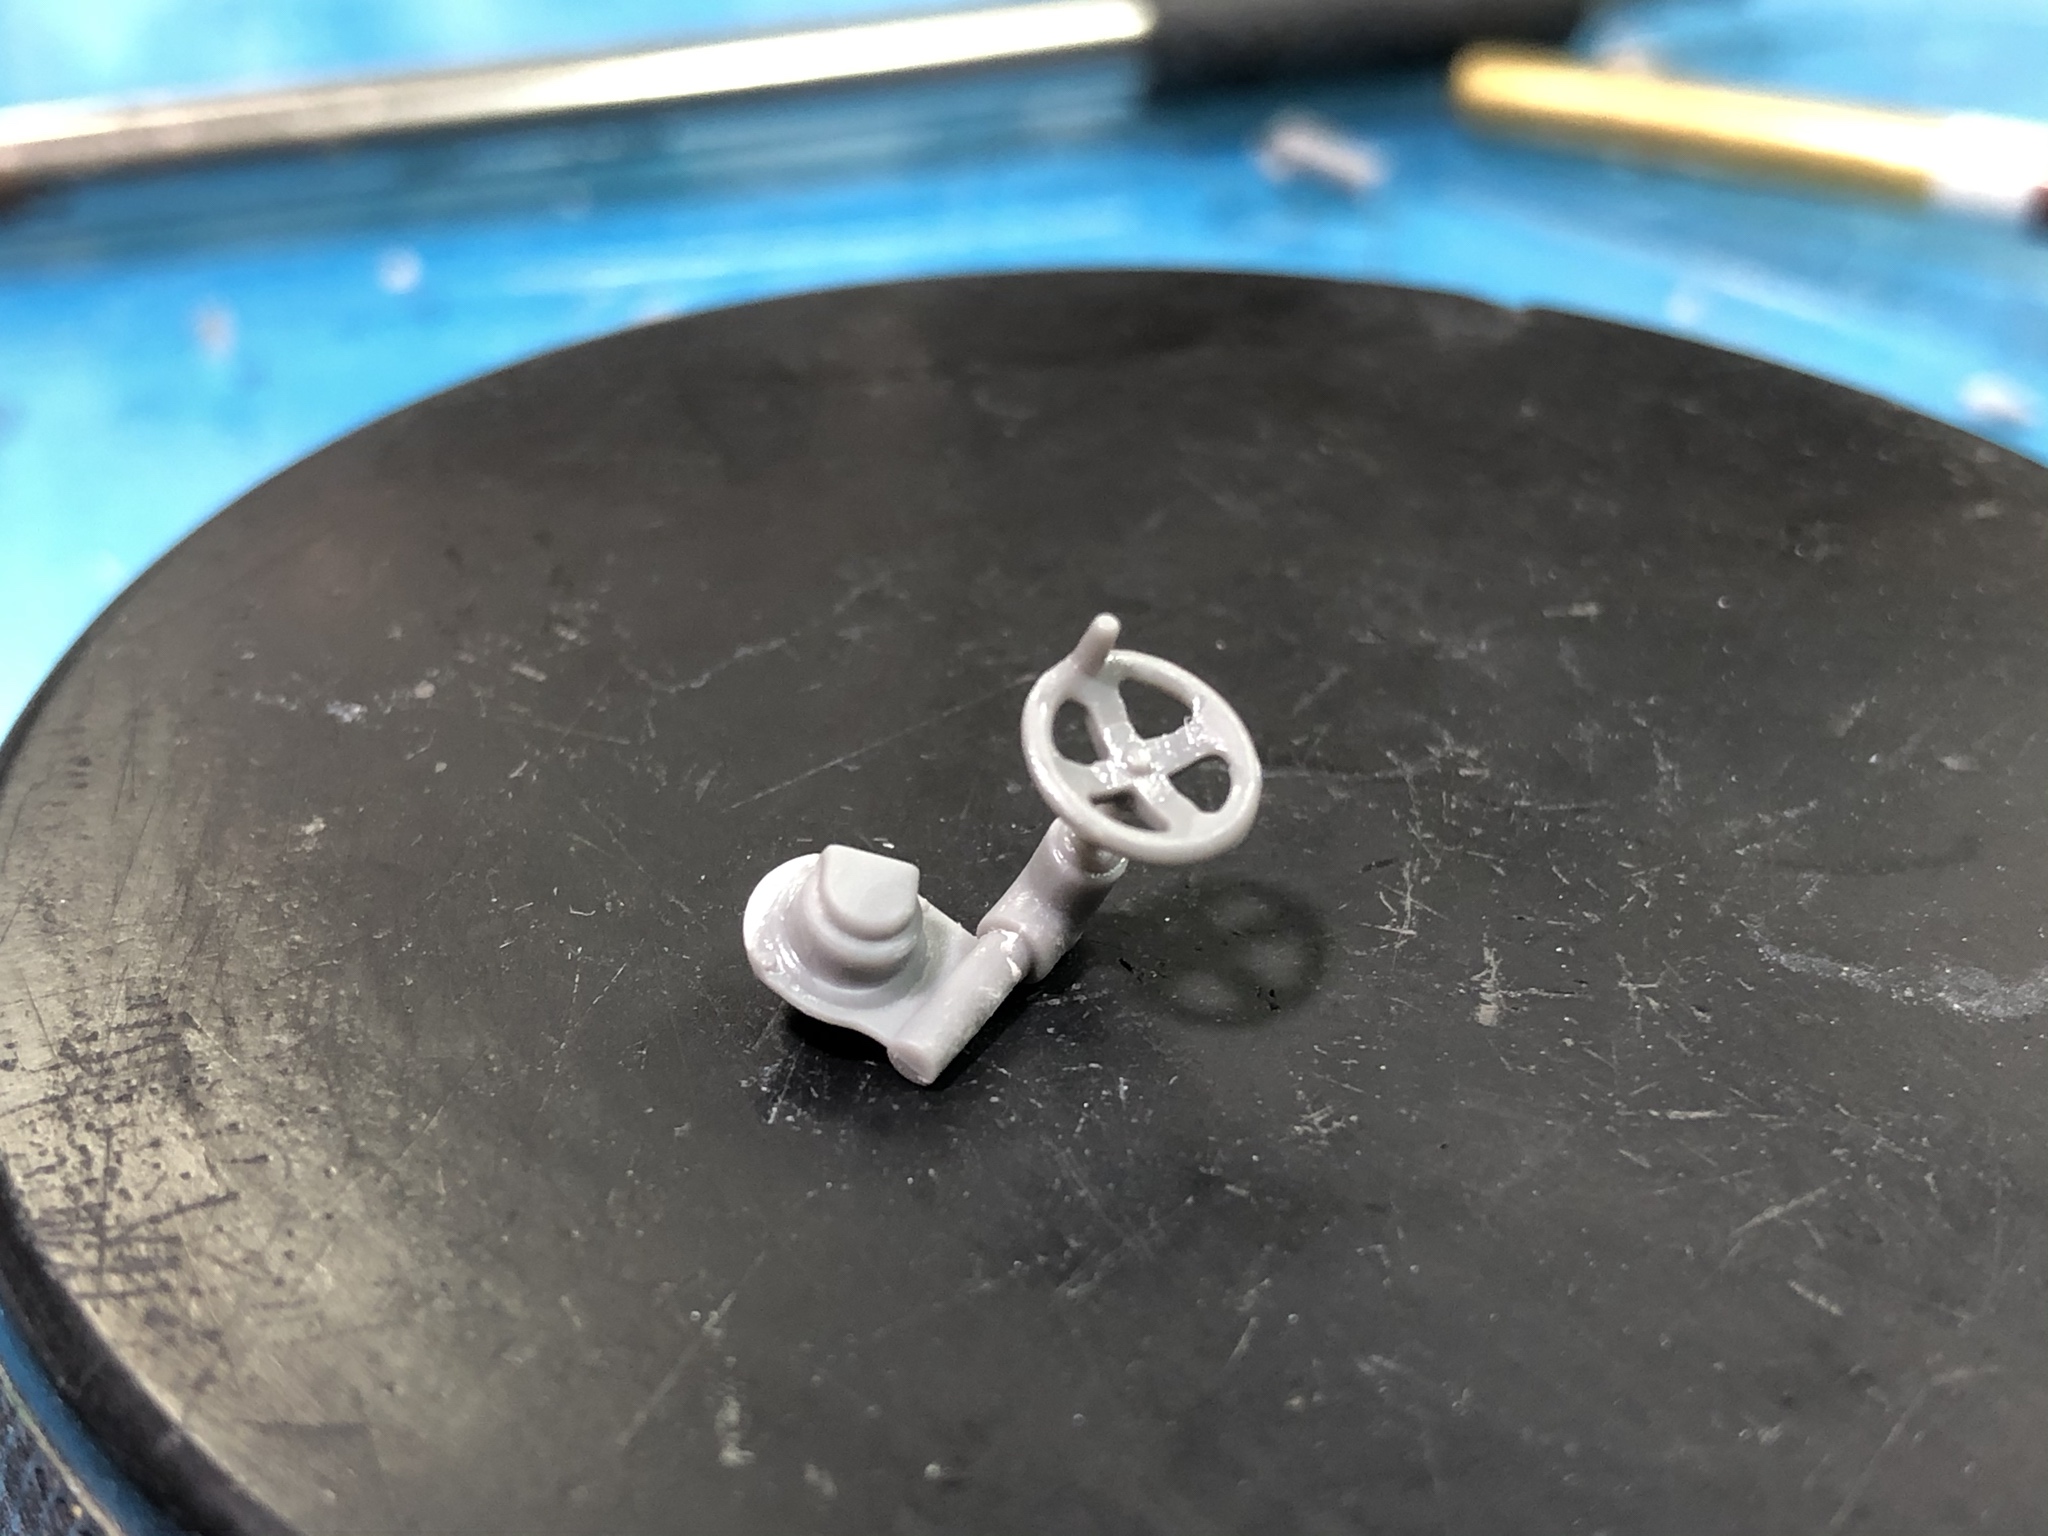
Cleaning up the parts for the main gun, I ran into part FC14 that had the sprue attachment point in a place that was readily visible and it was misshapen. When I cleaned it up the part was not circular and the bolt detail shown in the instructions was where the sprue attachment point was. I trimmed it back and repaired the shape issue and missing bolt detail.
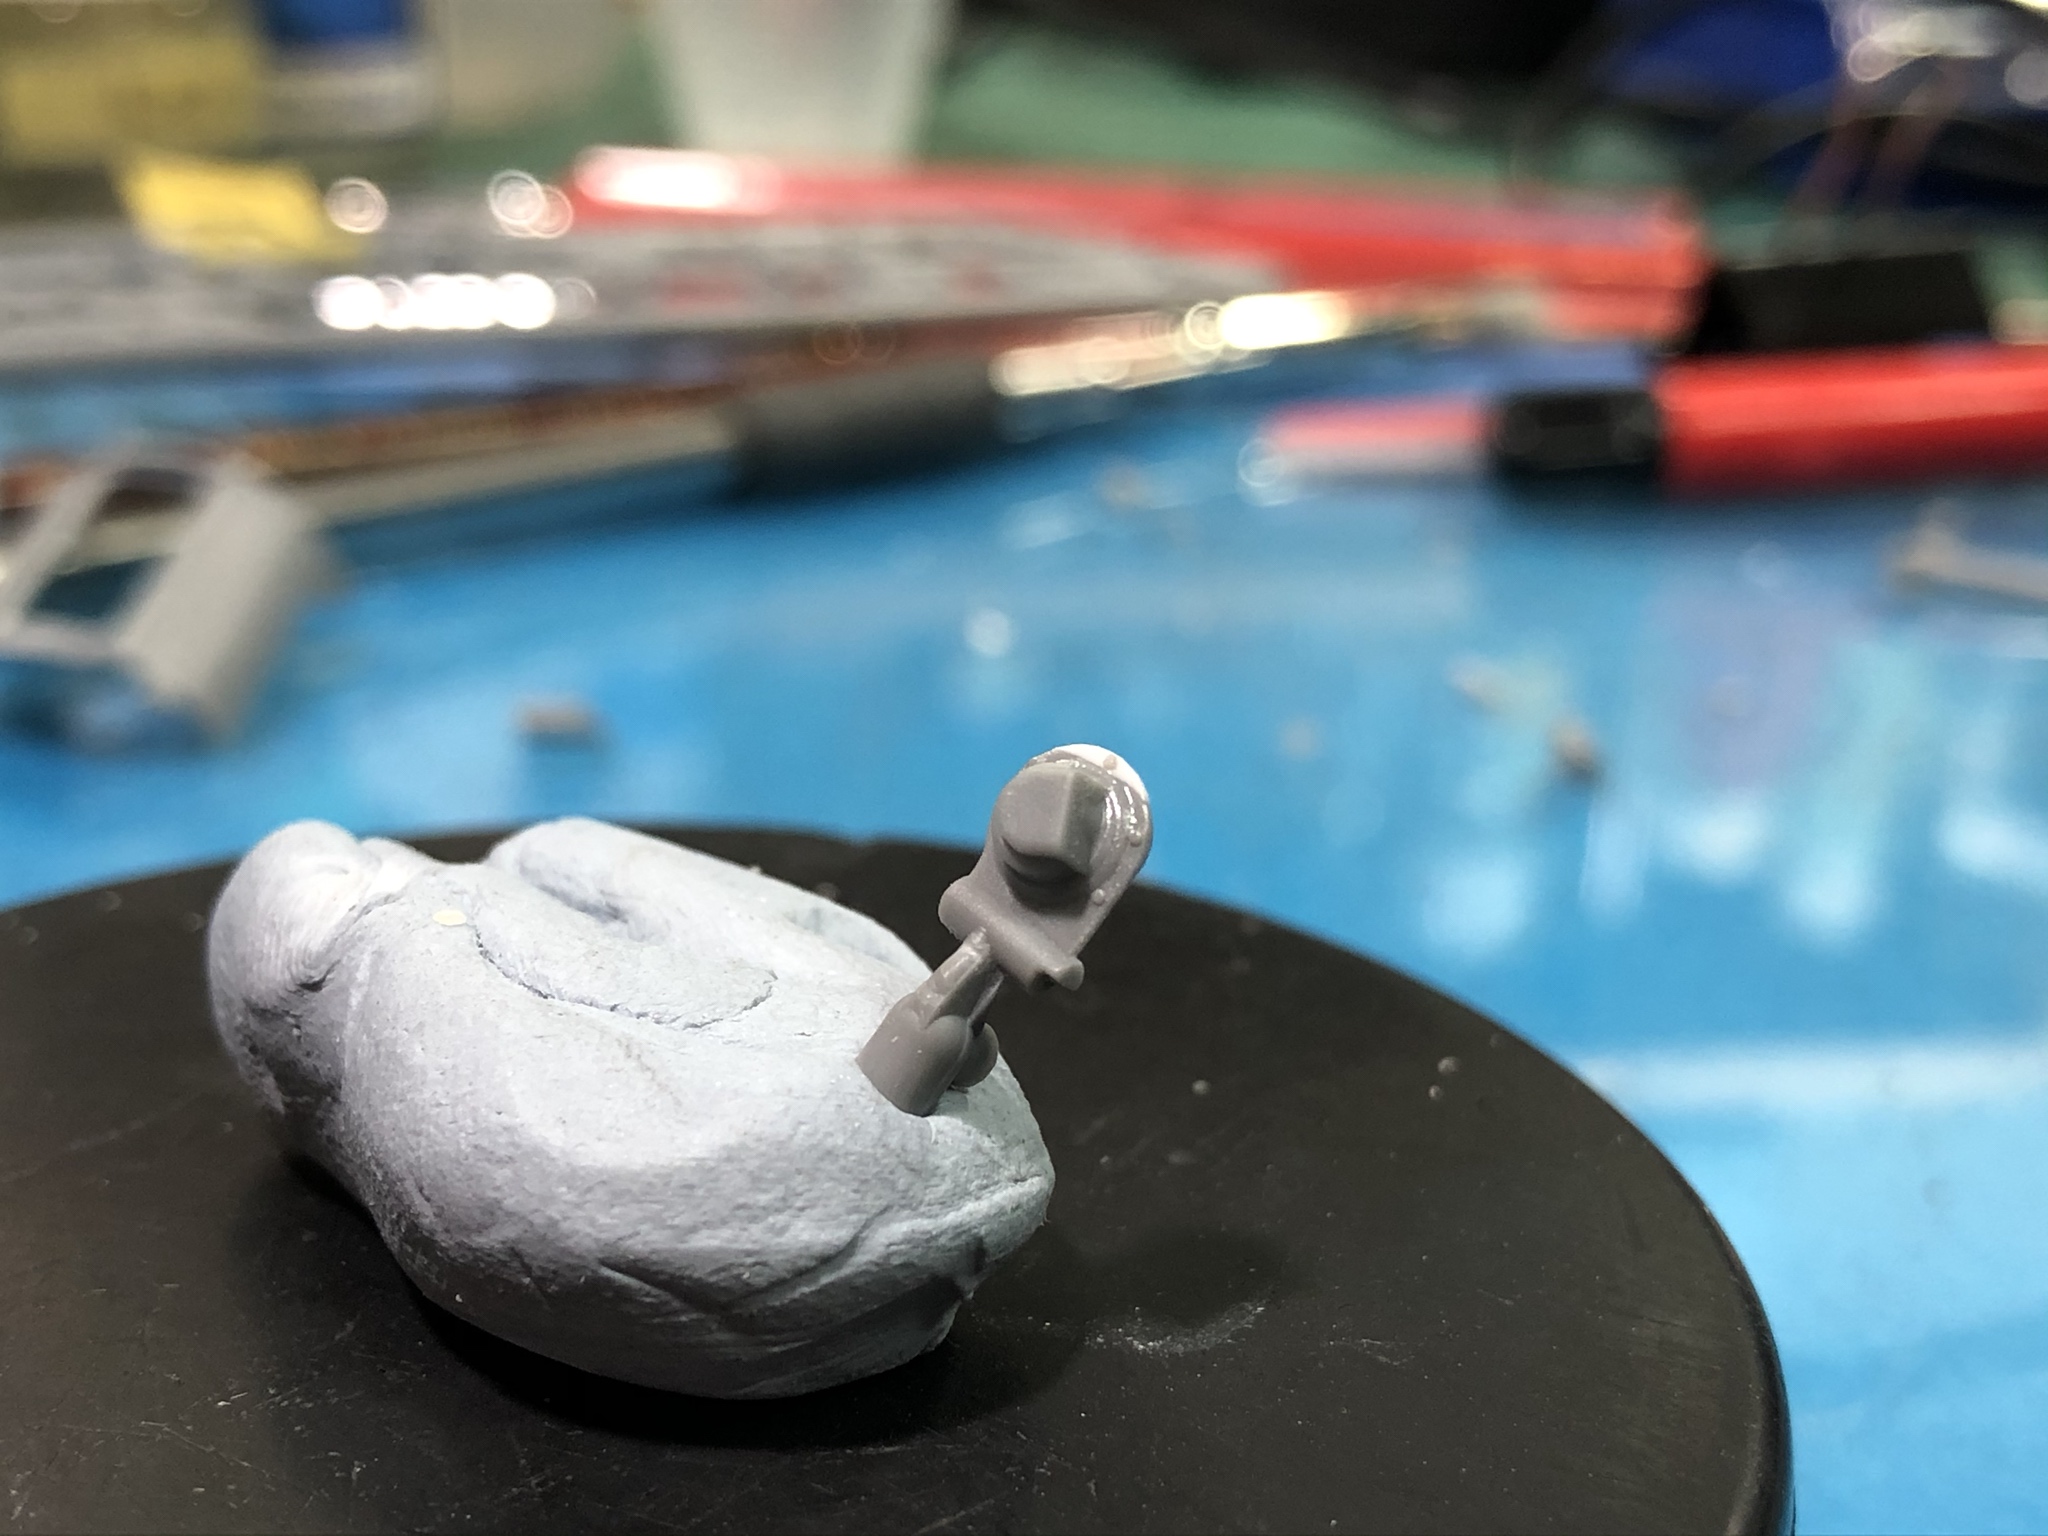
Again, some of the parts had significant mold offset and had to be reworked to get a good cross section. This handwheel was like that and is shown attached to the repaired gearbox FC14.
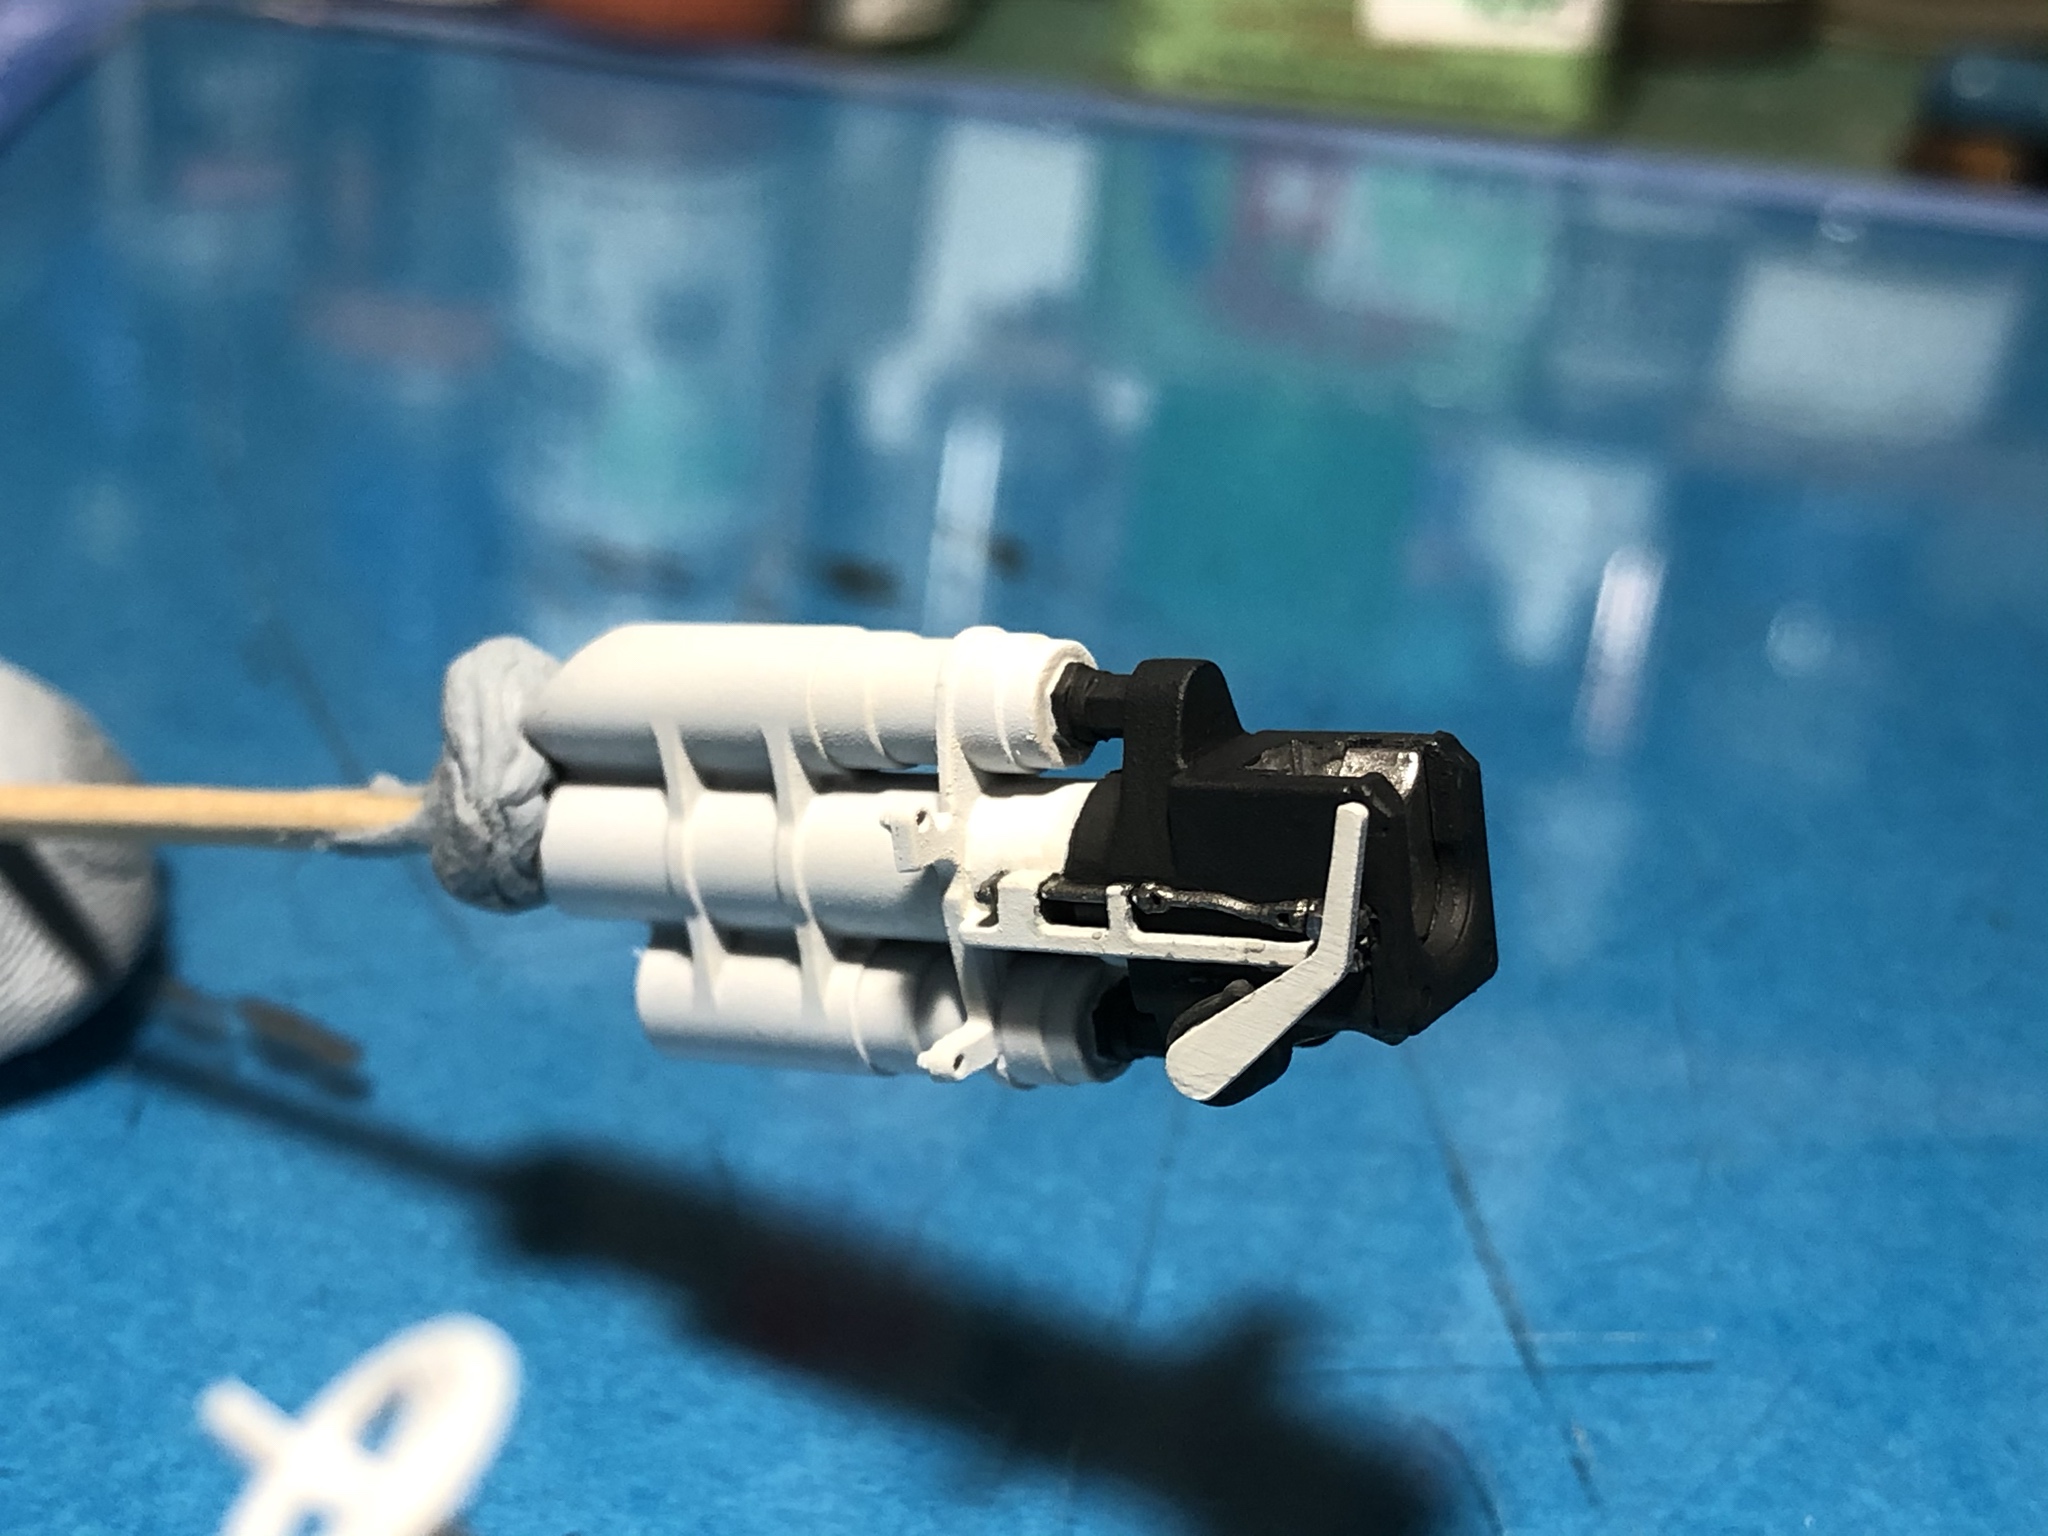
The breech and recoil assembly was assembled and painted. The breech and several fittings on the recoil assembly did need some filler to blend seams. Nothing major but it slowed me down enough to prevent weathering tonight.
This doesnít look like 4 hours worth of work, but it is...
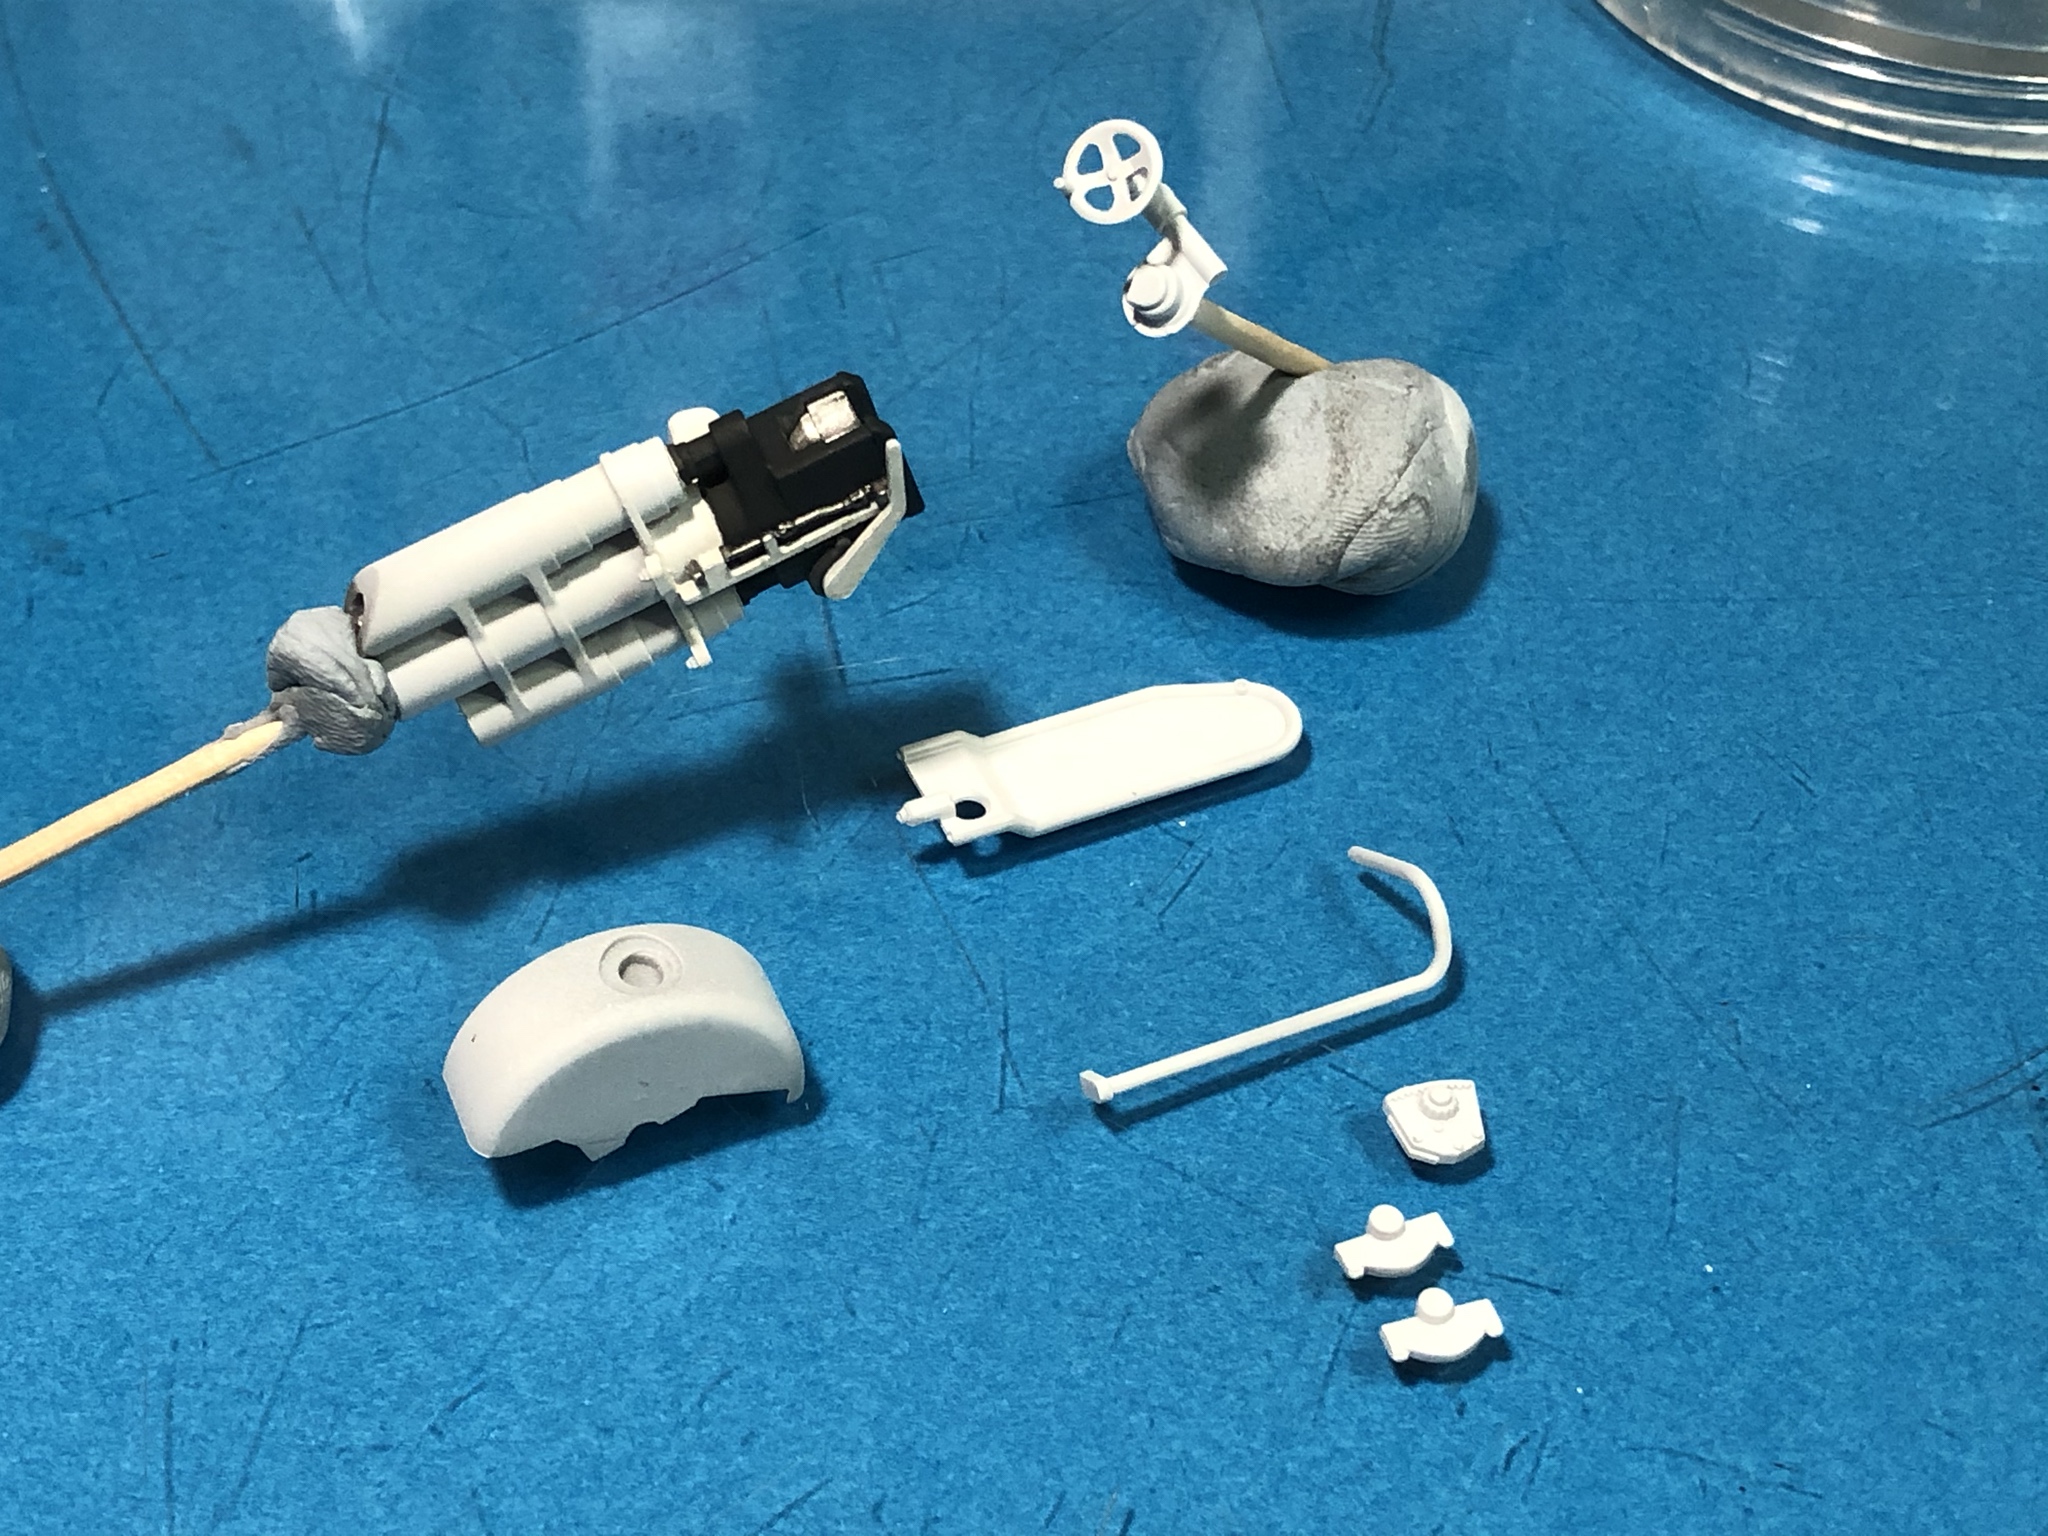
Colors used were Tamiya Primer White, Vallejo Black Grey, and AK Interactive Aluminum with a Vallejo Flat Black Grey wash.

Again, some of the parts had significant mold offset and had to be reworked to get a good cross section. This handwheel was like that and is shown attached to the repaired gearbox FC14.

The breech and recoil assembly was assembled and painted. The breech and several fittings on the recoil assembly did need some filler to blend seams. Nothing major but it slowed me down enough to prevent weathering tonight.

This doesnít look like 4 hours worth of work, but it is...

Colors used were Tamiya Primer White, Vallejo Black Grey, and AK Interactive Aluminum with a Vallejo Flat Black Grey wash.
 |


