Armor/AFV: Allied - WWII
Armor and ground forces of the Allied forces during World War II.
Hosted by Darren Baker
MiniArt Grant w/interior build log interest?
PRH001
Visit this Community
New Mexico, United States
Joined: June 16, 2014
KitMaker: 681 posts
Armorama: 603 posts
Posted: Saturday, February 22, 2020 - 05:14 AM UTC
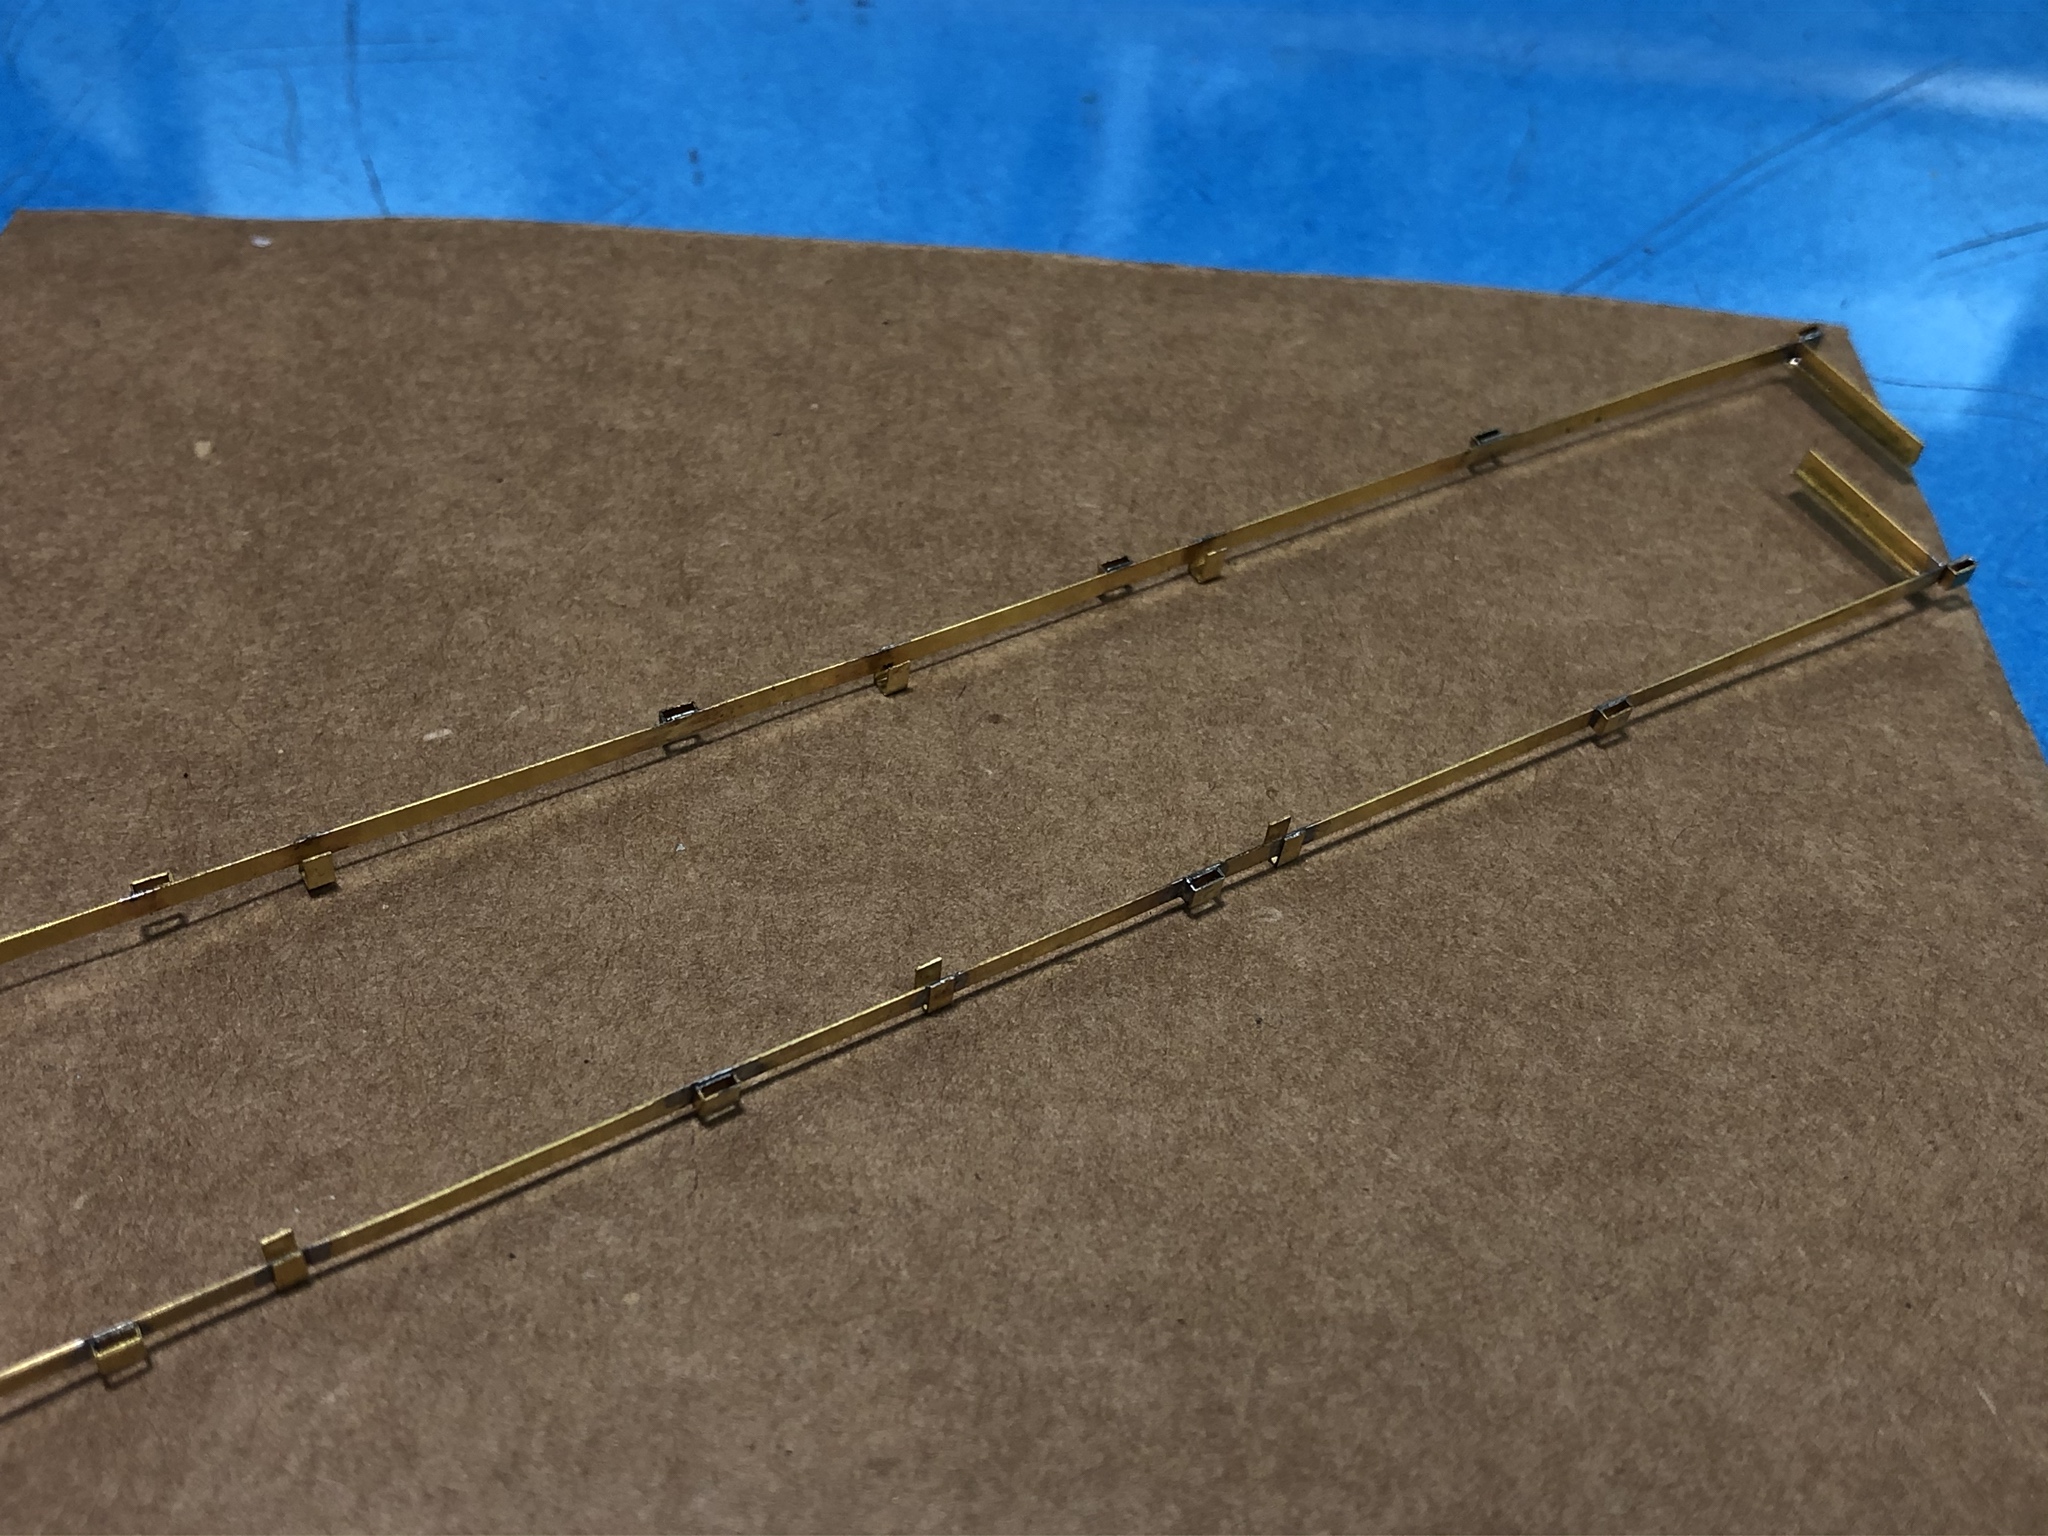
Stowage rail construction installment two...

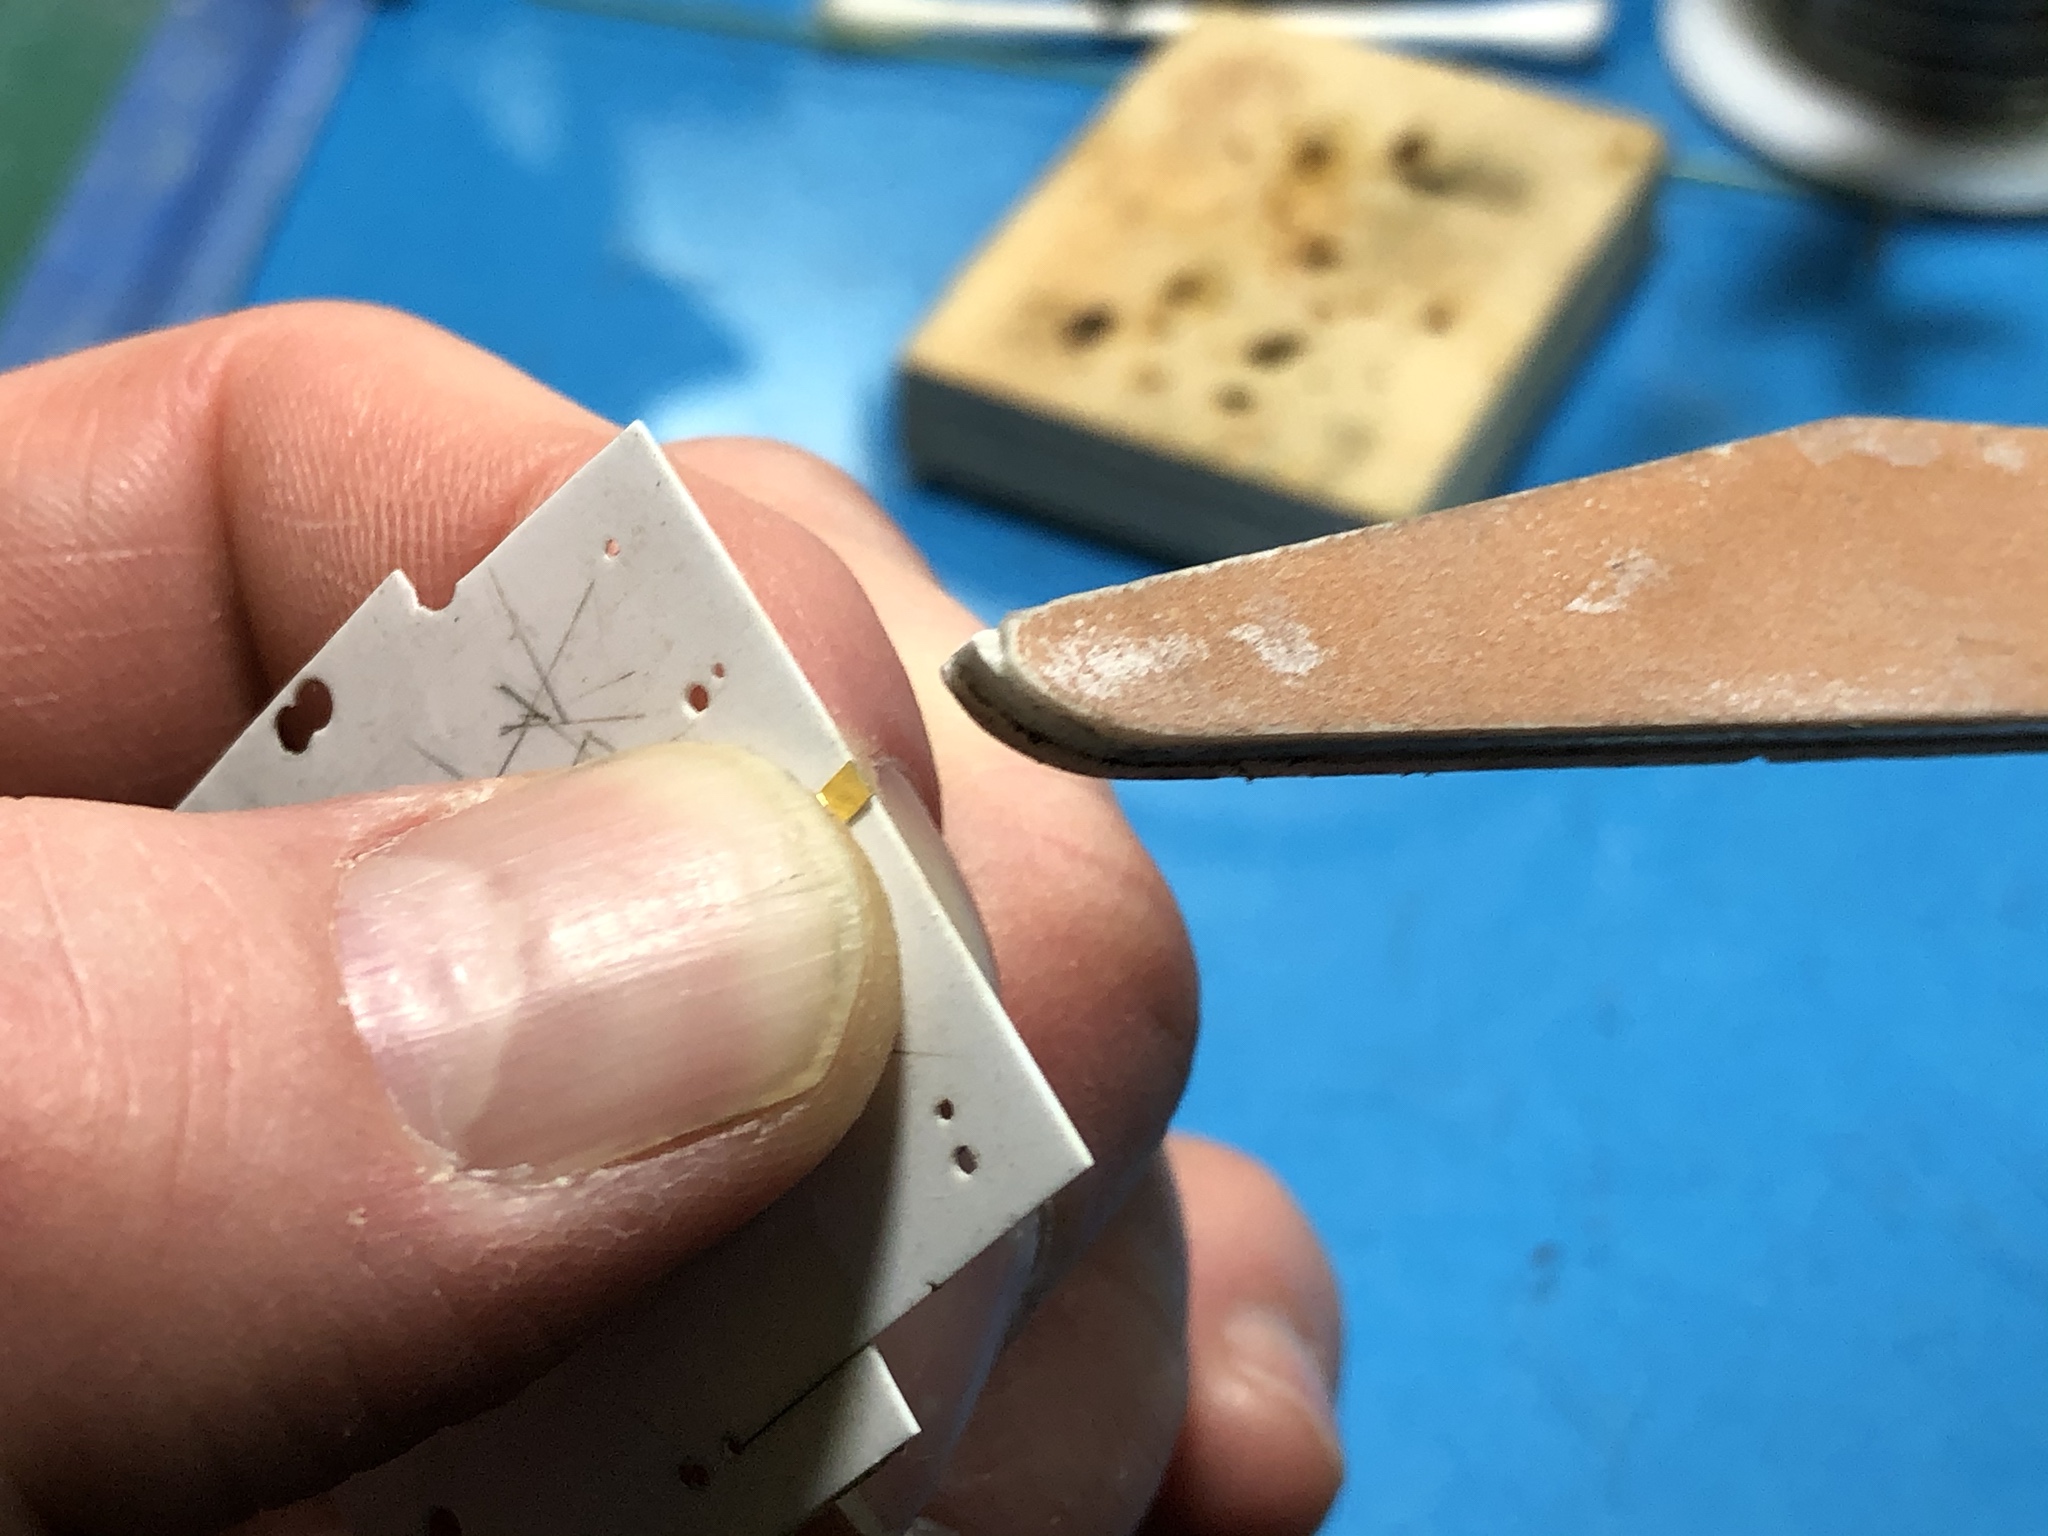
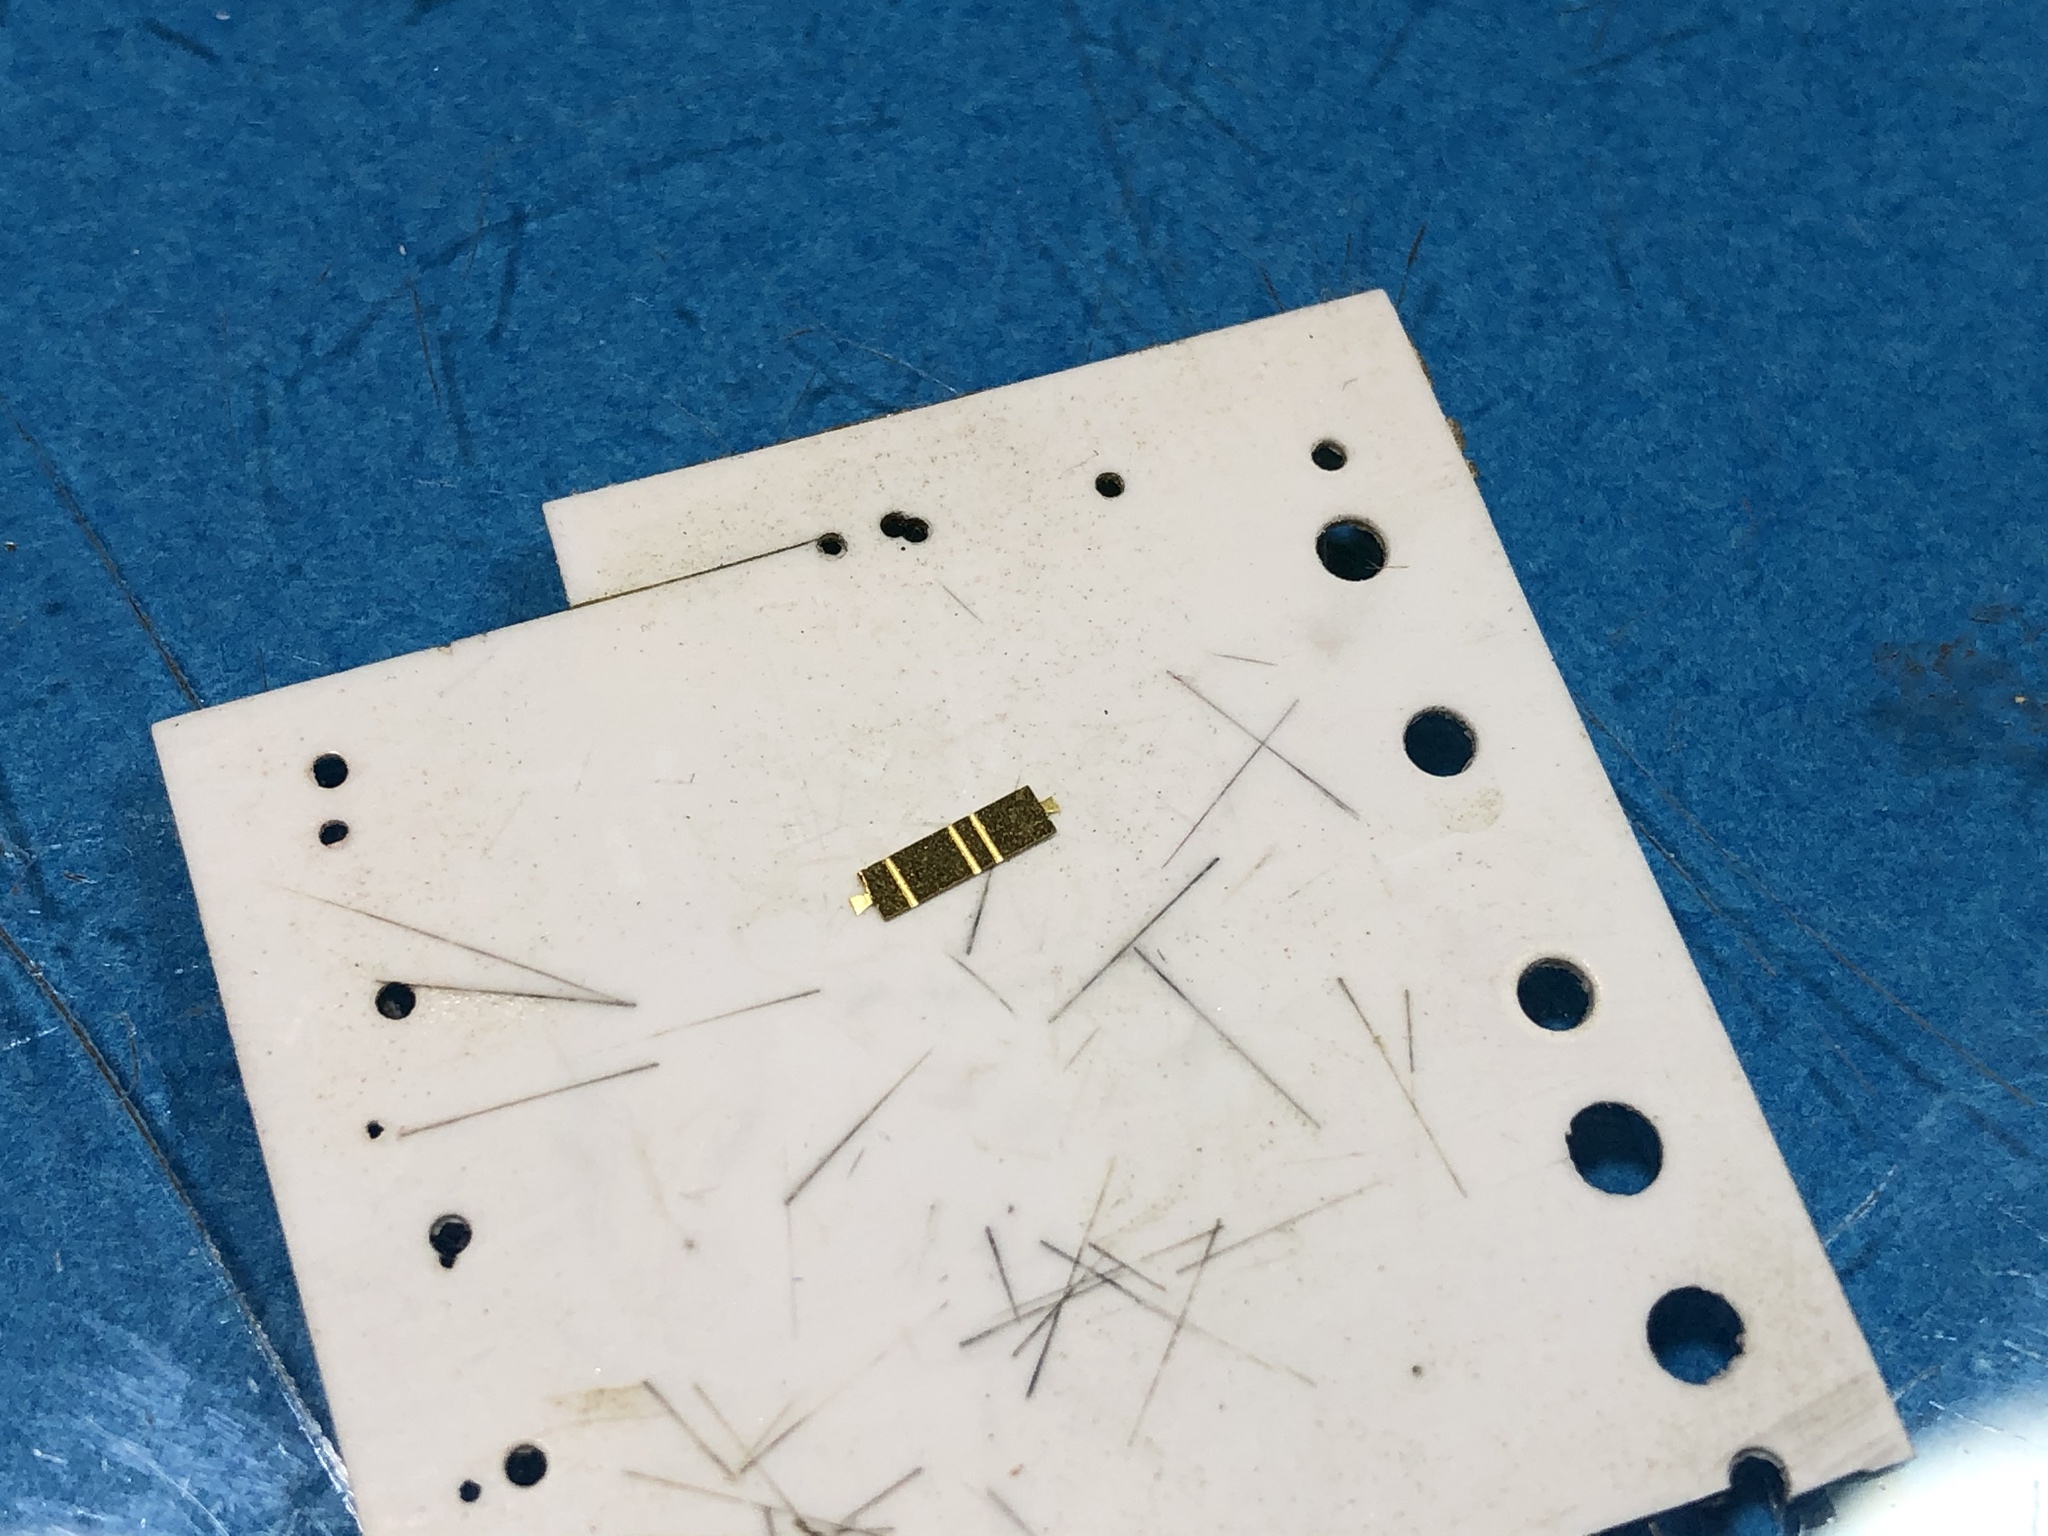
The box shaped fittings are removed from the PE sheet and cleaned up in the normal way. Removal of the attachment points and sanding to ensure no trace of the stub remains ensures the fit if the bend will be correct

Note: the part bends are not symmetrical, which means all bends should be made in the same order and in the same manner to improve the chance of having identical parts after folding. I’ve tried varying the bend order and for me it always produces dissimilar parts...


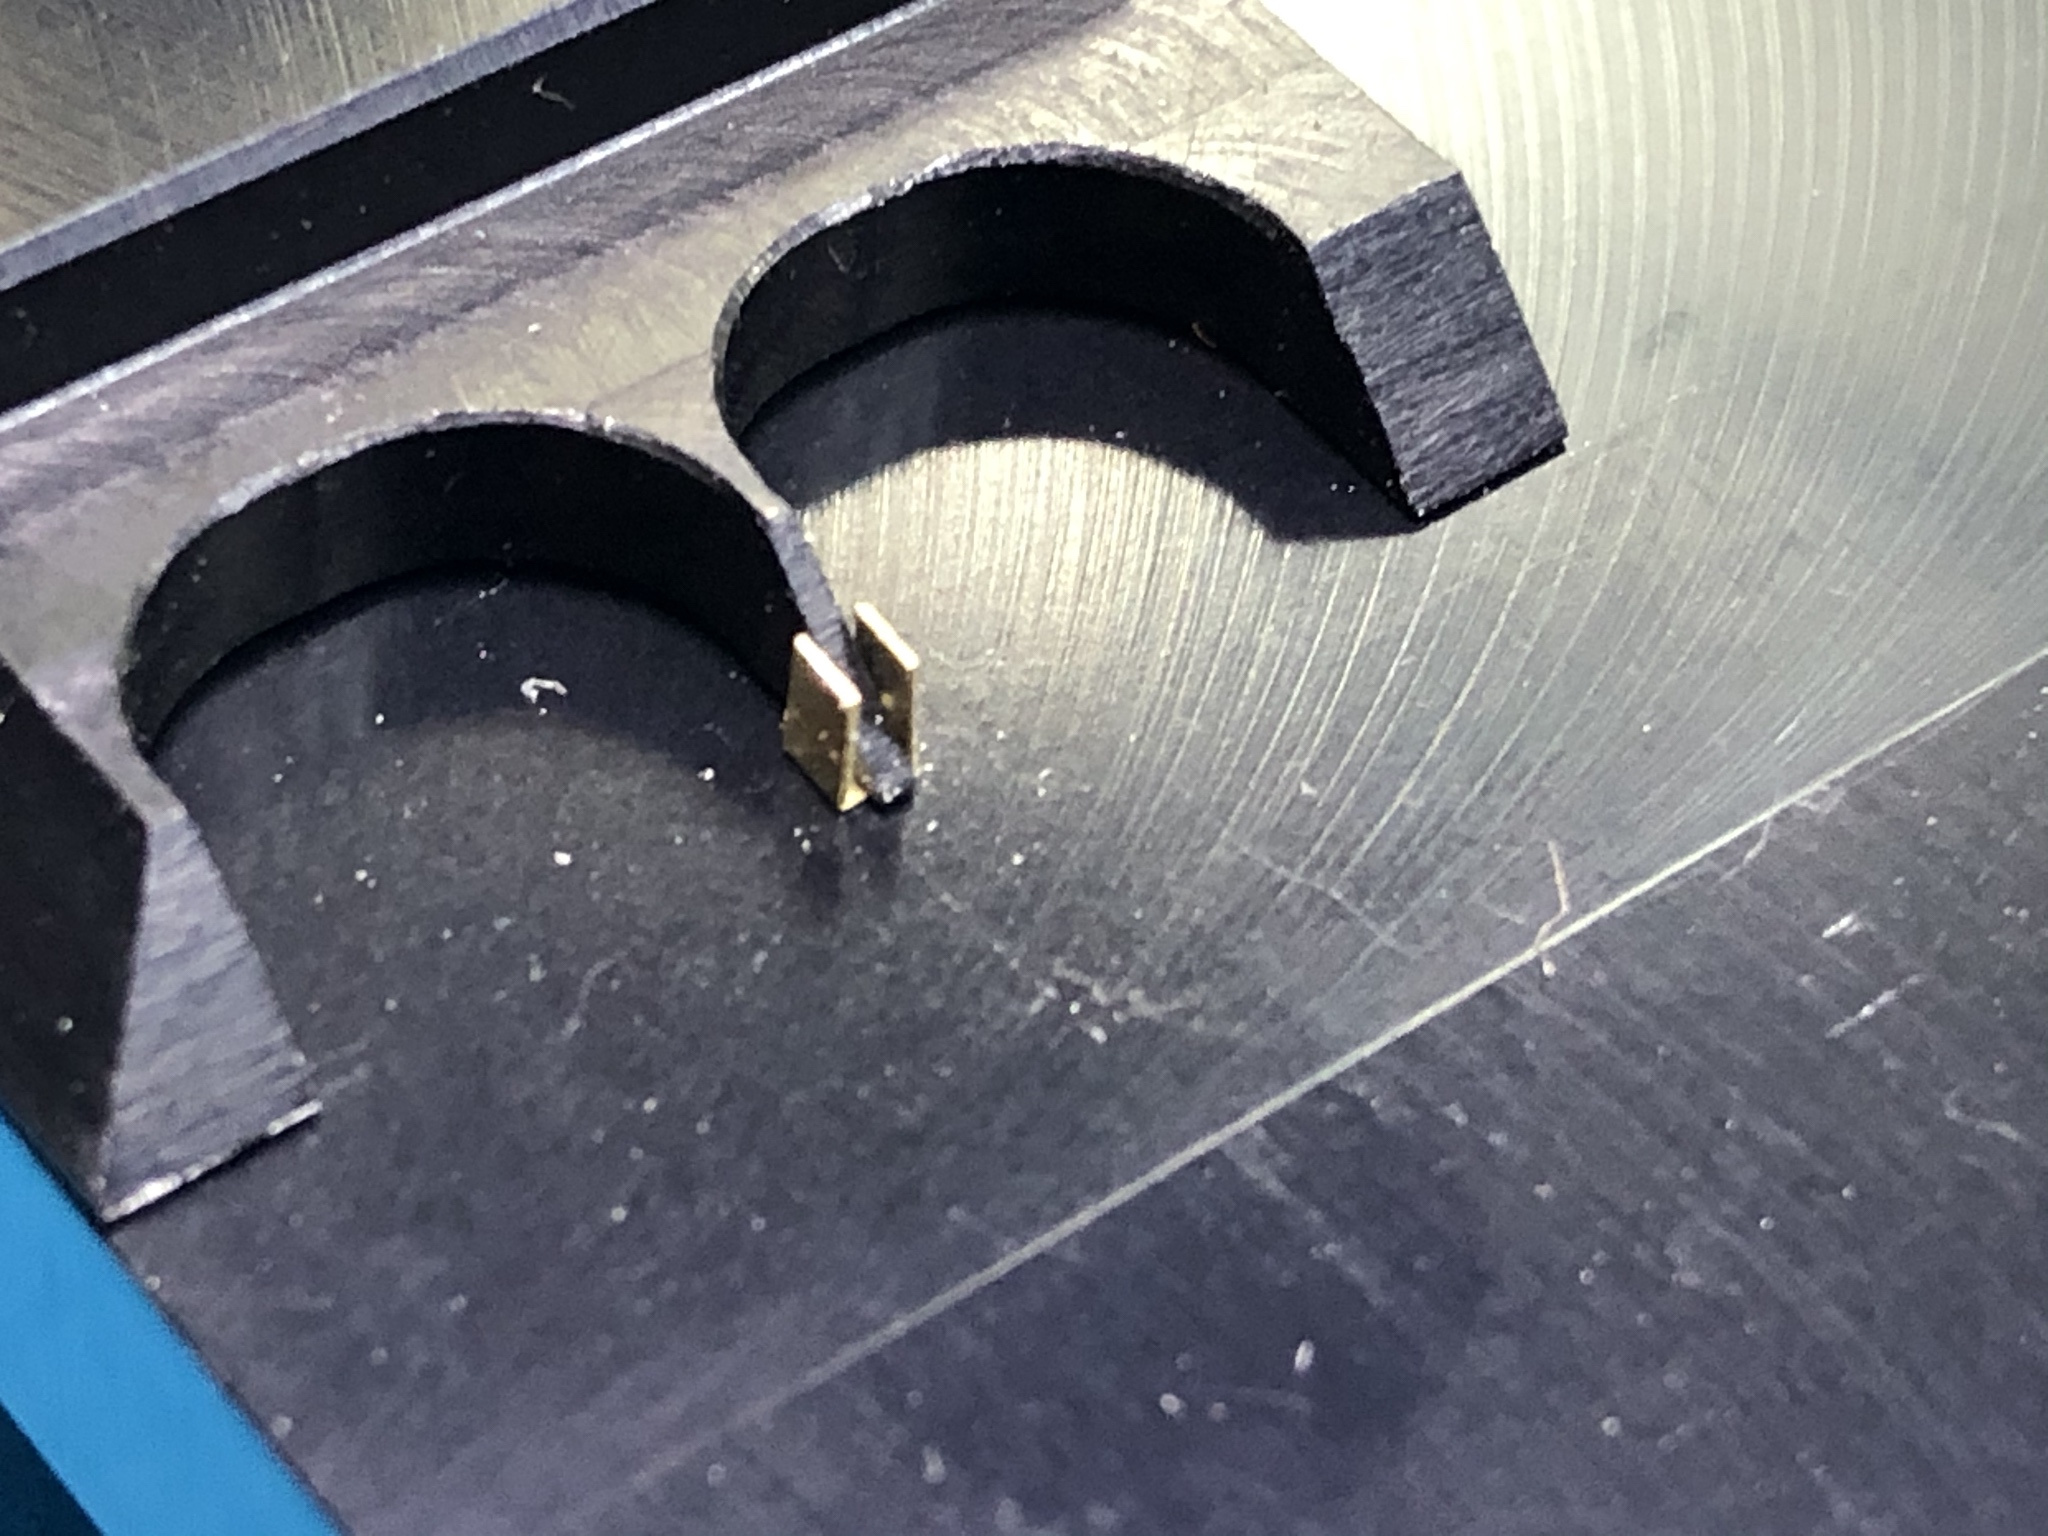
The best way to ensure part edges remain square to the assembly is a PE folding tool. You can bend PE with pliers and with tweezers 90% of the time and be perfectly fine, but when assemblies have to be bent and be identical, those methods introduce variables which are very hard to control and repeat. In the case of the tweezers, be aware that bending PE with them rounds the edges of the tool and makes picking up and holding delicate parts harder.
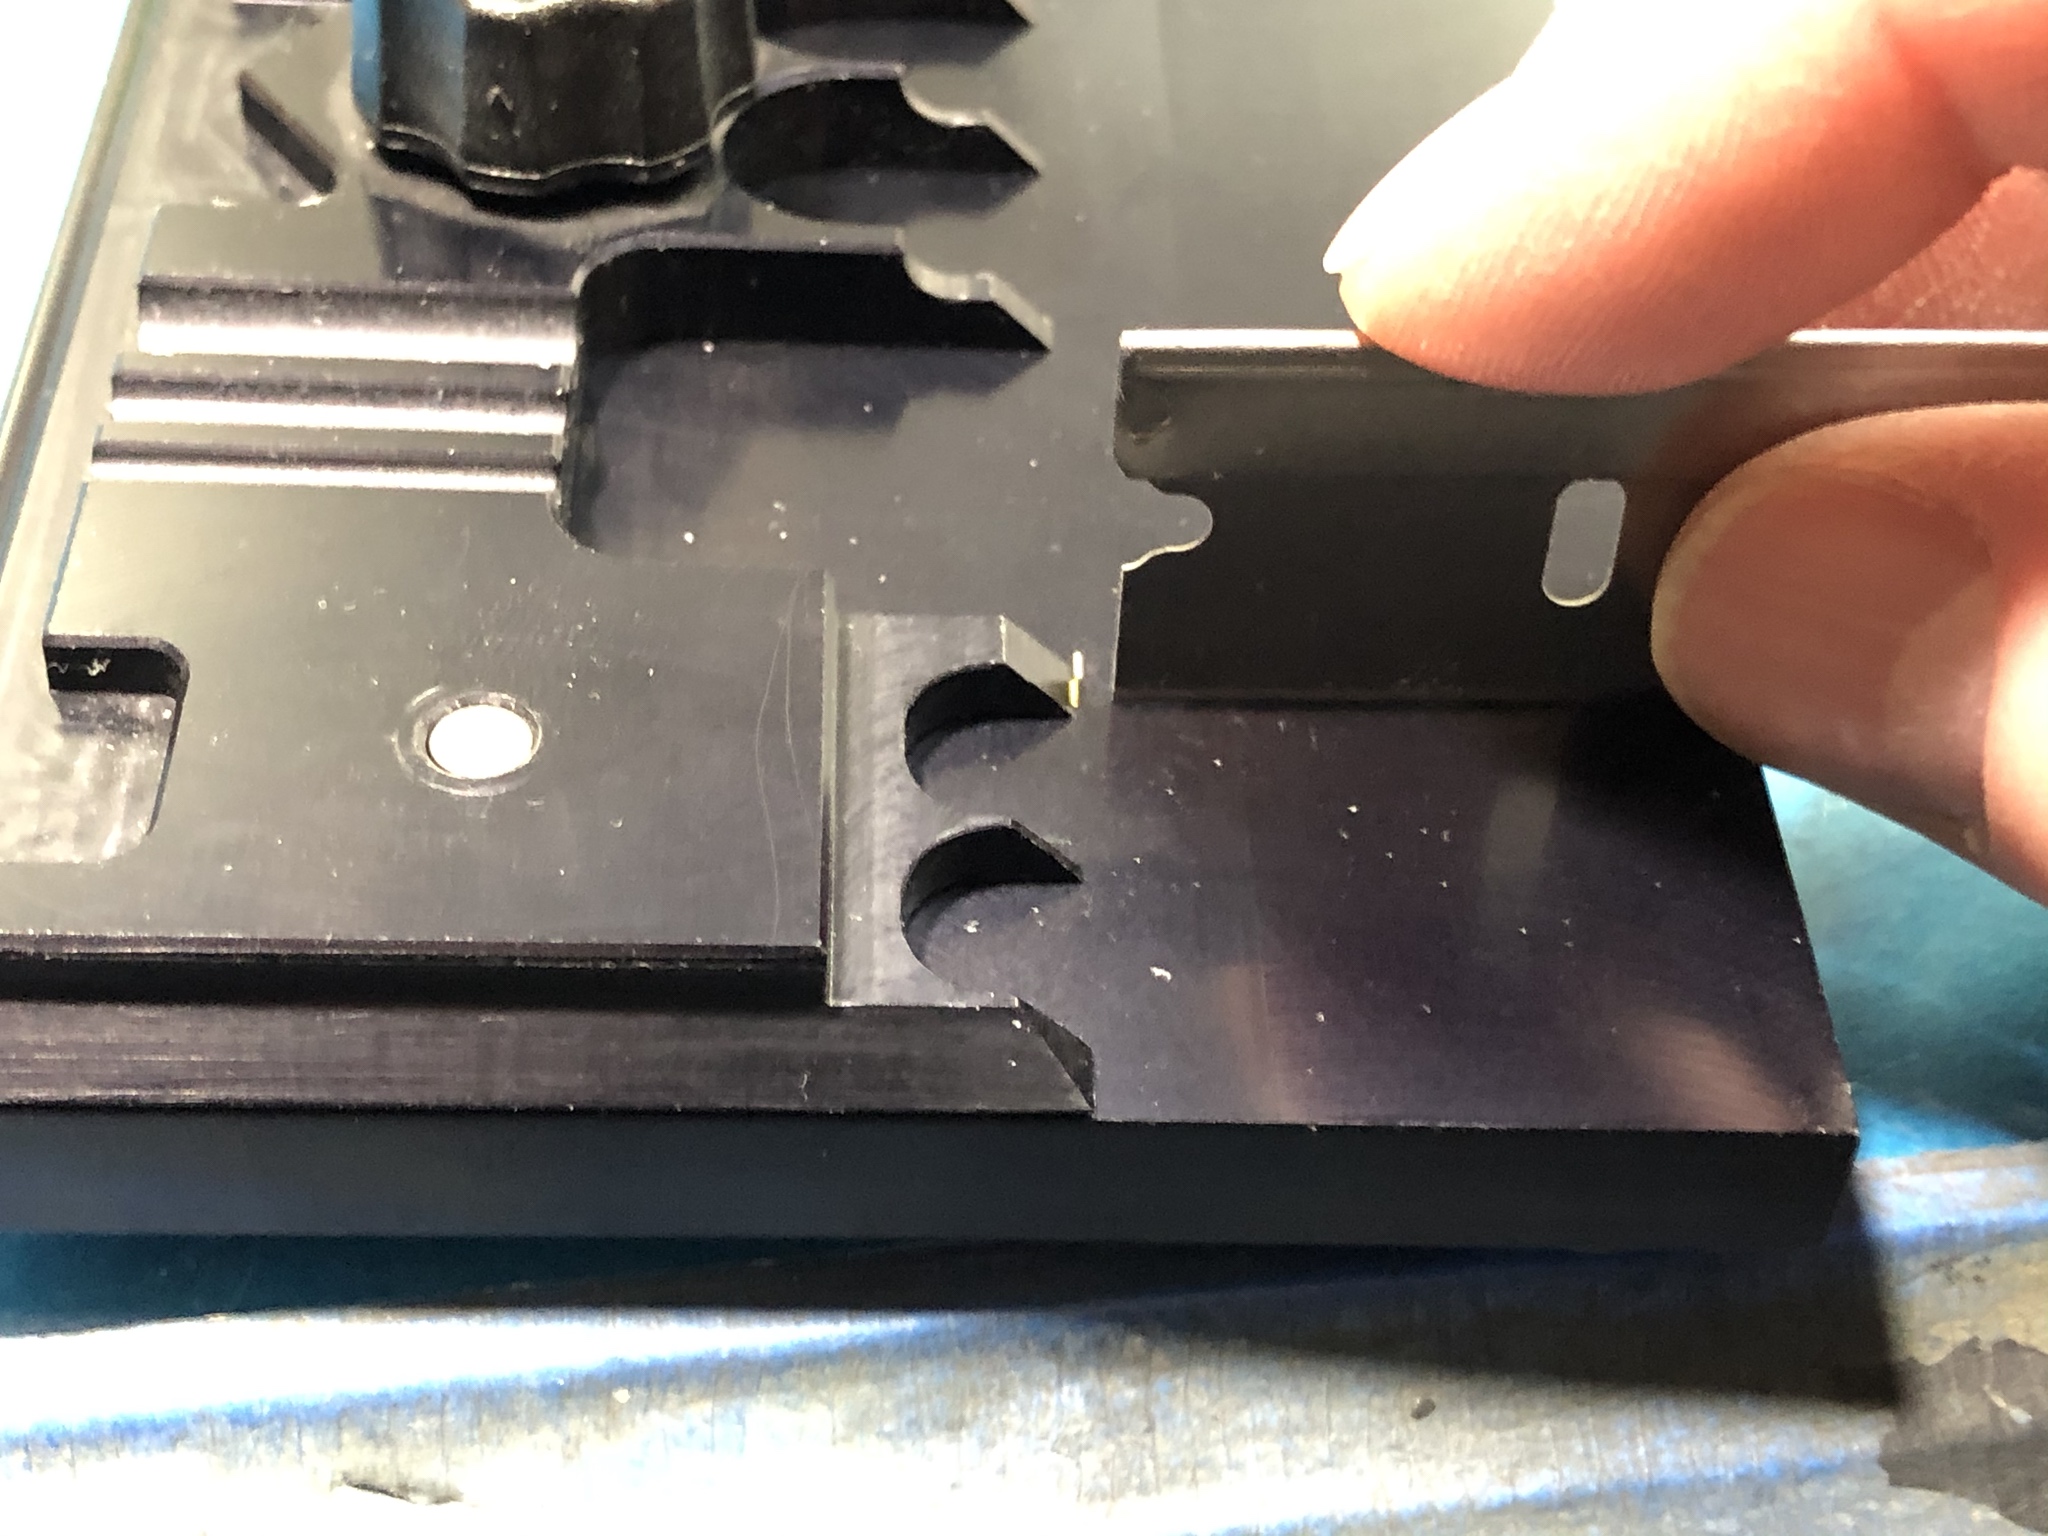


Here the part is bent into the completed shape.
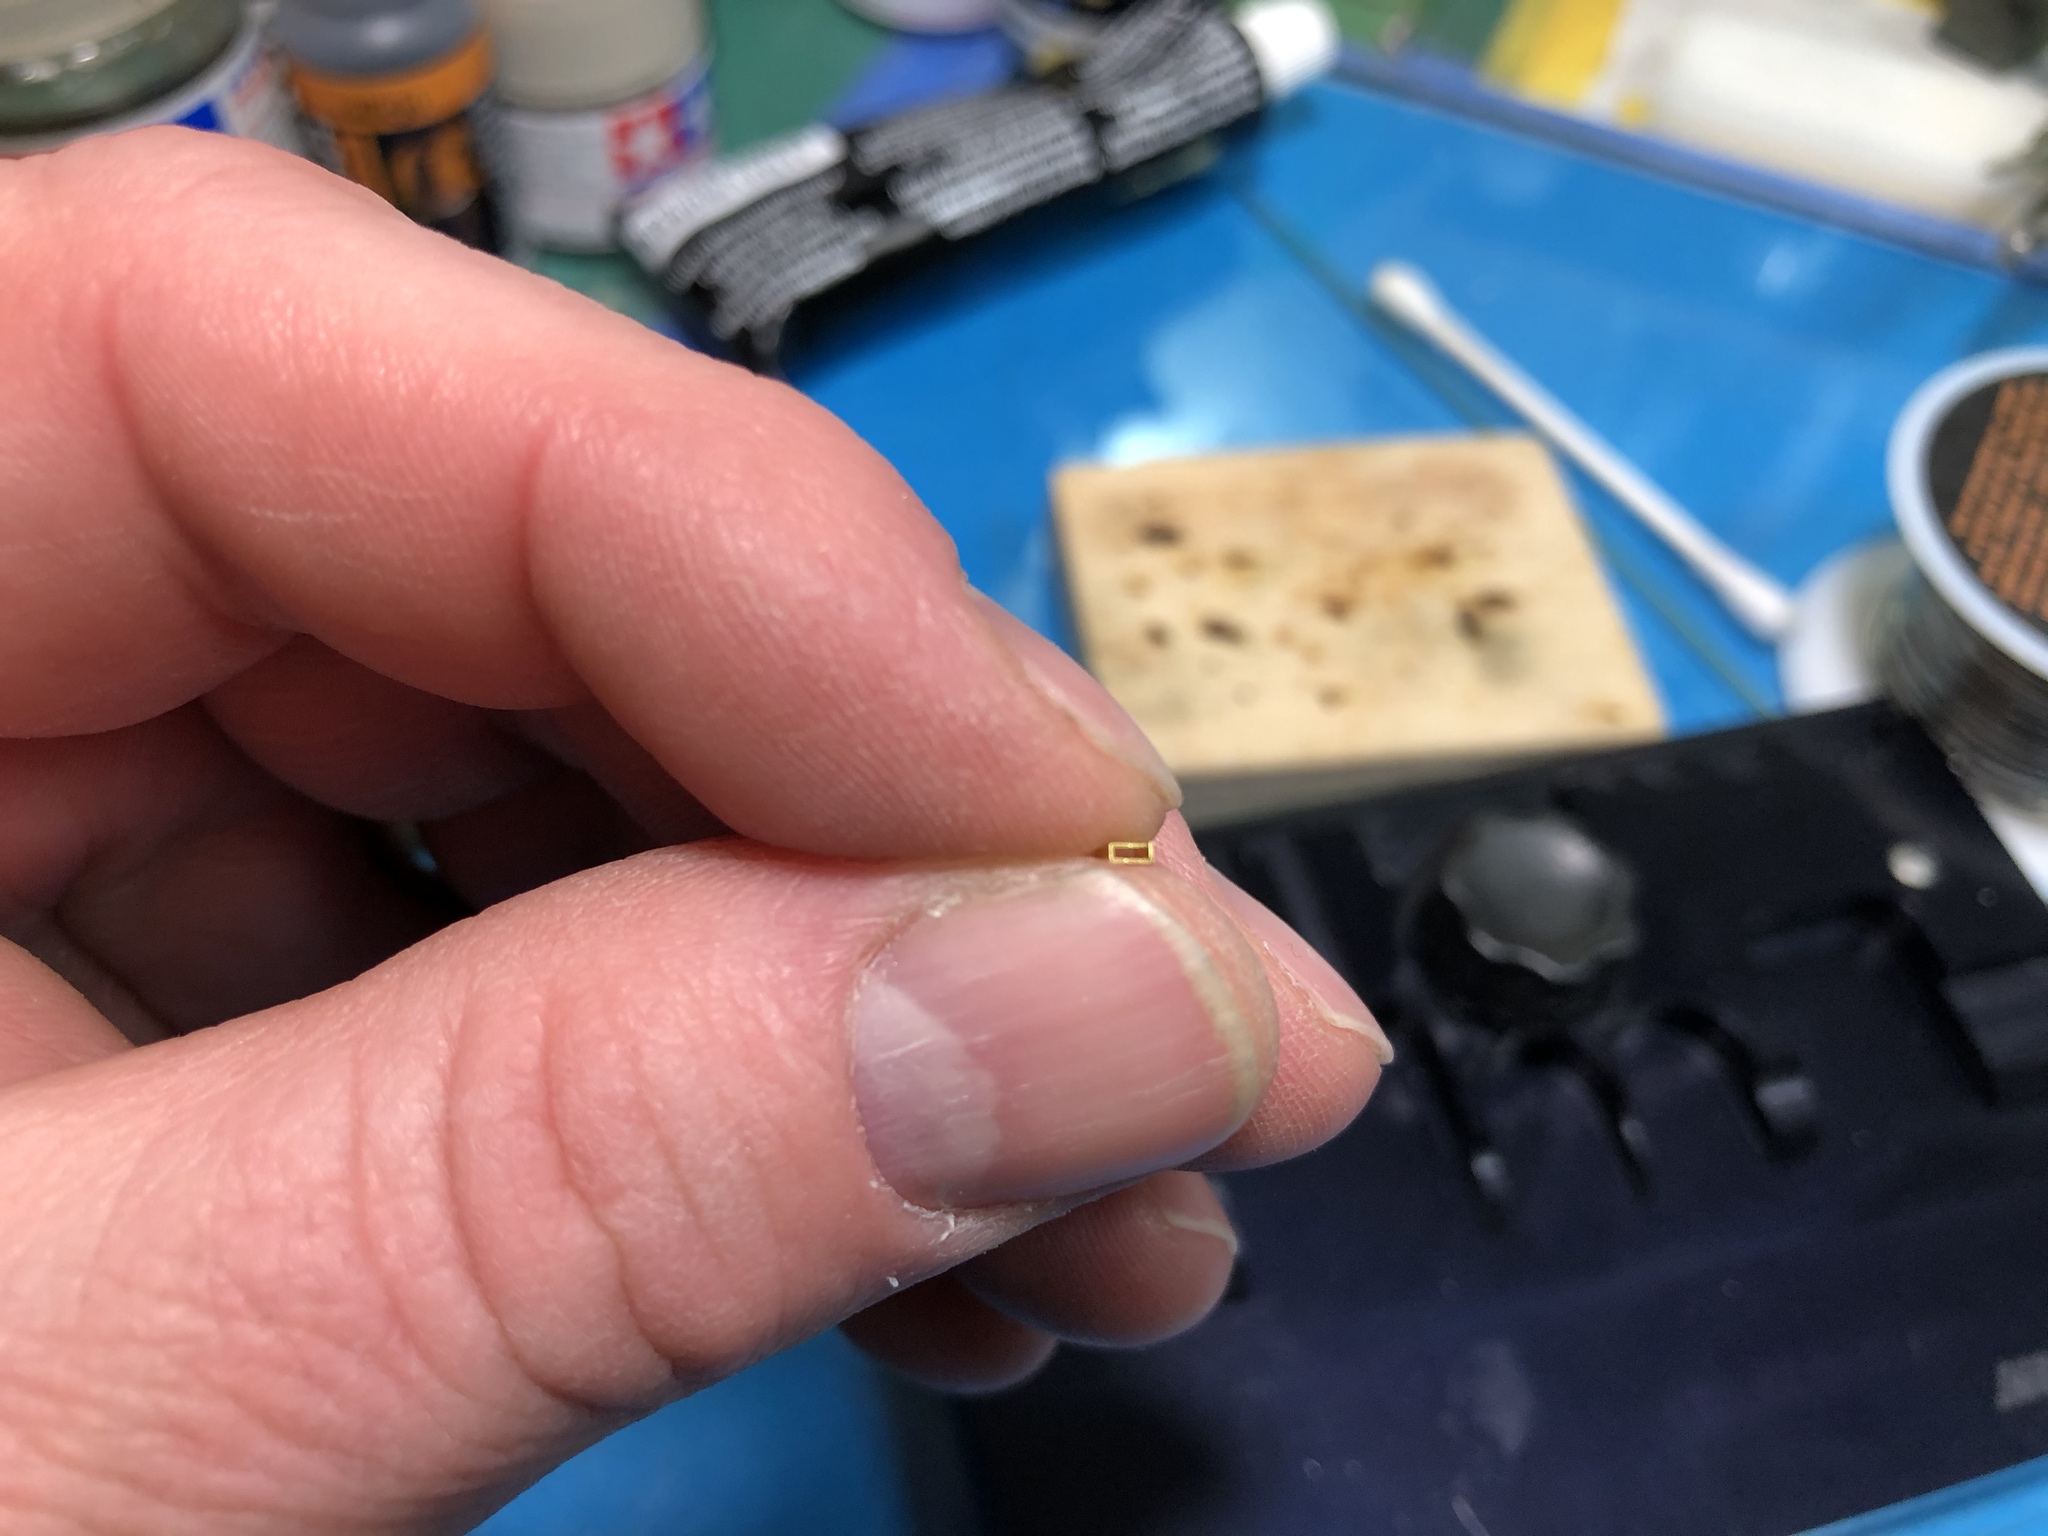


The part is cleaned with the glass fiber brush, flux is applied lightly and a small flake of solder is placed in the joint.


Here is the joint after soldering and cleanup with alcohol.
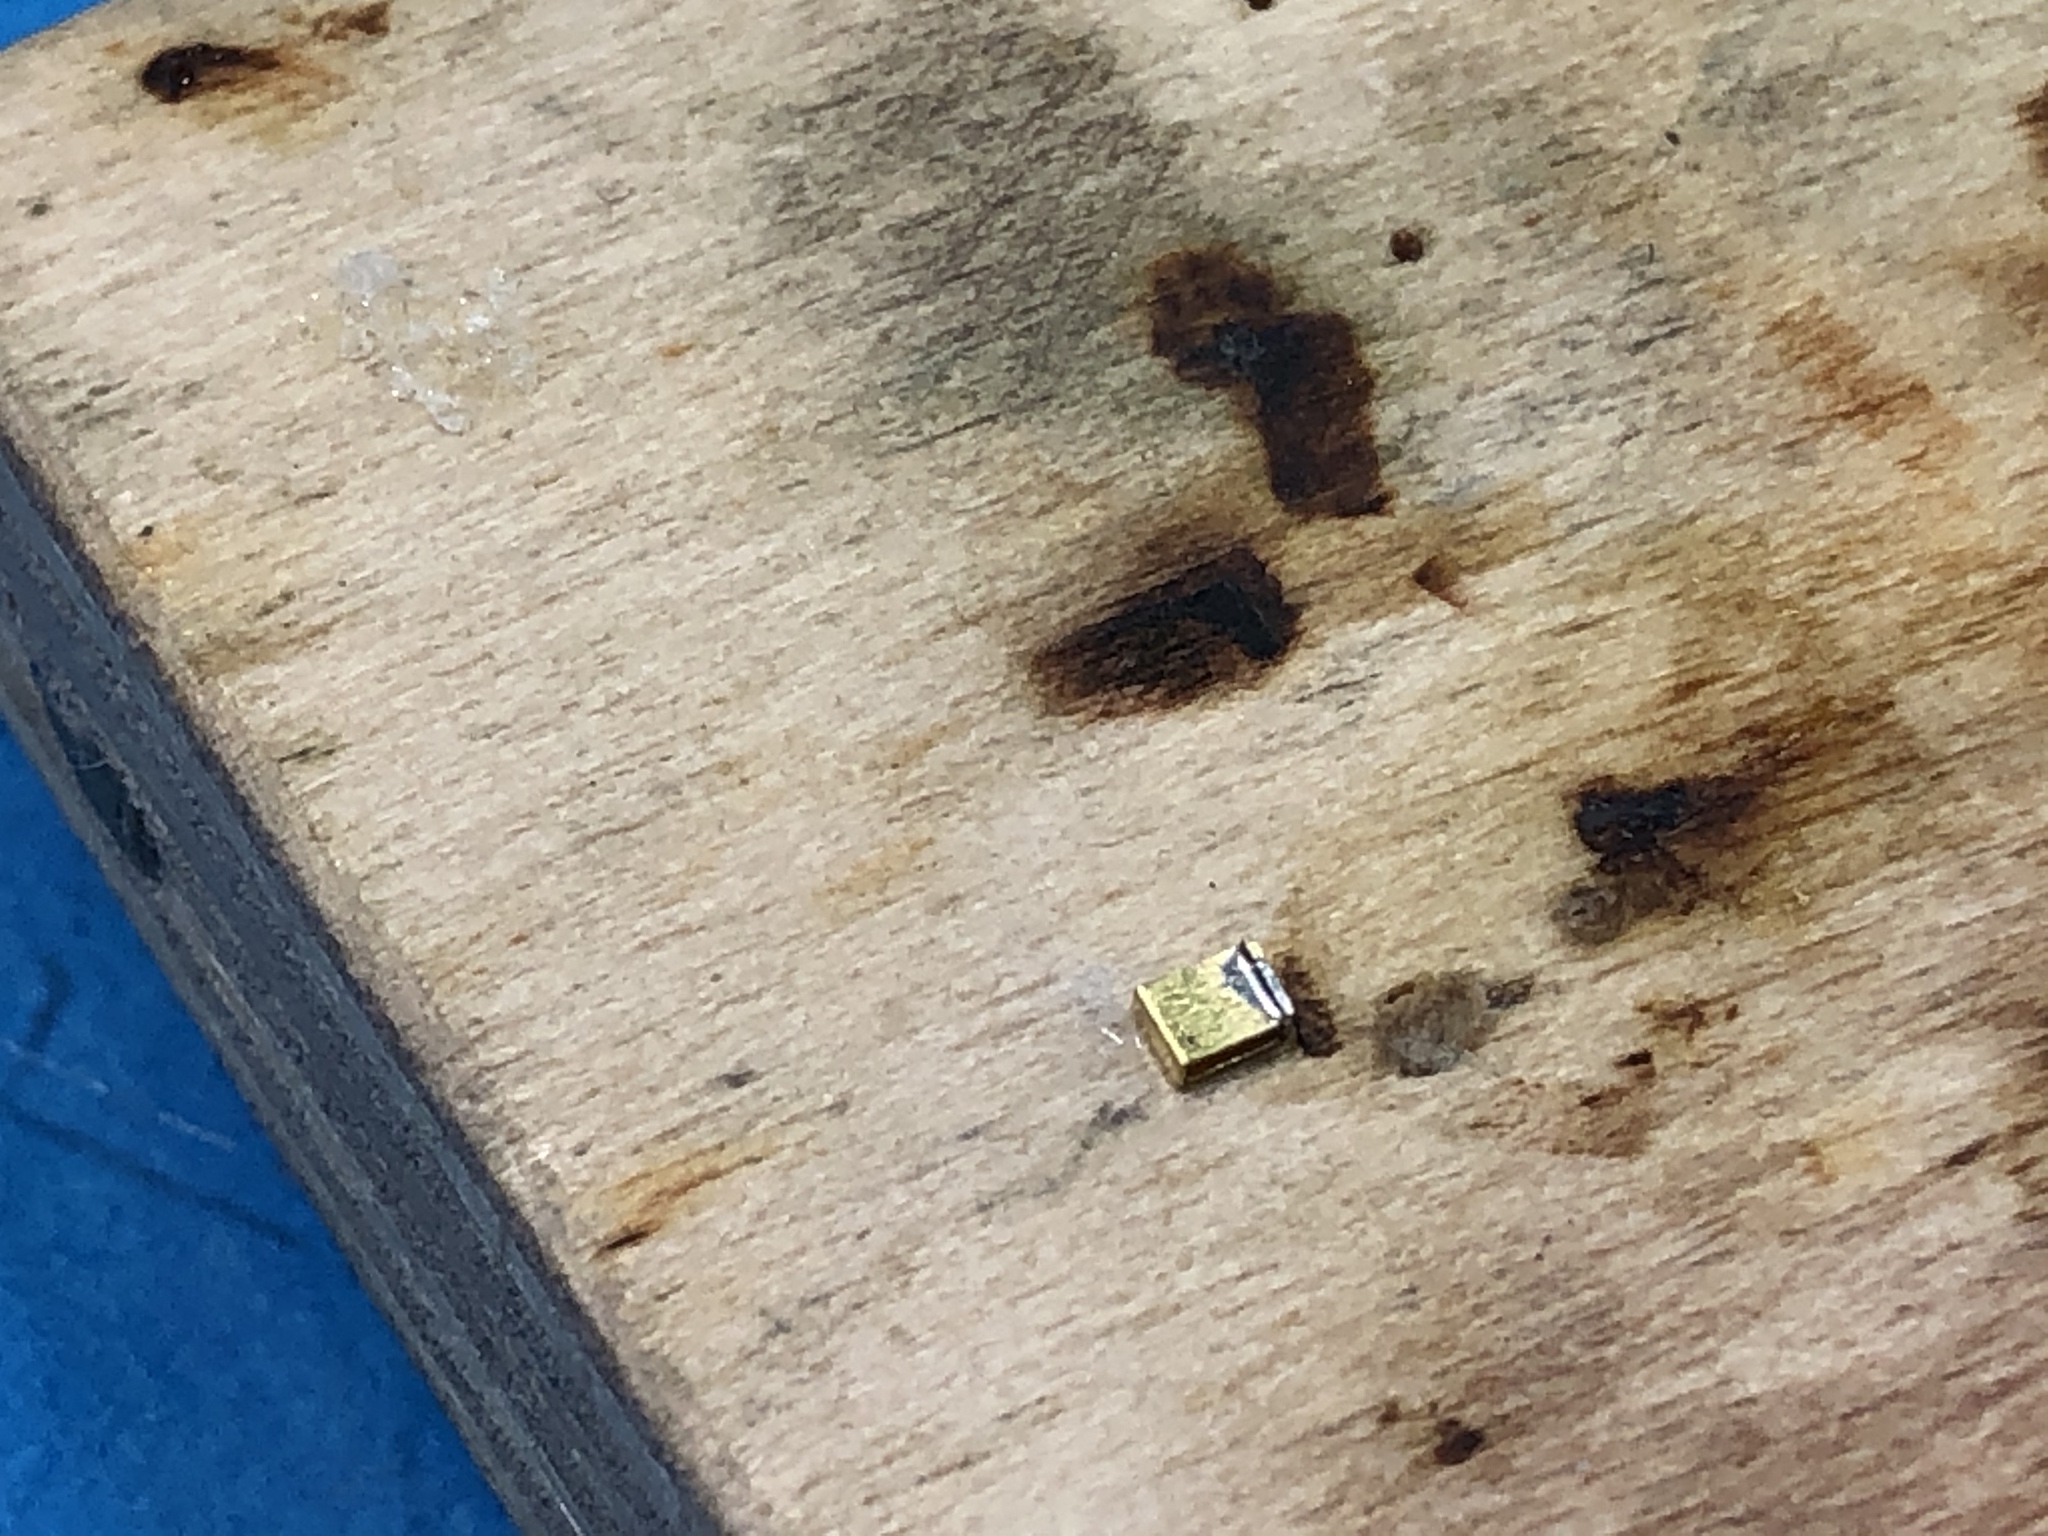


Here is the main rail the has been cleaned, fluxed, tinned and cleaned with alcohol for installation of the part.


The same part after installation.
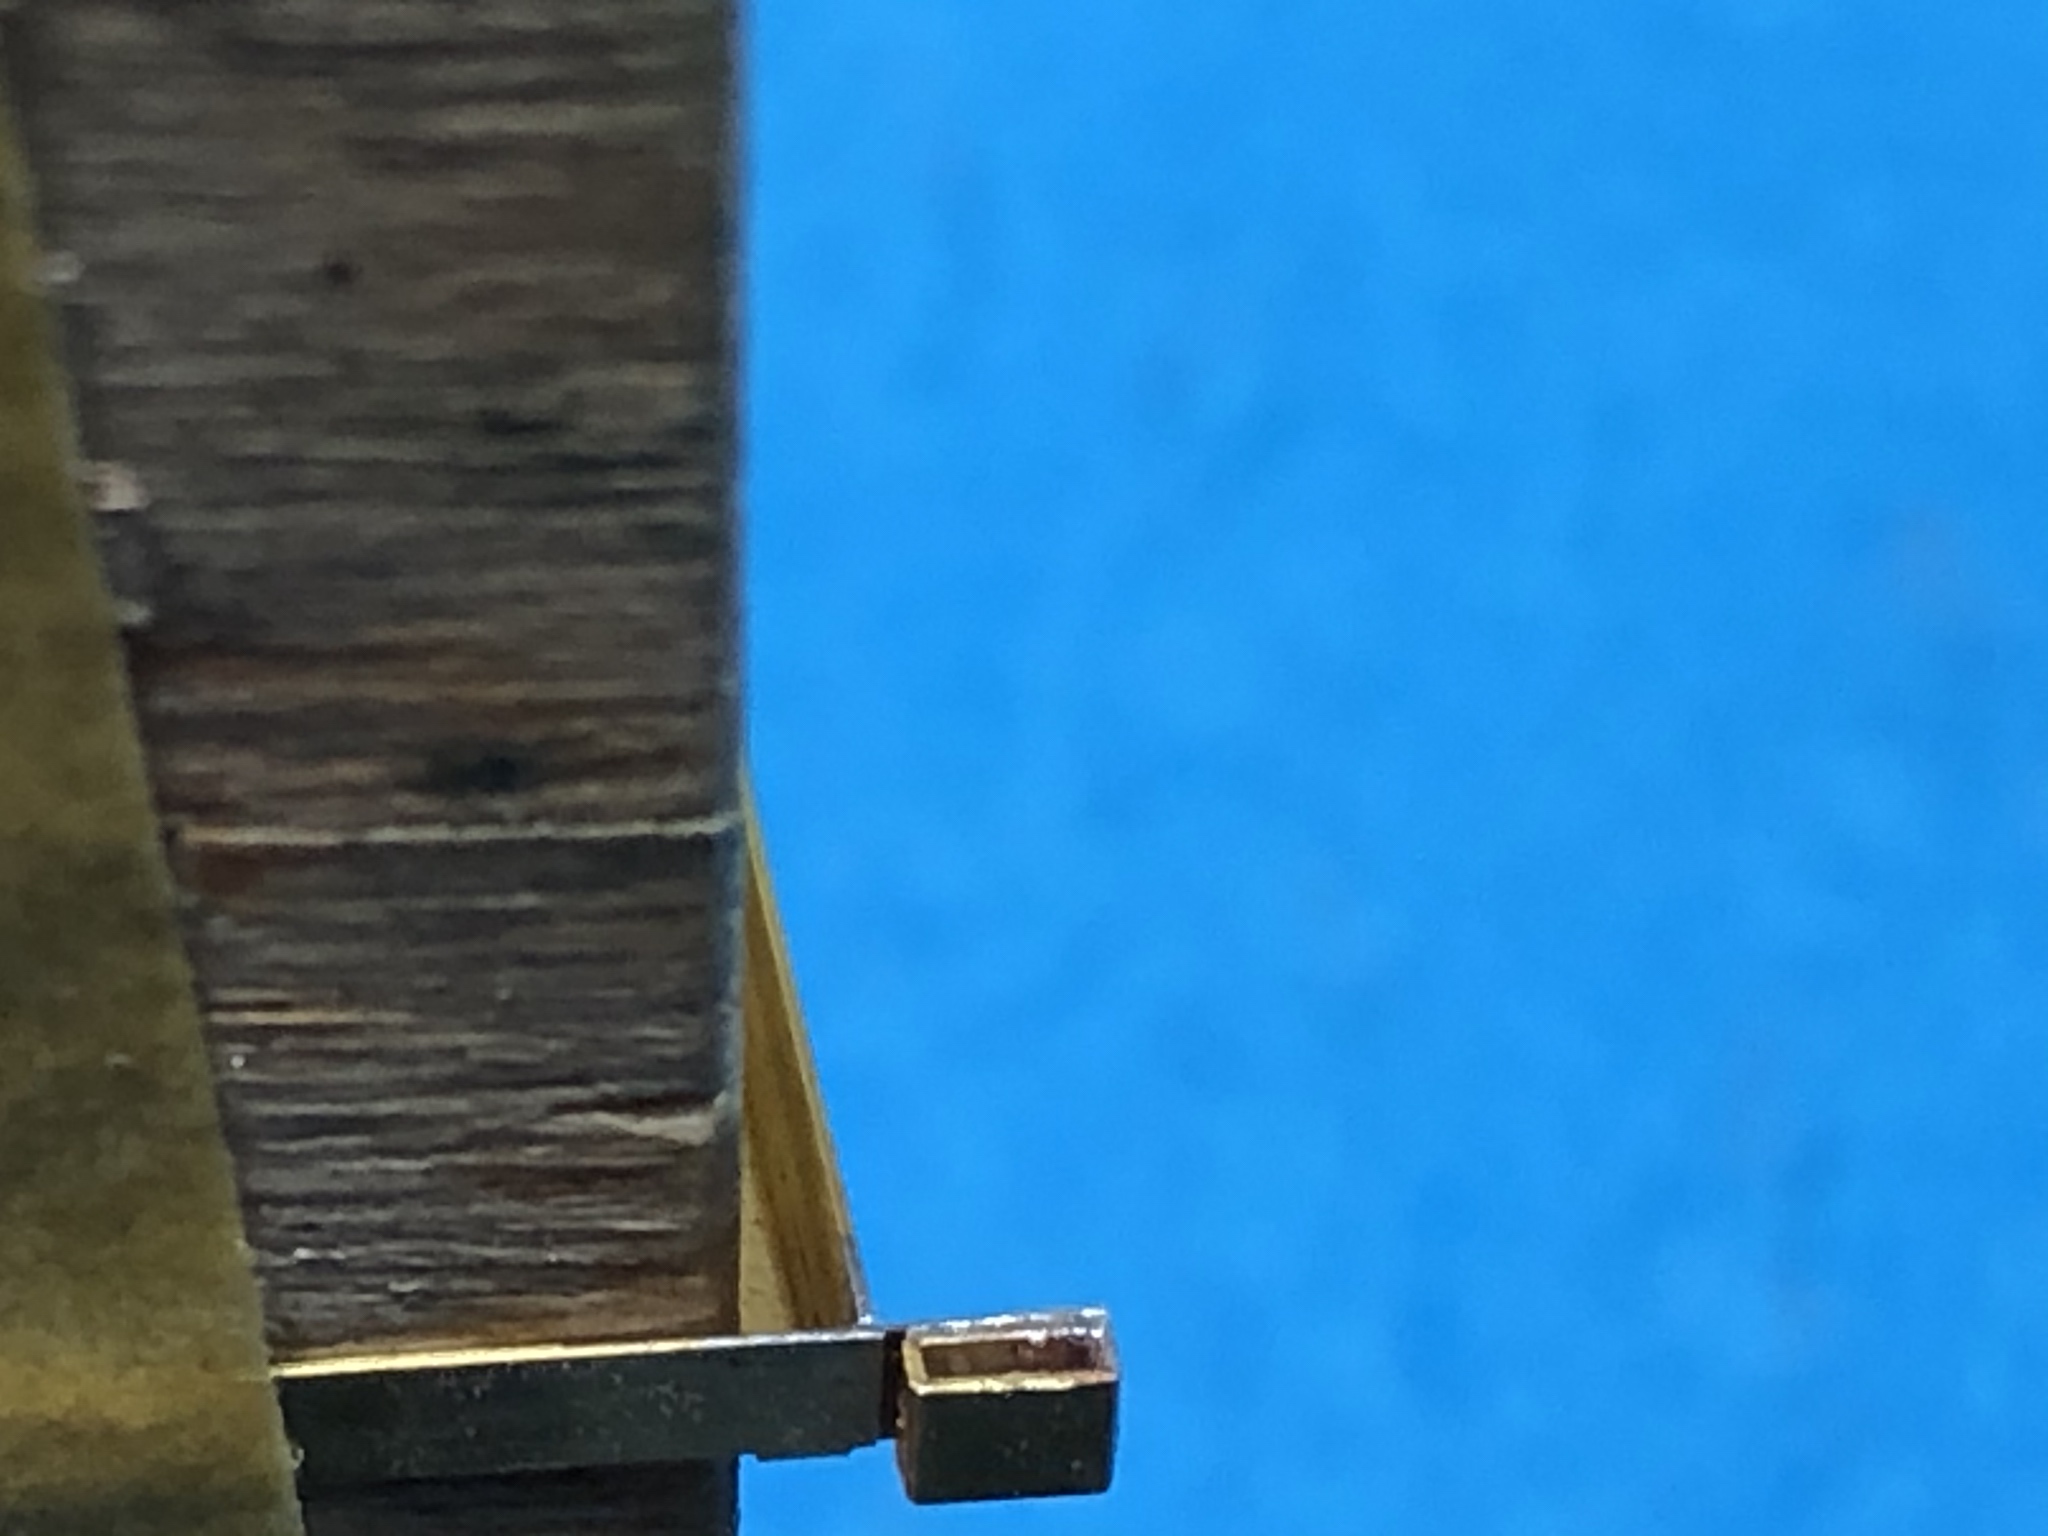


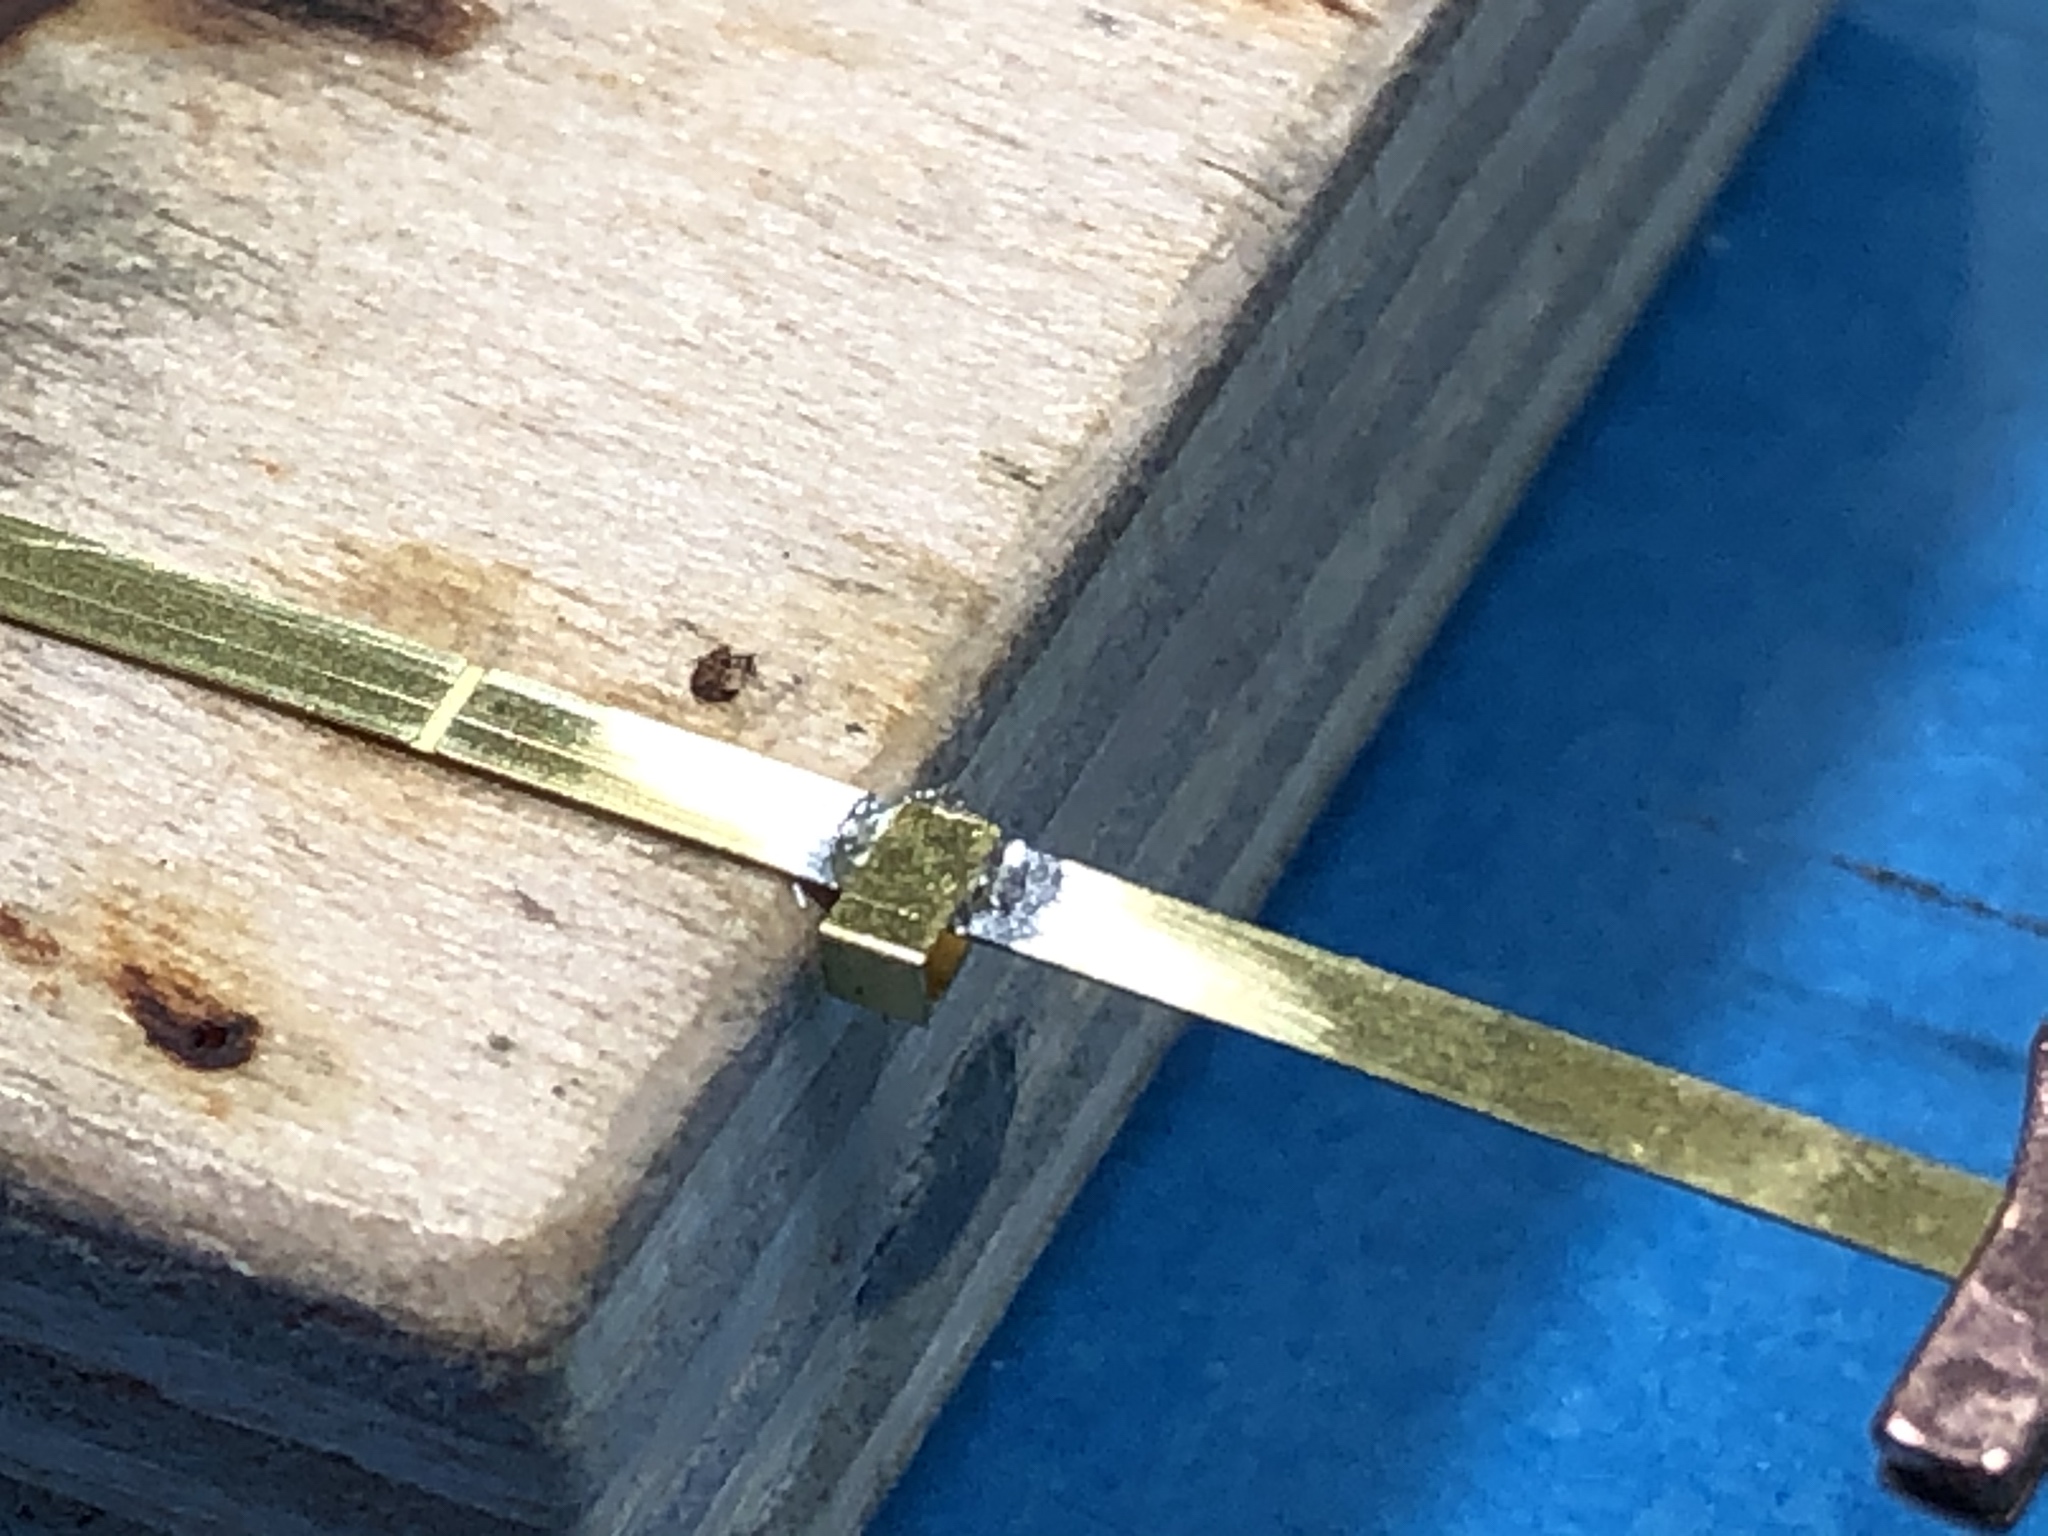
The next part is bent an soldered, the rail is repositioned, the install area is prepped and I apply flux to the clean joint. Before proceeding, I install a flat jawed copper heat sink to prevent de soldering the previous joints. The heat sink is rested on a ball of Blu Tack to prevent distortion of the part. When doing this task, I’d highly recommend not using standard alligator clips as the teeth prevent them from being a good heat sink and can damage you PE parts.


Here is the part after installation and cleanup.
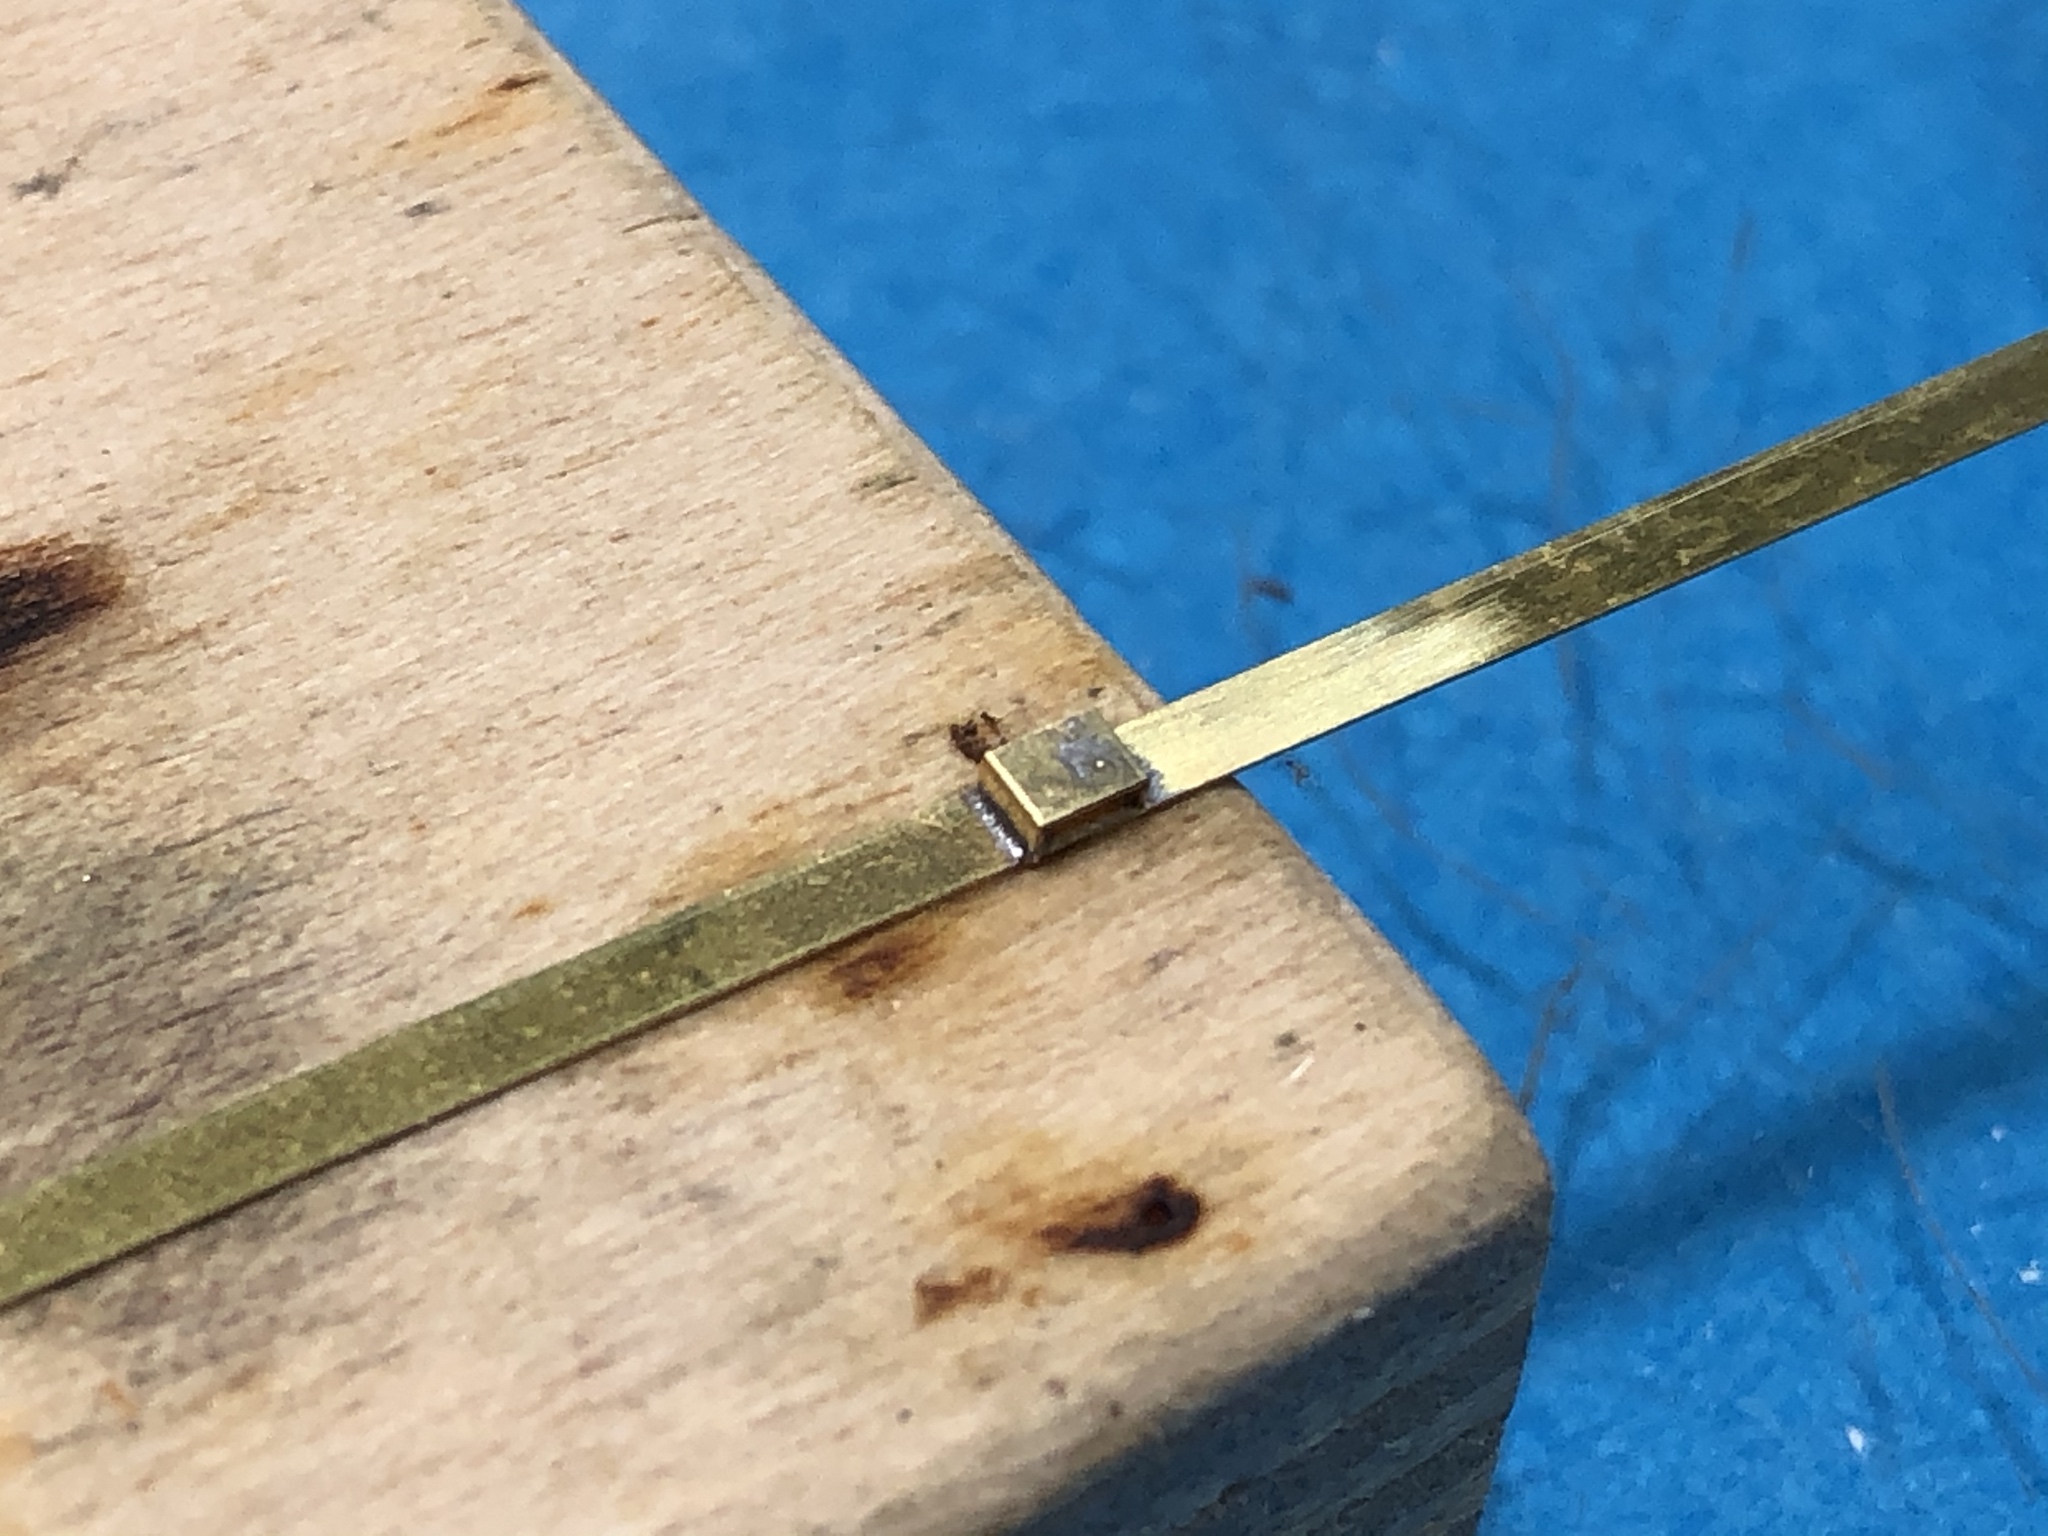


This same process is used for each component added to the rail. Work from one end to the other as much as you can and use heat sinks to protect your previous work. Next installment covers the attachment of the rail hangers.

Cheers


PRH001
Visit this Community
New Mexico, United States
Joined: June 16, 2014
KitMaker: 681 posts
Armorama: 603 posts
Posted: Saturday, February 22, 2020 - 05:12 PM UTC
This is the third an final installment of the Grant stowage rail assembly process.

The hanger bracket is cleaned up and folded into shape.


The location on the stowage rail is cleaned with the glass fiber brush.


The area has flux and solder applied to tin the brackets location.


A heat sink is placed between the hanger and the previous square tube fitting. Flux is applied to the soldering area and the bracket is put in place. A flake or solder is placed at the angled joint on each side.


Here is the part after it is soldered in place and the burnt flux is cleaned away with alcohol.


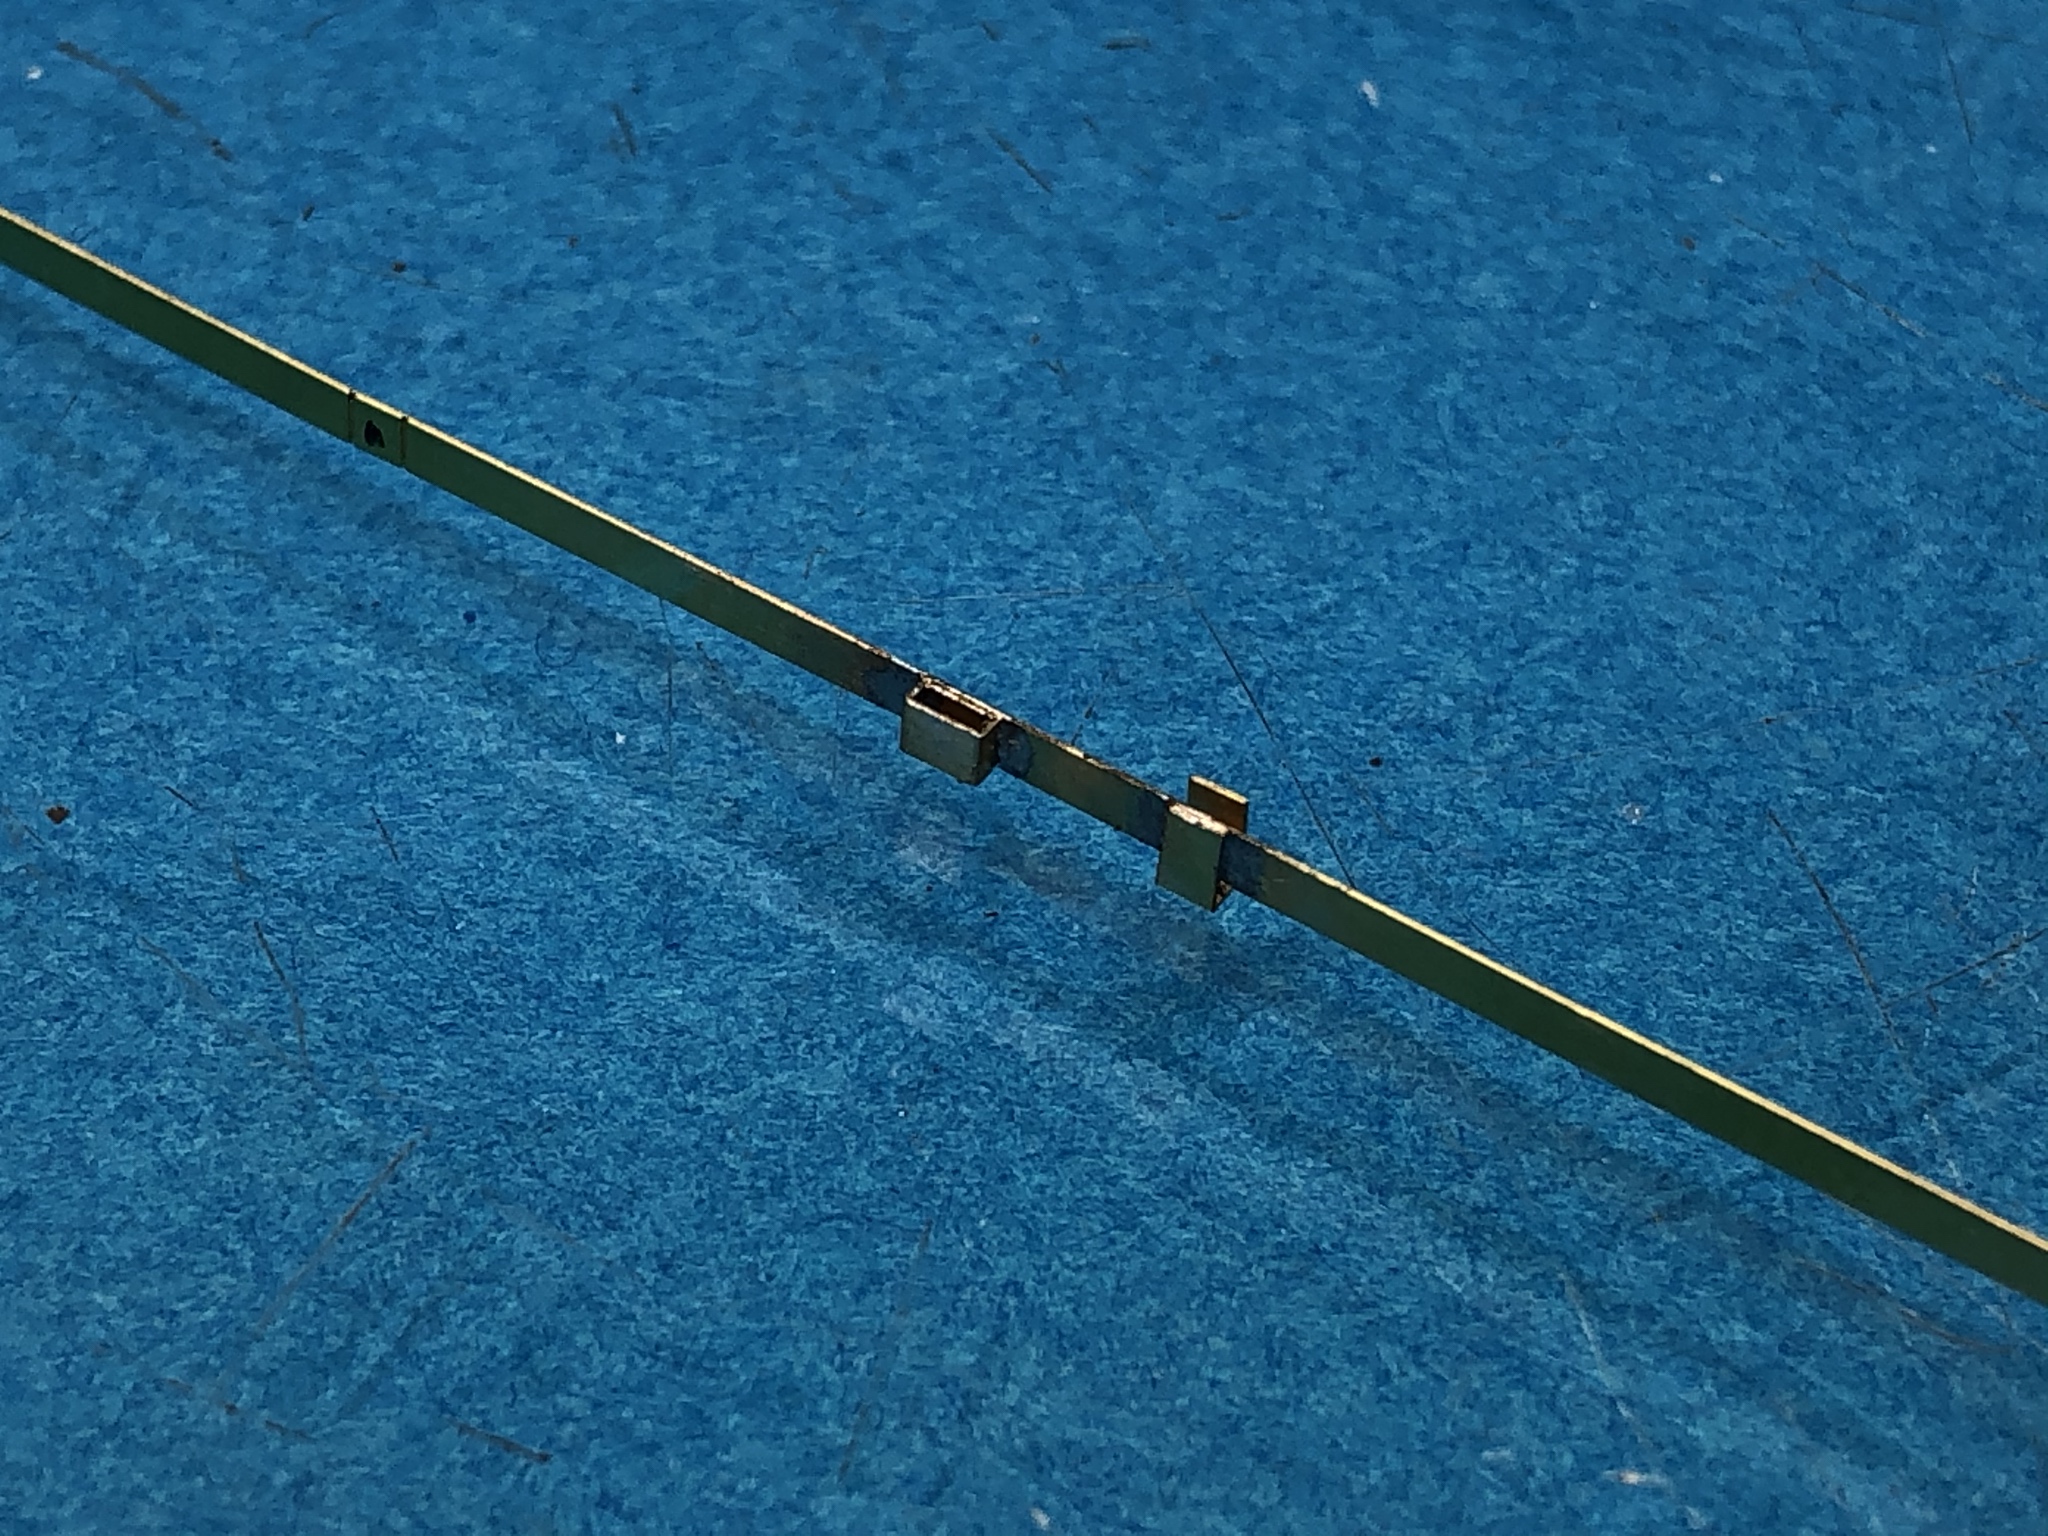
Here is a picture showing the proximity of the hanger and the square tube fitting. You can see why heat sinks are needed for this job.


And last is a picture of the full assembly.


I hope someone finds this walkthrough of the rail assembly useful.

Cheers
PRH001
Visit this Community
New Mexico, United States
Joined: June 16, 2014
KitMaker: 681 posts
Armorama: 603 posts
Posted: Sunday, February 23, 2020 - 03:36 PM UTC
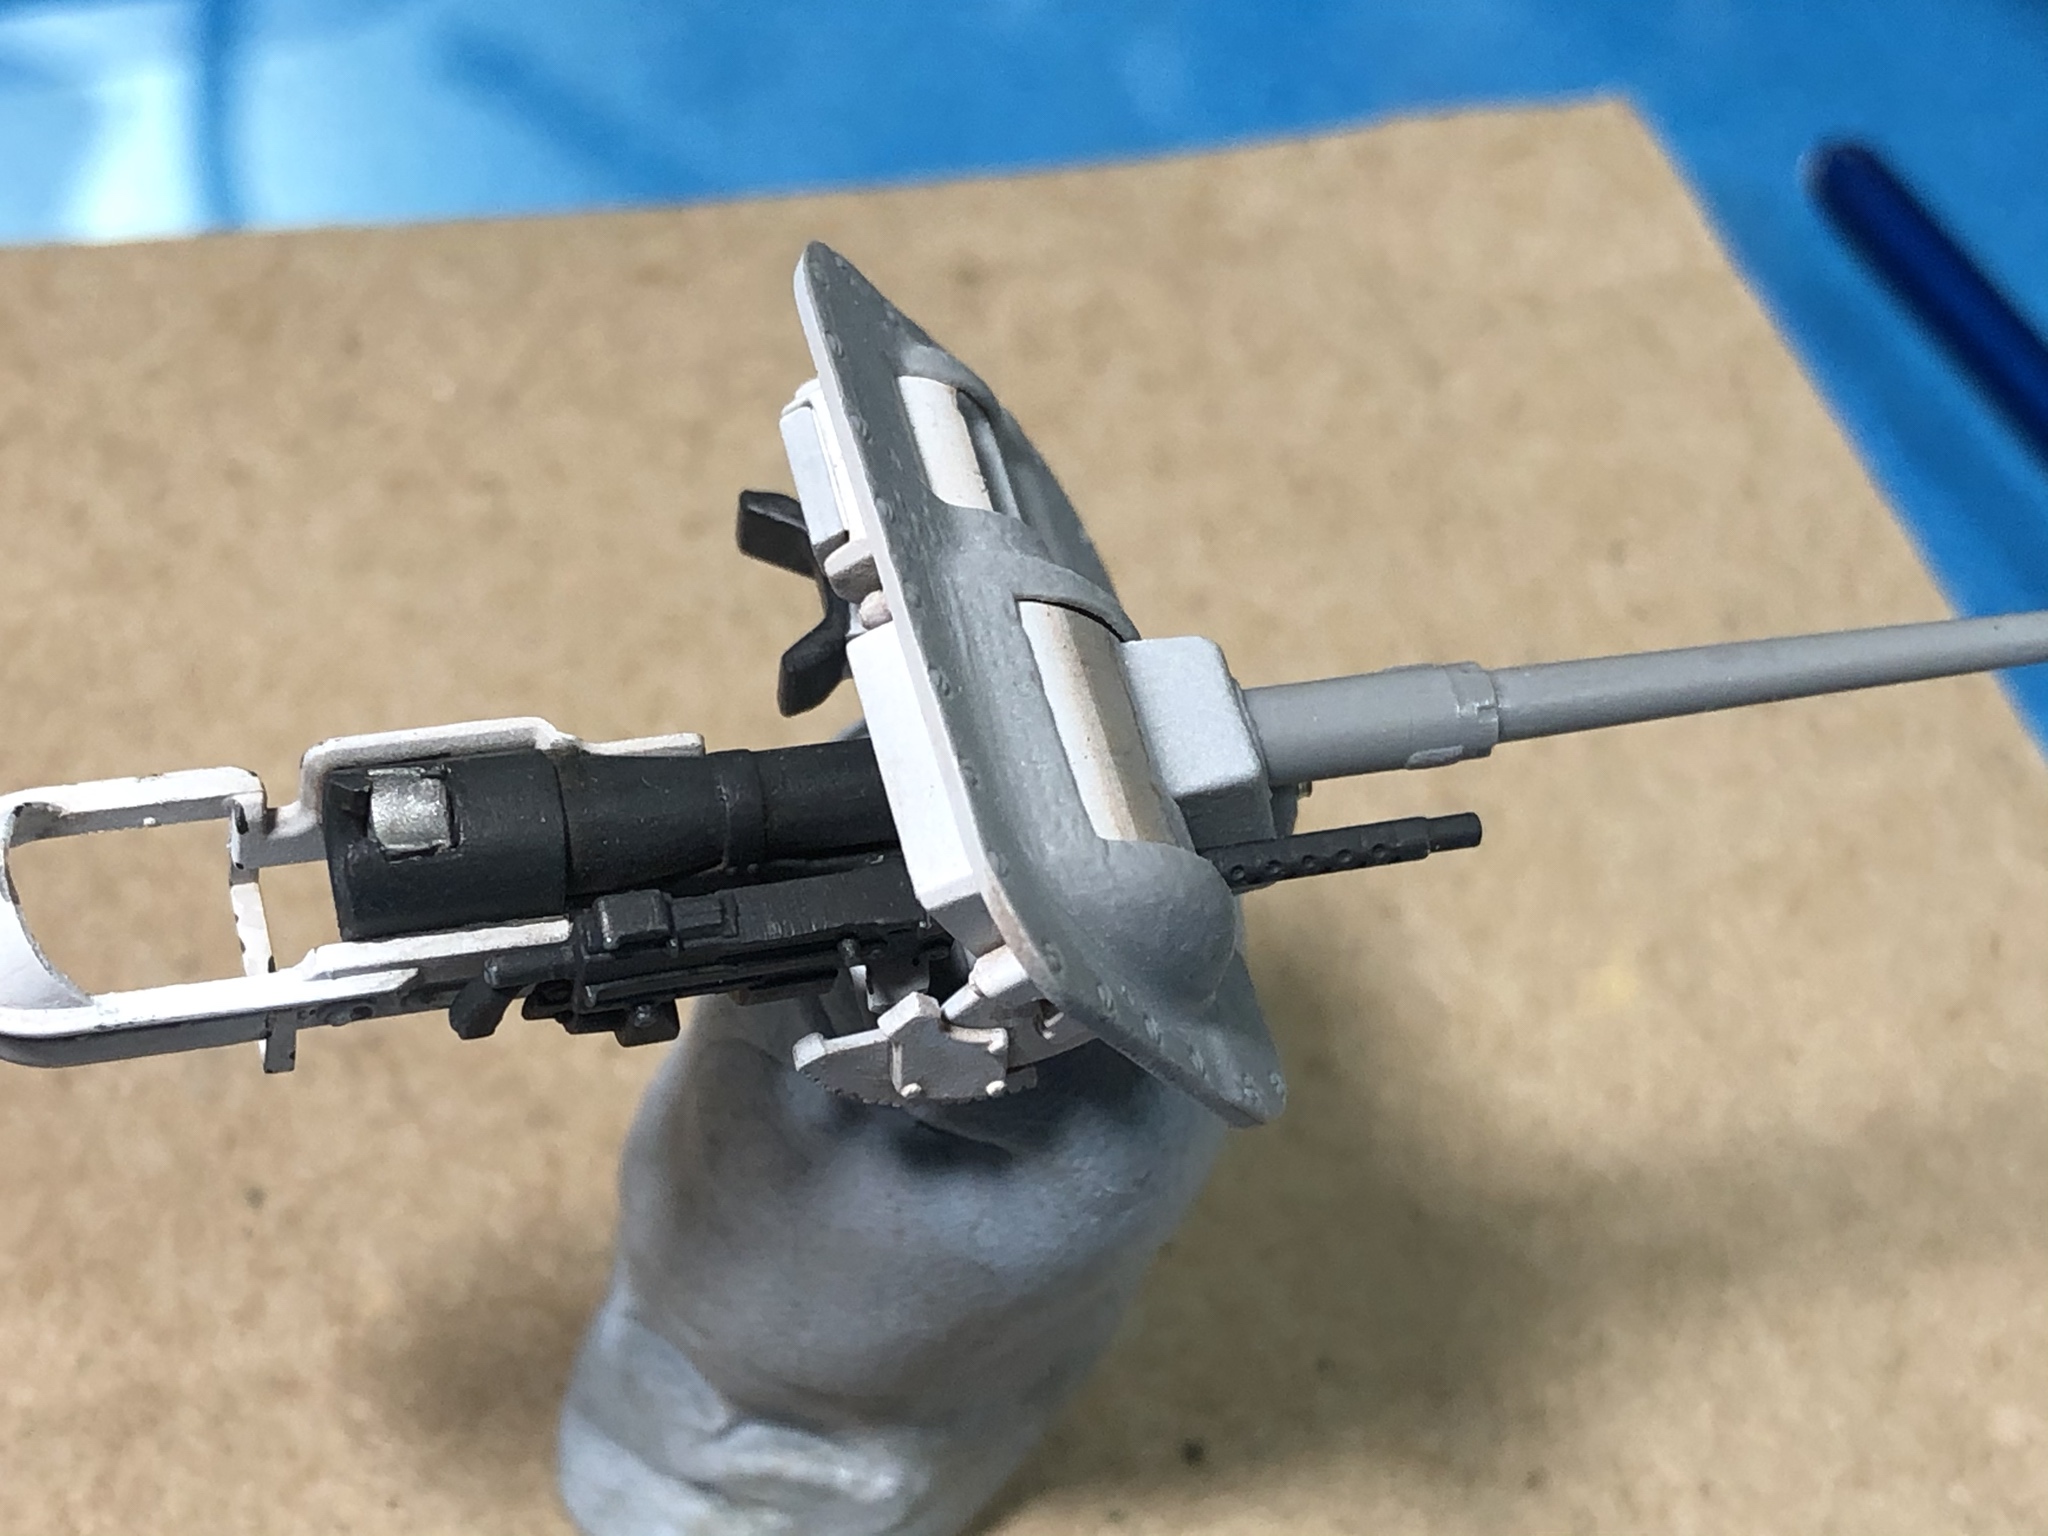
Final Grant update for the weekend. I completed assembly of the second stowage rail so that is a win. I still have a lot of handling to do, so I will leave them off for a while.


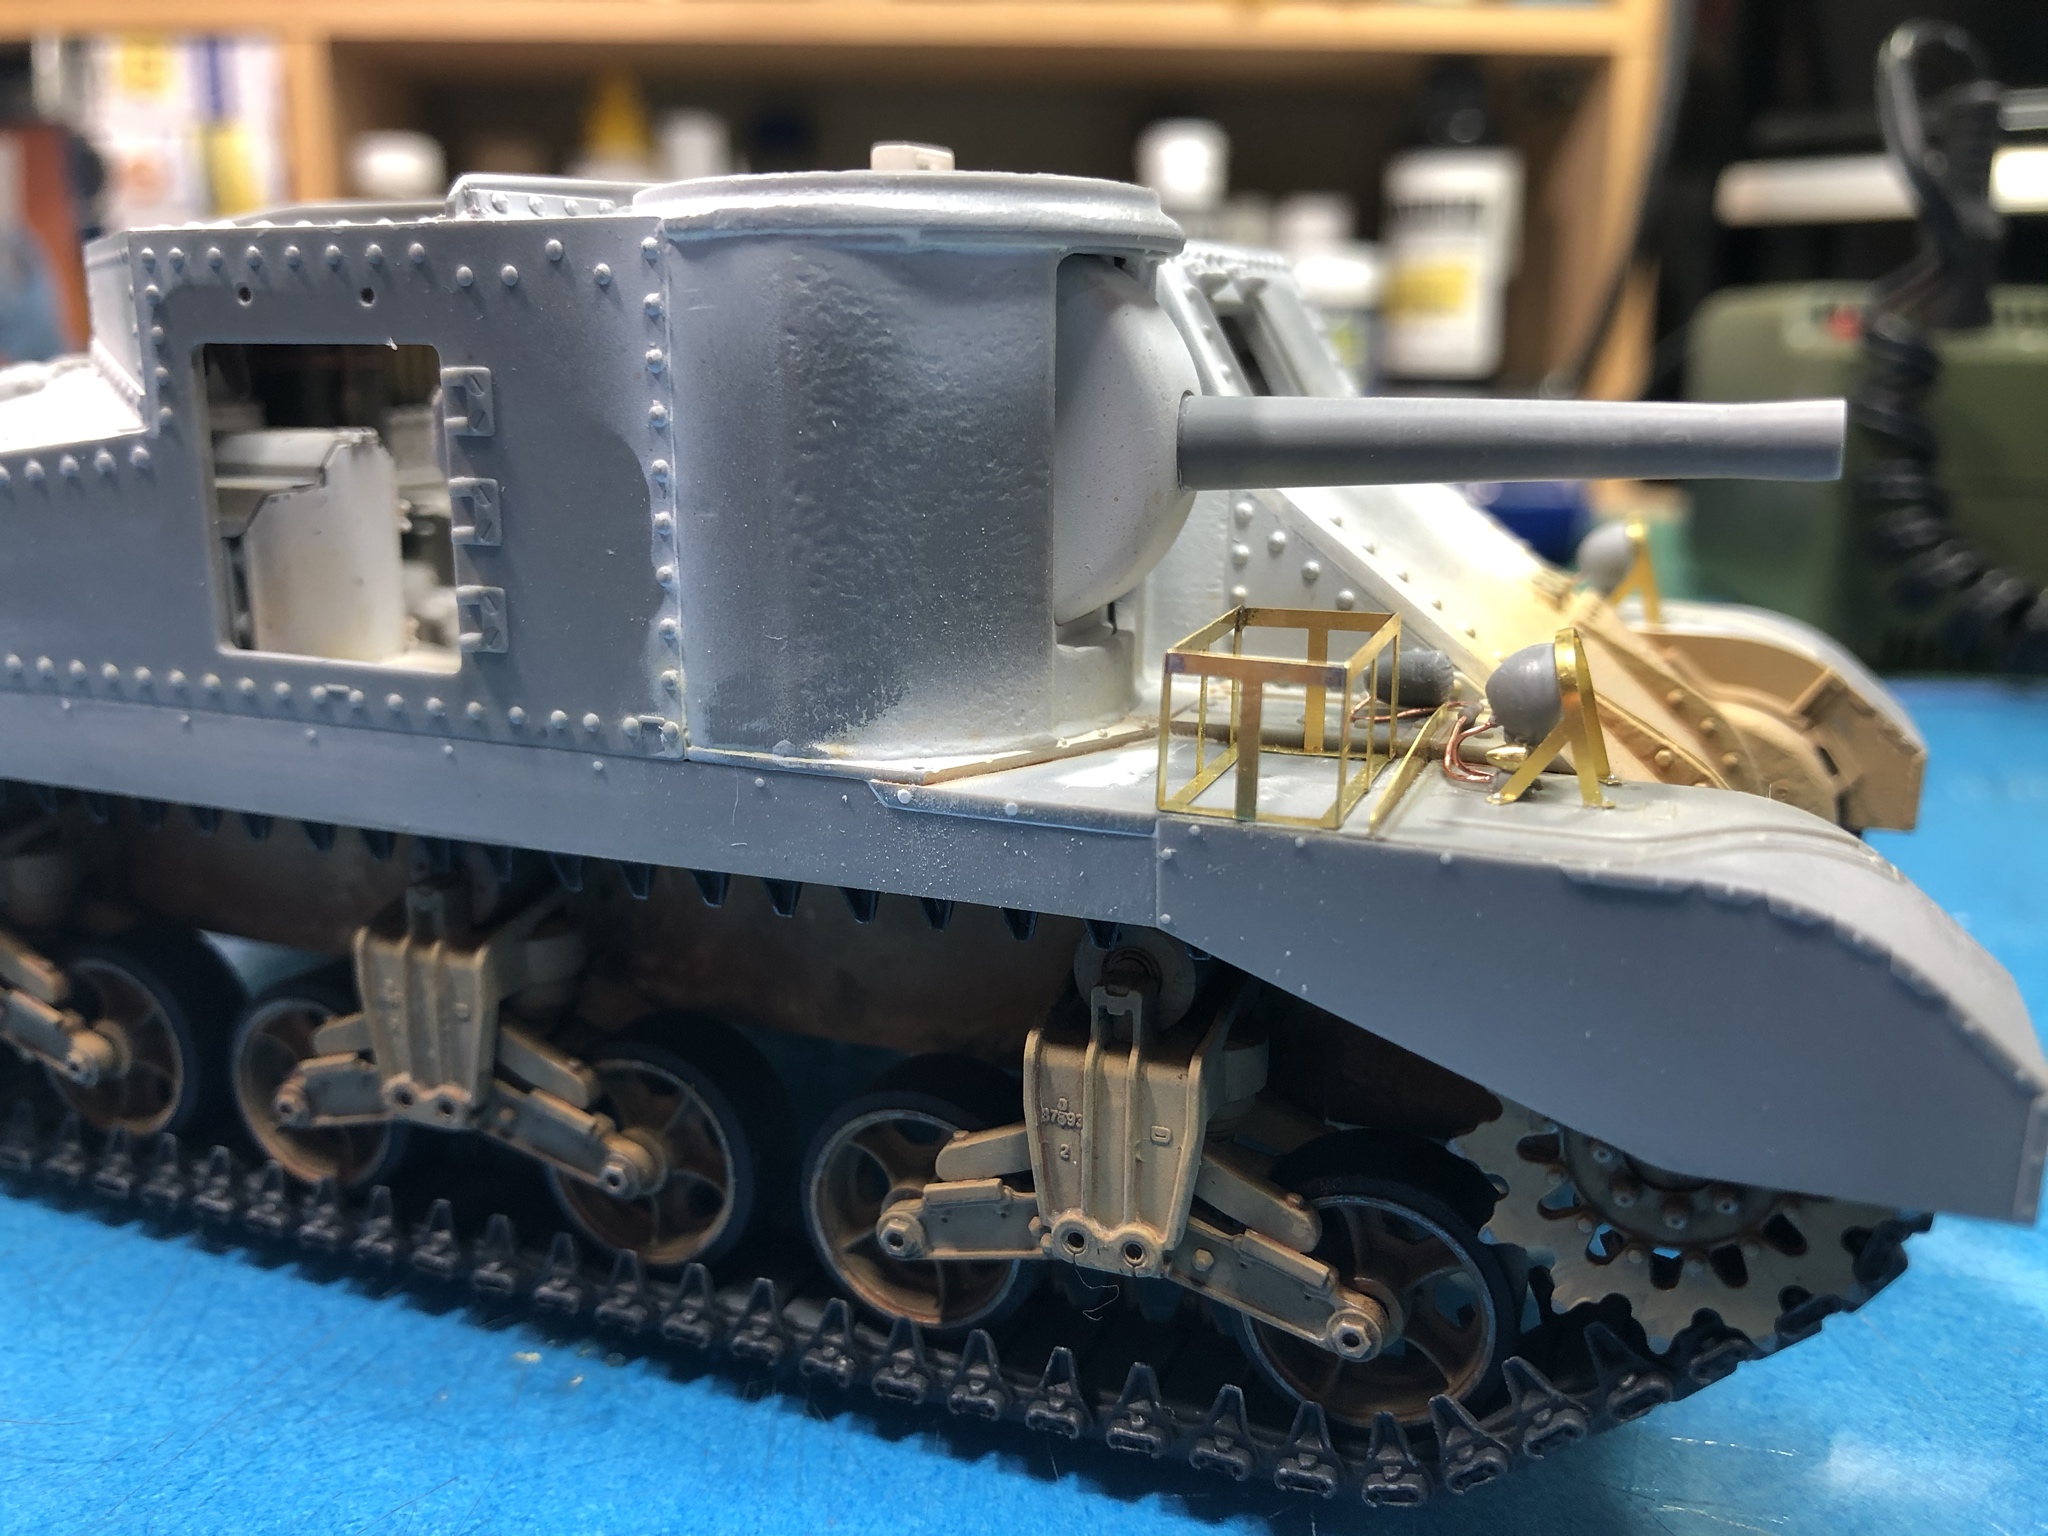
Here is a pretty large heads up for those building this kit. The canvas cover for the main gun will not fit if you choose to install the fender mounted PE stowage box. The only way for it to fit in its as molded condition is to build the kit with the tool and tripod mounts installed. After finding that out, I decided to reevaluate the paint scheme I’d chosen. Once I came up with a good alternative, I cleaned up the gun without the canvas cover and installed it.


TankManNick
Visit this Community
California, United States
Joined: February 01, 2010
KitMaker: 551 posts
Armorama: 543 posts
Posted: Sunday, February 23, 2020 - 04:40 PM UTC
Very neat PE soldering there. I'm going to have to up my game for sure when next I try it!
Kornbeef
Visit this Community
England - South East, United Kingdom
Joined: November 06, 2005
KitMaker: 1,667 posts
Armorama: 48 posts
Posted: Sunday, February 23, 2020 - 06:05 PM UTC
More brilliant tips while watching you build this work of art, thanks for sharing your knowledge with us. Soldering PE always seems a PITA for me and now I know why...
PRH001
Visit this Community
New Mexico, United States
Joined: June 16, 2014
KitMaker: 681 posts
Armorama: 603 posts
Posted: Monday, February 24, 2020 - 01:30 AM UTC

Quoted Text

More brilliant tips while watching you build this work of art, thanks for sharing your knowledge with us. Soldering PE always seems a PITA for me and now I know why...


That made me laugh! The funny thing is, I was an airplane only guy for years. I only started building armor, so I could try to solder some of the more complicated PE details and try the more involved painting processes.
raivo74
Visit this Community
Vilnius, Lithuania
Joined: November 09, 2009
KitMaker: 132 posts
Armorama: 109 posts
Posted: Monday, February 24, 2020 - 01:45 AM UTC

Quoted Text

I only started building armor, so I could try to solder some of the more complicated PE details and try the more involved painting processes.


Oh, I can see your next challenge

PRH001
Visit this Community
New Mexico, United States
Joined: June 16, 2014
KitMaker: 681 posts
Armorama: 603 posts
Posted: Monday, February 24, 2020 - 03:22 AM UTC
Nice! But I don’t see transitioning to building floaty things in my future. I would like to tackle that PE set though...
PRH001
Visit this Community
New Mexico, United States
Joined: June 16, 2014
KitMaker: 681 posts
Armorama: 603 posts
Posted: Sunday, March 01, 2020 - 02:49 PM UTC
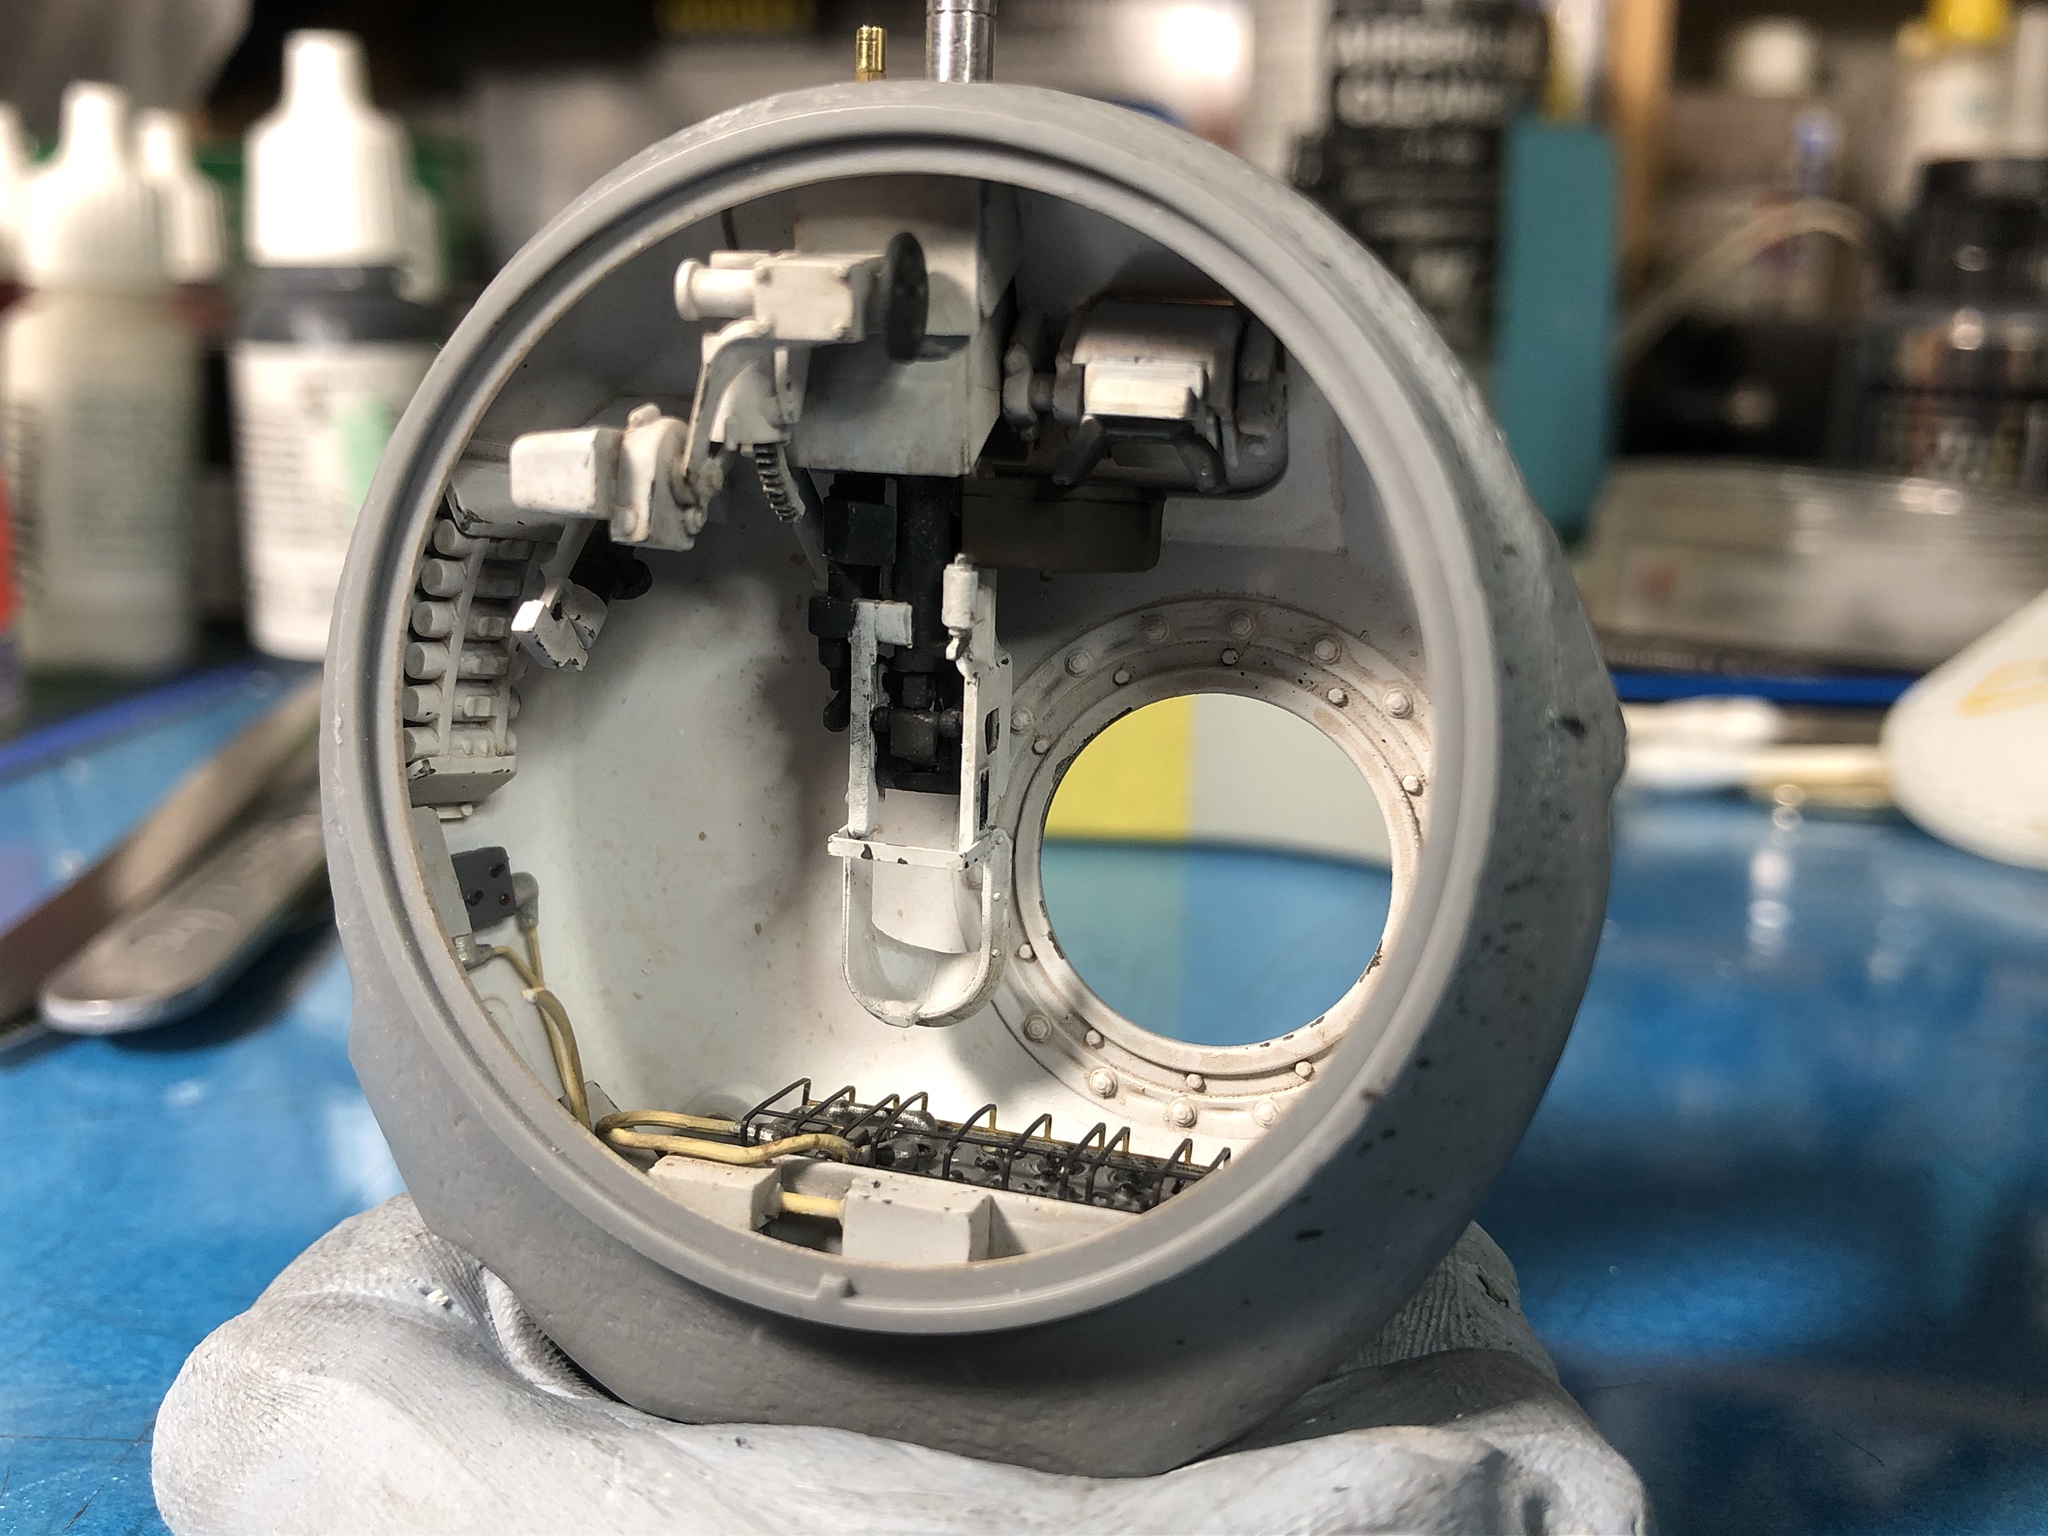
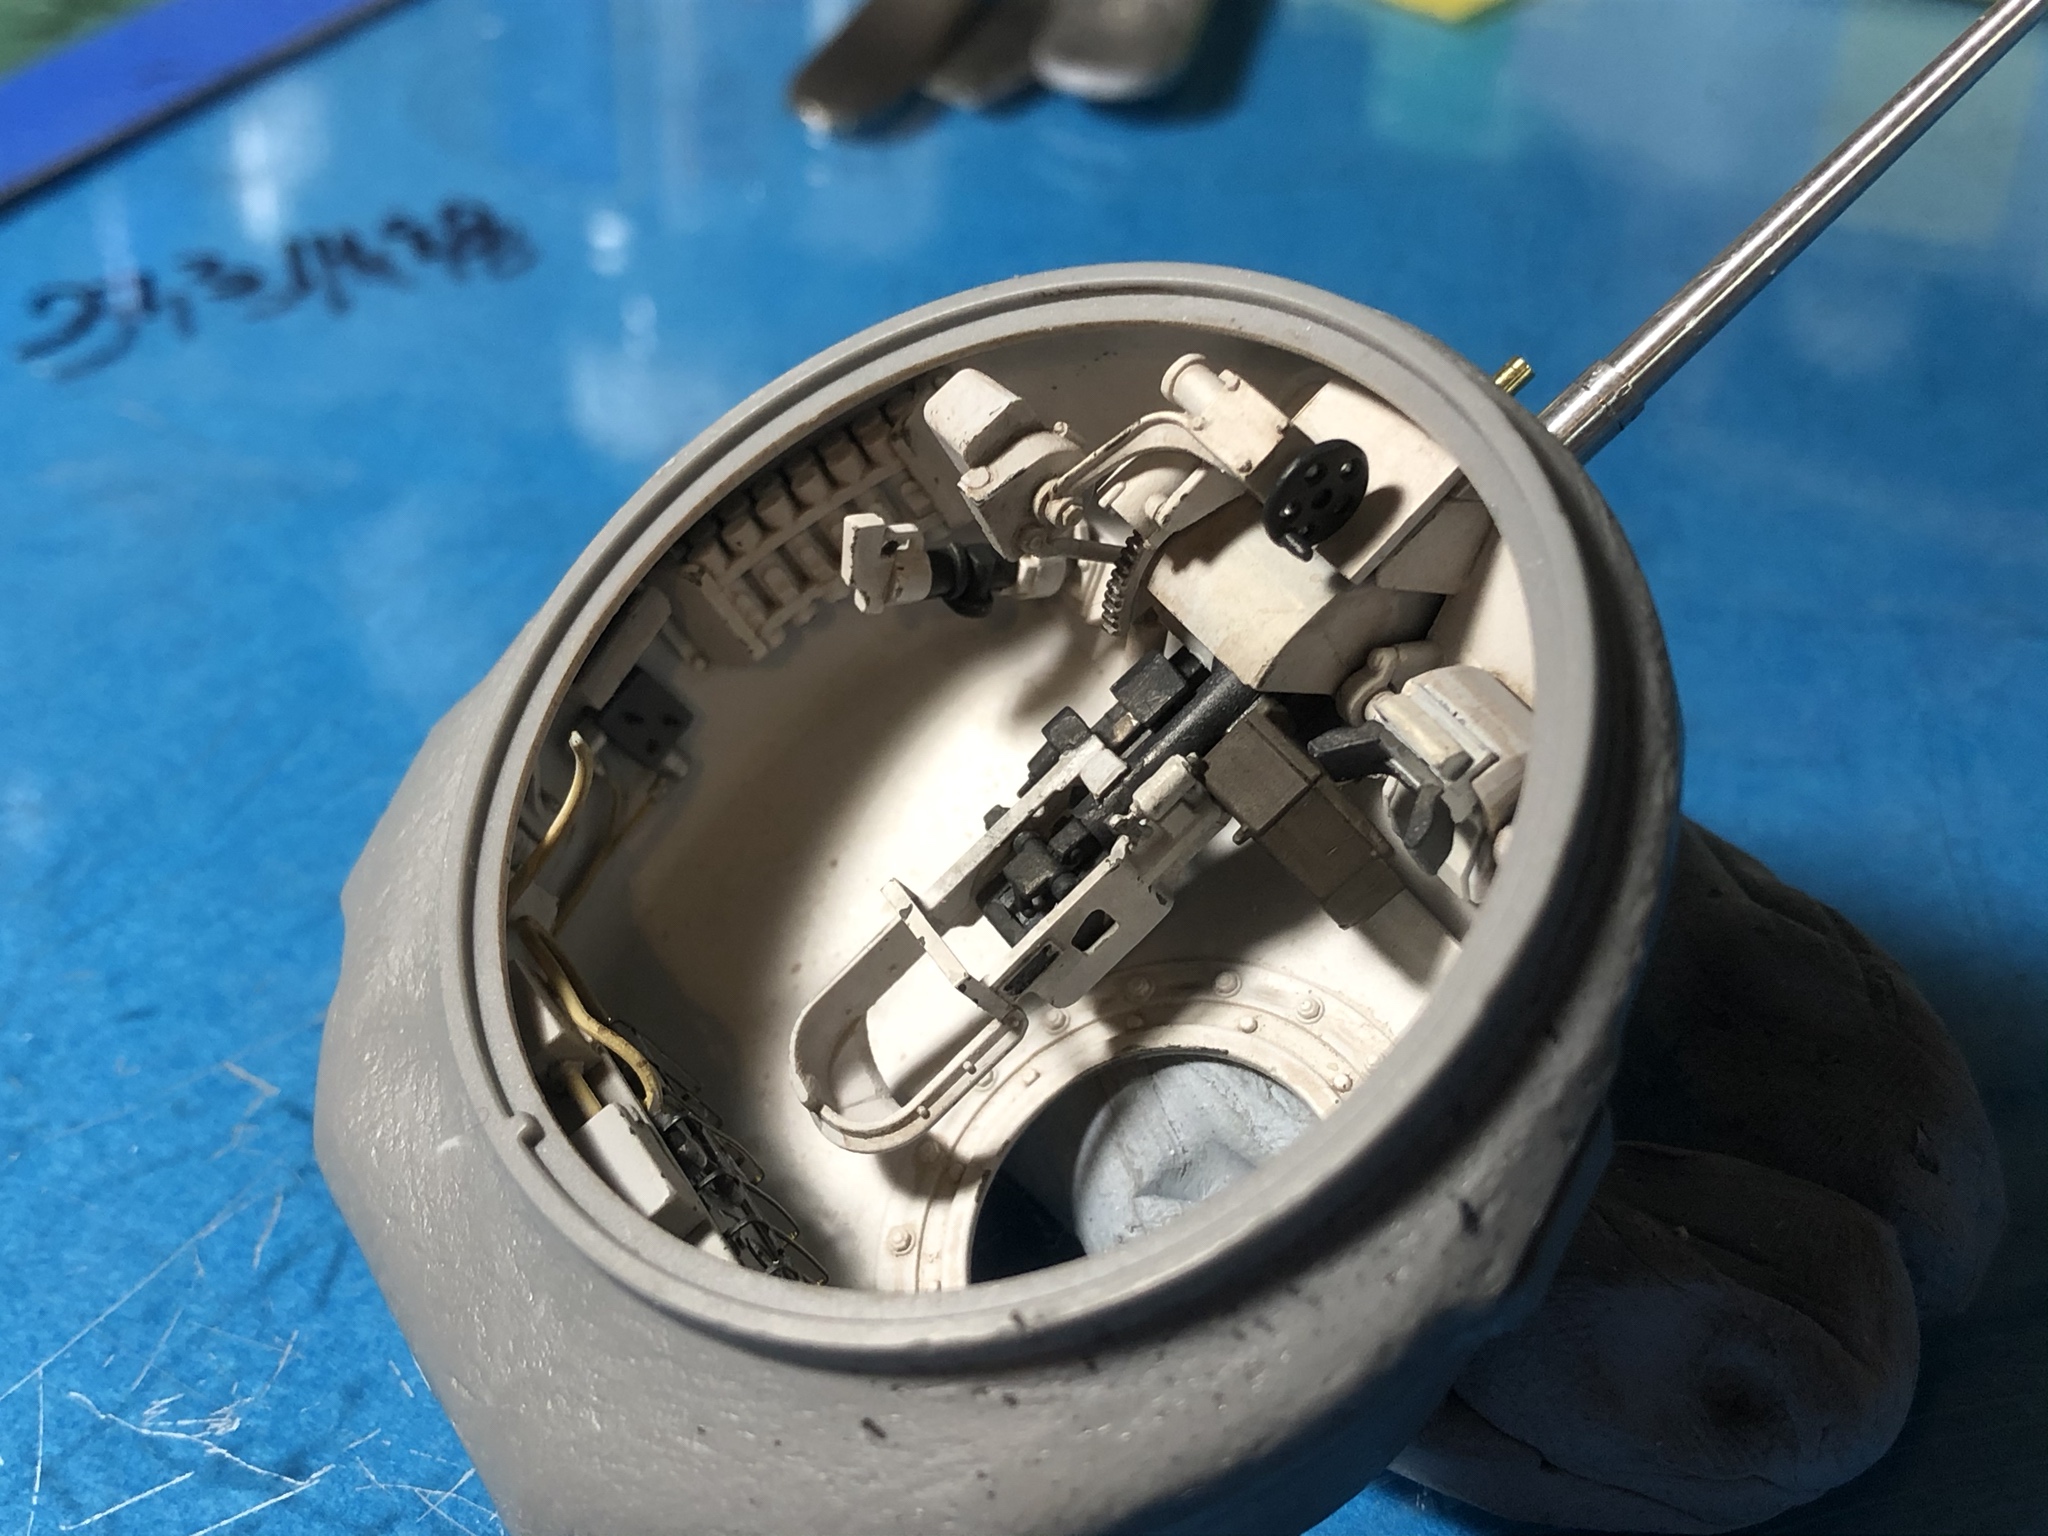
It’s turret time! This week’s project has been to clean up, modify, paint and install the upper turret shell components.

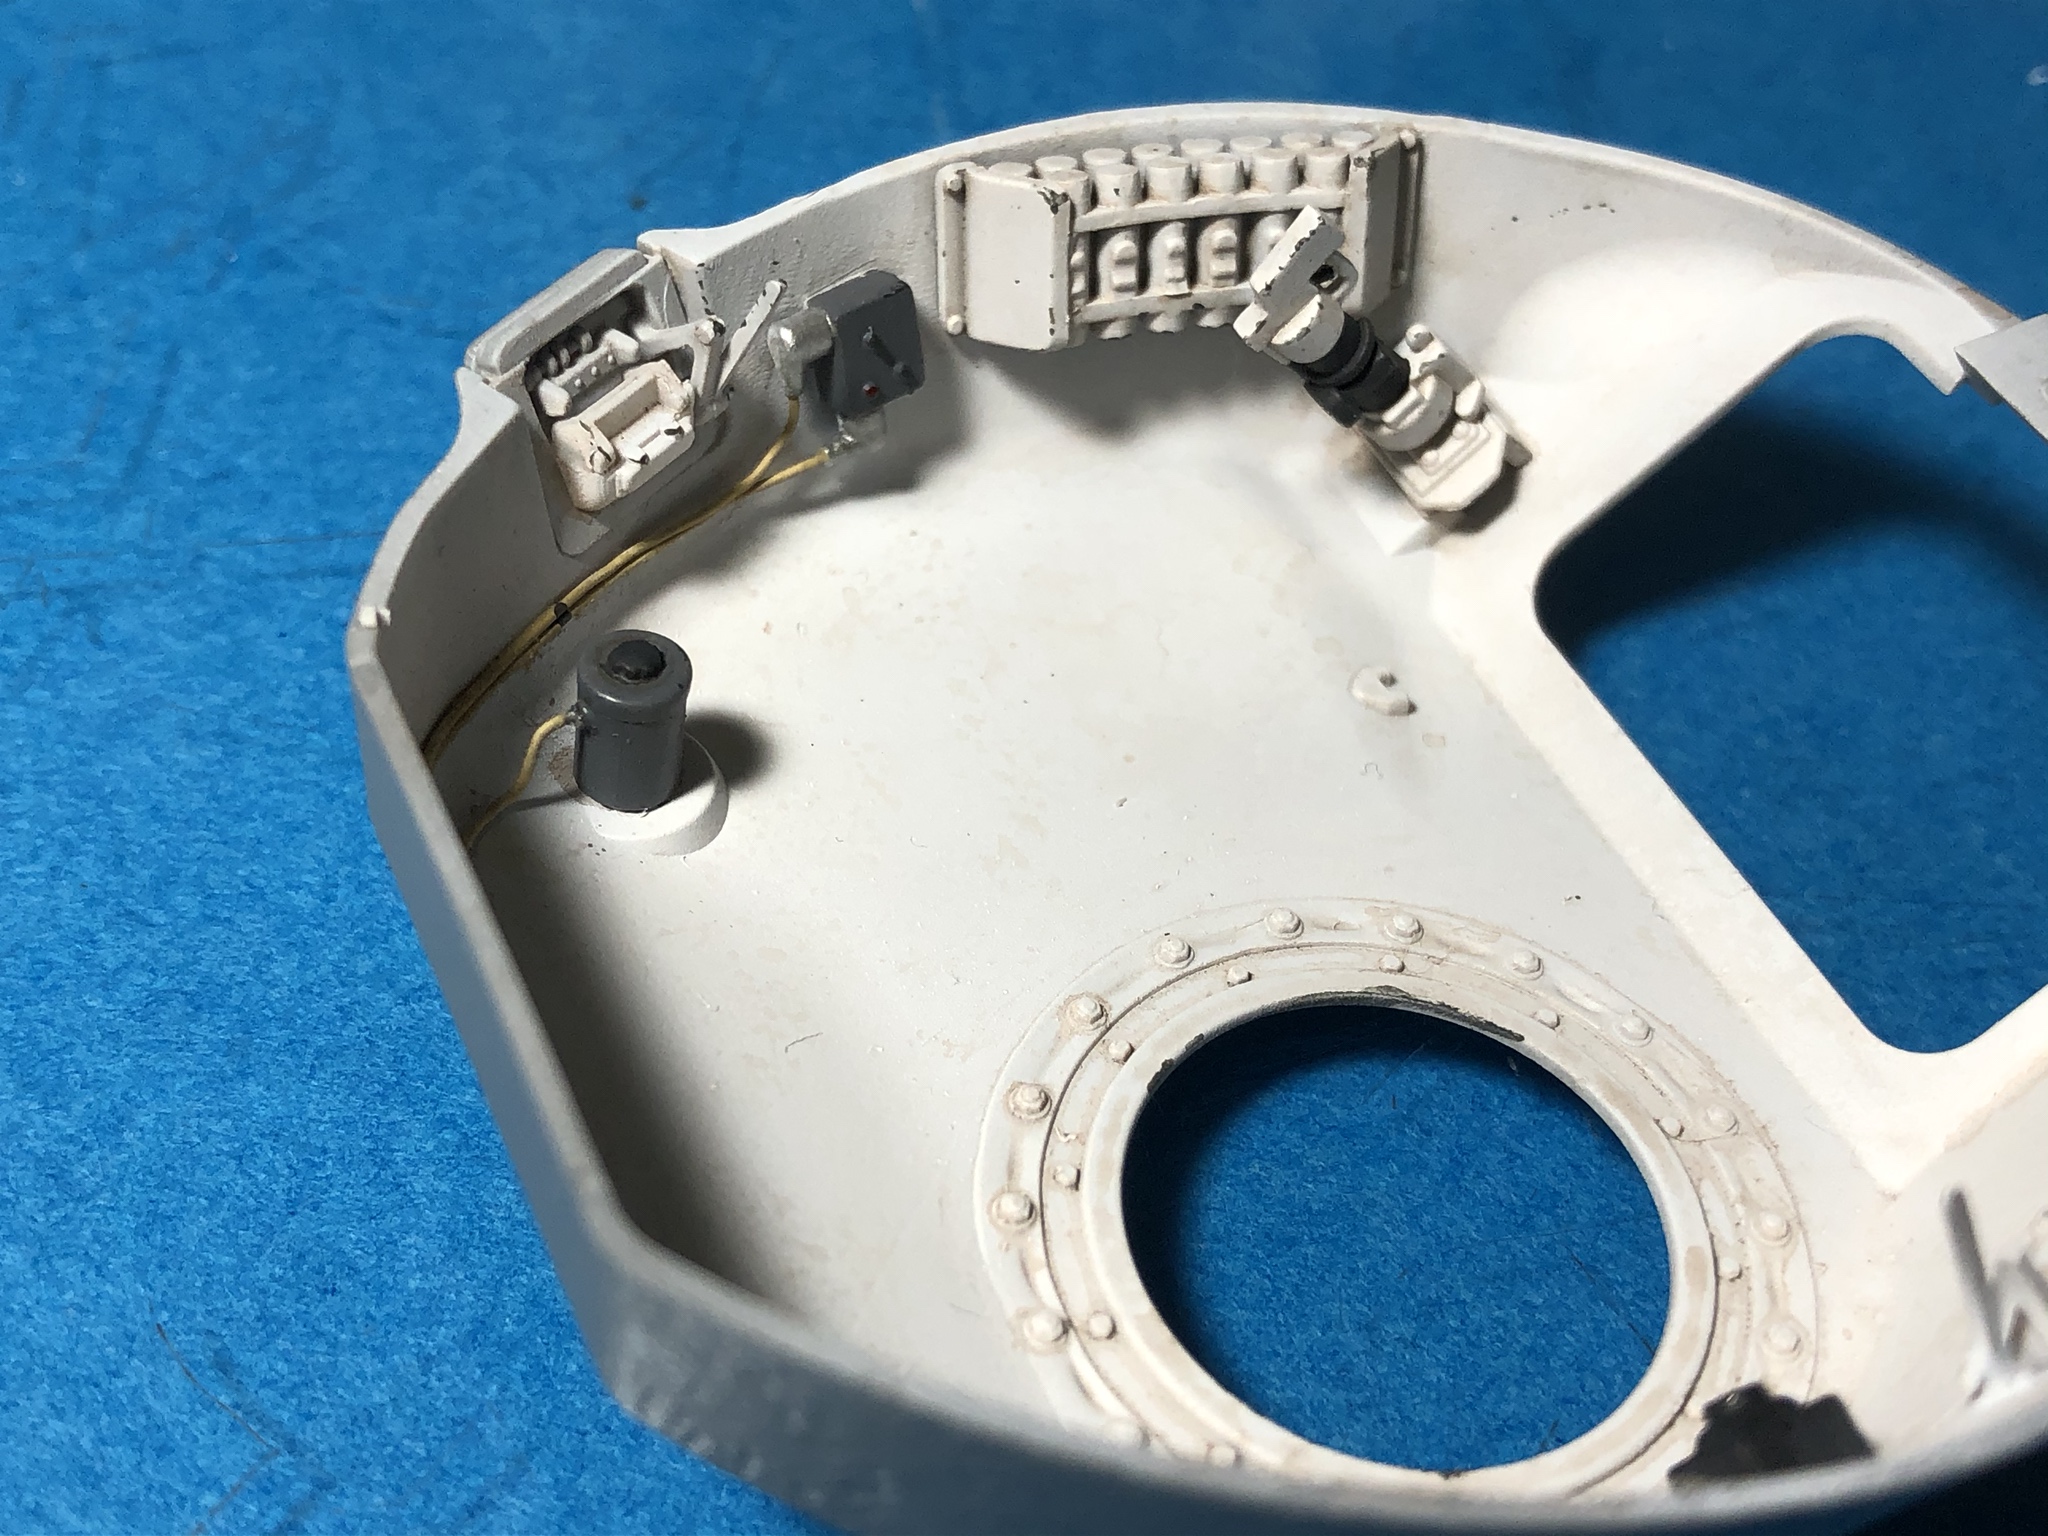
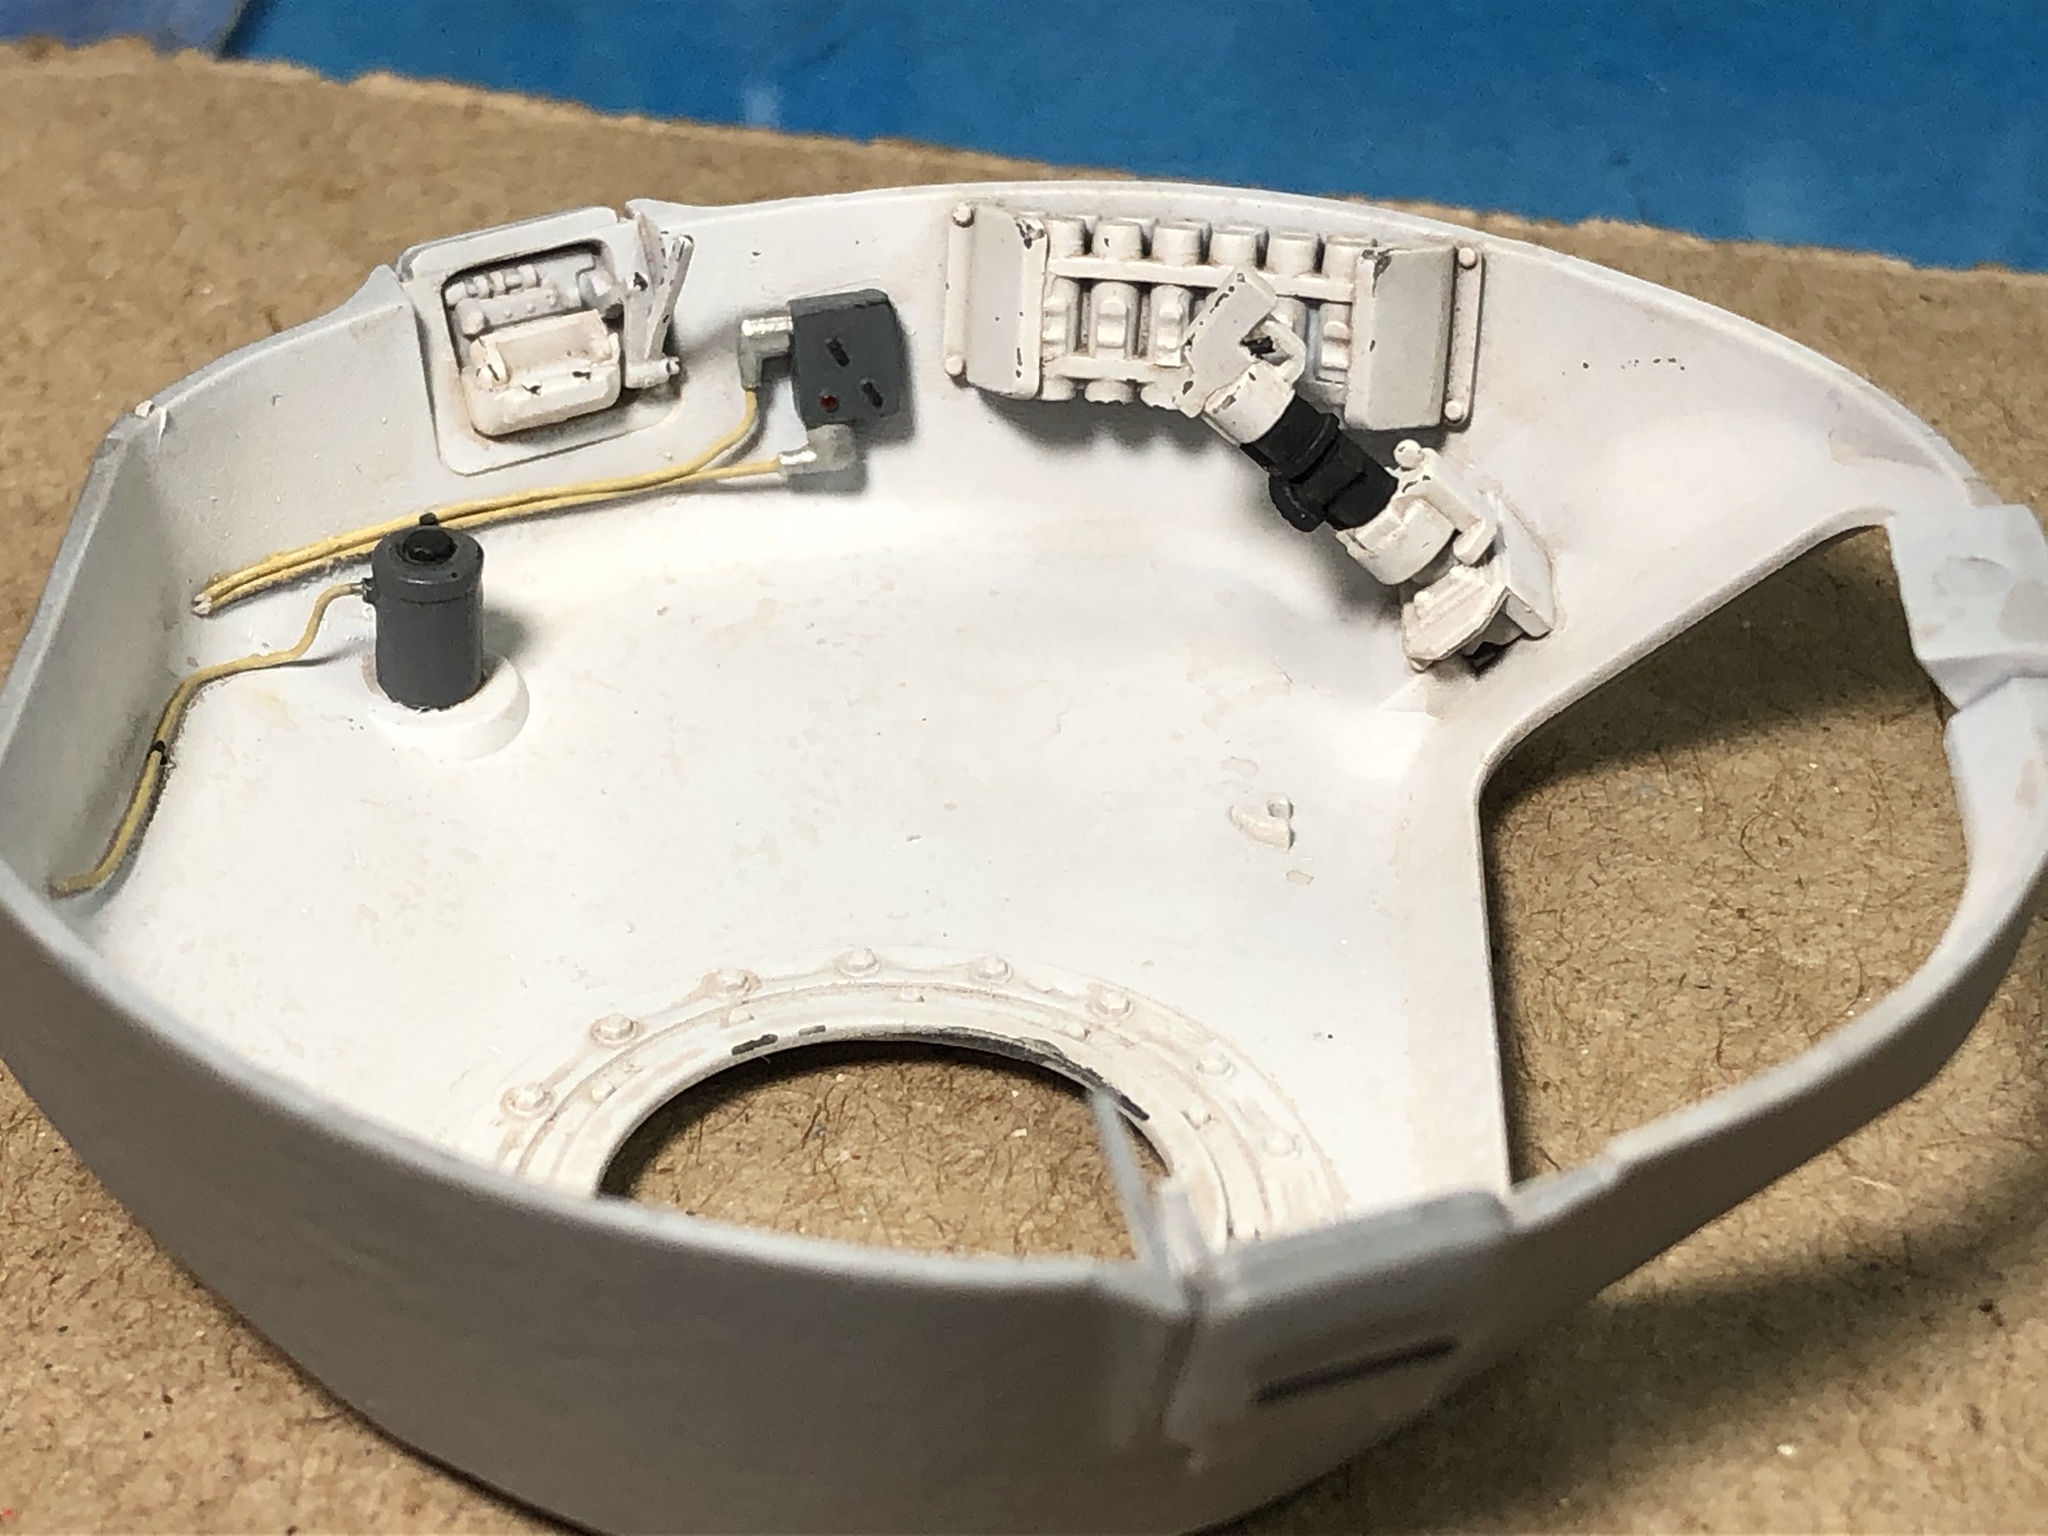
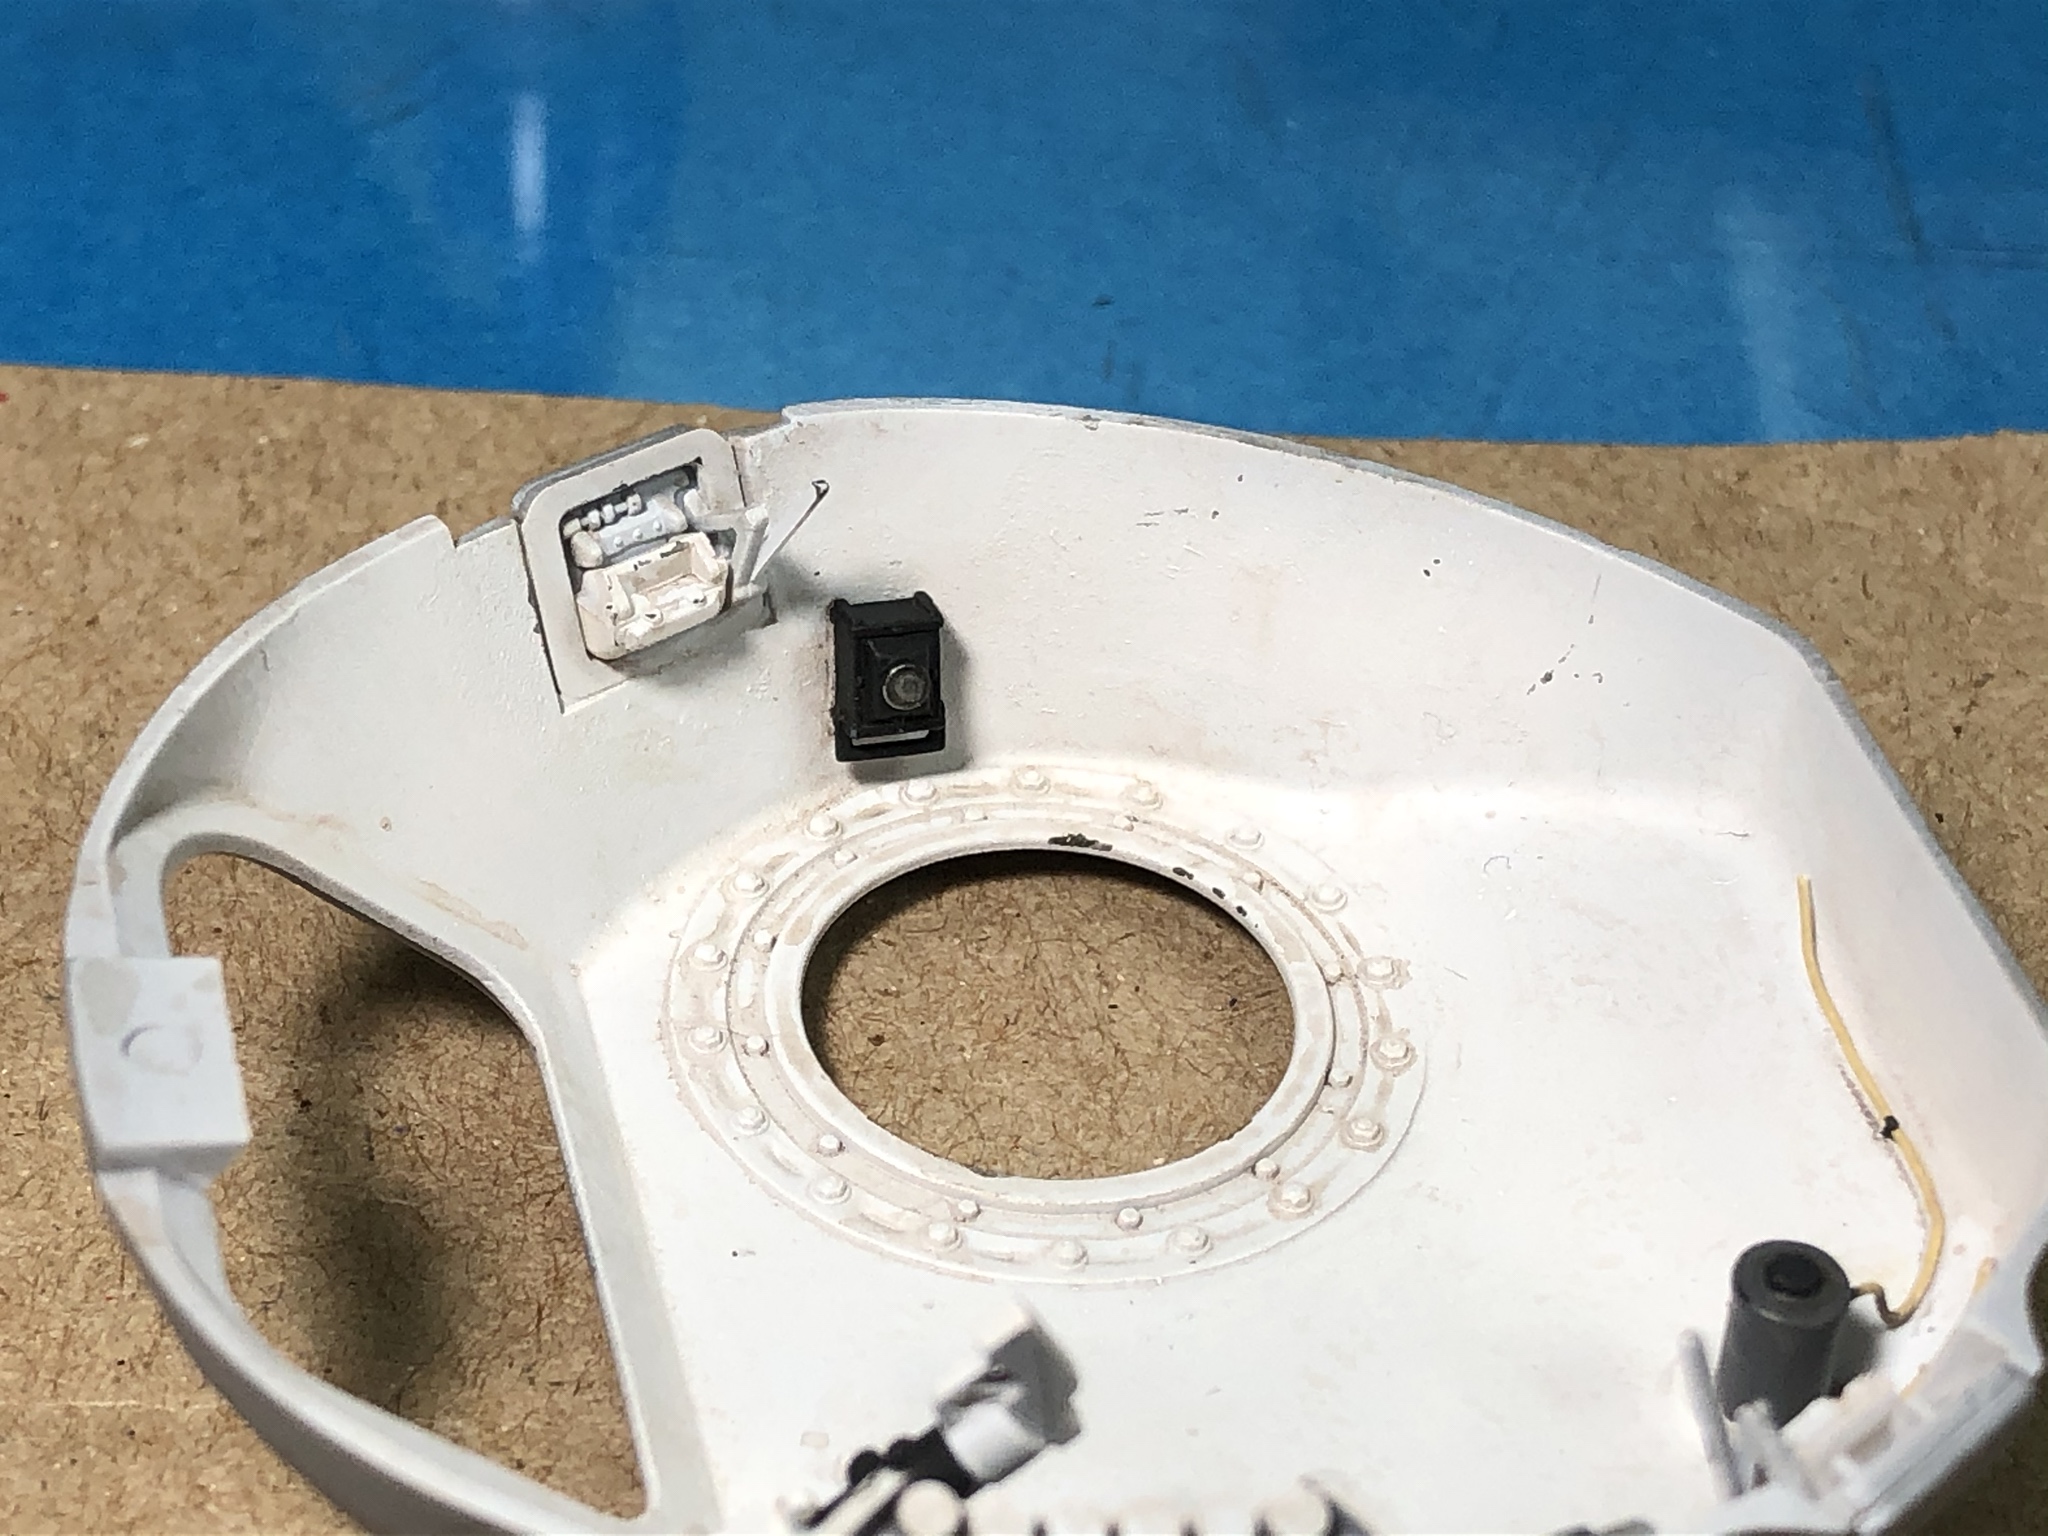
Here is are some photos of the work I did on the right and left sides. I drilled out the connectors on the radio and intercom components and added wire that runs back to where the radio set will be. The vision ports, flare rack and the flare gun assembly fit well with no real issues.


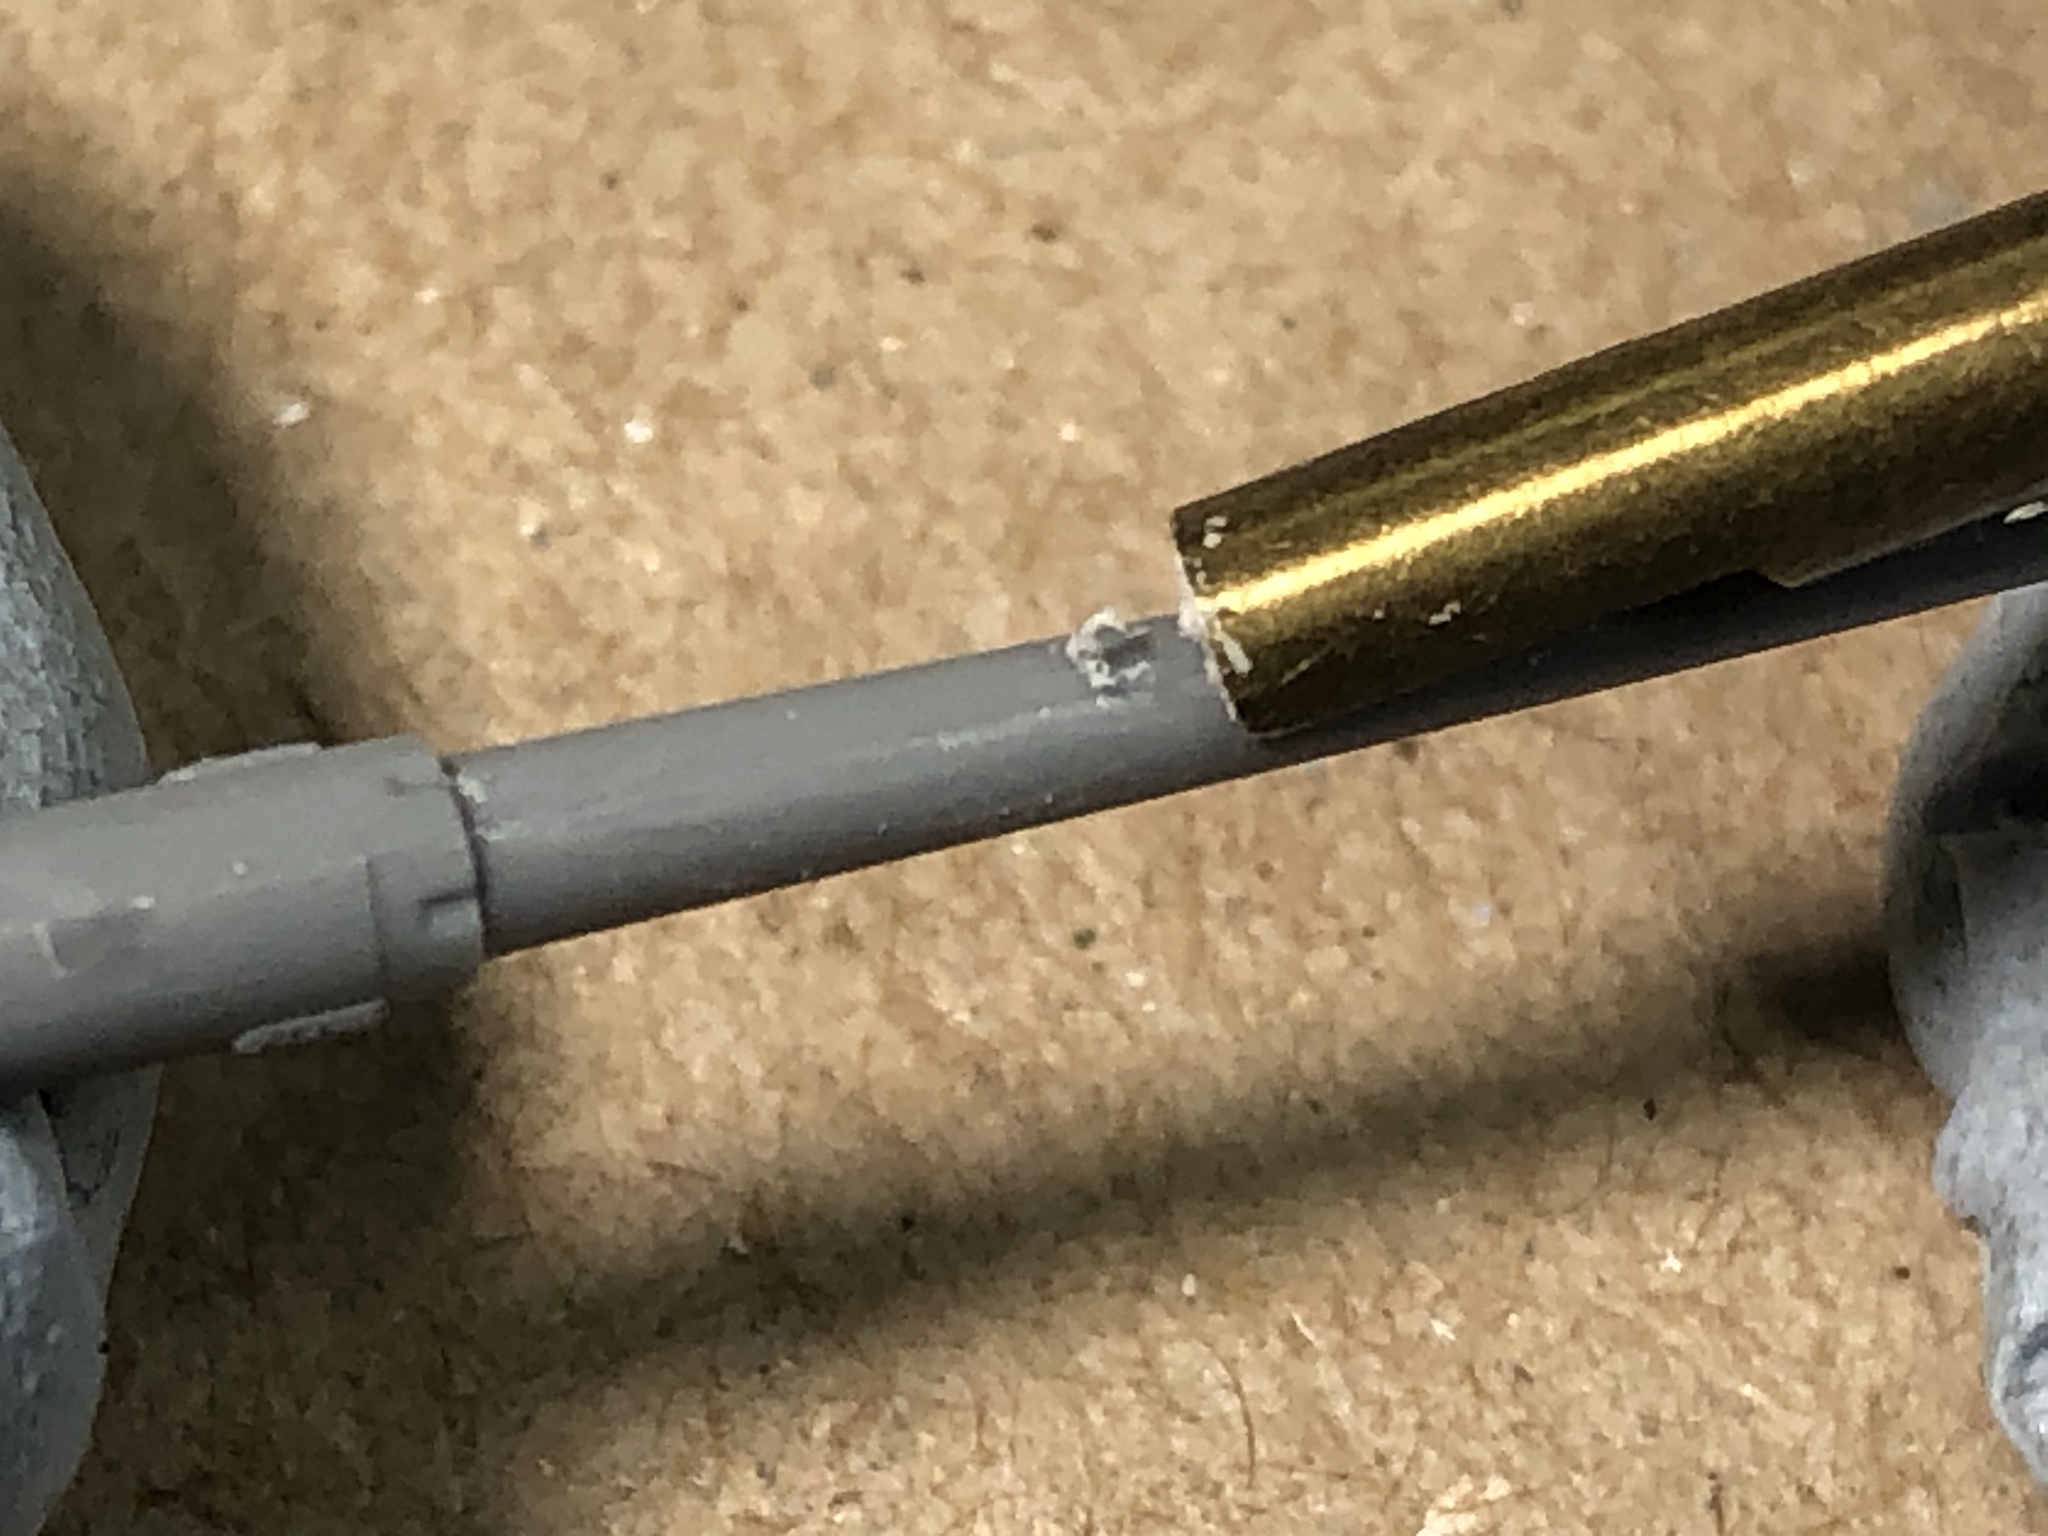
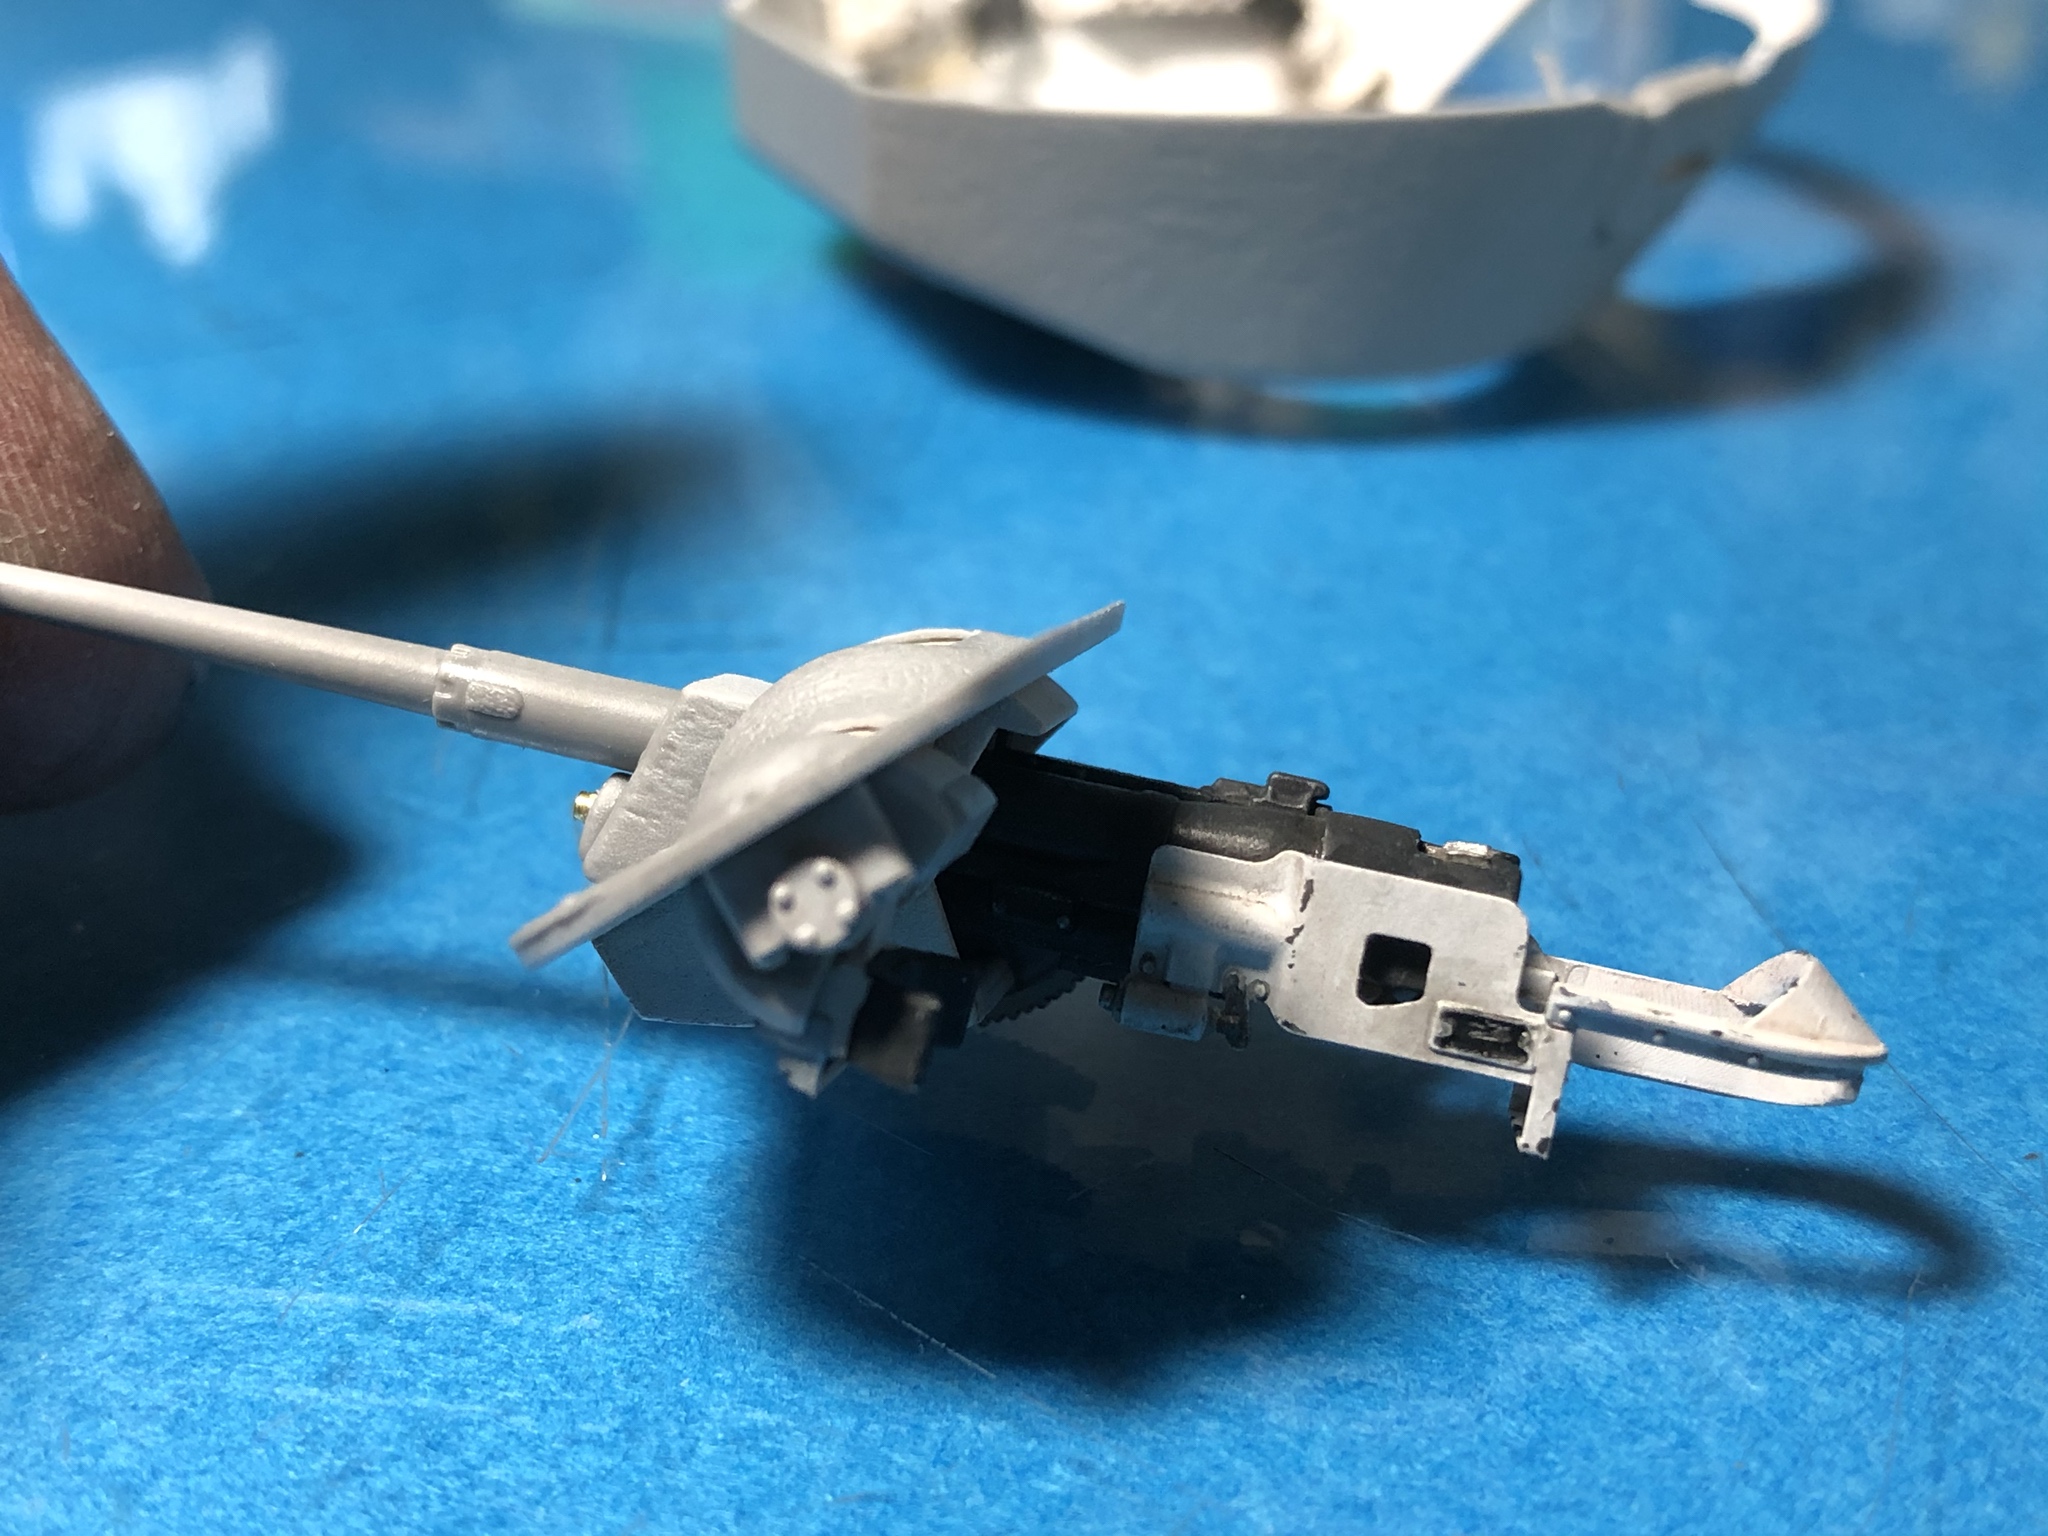
Gun assembly was next and was pretty straightforward. Mold seams required a good bit of cleanup using my home made scrapers. Here are a few of them...


They are basically just brass or copper tubing that is notched to allow an angle when they are being used. I use the different sizes based on what the size of the part being cleaned up is. They help prevent flat spots when sanding seams or removing mold lines.


Here are some pictures of the assembled 37mm gun.


I did get a start on the lower half of the turret by filling the ejector pin marks and doing the white and wash.


The paints used were:

Tamiya white primer- all white items
Vallejo Metal Color Aluminum- connectors on comm box
Vallejo Black Grey- the flare gun body, the main gun body and the chipping around the compartment
Vallejo Buff- wires
Vallejo Earth Brown- light wash on all white components
Tamiya Smoke - wash on silver components
Vallejo Neutral Gray- comm system component bodies

Hope this helps someone with their project!

Cheers
ivanhoe6
Visit this Community
Wisconsin, United States
Joined: April 05, 2007
KitMaker: 2,023 posts
Armorama: 1,234 posts
Posted: Tuesday, March 03, 2020 - 07:30 AM UTC
Paul, the brass tube technique - OUTSTANDING idea !
Thanks for the tip !
PRH001
Visit this Community
New Mexico, United States
Joined: June 16, 2014
KitMaker: 681 posts
Armorama: 603 posts
Posted: Tuesday, March 03, 2020 - 01:05 PM UTC
Glad you found it useful... Unfortunately, the brass tube cleanup doesn’t fix off-center bores. I thought I could live with a bit of variance and some careful rework, but it’s driving me insane. I’ve placed orders for metal replacements and if they are true when they arrive, I will probably swap them out. The kit parts fit fine and look good from a foot away, but the variation in the rifling is visible up close.

More to follow on this subject...
Fmatthews
Visit this Community
Pennsylvania, United States
Joined: July 25, 2010
KitMaker: 11 posts
Armorama: 10 posts
Posted: Tuesday, March 03, 2020 - 04:46 PM UTC
Spectacular workmanship! I am currently building the non-interior version of the Miniart Grant and it is a fantastic kit. Looking forward to see this one progress-thank you for sharing!
PRH001
Visit this Community
New Mexico, United States
Joined: June 16, 2014
KitMaker: 681 posts
Armorama: 603 posts
Posted: Wednesday, March 04, 2020 - 03:49 AM UTC
I appreciate the positive comments! It’s not one of those kits that fall out of the box in perfection, but it has been a really enjoyable build so far. Hopefully it will turn out well in the end and look like a Grant.

I’d be very interested to know how you attack the tracks and if the sand skirts have the same adjustments needed since your kit has the field-modified variety.

Cheers and good luck!
PRH001
Visit this Community
New Mexico, United States
Joined: June 16, 2014
KitMaker: 681 posts
Armorama: 603 posts
Posted: Monday, March 09, 2020 - 01:58 PM UTC
Spent most of the weekend out of town, so I got a relatively small amount done on the Grant. I also had to remake a piece for the lower half of the turret do to my careless handling of a part during cleanup.

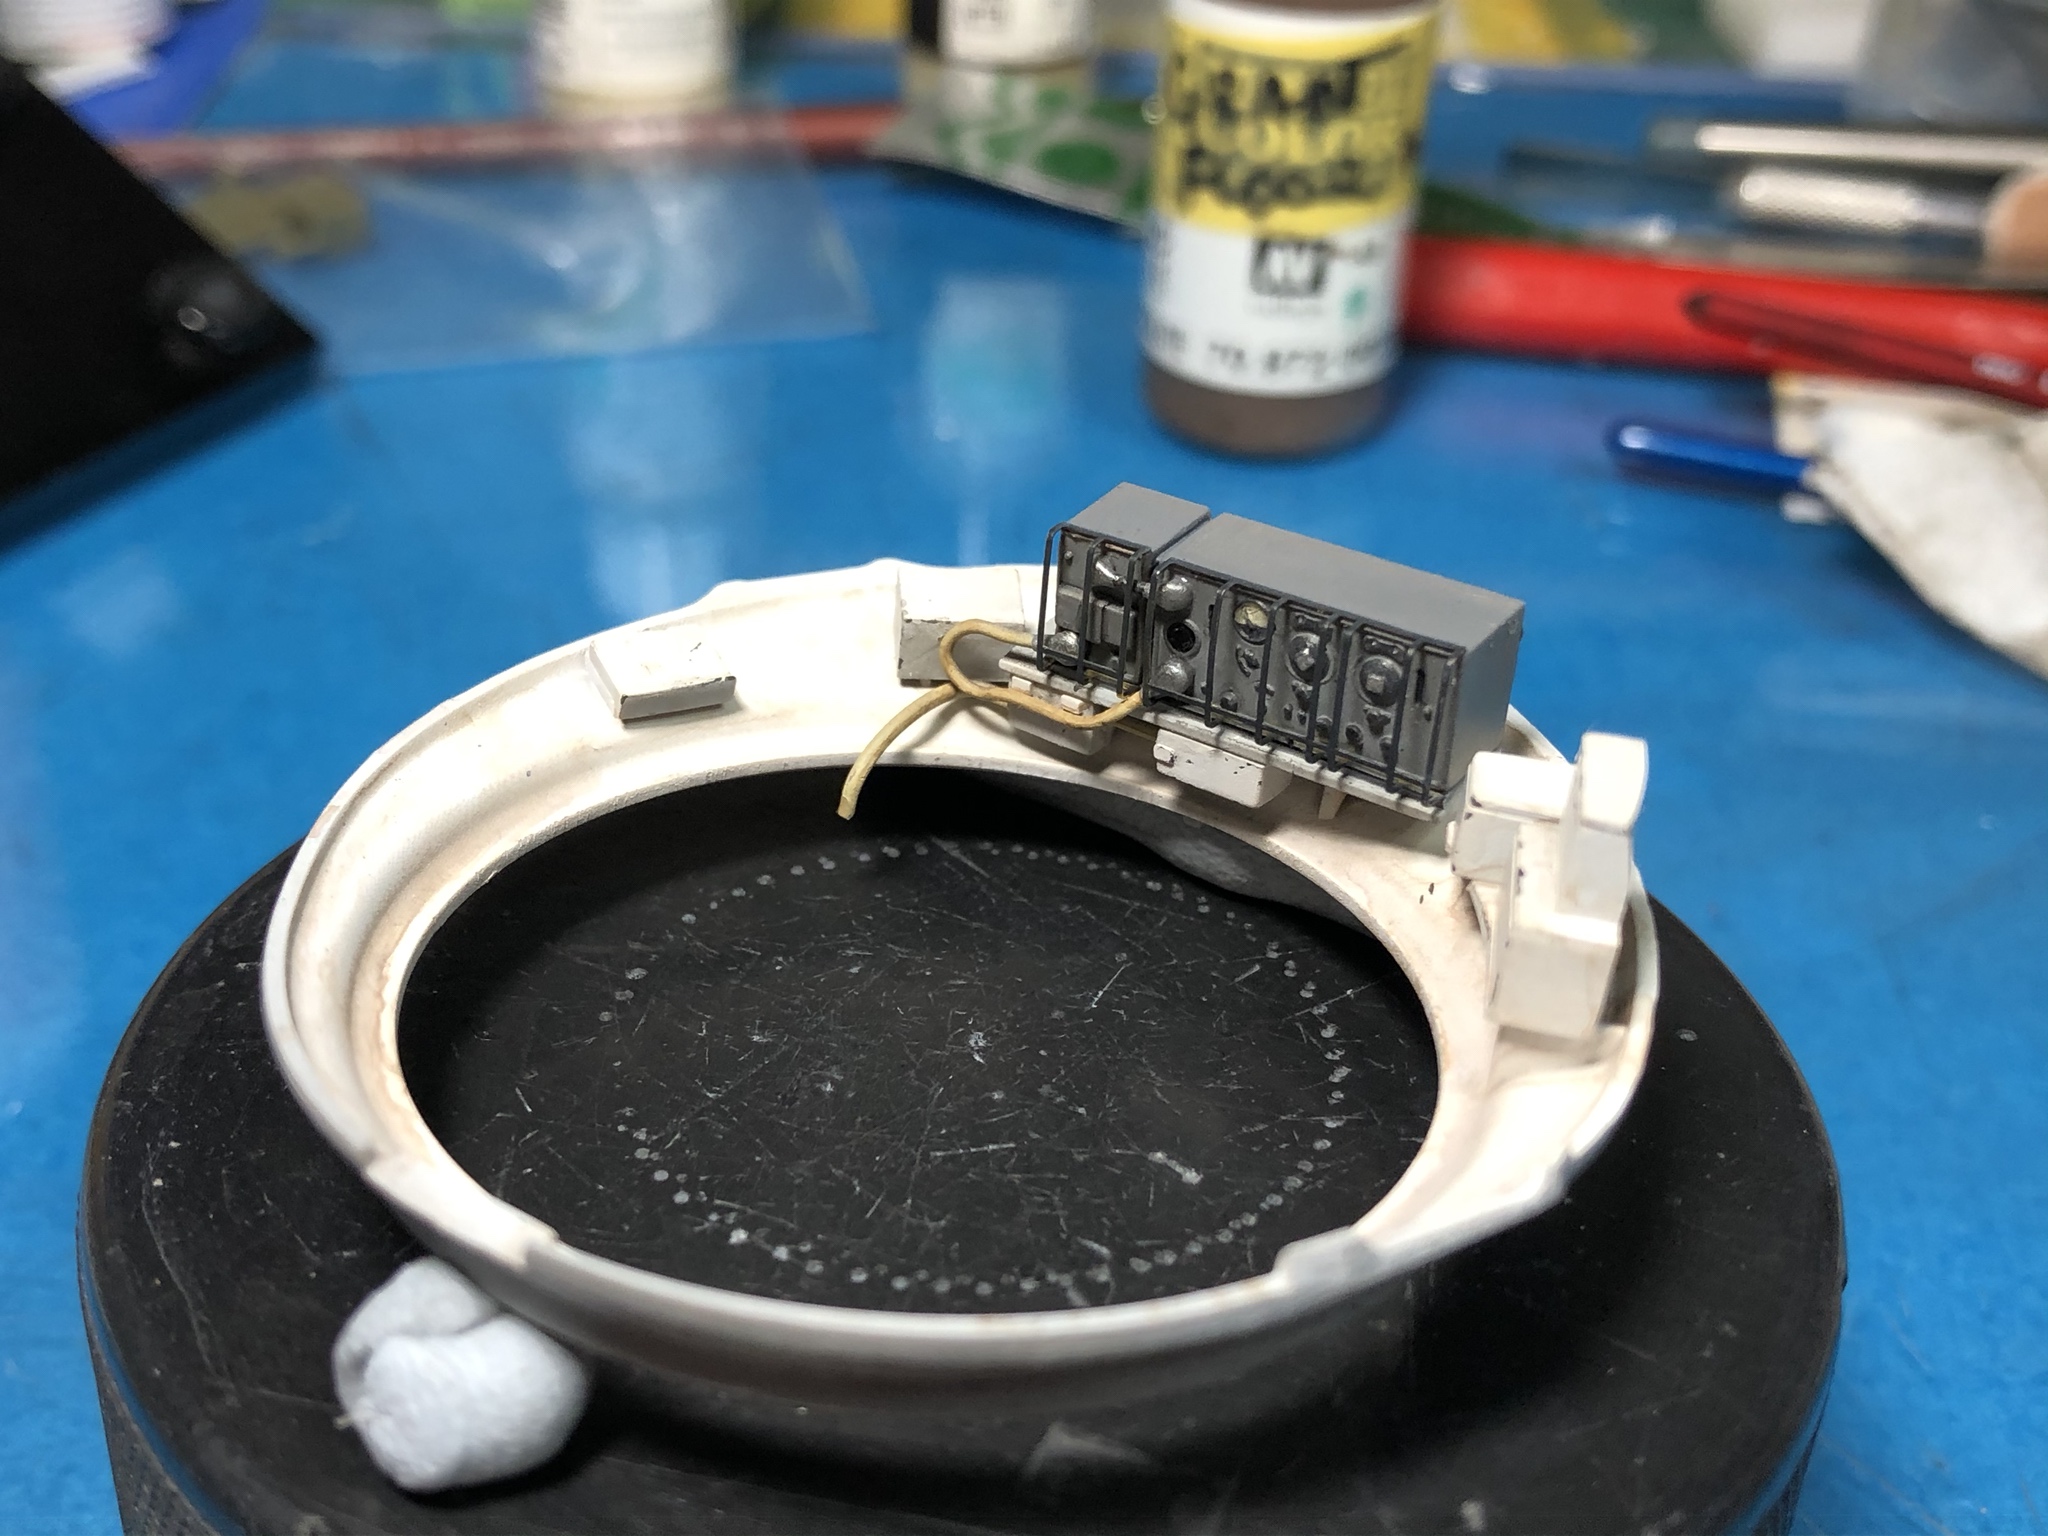
So, I got the boxes installed and painted, and then I managed to get the radio assembled, painted and installed.


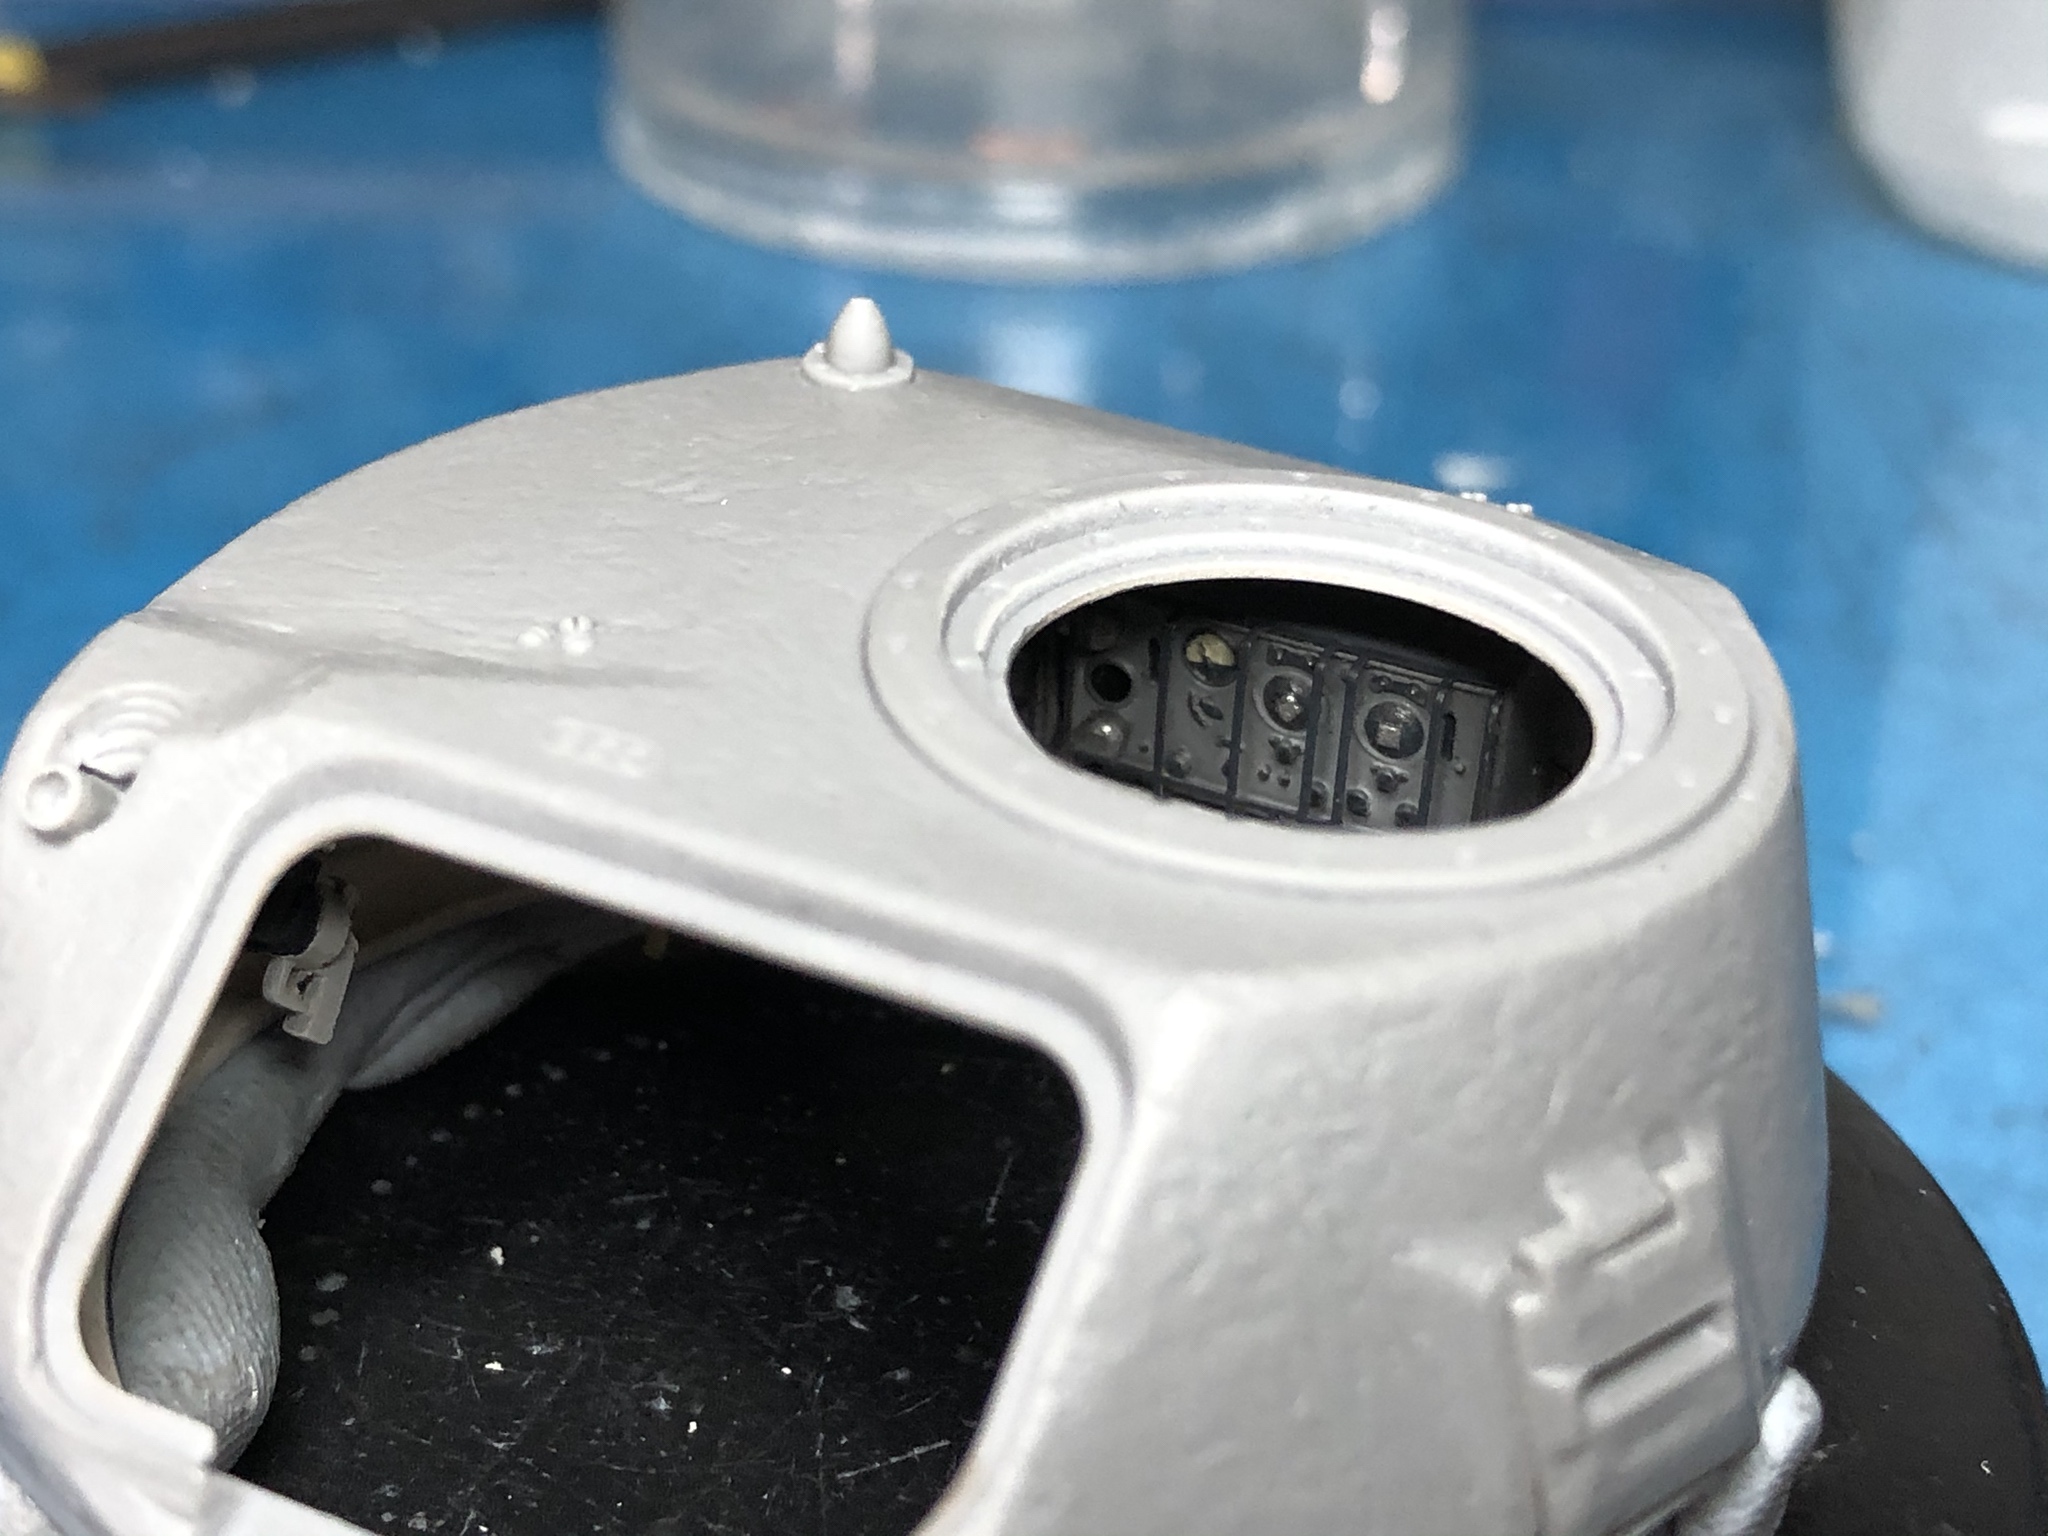
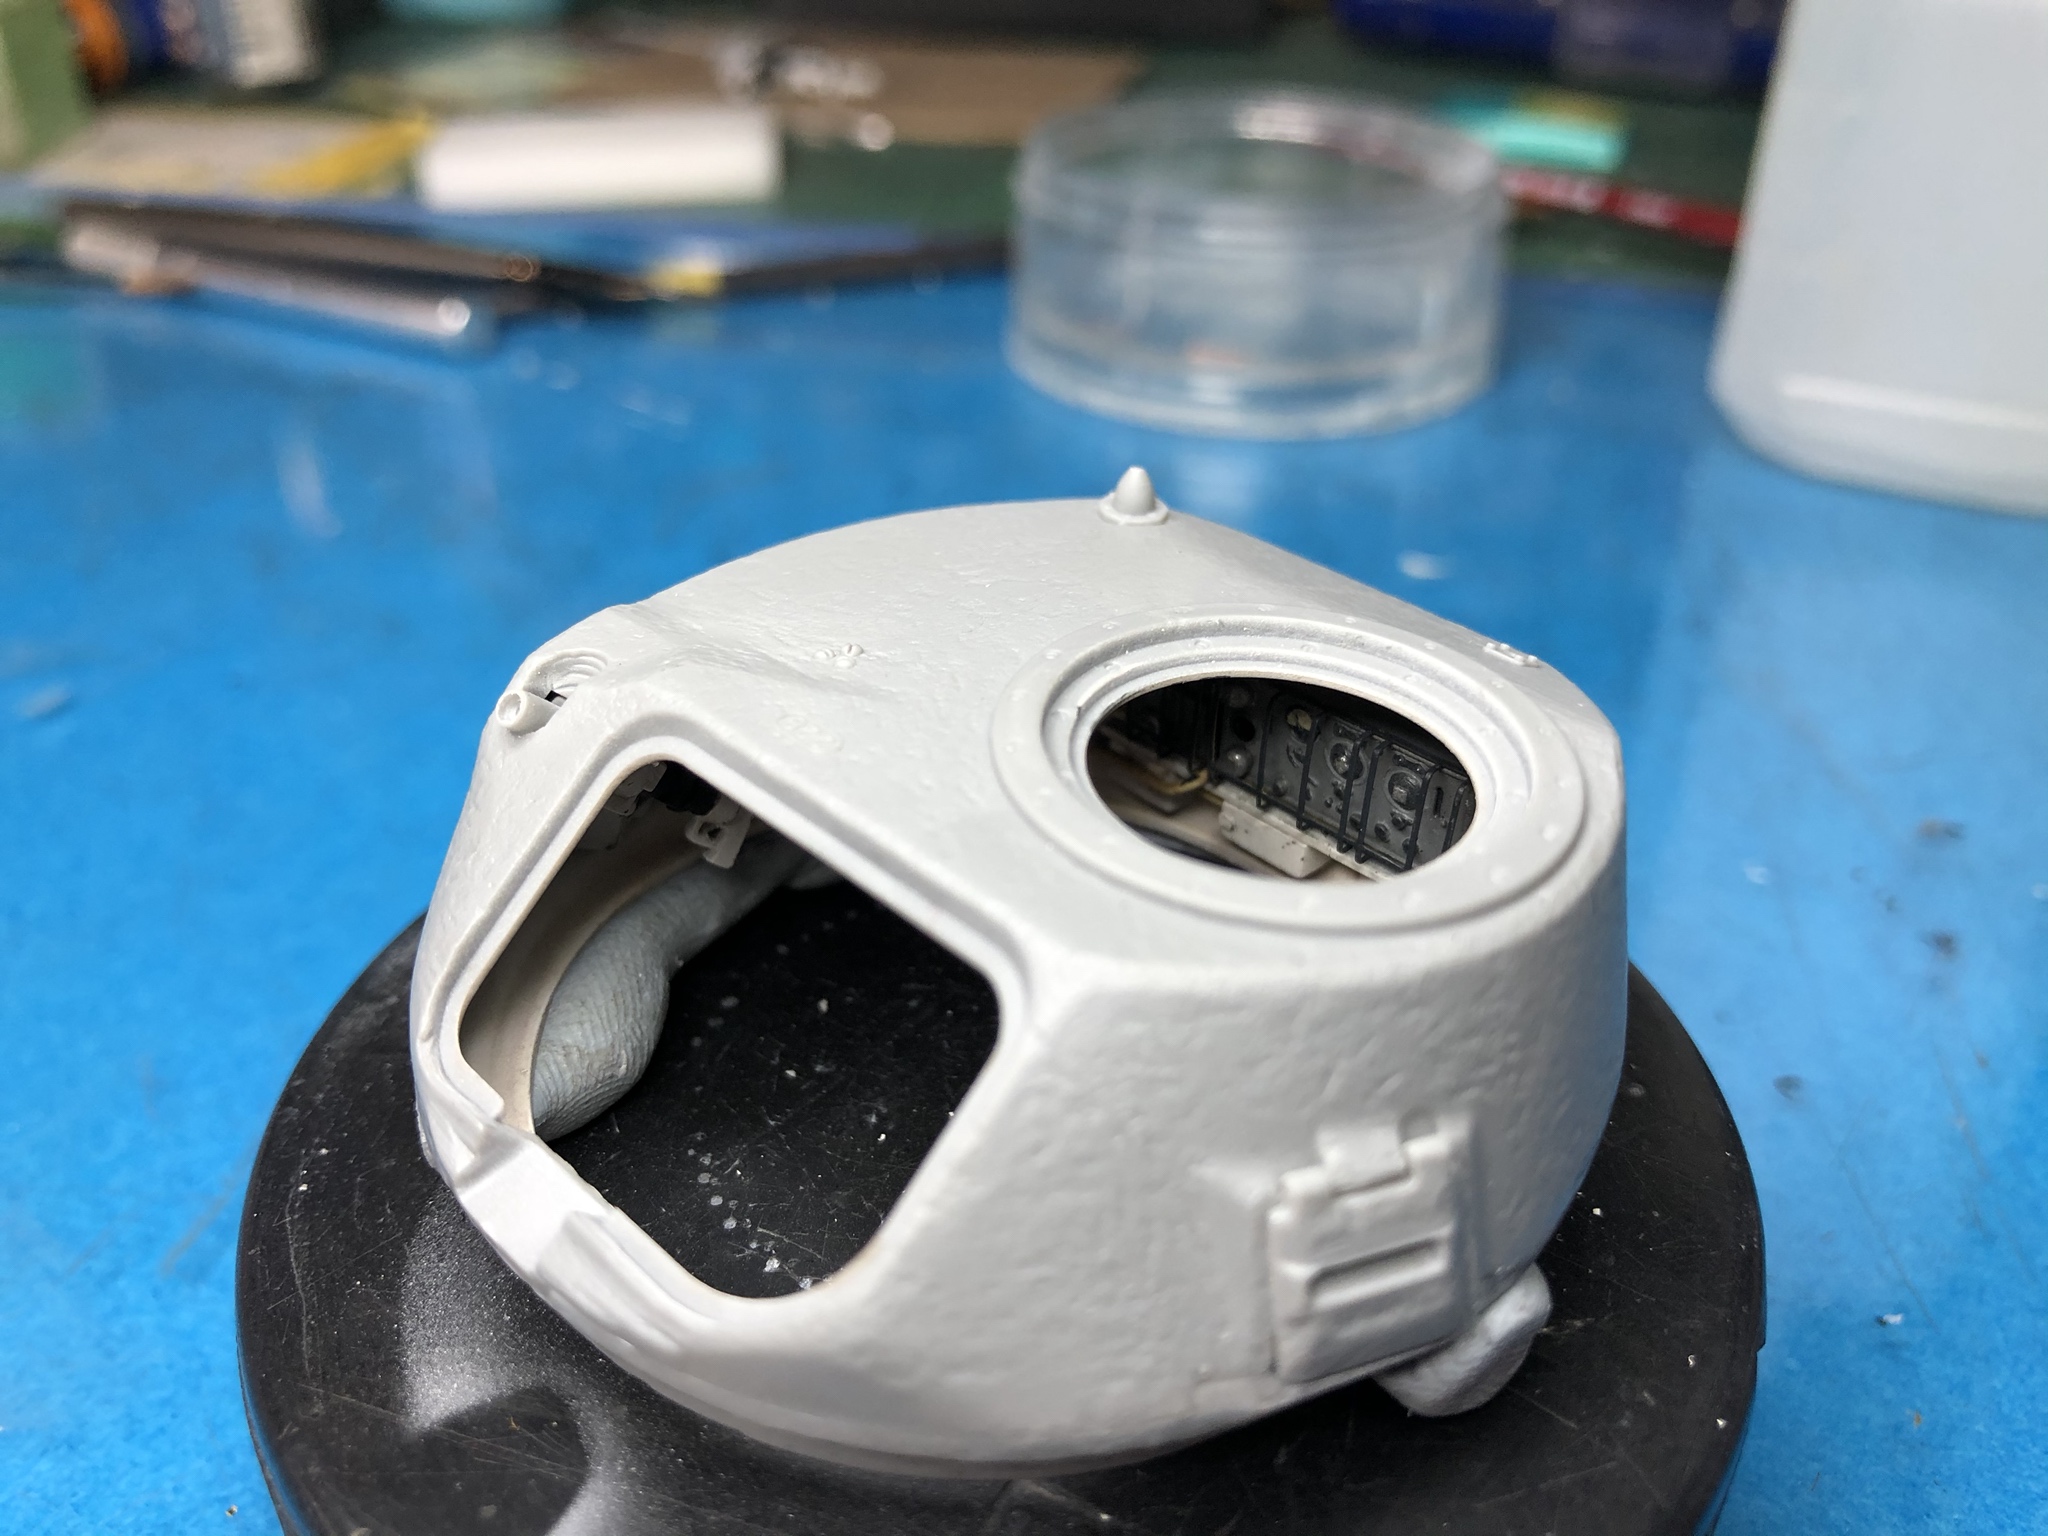
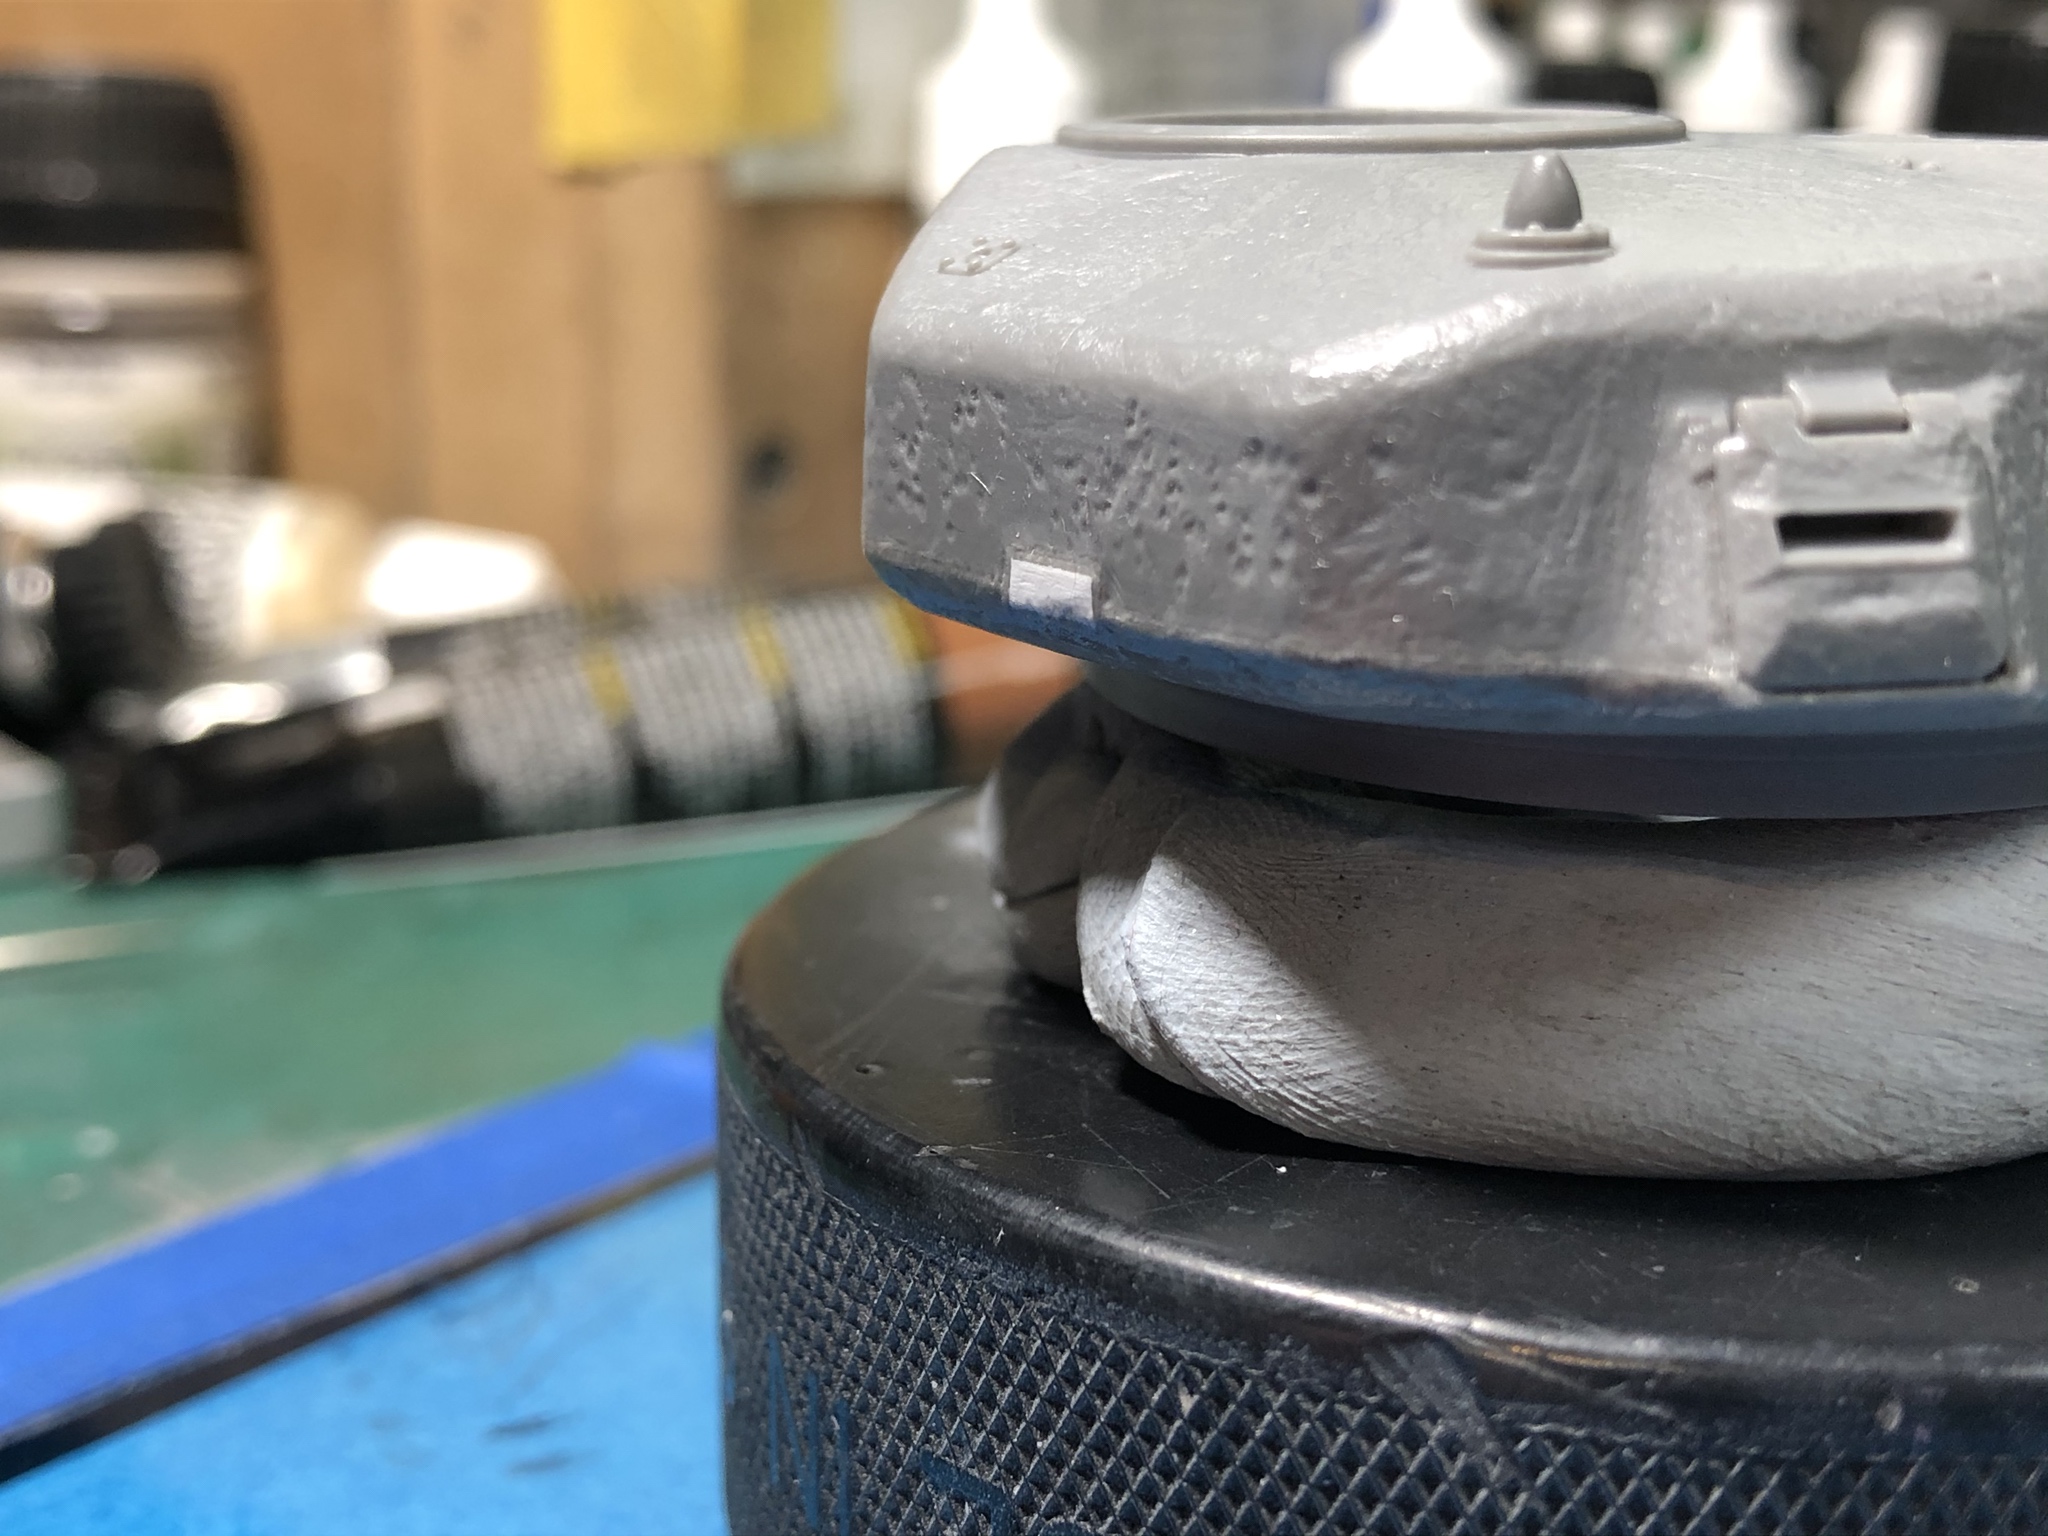
Once this was done, I joined the upper and lower turret halves and cemented then together. The seams were a little more prevalent than I expected, but once they are filled and textured, they it should be fine.


You’ll notice the radio and boxes are quite visible through the open hatch.


Colors used:

Boxes basic color - Tamiya Flat white w/Vallejo earth brown wash
Radio casework - Vallejo neutral gray
Radio dials and knobs and protective cage - Vallejo black grey, w/Vallejo semi glass clear over it
Radio tuning knob centers and the cable connectors - AK Interactive Xtreme Metal aluminum
Radio cables, Vallejo Buff with Vallejo earth brown wash
Radio gauge face - Vallejo Stencil (off white)


PRH001
Visit this Community
New Mexico, United States
Joined: June 16, 2014
KitMaker: 681 posts
Armorama: 603 posts
Posted: Friday, March 13, 2020 - 03:52 PM UTC
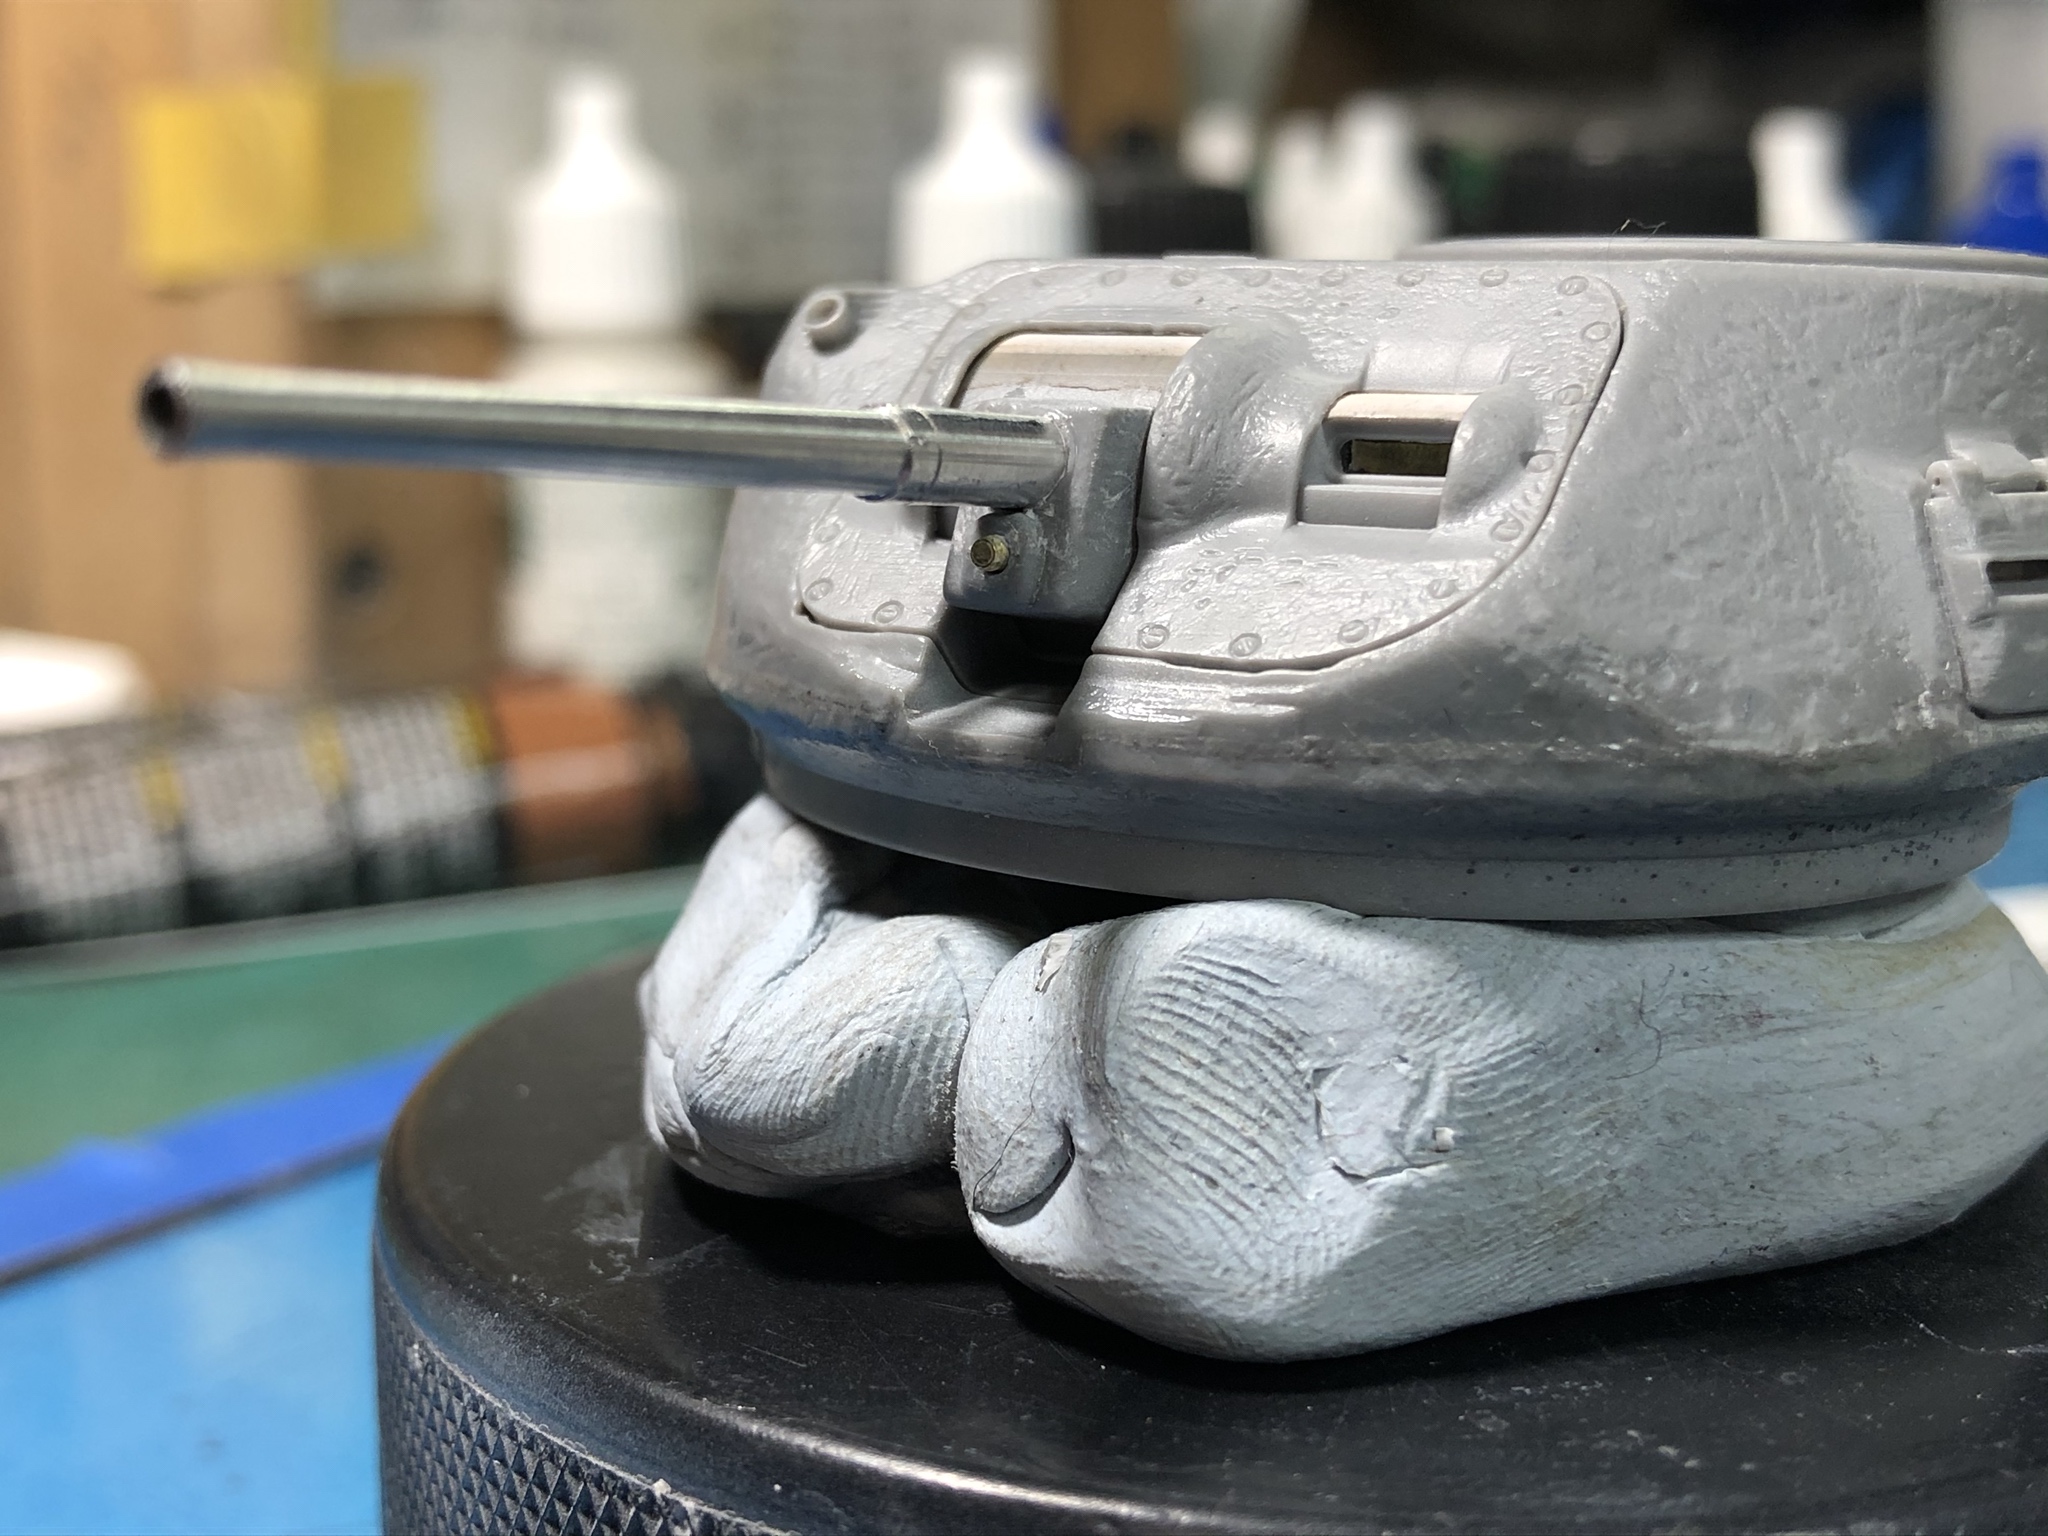
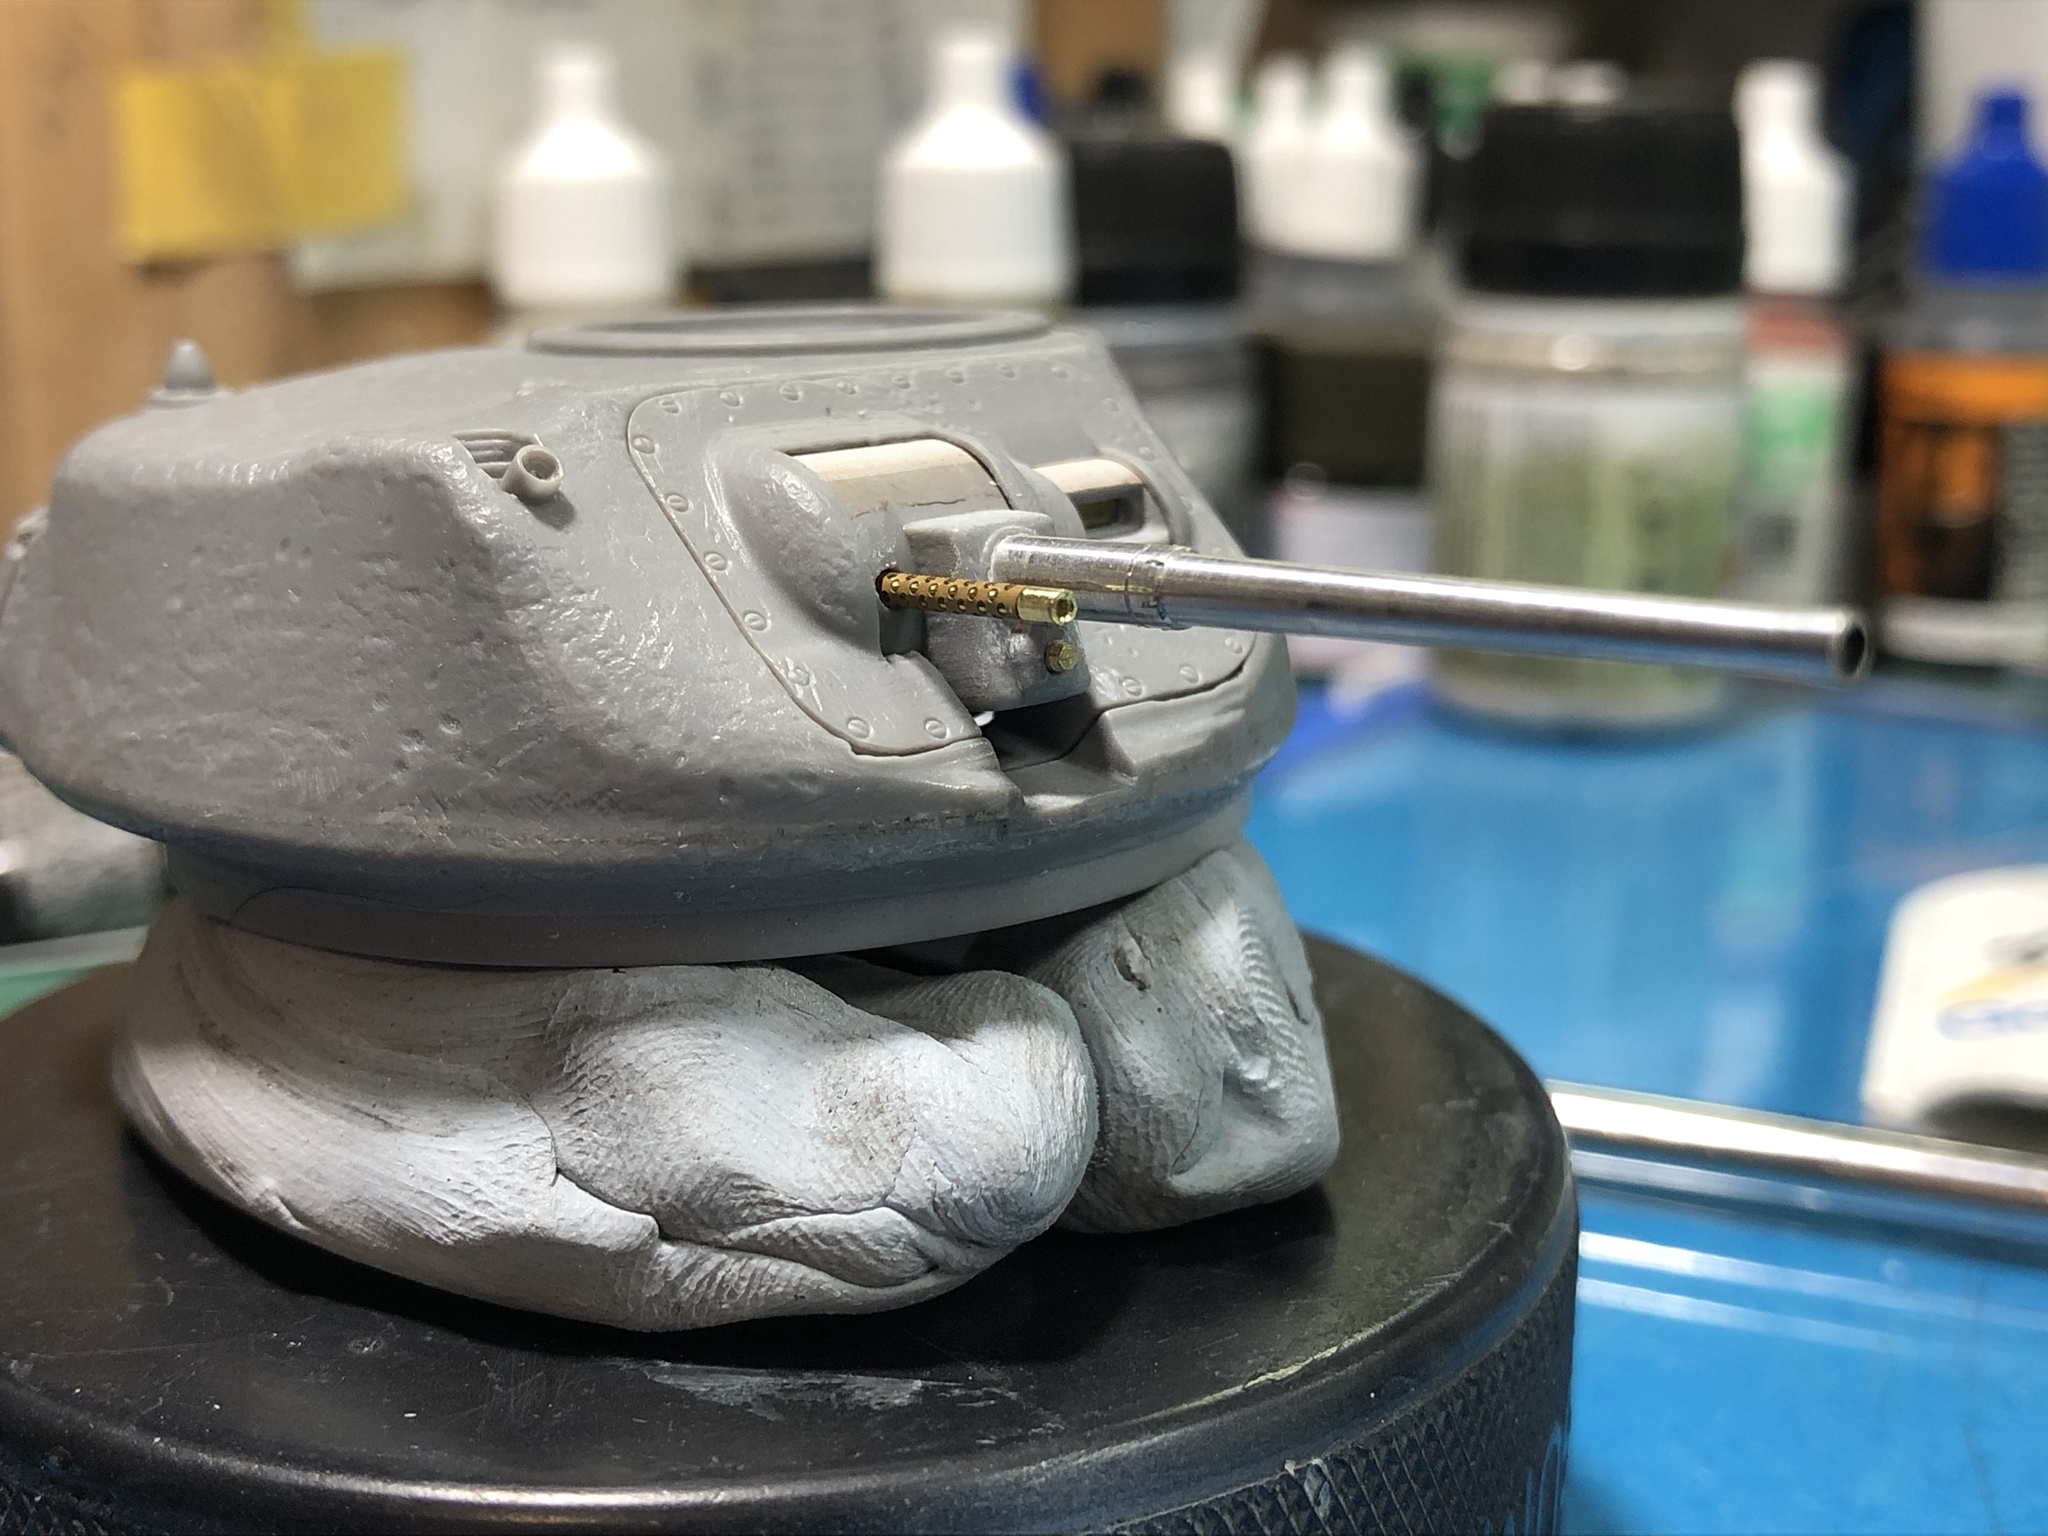
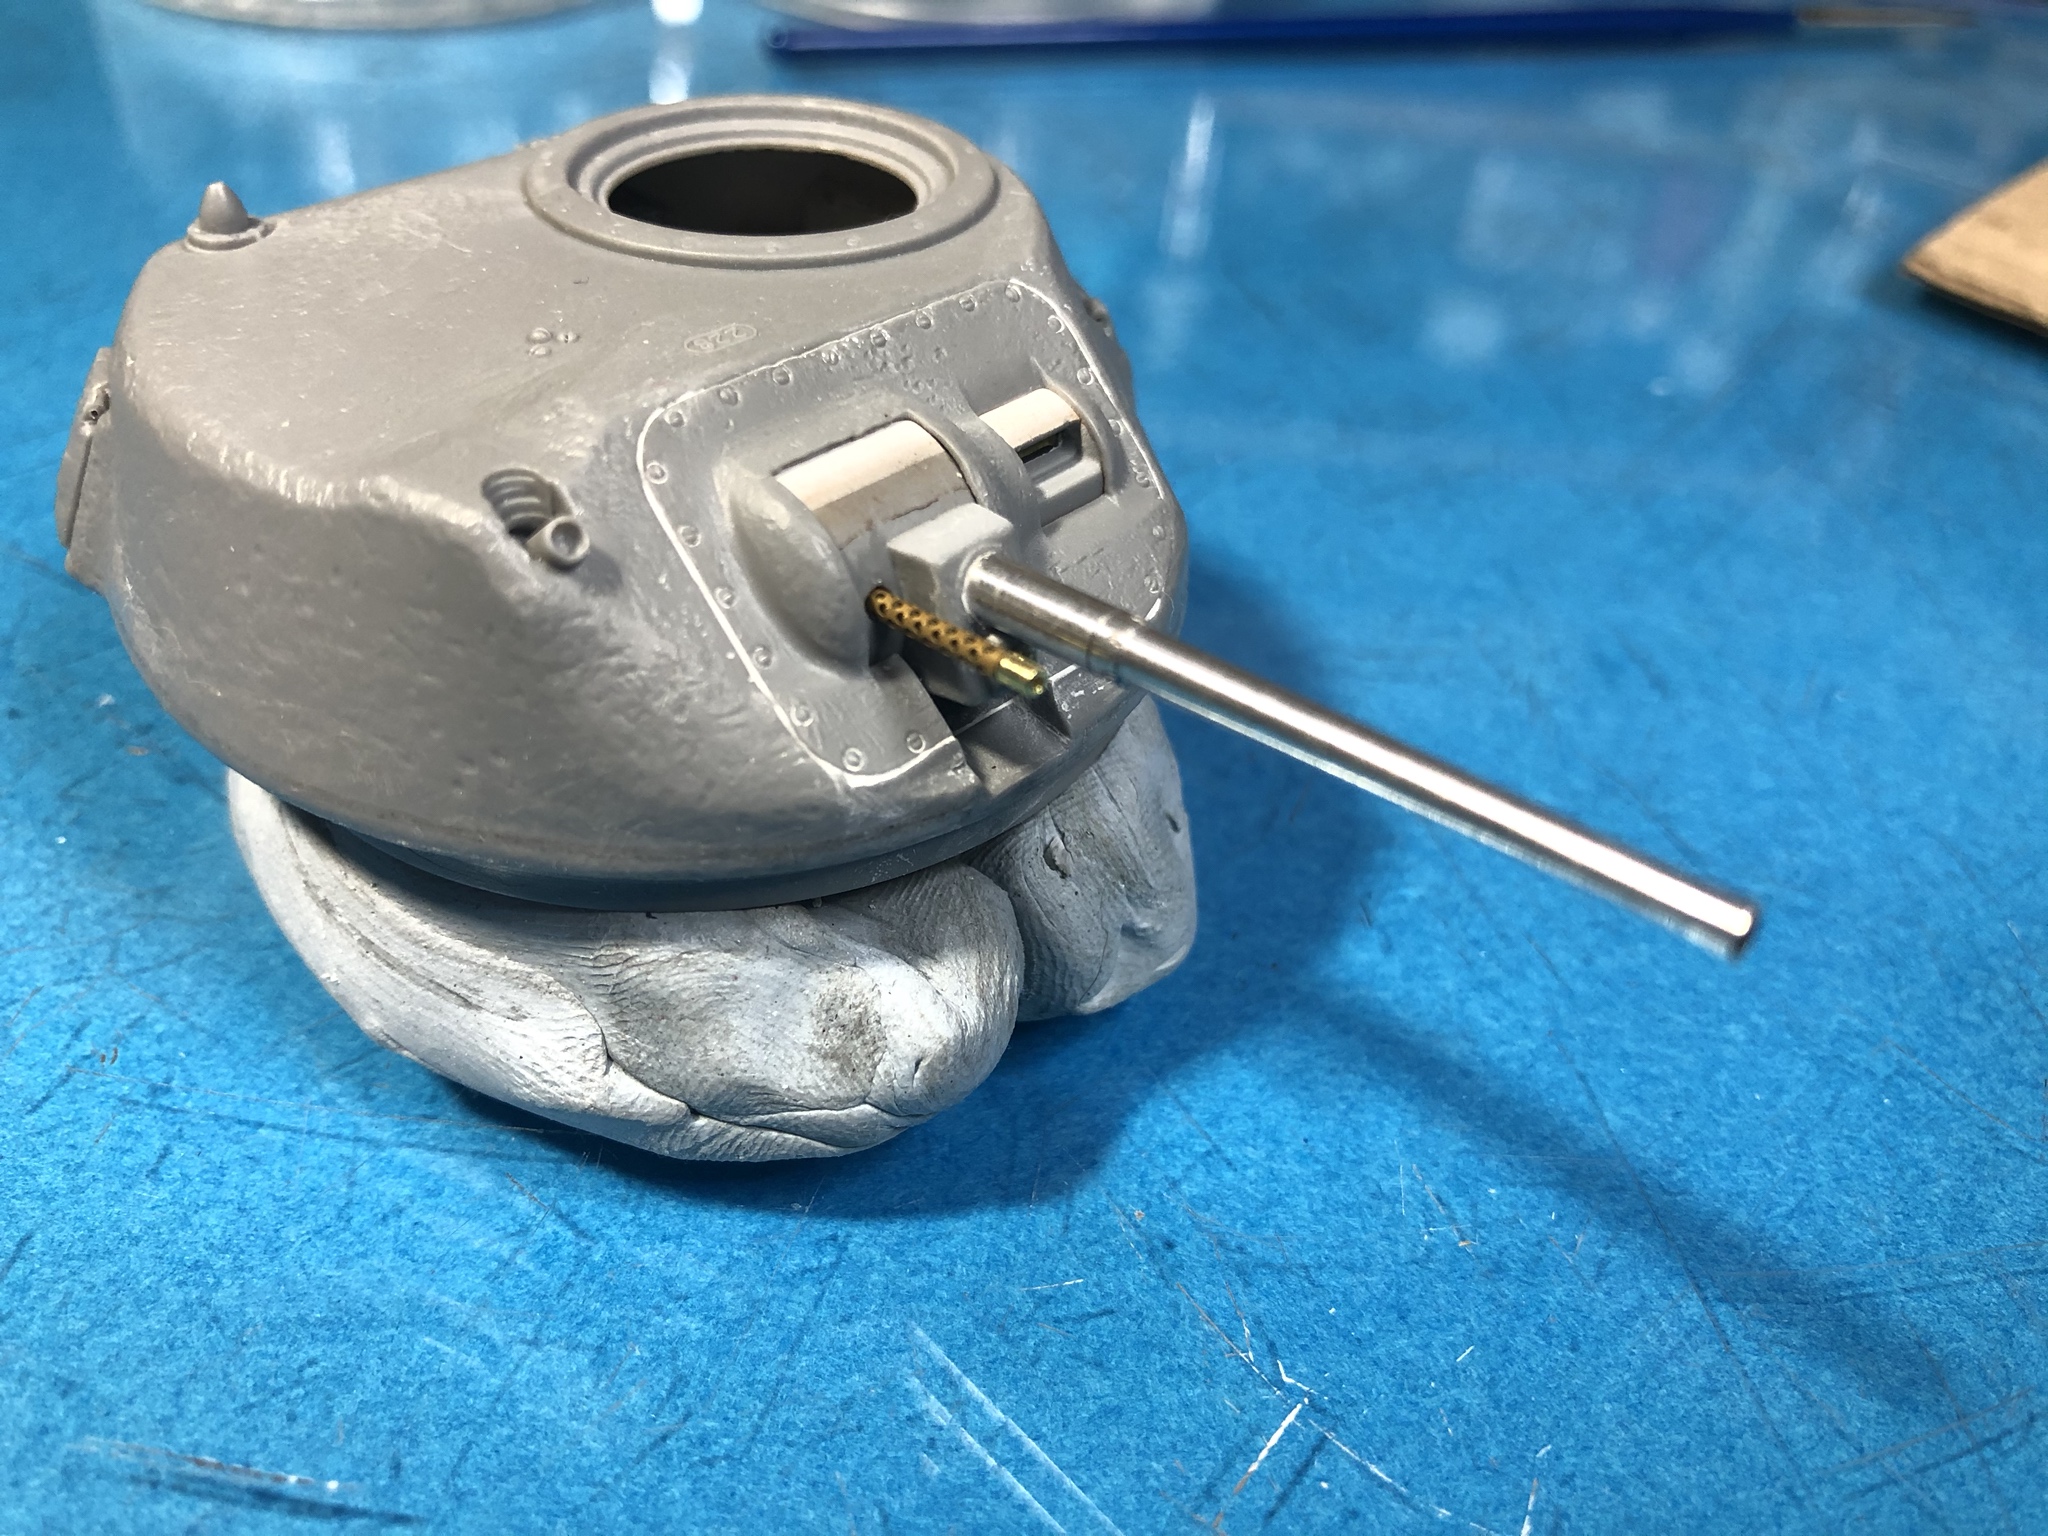
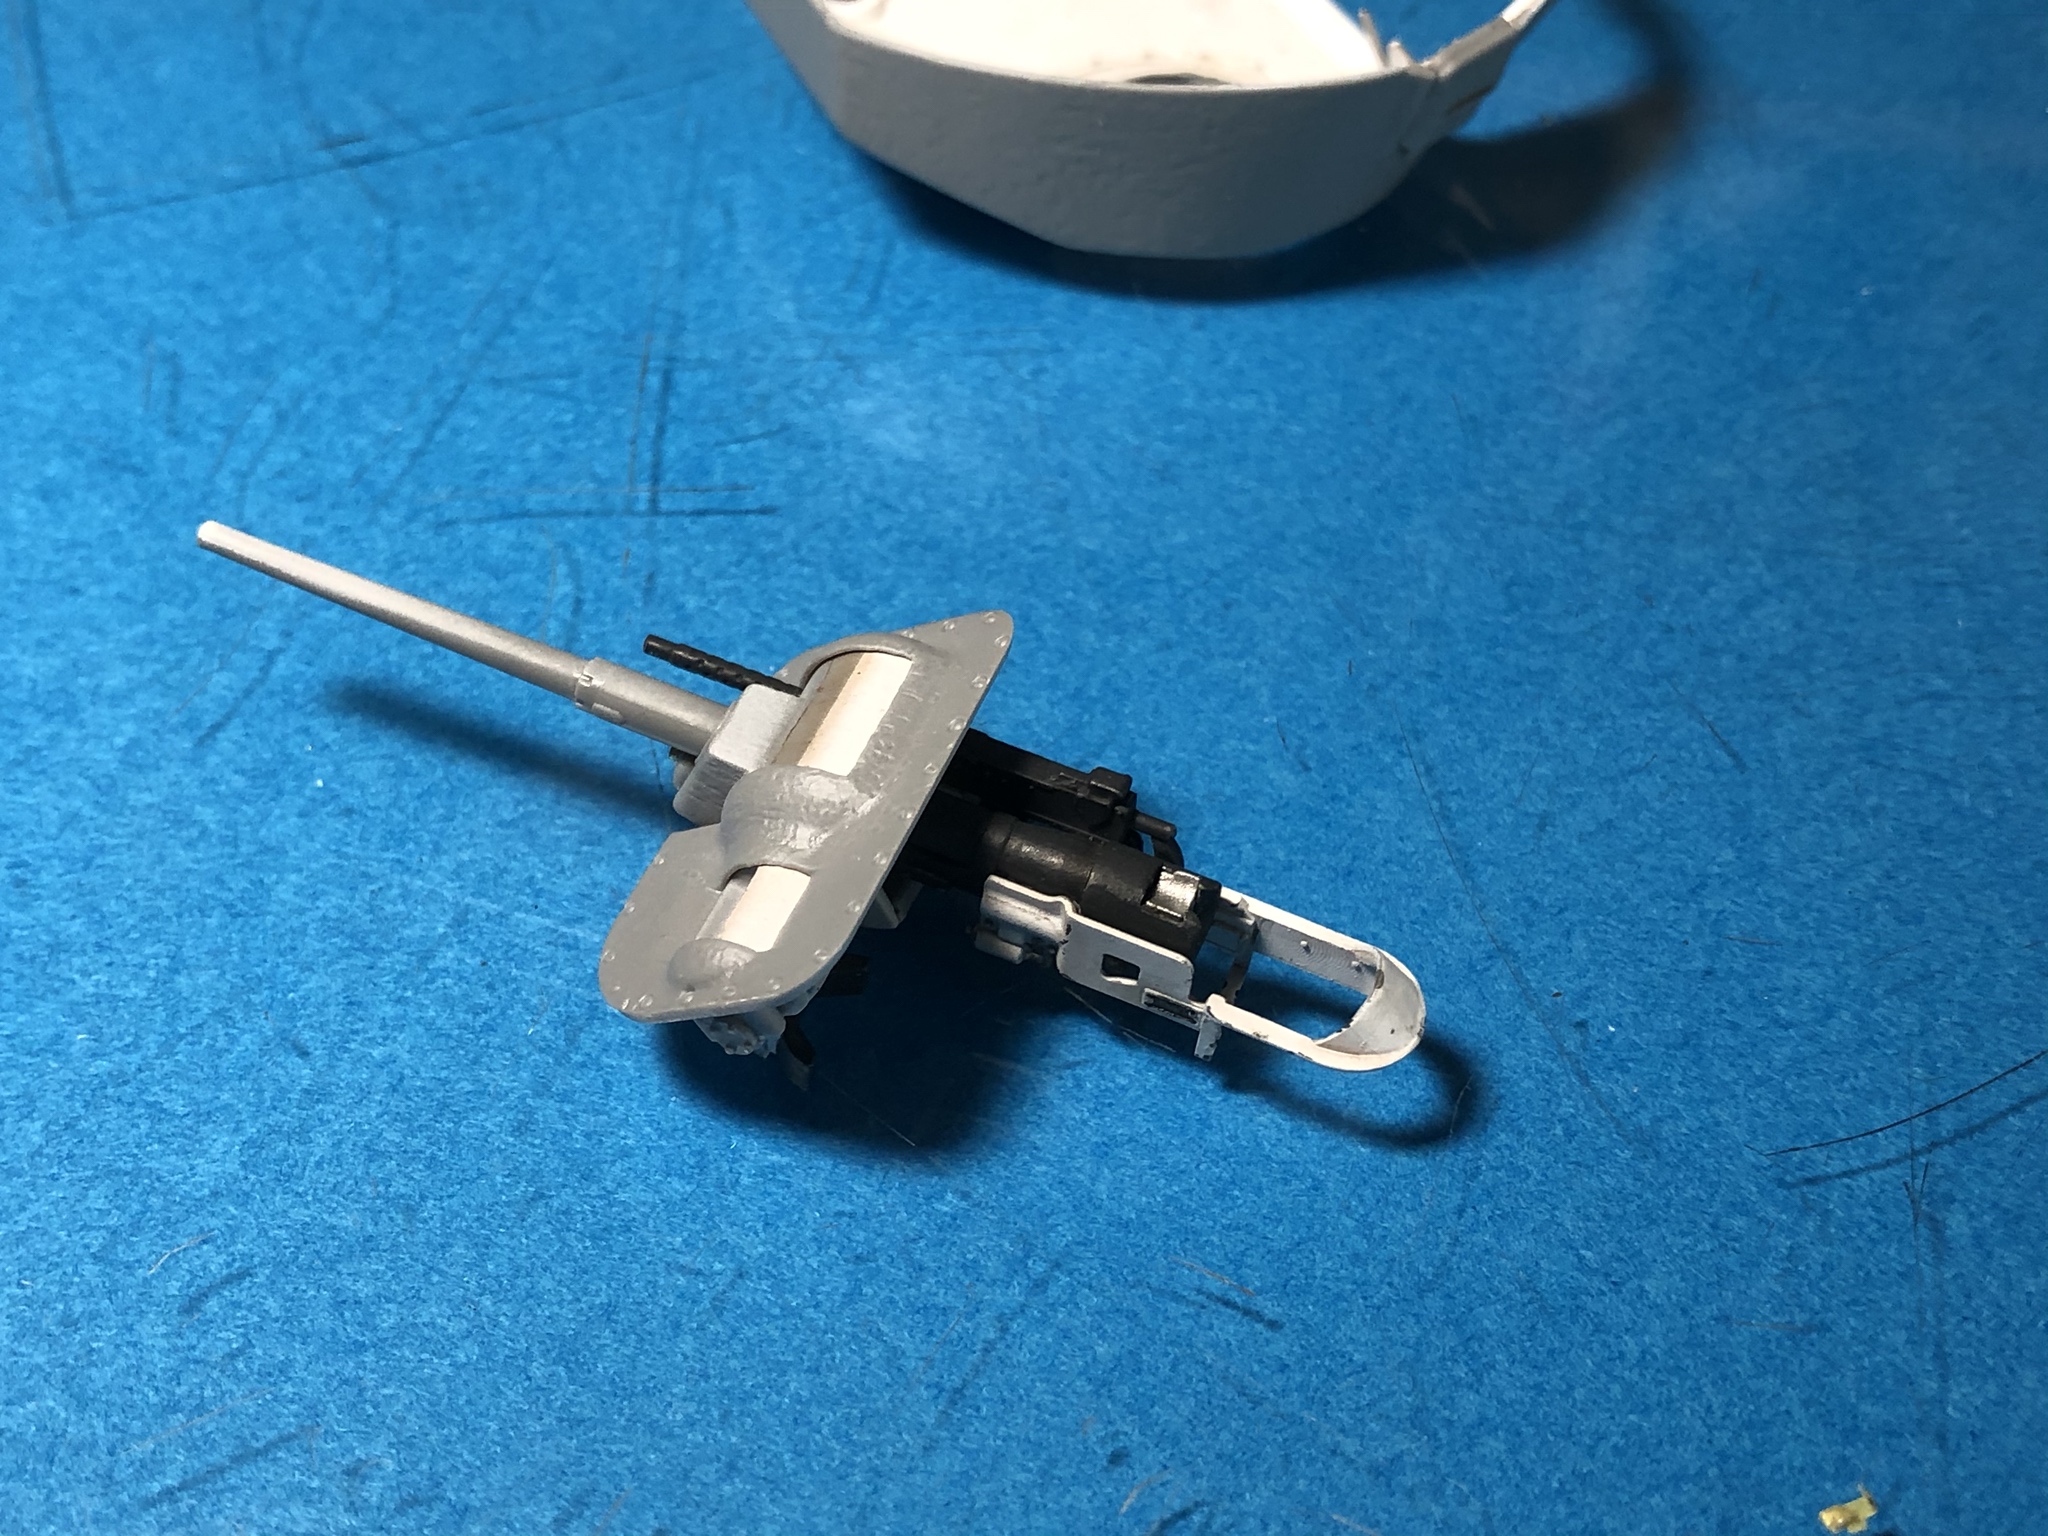
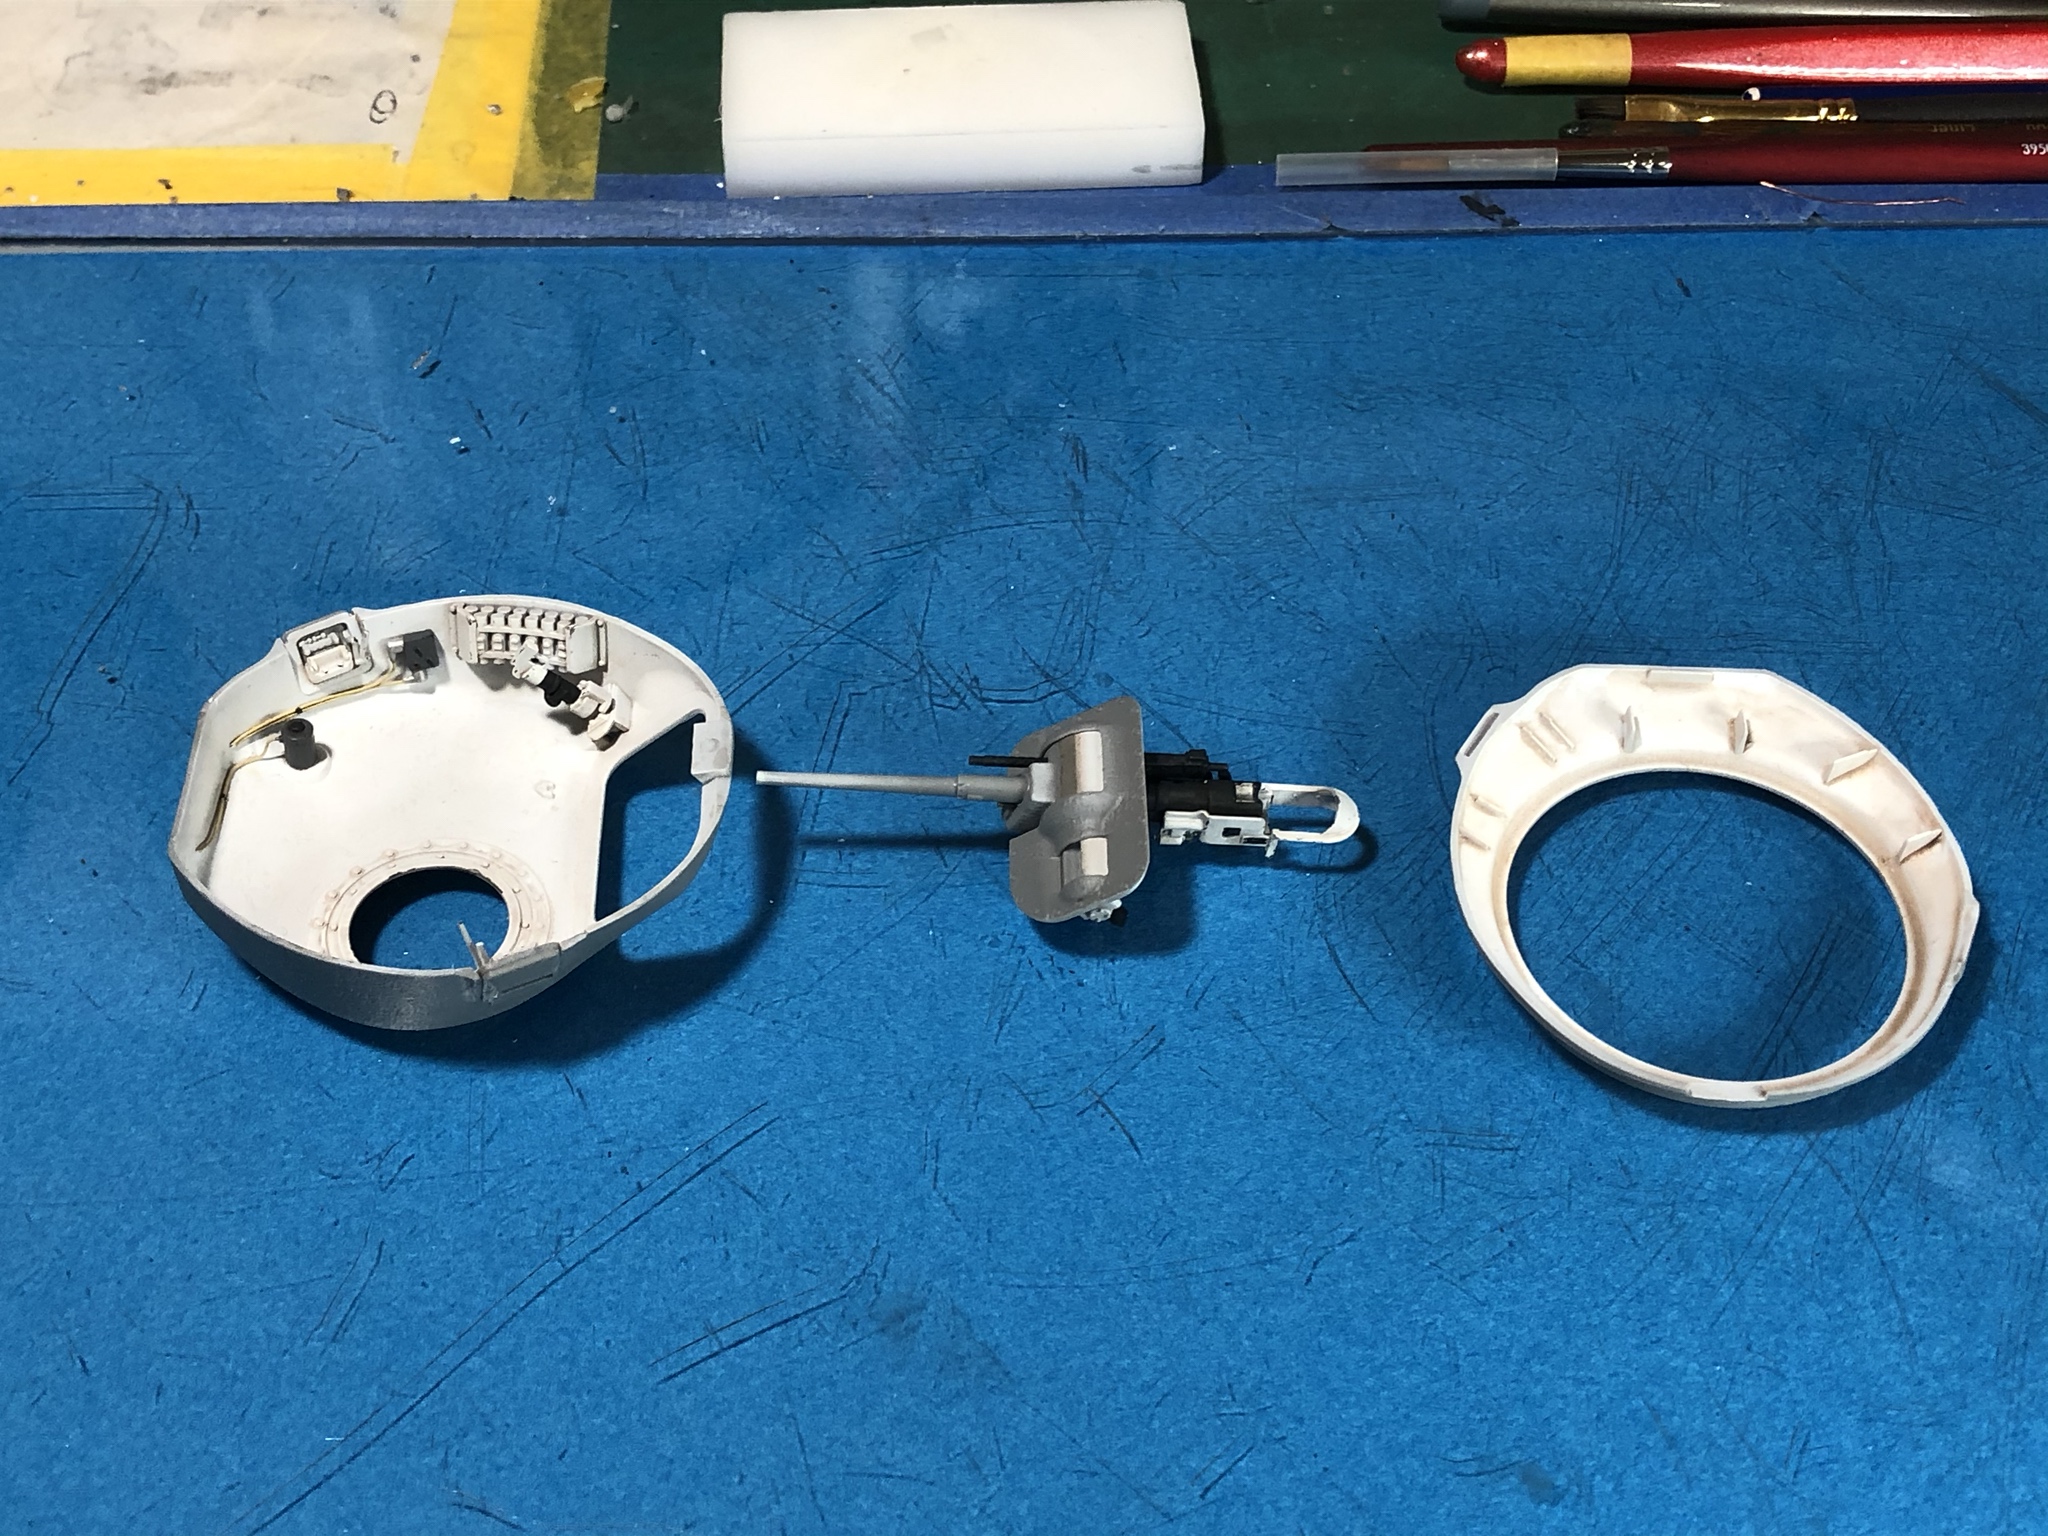
A quick update on the Grant. I was not happy with the barrels for the 75mm and 37mm guns due to offset bores on my kit. Correction of the offset was marginally successful, but I decided to replace them with metal items. The ones I used were from the Grant set for the Academy kit done by Barrel Depot. The seats for the parts on the kit required boring out and the 37mm gun had to be turned down on a lathe to get the correct length.

Here are some pictures of then items after installation.


It would have been a much quicker process if I hadn’t installed the kit parts to begin with!

Cheers
PRH001
Visit this Community
New Mexico, United States
Joined: June 16, 2014
KitMaker: 681 posts
Armorama: 603 posts
Posted: Saturday, March 14, 2020 - 02:14 PM UTC
Finally got the seam work done on the turret. The amount of variation in the welding and grinding on the real vehicle’s turret made this one the hardest one I’ve done. The parts are not difficult to assemble, and if the seams on the prototype were regular, it would have taken 5 minutes to make them disappear. I used stretched sprue and Tamiya extra thin cement to fill the seams and build up certain areas. I also added some cast texturing in areas that sanding removed it and in areas where the molds lacked that detail.

If you go all out on duplicating the actual joints I can easily imagine people might assume you just didn’t know how to clean up the seam properly... Regardless, here is the way I chose to work my turret seams.


I also chose to replace the mantlet machine gun. I ended up cutting the barrel out of brass rod and shortened an old 30 cal PE jacket to sharpen the details somewhat.


PRH001
Visit this Community
New Mexico, United States
Joined: June 16, 2014
KitMaker: 681 posts
Armorama: 603 posts
Posted: Sunday, March 15, 2020 - 04:35 PM UTC
I made some additional progress on the Grant this weekend. I installed the 37mm gun and took care of the lower edge seams since they were pretty pronounced. I filled these with Deluxe Perfect Plastic Putty because of it’s ability to be applied, left to dry and then clean up the area with water later. It works very well when you have a glue seam that’s dried with slight recesses or pin holes because you can fill and fair those areas very easily to match the other portion of the seam.


Next up was the cleanup of the commander’s hatch. Careful work is required for the handles on this component.


Moving to the turret basket, the drive motor and the seat brackets were cleaned up and installed along with the Basket insert and it’s fittings. These were painted Tamiya White Primer and given a wash of Vallejo Earth Brown.


The rest of my modeling day was consumed with cleanup and painting the 37mm ammo components. Colors used were AK Xtreme Brass, Vallejo US Olive drab, Vallejo Stencil. Over this is a thin layer of Vallejo Black Wash and then a light coat of Tamiya smoke to restore some of the sheen to the brass.


The turret underside and the basket interior have numerous small parts to clean up and install, so I’ll try to make some headway throughout the week if I have time.

Hopefully this build log is helping someone.

Cheers!
PRH001
Visit this Community
New Mexico, United States
Joined: June 16, 2014
KitMaker: 681 posts
Armorama: 603 posts
Posted: Tuesday, March 17, 2020 - 02:51 PM UTC
Progress on the Grant since this weekend...

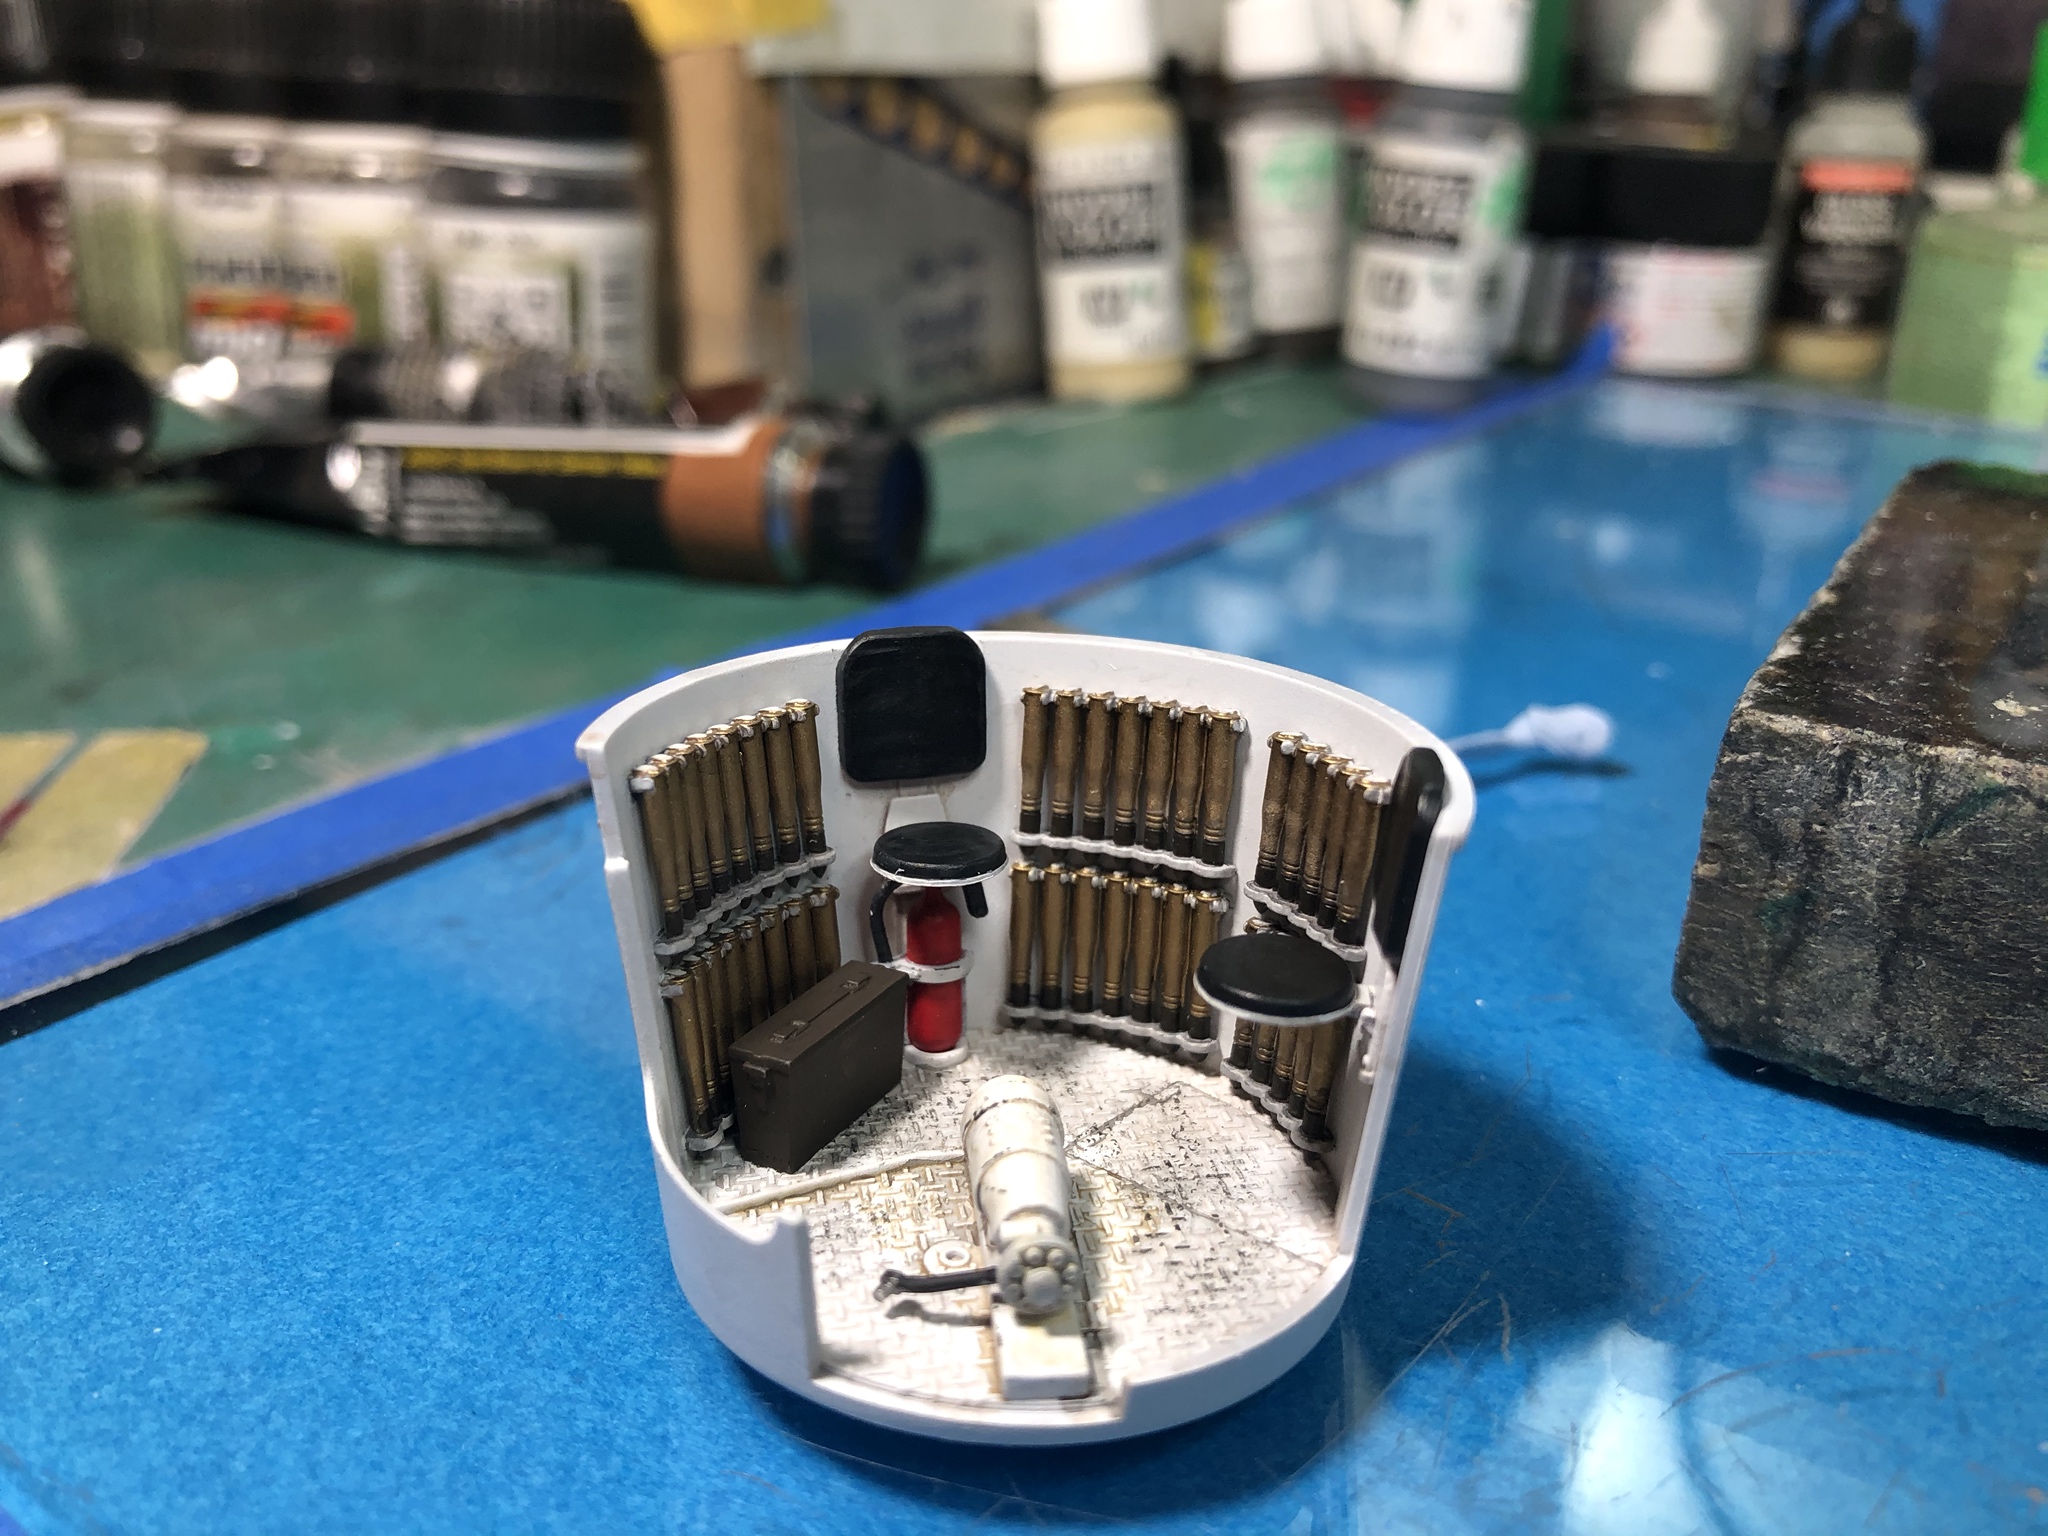
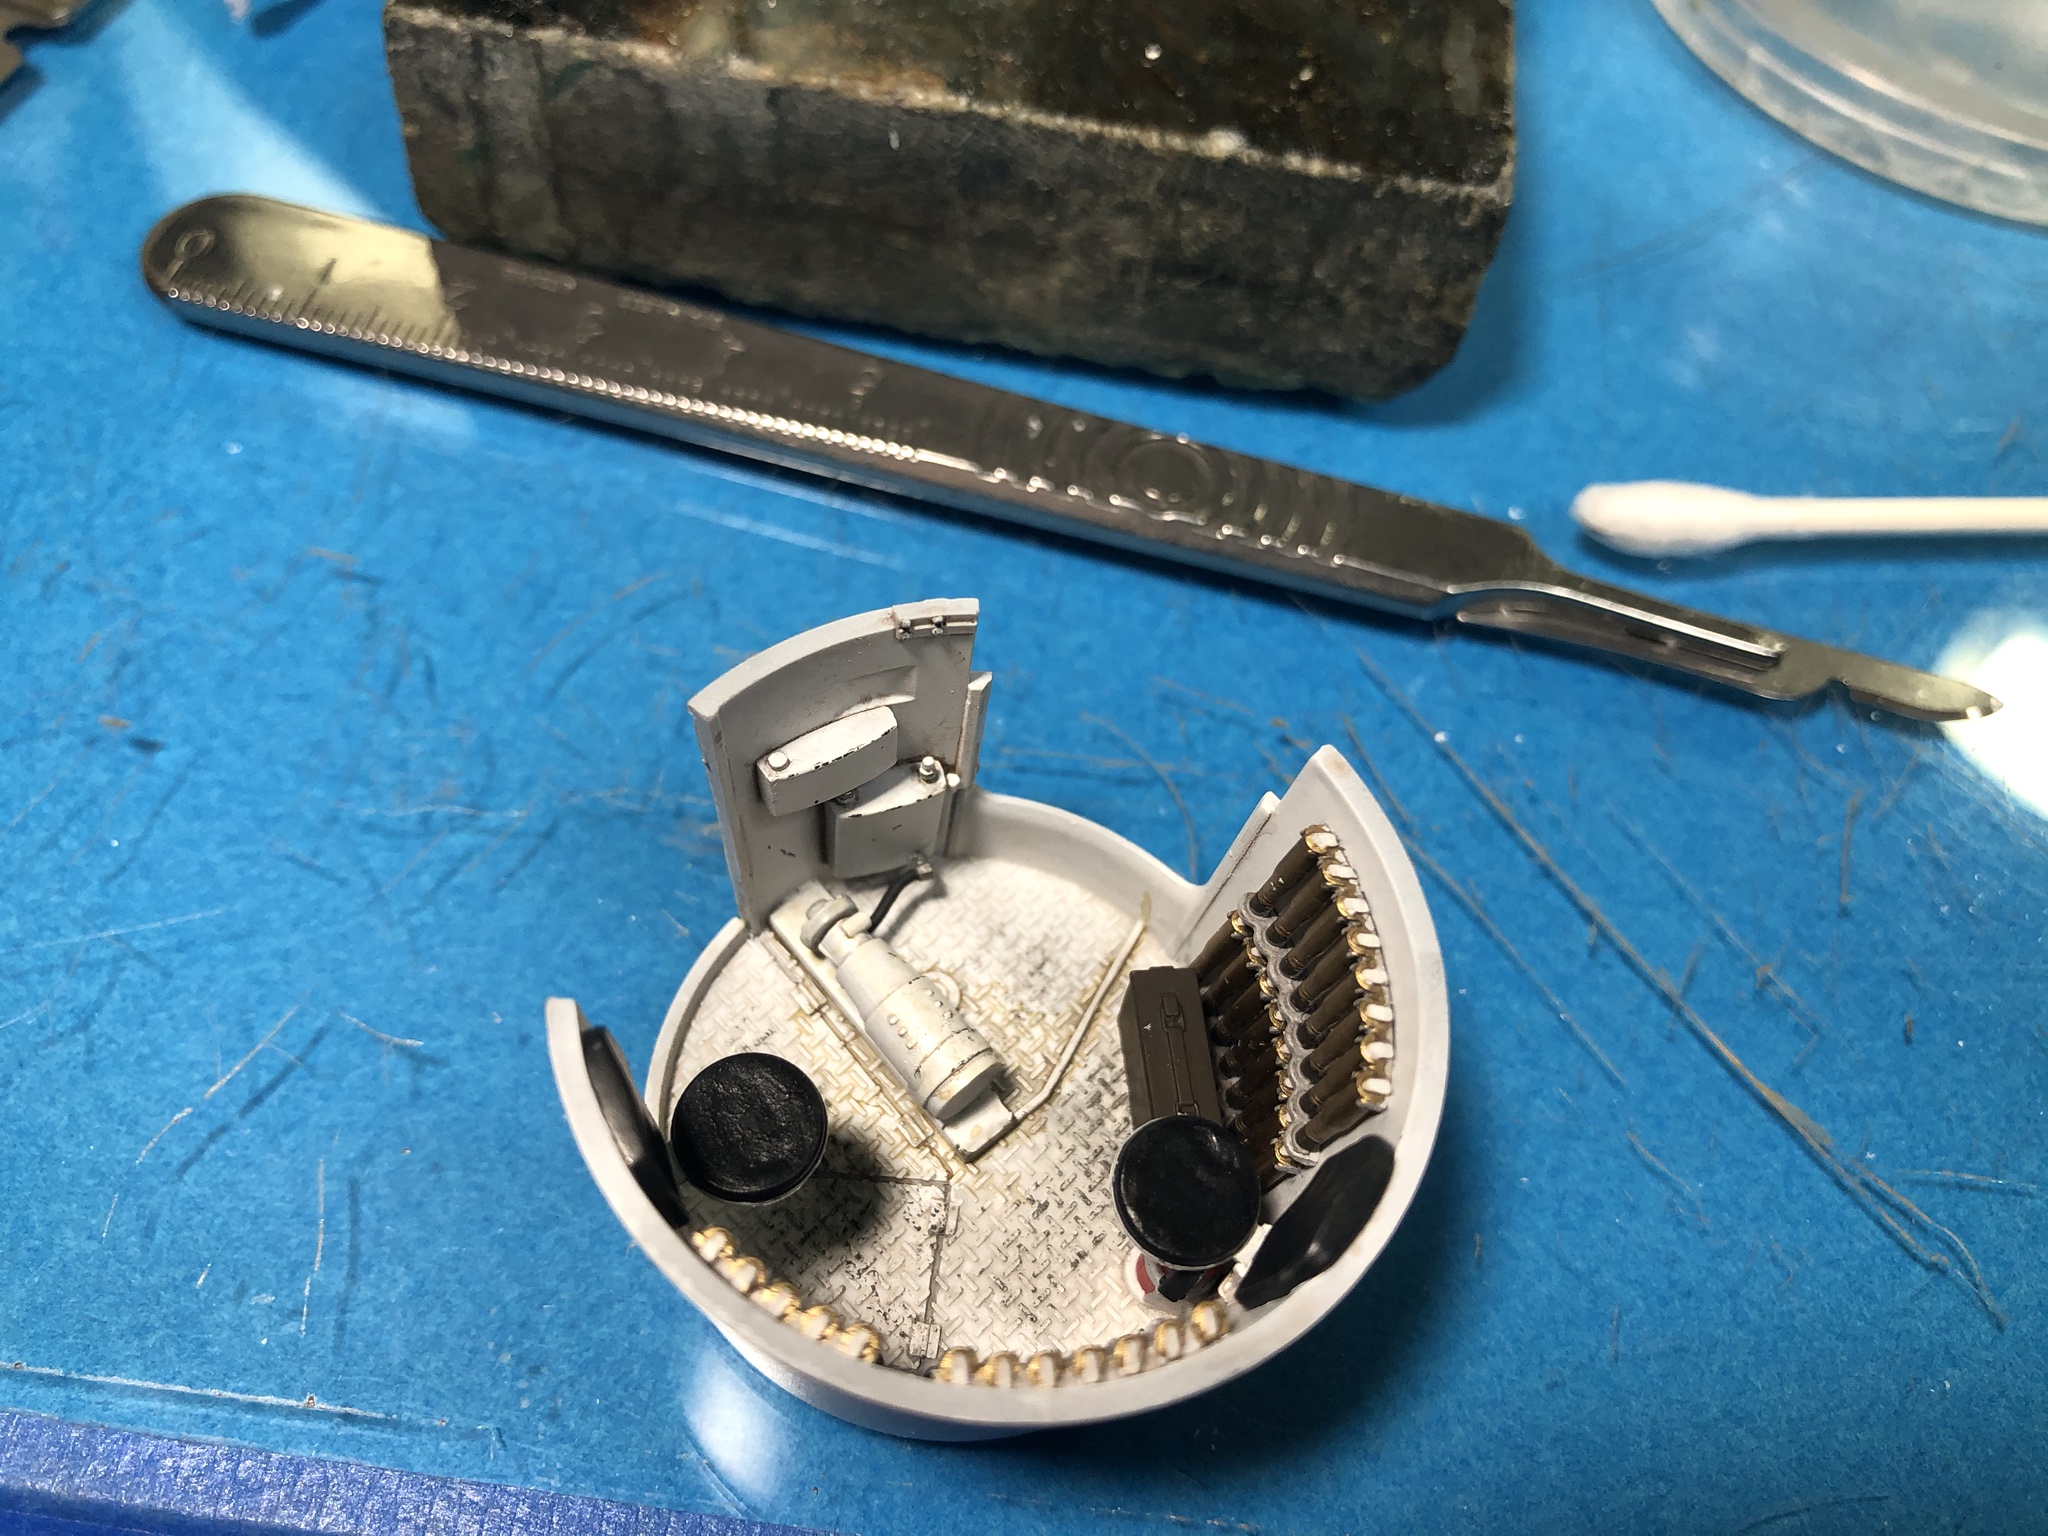
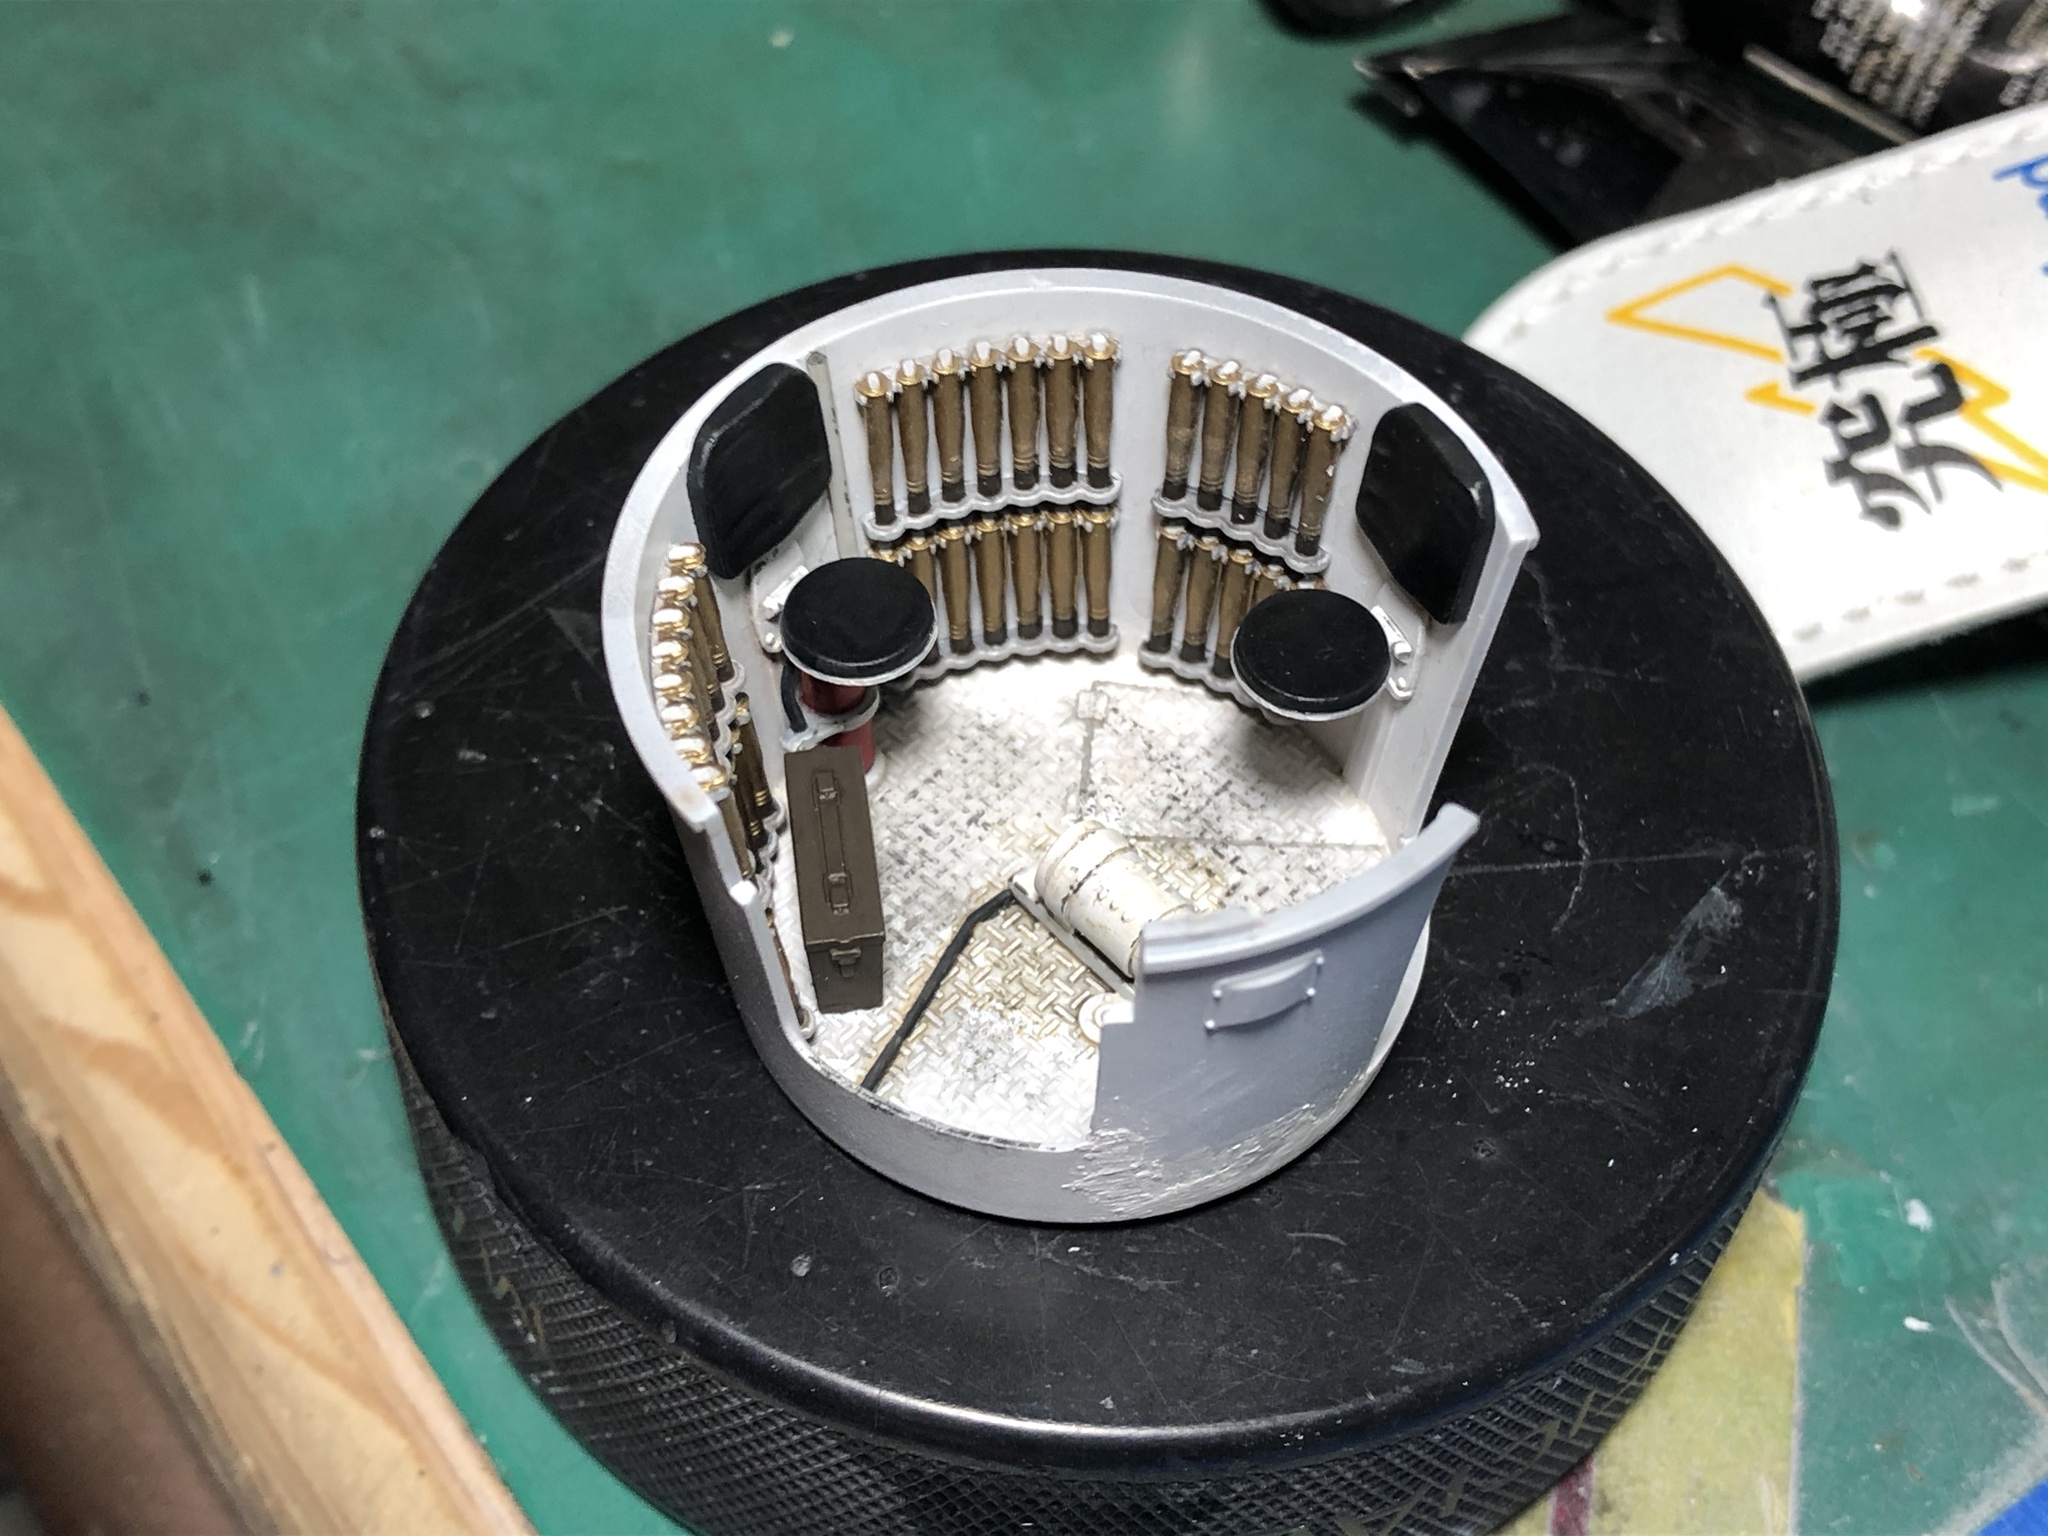
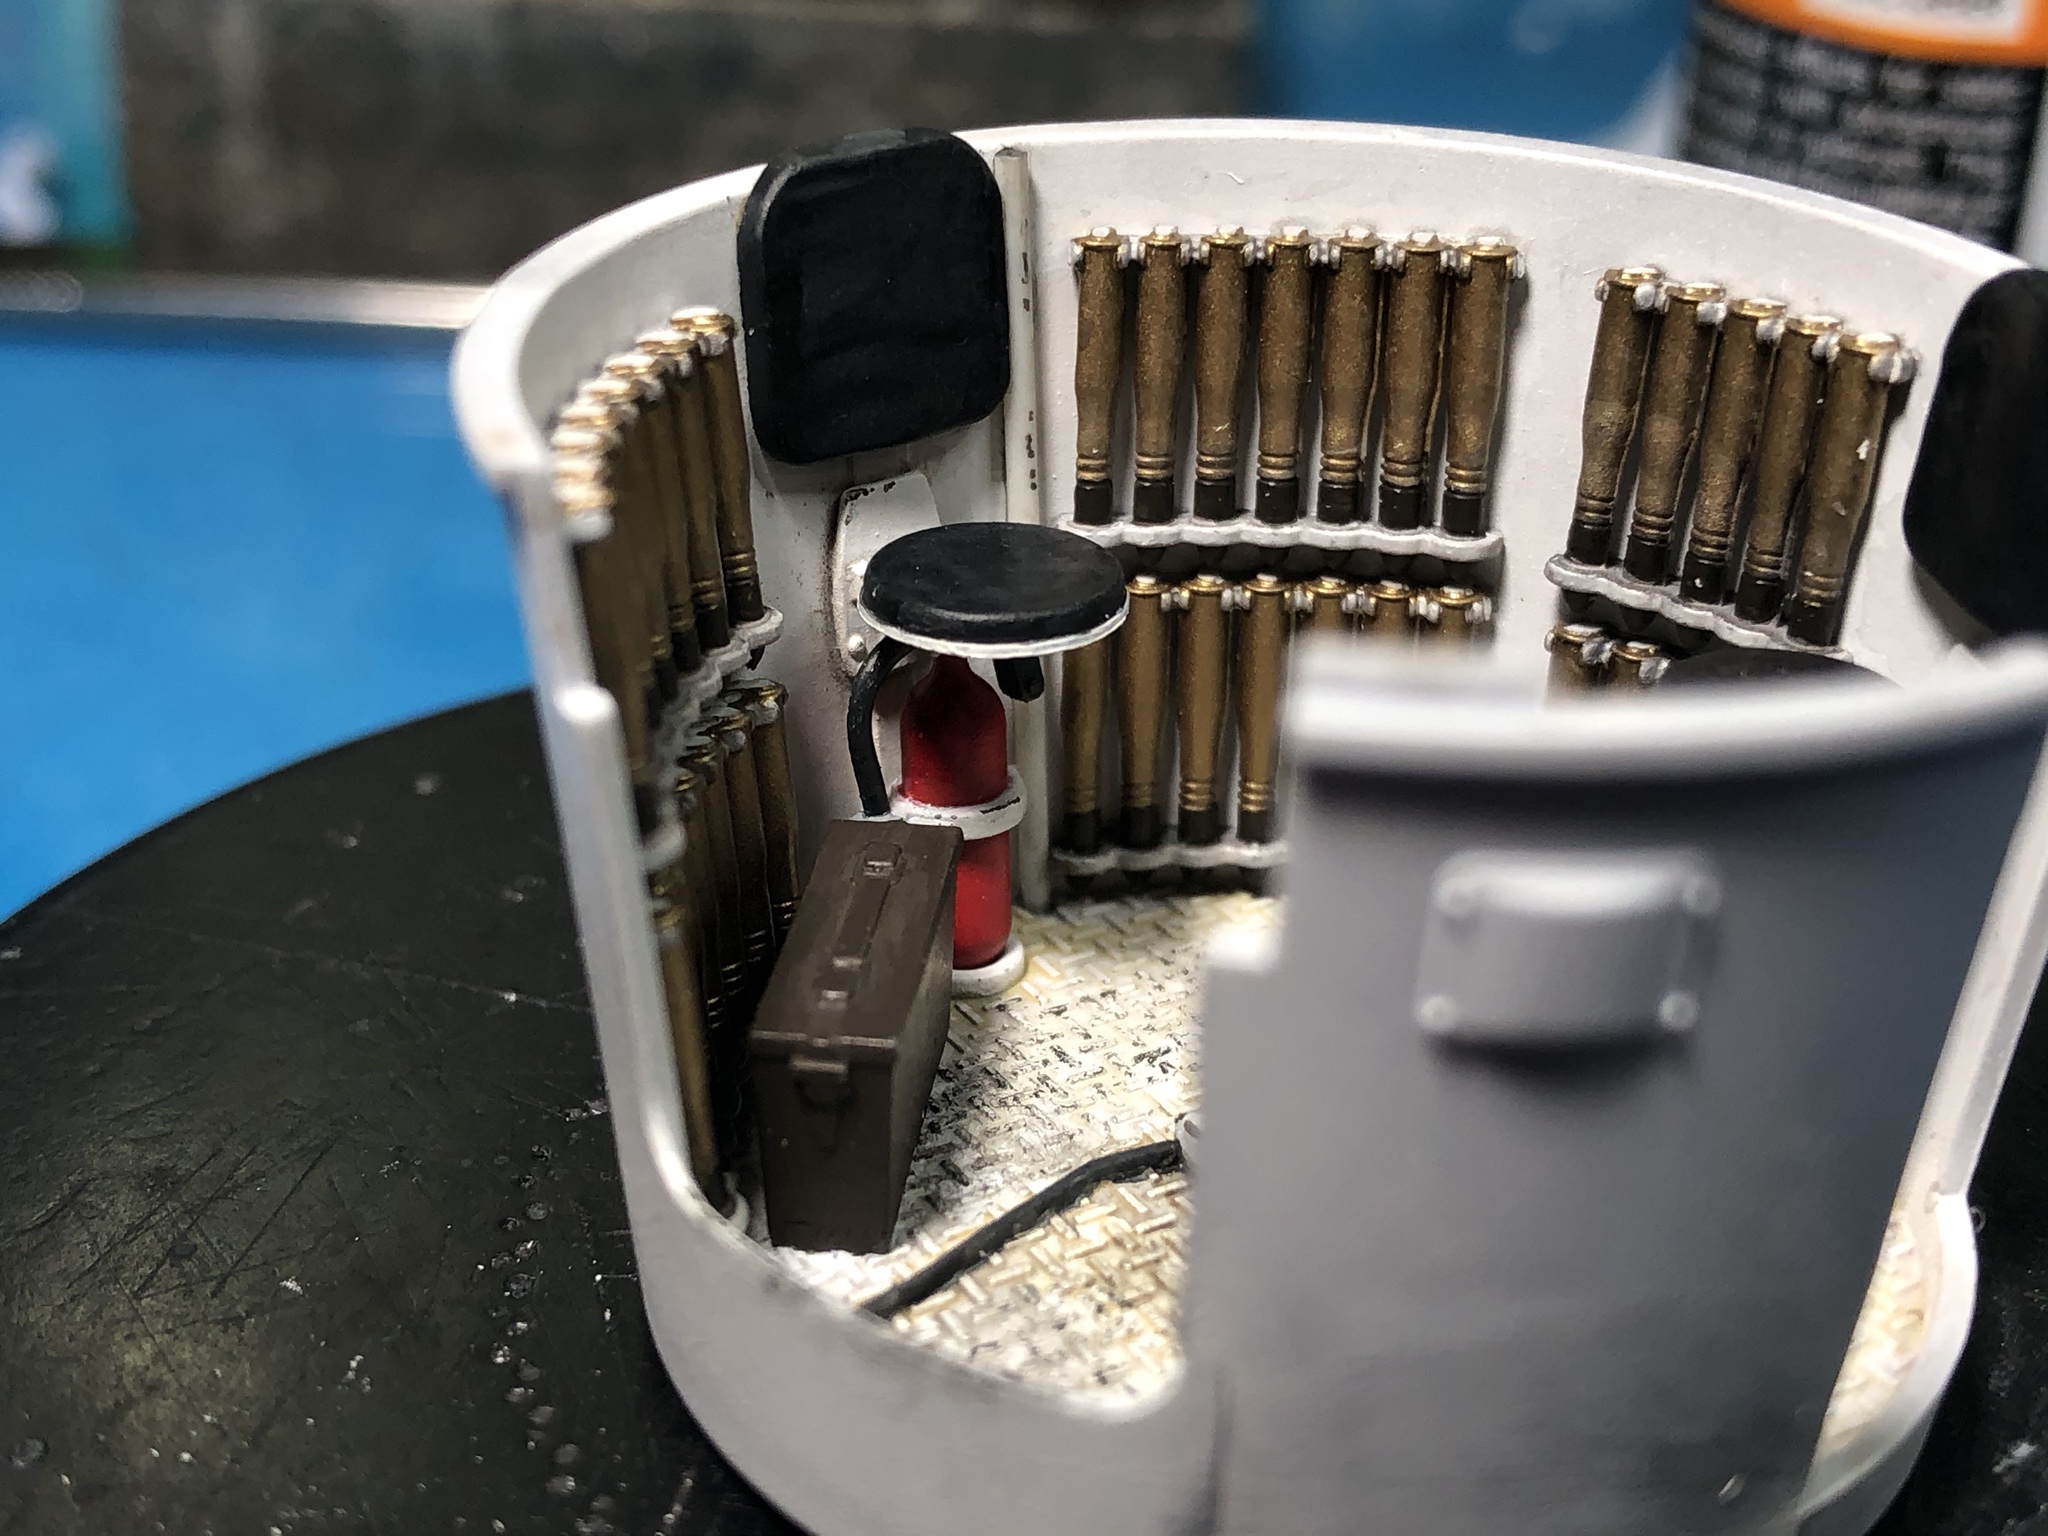
I began installing the ammo racks and fittings. The fire extinguisher is painted Vallejo Flat Red. The texturing on the seat pads was overdone and identical, so I scraped in new undulations for variety. The lower seat rims are painted Vallejo Stencil and the seat pads are painted Vallejo Black Grey with a Vallejo Black Wash over that. The last step for the painting of the seats was to use Vallejo Semi gloss clear to provide some sheen. The ammo box is Vallejo US Olive Drab with a lightly applied black wash.


Next up, I installed the small wall section. Here is an initial install pic.


Once the cement has set I did some more detail painting and weathering. The floor got additional items picked out in black grey and some light washes of black grey and Vallejo Oil wash to blend things together.


The seam for the small wall section that I added was filled with Deluxe Perfect Plastic Putty and left to dry for 15 mins or so.


I then sanded the seam, applied a thin film of CA glue over the filler and sanded again to ensure a smooth non-porous surface for paint.

Here are views from better angles to show the detail provided by Miniart.


The painting of the turret basket exterior will have to wait until I get some more downtime.

Cheers,
Paul H


PRH001
Visit this Community
New Mexico, United States
Joined: June 16, 2014
KitMaker: 681 posts
Armorama: 603 posts
Posted: Wednesday, March 18, 2020 - 04:04 PM UTC
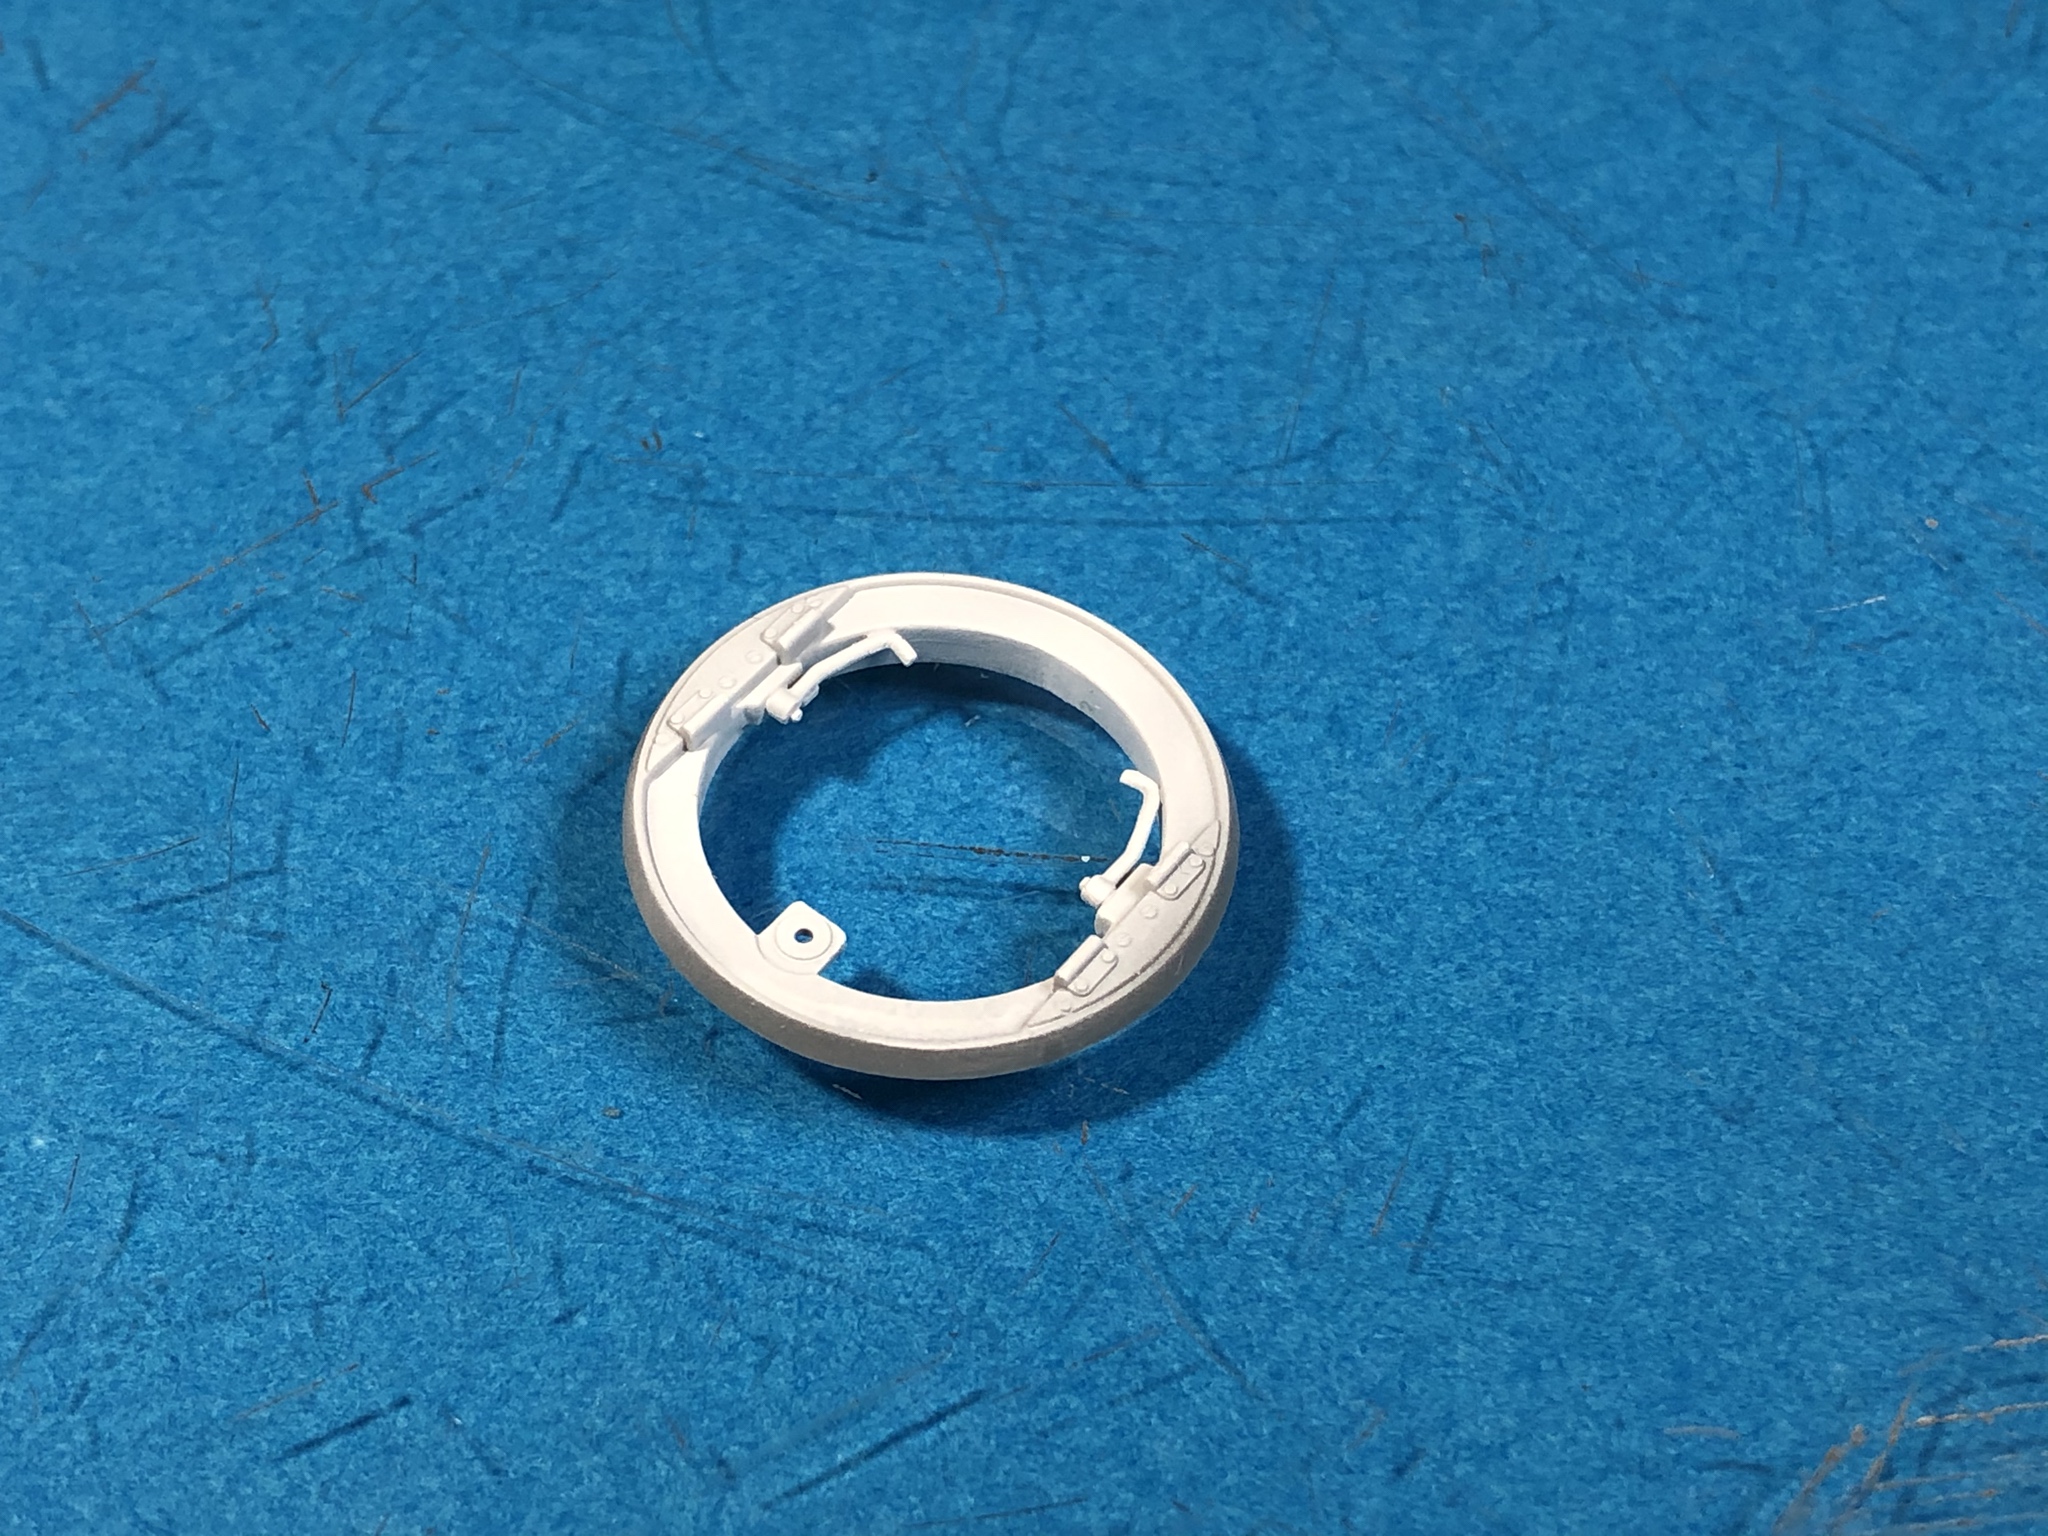
Finished closing up the lower portion of the turret basket. The small inserts fit pretty well and hiding the seams wasn’t too hard. I painted the reworked areas and weathered the in same fashion as all the white areas.


While filler was drying, I completed the 37mm cannon fittings installation.


Ammo box is painted Vallejo US Olive Drab
Turret basket and all lower gun fittings painted Tamiya White Primer and given a wash of Vallejo Flat Earth

howsthat1959
Visit this Community
Alabama, United States
Joined: October 06, 2015
KitMaker: 15 posts
Armorama: 15 posts
Posted: Thursday, March 19, 2020 - 12:44 AM UTC
This is a fantastic build. One basic (and really unrelated to the actual build) question: what is that putty you use to hold the parts?
PRH001
Visit this Community
New Mexico, United States
Joined: June 16, 2014
KitMaker: 681 posts
Armorama: 603 posts
Posted: Thursday, March 19, 2020 - 02:52 AM UTC
Thanks! The putty is Blu Tack made by Bostick. Mine is more of a gray color because of all the paints that are mixed in with it over the months and years from holding items for spraying. I found out about it when I was stationed in the UK.

Funny thing is that I couldn’t find Blu Tack in the US for years, and I didn’t like any of the substitutes available locally. So, a kind-hearted friend in the UK used to send me a care package with a pack or two every 3 or 4 years. Now I can just order it online.


Fmatthews
Visit this Community
Pennsylvania, United States
Joined: July 25, 2010
KitMaker: 11 posts
Armorama: 10 posts
Posted: Thursday, March 19, 2020 - 03:26 AM UTC
Again-this looks great. I’ll be using it as a reference for my Miniart Lee with interior.

The tracks aren’t too awful once you get a pattern and find a rhythm. It took me a few evenings to do the first run, but only two sessions over one day to do the second. I pre-painted the blocks and the connectors, which helped immensely. The process that worked best for me was to lay the connector pins in the bottom block half, apply liquid cement (just Testors bottle stuff) only on the divot and surrounding surface of the bottom pad-do not get cement in the connector pin slots. Press the inner block half. Once this sets for a few seconds, pry it apart slightly and add the next set of connector pins. Rinse and repeat. I found it easiest and quickest to work outwards from the middle. After assembling a few links (10-20), I’d touch up the paint where necessary. Tracks remain workable with this method.
https://flic.kr/p/2iFHXzs
PRH001
Visit this Community
New Mexico, United States
Joined: June 16, 2014
KitMaker: 681 posts
Armorama: 603 posts
Posted: Thursday, March 19, 2020 - 04:05 AM UTC
Great work! Hopefully mine will come out well also. You just never know what's gonna happen when you start applying finishes on long term projects. I also appreciate your taking the time to share your method of assembly for the tracks. It provides a different perspective and may be just the ticket someone needed.

Congrats and Cheers
howsthat1959
Visit this Community
Alabama, United States
Joined: October 06, 2015
KitMaker: 15 posts
Armorama: 15 posts
Posted: Thursday, March 19, 2020 - 06:10 AM UTC
Thanks. Of course, Amazon carries it. Assuming the whole country isn't completely shut down in the next few days, I should have some. Also got a hockey puck.
PRH001
Visit this Community
New Mexico, United States
Joined: June 16, 2014
KitMaker: 681 posts
Armorama: 603 posts
Posted: Thursday, March 19, 2020 - 02:12 PM UTC
;-) Hockey pucks and BluTack; I’d be at a total loss without mine...