MiniArt Grant w/interior build log interest?
New Mexico, United States
Joined: June 16, 2014
KitMaker: 681 posts
Armorama: 603 posts
Posted: Saturday, April 04, 2020 - 03:45 PM UTC
Well, there will be some desaturation based on the desert environment weathering, but fading will be minimal. The vehicle Iím doing was from late May-early June of Ď42 which means the Grants had only been in theater for a few months and out of the paint shop for well less than that. The desert environment creates wear quickly, so there will definitely be some, but it will not be heavily worn.
My current intent is to desaturate with light oils, but that may change as I get started.
Iím not sure if I answered your question well enough... If not, please let me know what additional info you were looking for, as Iím not trying to be obscure, Iím just not following a set pattern for this build.

On the Bench
MiniArt Grant Mk I with Interior
IBG Marmon-Herrington MKII
New South Wales, Australia
Joined: May 04, 2016
KitMaker: 1,476 posts
Armorama: 1,463 posts
Posted: Saturday, April 04, 2020 - 03:58 PM UTC
Fair enough sounds like a good plan & no it wasnít a rhetorical question, Iím always open to how others do/perceive things and particularly interested/curious what your preferred methods are going to be. If I did have anything in mind itís only that in all the thousands of photos of AFVs that have passed before my eyes, they all seem to have suffered wear & fading within seconds of leaving the factory


New Mexico, United States
Joined: June 16, 2014
KitMaker: 681 posts
Armorama: 603 posts
Posted: Saturday, April 04, 2020 - 05:08 PM UTC
You are absolutely correct. Brand new military equipment begins to show wear almost immediately. My plan is to find pics of the early desert arrivals and hopefully come close to those wear patterns.
Cheers!
On the Bench
MiniArt Grant Mk I with Interior
IBG Marmon-Herrington MKII
New Mexico, United States
Joined: June 16, 2014
KitMaker: 681 posts
Armorama: 603 posts
Posted: Sunday, April 05, 2020 - 01:12 PM UTC
Today I applied the markings for this build. A heads up for all builders of this kit, the white for the decals is translucent. If you intend to use them youíll need to under paint those locations or ensure that no color transitions happen under the white portions of your decals.

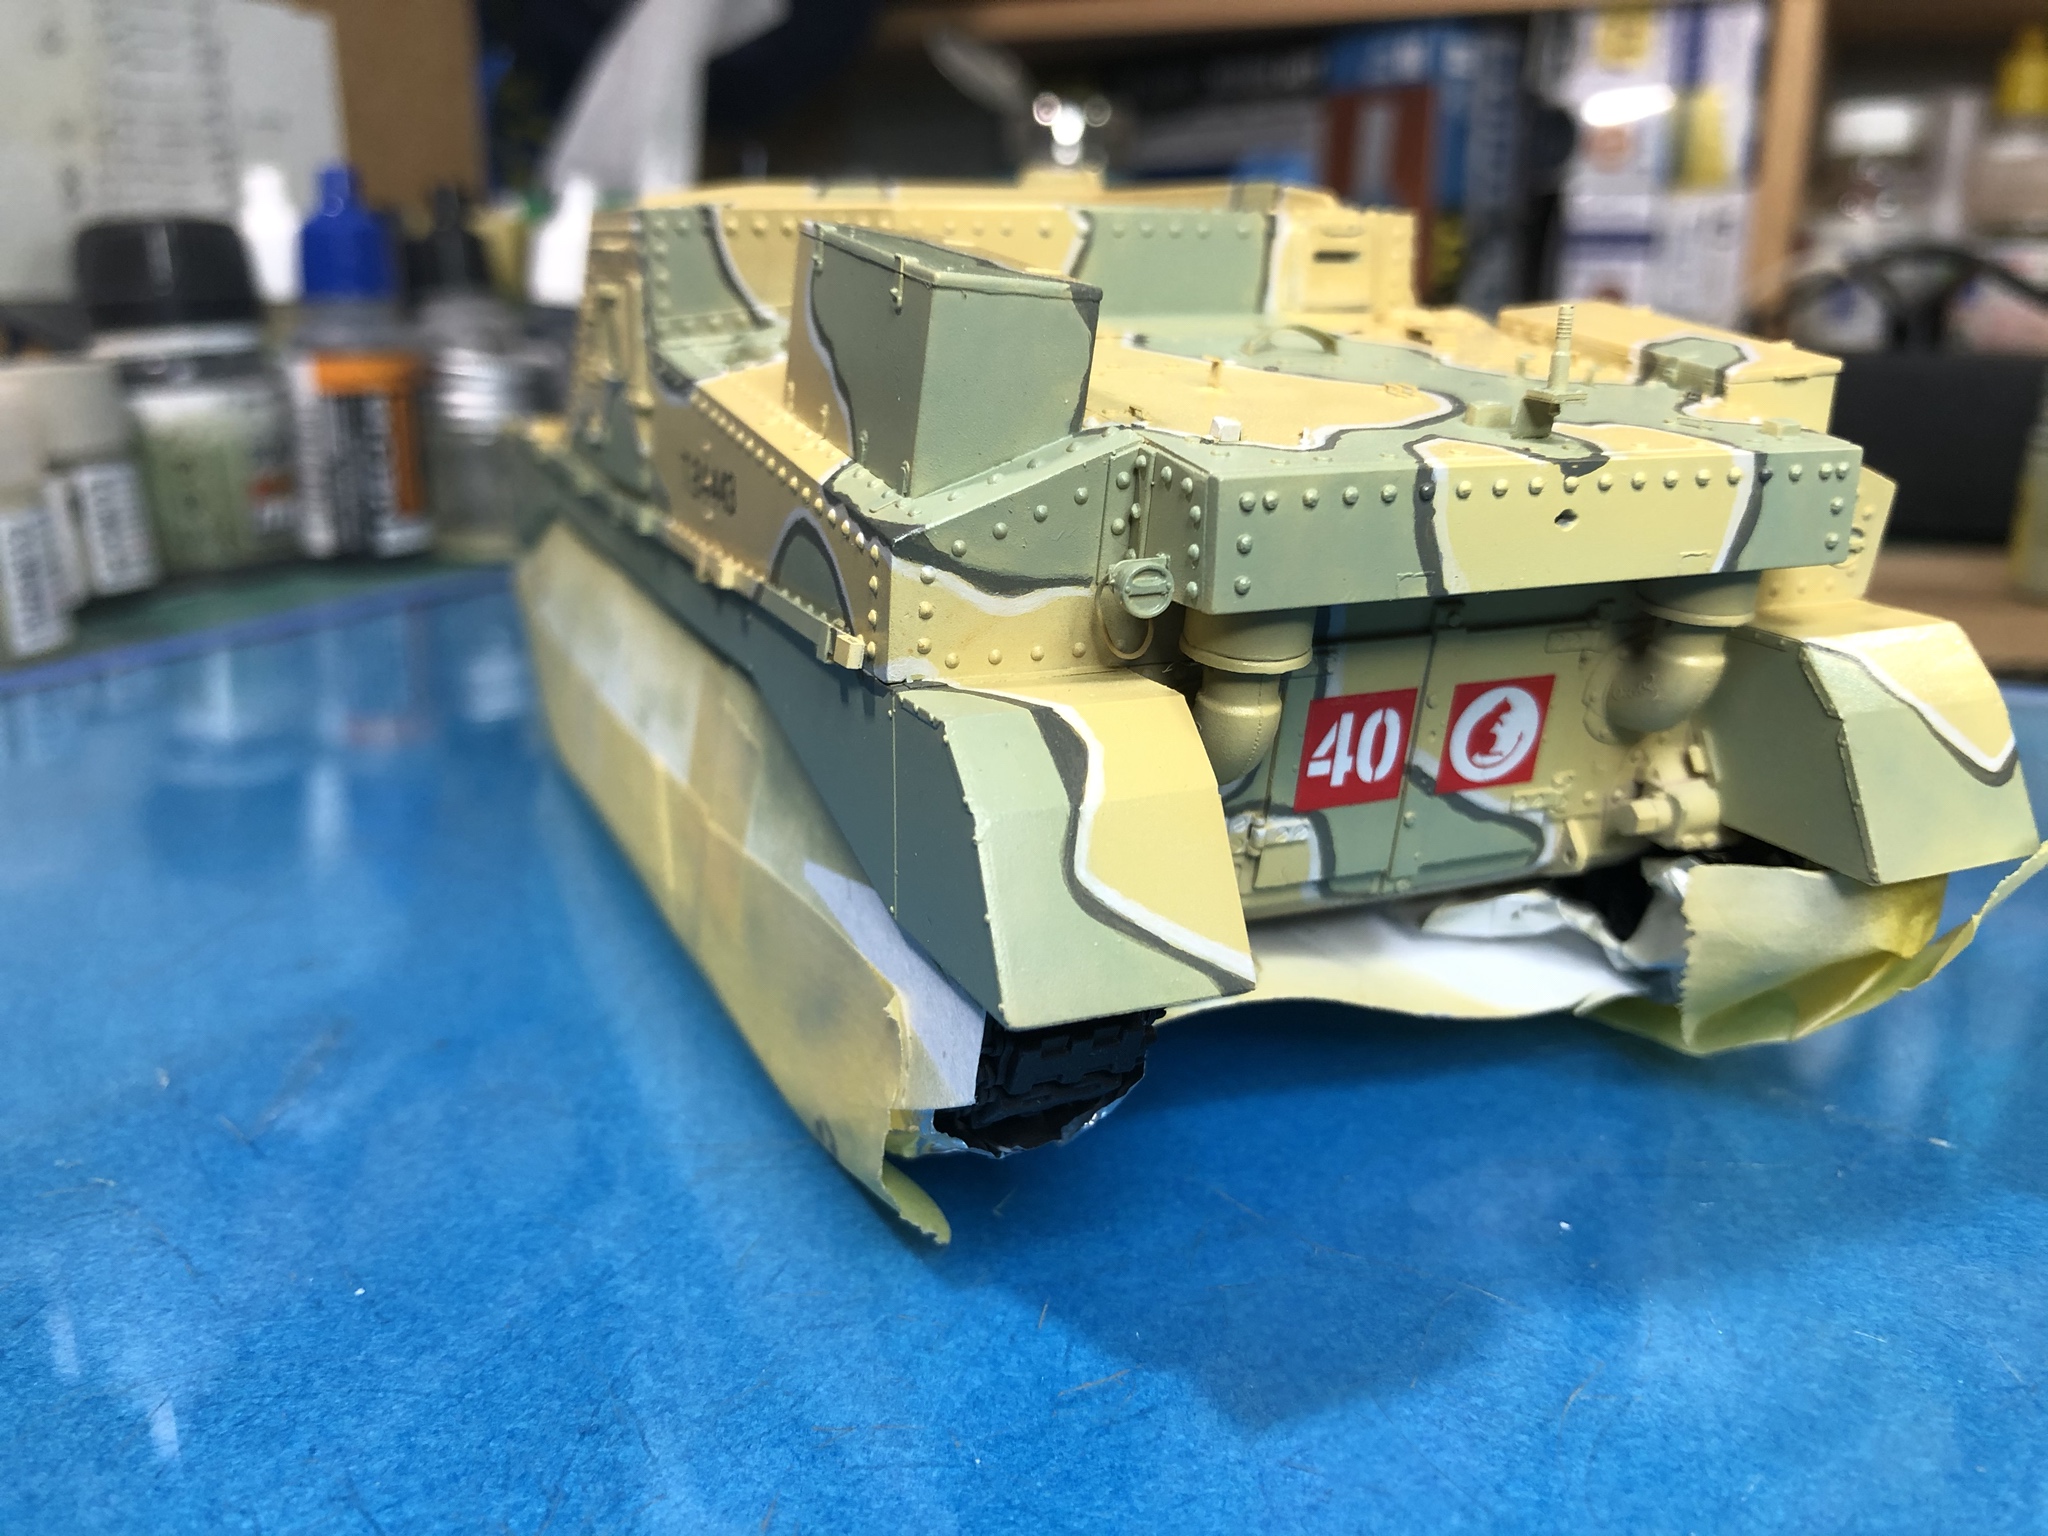

On the plus side, the decals conform to detail beautifully and respond well to Micro Sol and to Solvaset. Those are the only two solvents I had a chance to test, so others may also work well. A word of caution with the Solvaset; very little is needed and you wonít want to leave any droplets on the decals as they can bubble at that location.
Hope this info helps someone.
Cheers all
On the Bench
MiniArt Grant Mk I with Interior
IBG Marmon-Herrington MKII
CMOT
 Editor-in-Chief
England - South West, United Kingdom
Joined: May 14, 2006
KitMaker: 10,954 posts
Armorama: 8,571 posts
Posted: Sunday, April 05, 2020 - 11:47 PM UTC
I really like and appreciate the effort you have put into the painting of this model.
New Mexico, United States
Joined: June 16, 2014
KitMaker: 681 posts
Armorama: 603 posts
Posted: Monday, April 06, 2020 - 12:22 AM UTC
Thanks Darren. Iíve enjoyed the build very much. Iím hoping to get the second clear gloss coat on maybe tonight or tomorrow evening so I can press on with the build.
Cheers and stay well
On the Bench
MiniArt Grant Mk I with Interior
IBG Marmon-Herrington MKII
Wisconsin, United States
Joined: April 05, 2007
KitMaker: 2,023 posts
Armorama: 1,234 posts
Posted: Monday, April 06, 2020 - 12:44 AM UTC
Looking good Paul ! I too have enjoyed the build and have learned a lot. Not just tips & quirks about the kit but general modeling tips. Your PE soldering seminar helped to de-mystify the process for me.
Looking forward to the day when you say, "done"!
On the bench :
A whole bunch of figures, Too many half built kits and a (gasp) wing thing
New Mexico, United States
Joined: June 16, 2014
KitMaker: 681 posts
Armorama: 603 posts
Posted: Monday, April 06, 2020 - 05:43 AM UTC
As always, I appreciate the support and the kind words! Iím definitely looking forward to seeing this one on the shelf complete myself. Iíve enjoyed doing the build and also doing this build log. Hopefully people can tell me where it went poorly and what needs to done to make future logs, if there are any, better.
On the Bench
MiniArt Grant Mk I with Interior
IBG Marmon-Herrington MKII
Washington, United States
Joined: August 09, 2002
KitMaker: 1,742 posts
Armorama: 1,658 posts
Posted: Monday, April 06, 2020 - 11:52 AM UTC
Well, that is a pretty paint scheme. Nice work, good choices in color selection.
Msgt Retired USMC
M48/ M60A1/ M1A1
Semper Fi!
New Mexico, United States
Joined: June 16, 2014
KitMaker: 681 posts
Armorama: 603 posts
Posted: Monday, April 06, 2020 - 02:41 PM UTC
Greg, you made me laugh! I never thought of it as being pretty...
I went with this scheme because it was different than the the standard Light Stone or Portland Stone schemes common on the early Grants or the much later two and three color schemes that are more popular.
I hadnít personally seen a Grant built with any of the locally developed early camo schemes done with leftover paint stocks available in May-June 42, so I went with that.
On the Bench
MiniArt Grant Mk I with Interior
IBG Marmon-Herrington MKII
California, United States
Joined: January 30, 2013
KitMaker: 537 posts
Armorama: 531 posts
Posted: Monday, April 06, 2020 - 03:35 PM UTC
Wow! What a fantastic job! Inside and out it just looks amazing. Beautiful work Paul!
New Mexico, United States
Joined: June 16, 2014
KitMaker: 681 posts
Armorama: 603 posts
Posted: Tuesday, April 07, 2020 - 04:31 AM UTC
Thanks! I always appreciate it when people take the time to provide humor, comments, advice, constructive feedback or ask questions.
Cheers and stay well
On the Bench
MiniArt Grant Mk I with Interior
IBG Marmon-Herrington MKII
Pennsylvania, United States
Joined: April 09, 2015
KitMaker: 1,063 posts
Armorama: 1,000 posts
Posted: Tuesday, April 07, 2020 - 04:37 AM UTC
Very nice paint scheme. Heavy or light weathering?
"No plan survives contact with the enemy." Helmuth von Moltke the Elder
New Mexico, United States
Joined: June 16, 2014
KitMaker: 681 posts
Armorama: 603 posts
Posted: Tuesday, April 07, 2020 - 06:14 AM UTC
Iím planning on doing relatively light weathering. A bit of wear, some dust, not absolutely inundated though. This one hadnít been in the desert for very long.
On the Bench
MiniArt Grant Mk I with Interior
IBG Marmon-Herrington MKII
California, United States
Joined: February 01, 2010
KitMaker: 551 posts
Armorama: 543 posts
Posted: Tuesday, April 07, 2020 - 08:40 AM UTC
I'm really digging that paint scheme. Kinda reminds me of the Bovington Grant!
I admire your interior work too, though I'm not sure I'd want to tackle that part. Do you intend to display it with open hatches? Be curious to see what's visible!
New Mexico, United States
Joined: June 16, 2014
KitMaker: 681 posts
Armorama: 603 posts
Posted: Tuesday, April 07, 2020 - 11:20 AM UTC
Yep, the current plan is one batches other than the gun ports. Turret hatch, drivers viewport, both hull sides and the engine bay doors will be open. Having the gun ports open spoiled the lines of the turret too much for me.

On the Bench
MiniArt Grant Mk I with Interior
IBG Marmon-Herrington MKII
New Mexico, United States
Joined: June 16, 2014
KitMaker: 681 posts
Armorama: 603 posts
Posted: Sunday, April 12, 2020 - 01:21 PM UTC
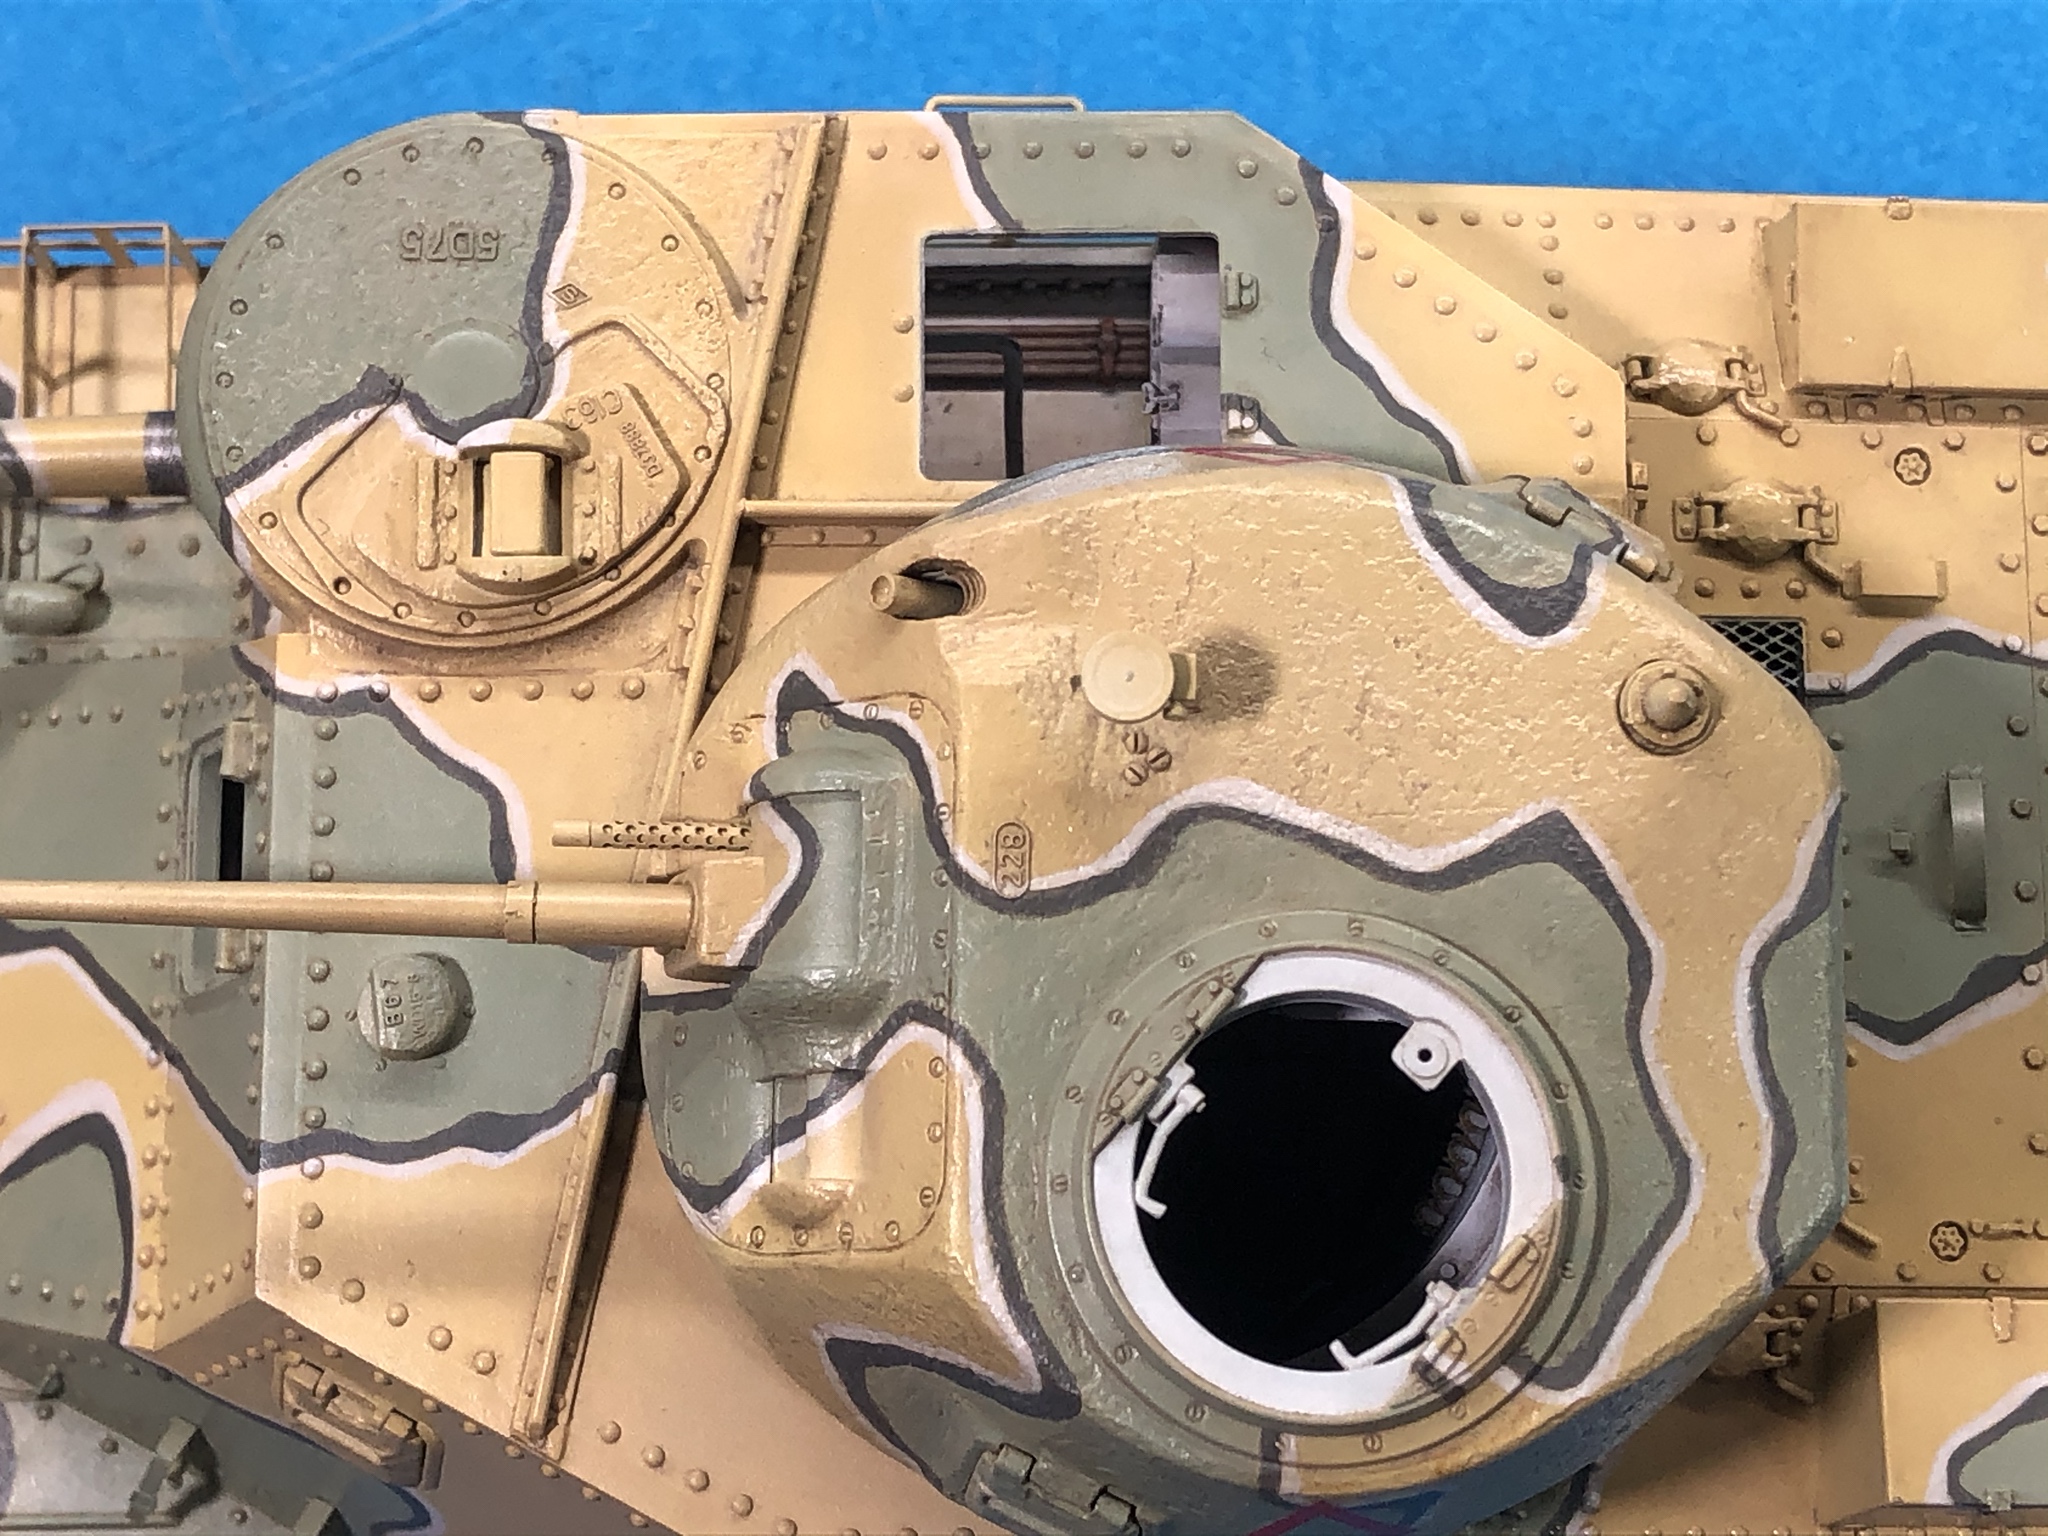
I had a busy week and didnít have a lot of time time spend on the Grant, but I did make some small progress. Iíve removed the hatches that were temp installed for painting and did the touch up painting for those areas.
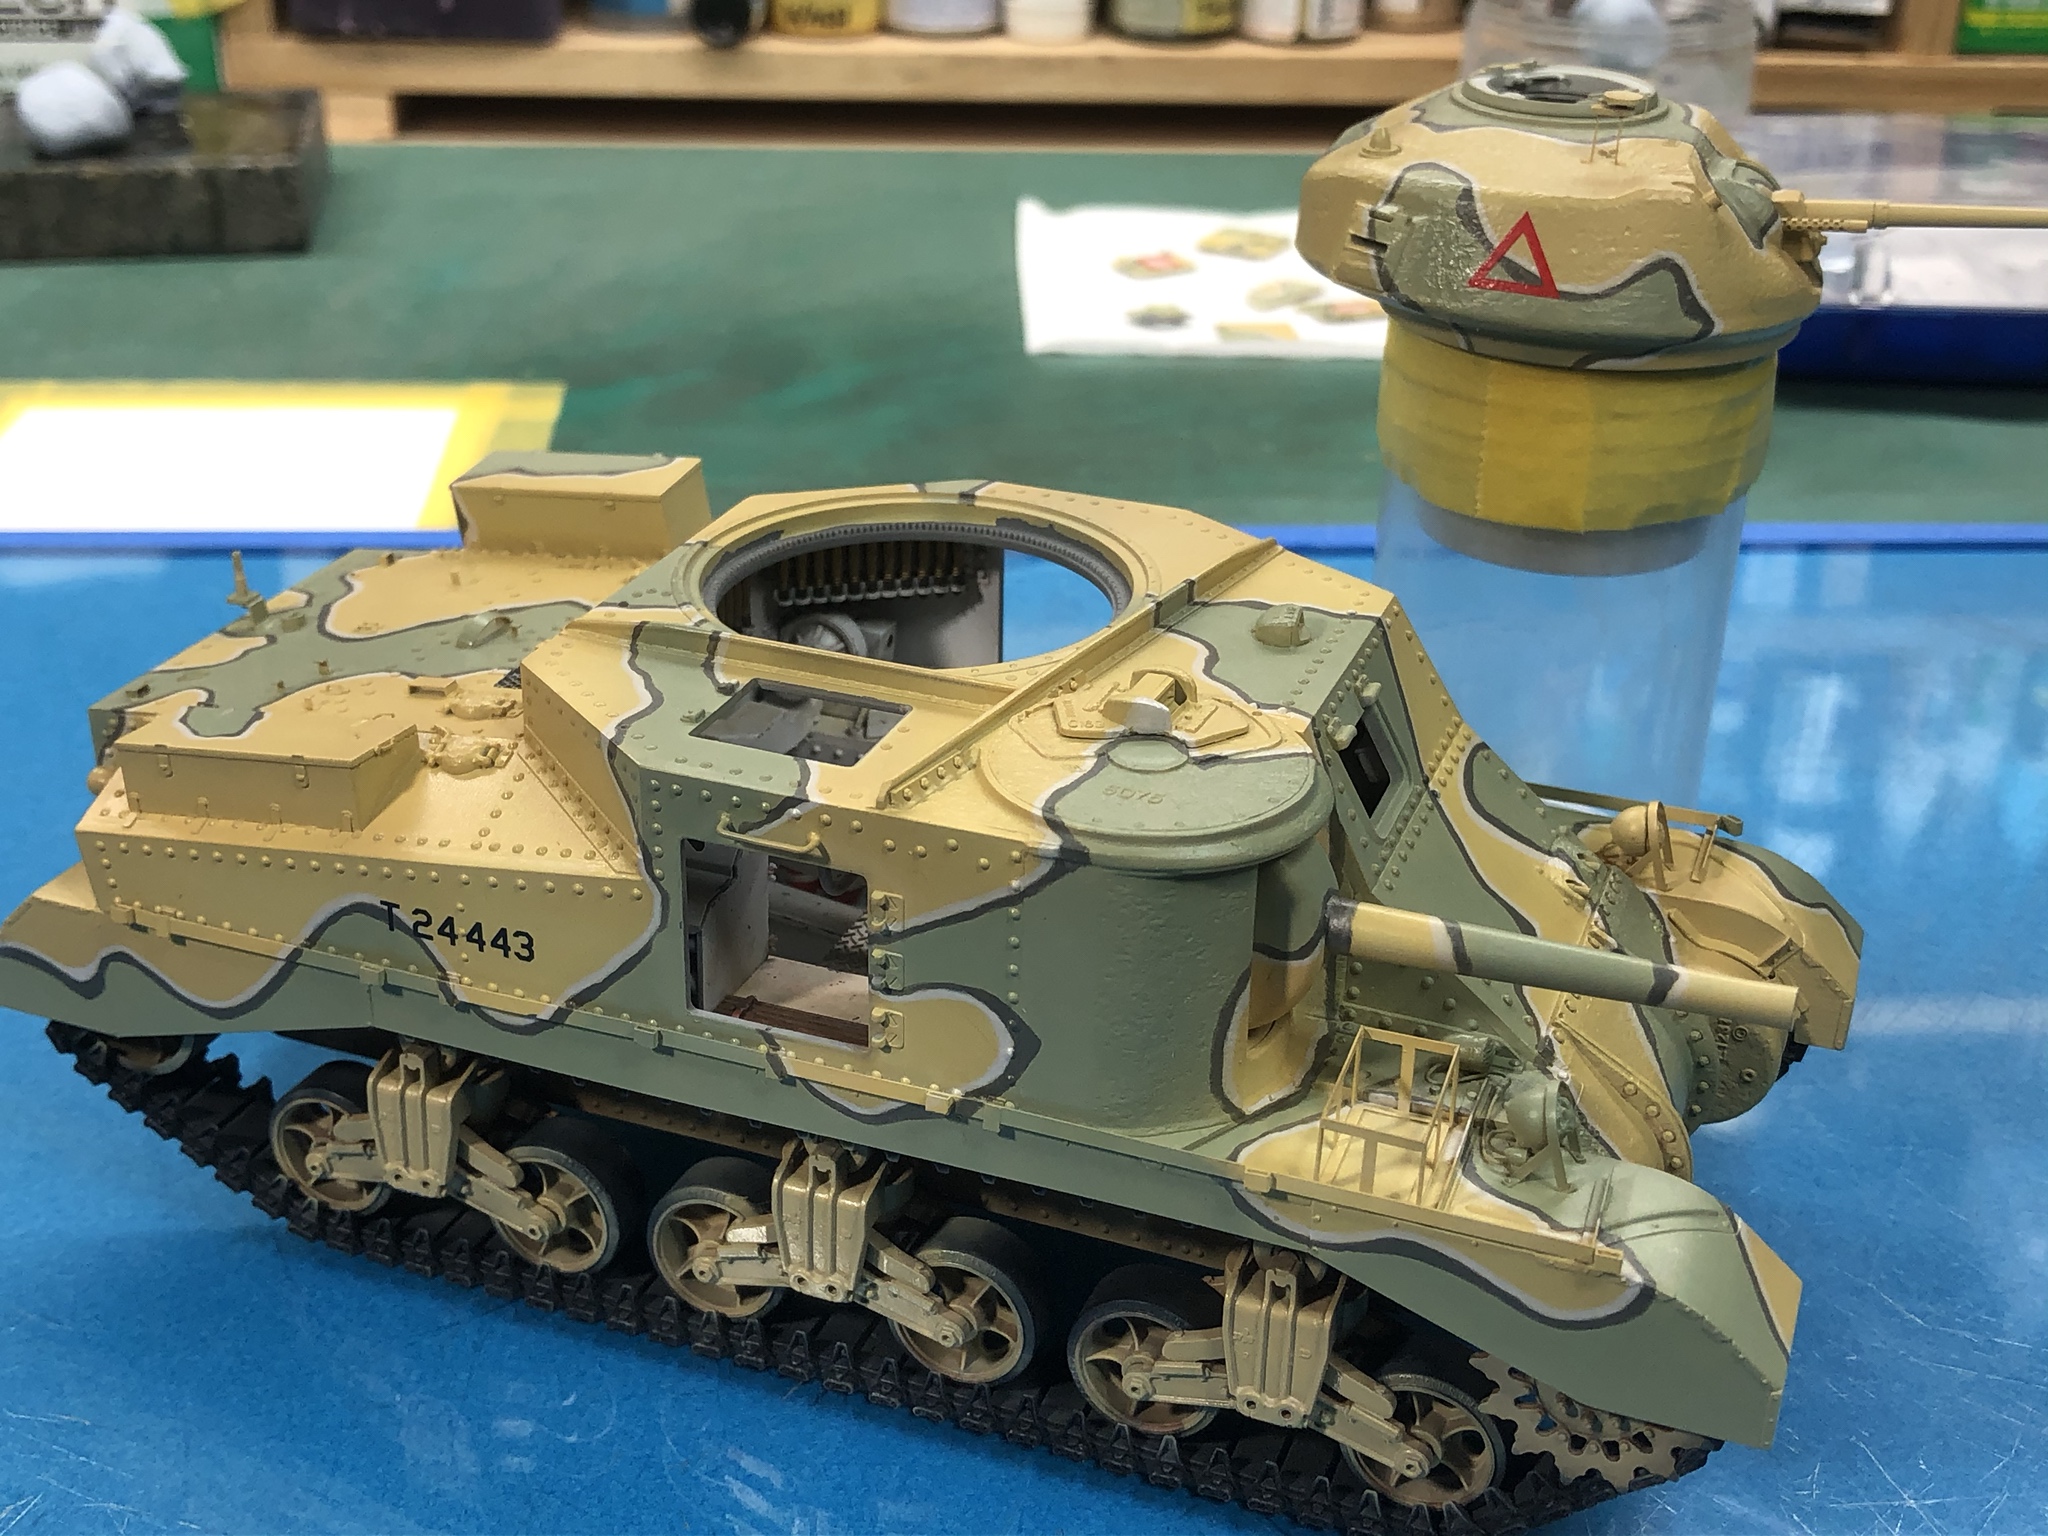

I also painted the grill on the upper deck when I did the touching up.
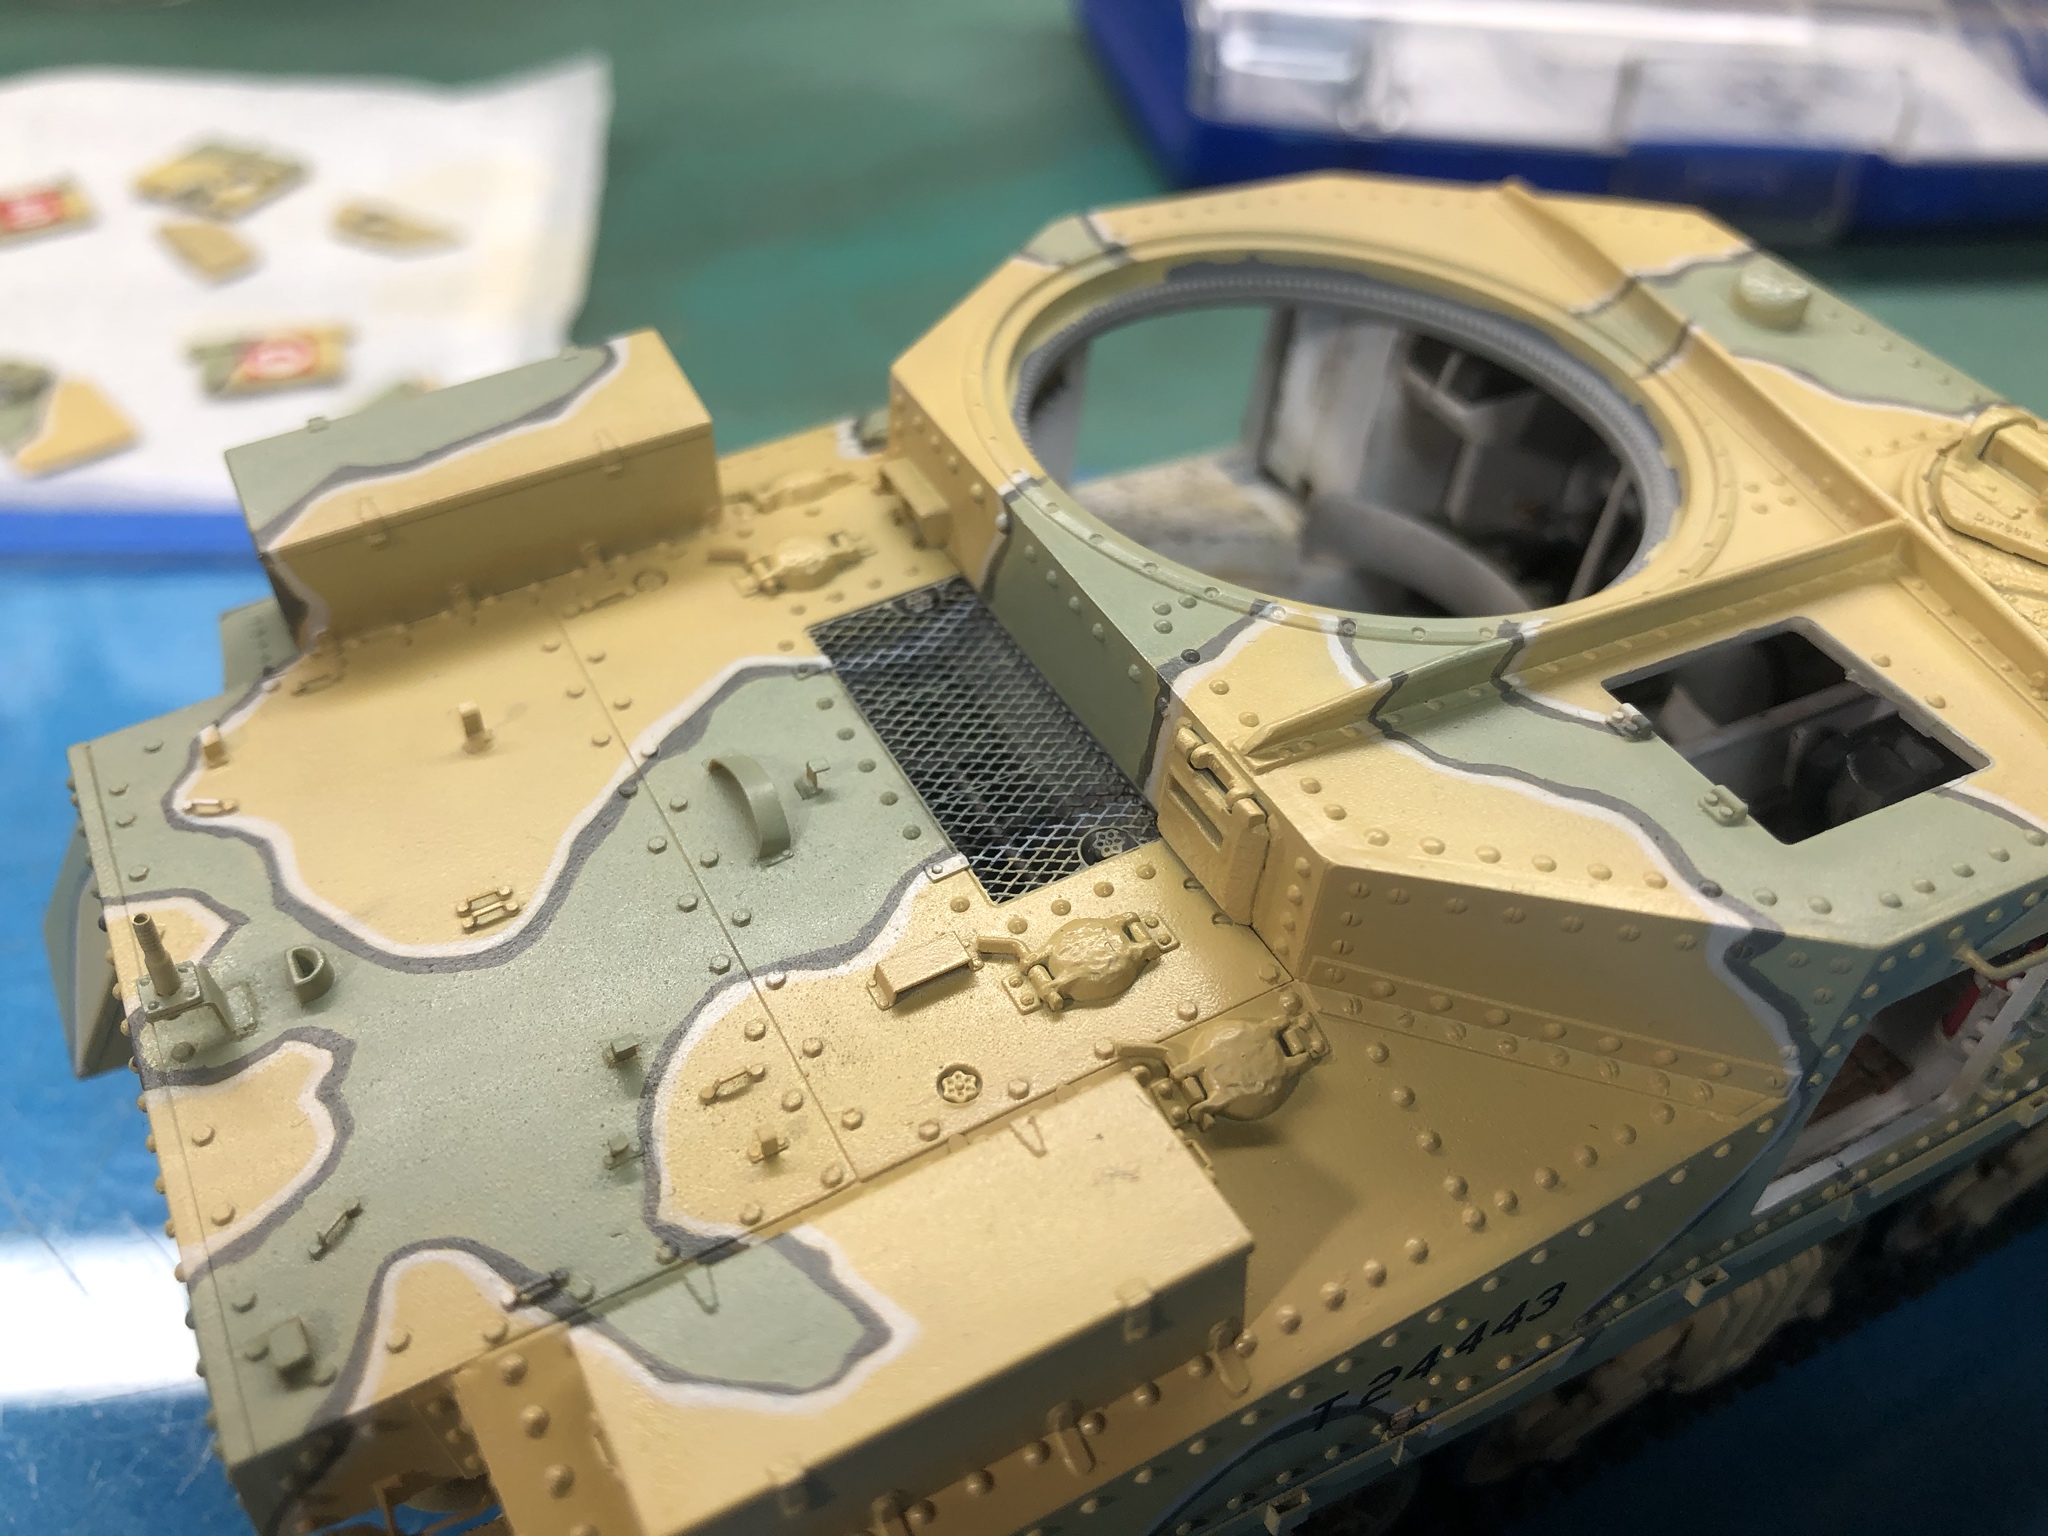
Iím tweaking the color of the running gear as the change to the paint scheme meant the base color wasnít right. Iím not satisfied with it yet, but itís a lot closer than it was when I removed the masking.
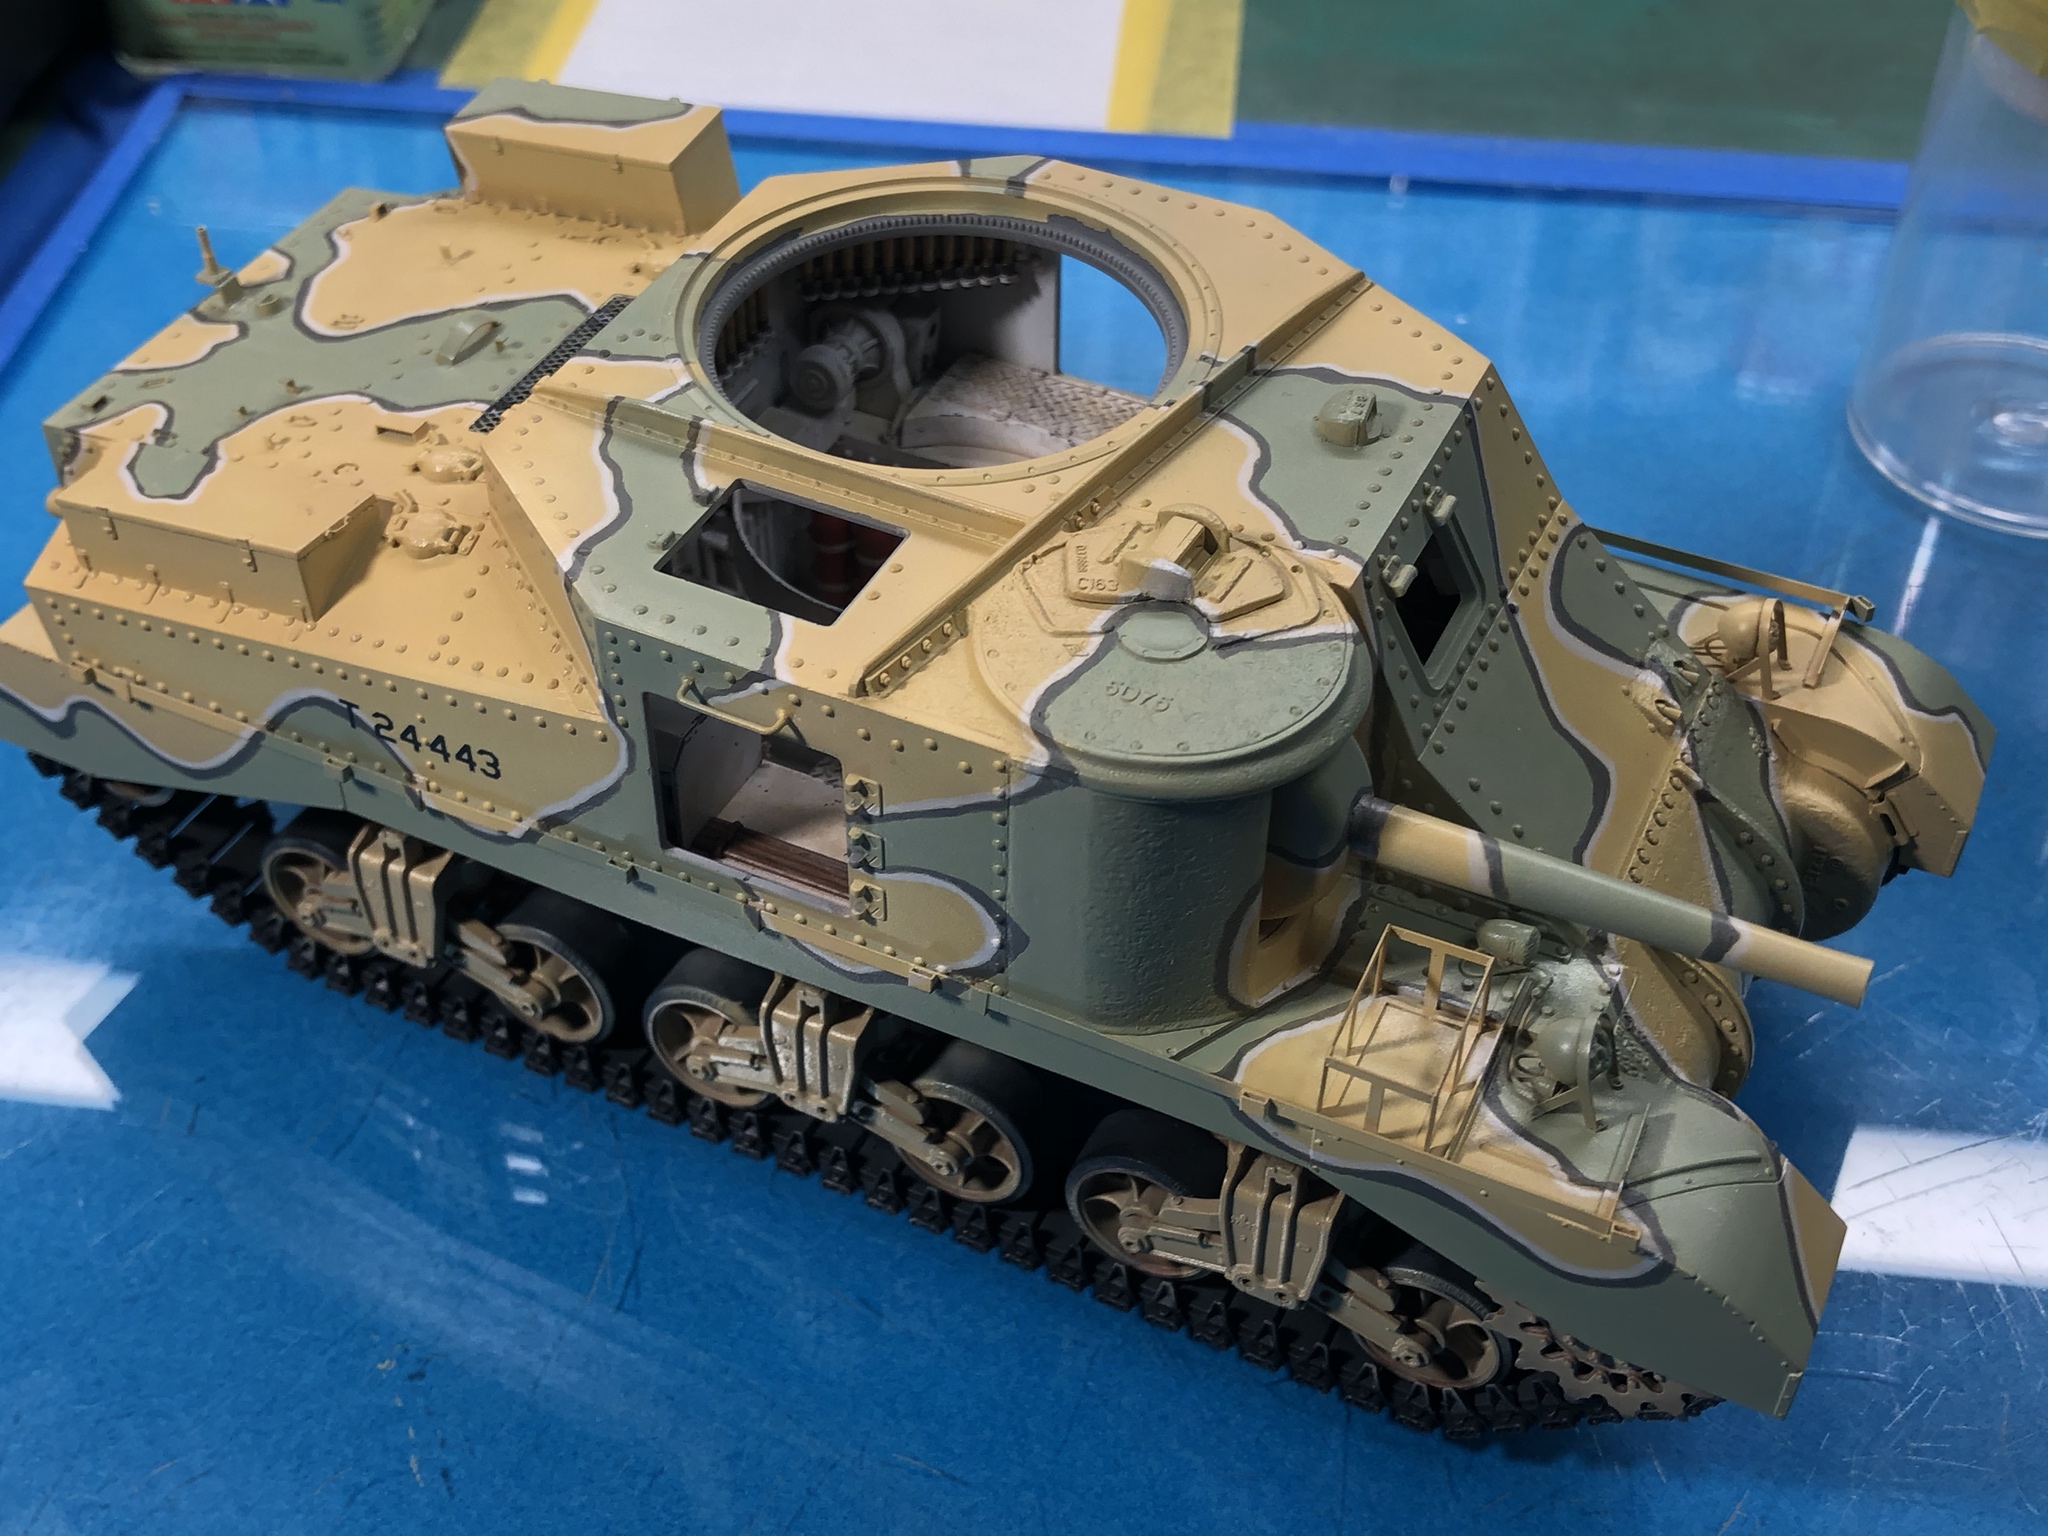
And Iíve also started the desaturation of the colors on the upper surfaces and the decals. Iím using a thin wash of 502 Abteilung Buff. This will be done very gradually, to ensure the markings arenít too pronounced but donít look faded.


Hopefully Iíll be able to get more done this week.
Cheers
On the Bench
MiniArt Grant Mk I with Interior
IBG Marmon-Herrington MKII
Chubut, Argentina
Joined: August 15, 2010
KitMaker: 593 posts
Armorama: 548 posts
Posted: Monday, April 13, 2020 - 12:07 PM UTC
Excellent model, she's really looking great on you.
Congratulations, Omar
New Mexico, United States
Joined: June 16, 2014
KitMaker: 681 posts
Armorama: 603 posts
Posted: Monday, April 13, 2020 - 03:06 PM UTC
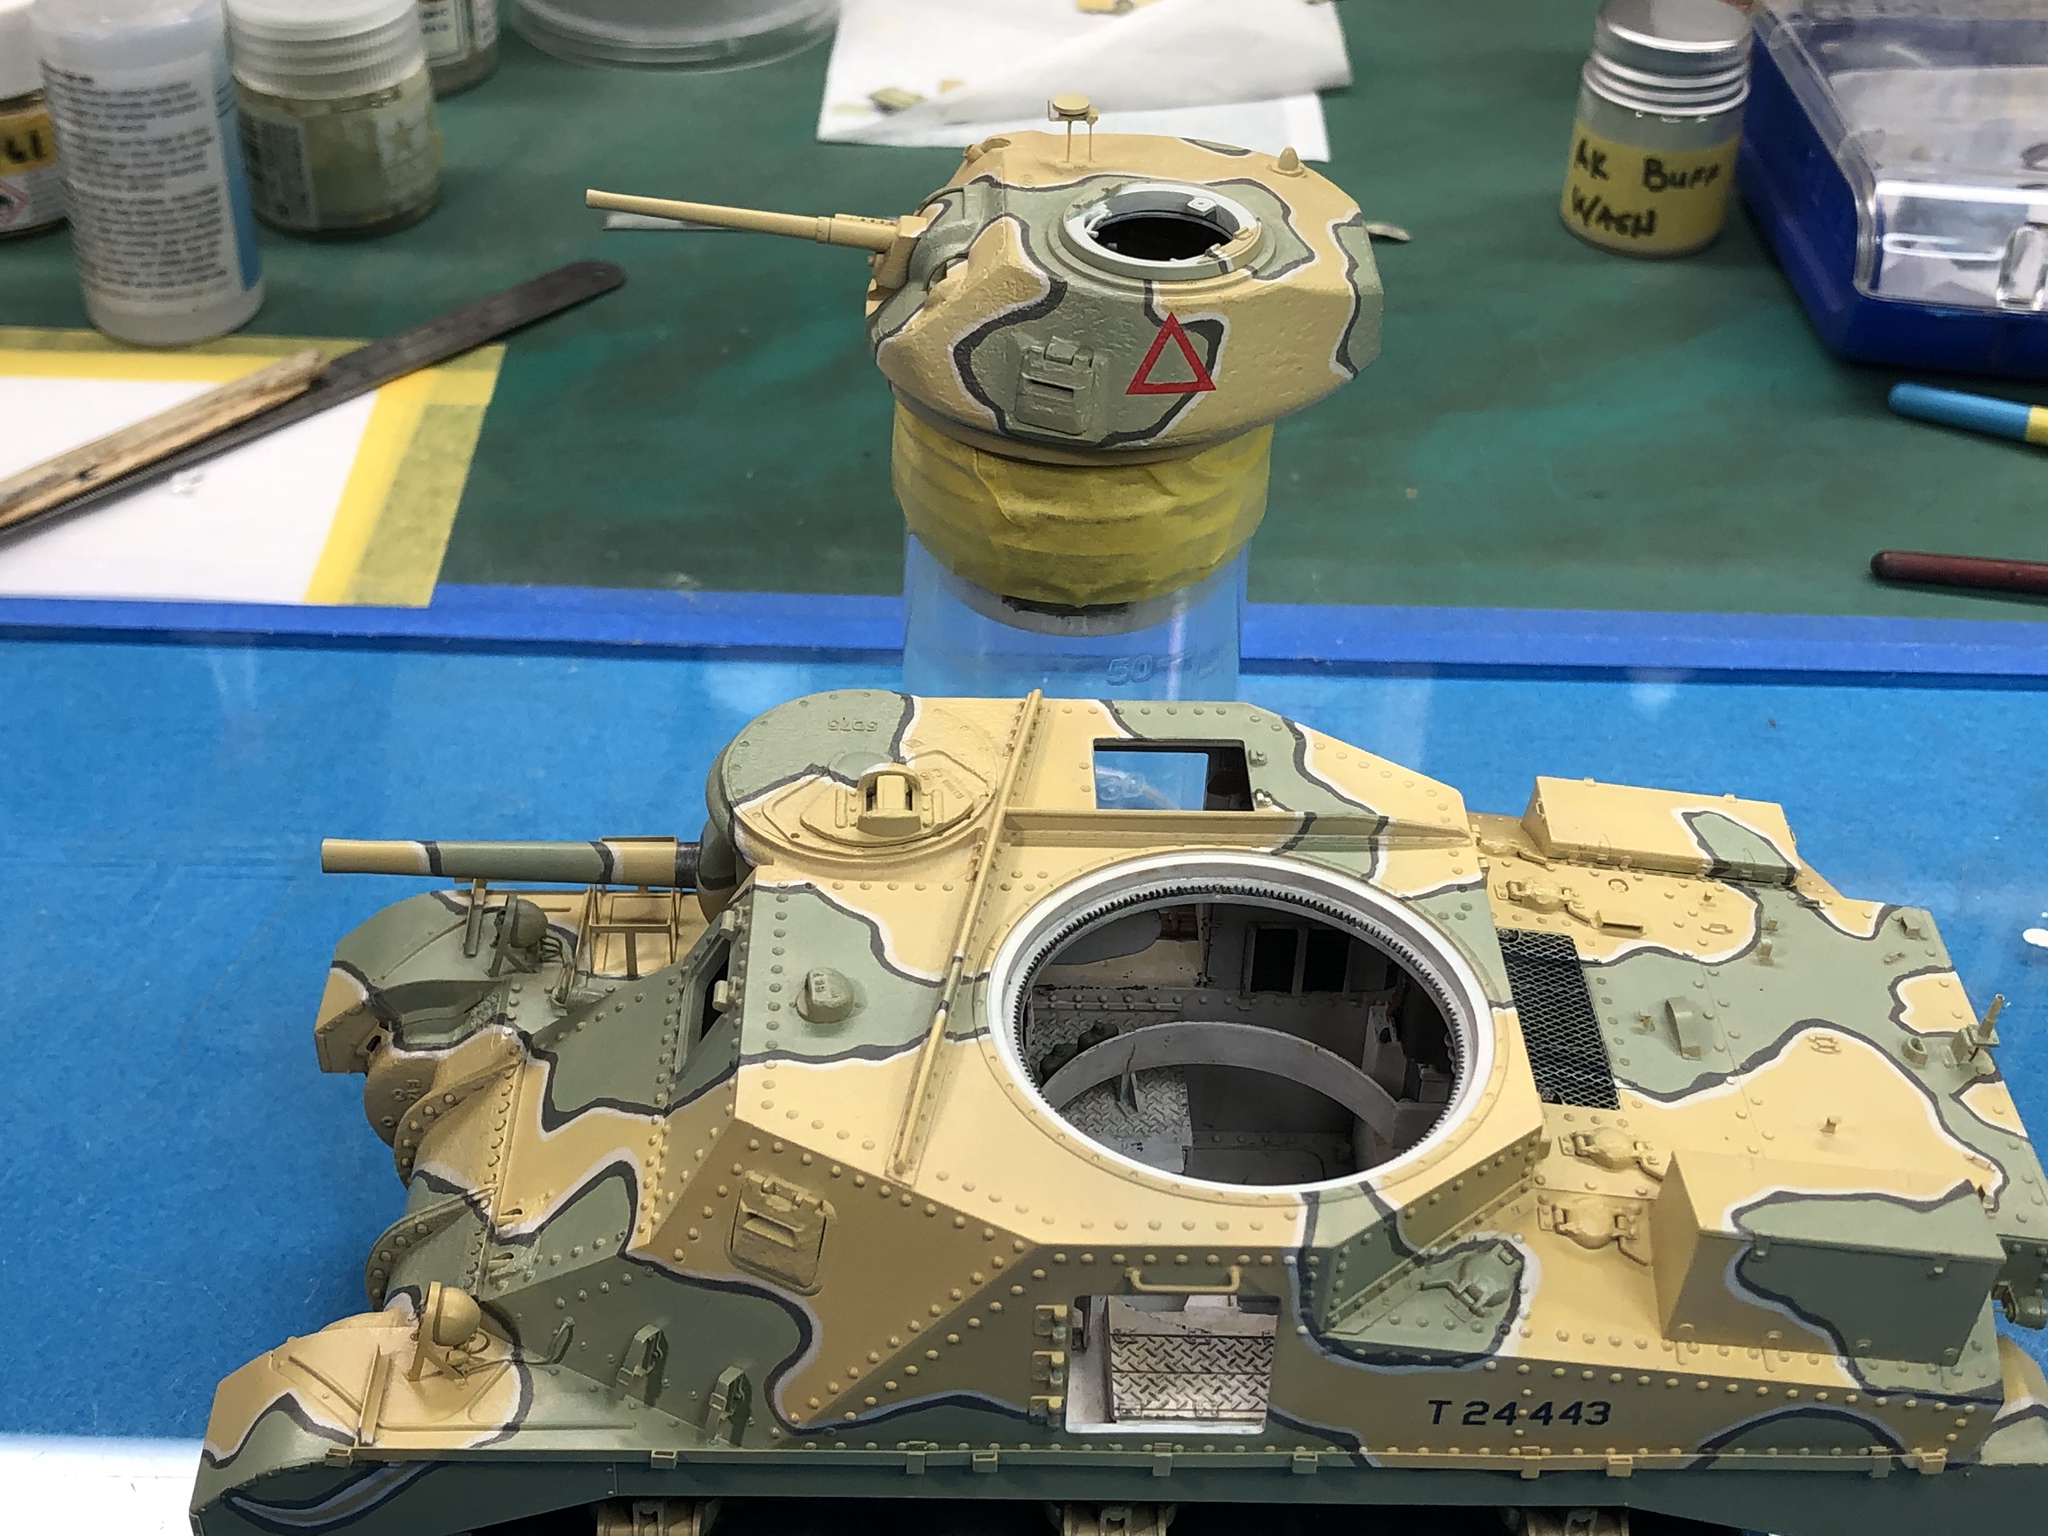
Thanks Omar! Right now Iím waiting for the desaturation oil wash to dry. Iím trying to keep it subtle versus heavily faded. Weíll see where we are when it dries a little more.
Cheers
On the Bench
MiniArt Grant Mk I with Interior
IBG Marmon-Herrington MKII
New Mexico, United States
Joined: June 16, 2014
KitMaker: 681 posts
Armorama: 603 posts
Posted: Thursday, April 16, 2020 - 04:46 PM UTC
On the Bench
MiniArt Grant Mk I with Interior
IBG Marmon-Herrington MKII
New Mexico, United States
Joined: June 16, 2014
KitMaker: 681 posts
Armorama: 603 posts
Posted: Friday, April 17, 2020 - 04:27 PM UTC
Still waiting for the oils to dry, so I tackled adding the tools to the rear deck so they would be included in the weathering step. I wanted to try doing the straps in a different manner than the usual PE straps because they seem to sit oddly sometimes. I didnít have any PE buckles to use with tape or Milliput, so I decided to make my own.
Here is picture of the buckles I made from very thin aluminum sheet. I made punch out of steel rod and used it to create the center hole. I then used a chisel tipped Xacto blade to cut the exterior shape.

Here are the tape straps and the aluminum buckles installed on the Grant.
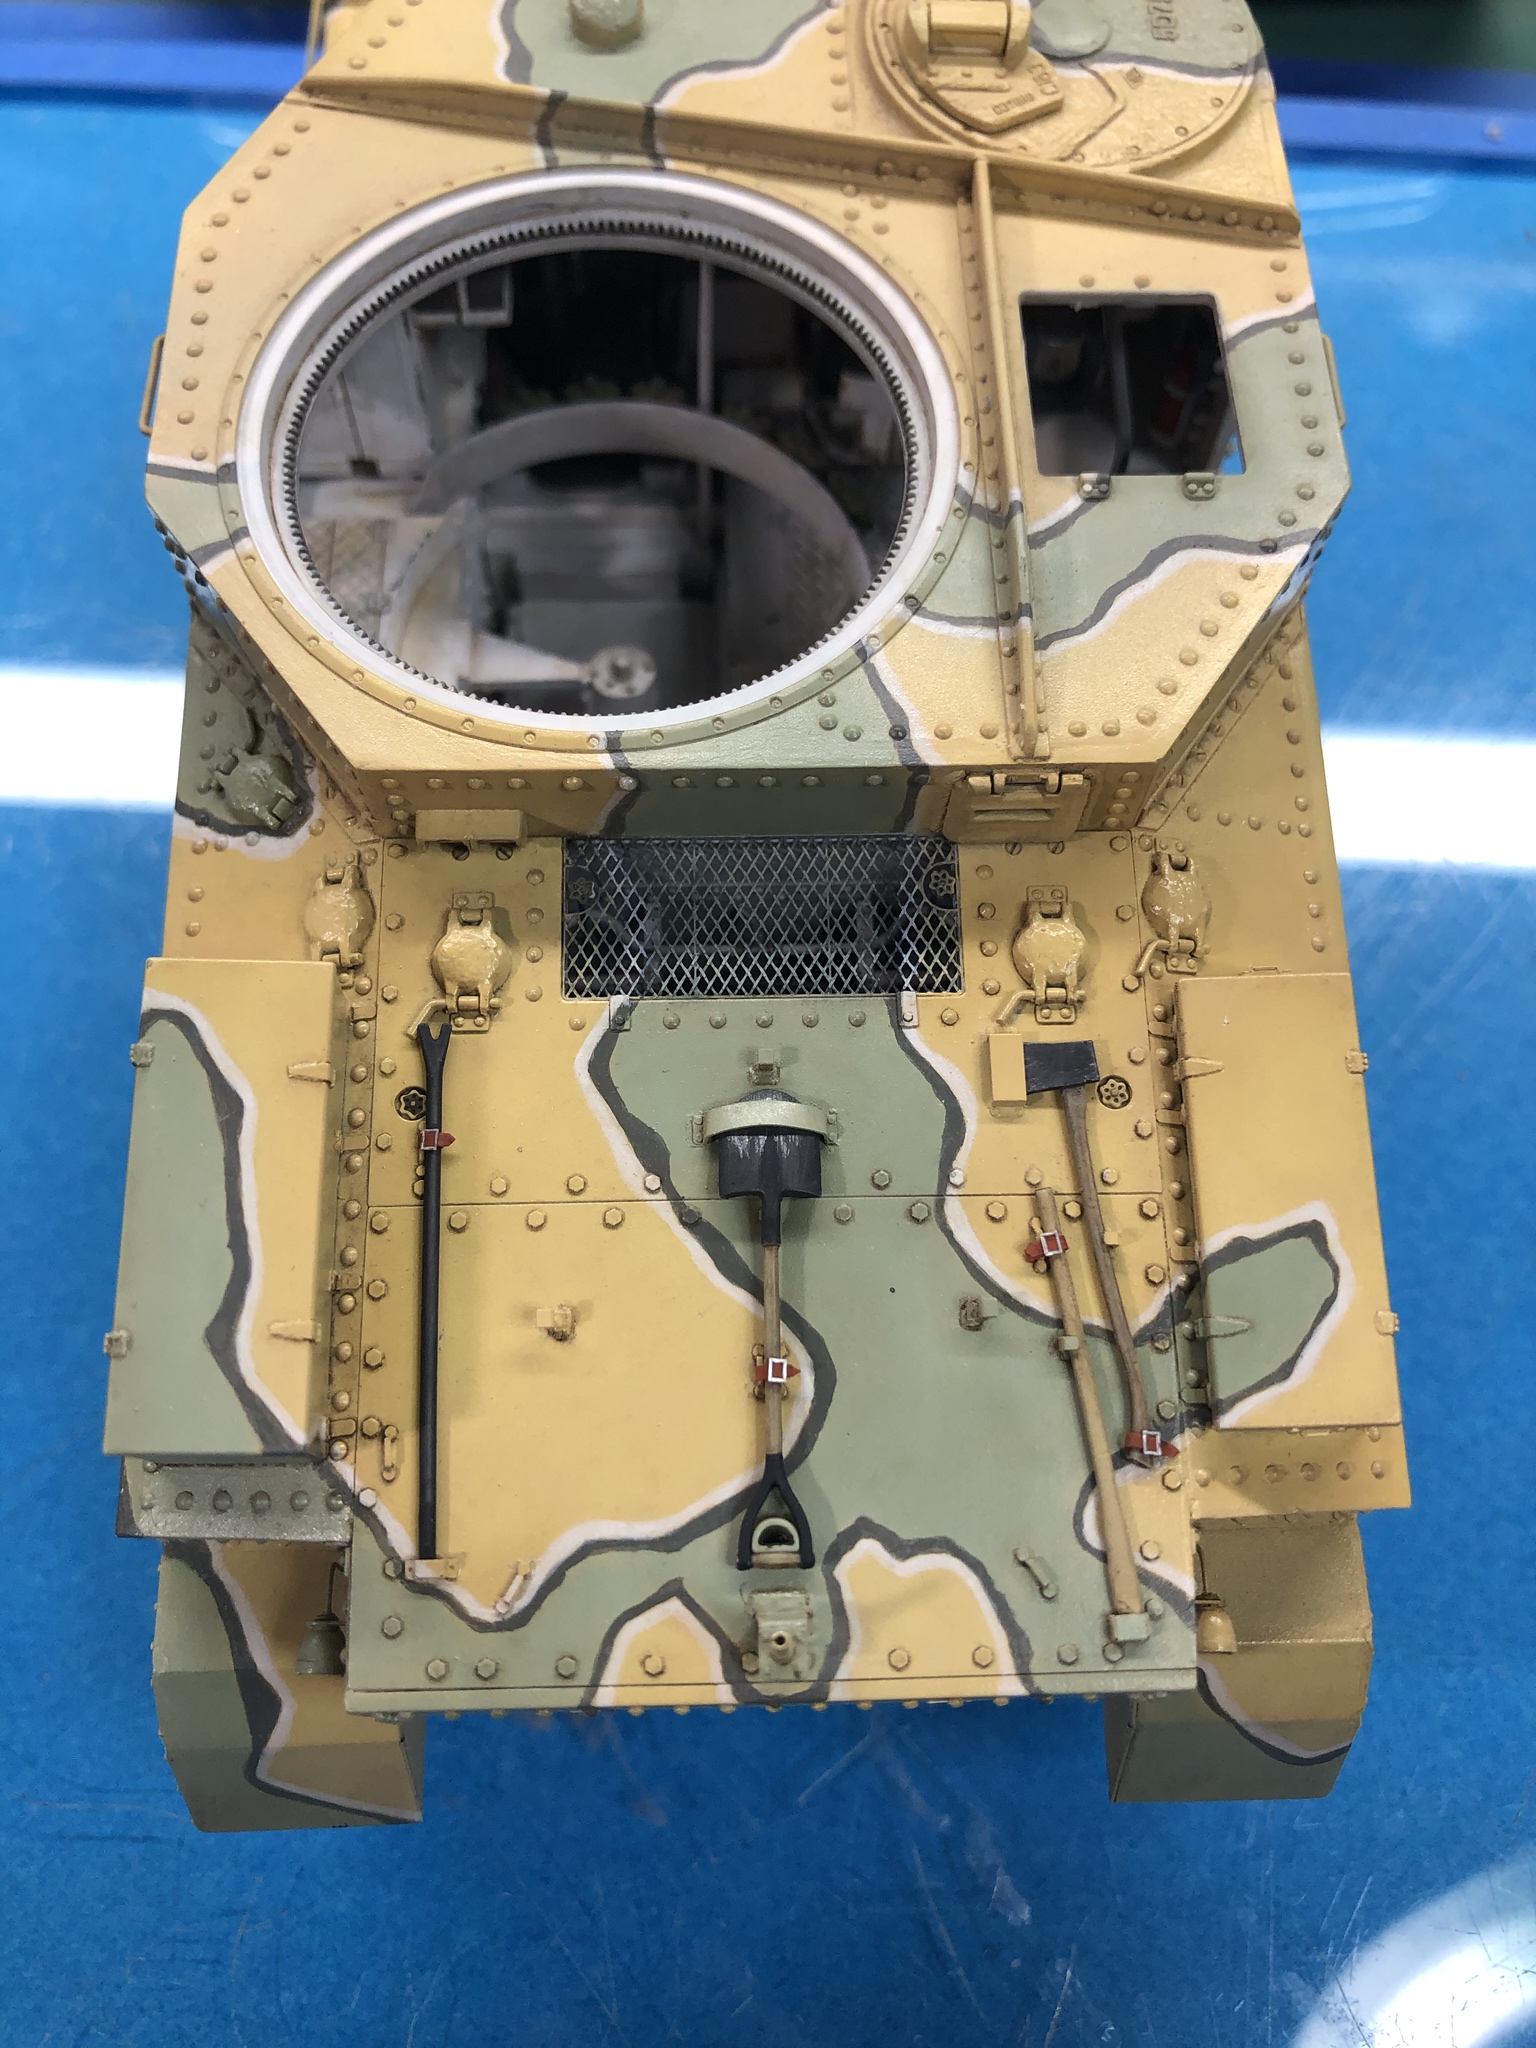
The color of the straps is Vallejo Red Leather.
Cheers
On the Bench
MiniArt Grant Mk I with Interior
IBG Marmon-Herrington MKII
New Mexico, United States
Joined: June 16, 2014
KitMaker: 681 posts
Armorama: 603 posts
Posted: Tuesday, April 21, 2020 - 02:39 PM UTC
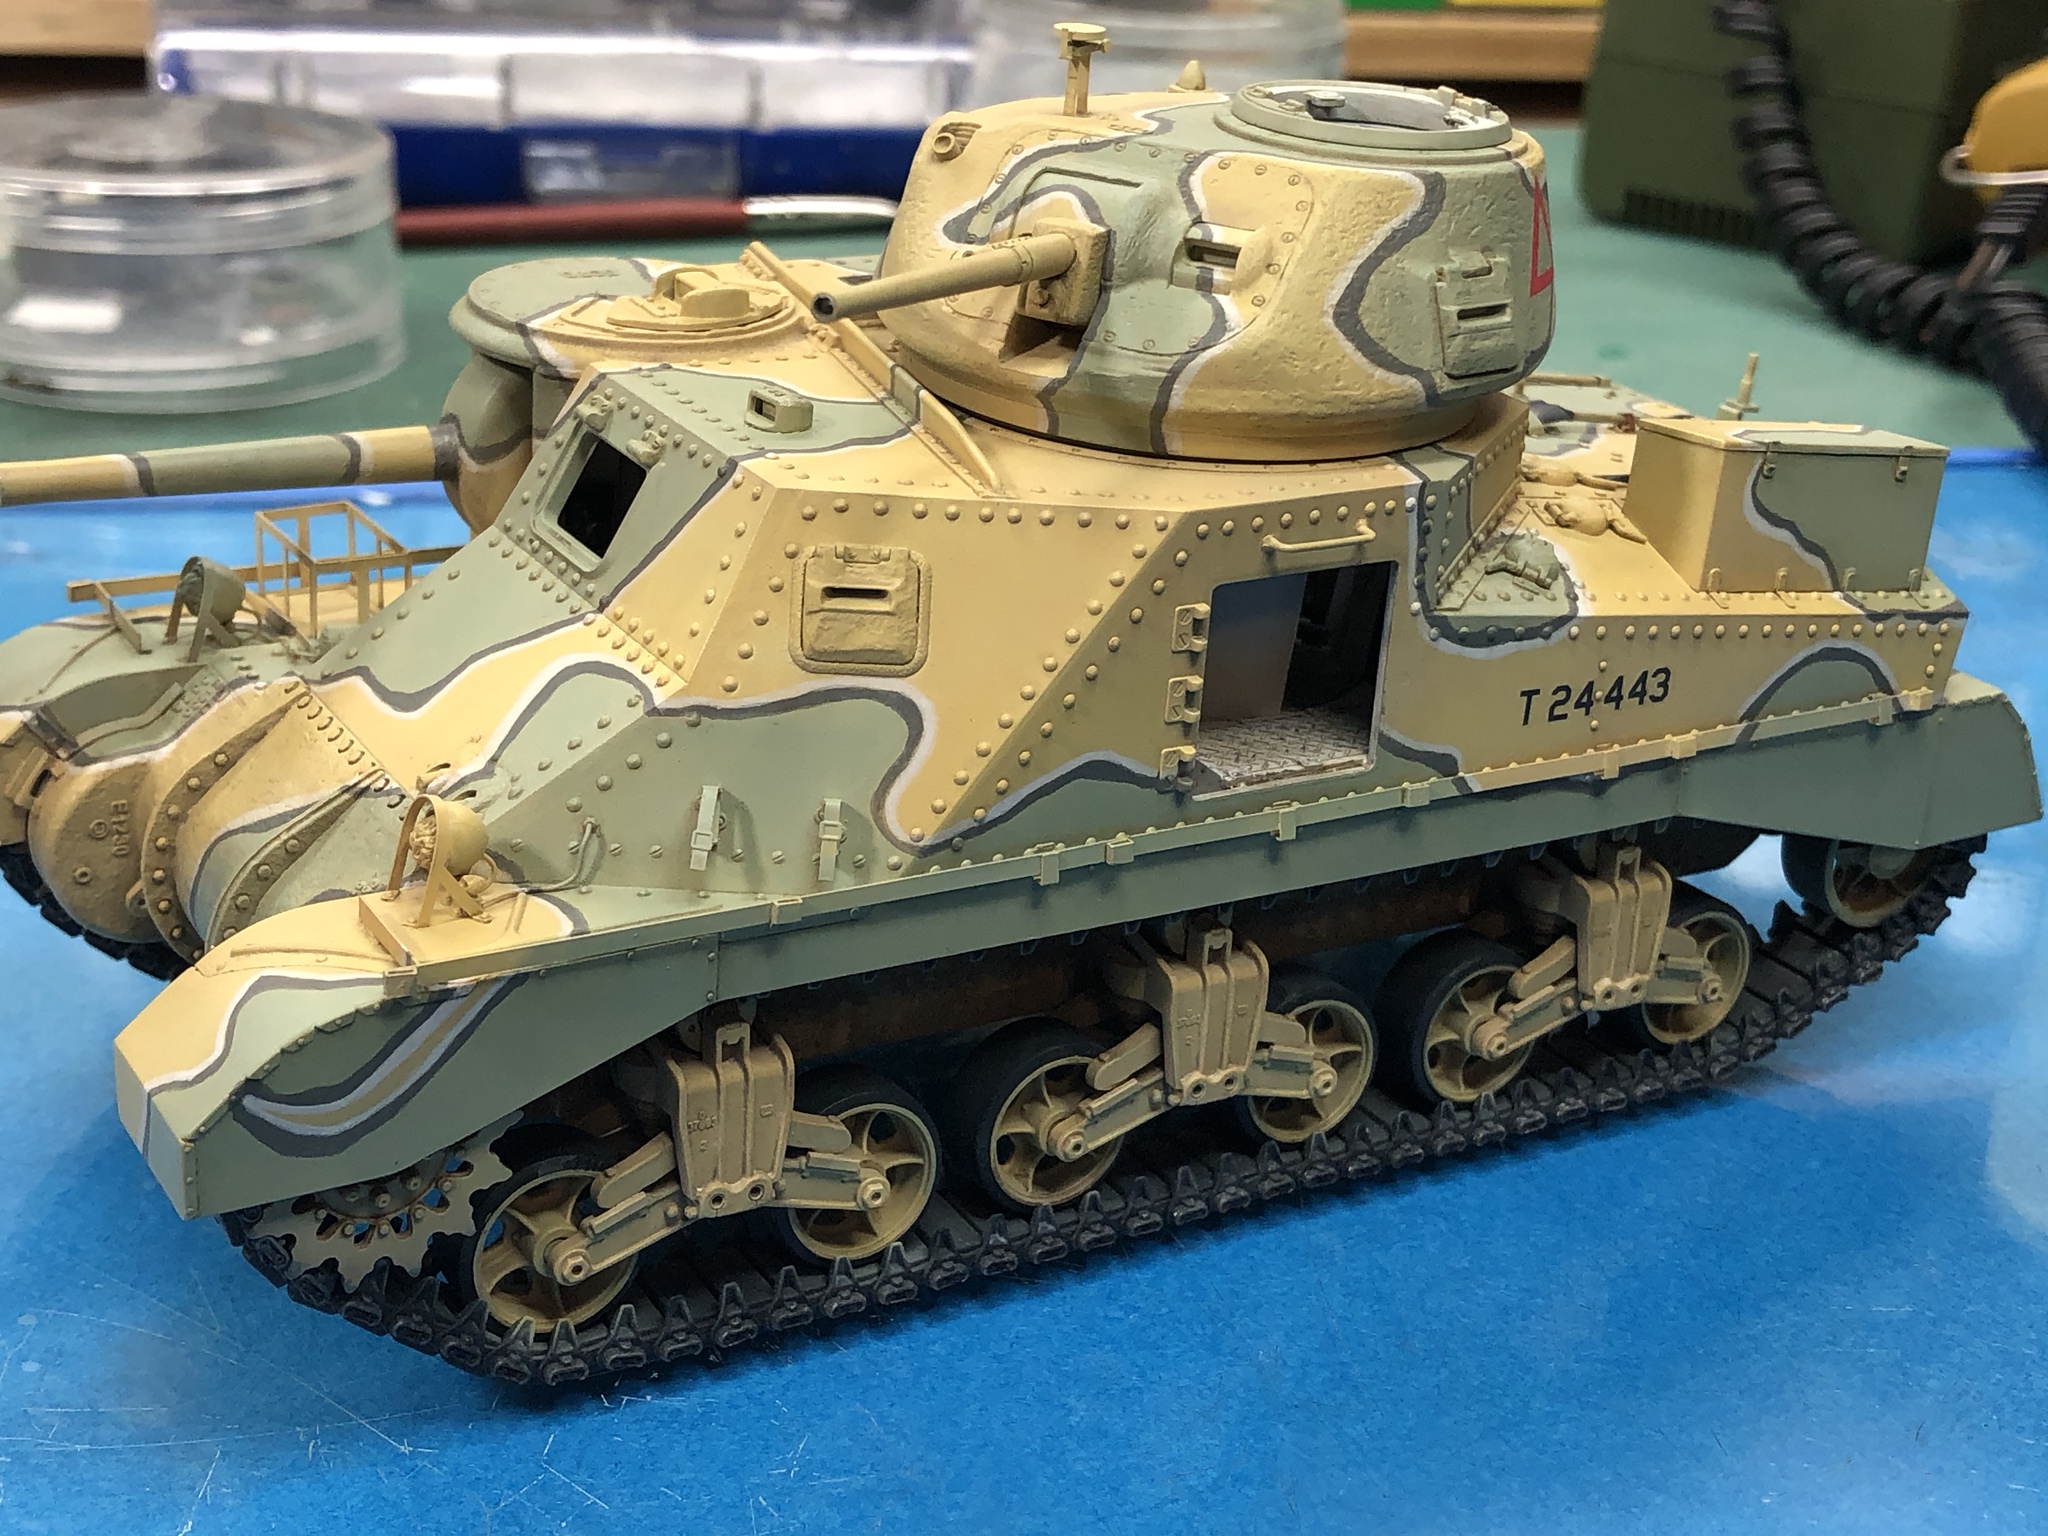
Finally, the oils dried enough for me to apply the matte coat. Itís a bit easier to see how the colors integrate better than before the oils were applied. Once this matte coat cures Iíll press on with the weathering.

On the Bench
MiniArt Grant Mk I with Interior
IBG Marmon-Herrington MKII
New Mexico, United States
Joined: June 16, 2014
KitMaker: 681 posts
Armorama: 603 posts
Posted: Sunday, April 26, 2020 - 05:58 PM UTC
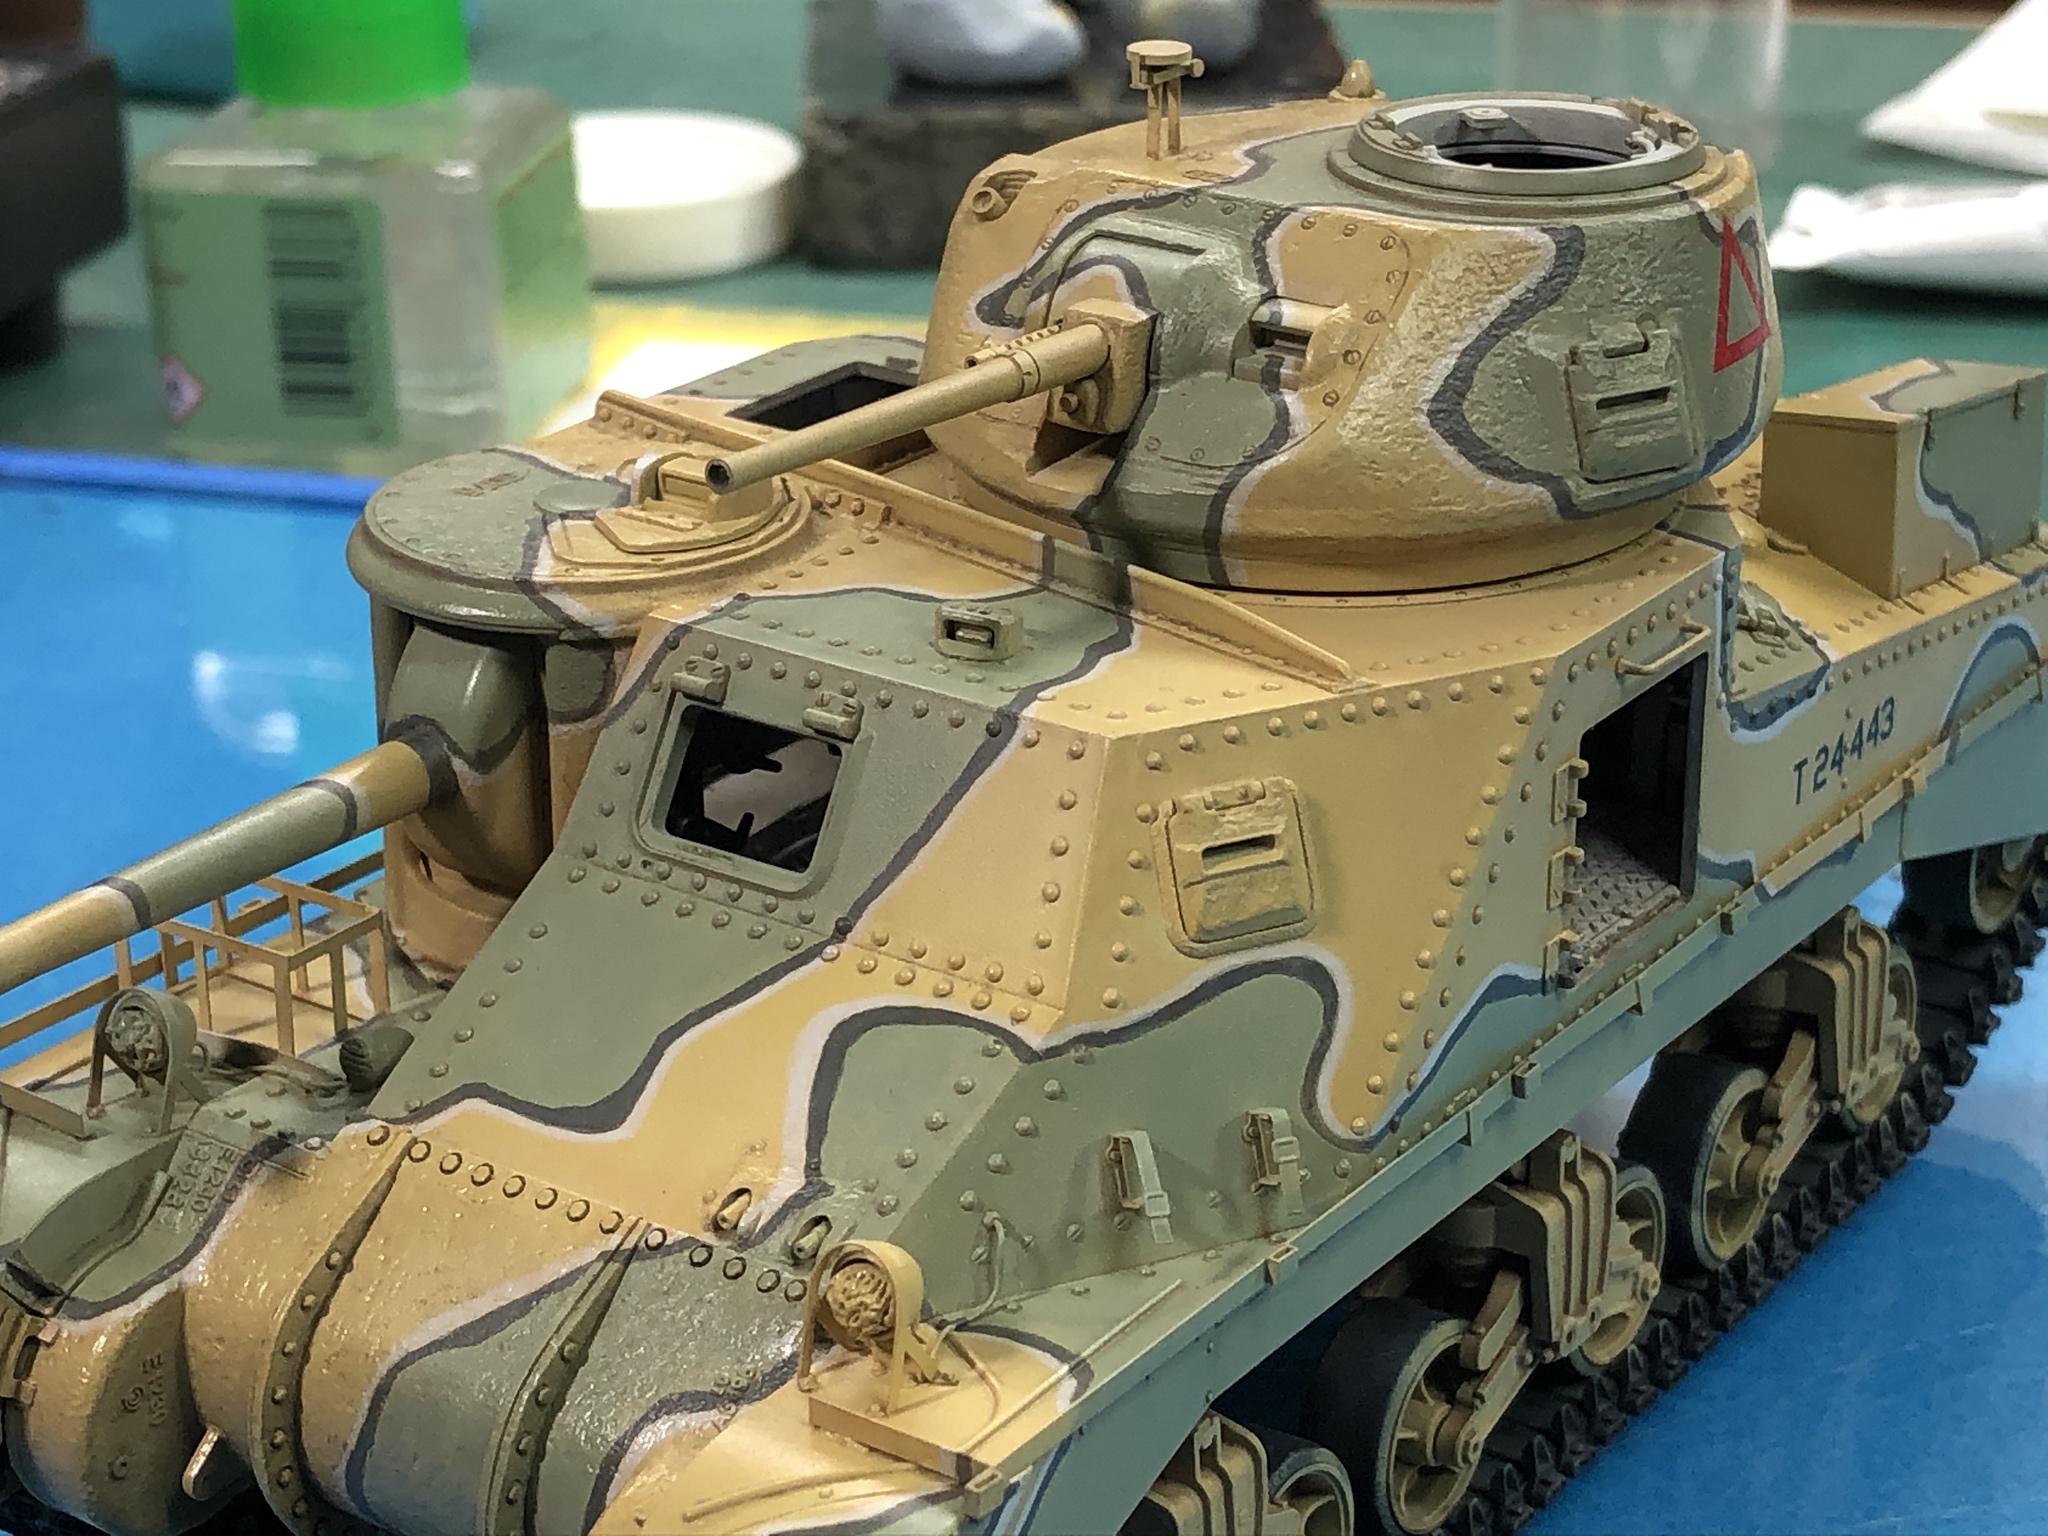
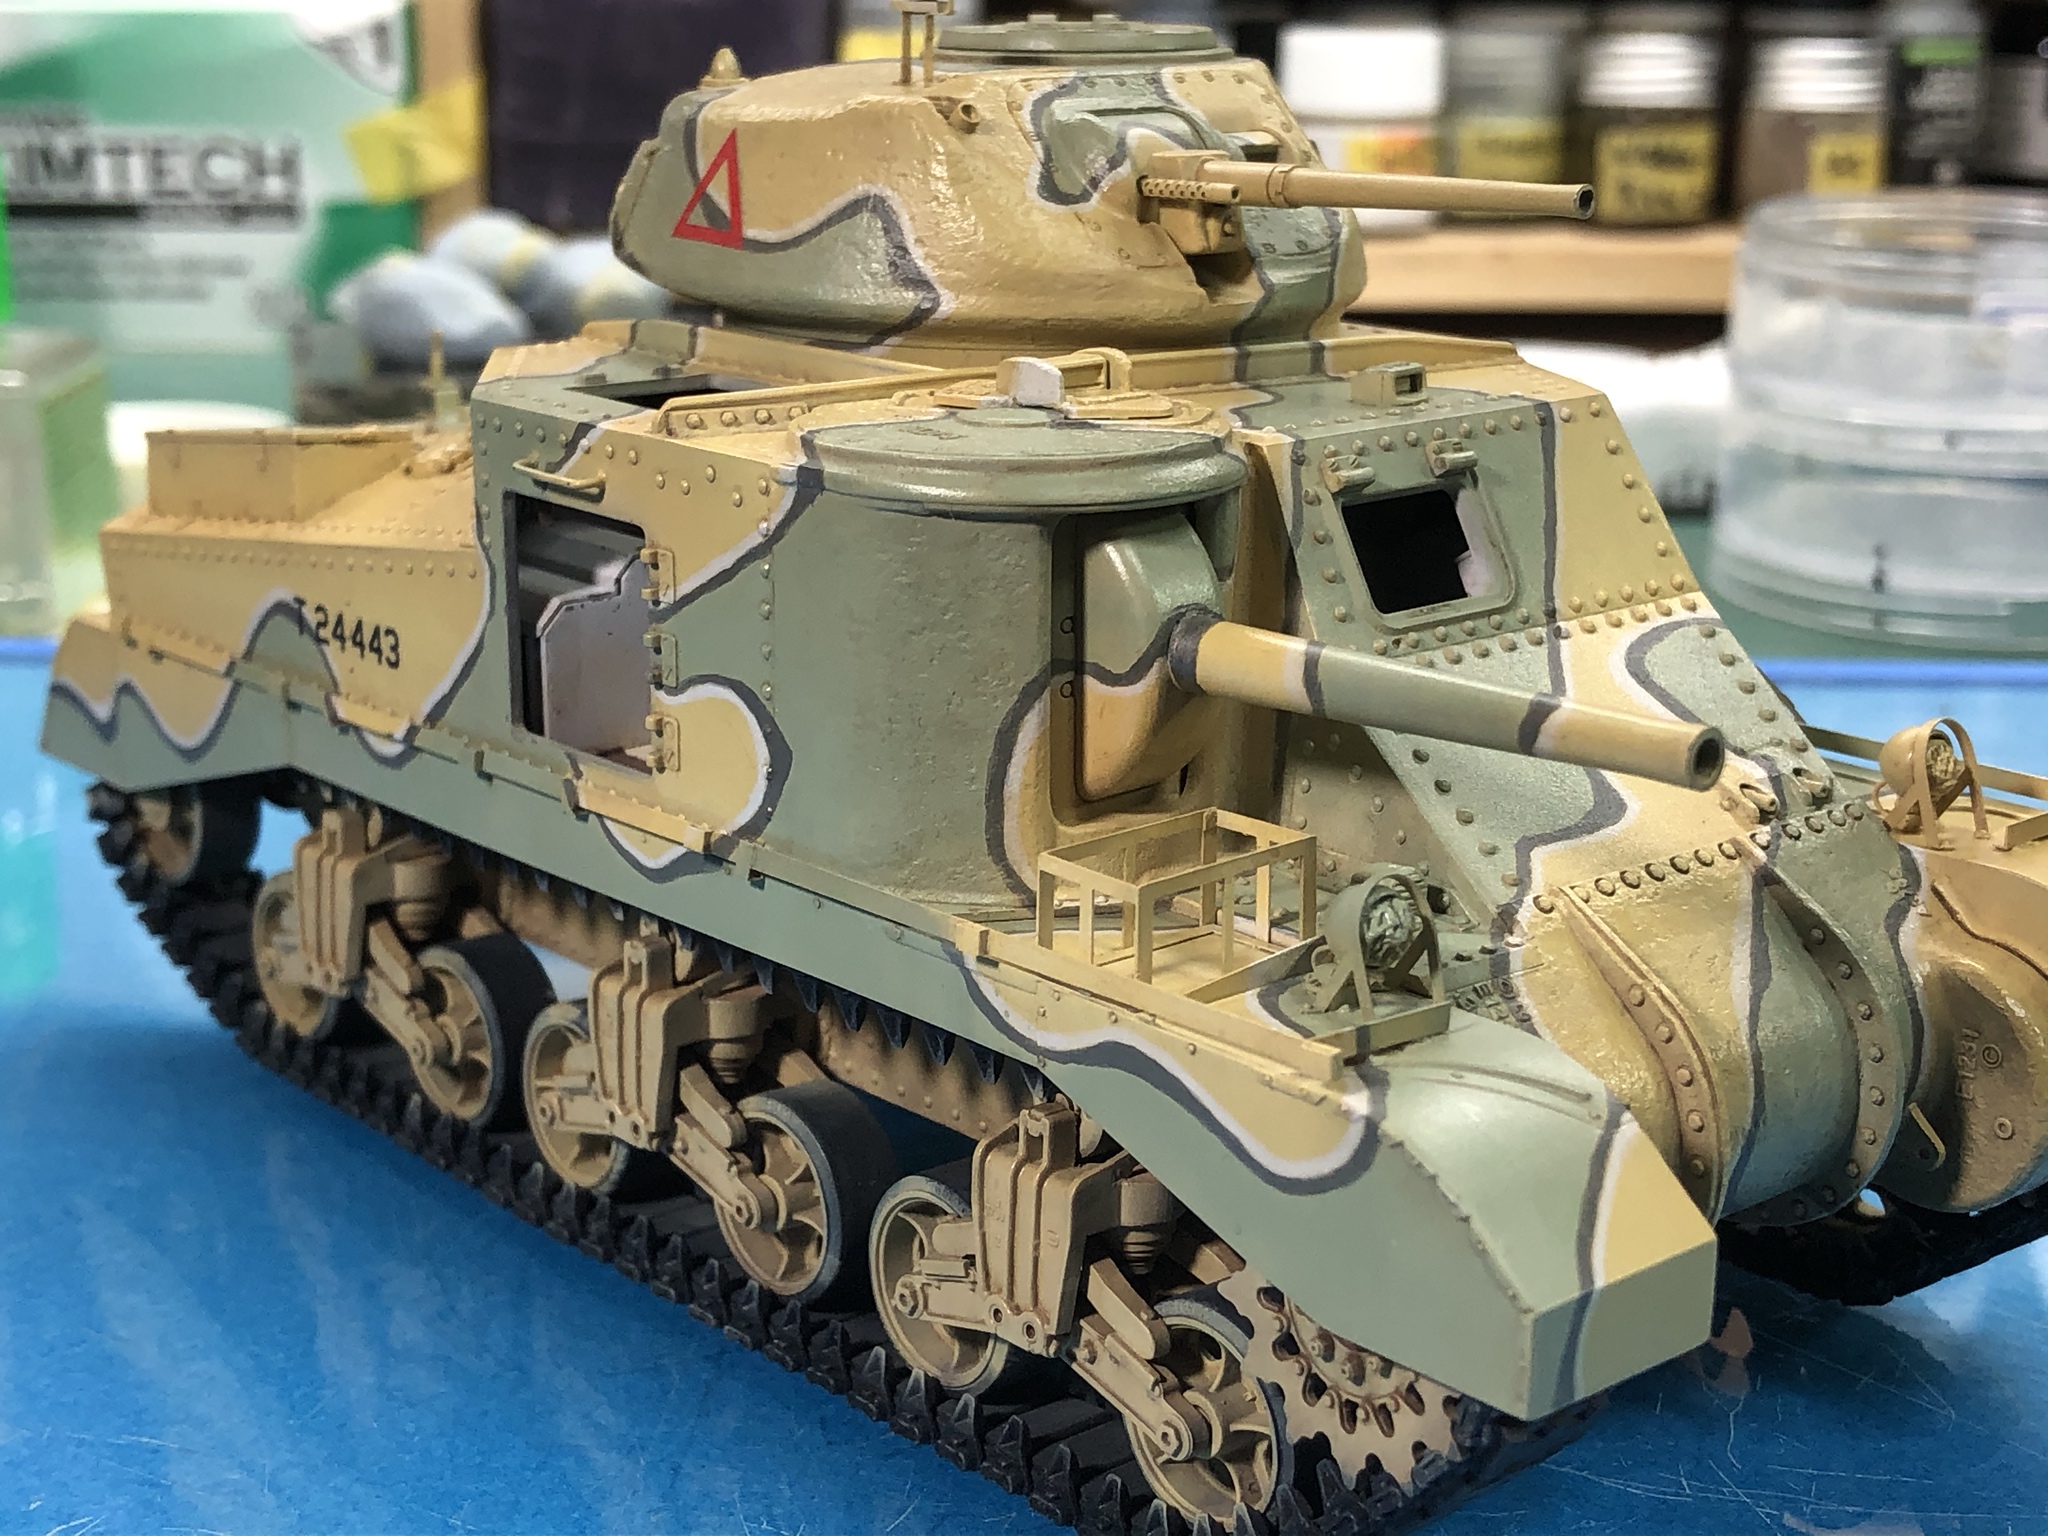
Slowly but surely, Iím making my way through the weathering and detail installation on the Grant. Today I made And installed the replacement muzzles for the hull mounted guns.
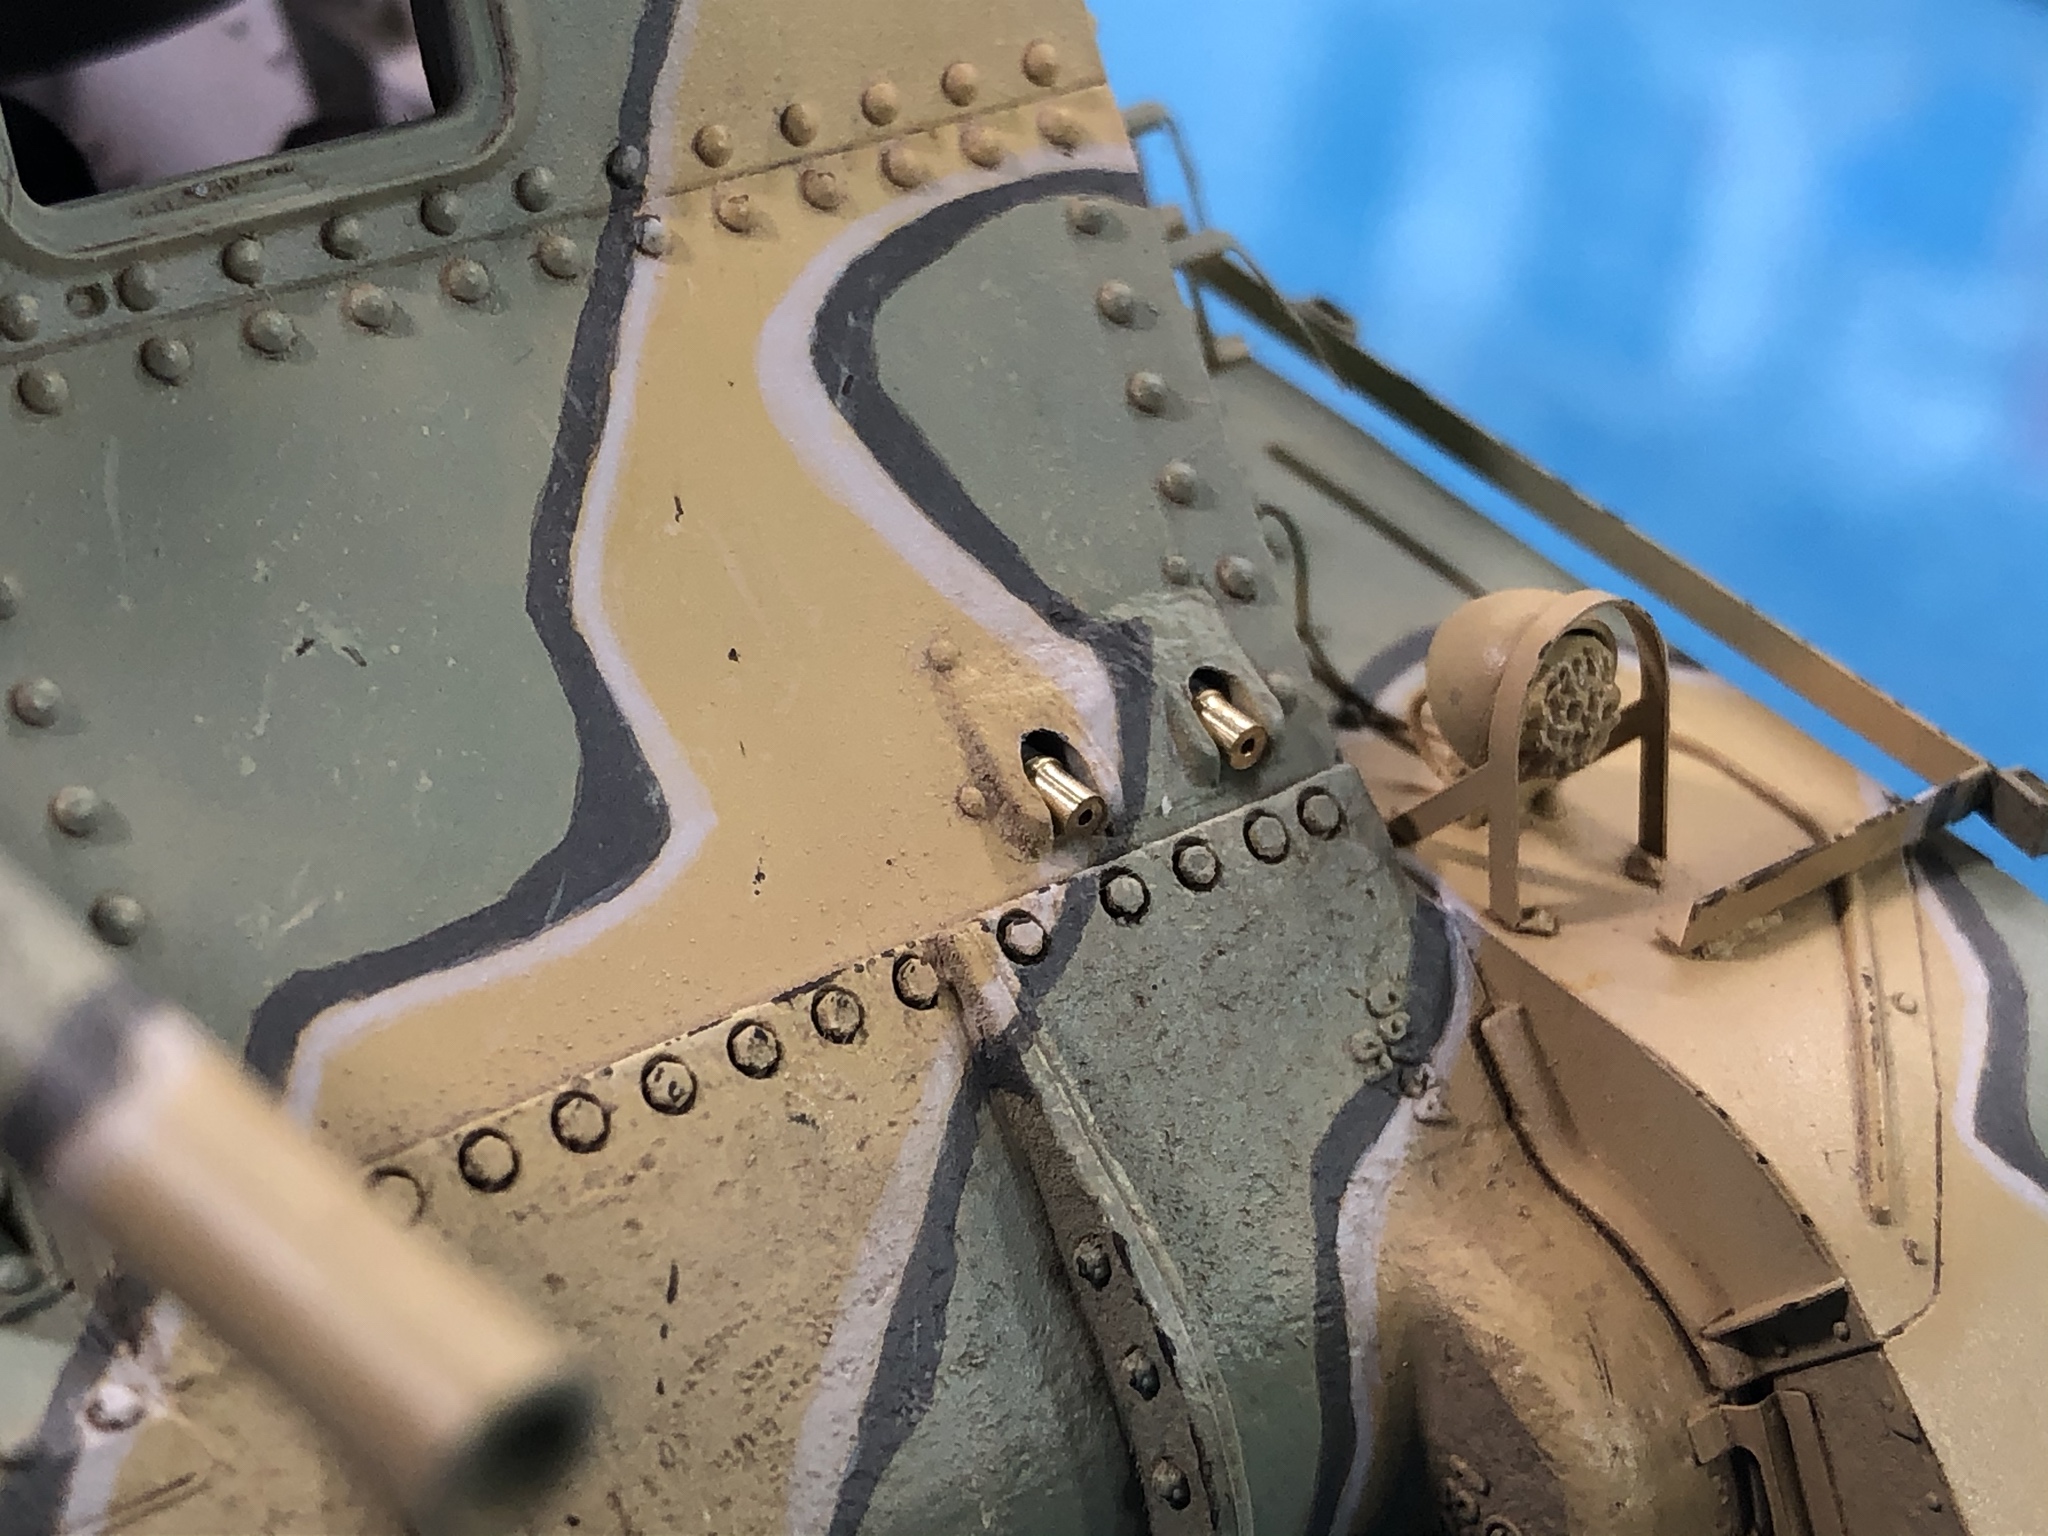
You can see that Iím currently working my way around the model doing light chipping and have begun to create the dust coats with oils and enamels.
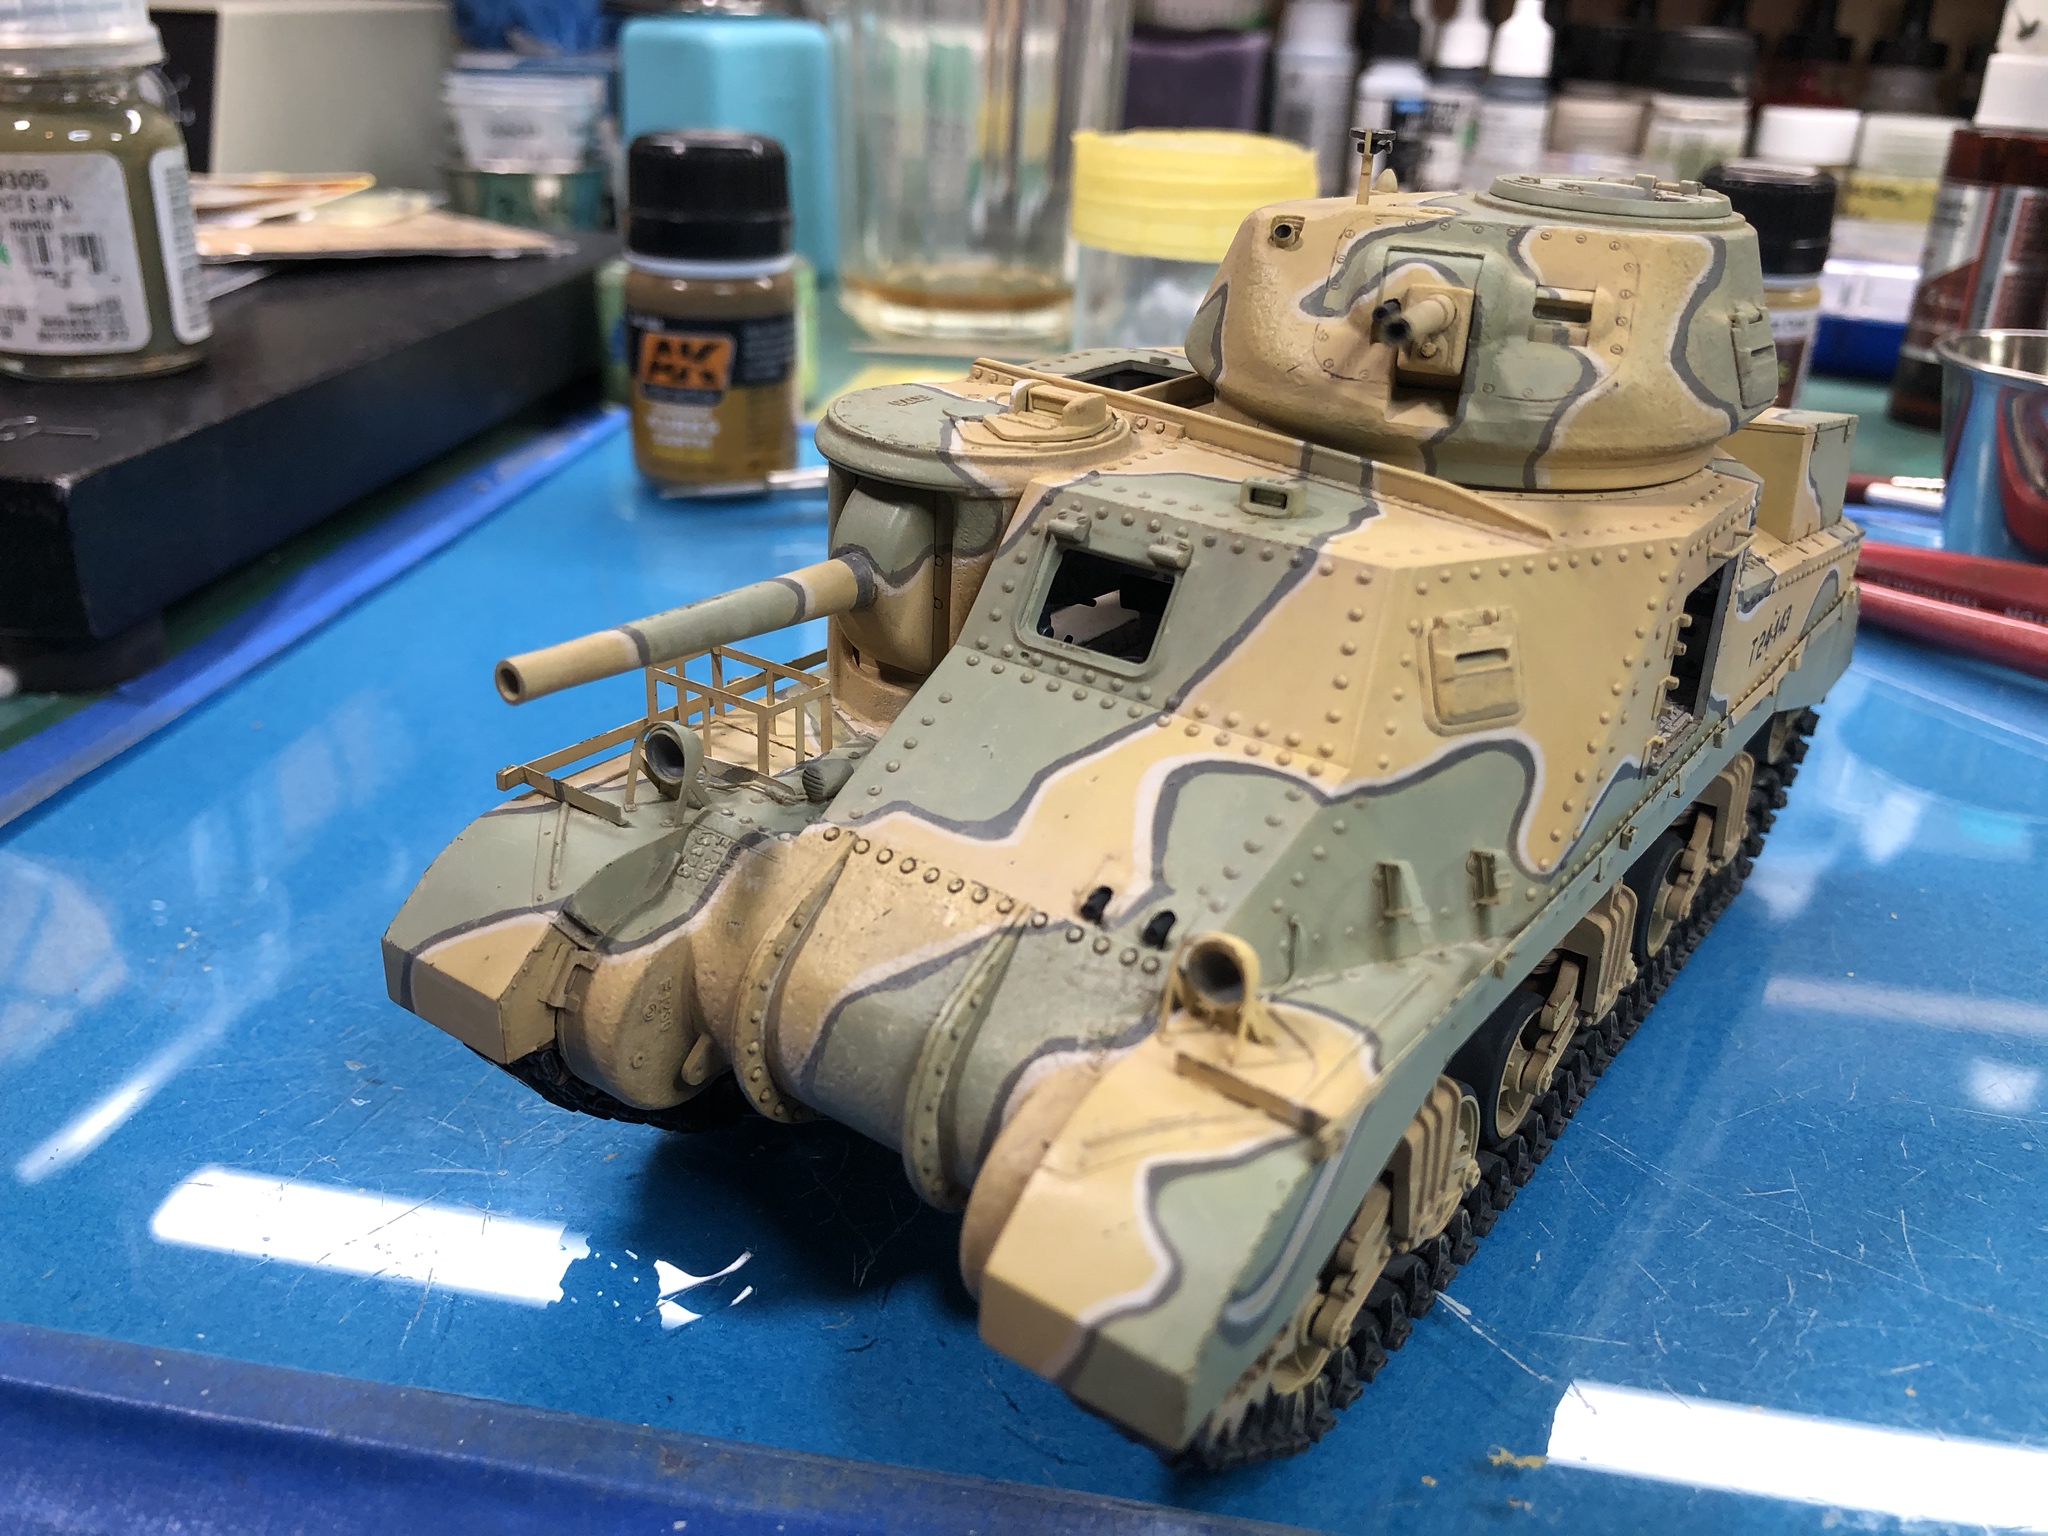

I still have tons of work to do on the finish, but I wanted to post an update since itís been a while.
Colors used so far in the weathering stage:
Vallejo US Olive Drab- dark chipping
Vallejo Model Air - Radome Tan - light chipping
AK Interactive Enamel - Africa Dust
Webber - Raw Umber Oil
502 Abteilung - Buff
Bob Ross - Yellow Ochre
Cheers
On the Bench
MiniArt Grant Mk I with Interior
IBG Marmon-Herrington MKII
Vilnius, Lithuania
Joined: November 09, 2009
KitMaker: 132 posts
Armorama: 109 posts
Posted: Sunday, April 26, 2020 - 06:14 PM UTC
Going well, Paul, camo is blending really nice. Do you weather doors and hatches separately or install them temporarily during the process?
New Mexico, United States
Joined: June 16, 2014
KitMaker: 681 posts
Armorama: 603 posts
Posted: Sunday, April 26, 2020 - 06:37 PM UTC
Hi Raimondas,
The answer to your question is both. I usually start the weathering for those items off of the model and then as I complete a step, I set it in place to ensure I havenít skewed the colors from the chassis. I do this because keeping the doors in place creates hard lines around openings that cause difficulties trying to integrate them when you intend to show the vehicle opened up.
Hope this answers your question.
Cheers
On the Bench
MiniArt Grant Mk I with Interior
IBG Marmon-Herrington MKII


