Colorado, United States
Joined: December 25, 2004
KitMaker: 3,770 posts
Armorama: 2,263 posts
Posted: Monday, July 27, 2009 - 02:36 PM UTC
I managed to get a little more done today; the A7V is now coated with Future and I did some "paint work" on the tracks.
After the tracks were primed, I used Testor's enamel rattlecan Gloss Black and gave them a quick coat. Once that was dried I AB'd on some Vallejo Air Mud Brown....more for color than anything else. When that was reasonably dried, I liberally applied a Raw Sienna wash:

It's my intent to highlight the ridges and raised parts of the tracks with steel and then give a final wash of Burnt Umber.
The ejector marks on the insides of the tracks will not be seen once they're back on; hence I didn't mess with those.
Mike

California, United States
Joined: April 01, 2002
KitMaker: 4,287 posts
Armorama: 1,867 posts
Posted: Tuesday, July 28, 2009 - 01:55 AM UTC
Atta boy Mike. I have stalled with building anything. As I get closer to leaving my job, my daughters wedding, starting school, working on my Falcon, and dirt bikes etc. etc. etc. my modeling building has taken a back seat as it were. Trying to at least put the wraps on getting some reviews completed that I have ongoing. Thanks for the progress report. "Q"

"Don't fear the night, fear what hunts at night"
Colorado, United States
Joined: December 25, 2004
KitMaker: 3,770 posts
Armorama: 2,263 posts
Posted: Tuesday, July 28, 2009 - 01:20 PM UTC
Good evening!
Tried something a little different with the "dry brushing" of the tracks; I took a sanding-sponge and cut it down, as seen. I then applied some older Testors "Silver" to the sponge-side of it, and then gently brushed it along the raised portions of the tracks. Here's what I got (I'm pretty happy with the first attempt

):

Next up is to do the same to the inner side of the tracks (though it really won't be seen) and then hit them with the Raw Umber wash to "dirty them up."
Oh yea, I "two-toned" the MGs....they're about done.

Mike

California, United States
Joined: December 06, 2004
KitMaker: 3,694 posts
Armorama: 2,693 posts
Posted: Thursday, July 30, 2009 - 04:10 AM UTC
Here is a picture I uploaded in 2007 of the Tamiya M5A1 Stuart kit I'm hoping to finish for this campaign. Strictly OOB.

I've actually put some putty on the commander's .30cal to fill in some sink holes although I might replace it with a .30cal from Academy's US WW2 Tank Machinegun set. I kind of got putty on some details so we shall see. I also hand painted the kit tracks black just the other day. Later I will paint the end connectors Gunmetal. I also might replace these with a set of AFV Club tracks (also part of a possible build review of the set).
Scotland, United Kingdom
Joined: February 04, 2006
KitMaker: 884 posts
Armorama: 622 posts
Posted: Thursday, July 30, 2009 - 04:48 AM UTC
Hi
Still no pic's at the moment sorry.
Have been busy though. I've almost finished the King Tiger just needs it's crew , started to paint them yesterday.
The M16AA Halftrack has been coated in future ready for the decals.
The Bren Gun carrier has been painted in the Malta scheme just need final painting before being sealed with the future.
Have been busy finishing a couple of other builds that are not for the campaign.

Building for My pleasure & hoping others like what I build.
Being built at the moment
Way too many unfinished.
Centurian MKIII Tamiya
MinenRaumer
Type 95 Ha Go
California, United States
Joined: October 06, 2006
KitMaker: 580 posts
Armorama: 499 posts
Posted: Saturday, August 01, 2009 - 03:26 PM UTC
I am just not feeling the love towards my M47, last seen on page 4 of this thread, so I decided to give my attention to a different shelf queen. I forgot to take pictures before starting work this week but here is where she stands:
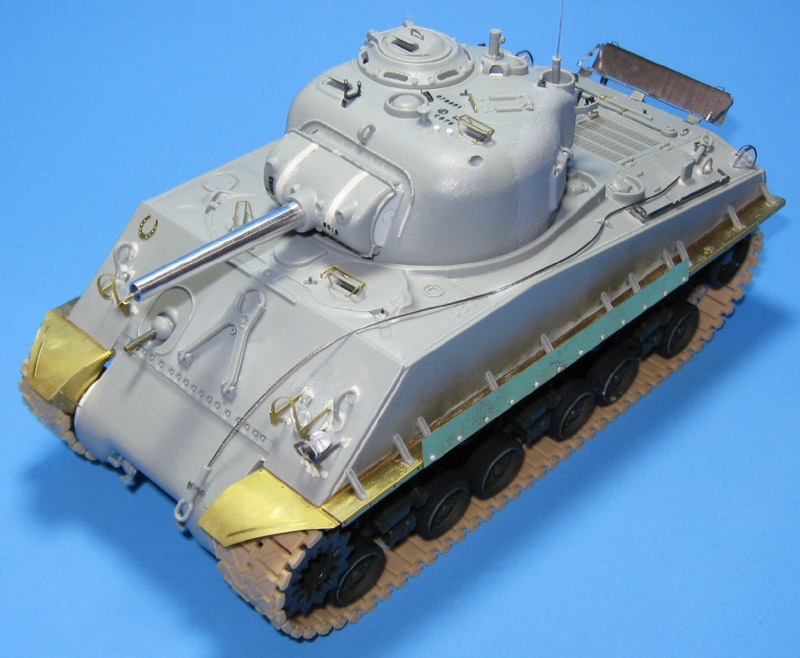
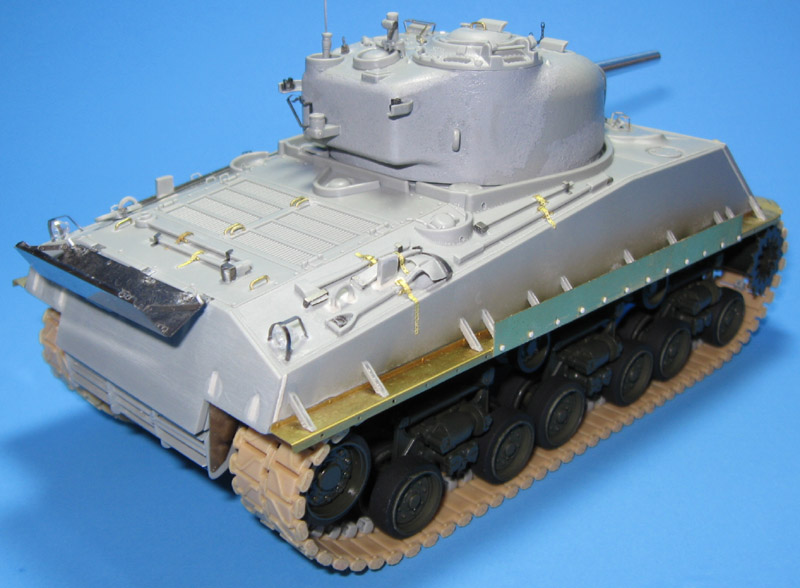
So far I have added all the brass (except for the fenders) and the casting marks. I also wrote a
Build Log with my notes and some additional pictures. I figured that was better than dropping a big essay here. My apologies if I am doing it wrong.
-Doug
California, United States
Joined: April 01, 2002
KitMaker: 4,287 posts
Armorama: 1,867 posts
Posted: Saturday, August 01, 2009 - 06:22 PM UTC
Doing fine Doug, Carry on.

"Q"
"Don't fear the night, fear what hunts at night"
California, United States
Joined: December 06, 2004
KitMaker: 3,694 posts
Armorama: 2,693 posts
Posted: Monday, August 03, 2009 - 01:11 AM UTC
Some slow progress. I am adding the grouser on the turret side. Unfortunately, I painted the backs of the grouser pieces as well as the front so I had to sand some paint off to get things to stick. I also used some red brown paint to paint the wooden tool handles.
In this photo, you can see the dark glue stains on the turret side frommy first attempt to glue on the smaller grouser parts as well as the paint on the back of those parts that kept the glue from doing its magic.

Colorado, United States
Joined: December 25, 2004
KitMaker: 3,770 posts
Armorama: 2,263 posts
Posted: Monday, August 03, 2009 - 10:59 AM UTC
I am calling this one done!
Not sure what's up with the lighting, but with the flash it really brings out the dusting pigments.....looks so much better in person.


Mike

California, United States
Joined: April 01, 2002
KitMaker: 4,287 posts
Armorama: 1,867 posts
Posted: Monday, August 03, 2009 - 07:04 PM UTC
Well done Mike. "Q"

"Don't fear the night, fear what hunts at night"
California, United States
Joined: October 06, 2006
KitMaker: 580 posts
Armorama: 499 posts
Posted: Wednesday, August 05, 2009 - 08:42 AM UTC
Some progress:
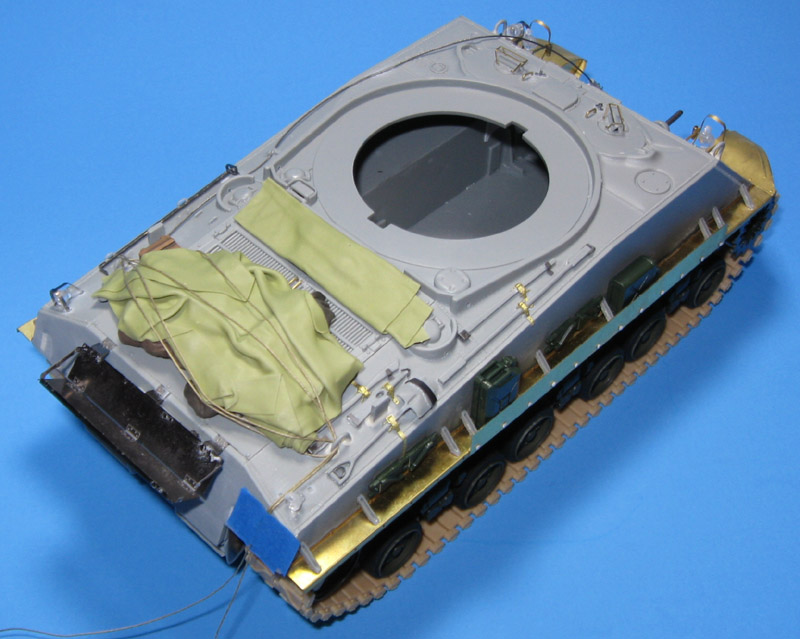
I made a stowage bundle for the rear deck. This was my second attempt.
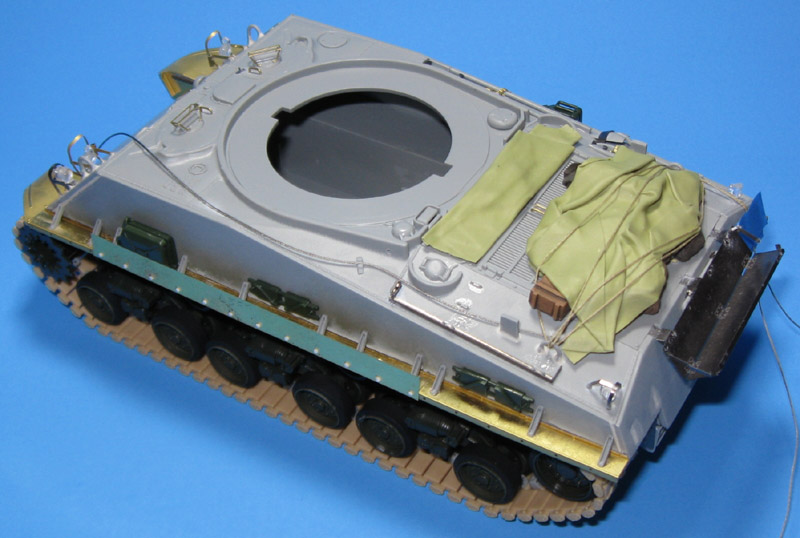
I also started building stowage for the fenders.
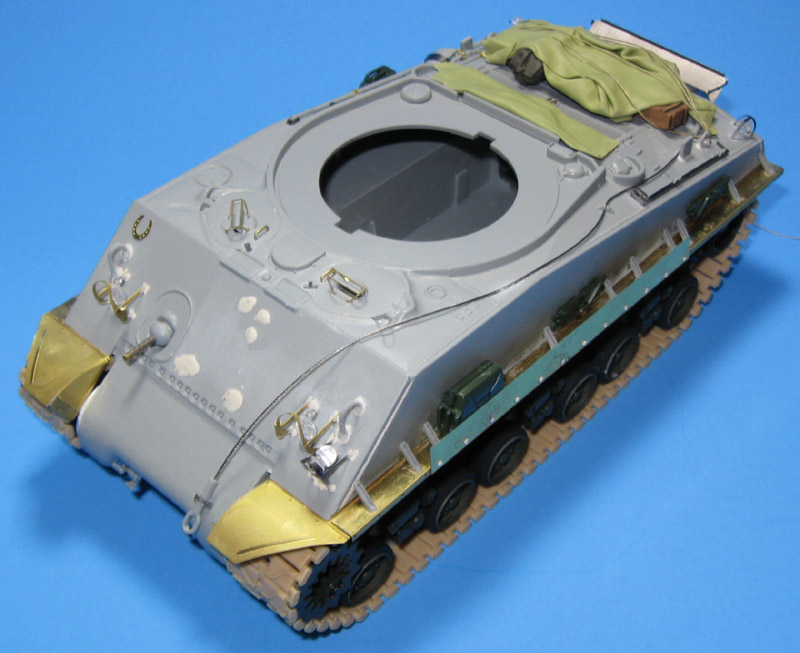
I sliced the travel lock off the bow and began repair work. It was not properly centered.
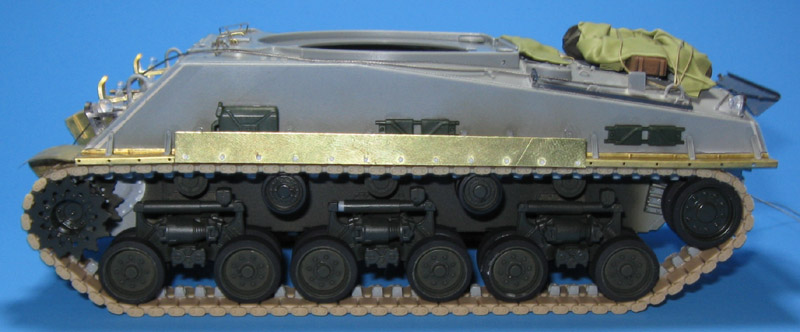
I shortened both track runs by two links. They are now nice and tight.
-Doug
California, United States
Joined: April 01, 2002
KitMaker: 4,287 posts
Armorama: 1,867 posts
Posted: Wednesday, August 05, 2009 - 02:12 PM UTC
Very nice Doug. What type of putty do you use for making your tarps? They look really good.
Thanks for posting. "Q"

"Don't fear the night, fear what hunts at night"
California, United States
Joined: October 06, 2006
KitMaker: 580 posts
Armorama: 499 posts
Posted: Wednesday, August 05, 2009 - 04:40 PM UTC
Hi Matt,
Jon Hayward recently posted a great video showing how to make tarps using epoxy putty and talcum powder.
The ThreadThe VideoJon uses Magic Sculpt. I used medium grade, green Milliput. They are basically the same thing.
That was my second attempt at making tarps. Ever. It's pretty easy and fun, too.
-Doug
California, United States
Joined: April 01, 2002
KitMaker: 4,287 posts
Armorama: 1,867 posts
Posted: Thursday, August 06, 2009 - 02:17 AM UTC
I use Aves myself. Was just curious as to what you were using. It is easy to do. I have a friend who makes the most realistic looking stowage iems using this stuff. Have been trying to get him to market it, but he's content just making stuff for himslef and a couple buddies. I'll keep trying though..

Thanks, "Q"

"Don't fear the night, fear what hunts at night"
California, United States
Joined: December 06, 2004
KitMaker: 3,694 posts
Armorama: 2,693 posts
Posted: Wednesday, August 12, 2009 - 03:13 AM UTC
Small amount of progress for me. The grousers are all glued onto the turret. I'm painting the tools (and found some mold seams to sand). I've been side-tracked by the AFV Club T16 workable track set. I bought this around the time I found out the Tamiya tracks had the end connectors in the wrong places. I finally decided to try them out and write up a build review on the track set.
The tracks go together well although sometimes an end connector will pop off as you try to put another link on. This is the first individual track set I've ever done so I'm working kind of slow. I have a length of 23 right now. AFV Club says you have to cut down some rings on the inside of the drive sprocket near the hub. Mine are glued on already so it's a bit tougher to do. This is because the AFV Club guide teeth are taller than the Tamiya. What they don't tell you is that you must also cut down the return roller mounts as you have the same problem there. I kept wondering why end connectors were popping off when I tried to get the length I'd built to sit down properly on the return rollers or sometimes it would sit without popping conectors but one section between the rollers would be bent in a "V". I was planning on putting the sand shields on anyway so that should hide the tracks floating above the rollers.
Live and learn.
Dalarnas, Sweden
Joined: March 24, 2006
KitMaker: 2,093 posts
Armorama: 1,359 posts
Posted: Wednesday, August 12, 2009 - 06:44 AM UTC
The figure for my Sd.Kfz.250/8 is done, too.
Just a few more things to do and I can complete the dio it is placed in.
Meet "Lachender Ludwig"(Laughing Ludwig)

The other 2 figures I completed so far are in the "Mighty 88"-campaignthread...
Only 3 more to go + all the gear....

Working on:
Reworking Italeri/Zvezda T 34/76
http://scalemodelling-by-ron.blogspot.se/
Queensland, Australia
Joined: April 22, 2003
KitMaker: 584 posts
Armorama: 241 posts
Posted: Thursday, August 13, 2009 - 04:05 AM UTC
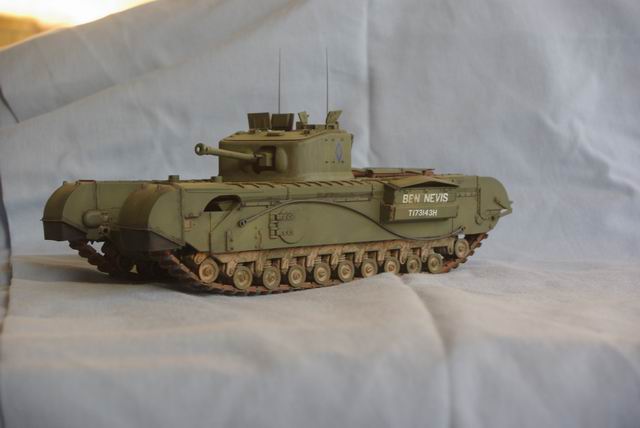
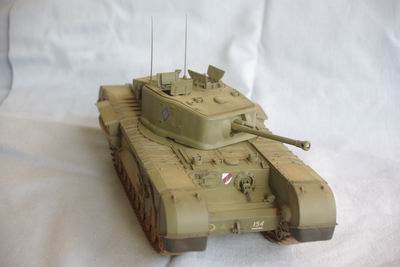
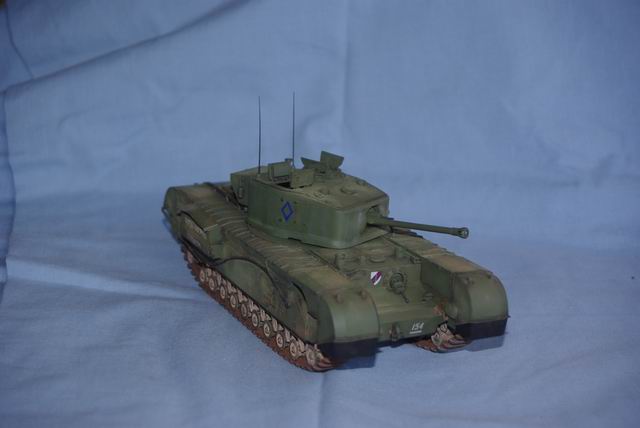
Well I am going to call the Churchill done. It has received a light dusting of pigments - the MIG Allied Green (Fading) and also some of the dried mix I made up for the wheels and tracks. I haven't added all the tools or the figures as I am contemplating a small dio in the future so will leave them and final weathering to suit whatever scenario I decide to put it in.
The first 2 pics are natural light - late afternoon and show the dusting well - the third is with a flash and it interestingly seems to have gone through the pigments and got the base green.
and here is the teaer for the next shelf sitter to be worked on:

Brian

Ohio, United States
Joined: August 05, 2007
KitMaker: 258 posts
Armorama: 116 posts
Posted: Thursday, August 13, 2009 - 09:18 AM UTC
Small update about my Cromwell. Things have been going at a snail's pace lately, and as I found out the hard way, I shouldn't have glued the upper and lower hull together until AFTER I had glued the track together around the wheels. So out came the acetone to separate them, and things got much easier.
I'm using the Hobbyboss Cromwell track links. I like them and they were cheap, but they are a lot of work to put together (according to the box 123 links per side). I've got about 80 links done on one side. I'm using superglue for the straight sections and regular modeling glue for the parts that need to curve, as it gives me longer working time to shape the tracks around the wheels:


Sorry about the bad quality of the pics. I'll try to take some more later. Hopefully I can get the tracks done within the next week or so... Any suggestions for working with individual link track are appreciated, this is my first time using them.

California, United States
Joined: October 06, 2006
KitMaker: 580 posts
Armorama: 499 posts
Posted: Friday, August 21, 2009 - 11:34 AM UTC
More progress on the M4A3(105) HVSS...
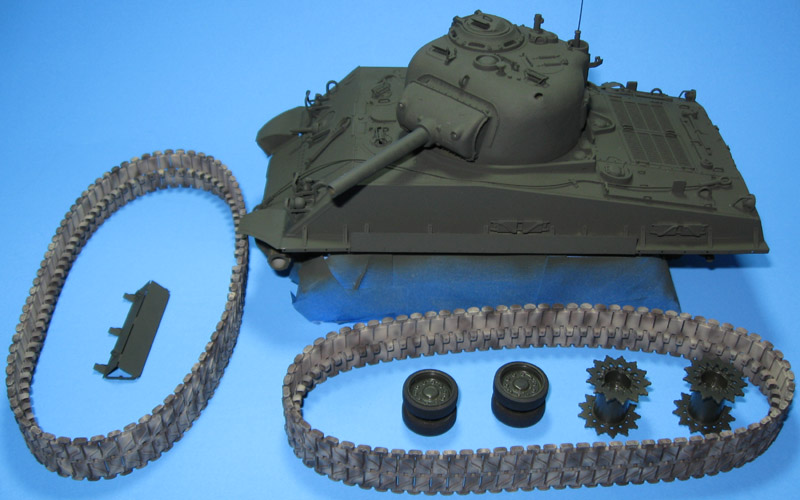
I discovered a few boo boos after putting on the base coat and need to fix those this evening. Then I can finish with the airbrushing and move on to detail painting and weathering.
-Doug
Alvsborgs, Sweden
Joined: April 21, 2003
KitMaker: 230 posts
Armorama: 64 posts
Posted: Sunday, August 23, 2009 - 10:14 AM UTC
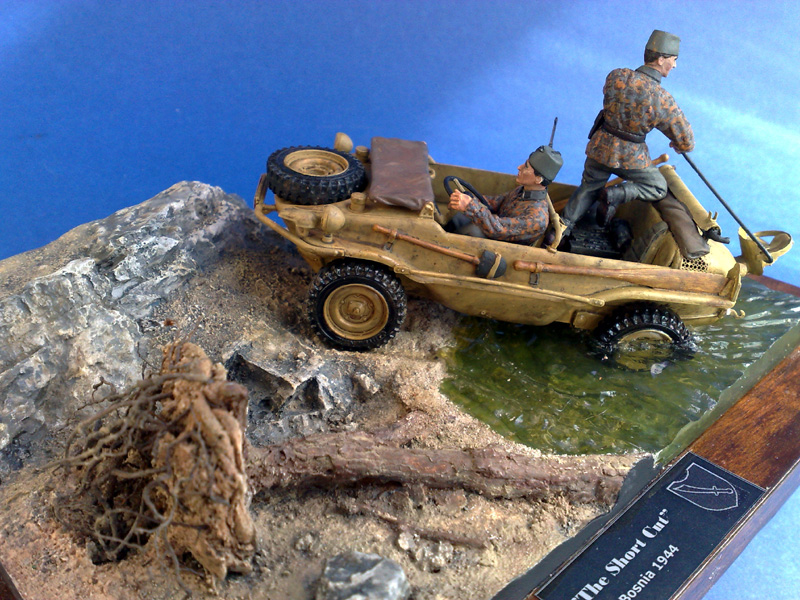
Hello, here is my entry for this “Get the job done” campaign, a diorama with the Handschar division. The kit is from Jaguar.
Cheers
/Christer


Dalarnas, Sweden
Joined: March 24, 2006
KitMaker: 2,093 posts
Armorama: 1,359 posts
Posted: Sunday, August 23, 2009 - 08:31 PM UTC
Very good looking dio, Christer!
What did you use for the water?
It is a bit too clear, though...
Working on:
Reworking Italeri/Zvezda T 34/76
http://scalemodelling-by-ron.blogspot.se/
Scotland, United Kingdom
Joined: February 04, 2006
KitMaker: 884 posts
Armorama: 622 posts
Posted: Tuesday, August 25, 2009 - 08:34 AM UTC
Hi
Like the diorama.
Interesting choice of occupants.

Building for My pleasure & hoping others like what I build.
Being built at the moment
Way too many unfinished.
Centurian MKIII Tamiya
MinenRaumer
Type 95 Ha Go
California, United States
Joined: April 01, 2002
KitMaker: 4,287 posts
Armorama: 1,867 posts
Posted: Saturday, August 29, 2009 - 04:44 PM UTC
Thanks for keeping the thread alive all. I have returned to college after almost 20 years and have a steep learning curve ahead of me

I've gotten in a little time at the bench, but nothing in regards to some of the campaigns I am running or participating in.

Hoping to get into the groove of school as it were, so I can get some of my campaign entries worked on. Again, thanks for keeping it going. "Q"

"Don't fear the night, fear what hunts at night"
Texas, United States
Joined: February 22, 2008
KitMaker: 5,026 posts
Armorama: 1,604 posts
Posted: Saturday, August 29, 2009 - 05:21 PM UTC
Matthew goodluck with school, the VA sent me back on a chapter 31 for reeducation Spring 2008 for accounting. Back to school this fall.

If it aint broke dont fix it.
Ain, France
Joined: April 16, 2009
KitMaker: 64 posts
Armorama: 57 posts
Posted: Saturday, August 29, 2009 - 09:23 PM UTC
"Laughing Ludwig" looks familiar. Tamiya's germans w/ bicycles?


