#136
Distrito Federal, Mexico
Joined: April 06, 2002
KitMaker: 437 posts
Armorama: 391 posts
Posted: Wednesday, November 17, 2010 - 07:04 PM UTC

Hello friends!
Byron, Bob and Sal thanks for your kind comments!Here more pics!
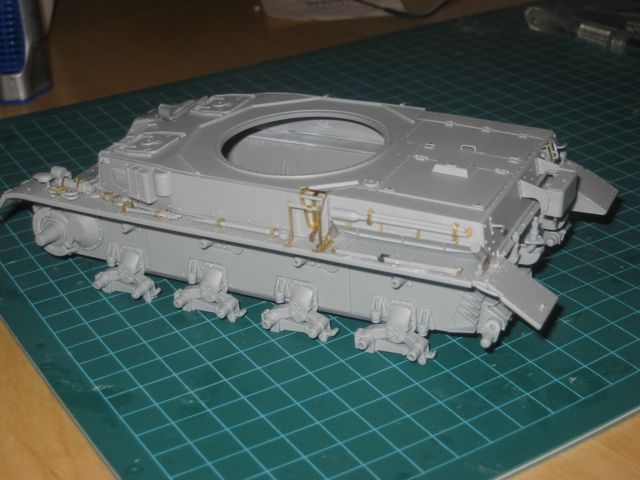
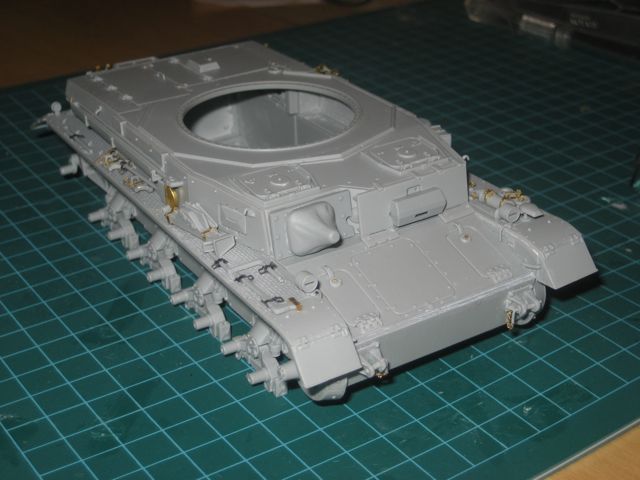
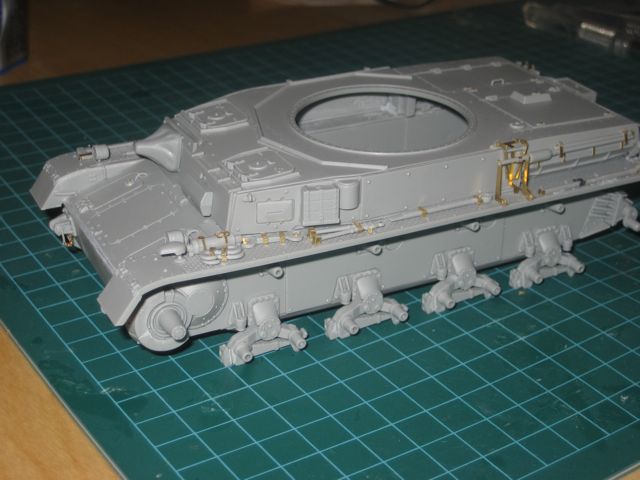
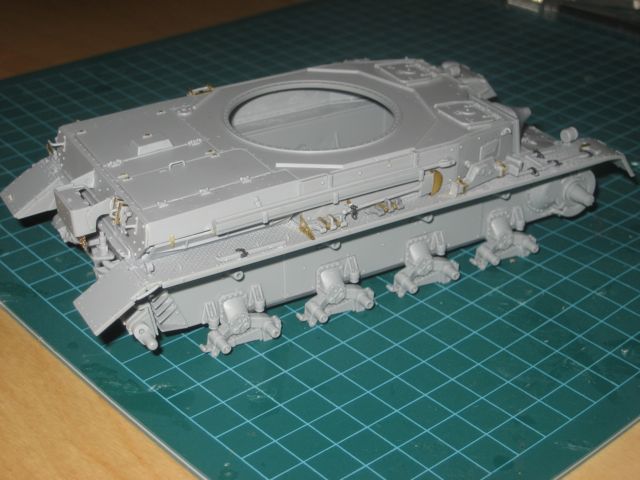
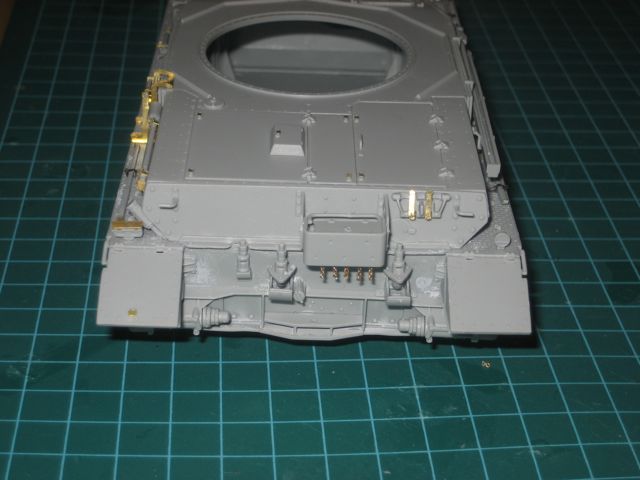
Added Port Vision and for the interior they were made with styrene and PE. Added impacts in the front mudguards. Ready the support hooks in the hatches.
 Added the rear mudguards of PE.
Regards,
Rodolfo
Current Project:
I am building a Kingtiger Ausf. B, Version: March 1945 - AMMO/MIG, 1/35

#041
Kobenhavn, Denmark
Joined: July 20, 2006
KitMaker: 10,069 posts
Armorama: 4,677 posts
Posted: Thursday, November 18, 2010 - 11:24 PM UTC
Looks nice, Rodolfo. Very nice details you have there.
Looking forward to see more.

Campaign'oholic - 252+ campaigns completed
Texas, United States
Joined: February 22, 2008
KitMaker: 5,026 posts
Armorama: 1,604 posts
Posted: Friday, November 19, 2010 - 05:59 AM UTC
Rodolfo, I am probably blind.but did you state which kit this is? Still looking good, I see a lot of patience and determination and research.
Bob
If it aint broke dont fix it.
Hunedoara, Romania
Joined: May 06, 2008
KitMaker: 354 posts
Armorama: 343 posts
Posted: Friday, November 19, 2010 - 06:04 AM UTC
Hi to all!
This is my first entry to this campaign,an old Pz 4 F1 made by Hasegawa in 1/72 scale...A fast progress and first coat of paint:


Cheers,
Dani

Texas, United States
Joined: February 22, 2008
KitMaker: 5,026 posts
Armorama: 1,604 posts
Posted: Friday, November 19, 2010 - 09:37 AM UTC
Dani, nice job and in braille scale which I have a hard time seeing not to mention the intricate dexterity. Paint looks good and the antenna also.
Bob
If it aint broke dont fix it.
England - West Midlands, United Kingdom
Joined: May 23, 2010
KitMaker: 642 posts
Armorama: 593 posts
Posted: Saturday, November 20, 2010 - 05:27 AM UTC
Ontario, Canada
Joined: May 18, 2010
KitMaker: 219 posts
Armorama: 213 posts
Posted: Saturday, November 20, 2010 - 08:51 AM UTC
Rudolfo, Dani and Paul, great work! You guys are definitely stepping things up a notch... I'm glad I got mine finished before I had to compare it with yours.

Dying is easy... comedy is hard! Scale modeling? Well that's another story altogether.
"War is a series of catastrophes that results in a victory." ~ Georges Clemenceau

#135
California, United States
Joined: August 05, 2007
KitMaker: 1,501 posts
Armorama: 1,485 posts
Posted: Saturday, November 20, 2010 - 12:30 PM UTC
Paul,
Your probably going to hate me for this but no its not ready for paint?
The engine muffler (larger one) on that extremely well detailed Panzer IV Ausf. D is incorrect in that it should be longer in length almost covering the entire area between the rear fenders. The engine muffler you have there is of a latter model panzer - first introduced on the Ausf F1. Also the small turret traverse engine muffler and angled exhaust pipe needs to be moved over near the left mud flap. The final exhaust pipe leading away from the small muffle should not be bent down toward the main muffler. This was a short piece coming straight out of the muffler running parallel with the main engine muffler. The muffler setup is identical to all of the Ausf A - E models.
And for goodness sake get rid of those over scaled reflectors on both mud flaps! These should not be larger in diameter than the openings on the skeleton tracks. Your also missing the tail light over the right rear fender opposite the distance indicator light on the left rear fender. And if you'll look on the rear section of your Jagdpanzer IV you'll see two vertical bars connection the towing hold with the lower muffler support brace. You could easily make these from thin sheet styrene.
After taking the time and effort to open each and everyone of the track horns, add rivets, aluminum barrel, brass mud flaps and holders on the turret not to mention many other small details that you've added turning this little cupcake into a real gem, don't you dare go and piss me off by not addressing these needed issues!

Nice figure too!
Here's a
link of a Tristar 35th scale kit, just click on the photos to enlarge.
-Eddy

If you absolutely must have a city completely destroyed overnight . . . call the MARINES
Currently on the bench:
1:12 Bandia Star Wars K-2SO
1:35 Takom T-54B Late
Hunedoara, Romania
Joined: May 06, 2008
KitMaker: 354 posts
Armorama: 343 posts
Posted: Saturday, November 20, 2010 - 10:17 PM UTC
England - West Midlands, United Kingdom
Joined: May 23, 2010
KitMaker: 642 posts
Armorama: 593 posts
Posted: Sunday, November 21, 2010 - 02:20 AM UTC
Hi Dani,
The 'salt technique' has turned out well, the model is looking really good so far. Are you going to put it on a base of any sort?
All the best,
Paul
England - West Midlands, United Kingdom
Joined: May 23, 2010
KitMaker: 642 posts
Armorama: 593 posts
Posted: Sunday, November 21, 2010 - 05:29 AM UTC
Quoted Text
don't you dare go and piss me off by not addressing these needed issues!
Hi Eddy,
As if I would. There is an old expression here (from our naval tradition) 'why spoil the ship for a 'happorth of tar', so on Tuesday I will go to my local rail enthusiast shop (it doesn't open on Monday) and purchase the correct diameter tube and get right on with doing a proper job. I also will put the spare track links on the right fender. I can only put this gaffe down to the fact I haven' t yet built up a full reference library and I am now going to concentrate my limited funds on buying a few books instead of kits (which I have more than enough to keep me occupied for years).
Thanks for the comments, this is what the forum is best at - helping each other out and ensuring we get the best from our modelling.
All the best,
Paul

Texas, United States
Joined: February 22, 2008
KitMaker: 5,026 posts
Armorama: 1,604 posts
Posted: Tuesday, November 23, 2010 - 06:01 PM UTC
I am done having fun with this kit, so its finished.


Bob
If it aint broke dont fix it.

#135
California, United States
Joined: August 05, 2007
KitMaker: 1,501 posts
Armorama: 1,485 posts
Posted: Saturday, November 27, 2010 - 09:01 AM UTC
Well Bob,
Your machine looks like it's been through a mud storm! But it's finished and your on your way, looks good too!
Quoted Text
@ Eddy: just looked at your build log. You are building a real tank correct?  it looks fantastic. (BTW) the Tamiya Mk IV was so easy and fast to build it was over in one afternoon, the painting is taking me the longest.
Bob
It's been 12 days of off and on building on the work bench. I just couldn't resist raiding my spares box . . . I'm just begining to have fun with this build and am quite a way's away from finishing it. Will post again before painting begins.
The Tamiya chassis is at least an 1/8 inch off both in width and length but I'm giving it my best shot!


Lets see how the rest of the kit falls together?
-Eddy

If you absolutely must have a city completely destroyed overnight . . . call the MARINES
Currently on the bench:
1:12 Bandia Star Wars K-2SO
1:35 Takom T-54B Late
Ontario, Canada
Joined: May 18, 2010
KitMaker: 219 posts
Armorama: 213 posts
Posted: Saturday, November 27, 2010 - 07:05 PM UTC
Eddy... you are scaring me now...

I think this'll be museum quality when you're done, and I can hardly wait to see the build up. A tip of the hat AND the glass to your abilities!
Peter


Dying is easy... comedy is hard! Scale modeling? Well that's another story altogether.
"War is a series of catastrophes that results in a victory." ~ Georges Clemenceau
Hamilton, New Zealand
Joined: February 07, 2009
KitMaker: 795 posts
Armorama: 743 posts
Posted: Sunday, November 28, 2010 - 07:52 PM UTC
Time for an overdue update. I posted this earlier as part of my blog but just adding it here by way of apology because it looks like I won't make the deadline on this campaign.
I struck a problem with the markings (
I won't bore you with it all but you can read the details of that HERE if you want ) which meant it got put on hold for five/six weeks while I sorted that out.
And we're abandoning big city life to go live in a small town that has a population smaller than the roll at my daughter's highschool which was planned for early next year but has now been bought forward to the week before Christmas because we found a house we wanted but had to take it earlier to get it.
So into the box this goes and hopefully it'll get finished sometime in late January/early February.
On the bright side the new house has a large self contained third lounge that will become my office and hobby room so no more competing for the dining table which will hopefully mean a much more productive modelling year in 2011.

#144
Alberta, Canada
Joined: February 18, 2005
KitMaker: 268 posts
Armorama: 111 posts
Posted: Tuesday, November 30, 2010 - 07:47 AM UTC
i have finally finished the hull of my project, (its amazing how a new born baby, can put a stop to normalcy for a while), but for some reason the web site is down, any idea how i can post pictures ?
thanks
North Carolina, United States
Joined: June 06, 2006
KitMaker: 4,691 posts
Armorama: 3,509 posts
Posted: Tuesday, November 30, 2010 - 12:18 PM UTC
Quoted Text
i have finally finished the hull of my project, (its amazing how a new born baby, can put a stop to normalcy for a while), but for some reason the web site is down, any idea how i can post pictures ?
thanks
You can post pictures of your progress right here in the thread,you must use a site like photo-bucket or the like,then paste the image's link right here on your posting.Then when the gallery is up again,you may upload your finished build pictures directly to the gallery,when doing this make sure your pic is 800x600.
Uusimaa, Finland
Joined: March 30, 2004
KitMaker: 2,845 posts
Armorama: 808 posts
Posted: Wednesday, December 01, 2010 - 06:37 AM UTC

#144
Alberta, Canada
Joined: February 18, 2005
KitMaker: 268 posts
Armorama: 111 posts
Posted: Wednesday, December 01, 2010 - 05:20 PM UTC
Texas, United States
Joined: February 22, 2008
KitMaker: 5,026 posts
Armorama: 1,604 posts
Posted: Wednesday, December 01, 2010 - 05:41 PM UTC
Mark, nice clean job you have there. Mine are usually messy up until I get them ready for paint.
Bob
If it aint broke dont fix it.

#144
Alberta, Canada
Joined: February 18, 2005
KitMaker: 268 posts
Armorama: 111 posts
Posted: Wednesday, December 01, 2010 - 05:51 PM UTC
Bob, i know what you mean i am usually the same, but for some reason i was able to complete most of the PE without messing it up to much.. it took me the best part of a day and a half to do mind you...
mark

#041
Kobenhavn, Denmark
Joined: July 20, 2006
KitMaker: 10,069 posts
Armorama: 4,677 posts
Posted: Friday, December 03, 2010 - 01:47 AM UTC
Very nice zimmerit, Eetu. Sure it is the first time?

Looking forward to see more

Campaign'oholic - 252+ campaigns completed
England - West Midlands, United Kingdom
Joined: May 23, 2010
KitMaker: 642 posts
Armorama: 593 posts
Posted: Friday, December 03, 2010 - 02:43 PM UTC
Hi everyone and especially Eddy,
I have finally finished the correction to the exhaust of my IVD. It took a bit longer to source the styrene tube, but the construction was straightforward. While I was at it I added a few more rivets and put the prominient lifting hooks on the turret. Well here it is and I sincerely hope it is ready for painting now.


All the best,
Paul

Texas, United States
Joined: February 22, 2008
KitMaker: 5,026 posts
Armorama: 1,604 posts
Posted: Friday, December 03, 2010 - 04:52 PM UTC
Paul G. nice job on the muffler, is it scratch or after market?
Bob
If it aint broke dont fix it.
England - West Midlands, United Kingdom
Joined: May 23, 2010
KitMaker: 642 posts
Armorama: 593 posts
Posted: Friday, December 03, 2010 - 09:15 PM UTC
Quoted Text
Paul G. nice job on the muffler, is it scratch or after market?
Bob
Hi Bob,
It's a scratch job using photos as reference. So it may not be 100% dimensionally accurate, but I don't care I am going to paint it now, to get it finished for the end of the campaign.
Thanks for the comment, all the best,
Paul
 Hello friends!


