Stan: nice work on the Sherman, looks great. Looking forward to seeing your Dio.
Here's the finished 1:72 Airfix Jeep and Trailer.
I tried using matt varnish on the windshield to get a dusty look after reading someone suggest it on the site but it did'nt work out as well as i'd hope, looks a little wrong.
The Tac sign 9/56 on the windshield and trailer is made of 4 seperate numbers sliced off a spare decal sheet, I will be buying a magnifying light asap after nearly going blind getting them all on there!
Markings are for a Jeep of the Australian 9th Division in the Pacific Campaign.
Cheers,
Tim
Campaigns
Where Armorama group builds can be discussed, organized, and updates posted.
Hosted by Darren Baker, Richard S.
Land Down Under
Firefly74
Queensland, Australia
Joined: April 15, 2010
KitMaker: 224 posts
Armorama: 205 posts
Joined: April 15, 2010
KitMaker: 224 posts
Armorama: 205 posts
Posted: Saturday, June 04, 2011 - 04:43 PM UTC
Bigrip74
Texas, United States
Joined: February 22, 2008
KitMaker: 5,026 posts
Armorama: 1,604 posts
Joined: February 22, 2008
KitMaker: 5,026 posts
Armorama: 1,604 posts
Posted: Saturday, June 04, 2011 - 05:56 PM UTC
@ Stan: beautiful job on the paint.
@ Tim: nice willys, what type of lighting are you using? There are no glares. I need to see if I can replicate what you have done.
Bob
@ Tim: nice willys, what type of lighting are you using? There are no glares. I need to see if I can replicate what you have done.
Bob
Posted: Sunday, June 05, 2011 - 11:48 PM UTC
Hi all!
You've been progressing great so far!
I'll join in with a Tasca M4 Mark III DV. The famous 'Cricklade' of the Royal Wiltshire Yeomanry. That unit served under 2nd NZ Div. in Syria.
Will have the starting shot and some progress pics ready for you soon.
Keep up the good work
greetings from Bavaria
You've been progressing great so far!
I'll join in with a Tasca M4 Mark III DV. The famous 'Cricklade' of the Royal Wiltshire Yeomanry. That unit served under 2nd NZ Div. in Syria.
Will have the starting shot and some progress pics ready for you soon.
Keep up the good work
greetings from Bavaria
stansmith
England - North West, United Kingdom
Joined: July 18, 2010
KitMaker: 611 posts
Armorama: 584 posts
Joined: July 18, 2010
KitMaker: 611 posts
Armorama: 584 posts
Posted: Monday, June 06, 2011 - 07:12 AM UTC
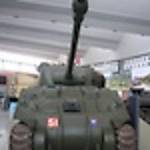
here is where i am now. this was my first time at an attempt to weather with oils and do rain marks. i still have to go at it with some pigments yet. but being 14 it's quite difficult getting to somewhere that they sell them. the crew was scrounged from an old tamiya mitalda that i never finished. just waiting for the tankriders and the other soldiers and the dio will be nearly done.
does anyone know if that is the right coloured beret for new zealand tankers, or is it a different colour?
stan
does anyone know if that is the right coloured beret for new zealand tankers, or is it a different colour?
stan
Middle_Franconian
Bayern, Germany
Joined: January 02, 2011
KitMaker: 279 posts
Armorama: 30 posts
Joined: January 02, 2011
KitMaker: 279 posts
Armorama: 30 posts
Posted: Monday, June 06, 2011 - 08:36 AM UTC
@ Leo: To speak in medical terms: Your Sherman addiction is pathological!
What about an Australian Leopard? M113? A Centurion??
Unfortunately, I do not have anything to join this campaign, but I will watching it´s progress attentively
Servus,
Sebastian
What about an Australian Leopard? M113? A Centurion??
Unfortunately, I do not have anything to join this campaign, but I will watching it´s progress attentively
Servus,
Sebastian
Bigrip74
Texas, United States
Joined: February 22, 2008
KitMaker: 5,026 posts
Armorama: 1,604 posts
Joined: February 22, 2008
KitMaker: 5,026 posts
Armorama: 1,604 posts
Posted: Monday, June 06, 2011 - 11:46 AM UTC
Ok Stan old man, give us your rundown on the track edge wearing it looks much better than anything that I have done. Remember I only can read in the
1.
2.
3.
format. But please take some time to explain your method on the tracks they look great.
Bob
1.
2.
3.
format. But please take some time to explain your method on the tracks they look great.
Bob
Posted: Monday, June 06, 2011 - 08:33 PM UTC
Quoted Text
@ Leo: To speak in medical terms: Your Sherman addiction is pathological!
What about an Australian Leopard? M113? A Centurion??
Unfortunately, I do not have anything to join this campaign, but I will watching it´s progress attentively
Servus,
Sebastian
Yeah, Babe!! Come on over I'll fix you up with a nice Sherman Mark III of Dragon!!
stansmith
England - North West, United Kingdom
Joined: July 18, 2010
KitMaker: 611 posts
Armorama: 584 posts
Joined: July 18, 2010
KitMaker: 611 posts
Armorama: 584 posts
Posted: Tuesday, June 07, 2011 - 03:51 AM UTC
Quoted Text
Ok Stan old man, give us your rundown on the track edge wearing it looks much better than anything that I have done. Remember I only can read in the
1.
2.
3.
format. But please take some time to explain your method on the tracks they look great.
Bob
hi bob,
1. first of all, i painted the whole of the tracks in tamiya XF-52 flat earth
2. i sprayed all of the tracks in XF-1 flat black, not completely black, just lightly so there is a bit of a light brown tinge going through
3. i mixed up some paint of revells steel and tamiyas flat black about the ratio of 80:20
4. i brushed this on all the prominent places like those double H kind of things on the tracksa and when there was hardly any paint on the brush, i went along all those little track connectors, because there was hardly any paint on the brush, it just went on the sticky out bits. don't paint the inside of the tracks though
5. i shaved a beige coloured pastel with my craft knife till it was like a powder, mixed it with water until it was like a paste kind of substance and brushed it on all of the tracks even the inside.
6. when this had dryed, i thoroughly scrubbed the tracks with a tooth brush until most of it had gone.
and then your done.
hope that helped.
cheers stan
Bigrip74
Texas, United States
Joined: February 22, 2008
KitMaker: 5,026 posts
Armorama: 1,604 posts
Joined: February 22, 2008
KitMaker: 5,026 posts
Armorama: 1,604 posts
Posted: Tuesday, June 07, 2011 - 02:22 PM UTC
Stan,
I printed your description and put into my binder labeled Modeling Techniques. Thanks for the blow by blow I get the picture, but it was the pastel that peaked my interest. I will try that very soon.
Bob
I printed your description and put into my binder labeled Modeling Techniques. Thanks for the blow by blow I get the picture, but it was the pastel that peaked my interest. I will try that very soon.
Bob
stansmith
England - North West, United Kingdom
Joined: July 18, 2010
KitMaker: 611 posts
Armorama: 584 posts
Joined: July 18, 2010
KitMaker: 611 posts
Armorama: 584 posts
Posted: Wednesday, June 08, 2011 - 03:34 AM UTC
no problem bob
Firefly74
Queensland, Australia
Joined: April 15, 2010
KitMaker: 224 posts
Armorama: 205 posts
Joined: April 15, 2010
KitMaker: 224 posts
Armorama: 205 posts
Posted: Wednesday, June 08, 2011 - 09:12 PM UTC
Rebilda: Nice choice, look forward to seeing your build.
Stan: Great work on the Sherman! Weathering is well done.
Bob: I took the photos of the Willys in the morning on an overcast day with a little sun around. Usually I take photos in the mid afternoon when the sun is high and at it's brightest and use the shade of the carport to take them. I put the model just outside the direct sunlight on the edge of the shadow as we get a lotta sun here and full sunlight produces glare and obscures the detail in the paint and weathering.
Sometimes it takes a bit of playing around to get the light right and to avoid getting my shadow or the camera shadow on it but it seems to work ok for me. Hope that's of some help.
Tim
ianclasper
Washington, United States
Joined: September 02, 2009
KitMaker: 227 posts
Armorama: 141 posts
Joined: September 02, 2009
KitMaker: 227 posts
Armorama: 141 posts
Posted: Friday, June 10, 2011 - 07:51 AM UTC
I have decided to build a 17 pounder / GMC 353 combination as used by 3RAR in Korea.
I am using the Bronco 17 pounder and the Tamiya 353.
Following photos on the Australian War Memorial, I am building the 17 pdr as an Australian built example that lacked the pony wheel on the trail and the curved strapping along the top of the gun shield. It appears from WW11 photos that these guns were fitted with an additional sighting system that sighted through a hole in the right hand side of the shield, however on studying Korean war era photos shows that these had been deleted and the hole had been plated over. Another issues are the tyres, the tread pattern in photos is symmetrical about the tyre center-line , however in the kit, the tread appears to be reversed, any one know of a good replacement ?
On to the GMC, this will be a standard US Army issue 353, that has been remarked with commonwealth roundels, however I cannot tell from the available photos if there were any unit / brigade markings.
Anyone do any decent Australian figures ? I guess that the equipment is going to be similar to late WW11 British, but how about the Hat, the very thing that distinguishes Aussie units from everyone else !
Ian Clasper
mickmelb
Victoria, Australia
Joined: August 16, 2010
KitMaker: 28 posts
Armorama: 19 posts
Joined: August 16, 2010
KitMaker: 28 posts
Armorama: 19 posts
Posted: Friday, June 10, 2011 - 10:11 PM UTC
Finaly got statred. Doing an aussie M548 Crago carrier. here are some early pic, if I can work out how to put them in here?
Sudzonic
Scotland, United Kingdom
Joined: December 07, 2007
KitMaker: 2,096 posts
Armorama: 1,983 posts
Joined: December 07, 2007
KitMaker: 2,096 posts
Armorama: 1,983 posts
Posted: Wednesday, June 15, 2011 - 08:55 AM UTC
Great start mick, good to have on board for the campaign good luck with your build.
Well I have finally got something for this campaign, I just won an Australian M113A1 FSV it is the old Tamiya kit but I got it for £15 on eBay so shouldn't grumble, as much as I would have loved to do an ASLAV with all the bar armour and such like I just do not have the cash to spend on it right now .
Sudzonic
Scotland, United Kingdom
Joined: December 07, 2007
KitMaker: 2,096 posts
Armorama: 1,983 posts
Joined: December 07, 2007
KitMaker: 2,096 posts
Armorama: 1,983 posts
Posted: Saturday, June 18, 2011 - 07:31 AM UTC
Bigrip74
Texas, United States
Joined: February 22, 2008
KitMaker: 5,026 posts
Armorama: 1,604 posts
Joined: February 22, 2008
KitMaker: 5,026 posts
Armorama: 1,604 posts
Posted: Saturday, June 18, 2011 - 10:17 AM UTC
Scott, I tried to accomplish that version as a conversion of a Tamiya M113 back in the early 1980"s. Never knew what became of the build I will need to watch your progress to see what I may have done, only the turret would have been a problem for my talents at that time.
Bob
Bob
Kiwi_Modeller
Queensland, Australia
Joined: August 13, 2010
KitMaker: 188 posts
Armorama: 121 posts
Joined: August 13, 2010
KitMaker: 188 posts
Armorama: 121 posts
Posted: Saturday, June 18, 2011 - 06:15 PM UTC
gday guys, well i finally got the urge to finish this piece of junk i wouldnt recomend it at all its a rubbish kit.
it came out reasonable but its all its gonna get.
nice lookin stuff going on by you guys keep it up im takin a break for a while as works gone crazy which is good in one sense.
cheers,
Graham
it came out reasonable but its all its gonna get.
nice lookin stuff going on by you guys keep it up im takin a break for a while as works gone crazy which is good in one sense.
cheers,
Graham
17741907
Istanbul, Turkey / Türkçe
Joined: December 05, 2007
KitMaker: 953 posts
Armorama: 705 posts
Joined: December 05, 2007
KitMaker: 953 posts
Armorama: 705 posts
Posted: Sunday, June 19, 2011 - 11:36 AM UTC
Nice one Graham....
ltb073
New York, United States
Joined: March 08, 2010
KitMaker: 3,662 posts
Armorama: 3,078 posts
Joined: March 08, 2010
KitMaker: 3,662 posts
Armorama: 3,078 posts
Posted: Sunday, June 19, 2011 - 03:15 PM UTC
Graham, for a rubbish kit like those it looks like you did pretty well there bud
Kiwi_Modeller
Queensland, Australia
Joined: August 13, 2010
KitMaker: 188 posts
Armorama: 121 posts
Joined: August 13, 2010
KitMaker: 188 posts
Armorama: 121 posts
Posted: Sunday, June 19, 2011 - 05:19 PM UTC
thanks guys, yeh its a pitty the interior detail is so bad thats why i glued the top on LOL theres nothing worth showing in it without a heap of scratch work but after the hassles i couldnt be bothered wasting more time on it, i've never struck a kit likt this one even 30 odd year old airfix an revell kits were better and nicer to build.
least i got a heap more good dragon kits in the stash am movin house soon so if i have time i want to try an build the aslav once i get the new place setup.
cheers,
Graham
least i got a heap more good dragon kits in the stash am movin house soon so if i have time i want to try an build the aslav once i get the new place setup.
cheers,
Graham
Sudzonic
Scotland, United Kingdom
Joined: December 07, 2007
KitMaker: 2,096 posts
Armorama: 1,983 posts
Joined: December 07, 2007
KitMaker: 2,096 posts
Armorama: 1,983 posts
Posted: Tuesday, June 21, 2011 - 03:28 AM UTC
That looks really great for a dog of a kit Graham well done.
I have started to build.
Uploaded with ImageShack.us
I have started to build.
Uploaded with ImageShack.us
stansmith
England - North West, United Kingdom
Joined: July 18, 2010
KitMaker: 611 posts
Armorama: 584 posts
Joined: July 18, 2010
KitMaker: 611 posts
Armorama: 584 posts
Posted: Tuesday, June 21, 2011 - 04:27 AM UTC
does a photo of the finished model need to go in the campaign gallery? if there is one.
stan
stan
GaryKato
California, United States
Joined: December 06, 2004
KitMaker: 3,694 posts
Armorama: 2,693 posts
Joined: December 06, 2004
KitMaker: 3,694 posts
Armorama: 2,693 posts
Posted: Tuesday, June 21, 2011 - 06:41 AM UTC
Quoted Text
does a photo of the finished model need to go in the campaign gallery? if there is one.
stan
Yes, indeed it does. Here is a link to the gallery.
Land Down Under
Adamskii
South Australia, Australia
Joined: November 06, 2010
KitMaker: 537 posts
Armorama: 474 posts
Joined: November 06, 2010
KitMaker: 537 posts
Armorama: 474 posts
Posted: Thursday, June 23, 2011 - 12:35 AM UTC
hey folks,
with the number of notification emails coming in on a daily basis for this campaign, I feel motivated to get something started.
So decision made - for this campaign I will do a centurion in Vietnam.
At this stage I guess I can only offer what i am doing in the way of research and decisions. I have decided to model one of the 4 centurions that participated in the defence of firebase Coral in 1968, by 1st Armoured Regiment, part of C squadron.
The reference books I am using and reading to make sure I get this correct ( as always) are the Mouse house publication "Military Briefs no.3 Centurions", "My Vietnam" a photo essay of the war, and "Firebase Coral" the documented event in novel form.
The base kit will be the AFV club Centurion mk5/1 RAAC Australian Vietnam version. Supplemental kits I will aquire over the coming weeks while I confirm the modifications/ continue research include, Mouse house decal set "Firebase Coral centurions" (how great that they make that set!), some Mouse house stowage bits, Rations boxes and some printed materials from BNA model world, Firestorm figures, Figures from hobby fan, and a photo etch set from Eduard. If I could find some quality proper tow cables I would be happy aswell. I already have the fruil tracks, and some markings and figures.
Known mods so far - Firebase Coral battle occured very early on for the centurions in vietnam so many of the in country modifications had not been done - so in fact i have to back date the kit in some ways rather than update! This includes REMOVING the two spare wheels from the front glacis plate and the omega brackets, removing any star picket bracing along the sides, removing the headlights and infra red system (although it may be carried tba more reference needed).
Unknown details - help needed! I still am unsure about the skeletal idler - is the kit one ok or do I need to update for a 1968 version? the ammo holder on the roof was on them apparently but nor for certain - which of the 4 vehicles at coral was the troop commander - (whats the ARN, callsign will be obvious) because that vehicle has 3rd Antenna mount that shortens the 30 cal ammo rack. The stowage boxes on the side and the guards all took a helluva beating and will have to be bent out of shape and battle damaged. I have no idea about type 1 2 or 3 barrels and mantlet covers, and will have to assume that the kits got it right. I know there is two turret types one more square than rounded, and the ARN's need to match, but just not confident yet about the other bits - more reading required! Also, If any of the 4 were a dozer variant then I want to do that one! but I think I am out of luck. dunno where I got the idea that there were 2 dozers there ... ?
I know this can be a can of worms but what colour do people reccomend for Australian Vietnam armour? can I use the white ensign OD ?
So thats the model I plan on doing. It will be a static model for this campaign, but I will leave the wheels and suspension operable as it will later be placed on a firebase coral diorama. (So might need to do some turret interior work too - anyone know if theres a kit for this ?? lol)
So lots of work to do before I start building. When I do I will post updates here but build log it elsewhere or I will hijack these pages.. lol.
thanks for the motivation folks..
Adam
(I never done Vietnam stuff before.. dad's a Veteran)
Firefly74
Queensland, Australia
Joined: April 15, 2010
KitMaker: 224 posts
Armorama: 205 posts
Joined: April 15, 2010
KitMaker: 224 posts
Armorama: 205 posts
Posted: Thursday, June 23, 2011 - 01:45 AM UTC
Graham: nice work on the scout car it scrubbed up well! Interesting unit markings, what kiwi unit are they for?
Adam: Nice choice! Sorry can't help with any Centurion info yer after, haven't got around to building one yet. Look forward to seeing your build.
Cheers,
Tim
Adam: Nice choice! Sorry can't help with any Centurion info yer after, haven't got around to building one yet. Look forward to seeing your build.
Cheers,
Tim