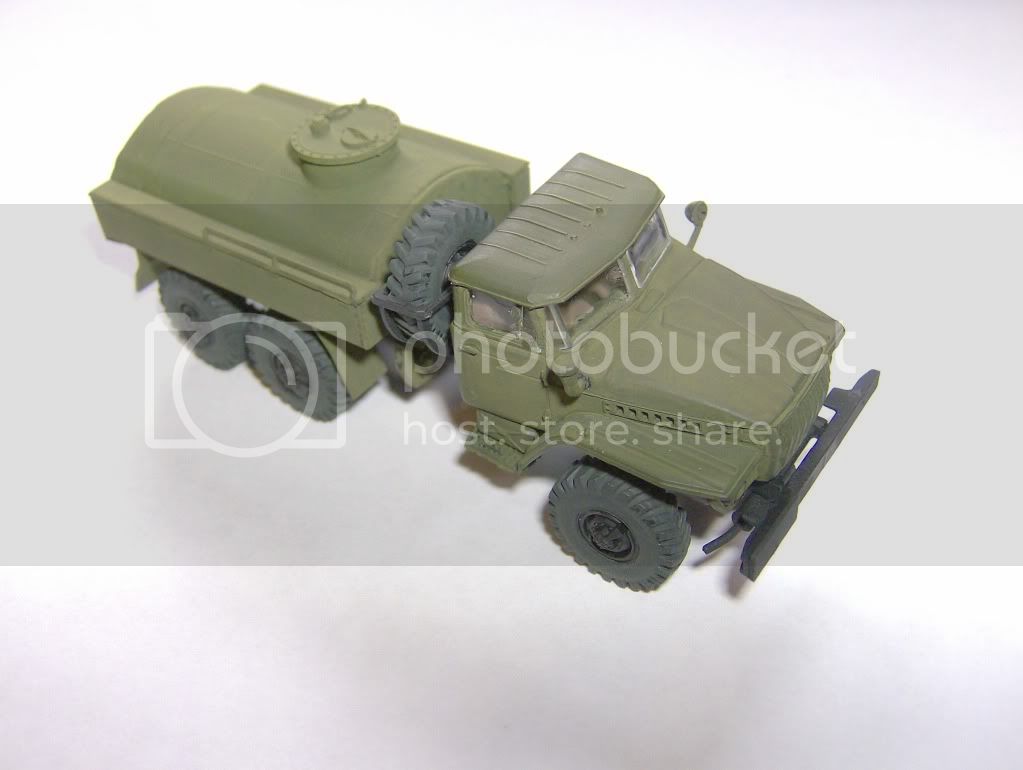
strictly out of the box campaign.
United Kingdom
Joined: March 15, 2010
KitMaker: 123 posts
Armorama: 118 posts
Posted: Wednesday, July 20, 2011 - 02:34 PM UTC
Quoted Text
I think I will go with the individual link track for this build...
What do you guy think a no brainier 
Those flexible tracks look just a tad loose there. I've successfully shortened 1/72 vinyl tracks by dipping them in boiling water but I couldn't say for certain whether it would work in this instance. It's also a bit of an imprecise science and easy to over-do resulting in tracks that are too tight (best to give the tracks very short dunks with lots of testing in between). If the indy links are OOTB and not too much of a drain on your patience then I'd guess they are your best option (if you try the shrinking process careful not to over do it or they will be your only option!!).
Anthony... very nice indeed!!
Cheers
John
Scotland, United Kingdom
Joined: November 16, 2009
KitMaker: 23 posts
Armorama: 23 posts
Posted: Friday, July 22, 2011 - 03:45 AM UTC
What a catastrophe, ive had a catastrophic failure of my compressor and airbrush. First the collar on my fave airbrush falls and breaks, then my compressor packs in. Thank flock i was just spraying an old stug iv.
New York, United States
Joined: March 08, 2010
KitMaker: 3,662 posts
Armorama: 3,078 posts
Posted: Monday, July 25, 2011 - 03:28 PM UTC
Active Campaigns on the bench:
Operation Fall Gelb - Pz.Kpfw. IV Ausf. C
Engineering the Future - M-26 Recovery Vehicle
115 Campaigns completed
Texas, United States
Joined: February 22, 2008
KitMaker: 5,026 posts
Armorama: 1,604 posts
Posted: Monday, July 25, 2011 - 04:14 PM UTC
Sal,
That build looks like it belongs in the EOD (End of Days) Campaign. It is just plain mean looking

Bob
If it aint broke dont fix it.
New York, United States
Joined: March 08, 2010
KitMaker: 3,662 posts
Armorama: 3,078 posts
Posted: Monday, July 25, 2011 - 04:27 PM UTC
Quoted Text
Sal,
That build looks like it belongs in the EOD (End of Days) Campaign. It is just plain mean looking 
Bob
Bob, this is the vehicle that will be supplying the ammo for my Morser Karl in your Art of the Battlefield Campaign


Active Campaigns on the bench:
Operation Fall Gelb - Pz.Kpfw. IV Ausf. C
Engineering the Future - M-26 Recovery Vehicle
115 Campaigns completed
Joel_W
 Associate Editor
New York, United States
Joined: December 04, 2010
KitMaker: 11,666 posts
Armorama: 1,143 posts
Posted: Tuesday, July 26, 2011 - 01:03 AM UTC
Scott, this morning when I logged in, all your pictures were gone and replaced with just Photobucket logos as you've exceded your bandwith limit.

On my Workbench:
Monogram 1/24 scale 427 Shelby Cobra
Just Completed:
Beemax 1/24 scale BMW M3 E30 1992 Evolution II
Joel_W
 Associate Editor
New York, United States
Joined: December 04, 2010
KitMaker: 11,666 posts
Armorama: 1,143 posts
Posted: Tuesday, July 26, 2011 - 01:06 AM UTC
Sal, super .looking build so far. A unusual subject for sure.

On my Workbench:
Monogram 1/24 scale 427 Shelby Cobra
Just Completed:
Beemax 1/24 scale BMW M3 E30 1992 Evolution II
Scotland, United Kingdom
Joined: December 07, 2007
KitMaker: 2,096 posts
Armorama: 1,983 posts
Posted: Tuesday, July 26, 2011 - 07:51 AM UTC
Quoted Text
Scott, this morning when I logged in, all your pictures were gone and replaced with just Photobucket logos as you've exceded your bandwith limit. 
Hay Sal I have been having some issues with photo bucket lately? Your build is coming on very nicely those are monster shells on there.
CUIDICH 'N RIGH
life is a river, it always runs.
New York, United States
Joined: March 08, 2010
KitMaker: 3,662 posts
Armorama: 3,078 posts
Posted: Tuesday, July 26, 2011 - 04:33 PM UTC
Quoted Text
Quoted Text
Scott, this morning when I logged in, all your pictures were gone and replaced with just Photobucket logos as you've exceded your bandwith limit. 
Hay Sal I have been having some issues with photo bucket lately? Your build is coming on very nicely those are monster shells on there.

no problem here with photobucket here
Yes the shells are huge, I would hate to be on the receiving end of 1 of these babies


Active Campaigns on the bench:
Operation Fall Gelb - Pz.Kpfw. IV Ausf. C
Engineering the Future - M-26 Recovery Vehicle
115 Campaigns completed
Scotland, United Kingdom
Joined: November 16, 2009
KitMaker: 23 posts
Armorama: 23 posts
Posted: Wednesday, July 27, 2011 - 11:10 AM UTC
California, United States
Joined: July 05, 2010
KitMaker: 39 posts
Armorama: 36 posts
Posted: Friday, July 29, 2011 - 03:52 PM UTC
Here is the build I'll be doing for the campaign. I saw this at my LHS and it reminded me of models I built as a kid. Not the most detailed but I'll have alot of fun building it.


Joel_W
 Associate Editor
New York, United States
Joined: December 04, 2010
KitMaker: 11,666 posts
Armorama: 1,143 posts
Posted: Saturday, July 30, 2011 - 02:01 AM UTC
Wow, an old Monogram kit. Good luck with your build. Looking forward to your progress right through completion.
On my Workbench:
Monogram 1/24 scale 427 Shelby Cobra
Just Completed:
Beemax 1/24 scale BMW M3 E30 1992 Evolution II
North Carolina, United States
Joined: June 06, 2006
KitMaker: 4,691 posts
Armorama: 3,509 posts
Posted: Sunday, July 31, 2011 - 12:33 AM UTC
Cape Province, South Africa
Joined: July 20, 2010
KitMaker: 10 posts
Armorama: 9 posts
Posted: Sunday, July 31, 2011 - 08:03 PM UTC
Hey everyone
Ive decided to enter the Campaign with my first military kit that i will build. Im still waiting for it to arrive from the states so i can get going. Really looking forward to the challenge. Sure it will be a nice change from 1/24 scale trucks and 1/48 scale railroad dioramas.
Im sure I will be posting alot of questions. Pictures will posted as soon as i have the kit.
Regards
Wes
Dont leave for tomorrow, what you can do today.
OOB Campaign - AFV Club M35A2 2-1/2 Ton Cargo Truck
Joel_W
 Associate Editor
New York, United States
Joined: December 04, 2010
KitMaker: 11,666 posts
Armorama: 1,143 posts
Posted: Monday, August 01, 2011 - 01:34 AM UTC
Anthony, the camo paint job looks great. With the washes and some dry brushing it will just come to life. Looking foward to your next update.

On my Workbench:
Monogram 1/24 scale 427 Shelby Cobra
Just Completed:
Beemax 1/24 scale BMW M3 E30 1992 Evolution II
California, United States
Joined: July 05, 2010
KitMaker: 39 posts
Armorama: 36 posts
Posted: Monday, August 01, 2011 - 09:12 AM UTC
Assembly and priming are both done. The kit took much longer than expected due to lots of warped parts. There was alot of flash and seam lines (expected) but they cleaned up quite well. I left off the wheel/tires until after painting to seal the tires from the plastic so it doesn't melt. The clear lights/lens etc have been left off until complete. I am thinking of painting this in panzer grey instead of the usual DAK scheme.


New York, United States
Joined: March 08, 2010
KitMaker: 3,662 posts
Armorama: 3,078 posts
Posted: Monday, August 01, 2011 - 02:24 PM UTC
@ Robert, nice looking clean build on that old kit what year is that thing from

@ Anthony, Jadgpanzer is looking great looking forward to seeing it finished
I have made a little progress busy with work this week

the Metal shell standing next to a 1/35 scale Dragon figure. It almost looks like a 500 gr. .50 cal bullet

Some of the rear PE work, yes those are my gluey fingerprints


And what it is looking like now lower hull complete minus the tracks, lower half of the crane is dry fit and I still have to figure out how to do the doors on the shell holders

but the spruces are getting less and less so I must be getting close to finishing the build


Active Campaigns on the bench:
Operation Fall Gelb - Pz.Kpfw. IV Ausf. C
Engineering the Future - M-26 Recovery Vehicle
115 Campaigns completed
North Carolina, United States
Joined: June 06, 2006
KitMaker: 4,691 posts
Armorama: 3,509 posts
Posted: Tuesday, August 02, 2011 - 12:02 AM UTC
Sal,that is some outstanding metalwork,I could never even attempt that.Looks great.
Joel_W
 Associate Editor
New York, United States
Joined: December 04, 2010
KitMaker: 11,666 posts
Armorama: 1,143 posts
Posted: Tuesday, August 02, 2011 - 01:33 AM UTC
Sal, super looking PE work. I'm always amazed at how simple others make it look while I struggle with those small flimsy pieces.
Looking forward to further updates, especially once you get some paint on the model.
On my Workbench:
Monogram 1/24 scale 427 Shelby Cobra
Just Completed:
Beemax 1/24 scale BMW M3 E30 1992 Evolution II
Scotland, United Kingdom
Joined: December 07, 2007
KitMaker: 2,096 posts
Armorama: 1,983 posts
Posted: Tuesday, August 02, 2011 - 03:40 AM UTC
Great work everyone your builds are all looking very good.
Robert great to have you with us for this campaign I am looking forward to seeing more of your build.
Anthony. WOW outstanding work well done that is an excellent build well done.
Wesley. Also good to have you on board welcome to the campaign.
Sal. What can I say? Great work that shell is a monster alright!
Here is my truck its is almost there now just some weathering to do really.

By
sudzonic at 2011-08-02

By
sudzonic at 2011-08-02
CUIDICH 'N RIGH
life is a river, it always runs.
New York, United States
Joined: March 08, 2010
KitMaker: 3,662 posts
Armorama: 3,078 posts
Posted: Tuesday, August 02, 2011 - 08:59 AM UTC
Active Campaigns on the bench:
Operation Fall Gelb - Pz.Kpfw. IV Ausf. C
Engineering the Future - M-26 Recovery Vehicle
115 Campaigns completed
Indiana, United States
Joined: February 15, 2010
KitMaker: 167 posts
Armorama: 5 posts
Posted: Tuesday, August 02, 2011 - 12:48 PM UTC
Hey guys! A couple months back I signed up for a strictly out of box campaign over on Aeroscale ( don't hate me for building planes, I was actually a 19K on M1A1s once upon a time...) and I've been waiting to see a campaign thread over on those forums. After not seeing anything I did a network search and found this thread. So, is this armor only or are us bird-bhoys welcome too?
Indiana, United States
Joined: February 15, 2010
KitMaker: 167 posts
Armorama: 5 posts
Posted: Tuesday, August 02, 2011 - 12:56 PM UTC
Nevermind! I scanned back a few pages and I've seen plenty of planes... I'll post a pic of my kit in the next couple of days. Slan!
California, United States
Joined: July 05, 2010
KitMaker: 39 posts
Armorama: 36 posts
Posted: Tuesday, August 02, 2011 - 05:06 PM UTC
Some nice builds going on in here. Here's a update to the 232, I still have washes/ weathering/ pigments etc to do.

Joel_W
 Associate Editor
New York, United States
Joined: December 04, 2010
KitMaker: 11,666 posts
Armorama: 1,143 posts
Posted: Wednesday, August 03, 2011 - 01:35 AM UTC
Robert, the 232 looks great. Can't wait to see the final pictures.
On my Workbench:
Monogram 1/24 scale 427 Shelby Cobra
Just Completed:
Beemax 1/24 scale BMW M3 E30 1992 Evolution II


