Nevada, United States
Joined: December 21, 2008
KitMaker: 1,109 posts
Armorama: 1,095 posts
Posted: Monday, April 04, 2011 - 09:56 AM UTC
Finished pics posted to the campaign gallery!
Bob, "scale effect" is a debateable topic. I for one subscribe to that method of painting to a degree. My one and only 1/72 scale PzIV is painted in a very light shade of dunkelgelb. I think it looks correct, yet some have argued the point. In the end it's what makes you, the modeler, happy.

G
Lasci la pistola. Porti le cannoli.
Nevada, United States
Joined: December 21, 2008
KitMaker: 1,109 posts
Armorama: 1,095 posts
Posted: Monday, April 04, 2011 - 12:30 PM UTC
Lasci la pistola. Porti le cannoli.
Nevada, United States
Joined: December 21, 2008
KitMaker: 1,109 posts
Armorama: 1,095 posts
Posted: Monday, April 04, 2011 - 02:33 PM UTC
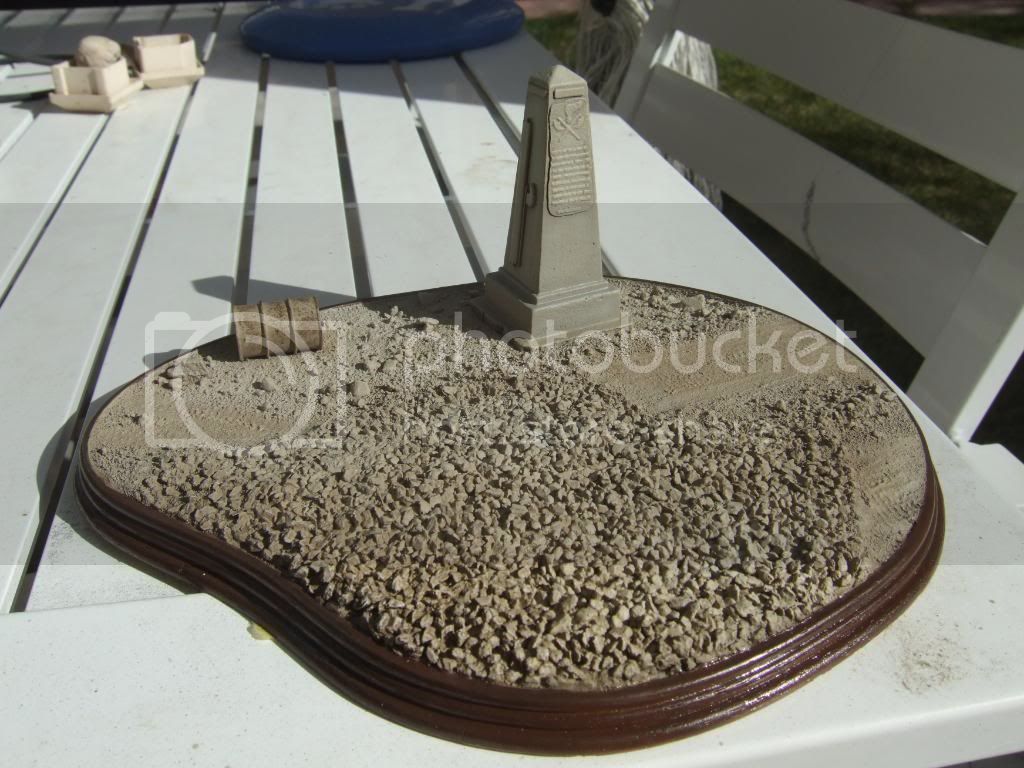
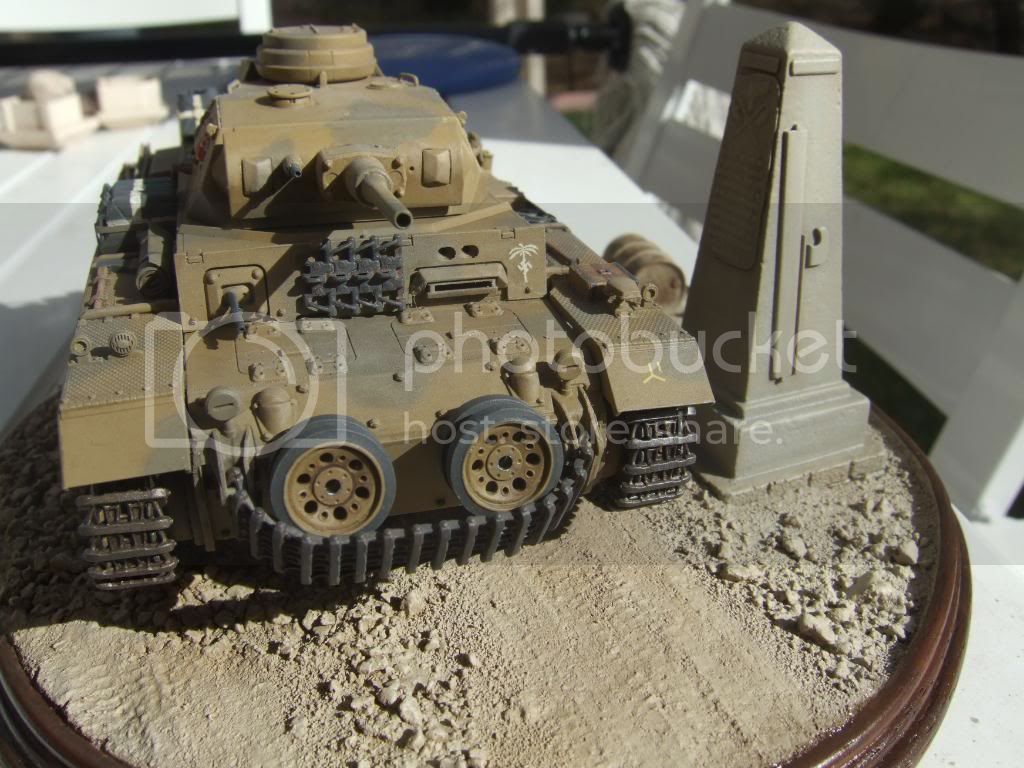
I tried the Pz III on one of my other desert bases.

I put my Pz IV on the new base.

G
Lasci la pistola. Porti le cannoli.
New York, United States
Joined: March 08, 2010
KitMaker: 3,662 posts
Armorama: 3,078 posts
Posted: Monday, April 04, 2011 - 02:54 PM UTC
Active Campaigns on the bench:
Operation Fall Gelb - Pz.Kpfw. IV Ausf. C
Engineering the Future - M-26 Recovery Vehicle
115 Campaigns completed
Hawaii, United States
Joined: August 27, 2006
KitMaker: 1,646 posts
Armorama: 1,557 posts
Posted: Monday, April 04, 2011 - 03:41 PM UTC
G: good choices for both. They look great. Also, I appreciate your color study. I remember a similar discussion somewhere in these forums about the same issue but with the early panzer grey and brown camo combinations which were also almost indistinguishable in B&W.
Sal: Nice!! I think the dio would benefit from a couple of figures in the lower left corner (of your lower photo) looking in the same direction as your tank commander.
Happy Modelling, -zon

"Certainty of death.
Small chance of sucess.
What are we waiting for?"
-Gimli, Return of the King.
Texas, United States
Joined: June 29, 2010
KitMaker: 5,854 posts
Armorama: 4,817 posts
Posted: Monday, April 04, 2011 - 08:07 PM UTC
G: Awesome, and congrats on having the first finished entry! If you can, I'd like a good photo of your Panzer on the new base for the campaign gallery so that I can use it for the feature at the end of this campaign
 Sal
Sal: Nice progress, the gauze can be weird to work with for sure. I would encourage you to add two or three figures if you're up to it

Florida, United States
Joined: August 09, 2006
KitMaker: 1,008 posts
Armorama: 847 posts
Posted: Tuesday, April 05, 2011 - 02:07 AM UTC
Sal, just a suggestion for something to try. Get a hold of some liquid starch. Paint the camo netting first, I use something called cheese cloth, spread it out on a piece of plywood and rattle can spray it with the camo colors you choose. Cut out the approx size you want to use, dip it in the liquid starch and wring out the excess, then lay it out where you want it. Let it dry, the starch completely disappears and the netting is stiff and will stay where you put it.
Works great for tarps also.
Bob


Nevada, United States
Joined: December 21, 2008
KitMaker: 1,109 posts
Armorama: 1,095 posts
Posted: Tuesday, April 05, 2011 - 09:09 AM UTC
Oh Sal I really like that!
Coffee or tea will stain the gauze a bit and render that "hemp rope" look. It'll smell good too!
Starch is a good tip, I've used hairspray, white glue, and all sorts of stuff, but never tried starch.
G
Lasci la pistola. Porti le cannoli.
Hawaii, United States
Joined: August 27, 2006
KitMaker: 1,646 posts
Armorama: 1,557 posts
Posted: Tuesday, April 05, 2011 - 11:13 AM UTC
Bob: nice tip on the starch. Thanks.
Happy Modelling, -zon

"Certainty of death.
Small chance of sucess.
What are we waiting for?"
-Gimli, Return of the King.
North Carolina, United States
Joined: June 06, 2006
KitMaker: 4,691 posts
Armorama: 3,509 posts
Posted: Tuesday, April 05, 2011 - 12:12 PM UTC
Nice finish "G" base brings it to life
sal,tank looks great,looking forward to the base.
Queensland, Australia
Joined: April 15, 2010
KitMaker: 224 posts
Armorama: 205 posts
Posted: Thursday, April 07, 2011 - 12:26 AM UTC
G: Great work! That base really sets it off nicely.
Sal:Nice work on the Tiger and the Dio,I reckon you should add a coupla figures as per Zon's suggestion in the bottom left corner,to finish it off. Maybe a fella with some binoculars? Or an officer?
Bob:Thanks for sharing the starch tip, i'll have to try that sometime.
Work on the AB 41 has come to a temporary halt till i pick up some paint. Wasn't quite happy with any of the 8 different shades of "sand" i had so i'll just have to get another one!
Keep up the great work all!
Cheers
Tim

New York, United States
Joined: March 08, 2010
KitMaker: 3,662 posts
Armorama: 3,078 posts
Posted: Thursday, April 07, 2011 - 09:12 AM UTC
Ok Guys I have a set of Dragon DAK troopers at rest that I started to put together the other night so I will add them in as well. Thanks for the suggestions and the feed back


Starch, yeah that should work right now it is just painted with the same color that I used on the base before i livened it up a bit

Active Campaigns on the bench:
Operation Fall Gelb - Pz.Kpfw. IV Ausf. C
Engineering the Future - M-26 Recovery Vehicle
115 Campaigns completed
Wisconsin, United States
Joined: July 29, 2010
KitMaker: 662 posts
Armorama: 457 posts
Posted: Thursday, April 07, 2011 - 10:23 AM UTC
Quoted Text
I tried the Pz III on one of my other desert bases.
G
is it possible to get information on how you got this look for the dirt on this base. im working on an africa theme. im kinda worried about teh groundwork not looking like real african terrain.

http://mymilitaryminiatureworld.blogspot.com/
Cork, Ireland
Joined: April 30, 2010
KitMaker: 232 posts
Armorama: 134 posts
Posted: Thursday, April 07, 2011 - 11:49 AM UTC
Hi folks,
I'm a relatively late entry, I saw this in my local model shop and just had to get it!

When I got home and opened it, I had a minor heart attack! Where's the PE and gun barrel???
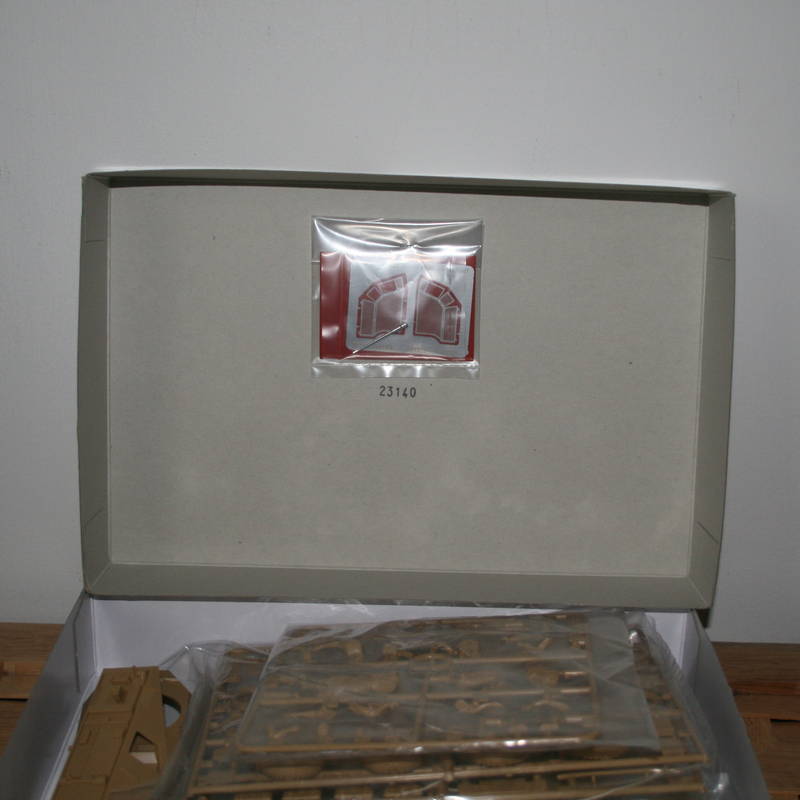
Phew!!!
Anywho, I'm building a DAK Kubelwagon for another campaign and the two will pair nicely!
Can't wait to start the build!
Eoin
You don't learn nothing unless you make mistakes
Nevada, United States
Joined: December 21, 2008
KitMaker: 1,109 posts
Armorama: 1,095 posts
Posted: Thursday, April 07, 2011 - 12:18 PM UTC
Quoted Text
Quoted Text
I tried the Pz III on one of my other desert bases.
G

Jesse,
I took a cheap pine plaque from Michaels, stained it, then used some clear laquer spray for the finish. The laquer sealed the wood for the next step which was Durhams "Water Putty" This is a powder you mix with water.
I made a thin paste of this tan colored wood filler and spread it on the top of the plaque. While it dried I cheated! I live in the Mojave Desert so I went into my own back yard and scooped up some dirt. I sifted the dirt to obtain several containers of fine dust, along with small, medium and large sized pebbles. These I used over the top of the damp putty to build the texture.
Just as the putty firmed up I placed Plastic wrap over the whole thing. Then I placed the tank on the base gently yet firmly pressing it down to make the track marks. I removed the wrap and look, tank tracks in the desert. I goofed around (experimented) and added another layer of dirt and rock which effectively erased the track marks
Once it dried I shook off the loose dirt and added the bushes which are pieces of lichen I got at Michaels too. They come in big bags of various earth tones and greens.
Regardless of where you live, you can steal dirt from your own back yard and sift it. I would microwave any organics to thoroughly "de-bug" it though.

G
Lasci la pistola. Porti le cannoli.
Wisconsin, United States
Joined: July 29, 2010
KitMaker: 662 posts
Armorama: 457 posts
Posted: Thursday, April 07, 2011 - 12:38 PM UTC
thanks for the reply. i want to go with an authentic look like real desert. would explain why yours looks authentic. problem i see with most dirt is the grains are too big for my liking. but since desert sand is alot like dust, i have an idea for what i can do to make up for it.
what i think ill do is use baking powder or something along those lines and mix it with a little actual dirt for texture. where i used to live, is an old mining area. so, there is truckloads of perfect ground up rock material that i use for larger chunks or stones.
thx for the reply
http://mymilitaryminiatureworld.blogspot.com/
Nevada, United States
Joined: December 21, 2008
KitMaker: 1,109 posts
Armorama: 1,095 posts
Posted: Thursday, April 07, 2011 - 12:58 PM UTC
Jesse just keep experiementing!
Eoin, don't feel alone, I did the same when I opened that kit too.

G
Lasci la pistola. Porti le cannoli.
Texas, United States
Joined: June 29, 2010
KitMaker: 5,854 posts
Armorama: 4,817 posts
Posted: Thursday, April 07, 2011 - 04:24 PM UTC
Eoin: Lol, that's just plain sneaky on their part! I really dig that kit too, just wish they would retool it to bring it up to modern standards.
Sal: Awesome!
G: Thanks, that'll look great in the feature!
California, United States
Joined: May 11, 2009
KitMaker: 128 posts
Armorama: 127 posts
Posted: Thursday, April 07, 2011 - 05:26 PM UTC
"In the absence of orders, go find something and kill it"
"I would rather he had given me one more division" in response to being promoted to Field Marshall.
Erwin Rommel
Hawaii, United States
Joined: August 27, 2006
KitMaker: 1,646 posts
Armorama: 1,557 posts
Posted: Friday, April 08, 2011 - 12:26 PM UTC
Eoin: welcome aboard. Nice kit and glad you found the PE!!
Ralph: the Pz. IV and the Blitz look good. Are you doing another base for the blitz?
As for me, I succesfully stripped the paint off the 222, so hopefully I can get new paint on it this weekend. Windex does the trick!!
Happy Modelling, -zon

"Certainty of death.
Small chance of sucess.
What are we waiting for?"
-Gimli, Return of the King.
North Carolina, United States
Joined: June 06, 2006
KitMaker: 4,691 posts
Armorama: 3,509 posts
Posted: Saturday, April 09, 2011 - 06:54 AM UTC
Hawaii, United States
Joined: August 27, 2006
KitMaker: 1,646 posts
Armorama: 1,557 posts
Posted: Saturday, April 09, 2011 - 07:44 AM UTC
Anthony: looks superb!! Congrats on finishing!
Happy Modelling, -zon

"Certainty of death.
Small chance of sucess.
What are we waiting for?"
-Gimli, Return of the King.
Texas, United States
Joined: June 29, 2010
KitMaker: 5,854 posts
Armorama: 4,817 posts
Posted: Saturday, April 09, 2011 - 08:00 AM UTC
Ralph: That PE can be time consuming for sure. Keep up the great work!
Anthony: I like your choice to hold back on heavy weathering. Keep at it and make sure that you post your final pics to the campaign gallery

Milano, Italy
Joined: November 30, 2007
KitMaker: 642 posts
Armorama: 234 posts
Posted: Monday, April 11, 2011 - 01:23 AM UTC
Hi all!
I've been a little lazy lately and my Pkw III is moving slowly...
In addition also my photographc skills don't seem to help, and just 1 pic is nice enough to share.
There it is:

G: I told you I was going to use something like your rack... what do you think?
I have also some pics of a figure I plan to use in the dio... don't know if it will be the only one or were to use it actually... It is a Tristar figure, not of the best quality I fear nor as casting nor as posture... but I like it since is my best effort yet...
I enhanced it by 'underlying' each line with a scalpel and then pouring sepia toned china ink in it... I find the outcome very nice?
What do you think?


That is all for now...
ciao
Edo
New York, United States
Joined: March 08, 2010
KitMaker: 3,662 posts
Armorama: 3,078 posts
Posted: Monday, April 11, 2011 - 01:38 AM UTC
Hey guys, some great work being shown here Ralph and Anthony both have outstanding builds


@ Eoin, had my eye on that kit for a while just never got 1 yet looking forward to seeing your build
@Edoardo, the Figure looks great, you went over the seams with a hobby knife, I'll have to try that

The left arm looks like it sagged a bit though

Active Campaigns on the bench:
Operation Fall Gelb - Pz.Kpfw. IV Ausf. C
Engineering the Future - M-26 Recovery Vehicle
115 Campaigns completed


