Hi Eoin!
thank you for the kind comments!
the burned out tank is actually a semovente 75
happy modelling!
edo
Campaigns
Where Armorama group builds can be discussed, organized, and updates posted.
Where Armorama group builds can be discussed, organized, and updates posted.
Hosted by Darren Baker, Richard S.
The Desert Fox

edoardo

Joined: November 30, 2007
KitMaker: 642 posts
Armorama: 234 posts

Posted: Sunday, July 17, 2011 - 06:14 PM UTC
spearhead21pz

Joined: May 11, 2009
KitMaker: 128 posts
Armorama: 127 posts

Posted: Saturday, July 23, 2011 - 10:22 AM UTC
I have been waiting for the wind to quit blowing so I could take pictures outside. No such luck so I had to take them indoors with the colors off.
Well here goes, this is my Opel Blitz 3t 4x2 (Cyberhobby) and the Pz Kpfw IV f (Dragon) that are mostly finished (took the pictures without putting the antenna on the IV). It seems that they are never really finished, it seems that I always have to tinker.
Erich: Very nice Pz III G conversion. Finish certainly looks like it has had a hard slog in the desert.
Scott; Nice 251/10, good job on camo.
Paul: Nice 1/72 222, to small for my eyes.
Eoin: Nice progress on the 222, it seems we are going to have a few when it is all said and done.
Here are the photos.


Nito74

Joined: March 04, 2008
KitMaker: 5,386 posts
Armorama: 4,727 posts

Posted: Sunday, July 24, 2011 - 06:43 AM UTC
Here's my slow progress on the Miniart Dingo


Tojo72

Joined: June 06, 2006
KitMaker: 4,691 posts
Armorama: 3,509 posts

Posted: Sunday, July 24, 2011 - 01:28 PM UTC
Eric and Ralph,some great looking work
ltb073

Joined: March 08, 2010
KitMaker: 3,662 posts
Armorama: 3,078 posts

Posted: Sunday, July 24, 2011 - 02:27 PM UTC
Ralph great looking work/dio, but I have a question. I see you left the inner road wheels in their primer. Was it normal not to paint the inner road wheels the same color as the outer 1's? If so this will be a bit of helpful information 

zontar

Joined: August 27, 2006
KitMaker: 1,646 posts
Armorama: 1,557 posts

Posted: Sunday, July 24, 2011 - 03:17 PM UTC
Quoted Text
Quoted TextScott: Looks good!! What is the white stuff?
Happy Modelling, -zon
Hi Mate, its Blu Tac. A putty like glue for putting up posters.
Scott: Thanks for the info. I use it for masking myself, but never thought of it for camo!! Great technique.
Eion: nice work on the 222. too bad your guy is un-armed!!

Erich: Looks great. Nice build.
Ralph: great dio! I like the scene.
John: welcome aboard.
Happy Modelling, -zon


vonHengest

Joined: June 29, 2010
KitMaker: 5,854 posts
Armorama: 4,817 posts

Posted: Sunday, July 24, 2011 - 04:00 PM UTC
Eoin: Stellar move on putting a gunner in there, we rarely ever get to see crew members in those little builds.
Erich: Great job!! The photos do your work justice, although could beneftif from some saturation (I'll see what I can do to take care of that on my end), and are going to look great when I make them part of the campaign feature
Ralph: Man, I can't tell you how much I've been waiting to see it all come together!
John: As is stands, your progress is much faster than mine lol. Keep it up!
Erich: Great job!! The photos do your work justice, although could beneftif from some saturation (I'll see what I can do to take care of that on my end), and are going to look great when I make them part of the campaign feature

Ralph: Man, I can't tell you how much I've been waiting to see it all come together!
John: As is stands, your progress is much faster than mine lol. Keep it up!
spearhead21pz

Joined: May 11, 2009
KitMaker: 128 posts
Armorama: 127 posts

Posted: Sunday, July 24, 2011 - 04:36 PM UTC
Sal said: :[Ralph great looking work/dio, but I have a question. I see you left the inner road wheels in their primer. Was it normal not to paint the inner road wheels the same color as the outer 1's? If so this will be a bit of helpful information :-]
I am not exactly sure how common it was, but, other modelers have used the oxide primer on the inside of road wheels as they were not painted at the factory, exterior only. In Bill Plunk's build story of a Pz III G (Cyberhobby Imperial Series) Afrika G, he painted the inside of the road wheels oxide primer. I have seen it elswhere, on Pz 111's and IV's, can't remember what build stories.
There is support from a color photo of a factory producing Pz III's where the final step involved a worker spray painting road wheels with Dunkelgelb but only the exterior surfaces were painted.
An additional color photo of a Bef Pz III coming out of a river (eastern front) with a closeup of a spare road wheel mounted on the right fender clearly showing red oxide primer on the inner surfaces, nicely washed and very visible as well.
The question is how prevalent was it on IV's?
Thanks guys for the kind comments. I am in the process of gathering parts for a Pz III Ausf F, up-gunned to 5cm kwik42, on the streets of Tripoli in February of 1941, can use Pz gray w/black uniforms. Attempting to get parts from a "H" or "J" for the, as Erich described as a "Rohrweige" E-5 (gun mantlett support?).
Thanks ;
Ralph
spearhead21pz

Joined: May 11, 2009
KitMaker: 128 posts
Armorama: 127 posts

Posted: Sunday, July 24, 2011 - 07:02 PM UTC
Jermey:
I am going to produce photos, this time with the finished antenna attached and outdoors to hopefully to get an acurate color register. All I need is to have the wind quit blowing at noon or there abouts. I can't remenber when we have had a summer this cool and windy, edge of Sacramento valley and Bay area.
Ralph
imransz

Joined: July 10, 2007
KitMaker: 38 posts
Armorama: 37 posts

Posted: Tuesday, July 26, 2011 - 12:11 AM UTC
Minor updates.


Next will be priming.


Next will be priming.

vonHengest

Joined: June 29, 2010
KitMaker: 5,854 posts
Armorama: 4,817 posts

Posted: Tuesday, July 26, 2011 - 04:56 PM UTC
Ralph: Great, looking forward to it! It's been down and out hot and humid here in TX.
Imran: Where did you get the figure for the motorcycle?
Imran: Where did you get the figure for the motorcycle?
imransz

Joined: July 10, 2007
KitMaker: 38 posts
Armorama: 37 posts

Posted: Tuesday, July 26, 2011 - 11:56 PM UTC
Quoted Text
Ralph: Great, looking forward to it! It's been down and out hot and humid here in TX.
Imran: Where did you get the figure for the motorcycle?
Jeremy,the figure came with the kit .

eoinryan

Joined: April 30, 2010
KitMaker: 232 posts
Armorama: 134 posts

Posted: Sunday, July 31, 2011 - 04:57 AM UTC
Hi folks,
@ Imran: Great to see a antother 222. I'm building and painting as I go. I got the bike too but I'm probably going to keep that for a diarama. I got a Kubelwagon to go with my 222.
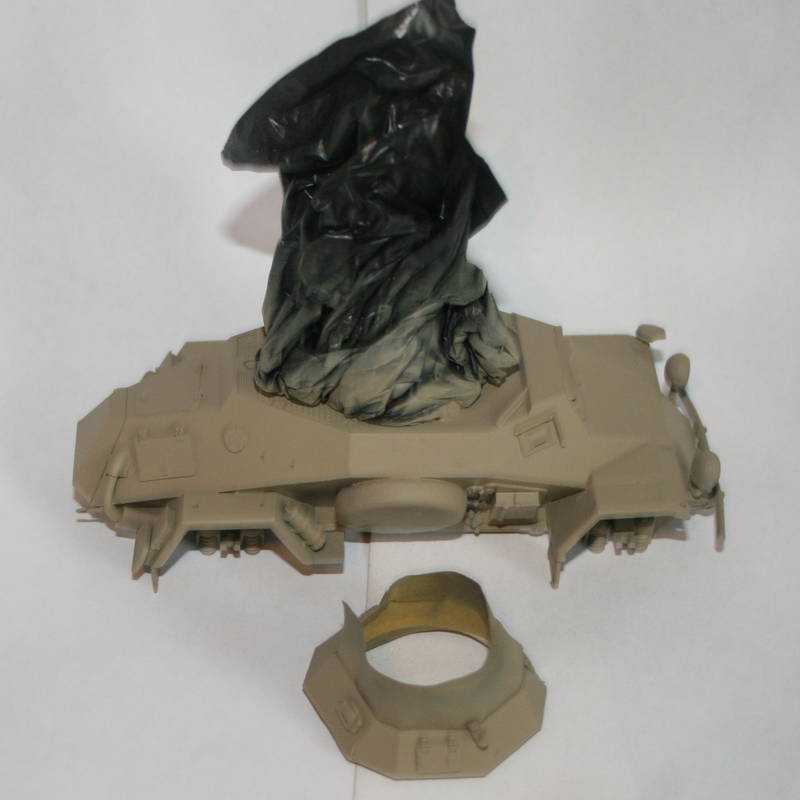
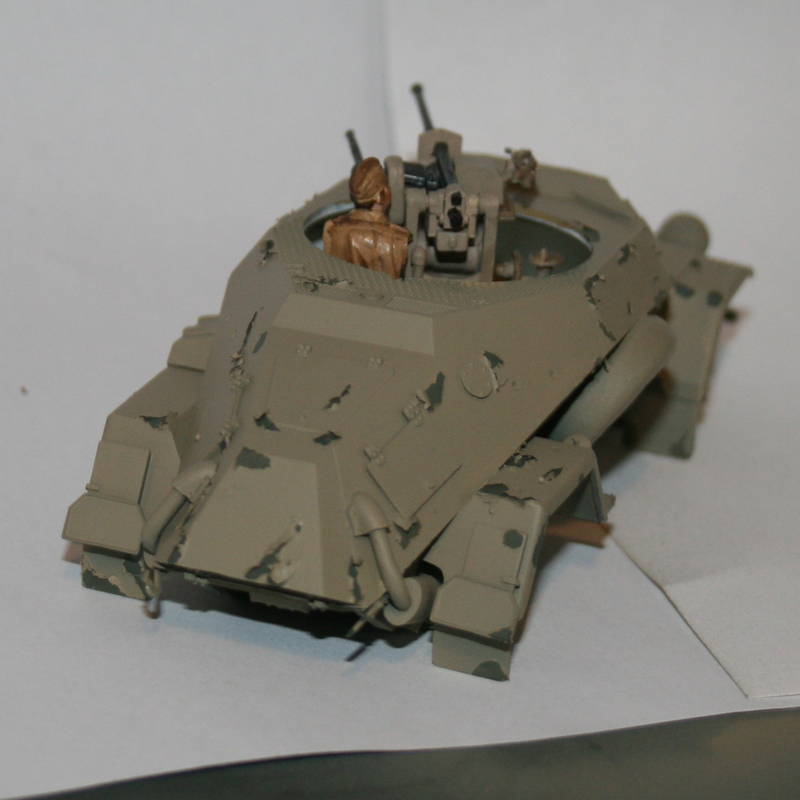
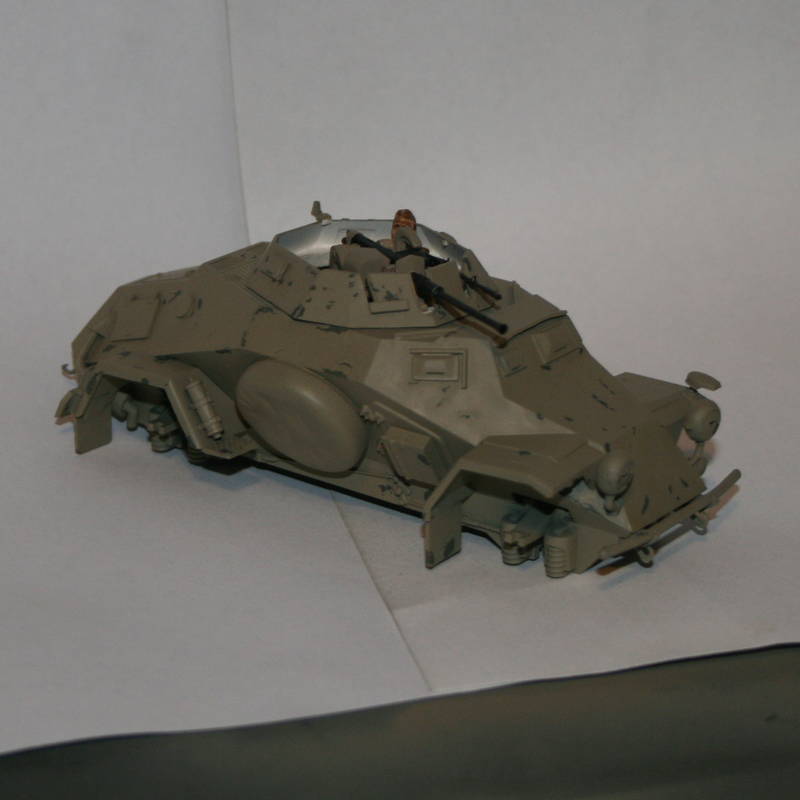
Anywho, here's some progress photos:

Hull masked and sprayed. All the lumps and bumps is where I applied Humbrol Maskol to create a chipped affect.

Here you can see the hull with the Maskol taken away... Mmm mixed results.
The chips look too big and unnatural but I'll soften them with Microsol.

I've softened down the paint chips a bit. I still have a lot of touch-ups to do, especially on the edges.
I painted the inside of the turret white. I know that that is not strictly accurate, but the gunner and the .38 stand out much better against the white.
Later,
Eoin
@ Imran: Great to see a antother 222. I'm building and painting as I go. I got the bike too but I'm probably going to keep that for a diarama. I got a Kubelwagon to go with my 222.
Anywho, here's some progress photos:

Hull masked and sprayed. All the lumps and bumps is where I applied Humbrol Maskol to create a chipped affect.

Here you can see the hull with the Maskol taken away... Mmm mixed results.
The chips look too big and unnatural but I'll soften them with Microsol.

I've softened down the paint chips a bit. I still have a lot of touch-ups to do, especially on the edges.
I painted the inside of the turret white. I know that that is not strictly accurate, but the gunner and the .38 stand out much better against the white.
Later,
Eoin
spearhead21pz

Joined: May 11, 2009
KitMaker: 128 posts
Armorama: 127 posts

Posted: Sunday, July 31, 2011 - 06:29 AM UTC
Hi everyone, just finished taking new photos of the Pz IV f and Opel Blitz, outdoors this time. I don't know if you can really tell the difference but here goes.


AgentG

Joined: December 21, 2008
KitMaker: 1,109 posts
Armorama: 1,095 posts

Posted: Monday, August 01, 2011 - 05:42 AM UTC
Ralph I really like the way that turned out. I shamelessly took a page from your book and applied it to my own PzIII. 


I recently received two sets of the new MasterBox DAK figures. This seated fellow is who I wanted most. I think he looks suitably forlorn sitting alone on that tank.
G


I recently received two sets of the new MasterBox DAK figures. This seated fellow is who I wanted most. I think he looks suitably forlorn sitting alone on that tank.
G
ltb073

Joined: March 08, 2010
KitMaker: 3,662 posts
Armorama: 3,078 posts

Posted: Monday, August 01, 2011 - 06:03 AM UTC
Quoted Text
This seated fellow is who I wanted most. I think he looks suitably forlorn sitting alone on that tank.
G
G That poor guy looks like he ran out of gas ammo and water and is just waiting for a supply truck to come by


AgentG

Joined: December 21, 2008
KitMaker: 1,109 posts
Armorama: 1,095 posts

Posted: Monday, August 01, 2011 - 06:29 AM UTC
I can hear the conversation now.
"Otto, you guard the panzer, we'll be right back......................"
G
"Otto, you guard the panzer, we'll be right back......................"
G
spearhead21pz

Joined: May 11, 2009
KitMaker: 128 posts
Armorama: 127 posts

Posted: Monday, August 01, 2011 - 07:56 AM UTC
G;
Thanks for the compliment. I orderd the new Masterbox DAK figures also, can't wait to get them. Belive it or not, I have a completed Pz III Ausf J, number 221 (just like on the MB photo of Rommel) waiting for those figures. When I saw the MB work in progress, I just about fell out of my chair because I just completed the Px III J, pictures previously in my gallery.
Good work on the base and figure, he looks like he is waiting for the supply truck being occupied by the Pz IV up the road.
Ralph.

vonHengest

Joined: June 29, 2010
KitMaker: 5,854 posts
Armorama: 4,817 posts

Posted: Saturday, August 06, 2011 - 02:06 PM UTC
There's nothing wrong with imitation G, it's the birthplace of inspiration, learning, and flattery 
With all of the Pz III's and IV's as well as the armored cars being lined up here, I seriously wish that we could line them all up in real life for some nice group photos

With all of the Pz III's and IV's as well as the armored cars being lined up here, I seriously wish that we could line them all up in real life for some nice group photos

stonecw

Joined: May 11, 2011
KitMaker: 12 posts
Armorama: 10 posts

Posted: Monday, August 08, 2011 - 09:48 PM UTC
Finally weighing in with my contribution - the Hobbyboss Sd.Kfz.222 ... sorta. I'm incorporating portions of the Tri-star kit, plus the Royal Model and Eduard detail kits for the Tamiya kit.
I'm a volunteer at the Military Vehicle Technology Foundation (www.mvtf.org) and have access to a fully restored 222 - so I decided to try and build out the interior as completely as I could. You can see one major difference between this build and most kits is the scratch-built GurtKasten ammo containers along the inside (some styrene and lead foil).
Unfortuntely, I neglected to take pictures of the box before I started, so if that disqualifies me, then oh well, it's still a fun build. Pics of the work-in-progress are below ... I hope.
For some reason, when I hit the upload button, it says "The category you chose for this photo can't contain photos." And any photos I try to load to my albums just don't appear. Tried searching forum for help, but nothing seems to work.
stonecw

Joined: May 11, 2011
KitMaker: 12 posts
Armorama: 10 posts

Posted: Monday, August 08, 2011 - 10:02 PM UTC
That didn't work - trying again.

stonecw

Joined: May 11, 2011
KitMaker: 12 posts
Armorama: 10 posts

Posted: Monday, August 08, 2011 - 10:04 PM UTC

vonHengest

Joined: June 29, 2010
KitMaker: 5,854 posts
Armorama: 4,817 posts

Posted: Friday, August 12, 2011 - 12:31 PM UTC
Looking reeeeeeal good Clint, that's one of the nicest interiors that I've ever seen on a 222/223 


eoinryan

Joined: April 30, 2010
KitMaker: 232 posts
Armorama: 134 posts

Posted: Saturday, August 13, 2011 - 02:32 AM UTC
Hats off, Clint!
The interior is looking absolutely fantasic! Great attention to detail. Any chance of putting a few interior shots of the reall 222 up on the thread?
I've never seen the interior of a real 222 before.
Eoin
spearhead21pz

Joined: May 11, 2009
KitMaker: 128 posts
Armorama: 127 posts

Posted: Saturday, August 13, 2011 - 05:17 AM UTC
Clint;
Excellent work on the interior of the 222. Nice detail painting, looks very good.
Ralph
Excellent work on the interior of the 222. Nice detail painting, looks very good.
Ralph
 |


