California, United States
Joined: December 06, 2004
KitMaker: 3,694 posts
Armorama: 2,693 posts
Posted: Saturday, August 13, 2011 - 07:02 AM UTC
Quoted Text
Hats off, Clint!
The interior is looking absolutely fantasic! Great attention to detail. Any chance of putting a few interior shots of the reall 222 up on the thread?
I've never seen the interior of a real 222 before.
Eoin
You can find some here:
http://svsm.org/gallery/Sdkfz222California, United States
Joined: May 11, 2011
KitMaker: 12 posts
Armorama: 10 posts
Posted: Sunday, August 14, 2011 - 06:07 AM UTC
Thanks guys - if I can get the link to work right, I'll post the link to my picasa page with a ton of photos I've taken over the last couple of years. I have access to most of the vehicles out there, and if you have a project in particular you're working on, I may have some pics or can go take some for you.
http://picasaweb.google.com/Stonecw/SdKfz222?authuser=0&authkey=Gv1sRgCJb-i7uZ_PCF_QE&feat=directlink California, United States
Joined: May 11, 2011
KitMaker: 12 posts
Armorama: 10 posts
Posted: Sunday, August 14, 2011 - 06:15 AM UTC
Gary - That's the same 222 that I get to crawl around on out at what is now the Military Vehicle Technology Foundation (formerly the Jacques LIttlefield Collection) in Portola Valley, CA - Vlad (the photographer in the link you sent) is an active volnteer out there as well. If you're interested in some VERY high quality walk-around-style pics, the guy that runs Toadman's Tank Pictures
http://www.toadmanstankpictures.com/ is also a very active member and team leader at the foundation.
We've recently started work on getting more of the vehicles in running condition, and if anyone is interested in touring the museum, contact the director at
http://www.MVTF.org . Send me a PM if you're scheduled to for a tour and I'll try to be out there at the same time.
North Carolina, United States
Joined: June 06, 2006
KitMaker: 4,691 posts
Armorama: 3,509 posts
Posted: Sunday, August 14, 2011 - 06:21 AM UTC
Really nice interior Clint
Singapore / 新加坡
Joined: July 10, 2007
KitMaker: 38 posts
Armorama: 37 posts
Posted: Tuesday, August 16, 2011 - 06:23 AM UTC
Updates.
Kit glosed coat,washed and decaled.Next will be weathering.


Cork, Ireland
Joined: April 30, 2010
KitMaker: 232 posts
Armorama: 134 posts
Posted: Sunday, August 21, 2011 - 12:21 AM UTC
Hey Clint,
Your link is fantastic! great detail shots- really appreciate it putting the link up. A modeller's eye behind that lens!
Eoin
You don't learn nothing unless you make mistakes
Lisboa, Portugal
Joined: March 04, 2008
KitMaker: 5,386 posts
Armorama: 4,727 posts
Posted: Sunday, August 21, 2011 - 03:23 PM UTC
Slow progress this weekend.
Worked a little on the interior of the Dingo (Miniart German version).
But it has some very small PE parts (2 cm long / 1 cm width with 3 folding parts... and I need to add 4 PE rivets/bolts that have 1mm ) so as expected I gave up on these details, too small, lost 3 PE parts, on such a tiny interior I guess I won't miss those rivets..
Back to my other Campaigns, I spent 4 hrs around the PE set, I ran out of patience and moved to another build.
Next week I'll be back on the Dingo.
Active Builds: 0
Active Campaigns: 0
Cork, Ireland
Joined: April 30, 2010
KitMaker: 232 posts
Armorama: 134 posts
Posted: Monday, August 22, 2011 - 02:27 AM UTC
Hey folks,
Here's some more progress photos from my 222. Thanks again to Clint and Gary for your links both interior and exterior shots. Going through them, I can see I made one or two mistakes, but not major ones (e.g. I painted the small sheild for the cannon beige instead of black), but it's great to learn.
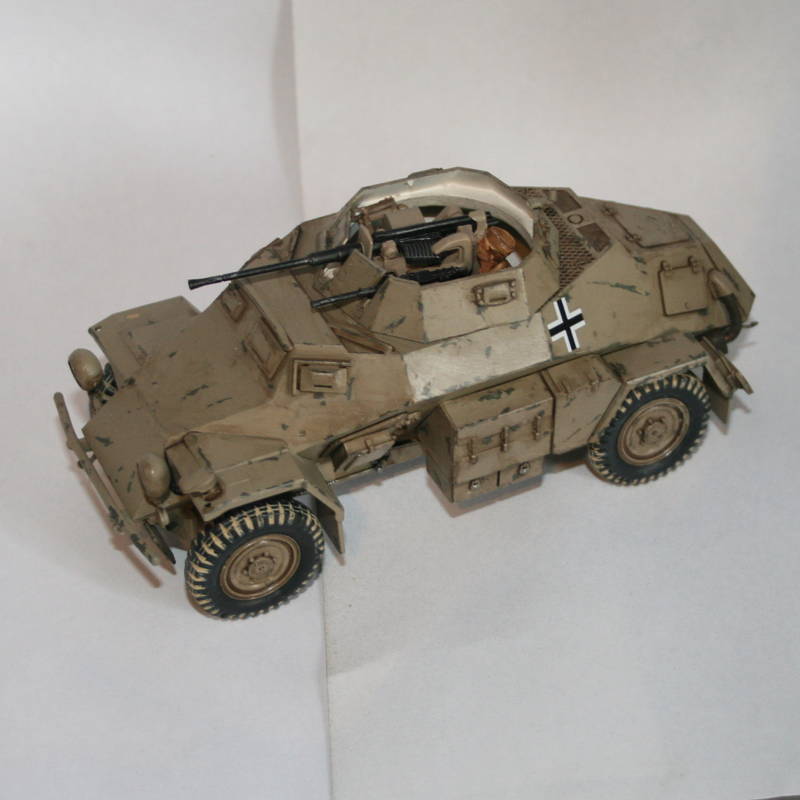
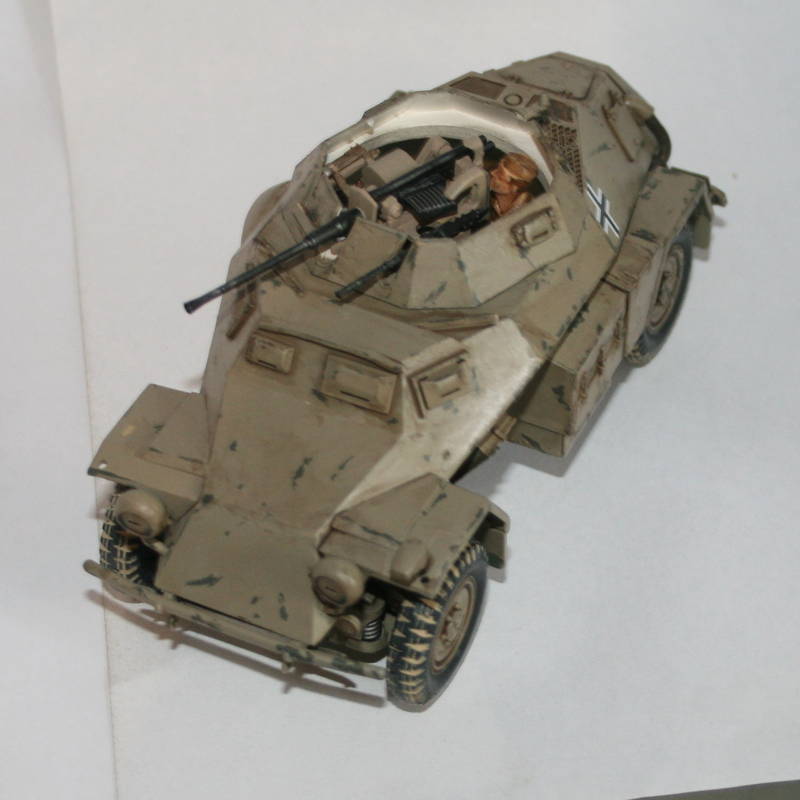
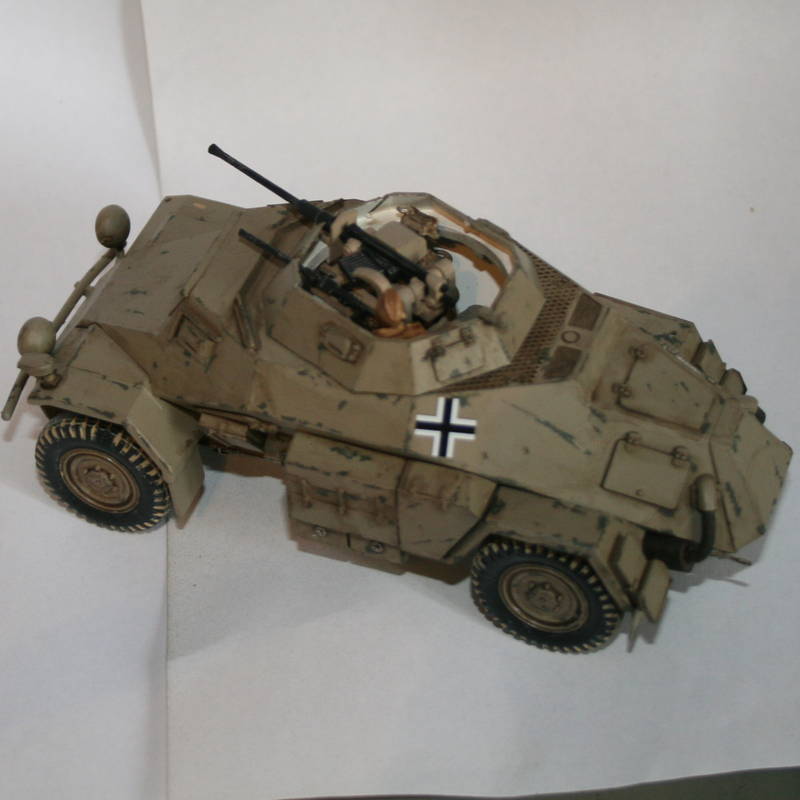
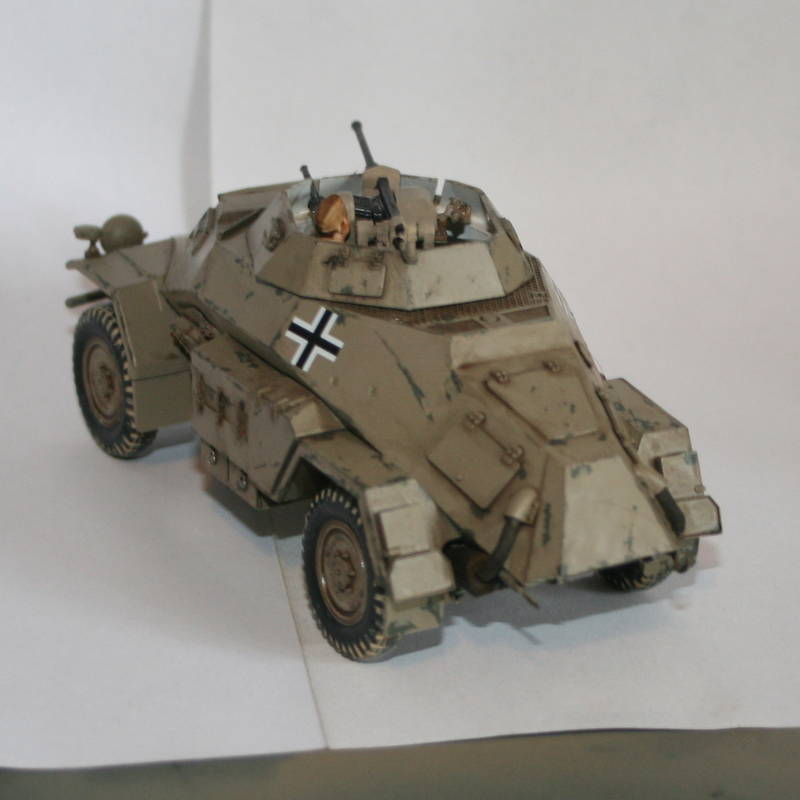
I still have to put on a lot of the external detailing and the grenade mesh, but it's starting to look pretty beaten up, which is the look I was going for....
And I still have to do the dang Commander. I've no problem doing figures when all you can see are their heads popping out!
Later,
Eoin
You don't learn nothing unless you make mistakes
California, United States
Joined: May 11, 2011
KitMaker: 12 posts
Armorama: 10 posts
Posted: Tuesday, August 23, 2011 - 08:11 AM UTC
I wouldn't worry about the colors too much - your tan-colored shield looks right, which is more important than anything in my opinion. Remember, the restored vehicles could be wrong too. I know there are a few questionable things on the one at the MVTF. Plus on the few pictures of DAK 222's that I've found with the gun raised, the shield certainly looks like it COULD have been painted tan - hard to tell in B&W.
Nevada, United States
Joined: December 21, 2008
KitMaker: 1,109 posts
Armorama: 1,095 posts
Posted: Tuesday, August 23, 2011 - 08:22 AM UTC
I'm liking the 222 just the way it is. Who's to say what's correct anyway? The painting was pretty much up to the crews/maintanence folks so there was a lot of "artistic license".

G
Lasci la pistola. Porti le cannoli.
California, United States
Joined: May 11, 2009
KitMaker: 128 posts
Armorama: 127 posts
Posted: Tuesday, August 23, 2011 - 01:52 PM UTC
Looks good the way it is, afterall wouldn't the crew want the sheild tan as opposed to black which would stand out more?
Ralph
"In the absence of orders, go find something and kill it"
"I would rather he had given me one more division" in response to being promoted to Field Marshall.
Erwin Rommel
Texas, United States
Joined: June 29, 2010
KitMaker: 5,854 posts
Armorama: 4,817 posts
Posted: Sunday, August 28, 2011 - 09:49 AM UTC
Imran: Looking good, our ranks of 222's are growing
 John
John: Any progress is good progress!
Eoin: Keep it up, looking nice and worn

Guys, I'm not stressing colors here, you go with what you think makes the most sense and have some fun!!


Singapore / 新加坡
Joined: July 10, 2007
KitMaker: 38 posts
Armorama: 37 posts
Posted: Wednesday, August 31, 2011 - 12:34 AM UTC
Cork, Ireland
Joined: April 30, 2010
KitMaker: 232 posts
Armorama: 134 posts
Posted: Wednesday, August 31, 2011 - 01:38 AM UTC
Hi folks,
I'm just back from a brief [but well deserved] holiday. Thanks for all your views on the colour schemes etc. I'm leaving the gun sheild as is. Once the 222 looks fairly scuffed up, I'm happy.
@ Imram: Your chipping and weatering looks superb! What techniques did you use? Can't wait to see it when it is finished.
With the cigarettes it looks as if your 222 has been brought into a Formula One garage circa 1995! I don't think they'll have it refuelled and wheels changed in 6.9 seconds though!
Eoin
You don't learn nothing unless you make mistakes
Queensland, Australia
Joined: July 10, 2011
KitMaker: 653 posts
Armorama: 273 posts
Posted: Wednesday, August 31, 2011 - 01:50 AM UTC
Quoted Text
With the cigarettes it looks as if your 222 has been brought into a Formula One garage circa 1995! I don't think they'll have it refuelled and wheels changed in 6.9 seconds though!
Who needs speed when you have a 20mm cannon ?
"Give me the strength to be the man my dogs think I am"
Pennsylvania, United States
Joined: February 14, 2011
KitMaker: 390 posts
Armorama: 387 posts
Posted: Wednesday, August 31, 2011 - 06:49 AM UTC
California, United States
Joined: May 11, 2011
KitMaker: 12 posts
Armorama: 10 posts
Posted: Thursday, September 01, 2011 - 03:49 AM UTC
@imran: Wow! weathering is looking great! I'd love to hear what you used both for the chipping and the rusty-color around the boxes!
Singapore / 新加坡
Joined: July 10, 2007
KitMaker: 38 posts
Armorama: 37 posts
Posted: Thursday, September 01, 2011 - 12:58 PM UTC
@ eoin & scott:Chipping done by using sponge technique and fine brush.The sponge technique was used mainly on most of the large surrface area and the fine brush mainly on the edges of the vehicle.i used a mixture of vallejjo white and back to get the grey for the chipping.Then i used oil paint ,raw umber and raw sienna to filter.Hope that help.

Texas, United States
Joined: June 29, 2010
KitMaker: 5,854 posts
Armorama: 4,817 posts
Posted: Tuesday, September 06, 2011 - 09:52 AM UTC
imran: The chipping looks excellent! Now get the pit crew on those wheels asap!

 Eoin
Eoin: Your 222 is already a beauty, can't wait to see her finished
 Neal
Neal: That blue background combined with the natural sunlight is working out really well for you, the photos look great. Congrats on completion!

California, United States
Joined: May 11, 2009
KitMaker: 128 posts
Armorama: 127 posts
Posted: Saturday, September 10, 2011 - 11:56 AM UTC
Hi Gents;
I am back from surgery recovery, everything is fine, it is all good. Anyway, I have been talking about doing a Pz Kpfw III Ausf F for awhile, so it here is. I am going to build this as an upgunned and tropicalized version. Earrly 1941, with the 50 mm Kwk 39/42, turret bustle and tropicl filters added. I have been thinking about placing this tank, maybye with a "G" on the streets of Tripoli in Schwarzgrau RAL 7021(Grey) or on the road to the front, El Agheila, in Grunbraun RAl 8000/Grangrun RAL7008 in March 1941. Pictures of the kit in pacjages and aftermarket items, and parts pirated from an Ausf J kit.


"In the absence of orders, go find something and kill it"
"I would rather he had given me one more division" in response to being promoted to Field Marshall.
Erwin Rommel
Nevada, United States
Joined: December 21, 2008
KitMaker: 1,109 posts
Armorama: 1,095 posts
Posted: Saturday, September 10, 2011 - 12:46 PM UTC
Good to see ya Ralph! Hope all is well.
That's an interesting idea for the F model.
I just received the "Workhorse, PzIII in North Afrika" book. Inside is a colorplate of a F as you described. It represents a vehicle hastily sprayed RAL 8000 over the gray. I think I want to try that myself, and mention this as a possible choice for you. According to the text most early arrivals were gray and repainted after about three weeks anyway.
Model away!
G
Lasci la pistola. Porti le cannoli.
Cork, Ireland
Joined: April 30, 2010
KitMaker: 232 posts
Armorama: 134 posts
Posted: Tuesday, September 13, 2011 - 08:27 AM UTC
Hi folks,
Here's a few updates from my 222. It's pretty much finished, I just have to weather it a bit more and finish the commander:
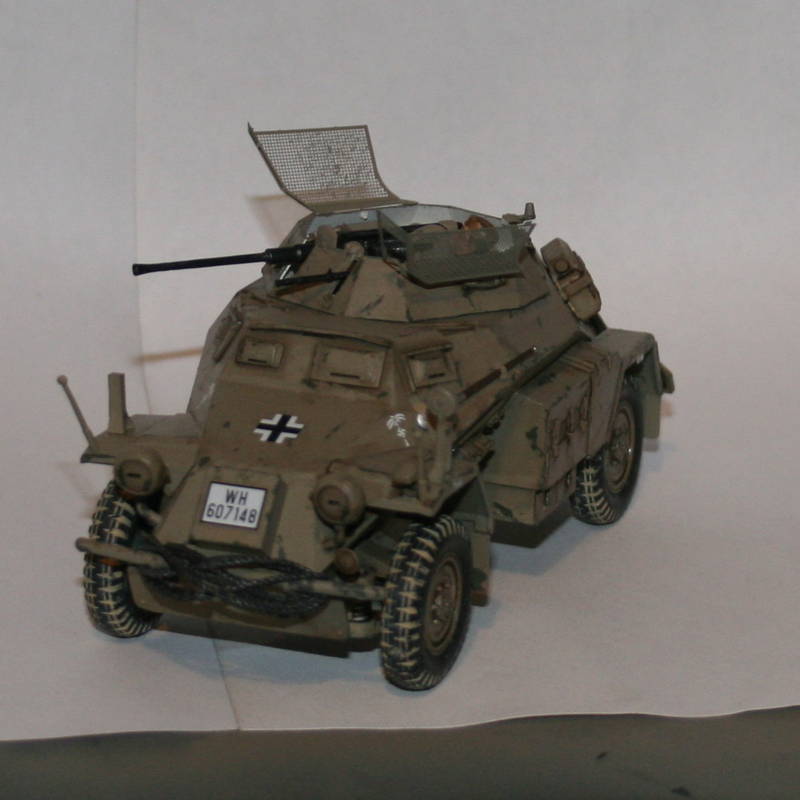
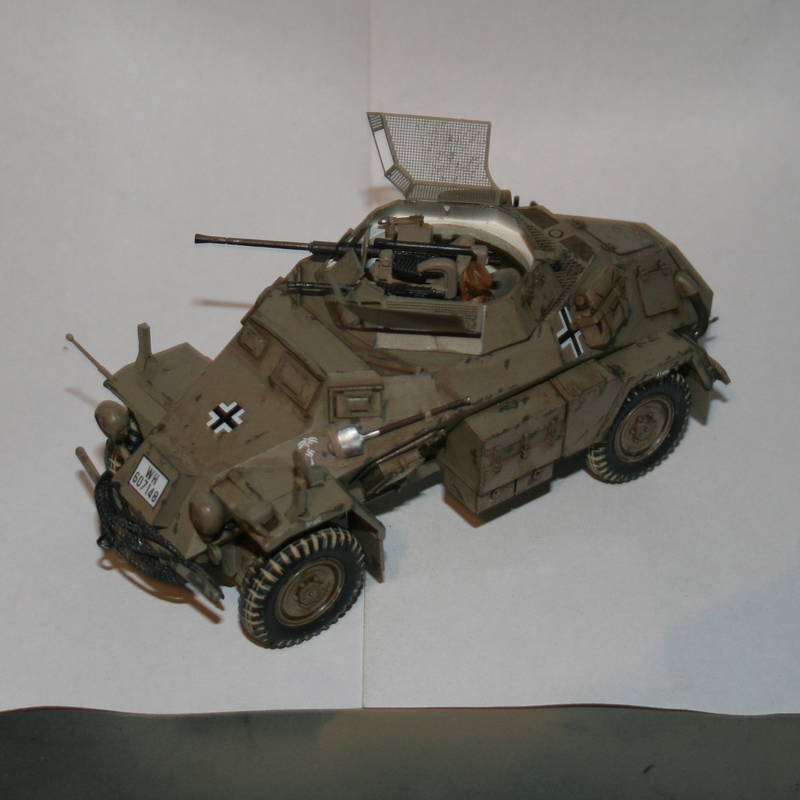
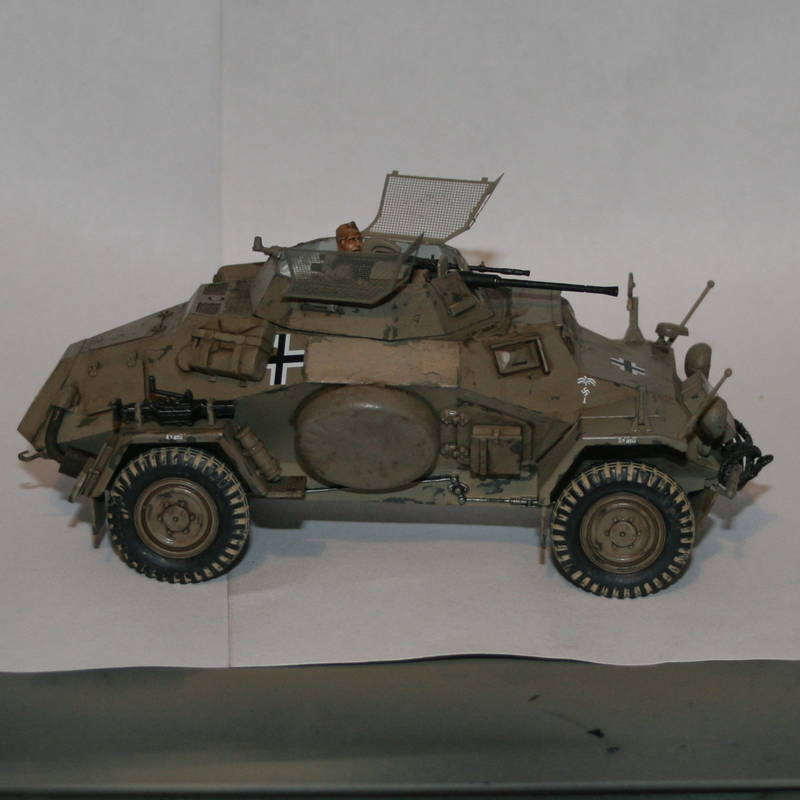
I'm going to put it into a diorama with a Kubelwagon- I should have photos of it shortly.
Keep building folks!
Eoin
You don't learn nothing unless you make mistakes
Texas, United States
Joined: June 29, 2010
KitMaker: 5,854 posts
Armorama: 4,817 posts
Posted: Saturday, September 17, 2011 - 12:04 PM UTC
Ralph: Wb, and congrats on a successful surgery! I'm really looking forward to your build as I haven't seen one of these kits myself yet. Looks like you have plenty of extra goodies to go with it
 Eoin
Eoin: Excellent, can't wait to see it with the commander figure in your dio

California, United States
Joined: May 11, 2009
KitMaker: 128 posts
Armorama: 127 posts
Posted: Sunday, September 18, 2011 - 10:53 AM UTC
Made a little progress today on my Pz Kpfw III Ausf F (upgunned and tropical).
Finished steps 1-3 in instructions. Slight fi problems with the suspension arms, pin was to large for hole in torision bars. A little trimming and problem solved. The detail is very good. It is amazing how much detail is molded on the tub. Have to watch directions closely, Some hole drilling and removal of detail and the six tabs is called for in step 3 on bottom of hull.


Until next update.
"In the absence of orders, go find something and kill it"
"I would rather he had given me one more division" in response to being promoted to Field Marshall.
Erwin Rommel
North Carolina, United States
Joined: June 06, 2006
KitMaker: 4,691 posts
Armorama: 3,509 posts
Posted: Sunday, September 18, 2011 - 01:40 PM UTC
Some good stuff still going one here everybody,keep em coming


