Campaigns
Where Armorama group builds can be discussed, organized, and updates posted.
The Marine Corps Campaign ( Official Thread )
grayghost666
#021
Joined: August 02, 2007
KitMaker: 2,458 posts
Armorama: 656 posts
Posted: Wednesday, December 14, 2011 - 06:39 PM UTC
Hello All,
I declare the campaign official started.
This is the thread where you will post your photo's of your builds, your WIP's, ask questions, ETC.
If you have any questions for me, you can ask them here or PM me.
Have a great Build,
Cheers,
Bruce
GaryKato
Visit this Community
California, United States
Joined: December 06, 2004
KitMaker: 3,694 posts
Armorama: 2,693 posts
Posted: Wednesday, December 14, 2011 - 08:21 PM UTC
Here is a link to the photo gallery. Pictures of your final build go here.
Marine Corps Campaign Photo Gallery
vertigo
Visit this Community
Dublin, Ireland
Joined: November 11, 2004
KitMaker: 388 posts
Armorama: 113 posts
Posted: Thursday, December 15, 2011 - 02:37 AM UTC
Hehe, I'm in before the armour buffs.


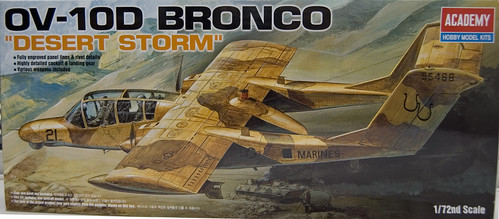
I'll be building this for the campaign, an OV-10D Bronco which was used by two squadrons of the United States Marine Corps during Desert Storm.


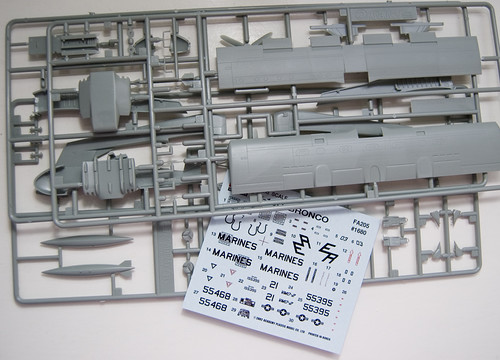
Here's a shot of the sprue with the decals. I'm really looking forward to this as the Bronco is one of my favorite aircraft but I won't get started until January because I'll be heading away for Christmas in a few days.

I don't have any 'dated' shots yet as I completely forgot but I'll get one in January when I start building proper.
windysean
Visit this Community
Wisconsin, United States
Joined: September 11, 2009
KitMaker: 1,917 posts
Armorama: 735 posts
Posted: Thursday, December 15, 2011 - 03:52 AM UTC
Cool, Alcatraz. I'll be watching your build because I'm going to do Academy's OV-10A for the Viet Nam campaign. I assume the kits have only minor changes.
I'll get to this campaign myself shortly into the new year. I already have my 1/35 Revell Mercedes LKw Wolf to convert to a Marines IFAV.
Cheers!
Sean H.
vertigo
Visit this Community
Dublin, Ireland
Joined: November 11, 2004
KitMaker: 388 posts
Armorama: 113 posts
Posted: Thursday, December 15, 2011 - 04:07 AM UTC
The main difference, as far as I'm aware, between an OV-10A and an OV-10D is the D model has an extended nose. The two kits are probably identical besides that.

I'll have to watch your build as well because I'd like to do a U.S Navy OV-10A sometime.
vonHengest
Visit this Community
Texas, United States
Joined: June 29, 2010
KitMaker: 5,854 posts
Armorama: 4,817 posts
Posted: Thursday, December 15, 2011 - 01:42 PM UTC
OV-10's are cool in any form. One of the first kits that I tried my hands at was Testors' 1/48 rendition. Can't wait to see your build come together Alcatraz!
AgentG
Visit this Community
Nevada, United States
Joined: December 21, 2008
KitMaker: 1,109 posts
Armorama: 1,095 posts
Posted: Thursday, December 15, 2011 - 02:10 PM UTC
I will be starting after the first of the year on a USMC M4A1 from the battle at Cape Gloucester. I aquired a Tasca M4A1 mid production just for this build.

She will have red brown camo over the base OD, and Model Kasten T49 steel cleat tracks. Bison has a sheet for this particular tank, and I found them in stock at Sprue Brothers!

Semper Fi

G

ltb073
Visit this Community
New York, United States
Joined: March 08, 2010
KitMaker: 3,662 posts
Armorama: 3,078 posts
Posted: Thursday, December 15, 2011 - 02:20 PM UTC
Alcatraz that looks like a cool kit I like the Academy birds
Im gonna enter with an Italeri USMC M-4 Sherman, not my favorite tank but I liked what Wayne did with "Davie Jones" and this kit comes with the wood sides
Hopeful to get started by Monday or Tuesday
AgentG
Visit this Community
Nevada, United States
Joined: December 21, 2008
KitMaker: 1,109 posts
Armorama: 1,095 posts
Posted: Thursday, December 15, 2011 - 03:08 PM UTC
You're Welcome Lt.!


G

PS ( I'll make a Shermaholic out of you too...........)
GSPatton
Visit this Community
California, United States
Joined: September 04, 2002
KitMaker: 1,411 posts
Armorama: 609 posts
Posted: Thursday, December 15, 2011 - 03:24 PM UTC
Semper Fi - Hobby Boss's AAVP 7A1 with EAAK coming at you soon.
geirand
Visit this Community
Vestfold, Norway
Joined: November 27, 2005
KitMaker: 5 posts
Armorama: 4 posts
Posted: Thursday, December 15, 2011 - 10:55 PM UTC
My build for this campaign will be the Hobbyboss LVTP-7.
It will be based on vehicles I saw during excercise Blue Fox as a kid back in 1987.

I'm considering a beach landing setting as I vividly remember seeing the USMC landing on the beaches near my home.
VLADPANZER
Visit this Community
Lebanon
Joined: December 20, 2010
KitMaker: 568 posts
Armorama: 549 posts
Posted: Friday, December 16, 2011 - 12:24 AM UTC

Hello all,

I have been waiting for this campaign, so here is my entry for it! Hobby Fan U.S marine digital uniform – 2 figures W/base (set HF 556). Really excited about this, looking forwards to your builds!


May I ask for your opinions on whether or not I should add the “electric box” on the side of the structure.

Regards,
melonhead
Visit this Community
Wisconsin, United States
Joined: July 29, 2010
KitMaker: 662 posts
Armorama: 457 posts
Posted: Friday, December 16, 2011 - 11:00 AM UTC
i was originally going to do something iconic showing past and present of the USMC.
however, i have decided against that after purchasing a Airborne Minaitures 120mm USMC Force Recon kit and another dragon kit completely seperate from this campaign. Since i already have plenty of started and unfinished kits, i didnt want to get into another kit that i would finish when i could use one that i already have to use for this.


the kit pieces are almost a plethora of differnt timelines and loadout combinations. it has the newer body armor but comes with teh older style butt packs and canteens. So, to go with the timeframe that it could be, going off of , i will be painting the butt pack as the normal green that was widely issued and painting the body armor as the woodland camo scheme. i wanted to do the dark brown that they have seemed to have switched to, but they didnt start going to that until later when they went with the high speed low drag loadouts. older style butt packs are no longer in use from what i can see. So, to keep it somewhat accurate, i have decided to go with the earlier style.
also, will be doing the cammies in the desert marpat just for a challenge. im hoping it turns out ok for being my first attempt.
pseudorealityx
Visit this Community
Georgia, United States
Joined: January 31, 2010
KitMaker: 2,191 posts
Armorama: 1,814 posts
Posted: Friday, December 16, 2011 - 12:57 PM UTC
I haven't done any USMC kits so far... so this needs to happen.

I'm thinking a Sherman from the PTO.
captnenglish
Visit this Community
California, United States
Joined: May 20, 2008
KitMaker: 1,184 posts
Armorama: 770 posts
Posted: Friday, December 16, 2011 - 02:15 PM UTC
I'll start my project when and if Dragon ever releases their Peleliu set they have been threatening to release for about six months
TheDiggs
Visit this Community
Illinois, United States
Joined: April 25, 2008
KitMaker: 338 posts
Armorama: 75 posts
Posted: Sunday, December 18, 2011 - 05:55 AM UTC
Here we go, there are some USMC Ospreys in here and I think the F-35s are the USMC version, but I will have to look at the parts and the decals closer to know for sure.

Buckeye198
Visit this Community
Ohio, United States
Joined: May 02, 2010
KitMaker: 596 posts
Armorama: 265 posts
Posted: Monday, December 19, 2011 - 07:07 PM UTC
For this campaign, I'll be building Tamiya's AAVP-7A1 with Up-Gunned Weapons System (UGWS) in 1/35 scale. I plan on modeling Marines fulfilling their original role as amphibious warriors by making a diorama of the AAV swimming on its way to the beachhead.

Here's the prebuild shot. At first glance, the pieces look nicely molded, thick plastic, very little flash (mainly just on the figures), and acceptable surface detail on the hull-top.


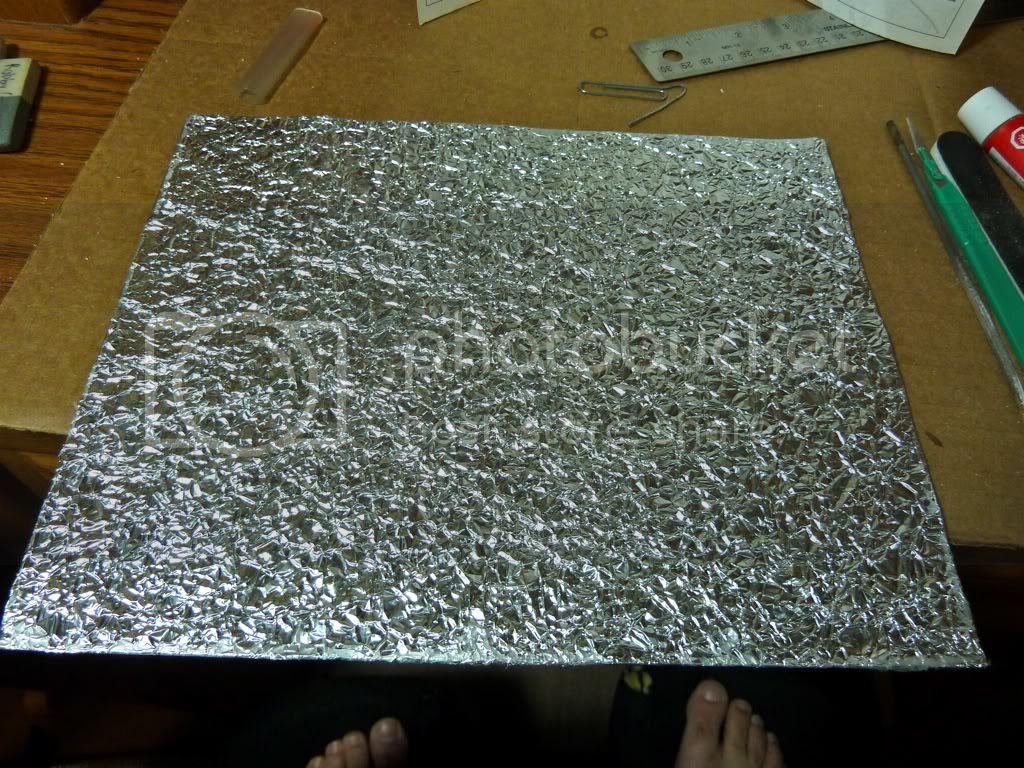
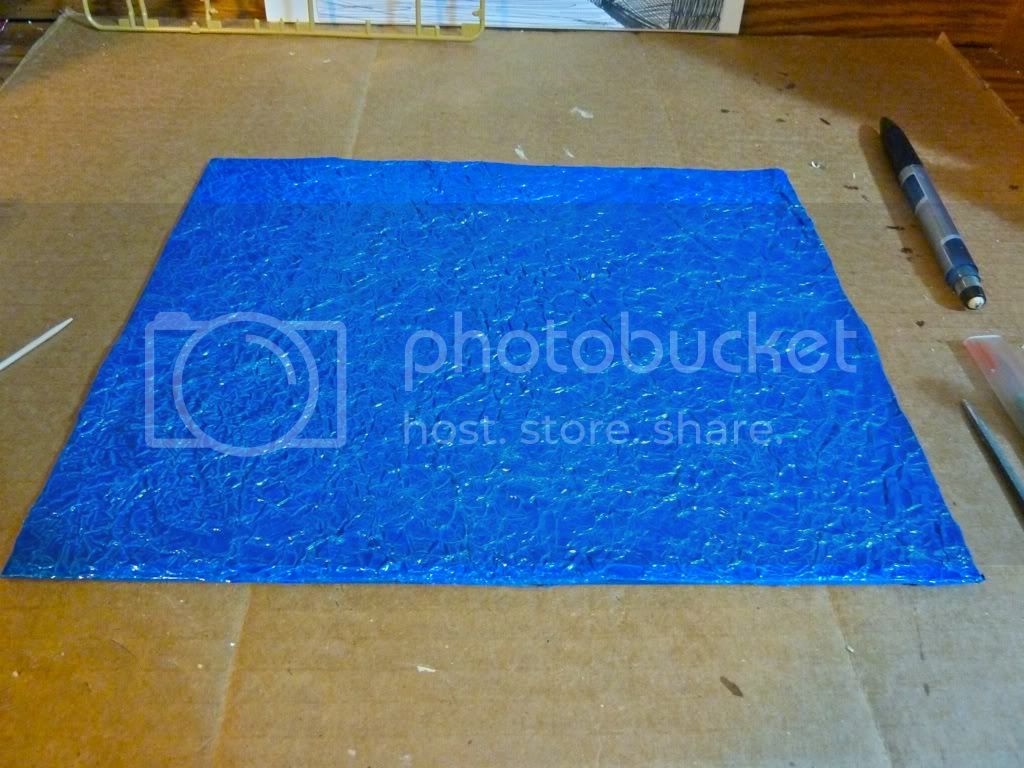
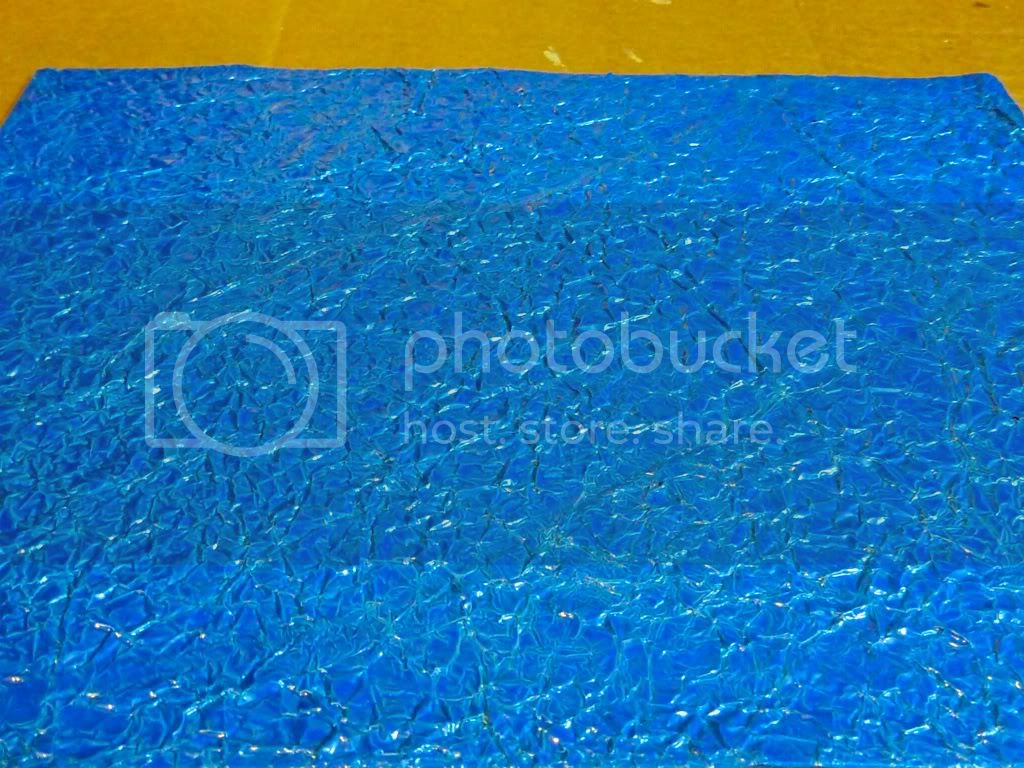
The first step towards the water! I'll be attempting to make foil water, as per the MS feature seen here. The crumbled foil was placed on a pane of glass from a Michael's picture frame, which will serve as the display base when the dio is finished.


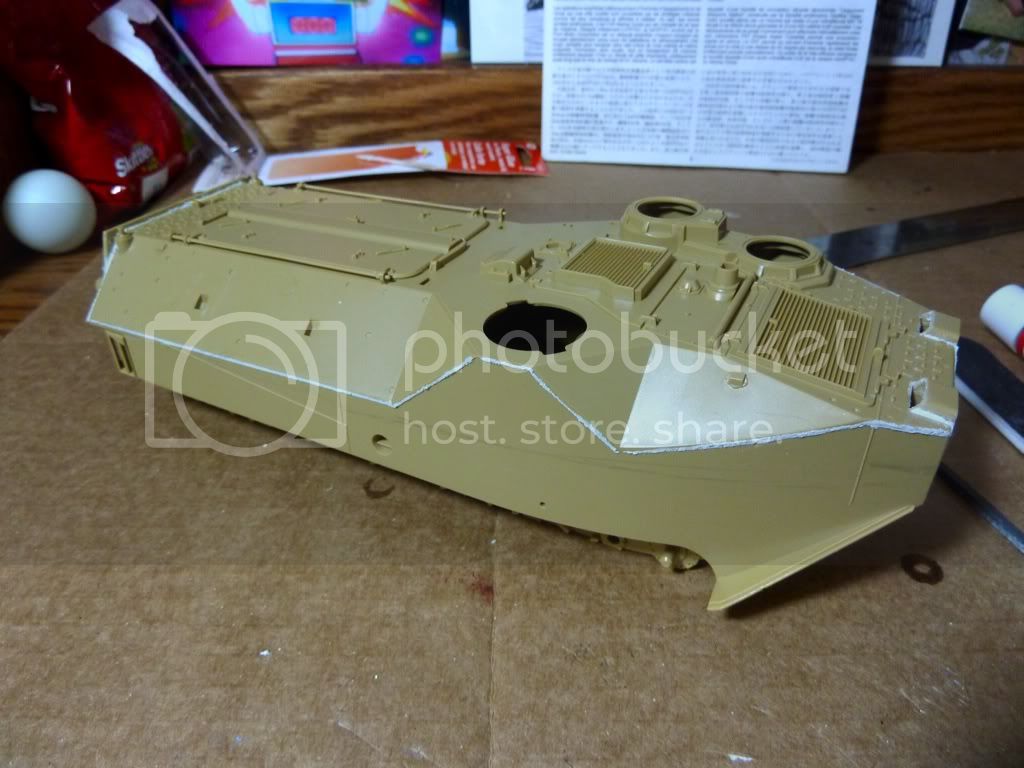
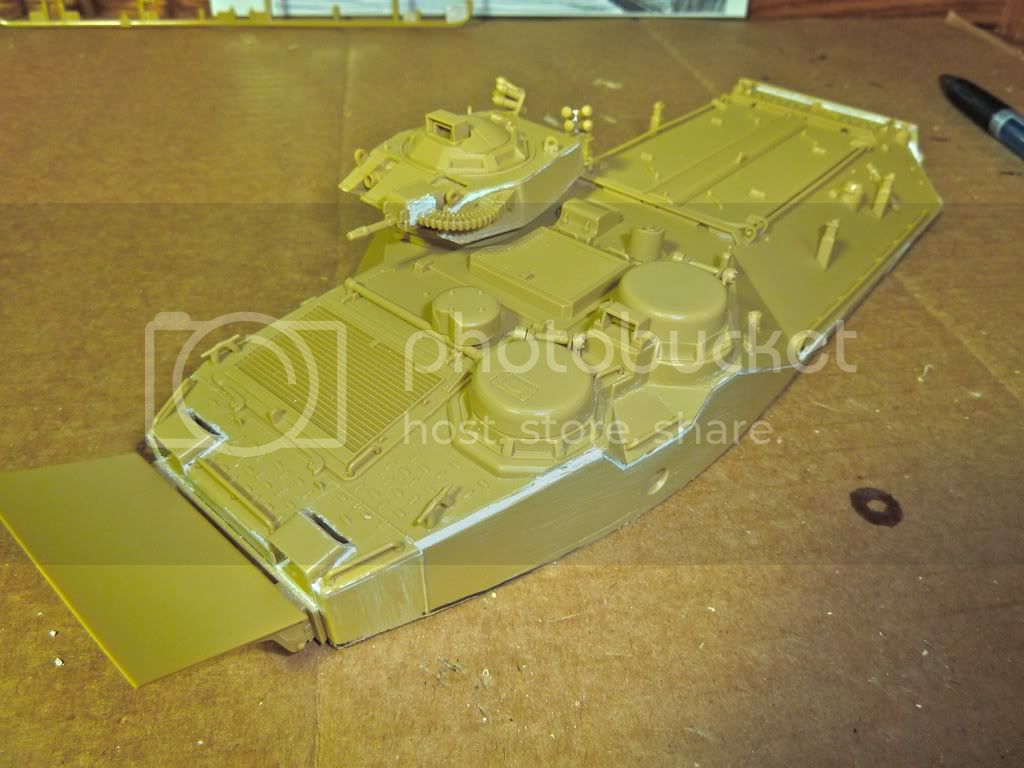
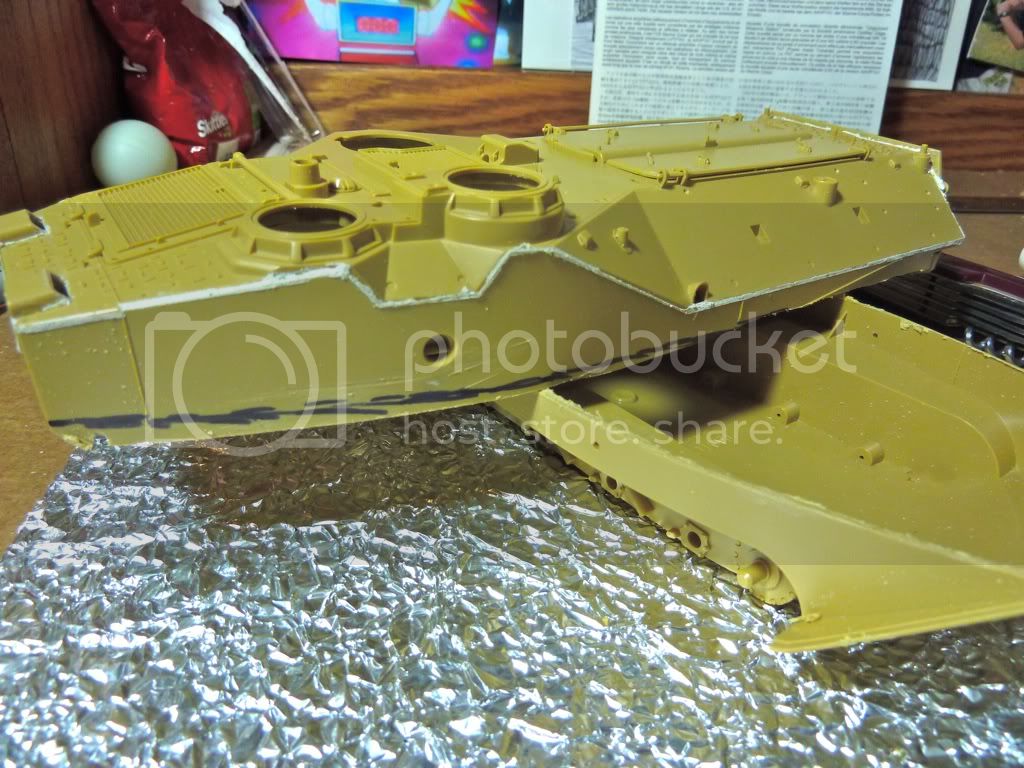
The two hull halves fit together okay, but putty will definitely be needed. Not sure if this is from the original mold or just the age of the kit.


After a night with the hacksaw, I was all ready to really dig into the dio!


Next step was to use the dremel sander to get the approximate sit of the AAV in the water. The bow plane will stick out over the edges of the frame, but it'll be fine. I've done my research about where the plane should settle during normal cruising in easy seas.


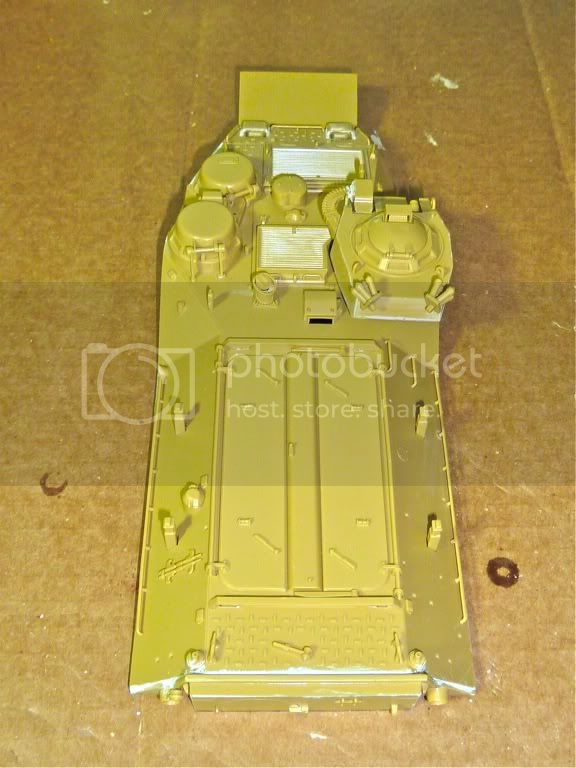
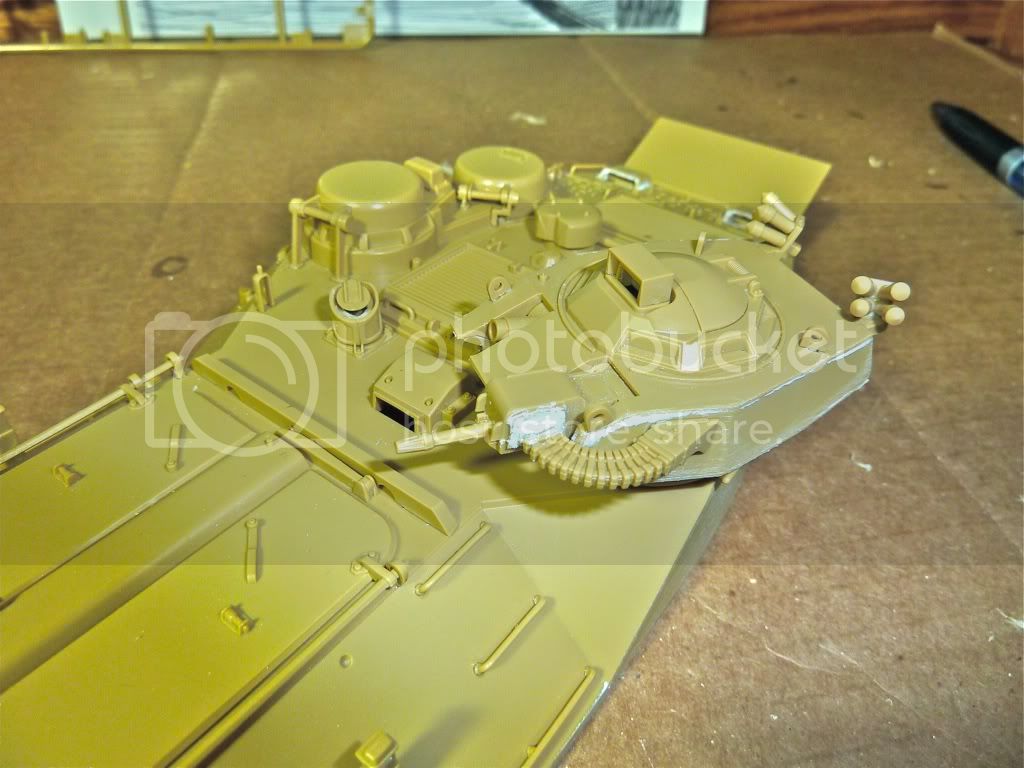
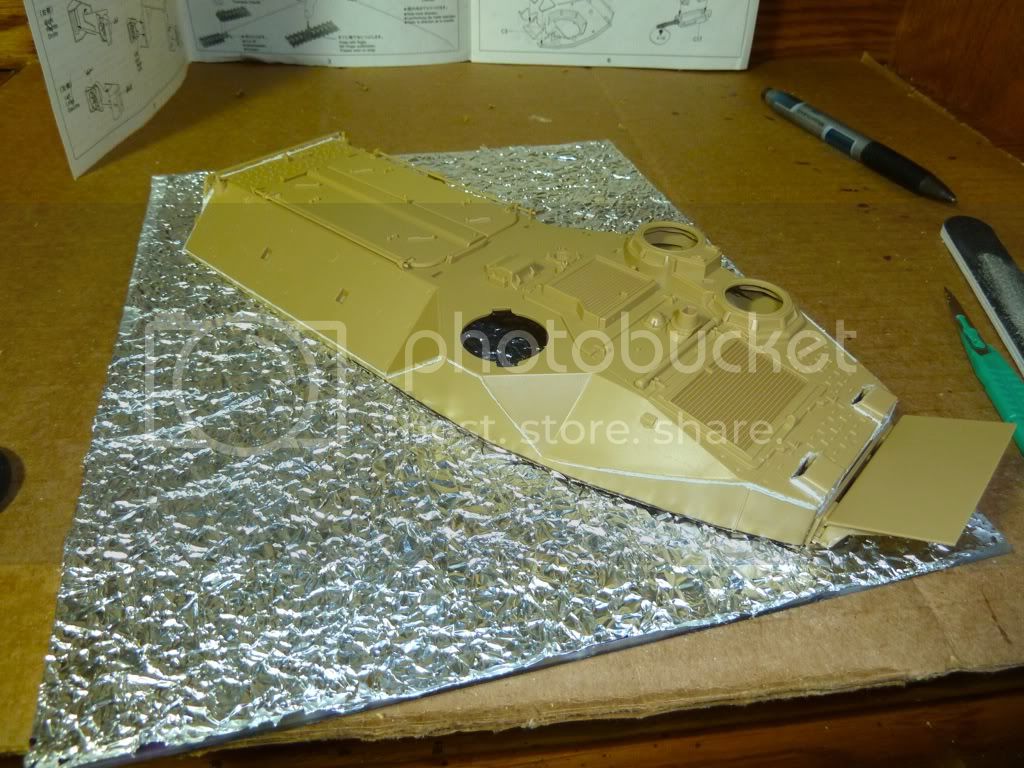
All the external details added and smoothed on (except tools, cables, and rucksacks, which will be hand-painted and attached after the camo).


Most of the kit went together just fine, but the 40mm feed belt and exhaust pipe (the cylinder just below the leftmost cupola) had no idea how they should go together. So putty and apathy became my friends.


The foil was sprayed with Testors Dark Blue aerosol enamel.


You can get a better sense of the shine in this picture, but it really doesn't do it justice...it looks SO much better in person!


So that was my work for the past three days. It's amazing how much faster a tracked vehicle can be built if you disregard the lower half! I hope to be done by the new year. If not, I expect it to be completed around springtime...the joys of being a student...
melonhead
Visit this Community
Wisconsin, United States
Joined: July 29, 2010
KitMaker: 662 posts
Armorama: 457 posts
Posted: Monday, December 19, 2011 - 07:19 PM UTC
one thing to think about.....during their plunges, the Marines wouldnt normally have their packs on the outside of the vehicle.
Buckeye198
Visit this Community
Ohio, United States
Joined: May 02, 2010
KitMaker: 596 posts
Armorama: 265 posts
Posted: Monday, December 19, 2011 - 07:24 PM UTC

Quoted Text

one thing to think about.....during their plunges, the Marines wouldnt normally have their packs on the outside of the vehicle.


O_o Brilliant!! I honestly really did not want to deal with those packs...I'm bad enough with figure-painting and they look like a real pain to work through. You saved me a world of trouble, Jesse!
melonhead
Visit this Community
Wisconsin, United States
Joined: July 29, 2010
KitMaker: 662 posts
Armorama: 457 posts
Posted: Monday, December 19, 2011 - 07:33 PM UTC
no problem. i actually thought you were putting them on for extra detail.

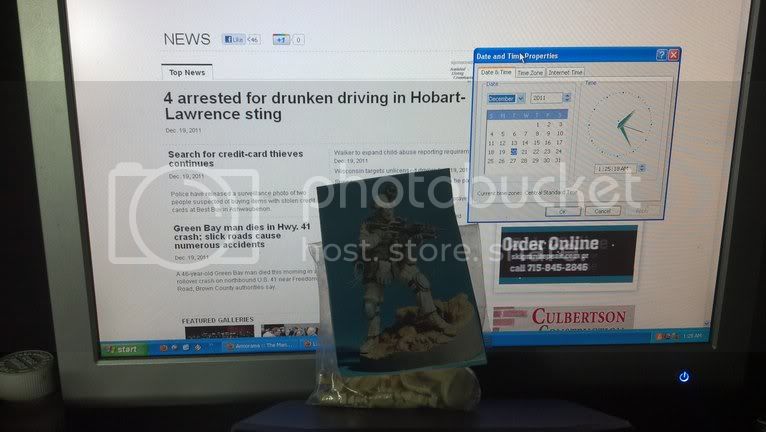
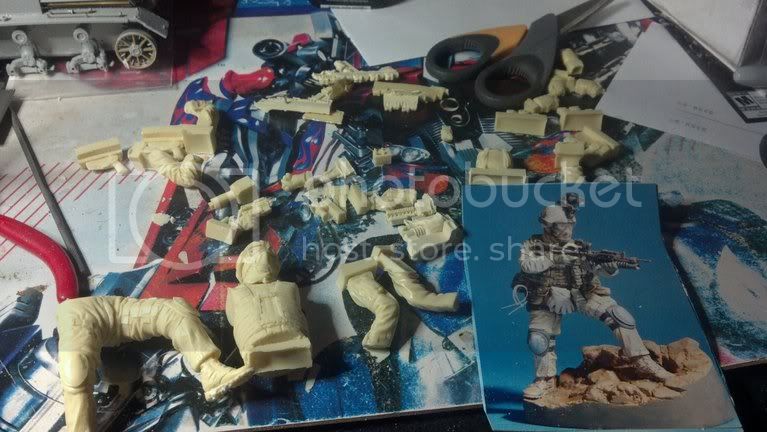
anywho...here is my kit....
sorry for the pic, had to use my phone and use the local newspaper website


Buckeye198
Visit this Community
Ohio, United States
Joined: May 02, 2010
KitMaker: 596 posts
Armorama: 265 posts
Posted: Tuesday, December 20, 2011 - 10:32 AM UTC
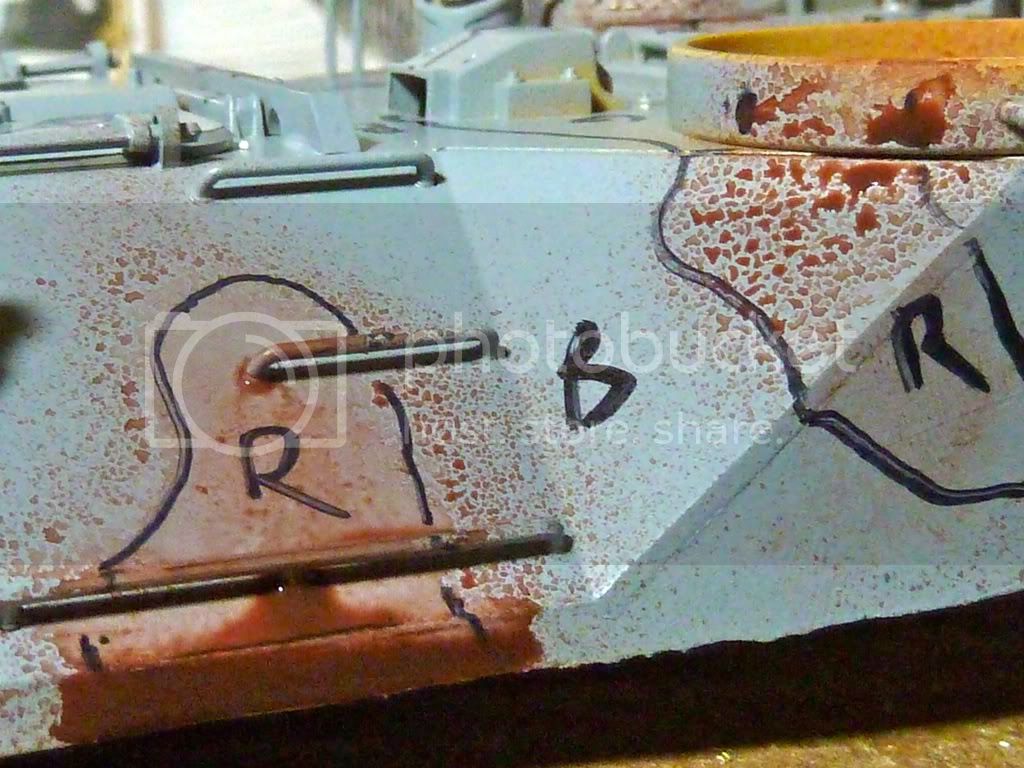
Once again, if you haven't heard any of my previous rants, I HATE VALLEJO. I bought their Model Air paints after reading that SO many people loved them so much and I wanted to try them out. Maybe really nice results are possible with them, but I must just be totally braindead because this is all I can ever get.

Unlike their advertisement, they are NOT ready to spray right out of the bottle and repeatedly clogged my Iwata Revolution CR. So I thinned them. It seemed that people were having good luck with distilled water, so I have tried that with no joy. In the picture above, you can see my results. Keep in mind this is the thickest I was able to get without clogging. I thinned, mixed thoroughly, and sprayed directly on the lines (low paint volume, ~8 PSI, brush roughly half an inch from the surface) and the paint decided to dramatically overspray, run entirely off the surface, and speckle anywhere it was thin enough not to run (which was everywhere I didn't want there to be paint). Admittedly, it looks pretty cool, but it's not the camo scheme I'm looking for. I am hereby giving up on Vallejo. It was a s***tty run, but I'm not sorry I tried it. It just reinforced my love of Testors enamels
melonhead
Visit this Community
Wisconsin, United States
Joined: July 29, 2010
KitMaker: 662 posts
Armorama: 457 posts
Posted: Tuesday, December 20, 2011 - 10:52 AM UTC

Quoted Text

Once again, if you haven't heard any of my previous rants, I HATE VALLEJO. I bought their Model Air paints after reading that SO many people loved them so much and I wanted to try them out. Maybe really nice results are possible with them, but I must just be totally braindead because this is all I can ever get.

Unlike their advertisement, they are NOT ready to spray right out of the bottle and repeatedly clogged my Iwata Revolution CR. So I thinned them. It seemed that people were having good luck with distilled water, so I have tried that with no joy. In the picture above, you can see my results. Keep in mind this is the thickest I was able to get without clogging. I thinned, mixed thoroughly, and sprayed directly on the lines (low paint volume, ~8 PSI, brush roughly half an inch from the surface) and the paint decided to dramatically overspray, run entirely off the surface, and speckle anywhere it was thin enough not to run (which was everywhere I didn't want there to be paint). Admittedly, it looks pretty cool, but it's not the camo scheme I'm looking for. I am hereby giving up on Vallejo. It was a s***tty run, but I'm not sorry I tried it. It just reinforced my love of Testors enamels


thats why they say, "if it aint broke, dont fix it". i will continue staying with the same paints until it stops working.
Buckeye198
Visit this Community
Ohio, United States
Joined: May 02, 2010
KitMaker: 596 posts
Armorama: 265 posts
Posted: Tuesday, December 20, 2011 - 11:40 AM UTC

Quoted Text

thats why they say, "if it aint broke, dont fix it". i will continue staying with the same paints until it stops working.


Update: I think it's my AB sucks a$$. I just tried spraying my trusty enamels and again, no joy. Even after my preparations, they were still too thick. So I thinned them ever so slightly. At least they clung to the model this time. But there was so little paint coming out it wasn't even worth the time. Put them in my old Badger single action, and it work flawlessly. Except that it's a siphon feed so it needed much more air to spray, causing overspray and heartbreak. Maybe I should just go back to handpainting all my models...
melonhead
Visit this Community
Wisconsin, United States
Joined: July 29, 2010
KitMaker: 662 posts
Armorama: 457 posts
Posted: Tuesday, December 20, 2011 - 12:47 PM UTC

Quoted Text


Quoted Text

thats why they say, "if it aint broke, dont fix it". i will continue staying with the same paints until it stops working.


Update: I think it's my AB sucks a$$. I just tried spraying my trusty enamels and again, no joy. Even after my preparations, they were still too thick. So I thinned them ever so slightly. At least they clung to the model this time. But there was so little paint coming out it wasn't even worth the time. Put them in my old Badger single action, and it work flawlessly. Except that it's a siphon feed so it needed much more air to spray, causing overspray and heartbreak. Maybe I should just go back to handpainting all my models...


perhaps the brush needs an overhaul or a thorough cleaning?
Buckeye198
Visit this Community
Ohio, United States
Joined: May 02, 2010
KitMaker: 596 posts
Armorama: 265 posts
Posted: Tuesday, December 20, 2011 - 03:17 PM UTC
I would doubt it, since it had the same troubles right out of the box. Honestly, I've never had a spraying session with the Revolution that I've been happy with the results. I'm considering taking the time to mask each color of the camo and then spray enamels with my single-action, as much of a pain as that whole process will be.