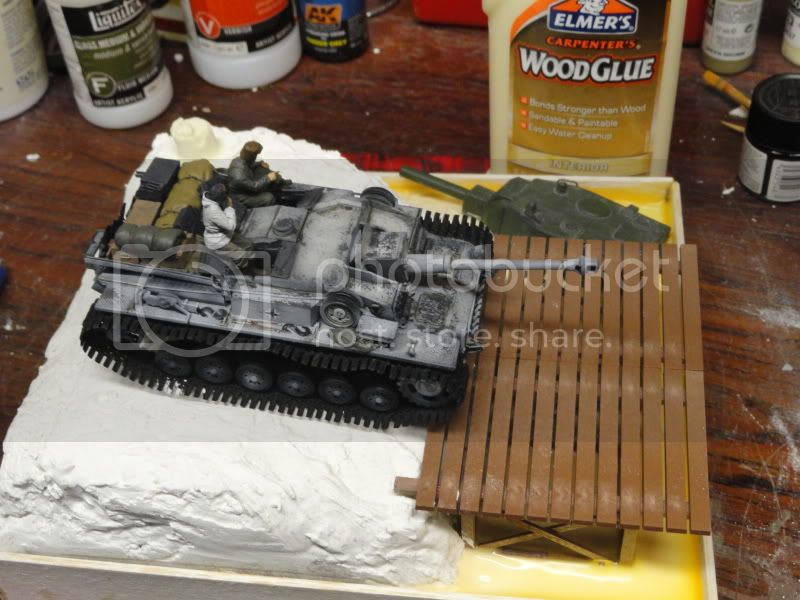
Jeff - Thank you Sir!
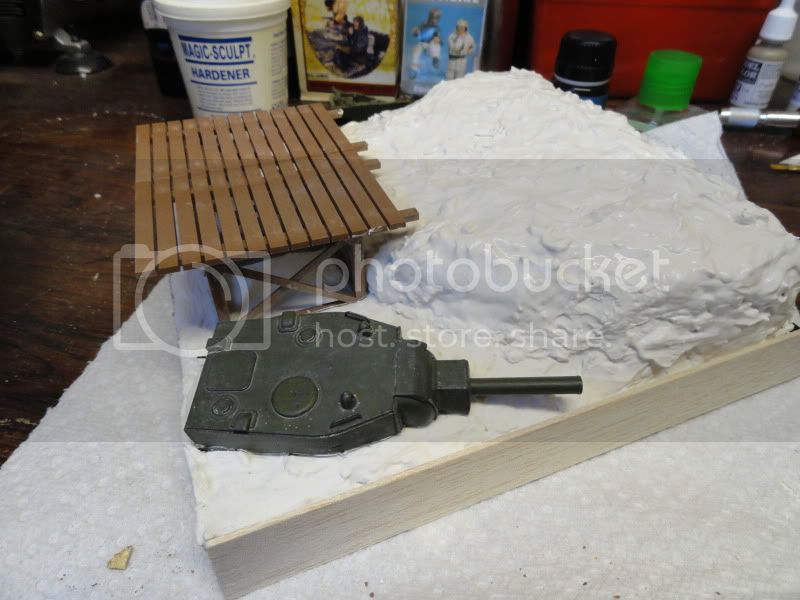
Spackling process has begun
Campaigns
Where Armorama group builds can be discussed, organized, and updates posted.
Hosted by Darren Baker, Richard S.
Sturmgeschütz Brigade Build
GregCloseCombat
California, United States
Joined: June 30, 2008
KitMaker: 2,408 posts
Armorama: 2,394 posts
Joined: June 30, 2008
KitMaker: 2,408 posts
Armorama: 2,394 posts
Posted: Sunday, October 28, 2012 - 07:22 AM UTC
panzerconor
Massachusetts, United States
Joined: February 08, 2012
KitMaker: 1,271 posts
Armorama: 1,253 posts
Joined: February 08, 2012
KitMaker: 1,271 posts
Armorama: 1,253 posts
Posted: Thursday, November 01, 2012 - 12:50 PM UTC
So as of now I'm painting my Stug IV in a late war scheme, the only issue is that my airbrush isn't at it's full function yet, so I'm using a spray can. I just need to know the best way of doing a camo pattern with one? I used to cut holes in papers but that's not the best way to do things...
Bit of a problem
-Conor
Bit of a problem
-Conor
GregCloseCombat
California, United States
Joined: June 30, 2008
KitMaker: 2,408 posts
Armorama: 2,394 posts
Joined: June 30, 2008
KitMaker: 2,408 posts
Armorama: 2,394 posts
Posted: Friday, November 02, 2012 - 02:36 AM UTC
Panzerconor - Sounds like tape, putty, or hand painting is in your future. I do not envy you having to go back to spray cans and handbrushing.
PantherF
Indiana, United States
Joined: June 10, 2005
KitMaker: 6,188 posts
Armorama: 5,960 posts
Joined: June 10, 2005
KitMaker: 6,188 posts
Armorama: 5,960 posts
Posted: Friday, November 02, 2012 - 08:30 AM UTC
Conor, there are many ways to accomplish that without an AB. Take it from someone who isn't using one, just not yet.
Brushing, sponge brushes, using cotton balls. putty... the later two by using a rattle can. Drawing the pattern on the vehicle, then outlining with a tiny brush and then fill it in by using a sponge brush is the best way to avoid brush marks. Of course, using enamel paint.
My 1/16th Sturmtiger is done that way.
~ Jeff
panzerconor
Massachusetts, United States
Joined: February 08, 2012
KitMaker: 1,271 posts
Armorama: 1,253 posts
Joined: February 08, 2012
KitMaker: 1,271 posts
Armorama: 1,253 posts
Posted: Sunday, November 04, 2012 - 10:26 AM UTC
I'm not quite as worried as I should be, mostly because I'm whitewashing it too. I'm not gonna post any pictures until all that's done though. I whitewashed a Panther a few months ago and I'm happy with it, so this Stug should look good.
-Conor
-Conor
GregCloseCombat
California, United States
Joined: June 30, 2008
KitMaker: 2,408 posts
Armorama: 2,394 posts
Joined: June 30, 2008
KitMaker: 2,408 posts
Armorama: 2,394 posts
Posted: Sunday, November 04, 2012 - 11:01 AM UTC
Still plugging away gradually. Waited a week for this glue pond to dry
Snorri23
Ontario, Canada
Joined: March 25, 2010
KitMaker: 514 posts
Armorama: 261 posts
Joined: March 25, 2010
KitMaker: 514 posts
Armorama: 261 posts
Posted: Tuesday, November 06, 2012 - 05:59 AM UTC
I have a R.B. model replacement barrel for my Stug AustF. The instructions on their web site leave me perplexed. Figured out some of the placement though where do the three rings/washers go?
1721Lancers
England - East Anglia, United Kingdom
Joined: March 21, 2012
KitMaker: 1,673 posts
Armorama: 1,640 posts
Joined: March 21, 2012
KitMaker: 1,673 posts
Armorama: 1,640 posts
Posted: Tuesday, November 06, 2012 - 06:09 AM UTC
Hello Trevor,
here´s your answer, if you´d have checked the thread from the start you would have found this:
Paul
Quoted Text
--------------------------------------------------------------------------------
And a first question.
Anyone has an idea as to where to fit the 3 round PE parts that are provided with the metal gun? There are no instructions provided with the RB barrel, and i am clueless as to were they go.
Here the pic:
--------------------------------------------------------------------------------
The two rings with gear-like teeth go inside the muzzle brake, the smooth one goes between the rear half of the muzzle brake and the small collar ring. The two tiny parts represent locking nuts - one goes on the back of the muzzle brake.
Take a look at Armorscale's barrel instructions: http://www.armorscale.com/products/barrels35/B35-059/
Probably easier to understand than my written explanations.
If I'm not mistaken, the turned brass parts on a lot of Armorscale sets are made by RB, with added bling like instructions, a bit more expansive PE and resin parts. The instructions they have on their website are often really helpful when working with the more complicated RB barrels.
Hmmm... Looking at all the nice builds going on, I starting to think if I should jump in as well.
BBD468
Texas, United States
Joined: March 08, 2010
KitMaker: 2,465 posts
Armorama: 2,383 posts
Joined: March 08, 2010
KitMaker: 2,465 posts
Armorama: 2,383 posts
Posted: Tuesday, November 06, 2012 - 06:22 AM UTC
Greg, its lookin' mighty good man! Keep it comin'!!!
Gary
Gary
Posted: Tuesday, November 06, 2012 - 05:46 PM UTC
Great looking diorama, Gary.
Looking forward to see more
GregCloseCombat
California, United States
Joined: June 30, 2008
KitMaker: 2,408 posts
Armorama: 2,394 posts
Joined: June 30, 2008
KitMaker: 2,408 posts
Armorama: 2,394 posts
Posted: Wednesday, November 07, 2012 - 03:06 AM UTC
Thanks Gary, Jesper,
I got the finishing steps all in my head, just need the time to implement now
Snorri23
Ontario, Canada
Joined: March 25, 2010
KitMaker: 514 posts
Armorama: 261 posts
Joined: March 25, 2010
KitMaker: 514 posts
Armorama: 261 posts
Posted: Friday, November 09, 2012 - 05:03 PM UTC
I am trying to build the dragon III Ausf F, in the red and green box. Threy have a photo etch piece which they state is the rear exhaust deflector. The directions show that is just slips in. Two holes are in each muffler in which the pins on the piece slide into. I can not get that piece to fit. Looked at photos and can not see that piece installed. Any suggestions in how it can be placed on or just forget it. Thanks for your suggestions.
PantherF
Indiana, United States
Joined: June 10, 2005
KitMaker: 6,188 posts
Armorama: 5,960 posts
Joined: June 10, 2005
KitMaker: 6,188 posts
Armorama: 5,960 posts
Posted: Friday, November 09, 2012 - 08:36 PM UTC
Quoted Text
I have a R.B. model replacement barrel for my Stug AustF. The instructions on their web site leave me perplexed. Figured out some of the placement though where do the three rings/washers go?
Trevor, does this help?
Or some links:
http://www.perthmilitarymodelling.com/reviews/vehicles/griffon/lb35002-4.html
http://scalemodelworld.net/forums/viewtopic.php?t=5153&sid=a8084ecfa42b7a2437eb7687f33d5e32
Also, about the exhaust deflector. Sometimes with those kits PE the parts or plastic need some "altering or adjusting" to fit correctly. My suggestion would be to google builds of your model in order to see how it fits.
If you need more help I'll see if any of my kits have a similar set. Same thing with the barrel... I have a Voyager instruction sheet.
~ Jeff
Petro
Connecticut, United States
Joined: November 02, 2003
KitMaker: 984 posts
Armorama: 846 posts
Joined: November 02, 2003
KitMaker: 984 posts
Armorama: 846 posts
Posted: Saturday, November 10, 2012 - 02:01 AM UTC
Quoted Text
I am trying to build the dragon III Ausf F, in the red and green box. Threy have a photo etch piece which they state is the rear exhaust deflector. The directions show that is just slips in. Two holes are in each muffler in which the pins on the piece slide into. I can not get that piece to fit. Looked at photos and can not see that piece installed. Any suggestions in how it can be placed on or just forget it. Thanks for your suggestions.
Yes that part is very confusing. I believe the part to be slightly over sized. I was able to get mine to sit in , but it does have a slight curve to it. I looked at all sorts of pictures on the net of StuGs, but could not really see that part on an actual StuG, usually due to no pics from that angle or poor picture quality. I think i did find one picture, but unfortunately, that was earlier this summer and don't remember where i found it.
1721Lancers
England - East Anglia, United Kingdom
Joined: March 21, 2012
KitMaker: 1,673 posts
Armorama: 1,640 posts
Joined: March 21, 2012
KitMaker: 1,673 posts
Armorama: 1,640 posts
Posted: Saturday, November 10, 2012 - 03:23 AM UTC
Hello Trevor,
maybe these can help:
Paul
maybe these can help:
Paul
Petro
Connecticut, United States
Joined: November 02, 2003
KitMaker: 984 posts
Armorama: 846 posts
Joined: November 02, 2003
KitMaker: 984 posts
Armorama: 846 posts
Posted: Sunday, November 11, 2012 - 04:09 AM UTC
Looks like it is supposed to be curved. So the piece isn't over sized. I did something correct!
Snorri23
Ontario, Canada
Joined: March 25, 2010
KitMaker: 514 posts
Armorama: 261 posts
Joined: March 25, 2010
KitMaker: 514 posts
Armorama: 261 posts
Posted: Sunday, November 11, 2012 - 04:20 AM UTC
Thank you all for the assistance, this is a great resource. Back to finishing this tank.
Snorri23
Ontario, Canada
Joined: March 25, 2010
KitMaker: 514 posts
Armorama: 261 posts
Joined: March 25, 2010
KitMaker: 514 posts
Armorama: 261 posts
Posted: Tuesday, November 13, 2012 - 05:53 PM UTC
Here are some photos of my progress. The offending heat shield is installed. Went a bit heavy on the dull coat need to remedy that. When installing the track the rear idler was not in alignment so the track needed to shift. Did not notice that until installed and too late to alter. The fenders hide that error. With your assistance was able to complete and attach the barrel
PantherF
Indiana, United States
Joined: June 10, 2005
KitMaker: 6,188 posts
Armorama: 5,960 posts
Joined: June 10, 2005
KitMaker: 6,188 posts
Armorama: 5,960 posts
Posted: Tuesday, November 13, 2012 - 11:58 PM UTC
Looks like you've got it licked Trevor and looking very nice!
~ Jeff
~ Jeff
BBD468
Texas, United States
Joined: March 08, 2010
KitMaker: 2,465 posts
Armorama: 2,383 posts
Joined: March 08, 2010
KitMaker: 2,465 posts
Armorama: 2,383 posts
Posted: Wednesday, November 14, 2012 - 06:01 AM UTC
Trevor - Your Stug looks nice! Is that a hint of a white wash or the result of the heavy dullcoat? What im lookin' at looks pretty damn sweet!!
Gary
Gary
GregCloseCombat
California, United States
Joined: June 30, 2008
KitMaker: 2,408 posts
Armorama: 2,394 posts
Joined: June 30, 2008
KitMaker: 2,408 posts
Armorama: 2,394 posts
Posted: Wednesday, November 14, 2012 - 04:01 PM UTC
Great looking Stug. It may be hard to get that extra dullcoat off without taking off paint. You want to consider the whitewash route or just leave it with a frosty look. Is that dullcote enamel or acrylic based?
Snorri23
Ontario, Canada
Joined: March 25, 2010
KitMaker: 514 posts
Armorama: 261 posts
Joined: March 25, 2010
KitMaker: 514 posts
Armorama: 261 posts
Posted: Wednesday, November 14, 2012 - 04:38 PM UTC
The testors dull coat I used is lacquer based. Not too sure what I will do. Spraying it with Future/Ajax/Pledge/? what ever your country sells usually takes away the fogged look. Thanks for the comments.
iakarch
Louisiana, United States
Joined: May 19, 2007
KitMaker: 459 posts
Armorama: 421 posts
Joined: May 19, 2007
KitMaker: 459 posts
Armorama: 421 posts
Posted: Thursday, November 15, 2012 - 12:55 PM UTC
My Stug is ready for paint!
iakarch
Louisiana, United States
Joined: May 19, 2007
KitMaker: 459 posts
Armorama: 421 posts
Joined: May 19, 2007
KitMaker: 459 posts
Armorama: 421 posts
Posted: Thursday, November 15, 2012 - 12:56 PM UTC
More:
iakarch
Louisiana, United States
Joined: May 19, 2007
KitMaker: 459 posts
Armorama: 421 posts
Joined: May 19, 2007
KitMaker: 459 posts
Armorama: 421 posts
Posted: Thursday, November 15, 2012 - 12:56 PM UTC
some rear