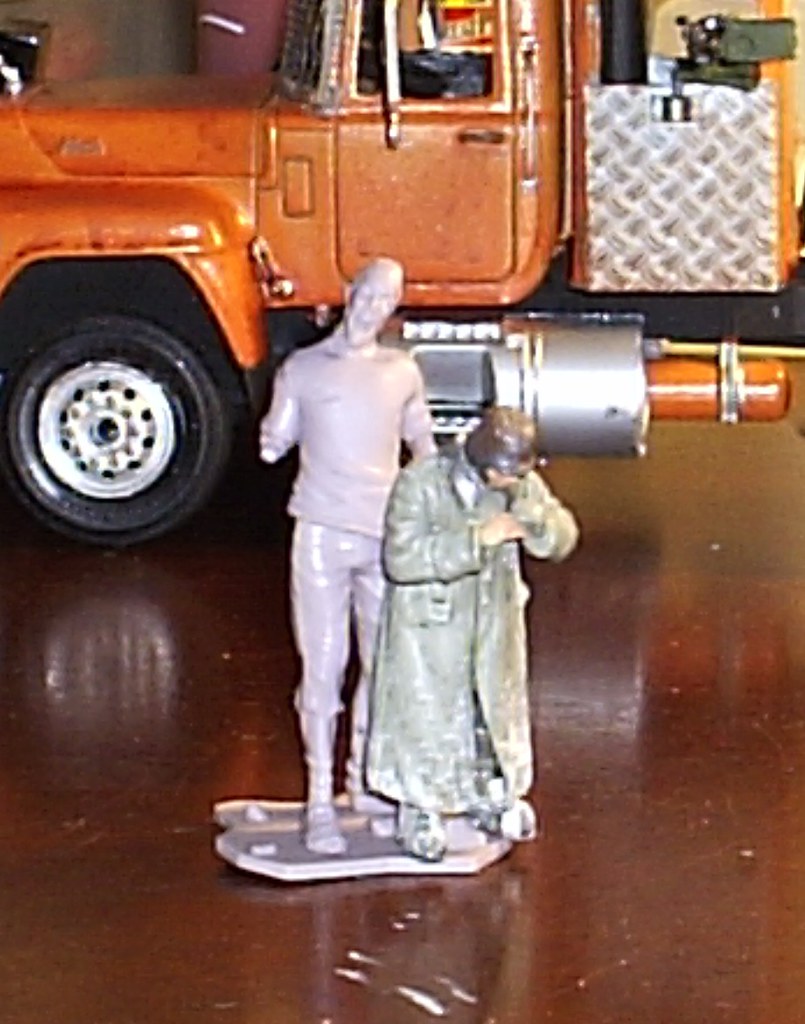
2 quick photos: the mesh is on the windows and lots of crates and ammo cans in....even found a battered old motorbike wich will get cleaned up a bit and strapped to the rear for any emergency get of of Dodge event. Making loads of those paper food cartons: I'd forgotten what a PITA they are. Also attempted to make the armour look rusted...used a crimson & brown oil wash....result is mixed to say the least.
Cheers
Sean
Campaigns
Where Armorama group builds can be discussed, organized, and updates posted.
Hosted by Darren Baker, Richard S.
End of Days 2 Campaign
35th-scale
Kildare, Ireland
Joined: November 21, 2007
KitMaker: 3,212 posts
Armorama: 2,807 posts
Joined: November 21, 2007
KitMaker: 3,212 posts
Armorama: 2,807 posts
Posted: Sunday, May 05, 2013 - 06:03 AM UTC
Bluestab
South Carolina, United States
Joined: December 03, 2009
KitMaker: 2,160 posts
Armorama: 1,906 posts
Joined: December 03, 2009
KitMaker: 2,160 posts
Armorama: 1,906 posts
Posted: Monday, May 20, 2013 - 05:03 PM UTC
By the way, has anyone heard from our Fearless leader, Phil?
1967er
Nordrhein-Westfalen, Germany
Joined: March 12, 2012
KitMaker: 224 posts
Armorama: 201 posts
Joined: March 12, 2012
KitMaker: 224 posts
Armorama: 201 posts
Posted: Tuesday, May 21, 2013 - 10:40 PM UTC
Hi folks,
I just received a parcel from America including the zombie walker horde from Gentlegiant. This horde consists of 14 figures in 7 different poses.
The molding is good for such cheap figures, and they could be a great addition for our End-of-Days projects.
Unfortunately their size is about 58 to 59mm, so around 1:31 or 1:30 scale.
This will look very weired if placed directly beneath a 1:35 figure
With a little distance this may work, but I have not tested it. Maybe I just replace my Alien Walker with a zombie-horde
I will update some current pictures during the next days...
cheers
Thomas
35th-scale
Kildare, Ireland
Joined: November 21, 2007
KitMaker: 3,212 posts
Armorama: 2,807 posts
Joined: November 21, 2007
KitMaker: 3,212 posts
Armorama: 2,807 posts
Posted: Wednesday, May 22, 2013 - 10:12 AM UTC
1967er
Nordrhein-Westfalen, Germany
Joined: March 12, 2012
KitMaker: 224 posts
Armorama: 201 posts
Joined: March 12, 2012
KitMaker: 224 posts
Armorama: 201 posts
Posted: Saturday, May 25, 2013 - 09:50 PM UTC
Hi folks,
Sean, your truck looks great.
I like the way you did the windows - it looks very realistic.
The motorbike - where is it from ?
Is it from the Tamiya JGSDF Motorcycle Reconnaissance Set?
And....
... its time to show some new pictures.
During the last few weeks I worked on the building interior, the buero and the workshop room.
Now it finally payed of, that I spent so much time on all the small items...
The buero - not finalized but nearly done:
and some scenes from the workshop (with two figures at their places):
So much for the interior...
I am not through with searching for zombie figures in a proper scale.
A few weeks ago I have bought a set of zombies from EBAY USA and they were delivered last week.
These are the "Walker Horde" from a company called "Gentle Giant" and are inspired by the series "the walking dead" (what else...).
Here a link to the company's webpage: click me
If you put them on a diorama by themselves, it looks OK (molding for one-piece figures is good, no molding lines, acceptable details):
But if you place them directly beneath another figure in 1:35 or 54mm scale, you notice that the zombies are just to large - they are about 58mm high up to their heads.
Comparison with 1:35 scale figure:
and compared with 54mm figure (nearly OK, but still to large):
So another range of zombies, that just cannot be used together with scale models and figures.
I really cannot understand, what those product designers think when they make something like this.
What's your opinion?
cheers
Thomas
Sean, your truck looks great.
I like the way you did the windows - it looks very realistic.
The motorbike - where is it from ?
Is it from the Tamiya JGSDF Motorcycle Reconnaissance Set?
And....
... its time to show some new pictures.
During the last few weeks I worked on the building interior, the buero and the workshop room.
Now it finally payed of, that I spent so much time on all the small items...
The buero - not finalized but nearly done:
and some scenes from the workshop (with two figures at their places):
So much for the interior...
I am not through with searching for zombie figures in a proper scale.
A few weeks ago I have bought a set of zombies from EBAY USA and they were delivered last week.
These are the "Walker Horde" from a company called "Gentle Giant" and are inspired by the series "the walking dead" (what else...).
Here a link to the company's webpage: click me
If you put them on a diorama by themselves, it looks OK (molding for one-piece figures is good, no molding lines, acceptable details):
But if you place them directly beneath another figure in 1:35 or 54mm scale, you notice that the zombies are just to large - they are about 58mm high up to their heads.
Comparison with 1:35 scale figure:
and compared with 54mm figure (nearly OK, but still to large):
So another range of zombies, that just cannot be used together with scale models and figures.
I really cannot understand, what those product designers think when they make something like this.
What's your opinion?
cheers
Thomas
bdanie6
New Hampshire, United States
Joined: November 09, 2008
KitMaker: 615 posts
Armorama: 60 posts
Joined: November 09, 2008
KitMaker: 615 posts
Armorama: 60 posts
Posted: Monday, May 27, 2013 - 12:53 AM UTC
Hi Thomas, great work on the building and all the accessories, your dio is going to be fantastic.
I see you are having the same problem with your zombies as I have with mine. I received my "Box O' Zombies" a few weeks ago and found the same problem. They seem to be 1/30 or 1/28 scale
This is one of my zombies with a figure from another dio I am working on standing on the same base. I am hoping to get away with the size difference by using a crawler
Anyway, love your work, it's looking great.
Later
Bluestab
South Carolina, United States
Joined: December 03, 2009
KitMaker: 2,160 posts
Armorama: 1,906 posts
Joined: December 03, 2009
KitMaker: 2,160 posts
Armorama: 1,906 posts
Posted: Monday, May 27, 2013 - 12:37 PM UTC
That's a shame about the figures. I wonder if you could shorten them by cutting them at their mid-sections and remove a section. That'd probably get the height correct. I'm not sure if the limbs and heads would look right compared to 1/35 scale figures. You might be stuck with 1/32 figures.
Thomas, great work. I'm really enjoying the little details you've added.
35th-scale
Kildare, Ireland
Joined: November 21, 2007
KitMaker: 3,212 posts
Armorama: 2,807 posts
Joined: November 21, 2007
KitMaker: 3,212 posts
Armorama: 2,807 posts
Posted: Monday, May 27, 2013 - 07:47 PM UTC
Thomas, the level of detail is fantastic! And so real looking....
1967er
Nordrhein-Westfalen, Germany
Joined: March 12, 2012
KitMaker: 224 posts
Armorama: 201 posts
Joined: March 12, 2012
KitMaker: 224 posts
Armorama: 201 posts
Posted: Friday, May 31, 2013 - 09:30 AM UTC
Hi folks,
thank you for all your positive feedback - this really boosts my motivation!
So I will give you some updates - to keep the fire burning...
During the last days I did some final works at the building - especially the intermediate ceiling and the roof.
First I put some stuff onto the intermediate ceiling:
And now I call the workshop ready (despite of the missing figures)...
The roof got an additional rain drain, nice green and mossy.
Just as the roof - there are some mossy patches here and there on the corrugated metal, right along the rusty stains.
And last, but not least there's the road barrier which will be up front on the diorama to hinder a straight movement of the walker. It's build from the concrete road barriers I showed before and debris (scratchbuilt) with some waste to give it some color...
So it will be seen if you stand in front the diorama:
And that's the backside (located towards the building)...
Next will be the Ford Bronco (which is nearly complete) and after that the hardest part:
Stripping the paint from the walker...
Until then, have a nice weekend
Thomas
35th-scale
Kildare, Ireland
Joined: November 21, 2007
KitMaker: 3,212 posts
Armorama: 2,807 posts
Joined: November 21, 2007
KitMaker: 3,212 posts
Armorama: 2,807 posts
Posted: Saturday, June 01, 2013 - 09:23 AM UTC
Bluestab
South Carolina, United States
Joined: December 03, 2009
KitMaker: 2,160 posts
Armorama: 1,906 posts
Joined: December 03, 2009
KitMaker: 2,160 posts
Armorama: 1,906 posts
Posted: Saturday, June 01, 2013 - 01:23 PM UTC
Nice work, Sean. And good luck with the paint Thomas.
I'm trying to wrap up my urban buildings part of my outbreak scene. I've had to redo it a couple of times after not really liking how it was turning out. I'm going with the "keep it simple" angle this time. I'm still hoping to do the second one, The Road, but I'll probably tweak it. My attempts at painting horses aren't looking too good. I might do a last stand style scene or maybe even tie it in with my wrecker and scout from EOD 1.
1967er
Nordrhein-Westfalen, Germany
Joined: March 12, 2012
KitMaker: 224 posts
Armorama: 201 posts
Joined: March 12, 2012
KitMaker: 224 posts
Armorama: 201 posts
Posted: Monday, June 03, 2013 - 07:59 AM UTC
Hi,
yesterday was a good day - I finished the Ford Bronco and the chairs and table for the roof terrace.
But today was not so great...
I tried to strip the paint of the walker.
You must know, that this kit consists of 3 different plastic materials: PP, PE and ABS.
And obviously the solvent I used to strip the paint (it's called Dowanol - or Methoxypropanol) likes either PE or ABS so much, that several parts break apart or simply disappear.
... mostly the elements used for joints.
So I have no chance but buy a new kit - the same one...
Well, in the end each experience is a positive one - but sometime it just hurts...
Cheers
Thomas
17741907
Istanbul, Turkey / Türkçe
Joined: December 05, 2007
KitMaker: 953 posts
Armorama: 705 posts
Joined: December 05, 2007
KitMaker: 953 posts
Armorama: 705 posts
Posted: Tuesday, June 04, 2013 - 11:02 AM UTC
Good work Thomas...
WARDUKWNZ
Auckland, New Zealand
Joined: June 01, 2011
KitMaker: 1,716 posts
Armorama: 1,638 posts
Joined: June 01, 2011
KitMaker: 1,716 posts
Armorama: 1,638 posts
Posted: Wednesday, June 12, 2013 - 01:21 PM UTC
Hey ya guys ,,, guess who ?? ok this is just a short message to let ya all know i'm still alive but only just ,, things have not been that best for me over the last few months and they still aren't the best now .. but slowly things are getting better and at least now i am able to see so i'm pretty damn happy about that i can tell you ,, i am lovin the work you guys are doing and since i am out for the count for a little while yet i will extend the hell out of this campaign just so i can get my build done ,,trust me its been driving me nuts not being able to do anything for nearly 3 months now but slowly and surely things will return to normal ,,keep it up guys ,,seeing this awesome work puts a smile on my face .
Phill
Phill
35th-scale
Kildare, Ireland
Joined: November 21, 2007
KitMaker: 3,212 posts
Armorama: 2,807 posts
Joined: November 21, 2007
KitMaker: 3,212 posts
Armorama: 2,807 posts
Posted: Wednesday, June 12, 2013 - 07:58 PM UTC
Hi Phill, great to see you're still with us. Sorry to hear you've been unwell but at least you're on the road to recovery! Take care of your self
Sean
Sean
Bluestab
South Carolina, United States
Joined: December 03, 2009
KitMaker: 2,160 posts
Armorama: 1,906 posts
Joined: December 03, 2009
KitMaker: 2,160 posts
Armorama: 1,906 posts
Posted: Thursday, June 13, 2013 - 02:53 AM UTC
Phill, Good to hear from you. Hopefully things will get back to normal for you soon.
17741907
Istanbul, Turkey / Türkçe
Joined: December 05, 2007
KitMaker: 953 posts
Armorama: 705 posts
Joined: December 05, 2007
KitMaker: 953 posts
Armorama: 705 posts
Posted: Thursday, June 13, 2013 - 09:57 AM UTC
Hey Phill best wishes to you my friend...Good luck...
1967er
Nordrhein-Westfalen, Germany
Joined: March 12, 2012
KitMaker: 224 posts
Armorama: 201 posts
Joined: March 12, 2012
KitMaker: 224 posts
Armorama: 201 posts
Posted: Friday, June 14, 2013 - 09:49 AM UTC
Hi Phil,
this sound really disturbing.
I hope you get well soon and are able to completely recover ...
Take care
Thomas
this sound really disturbing.
I hope you get well soon and are able to completely recover ...
Take care
Thomas
WARDUKWNZ
Auckland, New Zealand
Joined: June 01, 2011
KitMaker: 1,716 posts
Armorama: 1,638 posts
Joined: June 01, 2011
KitMaker: 1,716 posts
Armorama: 1,638 posts
Posted: Saturday, June 15, 2013 - 01:26 PM UTC
Hey guys ..thanks for the get wells,,i am hoping too things get back to normal soon to,,once the head aches go bye bye which from what the doc's have said will happen soon enough i will be a very happy camper ..like i said before at least my eye sight has returned fully which i couldnt be happier about ..have you guys ever tried to pee blind ?
I will be around alot more often from now on and once i have settled in my new digs things will really take off .
Phill
I will be around alot more often from now on and once i have settled in my new digs things will really take off .
Phill
Bluestab
South Carolina, United States
Joined: December 03, 2009
KitMaker: 2,160 posts
Armorama: 1,906 posts
Joined: December 03, 2009
KitMaker: 2,160 posts
Armorama: 1,906 posts
Posted: Tuesday, June 18, 2013 - 08:59 AM UTC
Update on the Outbreak diorama. I'm having alot of trouble getting the building to look like I want it to. I've actually rebuilt it three times already. That doesn't include the string of schanges for the scene as a whole. I'll go ahead and say I don't care for this current version all that much. However, it's getting too late to do another redo.
First is a general mock up of the diorama layout. It's set to be a downtown, middle-America sort of scene. I decided to leave the tree out early on as it ate up too much sidewalk space. For the base I am using 1/4 inch plywood. There shouldn't be any Celluclay or such base materials used so no worry about warping. I'm basically using cardboard and styrene.
I used a piece of posterboard as a template for the building, street, and sidewalk. I figure a corner shop will allow added use of the space.
One of the tweaks done to the sidewalk. I added an extension on the right side to allow curbside parking in front of the shop.
Sort of built up and rough painted. You can see the parking lane. In hindsight, I would have not made the building as deep and instead went with diagonal parking spaces out front. But more on that below.
Work on the storefront. This was going to be a shadow box style deal. The ground floor was to be filled with zombies. On the second floor were to be a group of survivors. The Hazmat guys were preparing to clear the zombies to save the survivors. Even then I was breaking from the initial plan...again.
Anyway, the window frames were glued to clear styrene. The bottom two windows were cut out. I had changed my mind before cutting the top floor windows. The brick facade are parts from Tamiya's old Brick Wall set.
Basic construction. You can see the open windows and the painted blanks. The inner building is styrofoam. Front looked bland so I initially tried an awning and it looked terrible. Instead, I added a roof extension.
And another shot with a figure for rough size comparison.
Rain gutter. I've already got it mounted to the side of the building. I also have a light pole mounted...it's just out of view...it's from the old Tamiya Accessory Set.
Well that's it for now. I'm not all that happy with it. It is what it is. There's still soem work to do on the street scene. The figures are so-so done. I'm workign on placement. And they are an odd mix of walking and assault poses.
I have a few zombies in the works, as well as a few survivors. I want to try to get them in here...maybe the zombies coming in behind the hazmat guys from the direction of the Mini.
I'm going to stew on that for a bit while I turn my attentions to the Road diorama.
Bluestab
South Carolina, United States
Joined: December 03, 2009
KitMaker: 2,160 posts
Armorama: 1,906 posts
Joined: December 03, 2009
KitMaker: 2,160 posts
Armorama: 1,906 posts
Posted: Thursday, June 20, 2013 - 08:27 AM UTC
I messed up and left these tow picture sout of the last update.
Here are the figures positioned on the base. The guy on the ground is not going to be used. The hazmat guys are looking at something, even have weapons drawn on them. I wonder what that could be?
Survivors. But I'm also making a few zombies. The ones that aren't used here will be used in the Road diorama. The figure pieces come from the spares. I'm hoping to recycle the soldier carrying the wounded guy as police or national guard. The legs kneeling may be a news caster or a paramedic. I figure the hazmat guys came across these survivors and they are checking them over before deciding what to do with them. The female is from Academy's Vietnam M113. She's 99% chance bound for the other diorama. The majority of their pants legs have been modified using tissue and white glue.
35th-scale
Kildare, Ireland
Joined: November 21, 2007
KitMaker: 3,212 posts
Armorama: 2,807 posts
Joined: November 21, 2007
KitMaker: 3,212 posts
Armorama: 2,807 posts
Posted: Thursday, June 20, 2013 - 07:00 PM UTC
Looking good Alex!
Unfortunately my Hemtt has taken a tumble and I'm out of the campaign
1967er
Nordrhein-Westfalen, Germany
Joined: March 12, 2012
KitMaker: 224 posts
Armorama: 201 posts
Joined: March 12, 2012
KitMaker: 224 posts
Armorama: 201 posts
Posted: Friday, June 21, 2013 - 12:49 AM UTC
Hello Sean,
Sorry to hear from your exit from this campaign - I looked like you were nearly ready with your truck...
May I ask what happened to your truck?
Was he trying the direct way from your desk to the ground?
Alex,
Your diorama looks very promising.
But... is it possible to get sharper pictures with better light?
Cheers
Thomas
tutilo17
Sankt Gallen, Switzerland
Joined: July 21, 2008
KitMaker: 8 posts
Armorama: 8 posts
Joined: July 21, 2008
KitMaker: 8 posts
Armorama: 8 posts
Posted: Friday, June 21, 2013 - 01:42 AM UTC
Great work Thomas!
Stefan
Stefan
strongarden
Florida, United States
Joined: May 14, 2012
KitMaker: 730 posts
Armorama: 624 posts
Joined: May 14, 2012
KitMaker: 730 posts
Armorama: 624 posts
Posted: Saturday, June 22, 2013 - 06:42 AM UTC
First and foremost - Phil - Gosh, hope you're getting better dude, hang in there!
Secondly, some kick-arse projects goin' down here!!!
Sean - Sorry to hear about that, your heavy mover really looks the post-apocalyptic part. I'm not just saying that either. Maybe you can fix whatever it was...?
Alex - Nice dio scene dude! I like the realism in those figures, well thought out. G-Men of the future?!
Thomas - What can I say? you have a real knack for the scene details. Looks great with the bldg, street, and figures. Very interesting. You could market this type of stuff.
It's a shame about the figure scale/size difference, because those are sick poses!
Alex is onto it with the ol' slice and dice of the softies. When my kid was little and collecting 1/32 Toy Soldiers, I tried this type of re-articulation and trying to create more varying poses with some "English Men-at-War/French Knights" figgies by swapping limbs, torsos, weapons etc, w/ mixed results. A #11 blade, steady fingers, a surgeon's care and a hot-glue gun/sticks w/ pin-inserts if anyone's interested. Still no guarantee of positive results maybe too much work w/o solid gains?
Have not been able to make any progress on my Lrg Rig, but hope to finish a couple or 3 other projects soon and continue on here.
Cheers Dave
Secondly, some kick-arse projects goin' down here!!!
Sean - Sorry to hear about that, your heavy mover really looks the post-apocalyptic part. I'm not just saying that either. Maybe you can fix whatever it was...?
Alex - Nice dio scene dude! I like the realism in those figures, well thought out. G-Men of the future?!
Thomas - What can I say? you have a real knack for the scene details. Looks great with the bldg, street, and figures. Very interesting. You could market this type of stuff.
It's a shame about the figure scale/size difference, because those are sick poses!
Alex is onto it with the ol' slice and dice of the softies. When my kid was little and collecting 1/32 Toy Soldiers, I tried this type of re-articulation and trying to create more varying poses with some "English Men-at-War/French Knights" figgies by swapping limbs, torsos, weapons etc, w/ mixed results. A #11 blade, steady fingers, a surgeon's care and a hot-glue gun/sticks w/ pin-inserts if anyone's interested. Still no guarantee of positive results maybe too much work w/o solid gains?
Have not been able to make any progress on my Lrg Rig, but hope to finish a couple or 3 other projects soon and continue on here.
Cheers Dave