Campaigns
Where Armorama group builds can be discussed, organized, and updates posted.
JEEP Campaign
Bluestab
Visit this Community
South Carolina, United States
Joined: December 03, 2009
KitMaker: 2,160 posts
Armorama: 1,906 posts
Posted: Friday, April 05, 2013 - 07:48 AM UTC
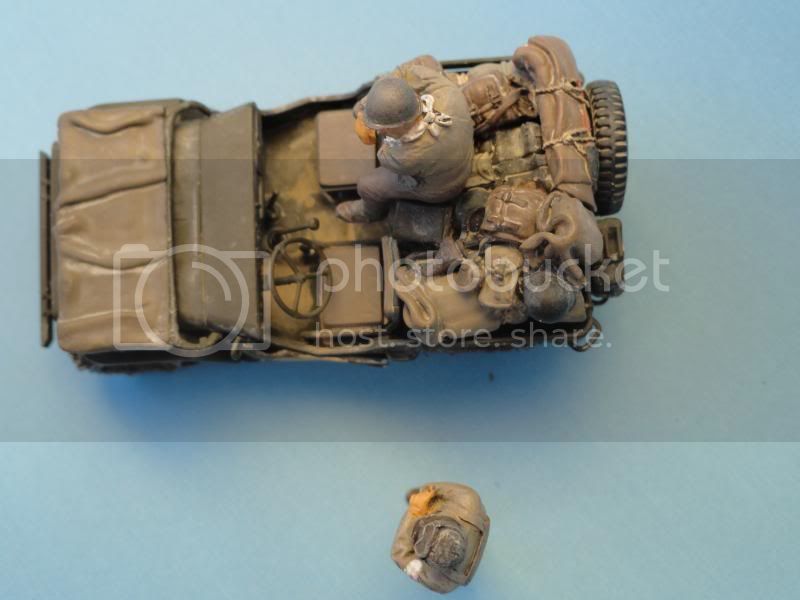
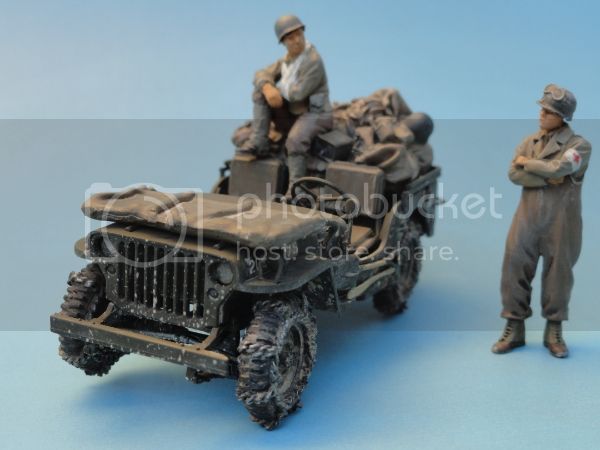
Update....the final update because I'm calling this one done. There's some touch-up and the like that'll do before I take my final pictures and upload. I know, I missed the shift lever knobs.


Anyway, it was a fun little build. Thanks Jeff for running this one.
Rob_Haelterman
Visit this Community
Oost-Vlaanderen, Belgium
Joined: October 01, 2008
KitMaker: 145 posts
Armorama: 139 posts
Posted: Sunday, April 07, 2013 - 05:33 AM UTC
I love these simple kits: they allow you to keep deadlines.


Cheers
R
alewar
Visit this Community
Canelones, Uruguay
Joined: December 27, 2006
KitMaker: 773 posts
Armorama: 765 posts
Posted: Sunday, April 07, 2013 - 10:00 AM UTC
Hi,

A small update, I add the photoetched floor mats, clean the dashborad to use the metal one. I cut a new glovebox door, as I want it open to show a map. The ,30 barrel come from JB brass one.
Also work in the metal bumpers, and some others details. Anyway, now the jeep rest in 4 wheels!. The one Star guy comes from Tamiya head and helmet with Miniart body, from jeep crew.


PantherF
Visit this Community
Indiana, United States
Joined: June 10, 2005
KitMaker: 6,188 posts
Armorama: 5,960 posts
Posted: Sunday, April 07, 2013 - 11:00 AM UTC
Wow, Rob and Alex... very nice JEEPs!

And Alvaro, great progress!


I'm about to lay down some paint on mine! I can see the finish line coming up soon too.


~ Jeff
windysean
Visit this Community
Wisconsin, United States
Joined: September 11, 2009
KitMaker: 1,917 posts
Armorama: 735 posts
Posted: Monday, April 08, 2013 - 02:41 AM UTC
Nice builds here, for sure!
Jeep_IMG_0525
Here's my progress earlier this weekend. (Rewriting this because the website killed my earlier draft when I hit "backspace" twice while removing an extra emoticon.)
I cut off the rear tire carrier and nerf bumpers with a saw. I filled the side tool indents/channels with styrene and filed and sanded it flush. Using an Xacto chisel blade (#10?), I shaved off and sanded the military side and rear details, except for the far right reflector on the rear.
And started to formulate a plan for the grill...
Is there any interest in a CJ2-A grill and tailgate for the Italeri kit, if I were to make molds and cast copies? I don't have pictures of my parts just yet though to show you how it turns out. If there isn't any interest, I'll go forward with assembling the body.
See in this photo that I was just getting an idea then of how to tackle the grill.
Cheers!
-Sean H.
skyhawk
Visit this Community
Florida, United States
Joined: June 03, 2003
KitMaker: 1,095 posts
Armorama: 743 posts
Posted: Monday, April 08, 2013 - 03:35 AM UTC

Quoted Text

And started to formulate a plan for the grill...
Is there any interest in a CJ2-A grill and tailgate for the Italeri kit, if I were to make molds and cast copies? I don't have pictures of my parts just yet though to show you how it turns out. If there isn't any interest, I'll go forward with assembling the body.
See in this photo that I was just getting an idea then of how to tackle the grill.
Cheers!
-Sean H.


Hey Sean, I would definitely be interested in a few copies!
Andy
skyhawk
Visit this Community
Florida, United States
Joined: June 03, 2003
KitMaker: 1,095 posts
Armorama: 743 posts
Posted: Monday, April 08, 2013 - 03:43 AM UTC
Had just some marginal progress over the last week. Came down with a cold for a few days, and between that, baby, and usual weekend activities not much was done. My wife was kind enough to let me steal away for a few hours last night to the workbench.

I added some stowage in the back, based on one of the photos that showed a large rolled bundle. An item from Value Gear was perfect, so I just filled in with some additional folded "stuff" from putty.


now, a question to the audience! Looking at the following photo, is it just me or does the interior still look OD Green? It appears that just the outside is sprayed tan! Thoughts?


hopefully more progress later. Just need to add some straps and finer bits and we will be ready for paint!
Andy
windysean
Visit this Community
Wisconsin, United States
Joined: September 11, 2009
KitMaker: 1,917 posts
Armorama: 735 posts
Posted: Monday, April 08, 2013 - 03:54 AM UTC
Andy,
I completely agree that the inside stayed green when the outside was painted tan (if there is an "inside" and "outside" of a Jeep! ) It even looks like overspray at the edge of the dashboard, and the rear reflector, and the rear tire...
And, I'll read the instructions in my Micromark beginner resin set and give it a shot! Take good care of Baby and your cold-- find time for the hobby when you can.
Thanks,
-Sean H.
alewar
Visit this Community
Canelones, Uruguay
Joined: December 27, 2006
KitMaker: 773 posts
Armorama: 765 posts
Posted: Monday, April 08, 2013 - 04:47 AM UTC
Andy, Sean

I use the highlight enhancement in ACDSee program, and I not 100% sure that the interior was OD.
They take care to paint the roof supports, so "maybe" they paint it overall.
The overspray in the rear light can be dust, not tan paint.

No, I not the devil advocate....


windysean
Visit this Community
Wisconsin, United States
Joined: September 11, 2009
KitMaker: 1,917 posts
Armorama: 735 posts
Posted: Monday, April 08, 2013 - 05:26 AM UTC
Alvaro, you make a good point about the top supports. I guess, Andy, barring any other opinions, it could be in the eye of the beholder, and you could go with whichever way you want-- especially considering the sheer number of Jeeps in every theater, each with it's own history.
skyhawk
Visit this Community
Florida, United States
Joined: June 03, 2003
KitMaker: 1,095 posts
Armorama: 743 posts
Posted: Monday, April 08, 2013 - 07:43 AM UTC

Quoted Text

Andy, Sean

I use the highlight enhancement in ACDSee program, and I not 100% sure that the interior was OD.
They take care to paint the roof supports, so "maybe" they paint it overall.
The overspray in the rear light can be dust, not tan paint.

No, I not the devil advocate....


Im not so sure about tan insides. Look at this photo. Note the color inside the windscreen. Also note the steering column.

Delbert
#073
Visit this Community
Pennsylvania, United States
Joined: October 05, 2002
KitMaker: 2,659 posts
Armorama: 1,512 posts
Posted: Monday, April 08, 2013 - 08:53 AM UTC
some more progress on the Old Tamiya SAS Jeep. I'm scratch building the Jerry can racks on the hood.. Got the smallest brass stock they had at the hobby store.. I think it looks better than the kit parts.. not perfect just better.


Delbert
alewar
Visit this Community
Canelones, Uruguay
Joined: December 27, 2006
KitMaker: 773 posts
Armorama: 765 posts
Posted: Monday, April 08, 2013 - 09:10 AM UTC
Hi,
Well this one show 2 differents aproaches to a paint job
the one near the camera, have more tan paint in the windscreen frame, than the far one.
So, maybe you can paint it OD inside, tan outside.
Echelon decals of Air Force jeeps in N.Africa, don't say nothing about color, but show "overall" one for decals placement.
Here the same pics, but the truck have the left inside corner painted "tan" or at least appears to be.
http://www.network54.com/Forum/47208/thread/1264888061/Sand+colored+jeep-+(pict)
Sadly I don't have another good one, so

Objection!....


alewar
Visit this Community
Canelones, Uruguay
Joined: December 27, 2006
KitMaker: 773 posts
Armorama: 765 posts
Posted: Monday, April 08, 2013 - 09:13 AM UTC

Quoted Text

some more progress on the Old Tamiya SAS Jeep. I'm scratch building the Jerry can racks on the hood.. Got the smallest brass stock they had at the hobby store.. I think it looks better than the kit parts.. not perfect just better.


Delbert


I like it!.
PantherF
Visit this Community
Indiana, United States
Joined: June 10, 2005
KitMaker: 6,188 posts
Armorama: 5,960 posts
Posted: Monday, April 08, 2013 - 09:21 AM UTC
When you flip over JEEPs, they all look the same.


~ Jeff
Delbert
#073
Visit this Community
Pennsylvania, United States
Joined: October 05, 2002
KitMaker: 2,659 posts
Armorama: 1,512 posts
Posted: Monday, April 08, 2013 - 11:06 AM UTC
another photo..

a strong scratched strap and buckle for the jerry cans.


Delbert
GregCloseCombat
Visit this Community
California, United States
Joined: June 30, 2008
KitMaker: 2,408 posts
Armorama: 2,394 posts
Posted: Wednesday, April 10, 2013 - 12:15 PM UTC
Calling it done. I messed up the decals: I didn't use clear and flat since I thought I had Archer Transfers in the stash...doh! I'll use it in a future dio. Thanks Jeff for the quickie campaign


http://i125.photobucket.com/albums/p63/GregHessig/DSC03016.jpg


Removed by original poster on 04/11/13 - 10:59:03 (GMT).
Removed by original poster on 04/11/13 - 11:03:58 (GMT).
Removed by original poster on 04/11/13 - 11:05:17 (GMT).
Removed by original poster on 04/11/13 - 11:06:36 (GMT).
Removed by original poster on 04/11/13 - 11:07:25 (GMT).
JScicluna
Visit this Community
Tasmania, Australia
Joined: March 11, 2013
KitMaker: 77 posts
Armorama: 52 posts
Posted: Wednesday, April 10, 2013 - 11:09 PM UTC
I may add backpacks and other 'items' at a later stage but for now this is officially finished. mainly due to lack of time/motivation

[img]https://gallery.kitmaker.net/data/28271/thumbs/Jeep_No_12.jpg" BORDER="0">[/img]

[img]https://gallery.kitmaker.net/data/28271/thumbs/Jeep_No_11.jpg" BORDER="0">[/img]


I will have to get my fiance to take some better pictures for the one I upload onto the campaign gallery as photography has never been my strong point.

Note: I have spent the last 20 minutes trying to upload these photos without success. Anyone interested in viewing, click on the links. Any ideas why they aren't loading?
windysean
Visit this Community
Wisconsin, United States
Joined: September 11, 2009
KitMaker: 1,917 posts
Armorama: 735 posts
Posted: Thursday, April 11, 2013 - 12:56 AM UTC

Quoted Text

Note: I have spent the last 20 minutes trying to upload these photos without success. Anyone interested in viewing, click on the links. Any ideas why they aren't loading?


James, it's a bit tedious, but the trick is to click the square icon to the right of the "Linked Thumbnail" bar under your photo on the gallery page. That makes an HTML Code appear below it. Copy that HTML Code here in your forum posting, and when it posts, your pictures will appear.
Personally, I used up most of my alloted photo space in the gallery here, so I use Flickr instead. That has a simple "Share" button that gives you the Code for whatever size photo you want to post. Some use Photobucket too. For an annual fee, you can join the Kitmaker Network and get unlimited gallery space.
I hope that helps.
-Sean H.
PantherF
Visit this Community
Indiana, United States
Joined: June 10, 2005
KitMaker: 6,188 posts
Armorama: 5,960 posts
Posted: Thursday, April 11, 2013 - 02:27 AM UTC

Quoted Text


Note: I have spent the last 20 minutes trying to upload these photos without success. Anyone interested in viewing, click on the links. Any ideas why they aren't loading?


James, be done with the gallery and get yourself a Photobucket account (or similar), this way you can show your photos on ANY forum.

I've had one since 2003 and never had any problems with it as it pretty much does all the work for you.


Oh... and it's FREE.


~ Jeff