

1⁄35Tasca Sherman III
8
Comments
hull details
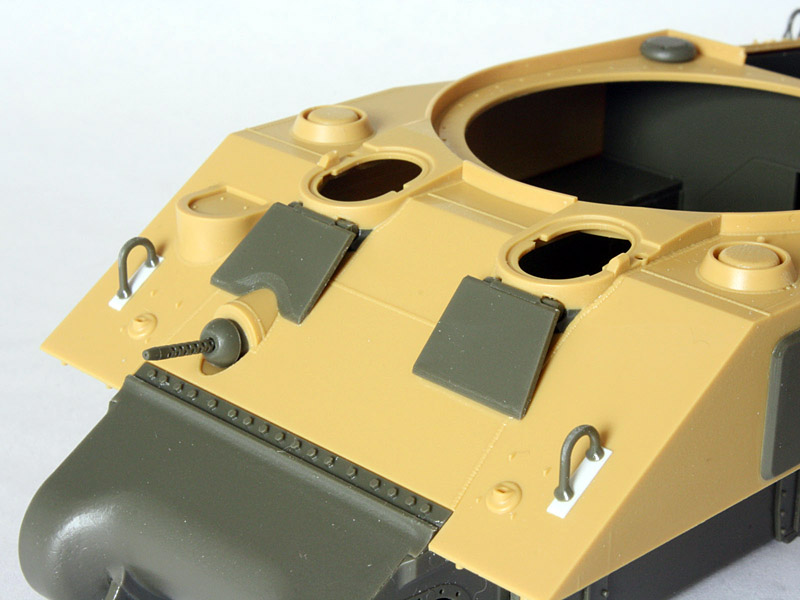
Up front I added the headlights and the plastic brush guards since I didnt think the PE ones could add enough improvement to warrant the fun of superglue. There are little holders for the plugs that protected the sockets if the lights were removed, and the instructions show these stuck to the brush guards standing away from the hull, but in the pictures of the tank Im modelling they look to be lying flat against the hull so thats where I put them. I built the hatches in the closed position with periscopes up, but struggled a bit with the separate spring detail because it has no positive location. Also, the hatches have no external handles! Tasca say to bend some out of wire (a nice touch in an expensive kit
) but I scrounged some spares from the 30-year-old Italeri Sherman kit that came complete with the handles. As for the periscope guards, once again I plundered the ancient Italeri sprues. (In fairness to Tasca, a lot of British Shermans did not have periscope guards
) Fortunately for modellers, the Italeri kits get re-popped occasionally and are often available at very low prices. I chose the green plastic periscopes rather than the clear ones because they are hard enough to see with closed hatches. The clear ones will go to a better home.
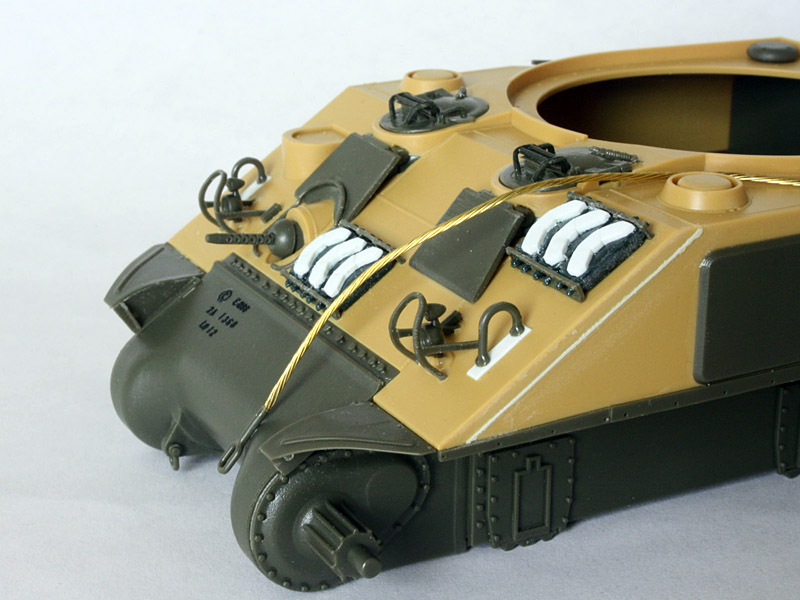
Tasca missed out a weld seam along the side where the front plate attaches to the hull sides, so I glued on a strip of Plastruct 0.010 rod that I then flattened while wet and lightly sanded when dry. If Id had a brain I would have done this before I added the appliqué armour plates
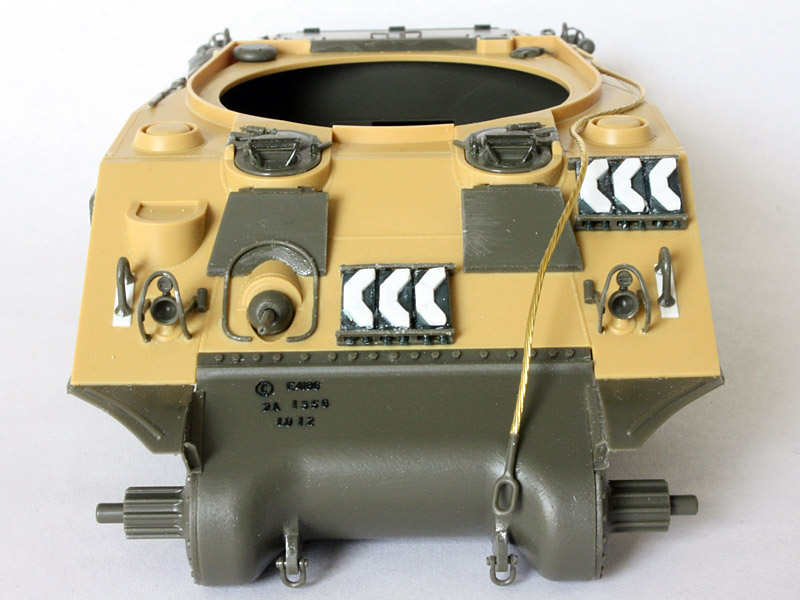
My model required two racks of spare track blocks on the front, and fortunately Tasca includes the necessary racks in the kit (parts C7). As I wanted rubber-chevron blocks I had to find replacements because the kit only has the T62 steel-chevron blocks. Dragon offer the rubber ones in their individual-link sets with their early Sherman kits but I didnt have any to hand, so instead I made my own! Rather than sand off the details from the kit track blocks (which I will use in another build
) I scrounged some plain blocks from the same old Italeri kit previously plundered and added the chevrons from plastic strip (Evergreen 0.030 x 0.080) cut to shape and then sanded to get the rounded edges seen on the Tasca tracks.
About the Author


FROM: ENGLAND - EAST ANGLIA, UNITED KINGDOM
A Yank living overseas on a long-term basis, I've been building tanks since the early '70s. I relish the challenges of older kits (remember when Tamiya was "new"?...) because I love to scratch-build.
Comments

Hi Tom,
Cracking build with and excellent finish. Congrats you have a real gem here.
Enjoyed the build story very infomrative.
Al
JUL 24, 2011 - 08:04 AM

Tom, congrats on another great one form you! the scribing on the sponsons is first class.
Cheers!
Stefan
JUL 31, 2011 - 12:12 AM

Tom,
thanks for sharing your build with us.
Outstanding your "assembly guide".
Did I interpreted it correctly.
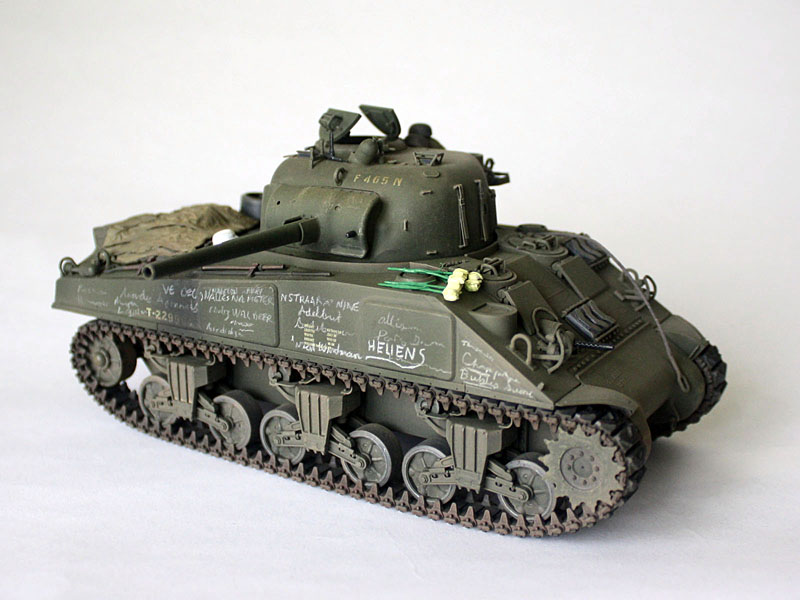
You show a "re-furbished" SHERMAN III with cast DV hoods that was upgrade by the so-called "Blitz Program", i.e. applique armor, and M34A1 mantlet!
Outstanding work!
Cheers
Hauke Krapf
AUG 05, 2011 - 09:02 AM
Hauke,
Yes - it definitely looks to have been refurbished at some point. The applique armour, wide mantlet, and MG stowage brackets on the turret are late features, but the sun compass bracket tells me the turret was used in the Africa campaign. I have no other detail - just what can be seen in the three original photos. But then that's half the fun!
Tom
AUG 06, 2011 - 05:39 AM

Very comprehensive review, Tom. Makes me wish I wasn't putting a stop to my WWII era. Maybe I'll try to fit one in as a "waiting for the glue to set and paint to dry" kit.
AUG 06, 2011 - 05:53 AM

Tom,
That is artistry. What a wonderful job you did mate. Thank you for taking the time to walk us through.
Cheers, Stu
SEP 11, 2011 - 02:10 AM
Copyright ©2021 by Tom Cromwell. Images and/or videos also by copyright holder unless otherwise noted. The views and opinions expressed herein are solely the views and opinions of the authors and/or contributors to this Web site and do not necessarily represent the views and/or opinions of Armorama, KitMaker Network, or Silver Star Enterrpises. All rights reserved. Originally published on: 2011-07-24 00:00:00. Unique Reads: 25139

WEB HOSTING BY


Copyright ©2021 Armorama and Kitmaker Network, a subsidiary of Silver Star Enterprises
All Rights Reserved. Please read our Conditions of Use and Privacy Policy.
All Rights Reserved. Please read our Conditions of Use and Privacy Policy.