

1⁄35Tasca Sherman III
8
Comments
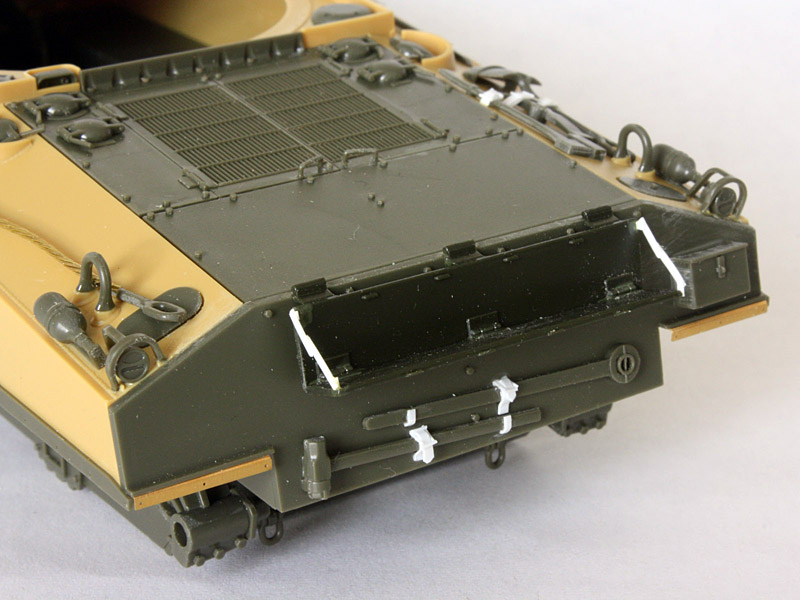
I added the first-aid box (part M29) and made up a tow cable from picture wire. The fire extinguishers are parts C8. The instructions offer choices for the sand shield mountings, so I went with parts I2, O22, and I4 the rest will be used on other Sherman builds. The rear sections are PE with no plastic alternative, but I found them easy enough to bend using a metal ruler to hold the part down and a wide X-acto chisel blade to pry up the bend.
I still needed to add some extra stowage covered in a tarp, as well as a spare wheel and a recycled ammo box at the rear. Also, the cable needed a clamp, and the left headlamp became a black-out light once I made the shrouded lens from scrap sprue.
Part 4 up to the turret.
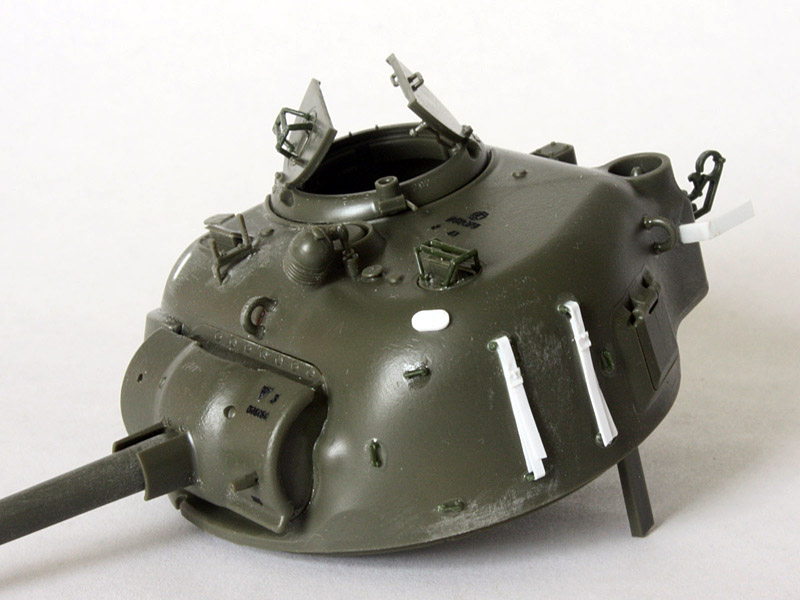
The turret builds up very well straight from the box, but care is needed when assembling the gun mount. Also, the gun is in two halves, so takes a bit of sanding or replacement with a metal one. (I wish Tasca had discovered the one-piece slide-moulded guns that Dragon use
) I failed to open up the mounting holes for the commanders sight or the grenade launcher, so had to shave off some stubs and guesstimate the location of the plate welded over the launcher opening. Once again I added the green periscopes for consistency anyone got a good tip on masking the tiny lenses on the clear ones given the size?
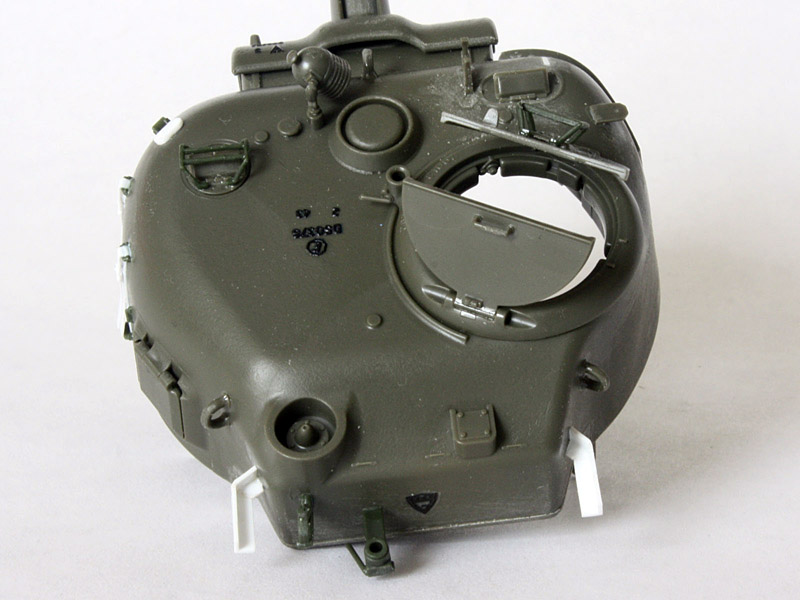
Tasca again forgot the foundry marks, so I added some to the turret top and gun shield based on pictures Ive seen. The turret markings include Ordnance drawing number D50878, while the gun shield is part D68454. I also added the big G mark seen on the rear on many examples.
To match my prototype I added the plastic base for the sun compass (part M27), plugged the slot for the unwanted blade sight (part C19), and mounted the rear lift-rings up higher than normal. I also made the bent angle-iron brackets for the rear out of some Evergreen 0.060 angle stock. As shipped from the factory, these held spare barrels for the M2HB .50cal machine gun, but as these Canadian tanks dont seem to have carried the M2 I didnt worry about the fiddly spring clips that sat inside them. The grainy picture suggested some kind of extra stowage across the back of the turret instead, and I finally settled on gun-cleaning rods. However, it also shows the pintle stowage bracket and bent metal clamp for the M2HB receiver still in place, so I scrounged them from an Academy M36 that was a donor for other projects I could have ordered Tasca sprue 35019-J for these parts to keep it all in the family. Naturally the rather nice rear stowage box from the kit went to a friend
Next up, I added tie-down cleats on the turret side with some empty straps. These normally held a rolled-up camouflage net, but were empty in the photo. I could have made some cleats from scratch, but found some lurking on the M36 sprues their only drawback is the lack of daylight underneath. The straps were made from 0.040 plastic strip, with a full-length bottom layer covered by a ¾-length lower part and then a full-length top part to get the overlap of an empty strap pulled tight. The buckle was again made from four strips of 0.010 rod. By the way, I eventually noticed the PE fret has some tie-downs on it, but by then I had added the plastic ones.

About the Author


FROM: ENGLAND - EAST ANGLIA, UNITED KINGDOM
A Yank living overseas on a long-term basis, I've been building tanks since the early '70s. I relish the challenges of older kits (remember when Tamiya was "new"?...) because I love to scratch-build.
Comments

Hi Tom,
Cracking build with and excellent finish. Congrats you have a real gem here.
Enjoyed the build story very infomrative.
Al
JUL 24, 2011 - 08:04 AM

Tom, congrats on another great one form you! the scribing on the sponsons is first class.
Cheers!
Stefan
JUL 31, 2011 - 12:12 AM

Tom,
thanks for sharing your build with us.
Outstanding your "assembly guide".
Did I interpreted it correctly.
You show a "re-furbished" SHERMAN III with cast DV hoods that was upgrade by the so-called "Blitz Program", i.e. applique armor, and M34A1 mantlet!
Outstanding work!
Cheers
Hauke Krapf
AUG 05, 2011 - 09:02 AM
Hauke,
Yes - it definitely looks to have been refurbished at some point. The applique armour, wide mantlet, and MG stowage brackets on the turret are late features, but the sun compass bracket tells me the turret was used in the Africa campaign. I have no other detail - just what can be seen in the three original photos. But then that's half the fun!
Tom
AUG 06, 2011 - 05:39 AM

Very comprehensive review, Tom. Makes me wish I wasn't putting a stop to my WWII era. Maybe I'll try to fit one in as a "waiting for the glue to set and paint to dry" kit.
AUG 06, 2011 - 05:53 AM

Tom,
That is artistry. What a wonderful job you did mate. Thank you for taking the time to walk us through.
Cheers, Stu
SEP 11, 2011 - 02:10 AM
Copyright ©2021 by Tom Cromwell. Images and/or videos also by copyright holder unless otherwise noted. The views and opinions expressed herein are solely the views and opinions of the authors and/or contributors to this Web site and do not necessarily represent the views and/or opinions of Armorama, KitMaker Network, or Silver Star Enterrpises. All rights reserved. Originally published on: 2011-07-24 00:00:00. Unique Reads: 25139

WEB HOSTING BY


Copyright ©2021 Armorama and Kitmaker Network, a subsidiary of Silver Star Enterprises
All Rights Reserved. Please read our Conditions of Use and Privacy Policy.
All Rights Reserved. Please read our Conditions of Use and Privacy Policy.