

1⁄35Tasca Sherman III
8
Comments
finishing up!
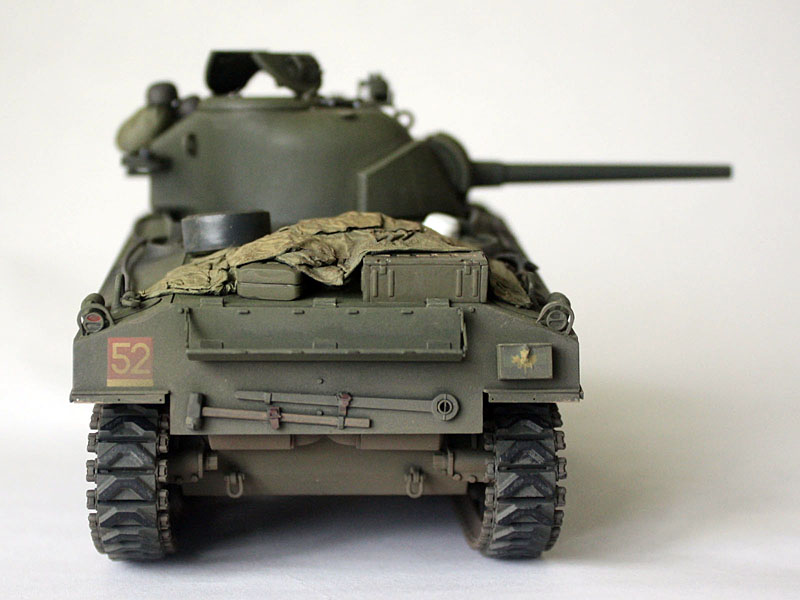
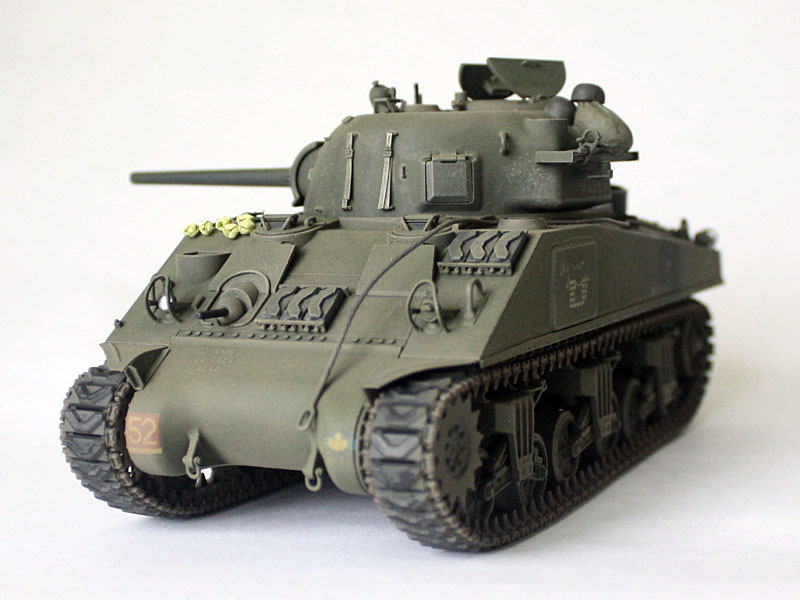
Final assembly included tacking the tracks down to the tops of the return rollers, idlers, and sprockets with a little liquid cement. (Thank goodness Tasca tracks can be glued!) I pushed some toothpicks in under the sponsons to wedge the track down until the glue had set overnight. Then I painted the inside of the headlight silver before adding a clear lens with a little Gators Grip glue around the rim. Normally Id use good old PVA for this, but wanted to try out this new glue to see what it was like. I also added a Sten gun on the turret (from the old Italeri accessories set) and an empty periscope holder to the TCs hatch. To do this I simply chopped the angled lens parts from one of the kit periscopes the fact that it isnt a hollow tin sheath cannot be seen from outside.
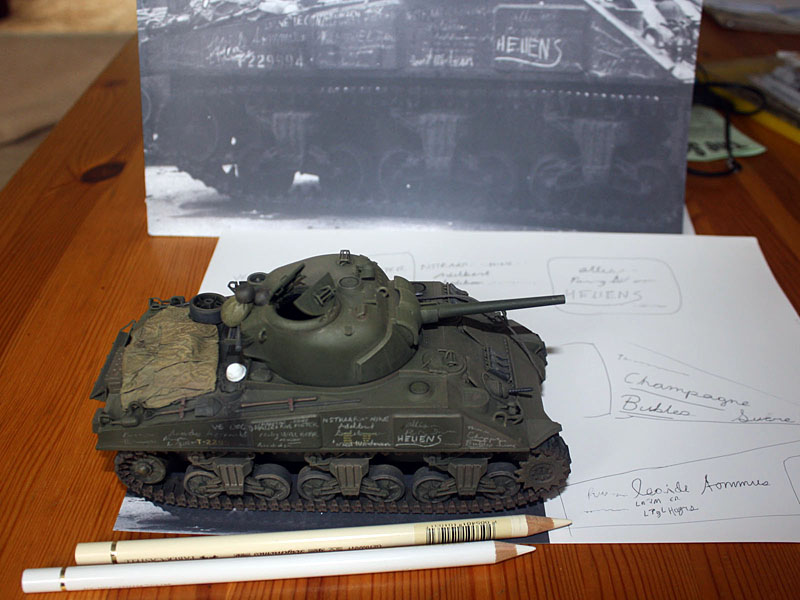
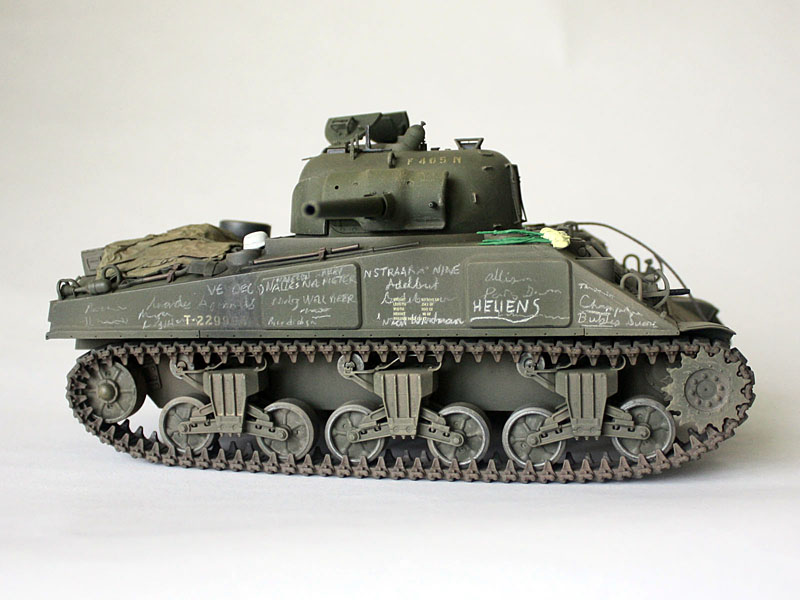
That left two key elements to match my prototype pics graffiti and flowers. The graffiti was a challenge to replicate, so I started with a blown-up image and tried to work out what each line said. (Apologies if I copied anything offensive in Dutch!) Then, I worked on each separate area with artists pencils to get that mix of fresh and older marks layered up. I really ought to seal it with a matt coat
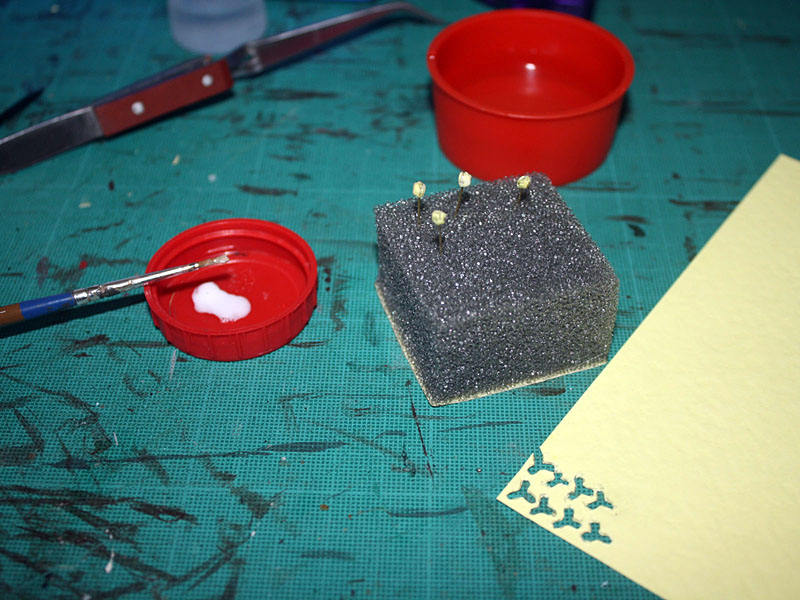
The flowers required creativity. They are tulips (no surprise in the Netherlands!), so the form is easy enough two sets of three petals to form the head, and two long leaves on the stem. I cut the petals as three-lobed propellers from yellow card, trying to make the inner set slightly smaller than the outer ones. A pencil, a knife, and an awl to punch a central hole were the only tools. I took some 0.019 brass wire, dipped one end in superglue to form a thickened stopper, and slid the petals on. After folding them up I added some Gators Grip glue, let them set a few minutes, squeezed them tight into a ball, and added more glue the petals try to open up so several reshapings are needed before the glue sets. Then, I cut the stems to about a scale two feet, added two leaves from slivers of white paper (with more Gators Grip), and when dry I painted the stems a nice green (Humbrol 101). I know there is a firm selling paper tulip kits, but this was easy enough for even me
Conclusion
So there we have it a complete build of Tascas Sherman III. Sure, by choosing to model a photo I had to make some substitutions, but Tascas on-line parts department made that easy. For those wanting a more out-of-box build I did stumble across a picture of two British tanks loading up for D-Day, and they were the spitting image of the kit contents. And even with my rather odd choice of prototype I managed most of the alterations with the spares in the box not bad! Some day Ill get another to build truly OOTB.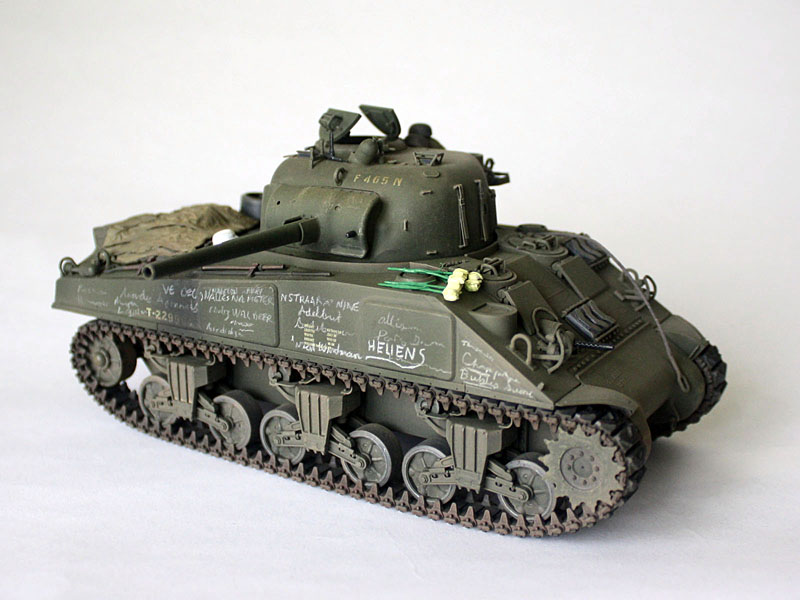
About the Author


FROM: ENGLAND - EAST ANGLIA, UNITED KINGDOM
A Yank living overseas on a long-term basis, I've been building tanks since the early '70s. I relish the challenges of older kits (remember when Tamiya was "new"?...) because I love to scratch-build.
Comments

Hi Tom,
Cracking build with and excellent finish. Congrats you have a real gem here.
Enjoyed the build story very infomrative.
Al
JUL 24, 2011 - 08:04 AM

Tom, congrats on another great one form you! the scribing on the sponsons is first class.
Cheers!
Stefan
JUL 31, 2011 - 12:12 AM

Tom,
thanks for sharing your build with us.
Outstanding your "assembly guide".
Did I interpreted it correctly.
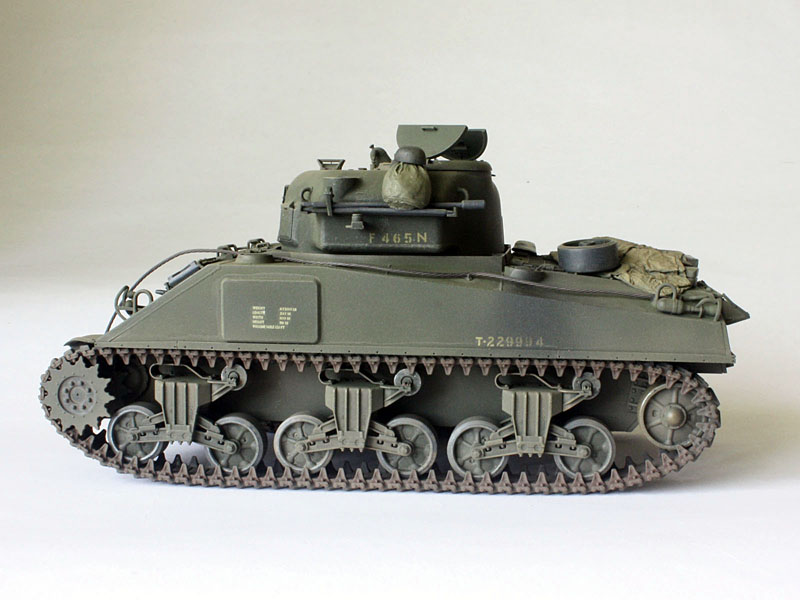
You show a "re-furbished" SHERMAN III with cast DV hoods that was upgrade by the so-called "Blitz Program", i.e. applique armor, and M34A1 mantlet!
Outstanding work!
Cheers
Hauke Krapf
AUG 05, 2011 - 09:02 AM
Hauke,
Yes - it definitely looks to have been refurbished at some point. The applique armour, wide mantlet, and MG stowage brackets on the turret are late features, but the sun compass bracket tells me the turret was used in the Africa campaign. I have no other detail - just what can be seen in the three original photos. But then that's half the fun!
Tom
AUG 06, 2011 - 05:39 AM

Very comprehensive review, Tom. Makes me wish I wasn't putting a stop to my WWII era. Maybe I'll try to fit one in as a "waiting for the glue to set and paint to dry" kit.
AUG 06, 2011 - 05:53 AM

Tom,
That is artistry. What a wonderful job you did mate. Thank you for taking the time to walk us through.
Cheers, Stu
SEP 11, 2011 - 02:10 AM
Copyright ©2021 by Tom Cromwell. Images and/or videos also by copyright holder unless otherwise noted. The views and opinions expressed herein are solely the views and opinions of the authors and/or contributors to this Web site and do not necessarily represent the views and/or opinions of Armorama, KitMaker Network, or Silver Star Enterrpises. All rights reserved. Originally published on: 2011-07-24 00:00:00. Unique Reads: 25139

WEB HOSTING BY


Copyright ©2021 Armorama and Kitmaker Network, a subsidiary of Silver Star Enterprises
All Rights Reserved. Please read our Conditions of Use and Privacy Policy.
All Rights Reserved. Please read our Conditions of Use and Privacy Policy.