

1⁄35Tasca Sherman III
8
Comments
Stowage, priming, painting, and marking
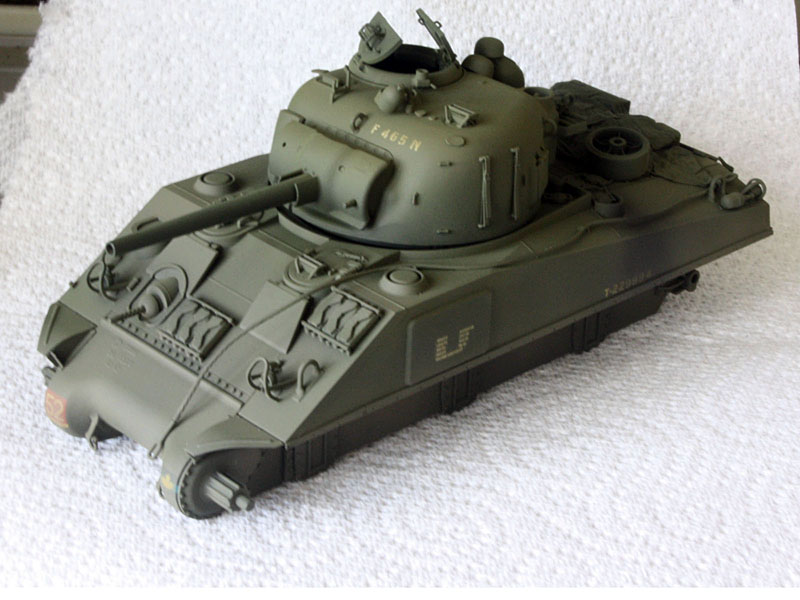
To match the pictures of the real tank I added some scratch-made gun cleaning rods to the brackets on the rear of the turret (made with Evergreen rod), along with a bag from the spares box (Tamiya, I think?) and two British-style tankers helmets bodged by filing down the flanges of some old Tamiya German helmets. Sure, theyre not perfect, but theyll do.
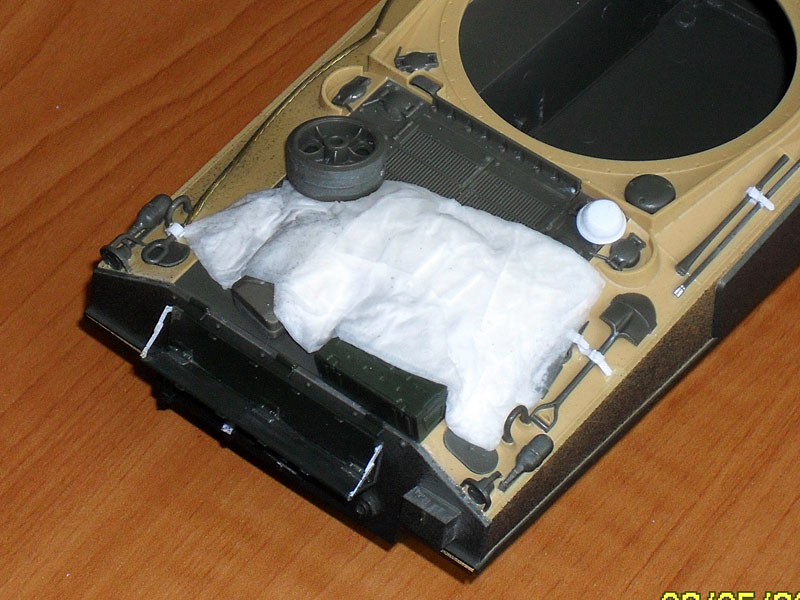
Down on the hull I added a fuel can (from the venerable Italeri set) and made a tarp from PVA glue and tissue. I took a scrap of .030 plastic and added some other scraps to form a small load, pinned the tissue to the hull by gluing this load in place, and after it set I started the process of folding the tissue over and adding glue thinned with water. While it was wet I added a spare road wheel from the kit it doesnt look very secure but thats where it is in the pictures! The best part was whittling a tin wash basin from some quarter-inch Plastruct rod.
The one thing I forgot to add was an empty periscope holder in the Commanders hatch. I cut off the ends of a kit periscope and super-glued it in after all the painting was finished.
Painting
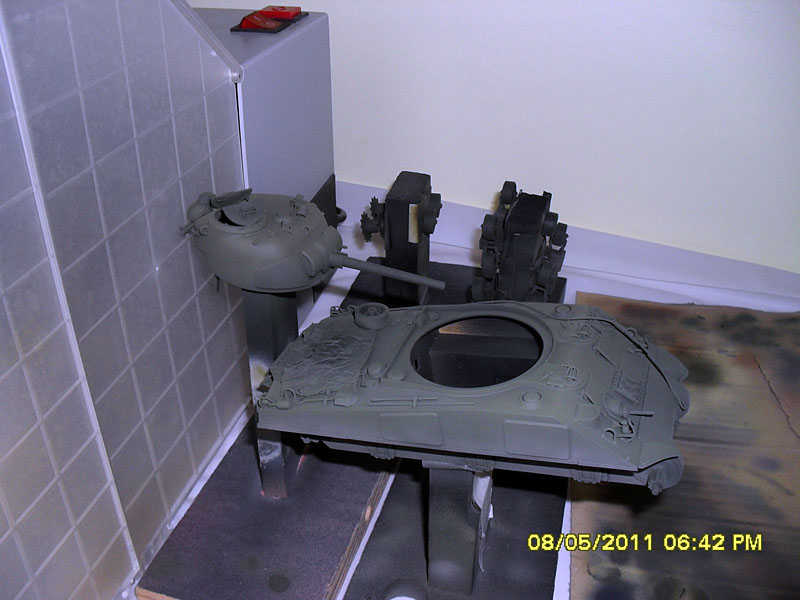
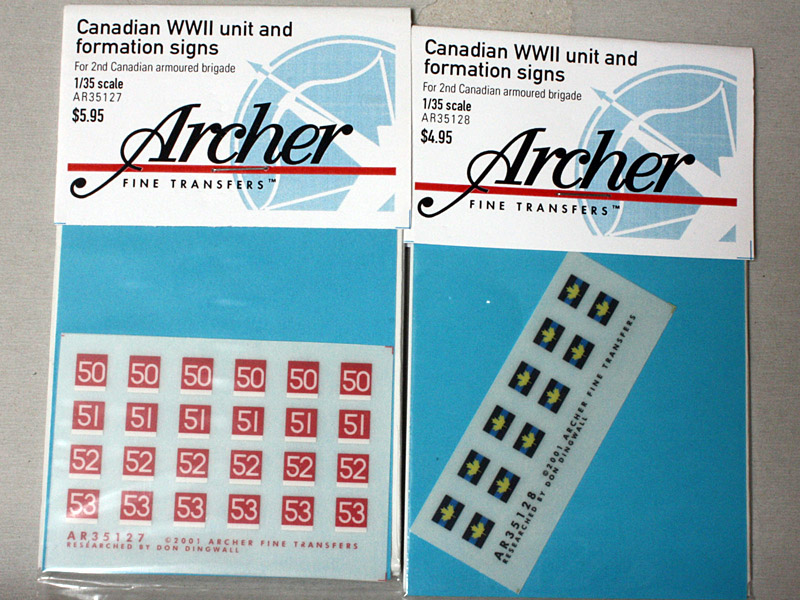
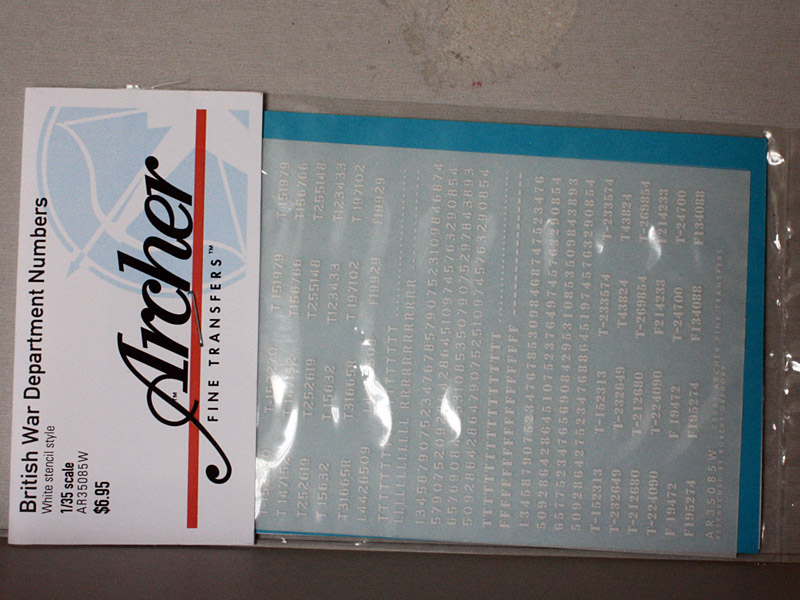
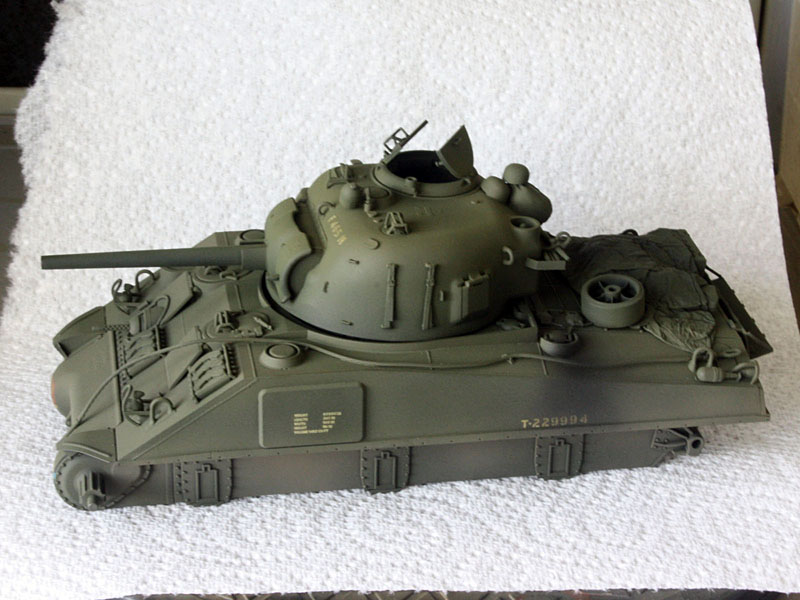
Painting started with a base coat of Tamiyas olive drab XF-62, which is a touch too green for most US subjects (to my eye) but is fine as a base for British OD SCC 15. Then, I mixed up some scale OD by adding about 20% Dark Yellow XF-60 and hit the highlights. A further dollop of Dark Yellow was added and the edges of the hull and turret-top corners got a very highlighted hit. A light dusting of thinned Earth added some dust below the sponsons. The sharp-eyed among you will have noticed that the kit has British markings, while I need Canadian ones. Since I plan to model several tanks from this regiment I splashed out on some Archer transfers for the AoS and Formation signs as well as Registration numbers so I could piece together the necessary T-229994 on each side. Ill no doubt use some of the Tasca decals in other projects. While I added some shipping stencils (again from Archer) I resisted adding the yellow square squadron symbol on the rear or the bridging plate on the front since I couldnt really see them in the photos. Adding rub-down markings can be a challenge it took me six hours to do all the numbers etc! However, the results are excellent. To blend them in I went back to the spray booth to add a fade coat of thinned OD and scale OD over the markings, followed by even more Earth dust. Now all it needed was loads of details painted, before the real weathering began!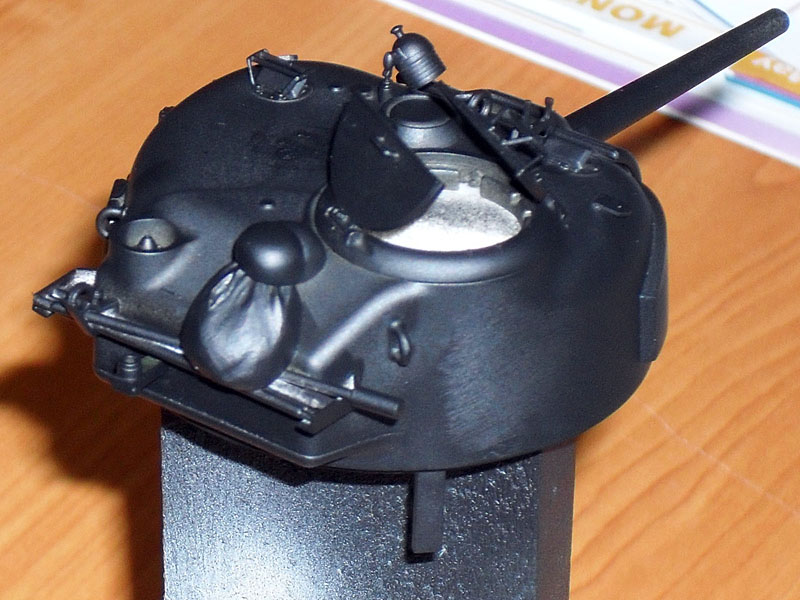

About the Author


FROM: ENGLAND - EAST ANGLIA, UNITED KINGDOM
A Yank living overseas on a long-term basis, I've been building tanks since the early '70s. I relish the challenges of older kits (remember when Tamiya was "new"?...) because I love to scratch-build.
Comments

Hi Tom,
Cracking build with and excellent finish. Congrats you have a real gem here.
Enjoyed the build story very infomrative.
Al
JUL 24, 2011 - 08:04 AM

Tom, congrats on another great one form you! the scribing on the sponsons is first class.
Cheers!
Stefan
JUL 31, 2011 - 12:12 AM

Tom,
thanks for sharing your build with us.
Outstanding your "assembly guide".
Did I interpreted it correctly.
You show a "re-furbished" SHERMAN III with cast DV hoods that was upgrade by the so-called "Blitz Program", i.e. applique armor, and M34A1 mantlet!
Outstanding work!
Cheers
Hauke Krapf
AUG 05, 2011 - 09:02 AM
Hauke,
Yes - it definitely looks to have been refurbished at some point. The applique armour, wide mantlet, and MG stowage brackets on the turret are late features, but the sun compass bracket tells me the turret was used in the Africa campaign. I have no other detail - just what can be seen in the three original photos. But then that's half the fun!
Tom
AUG 06, 2011 - 05:39 AM

Very comprehensive review, Tom. Makes me wish I wasn't putting a stop to my WWII era. Maybe I'll try to fit one in as a "waiting for the glue to set and paint to dry" kit.
AUG 06, 2011 - 05:53 AM

Tom,
That is artistry. What a wonderful job you did mate. Thank you for taking the time to walk us through.
Cheers, Stu
SEP 11, 2011 - 02:10 AM
Copyright ©2021 by Tom Cromwell. Images and/or videos also by copyright holder unless otherwise noted. The views and opinions expressed herein are solely the views and opinions of the authors and/or contributors to this Web site and do not necessarily represent the views and/or opinions of Armorama, KitMaker Network, or Silver Star Enterrpises. All rights reserved. Originally published on: 2011-07-24 00:00:00. Unique Reads: 25139

WEB HOSTING BY


Copyright ©2021 Armorama and Kitmaker Network, a subsidiary of Silver Star Enterprises
All Rights Reserved. Please read our Conditions of Use and Privacy Policy.
All Rights Reserved. Please read our Conditions of Use and Privacy Policy.