

1⁄35StuG.III Ausf.G Late Production Dec.1944
19
Comments
Let the fun begin
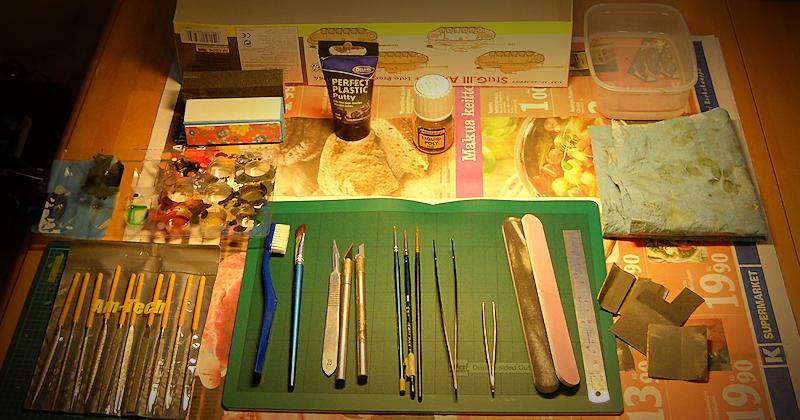
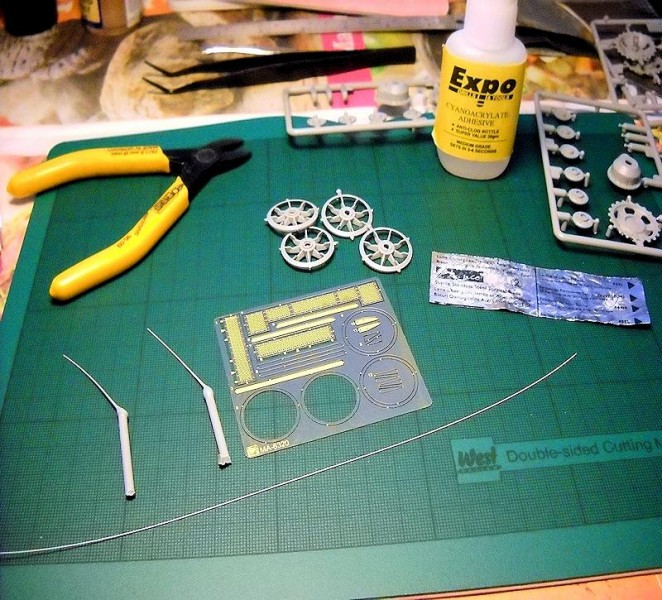
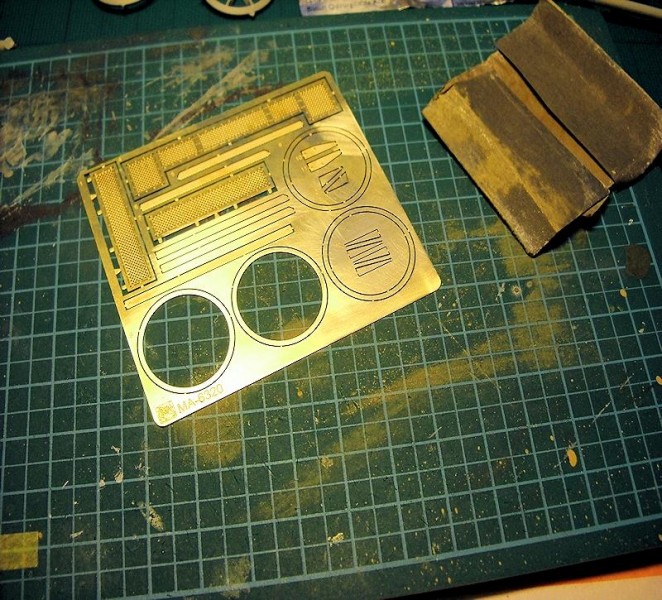
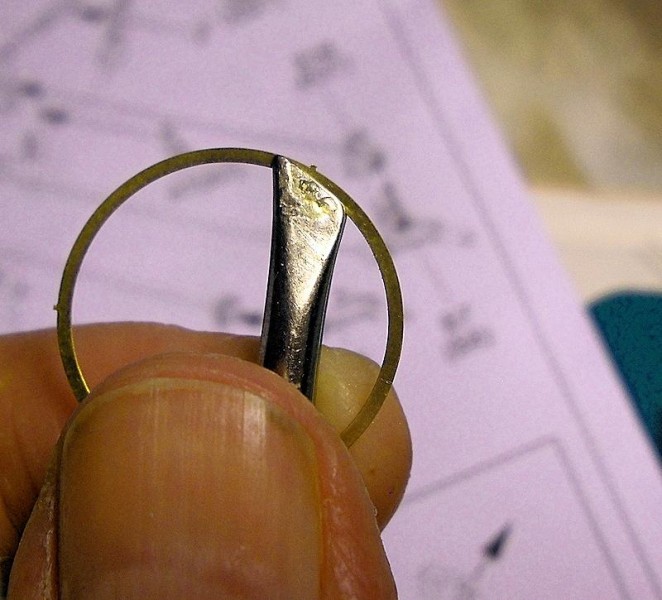
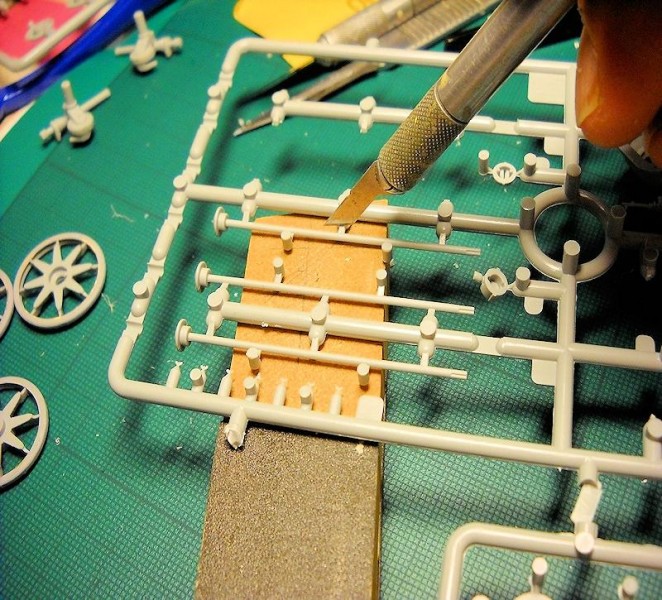
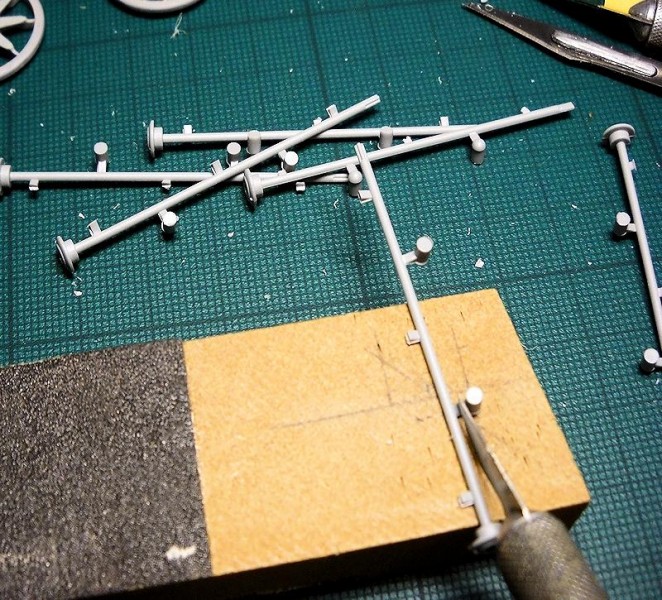
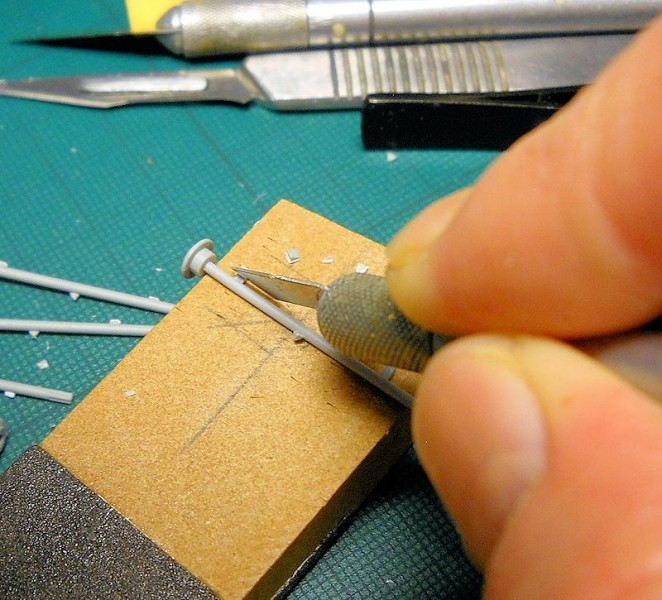
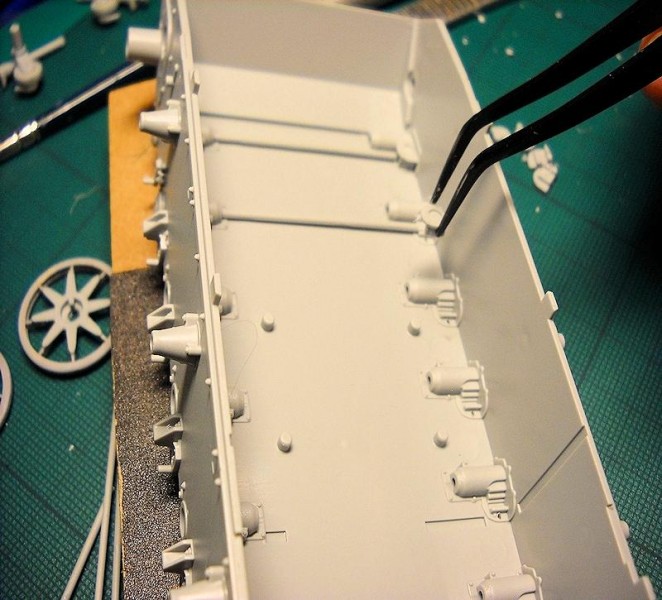
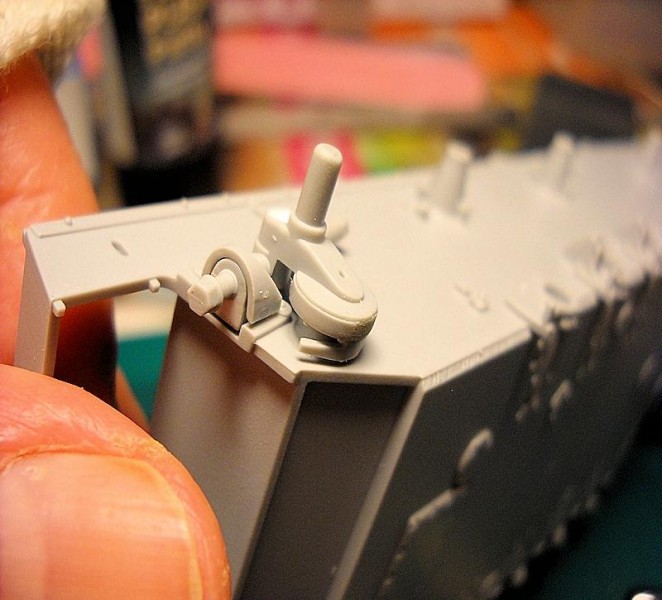
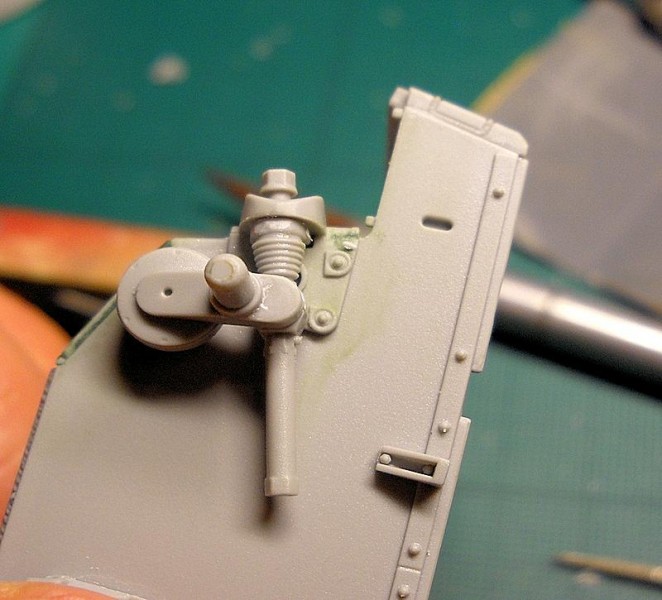
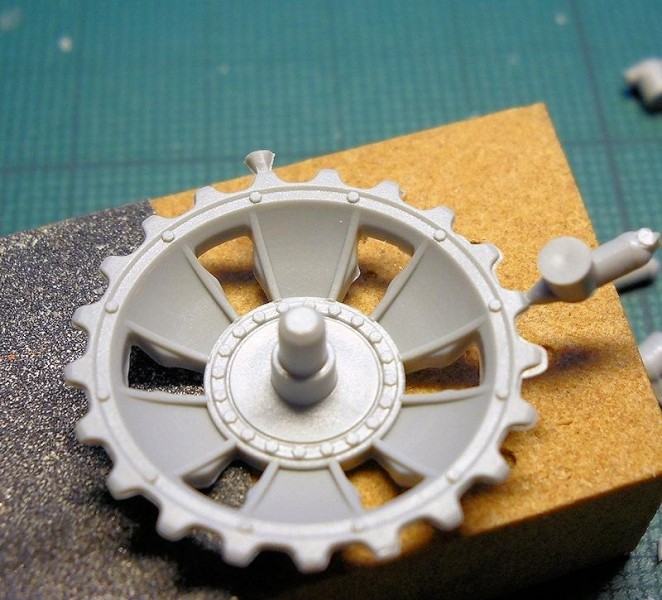
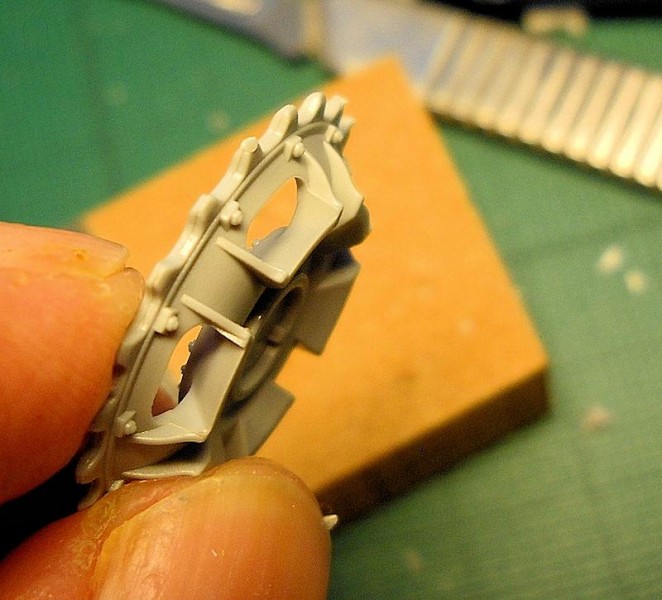
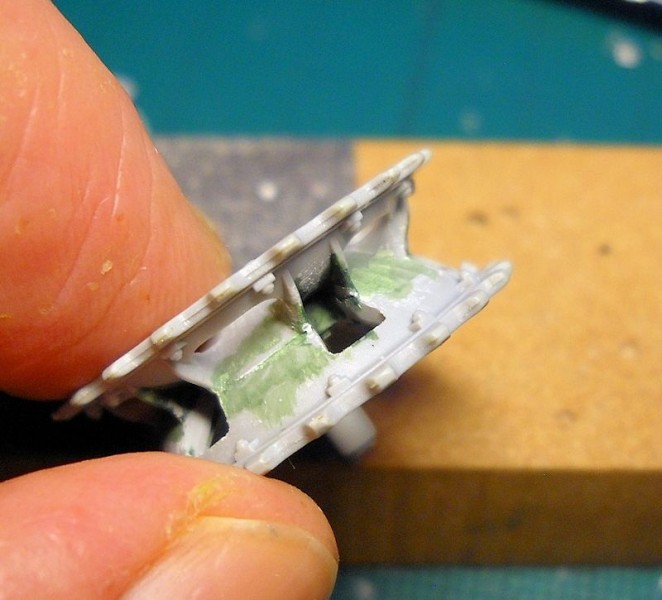
Before opening the box, I had a pretty good idea of what to expect based on earlier kit reviews and Dragon's reputation, both good and, shall we say, unfortunate, in regards to quality, difficulty of build and clarity of instructions. I also have a few (OK, more than a few) Dragon kits in the stash which I had looked over, and if I wasn't doing this review, I would be happily working my way through a Pz IV E right now. Right, so where to start? First off, I checked to see if everything was there, so far so good, then cleaned the sprues with some liquid dishwasher soap and warm water and left them to dry in a storage container to keep dust out. I also brushed a couple of coats of Future mixed with a few drops of green onto the clear parts and set that aside to dry and cure for a couple of days, or as it turned out, a week, until I actually got around to needing the first part. I might have gone a little heavy with the green though. I should mention at this point that I do not have a permanent build space, one of the main factors in my choice of going to acrylics and water soluble putties was that I couldn't stink up the joint with enamels and what not, nor leave things lying about to dry. Whenever I want to do something, or more accurately whenever I have the chance to do something, I simply appropriate half of the dining table and pack everything up when I'm done. As you can see, you don't really need all that much space to build. Also shown is my basic selection of tools which will be used for this build. Before the actual build started, I took some time to get familiar with the instructions, always a good idea, and with Dragon's reputation for having an oopsie or two in their instructions, doubly so. A few things managed to catch me off guard anyway. 20 steps will get you through the build, with numerous sub-assemblies per step, beginning with the lower hull and running gear. This build may jump around a little bit in the photos as I'm not following the instructions to the letter; I prefer to build logical sub-assemblies first to get them out of the way and painted as needed. As it happens, I started with the idler wheels. I wanted to start with pieces that looked like they could easily be removed and cleaned up to get a feel for Dragon's plastic. Very nicely done, with some etch rings to enhance detail, just a light scraping/sanding to get rid of mold seams. Dragon's brass is somewhat thicker than that of, say, Eduard, and this is a good thing. It is nice and sturdy to handle and clean up, yet soft enough to form when necessary. When working with etch, I like to give the frets a light sanding with spent wet and dry paper to give glue and paint a little more surface to grab on to. T he rings fit nicely with a slight gap that can be easily filled and sanded. Moving on to the hull tub and torsion bars, assembly is straightforward, although cleaning up the torsion bars was a bit of a pain. The bars are very delicate and flimsy. An angled chisel blade was used to remove them from the sprues and to cut off the nubs. If you've never built a Dragon kit, invest in three items: a side cutter, angled chisel and single edged razor blades. The way that Dragon molds their kits means that instead of filling in ejector pin marks, you will have to remove hundreds of nubs. I do mean hundreds, with some of them in rather absurd places. The instructions don't mention the part numbers for the right hand torsion bars (oopsie) but it is quite obvious what goes where. Remove one set of bars at a time so you don't confuse which ones go on which side as they are most likely handed, meaning the suspension arms will not fit properly if you put the bars in place on the wrong side. Carefully clean up the mold seam and nubs, and slide them in place. Glue the bar caps in place, and you sort of have a working torsion spring. If you want the suspension to articulate, you'll have to do some head scratching and pick your poison as to what will work best. Moving on to the idler mounts, careful removal and clean-up is needed. Pay attention to parts B16 and B17, they're tiny and can easily be lost or placed the wrong way, a common theme throughout this build. Detail here is very nice, fit is so-so. The armoured covers don't want to sit properly, and place the long sides to the top. You'll need to do a bit of sanding on the mounting bar, and a little on the inside face of the cover itself wouldn't hurt, to get a good fit and to give some clearance from the tensioning spring. Do not attach them yet, the rear hull plate should be installed first to avoid gaps, and the longer sides go to the top; the instructions aren't really clear on this. The sprockets are next; the instructions mislabel the correct halves (oopsie) but it's obvious what part is used. Invest some time to clean up the seams between the teeth and the lightening holes, and when shaving off the nubs from the teeth, angle your blade with the face of the tooth ring. Do the angled slices first, then sand any remaining bit off, this will help keep your teeth looking like teeth and the same height. The outer halves are from the new late sprue and have exposed bolt detail, very, very nice exposed bolt detail. A minor niggle is the fit to the old sprocket half. You get a very noticeable gap on the inside where I'm fairly certain a gap should not be. It didn't occur to me to check the fit with the old sprocket to see if this is peculiar to the new sprue or not. Out came the putty and brush. There are also some noticeable steps on the walls of the lightening holes which should be cleaned up at least a little. Scraping with a blade will mostly take care of that. The suspension arms, shock absorbers and other bits are pretty straight forward with the usual light sanding of seams and careful removal from sprues. Again, do one side at a time, and pay attention to what piece goes where, and thinning the braces on the stoppers and fender support wouldn't hurt. With the arms in place and the glue still fresh, I set the hull on my cutting mat with a couple of bottles of primer to weigh it down to keep the arms even, check to make sure the arms line up on either side with a ruler or other straight edge. There is a little vertical movement, so you could bolt the hull to a base with uneven groundwork to get a slightly animated look. Remove the placement rectangles under the bracket lip; see photos. The road wheels and return rollers are simple enough, remember to shave of the the right arm of the U in Coninentau to get an L on the road wheels if you want. I'd already coated in primer so I left it alone. I painted the insides of the wheels in red primer and the outsides Dark Yellow. Paint the inside rims of the wheels and the return roller rims and edges a shiny steel. Do this for the idlers and sprocket teeth too.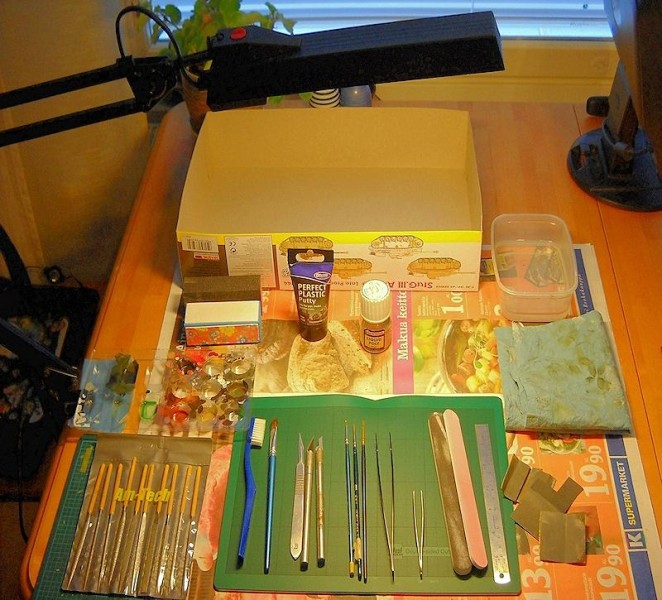


About the Author


FROM: UUSIMAA, FINLAND
I got my first kit when I was about 7 or 8 and was immediately hooked. Magazines such as Fine Scale Modeler helped to push me to go beyond what kits had to offer before photo etch and resin were commonplace. I took a break of about 8 years and now I'm back at it making up for lost time. When I'm not...
Comments
Do you sometimes get the impression that Dragon has become so overconfident in their 3D modelling and prototyping that they actually don't bother sitting a guy down at a table with a tube of glue to test assemble one of these before they run the production and ship? I am seriously beginning to think so.
SEP 13, 2013 - 06:27 PM

Does a bear wear funny hats at birthday parties?
But in all seriousness, I am amazed, and not in a pleasant way, at the number of parts that have fit issues and it's not just with this kit either. The worst seem to be the simplest too. For instance, a simple drop in part will have a hole that needs filler. You would think that the CAD driver would check measurements against each other, but maybe that's just me. In contrast, I recently fiddled with a Griffon early smoke candle rack and the fit was impossibly bang on for pieces that small, taking into consideration that etch has a bit of give and take with the process used. While the issues can be overcome, they are issues that should not be present for a major player like Dragon. I can forgive cottage industry manufacturers with engineering and fit, but not so easily with a major manufacturer. Even the ancient Tamiya Leopard 1A4 I had started a while back fit well.
Kimmo
SEP 13, 2013 - 11:17 PM

nice review, I read for some place the only wrong in this kit is because is dont final production for some part in the ass of this tank. But is really nice kit (except for the tracks, I prefer the Tamiya tracks or old Dragon in plastic).
SEP 14, 2013 - 06:46 AM
Thanks. As I said in the review, I'm not a Stug expert so I can't say too much about what is and isn't correct. Fortunately, there are a lot of unused parts and I think one could practically make any variant of the G/40.
Kimmo
SEP 15, 2013 - 02:12 AM

Very Nice review. I also bought this kit. I've been looking through your masterpiece and how you made it. But I think there might be a bit of an issue...
JAN 06, 2015 - 01:09 PM
This was my first Dragon kit in 1/35. I think I'll stick with Tamiya 1/35...
JAN 08, 2015 - 08:58 AM
This was actually my first modern Dragon as well, there is definitely an adjustment to be made going from Tamiya to Dragon, or any of the other new manufacturers these days. Lots of detail, lots of potential to get frustrated. Patience is the key.
Kimmo
JAN 08, 2015 - 01:57 PM
Uh, no, thanks.
Tamiya kits are for the most part too simplified.
Kimmo, that's a very extensive review and a credit to the site. I like your yellow pre-shading under the Dunkelgelb.
JAN 09, 2015 - 02:40 AM
Thanks Bill. When I was writing it up, I thought it was far too lengthy but I wasn't really sure where to start trimming text so just left it as is. I was rather pleased with the end result of the dunkelgelb, and going over the pics again, I can't help but notice those tracks really don't do the kit justice.
Kimmo
JAN 09, 2015 - 06:44 PM
Copyright ©2021 by Kimmo Happonen. Images and/or videos also by copyright holder unless otherwise noted. The views and opinions expressed herein are solely the views and opinions of the authors and/or contributors to this Web site and do not necessarily represent the views and/or opinions of Armorama, KitMaker Network, or Silver Star Enterrpises. All rights reserved. Originally published on: 2013-09-10 22:05:54. Unique Reads: 35745

WEB HOSTING BY


Copyright ©2021 Armorama and Kitmaker Network, a subsidiary of Silver Star Enterprises
All Rights Reserved. Please read our Conditions of Use and Privacy Policy.
All Rights Reserved. Please read our Conditions of Use and Privacy Policy.