

1⁄35StuG.III Ausf.G Late Production Dec.1944
19
Comments
Take cover, incoming details
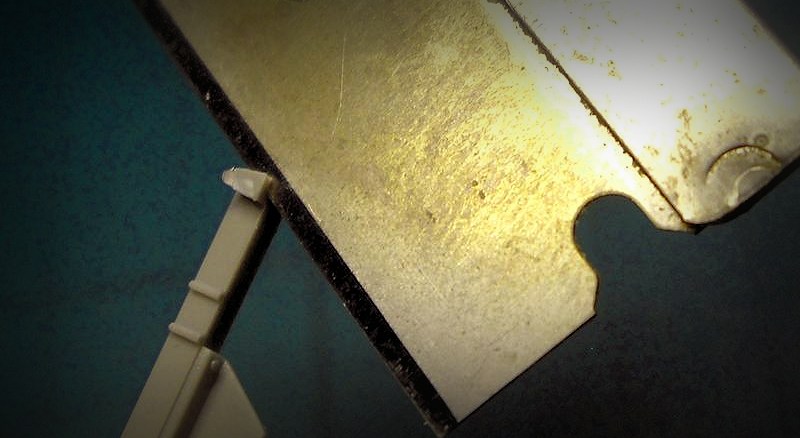
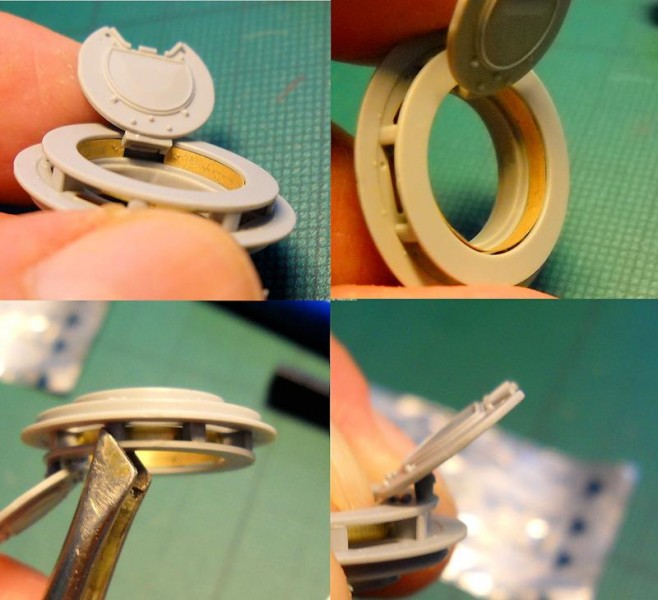
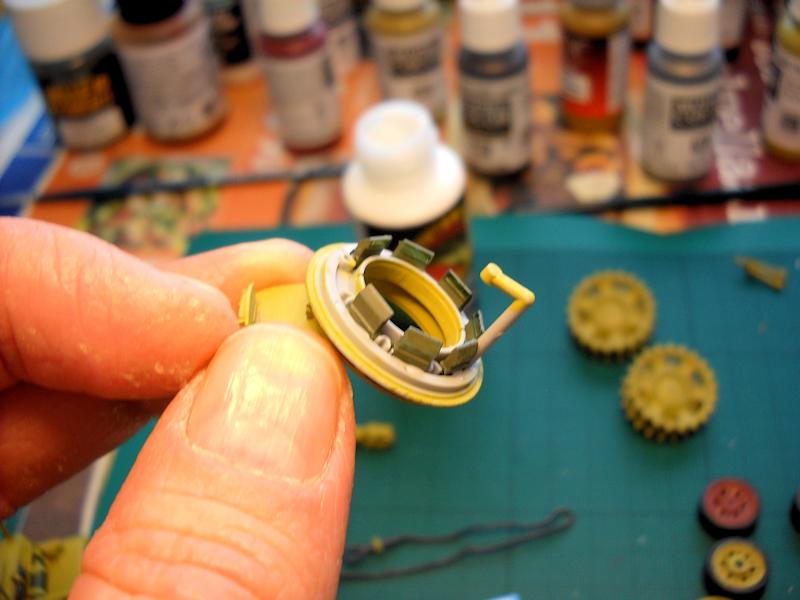
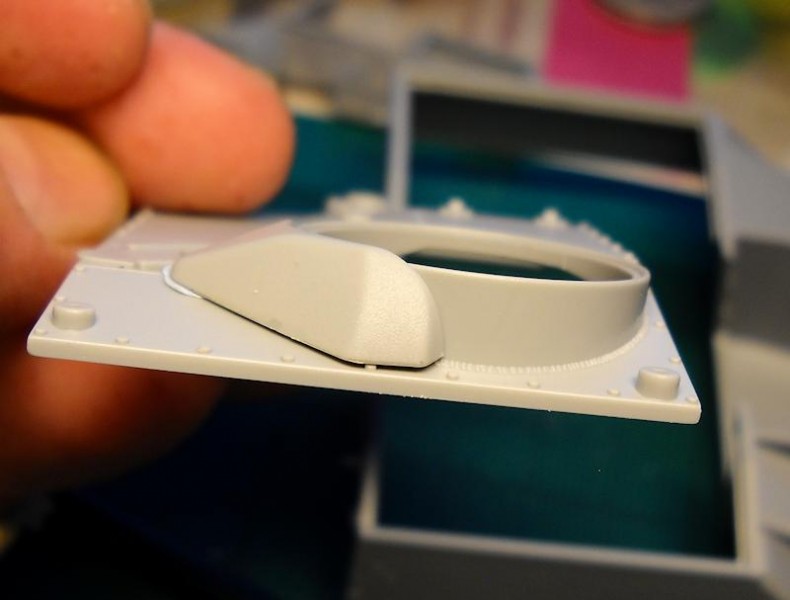
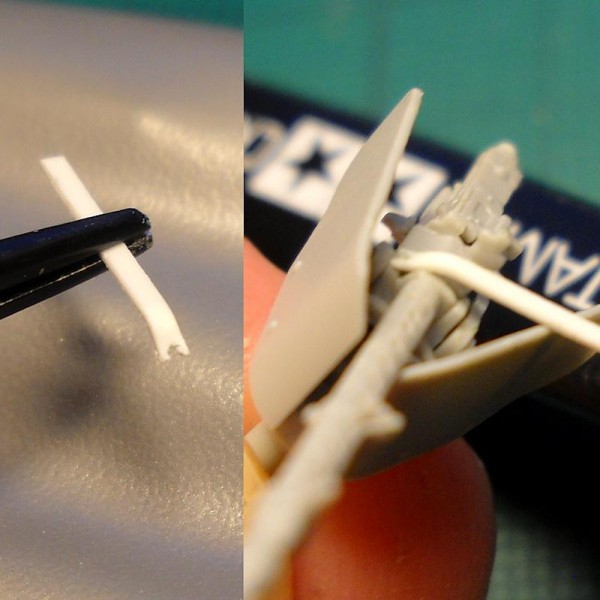
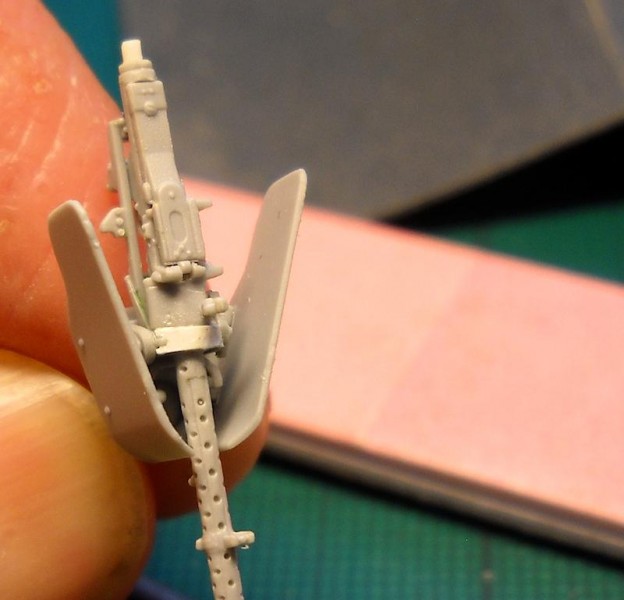
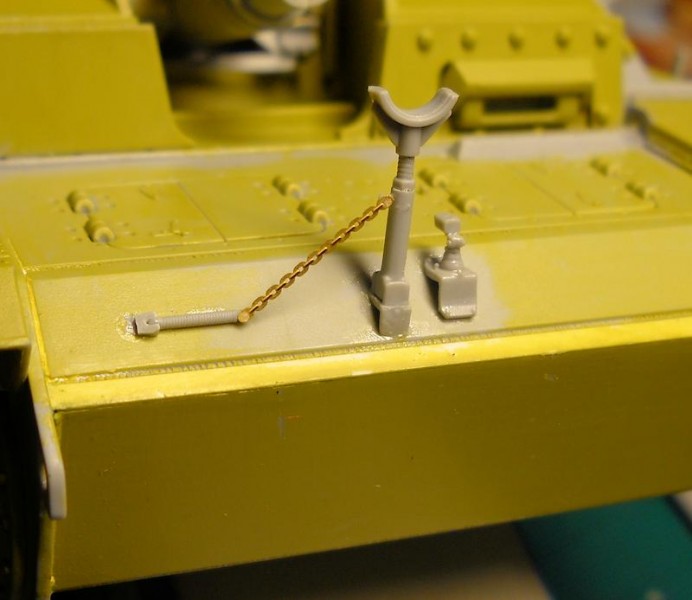
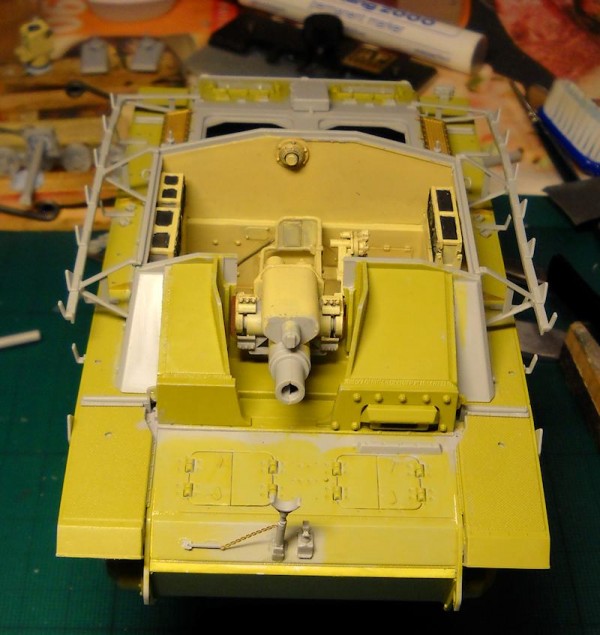
Now that the basic assembly is done, we can turn to adding the gun mount, roof and various details on the casemate and fenders. Pilsen mounts are molded on the new roof piece, though the holes are a little off centre on the round ones and need to be fixed. I just widened the holes slightly then plugged the undersides with scrap (in my case, shaved bits of sprue). The close-in defence unit can be left open or closed. The remote machine gun and mount is an exercise in patience. The machine gun itself is nicely molded with a separate feed cover. A nice idea, but the fit is lousy if you want it closed; shave and file/fill it as needed. The muzzle is pre-drilled, but will need enlarging. Leave the butt mount off until you've completed everything - mine went walkabout at some point. The shields are reasonably thin, but over scale nonetheless. The MG cradle will drive you mad due to the small size of everything and the so so fit; the top mount went flying into the unknown from my tweezers when I sneezed. I think I'll stick to early model StuGs in the future. The commander's cupola assembles easily enough. Add the periscopes after you've assembled and painted/weathered everything else, as they'll fit in from underneath easily. The etch piece that goes in bends nicely; I formed the curve around the handle of a knife. Use whatever you have handy, just make sure the diameter is a little smaller than the final size, as the brass will spring out. I glued it in place from the front openings, one support section at a time, with super glue. Let the glue set before you move onto the next section and you shouldn't run into any trouble. Add the binocular mount and binoculars last. Be very careful removing the binocular sight from the sprue. The deflector needs a little trimming and the removal of a bolt for a better fit. Now we can mount the main gun. The gun mount does not swivel, a minor point that can easily be fixed if you think about it for a minute or less. The gun mount will fit under the lip of the casemate if you chose to install it after the casemate is in place. If you want some more wiggle room, remove the forward mounting pin, and don't glue just yet. Adding the mantlet proved trickier than I had hoped; I managed to squeeze it in, but damaged the paint on the walls and on the mantlet itself. The gun cradle needs to be elevated as much as possible, and then the mantlet is wiggled in to place. You might be able to make this fit more easily by doing one of two things: shave off some of the recoil housing, or sand down the sides of the mantlet a wee bit. You only need to find a millimeter or so on all sides. Do some trial runs before you glue anything in place to see what works best for you. Add the breach assembly, and the gunner's periscope, which you should have painted already, after the mount is glued in place. The roof fits nicely, then add the hatches, remote assembly and cupola after painting and weathering is done. Placing the gun travel lock needs some thought as you don't get any help here. Glue the lock bits together, let them set, then slide the gun barrel in place if you haven't already glued it, lower it to the desired height and fit the travel lock in place, mark or glue depending on your dexterity. When that has set properly, add the etch chain first, then the spring. I noticed two things here: the spring should attach to something, and the chain/spring alignment seems wrong. If the chain/spring is supposed to provide tension to pull it to the side, then the spring shouldn't lay flat. Details, details, details. Carefully measuring with the old Mk 1 Eyeball, I chopped up a slice of sprue and cut a notch in it to provide something for the spring to attach to; amazingly, it worked on the first go. Check your references for what it should actually look like. The schurzen mounts and rails can now be added. Shave off the mounting pins on the bracket faces, as the earlier rails have mounting holes, the newer ones don't (oopsie). Take care when removing the attachment points from the rails, the trusty razor blade works well here using a rocking motion. As for placement, you'll need to study the painting guides as the instructions are again somewhat vague. No skirts are provided, so you'll need to source those. If you do hang skirts, use them as guides for where to mount the triangles and posts to be sure they'll line up. Dragon provides a nice touch with wing nuts that can be used on various brackets, and unlike some other releases, the instructions mention this. I opted not to use them. I wasn't 100% sure they'd still be where I glued them when all was said and done and just plum forgot to add them afterward. Hey, spare wing nuts!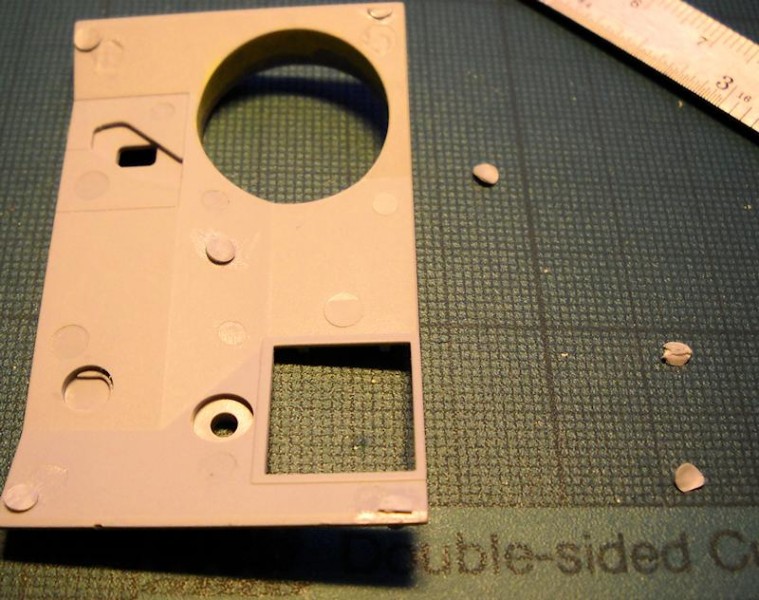

About the Author


FROM: UUSIMAA, FINLAND
I got my first kit when I was about 7 or 8 and was immediately hooked. Magazines such as Fine Scale Modeler helped to push me to go beyond what kits had to offer before photo etch and resin were commonplace. I took a break of about 8 years and now I'm back at it making up for lost time. When I'm not...
Comments
Do you sometimes get the impression that Dragon has become so overconfident in their 3D modelling and prototyping that they actually don't bother sitting a guy down at a table with a tube of glue to test assemble one of these before they run the production and ship? I am seriously beginning to think so.
SEP 13, 2013 - 06:27 PM

Does a bear wear funny hats at birthday parties?
But in all seriousness, I am amazed, and not in a pleasant way, at the number of parts that have fit issues and it's not just with this kit either. The worst seem to be the simplest too. For instance, a simple drop in part will have a hole that needs filler. You would think that the CAD driver would check measurements against each other, but maybe that's just me. In contrast, I recently fiddled with a Griffon early smoke candle rack and the fit was impossibly bang on for pieces that small, taking into consideration that etch has a bit of give and take with the process used. While the issues can be overcome, they are issues that should not be present for a major player like Dragon. I can forgive cottage industry manufacturers with engineering and fit, but not so easily with a major manufacturer. Even the ancient Tamiya Leopard 1A4 I had started a while back fit well.
Kimmo
SEP 13, 2013 - 11:17 PM

nice review, I read for some place the only wrong in this kit is because is dont final production for some part in the ass of this tank. But is really nice kit (except for the tracks, I prefer the Tamiya tracks or old Dragon in plastic).
SEP 14, 2013 - 06:46 AM
Thanks. As I said in the review, I'm not a Stug expert so I can't say too much about what is and isn't correct. Fortunately, there are a lot of unused parts and I think one could practically make any variant of the G/40.
Kimmo
SEP 15, 2013 - 02:12 AM

Very Nice review. I also bought this kit. I've been looking through your masterpiece and how you made it. But I think there might be a bit of an issue...
JAN 06, 2015 - 01:09 PM
This was my first Dragon kit in 1/35. I think I'll stick with Tamiya 1/35...
JAN 08, 2015 - 08:58 AM
This was actually my first modern Dragon as well, there is definitely an adjustment to be made going from Tamiya to Dragon, or any of the other new manufacturers these days. Lots of detail, lots of potential to get frustrated. Patience is the key.
Kimmo
JAN 08, 2015 - 01:57 PM
Uh, no, thanks.
Tamiya kits are for the most part too simplified.
Kimmo, that's a very extensive review and a credit to the site. I like your yellow pre-shading under the Dunkelgelb.
JAN 09, 2015 - 02:40 AM
Thanks Bill. When I was writing it up, I thought it was far too lengthy but I wasn't really sure where to start trimming text so just left it as is. I was rather pleased with the end result of the dunkelgelb, and going over the pics again, I can't help but notice those tracks really don't do the kit justice.
Kimmo
JAN 09, 2015 - 06:44 PM
Copyright ©2021 by Kimmo Happonen. Images and/or videos also by copyright holder unless otherwise noted. The views and opinions expressed herein are solely the views and opinions of the authors and/or contributors to this Web site and do not necessarily represent the views and/or opinions of Armorama, KitMaker Network, or Silver Star Enterrpises. All rights reserved. Originally published on: 2013-09-10 22:05:54. Unique Reads: 35745

WEB HOSTING BY


Copyright ©2021 Armorama and Kitmaker Network, a subsidiary of Silver Star Enterprises
All Rights Reserved. Please read our Conditions of Use and Privacy Policy.
All Rights Reserved. Please read our Conditions of Use and Privacy Policy.