

1⁄35StuG.III Ausf.G Late Production Dec.1944
19
Comments
On your mudguard
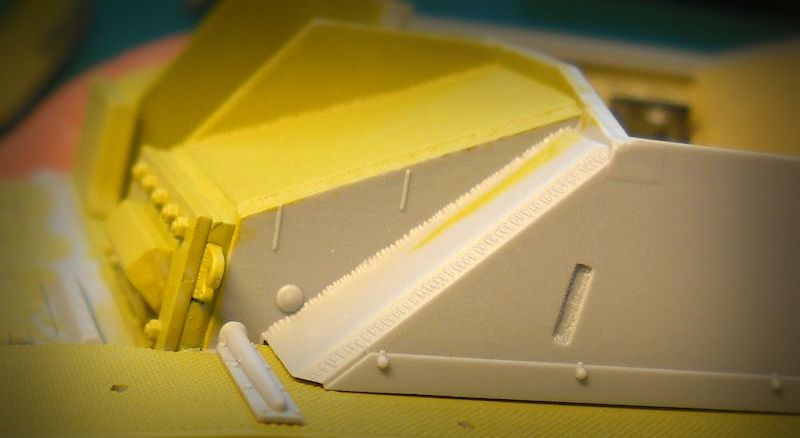
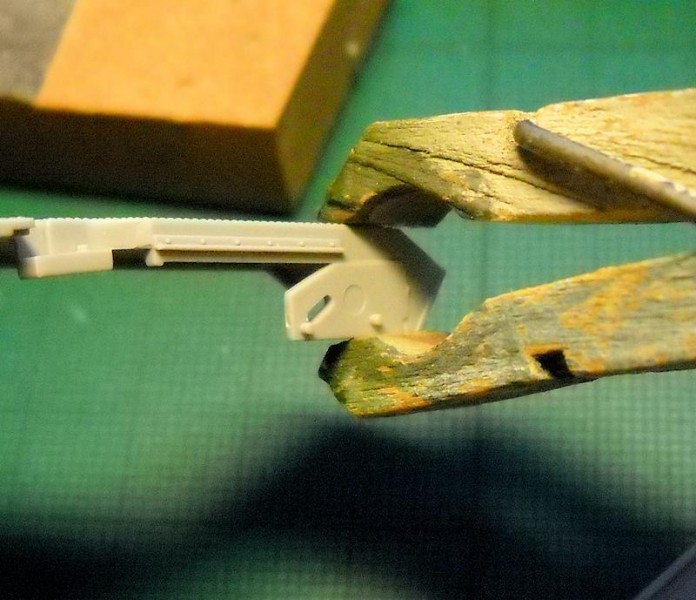
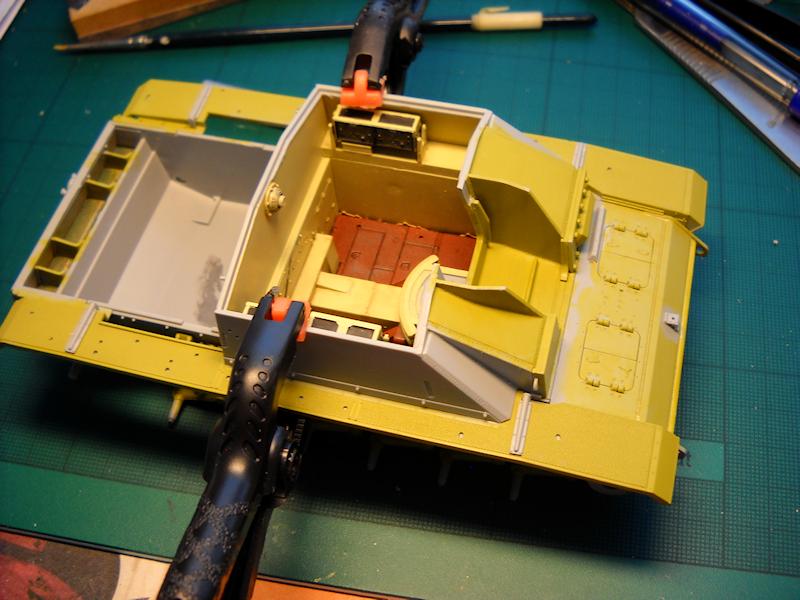
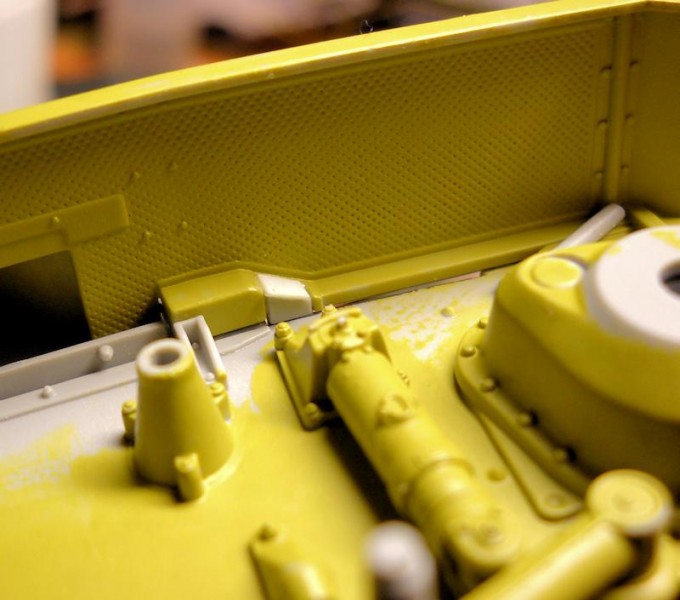
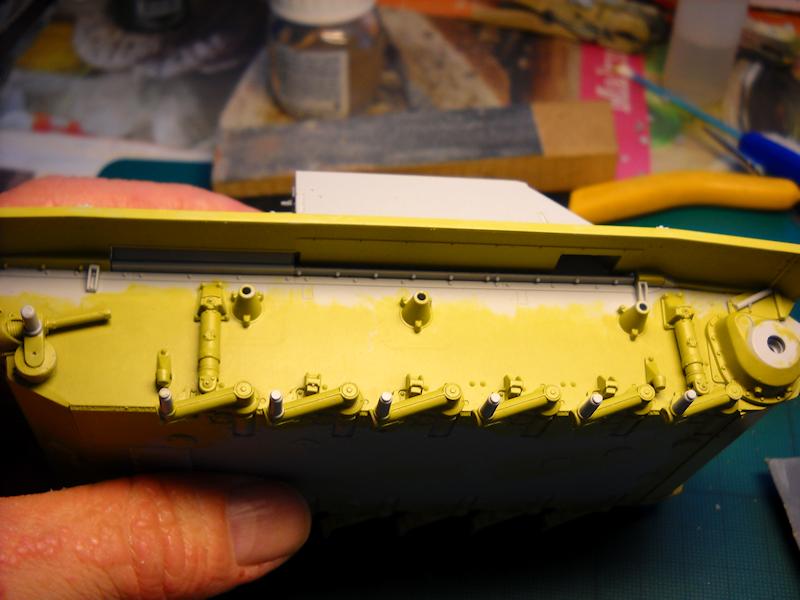
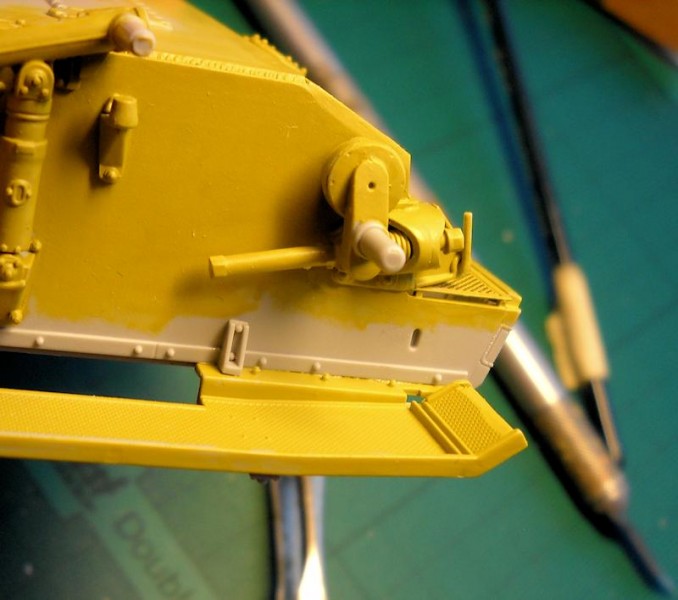
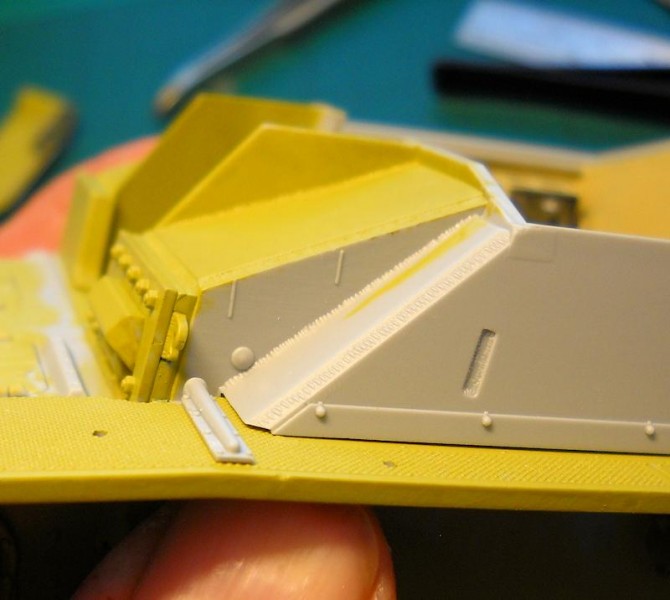
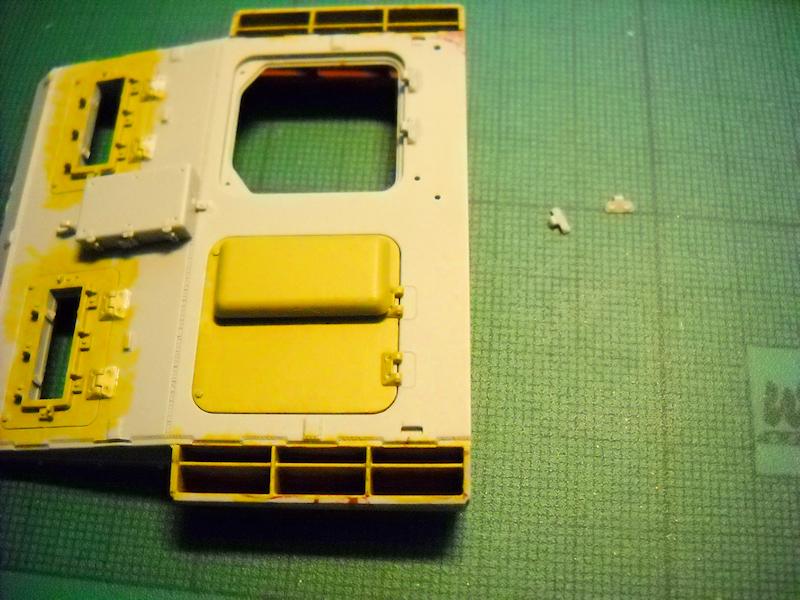
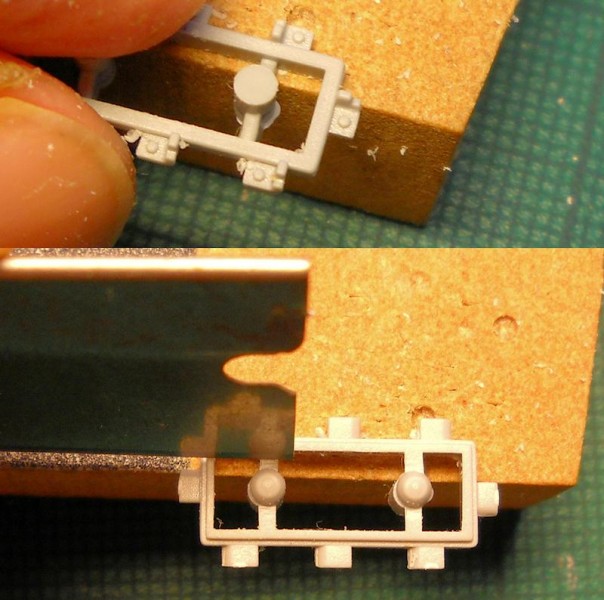
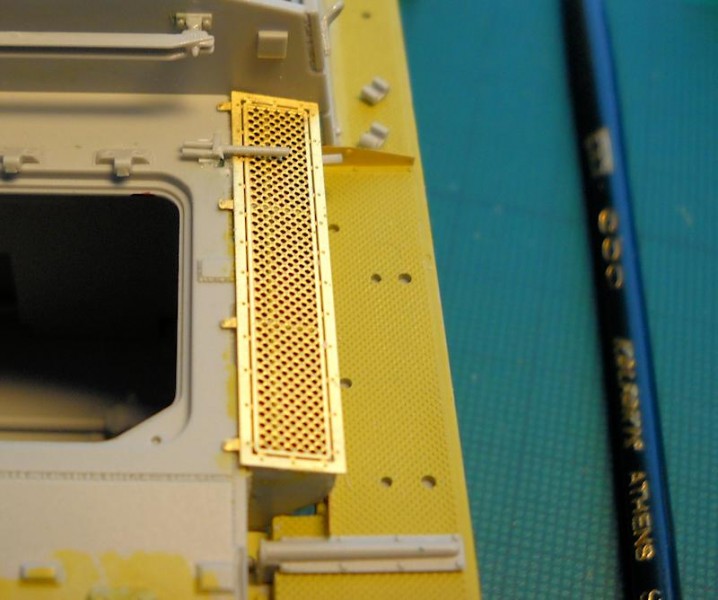
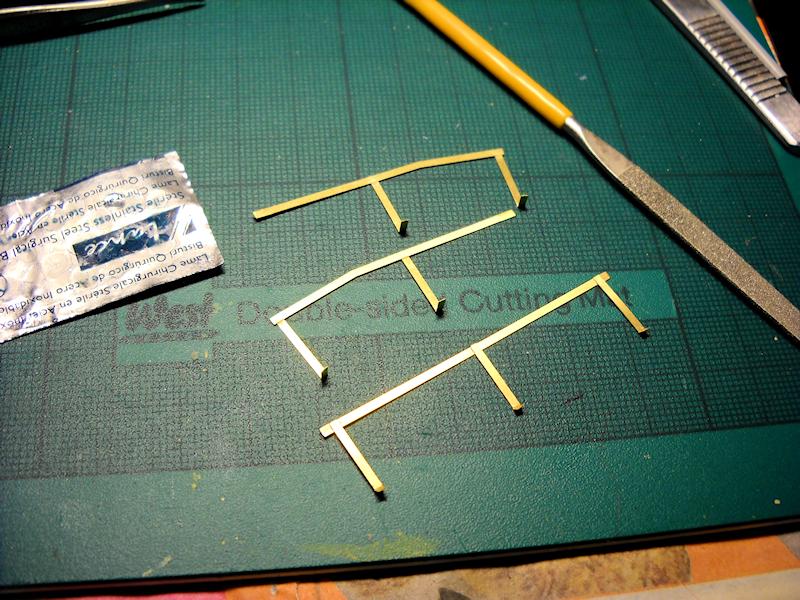
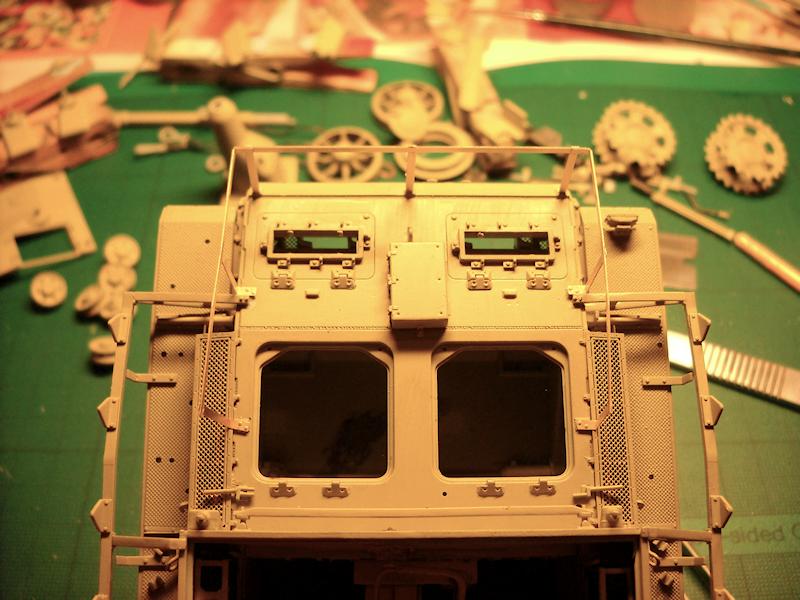
I like to leave tools and equipment off the fenders until everything is painted and weathering has started, as it makes painting details easier. You will need to decide on what to do with the placement of the towing clevises. The new clevises have etched brackets for mounting, but the old mounting points for the older style will leave you with at least one hole to fill in. I really wish all the mounting holes for equipment could be opened up from the underside to give you the option of using aftermarket clamps and so forth, or just no holes period. The instructions for laying the towing cables are somewhat unhelpful: it shows the old style clevis (S-hooks) in place on the right fender, and nothing on the left where the new style should be. Further adding to the joy of the moment, the cable provided is too stiff to be bent properly, is nearly impossible to cut cleanly, and the lengths called for are way too long. Youre going to have to source cables, there's no way around it. More on all this later. Also take note of what tools are actually called for. I mistakenly selected the wrong pry bar and shovel. There are a lot of unused tools on the sprue, so pay attention. The fenders themselves are nicely molded with the anti-skid detail on upper and lower sides, but they are too thick. This won't really be noticed apart from at the ends. As molded, they are approaching main armour thickness. Thin the edges down, but be careful what you thin on the rear. I mistakenly took down the inside edges not knowing they are supposed to mate with pieces G36 and G37 (see photos), my bad. You will lose some recessed detail here, but that's why Vishnu created mud. You could always re-drill the missing detail should you wish. Speaking of thinning, the outer faces should really be thinned as well, but it's not as simple as sanding them down. Well, it is, but that would mean the raised detail is too close to the edge. Thinning from the backside didn't appeal to me either, so I left it alone. Should you want to get a more scale appearance without resorting to after-market etch or to thinning, you could simply remove the underhang and replace it with thin strip. Some of the mounting brackets and supports could use a thinning down too. I added the front side pieces (take care to align the parts) and various support bars, but left off all the tools and schurzen mounting plates/bars. The fenders sit well enough, but all the separate detail pieces that are provided along the way leave some gaps. Looking at reference pictures, I still can't really tell what is a legitimate gap and what isn't; I ran some primer into the gaps and puttied where I could. The casemate fit can be improved slightly by scraping the raised detail off the fender. There is supposed to be a gap at the front edge, so don't fill that in. Glue and clamp at the casemate and front join first to get a solid sit, then the rear end when the glue has started to set. Add the etch fender braces when everything has had a chance to set properly. The rear deck is a nicely molded piece with weld seams, and hatches all fit beautifully. It's easier to install the deck before you attach all the parts, except for the side intakes, see below. The fit is really snug; check for fit issues and glue in place, but don't glue at the casemate join, leave the slight gap that is there. Something to pay attention to are the vent frames. They have the by now familiar nubs on the inside and out. Take care with removal and scrape the mold seams off the sides. I'd recommend leaving the armoured covers off until after painting. The side intakes are a good fit, though the insides can use a bit of sanding and/or filling. Not much will be seen after the mesh screens are installed, so it is up to you to decide on whether its worth the effort or not. I painted the insides primer red first, then Dark Yellow part way down. The idea was to make it look like what would happen if the exterior colour was sprayed after the screens were installed. You will have trouble with parts G27 and G28. The mounting holes are oversized, and if you install them first, the etched grills wont fit under them. Install the grills (bend the attachment stubs to an approximate fit first), then the parts, then fill in the holes. The lifting hooks are of course rather small, so take care when removing them from the sprues. Attach them first, then when the glue has set, remove any seams. This way parts won't get launched into the realm of the carpet monster. Do this with all small pieces wherever practical. Dragon provides nice etched pieces to cover the gap between fender and intake, as well as a luggage rack, but sadly, no luggage. Dry fit the MA6 and MA8: the instructions are wrong, the notch goes down on both to clear the fender brace (oopsie), and you should also trim away part of the vertical brace on the fender itself where the etch mounts, as it will be visible. All should be apparent after a dry run. The rack assembles well, even if the instructions are less than helpful. I forgot to make life easier by gluing 5 thou sheet onto the rack feet, so I could use regular glue to align the whole rack. The vertical bars will probably not set true, so a little play is to be expected. If the mounting points and feet don't line up, carefully bend the bars to sit properly rather than force gluing them in place. They'll eventually pop loose under the strain. A set of spare wheels and track pins completes the deck.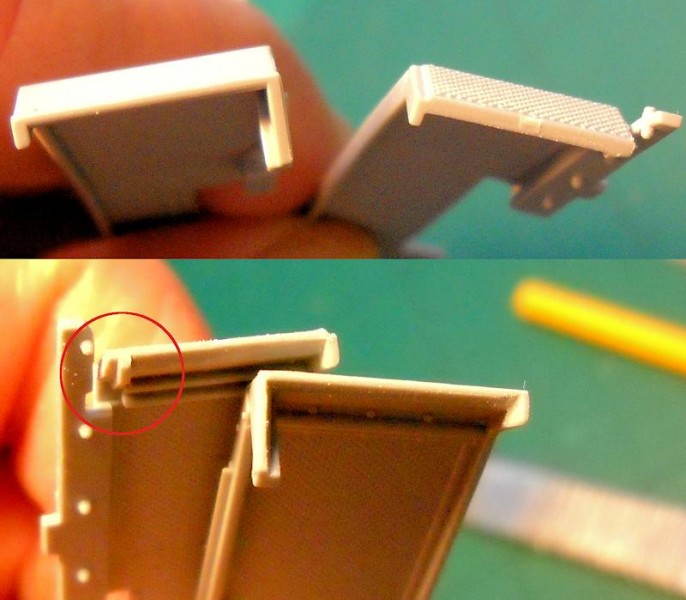


About the Author


FROM: UUSIMAA, FINLAND
I got my first kit when I was about 7 or 8 and was immediately hooked. Magazines such as Fine Scale Modeler helped to push me to go beyond what kits had to offer before photo etch and resin were commonplace. I took a break of about 8 years and now I'm back at it making up for lost time. When I'm not...
Comments

Do you sometimes get the impression that Dragon has become so overconfident in their 3D modelling and prototyping that they actually don't bother sitting a guy down at a table with a tube of glue to test assemble one of these before they run the production and ship? I am seriously beginning to think so.
SEP 13, 2013 - 06:27 PM

Does a bear wear funny hats at birthday parties?
But in all seriousness, I am amazed, and not in a pleasant way, at the number of parts that have fit issues and it's not just with this kit either. The worst seem to be the simplest too. For instance, a simple drop in part will have a hole that needs filler. You would think that the CAD driver would check measurements against each other, but maybe that's just me. In contrast, I recently fiddled with a Griffon early smoke candle rack and the fit was impossibly bang on for pieces that small, taking into consideration that etch has a bit of give and take with the process used. While the issues can be overcome, they are issues that should not be present for a major player like Dragon. I can forgive cottage industry manufacturers with engineering and fit, but not so easily with a major manufacturer. Even the ancient Tamiya Leopard 1A4 I had started a while back fit well.
Kimmo
SEP 13, 2013 - 11:17 PM

nice review, I read for some place the only wrong in this kit is because is dont final production for some part in the ass of this tank. But is really nice kit (except for the tracks, I prefer the Tamiya tracks or old Dragon in plastic).
SEP 14, 2013 - 06:46 AM
Thanks. As I said in the review, I'm not a Stug expert so I can't say too much about what is and isn't correct. Fortunately, there are a lot of unused parts and I think one could practically make any variant of the G/40.
Kimmo
SEP 15, 2013 - 02:12 AM

Very Nice review. I also bought this kit. I've been looking through your masterpiece and how you made it. But I think there might be a bit of an issue...
JAN 06, 2015 - 01:09 PM
This was my first Dragon kit in 1/35. I think I'll stick with Tamiya 1/35...
JAN 08, 2015 - 08:58 AM
This was actually my first modern Dragon as well, there is definitely an adjustment to be made going from Tamiya to Dragon, or any of the other new manufacturers these days. Lots of detail, lots of potential to get frustrated. Patience is the key.
Kimmo
JAN 08, 2015 - 01:57 PM
Uh, no, thanks.
Tamiya kits are for the most part too simplified.
Kimmo, that's a very extensive review and a credit to the site. I like your yellow pre-shading under the Dunkelgelb.
JAN 09, 2015 - 02:40 AM
Thanks Bill. When I was writing it up, I thought it was far too lengthy but I wasn't really sure where to start trimming text so just left it as is. I was rather pleased with the end result of the dunkelgelb, and going over the pics again, I can't help but notice those tracks really don't do the kit justice.
Kimmo
JAN 09, 2015 - 06:44 PM
Copyright ©2021 by Kimmo Happonen. Images and/or videos also by copyright holder unless otherwise noted. The views and opinions expressed herein are solely the views and opinions of the authors and/or contributors to this Web site and do not necessarily represent the views and/or opinions of Armorama, KitMaker Network, or Silver Star Enterrpises. All rights reserved. Originally published on: 2013-09-10 22:05:54. Unique Reads: 35745

WEB HOSTING BY


Copyright ©2021 Armorama and Kitmaker Network, a subsidiary of Silver Star Enterprises
All Rights Reserved. Please read our Conditions of Use and Privacy Policy.
All Rights Reserved. Please read our Conditions of Use and Privacy Policy.