

1⁄35StuG.III Ausf.G Late Production Dec.1944
19
Comments
In the belly of the beast
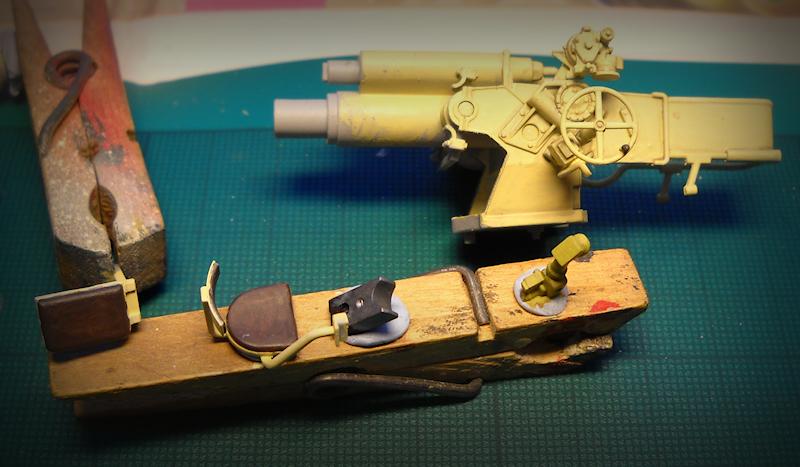
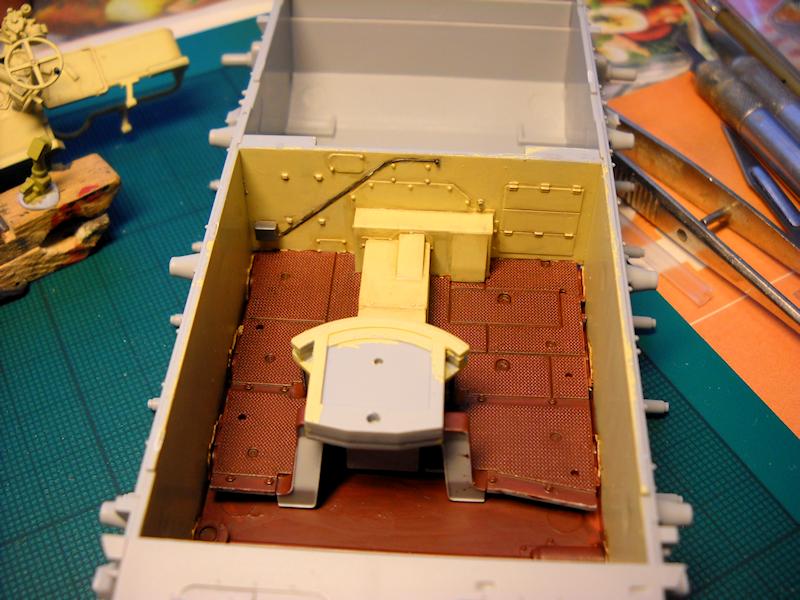
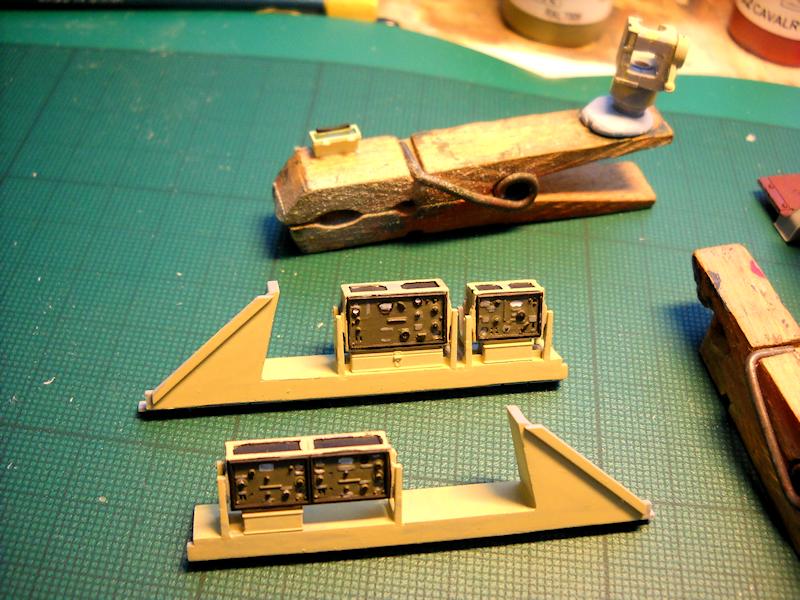
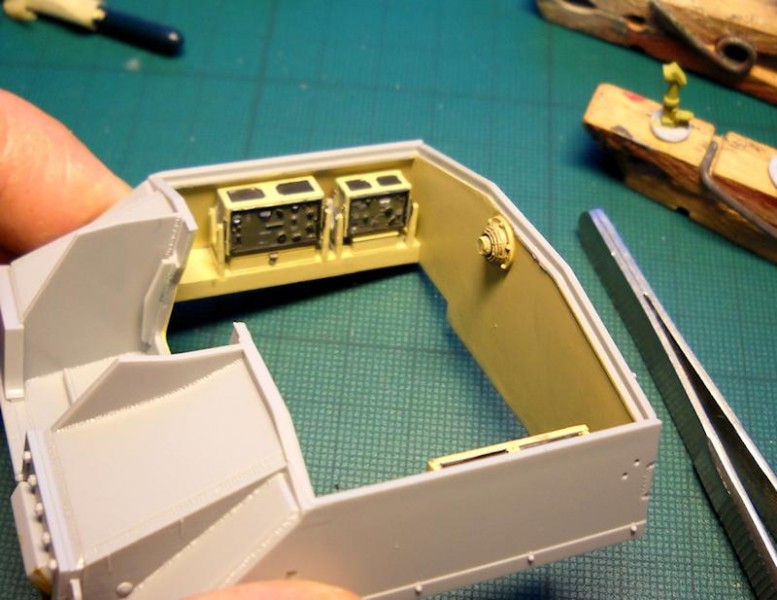
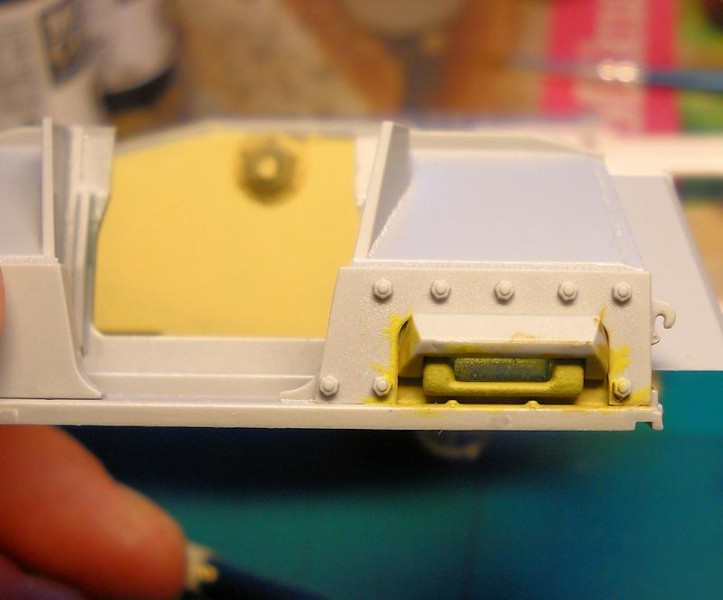
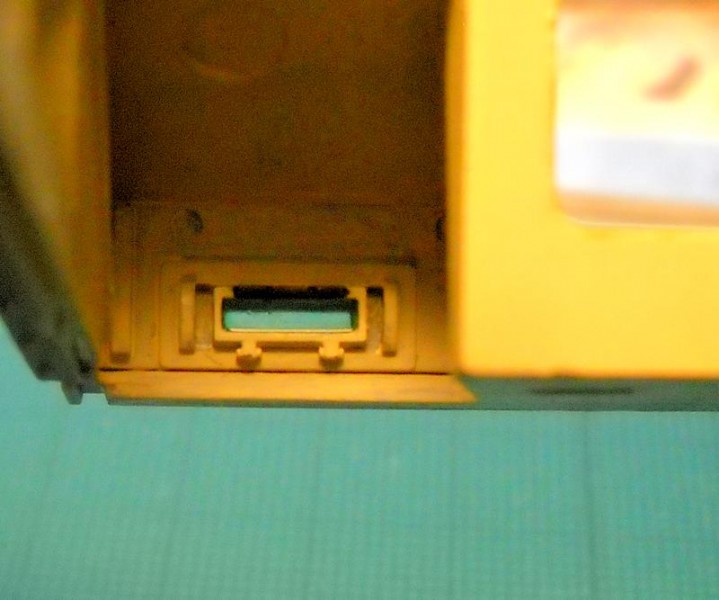
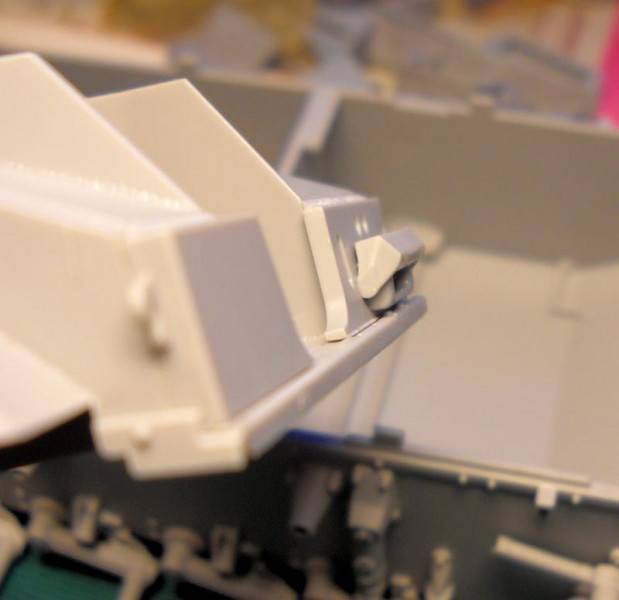
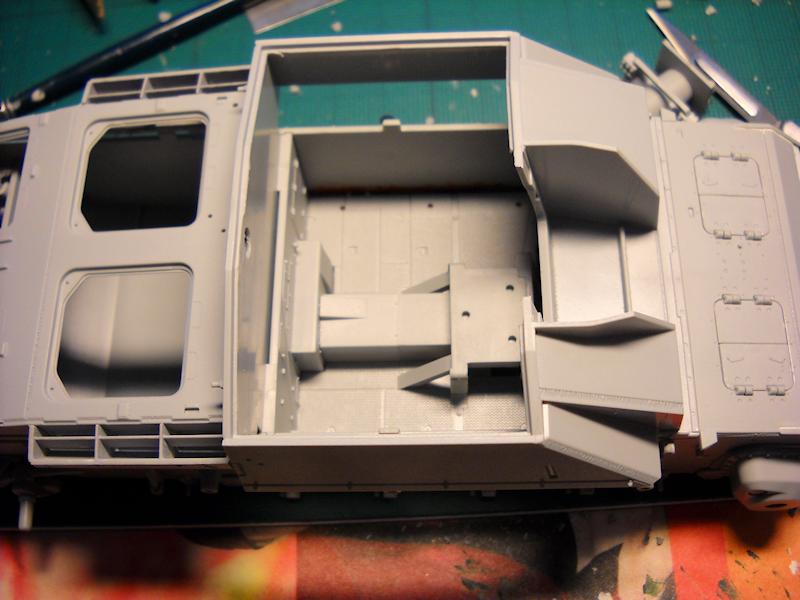
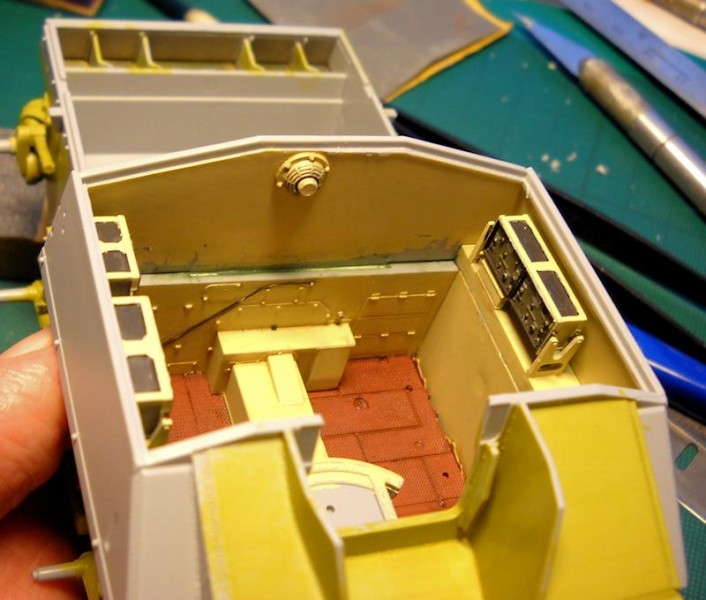
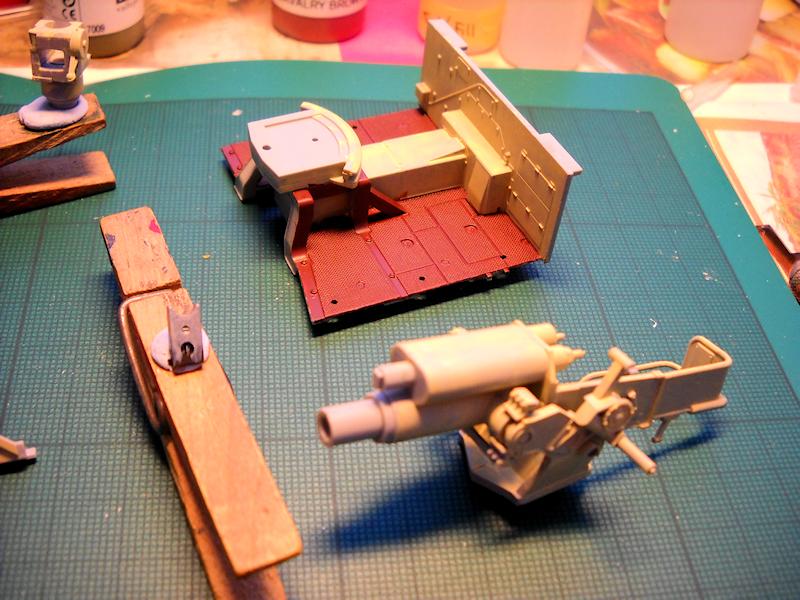
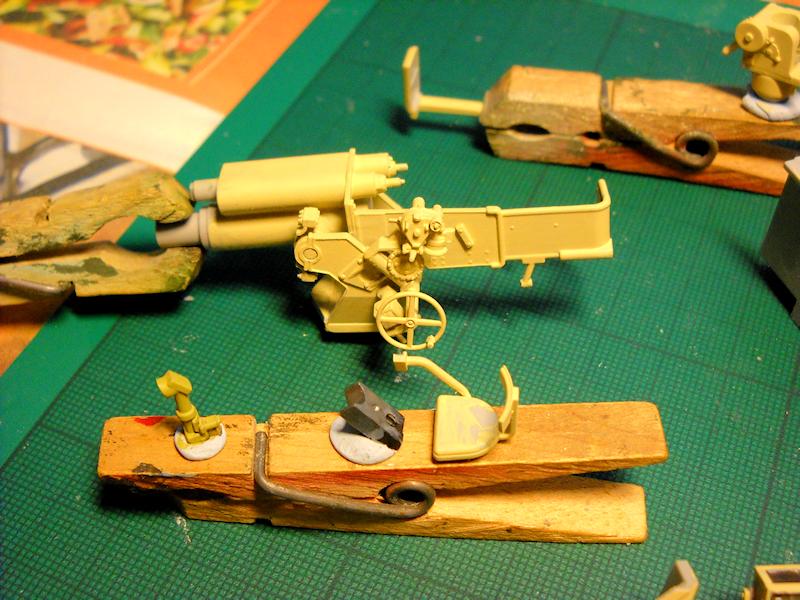
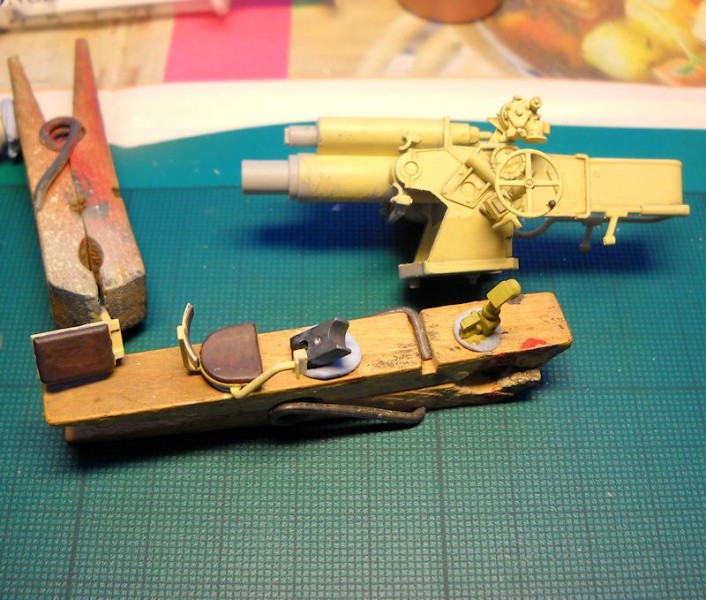
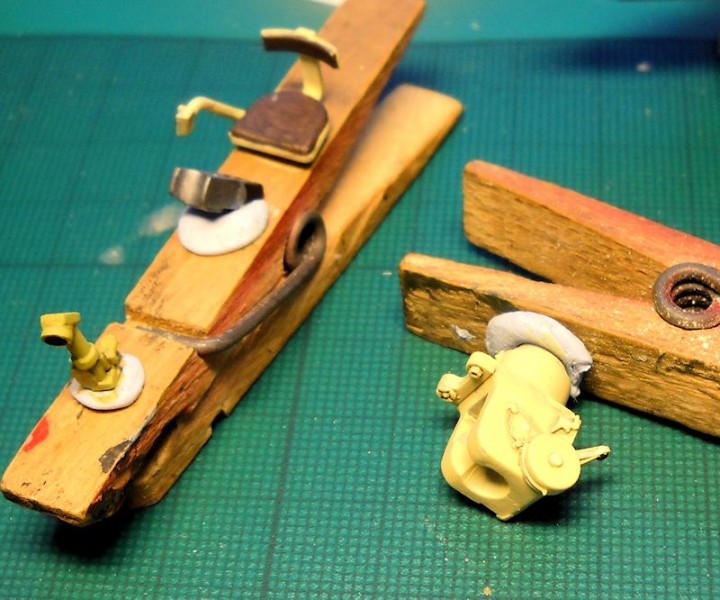
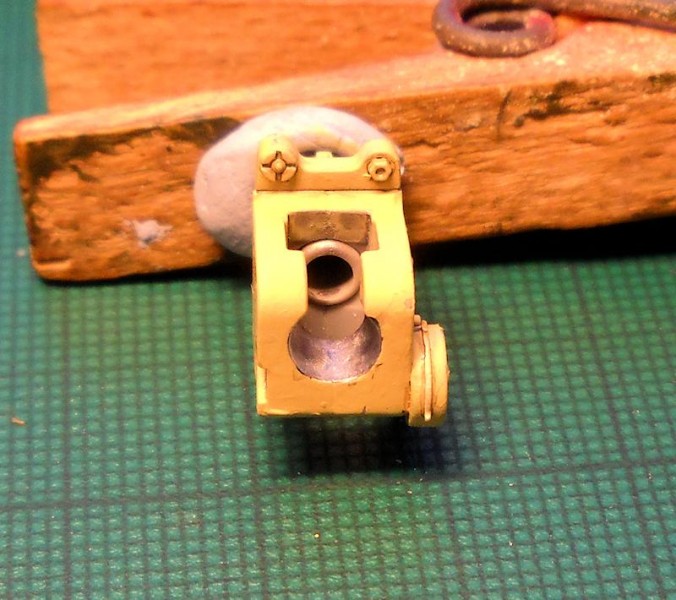
Now that things are shaping up on the outside, we can turn to the interior and the fighting compartment casemate. Dragon provides a basic interior to work with which should be more than enough if you plan on putting any figures into the hatches. You get a reasonably detailed floor and firewall, a fairly complete gun cradle and breech and radios. Sub-assembly is the word of the day here. Assemble everything you can in logical sets (see photos) and paint as you go. I assembled the radios on their mounts as per the instructions. Don't do this. Assemble the radios and mounts as separate units and paint, then attach. There are some gaps to be filled where the radios mount to the sponsons. To correctly attach the floor plate, first slide the firewall in place, then the floor plate, making sure it sits nicely, then use a little bit of glue to tack the pieces together and let it dry. Attach the sponsons, and add the drivers vision glass. Paint everything in the interior that needs painting at this stage. I also added the extra side armour (parts G23 and G24), drivers visor and front armour plates. From the instructions, it's difficult to say which way the visor cover should go, but after checking references, I think I got it the right way around. Before installing the driver's glass, I painted around the opening to reduce the chance of messing it up later. Dragon's assembly procedure here doesn't sit well with me, particularly after dry fitting the floor/firewall, casemate and rear hull. There is too much room for surprises if you do this. What I did was to fix the floor/firewall in place after painting and attach the casemate without the gun mount assembly. You can see the gap in the back and the join along the hull/sponson. Fill the back gap, repaint and just paint over the hull joins. There is a noticeable step here in real life, albeit a little higher, and so it doesn't look entirely out of place. You can fill if you wish. If you had followed Dragon's instructions, the hull joins would be impossible to fix and the back gap (which would have disappeared) might have caused bowing problems with the back wall of the casemate. It always pays to dry fit every major component to see how they interact with each other before you start gluing to avoid surprises. Much later in the build, I noticed a sink mark on the outside back wall. I have read of others finding similar glitches in thick pieces, so have a careful look. One other odd sink mark was found on the lower hull around the rearmost left return roller mount. I left it alone because it is not very noticeable, and looked to be more trouble than it was worth to try and sort out. The gun cradle is pretty straight forward. Leave the breach assembly off until after painting the various sub-assemblies. You'll need to check your references for painting, no call outs here or for the rest of the interior. I painted the floor with Vallejo Red primer followed by Cavalry Brown. The rest of the interior was done with Buff lightened with a bit of white. The radio faces are Field Gray. A wash and details picked out completes the painting stage, some pigment will be added during the final weathering stage to simulate a bit of dust and dirt. Leave the gunner's periscope off for now, it can easily snap off otherwise. The barrel is molded as a single piece with rifling detail at the muzzle, but there is a slight seam to be eliminated along the length. The muzzle brake is a multi-piece affair, and nicely detailed, but check for mold lines on the inside faces. We'll fit the gun assembly and roof later, first let's take a look at the fenders and back end.

About the Author


FROM: UUSIMAA, FINLAND
I got my first kit when I was about 7 or 8 and was immediately hooked. Magazines such as Fine Scale Modeler helped to push me to go beyond what kits had to offer before photo etch and resin were commonplace. I took a break of about 8 years and now I'm back at it making up for lost time. When I'm not...
Comments
Do you sometimes get the impression that Dragon has become so overconfident in their 3D modelling and prototyping that they actually don't bother sitting a guy down at a table with a tube of glue to test assemble one of these before they run the production and ship? I am seriously beginning to think so.
SEP 13, 2013 - 06:27 PM

Does a bear wear funny hats at birthday parties?
But in all seriousness, I am amazed, and not in a pleasant way, at the number of parts that have fit issues and it's not just with this kit either. The worst seem to be the simplest too. For instance, a simple drop in part will have a hole that needs filler. You would think that the CAD driver would check measurements against each other, but maybe that's just me. In contrast, I recently fiddled with a Griffon early smoke candle rack and the fit was impossibly bang on for pieces that small, taking into consideration that etch has a bit of give and take with the process used. While the issues can be overcome, they are issues that should not be present for a major player like Dragon. I can forgive cottage industry manufacturers with engineering and fit, but not so easily with a major manufacturer. Even the ancient Tamiya Leopard 1A4 I had started a while back fit well.
Kimmo
SEP 13, 2013 - 11:17 PM

nice review, I read for some place the only wrong in this kit is because is dont final production for some part in the ass of this tank. But is really nice kit (except for the tracks, I prefer the Tamiya tracks or old Dragon in plastic).
SEP 14, 2013 - 06:46 AM
Thanks. As I said in the review, I'm not a Stug expert so I can't say too much about what is and isn't correct. Fortunately, there are a lot of unused parts and I think one could practically make any variant of the G/40.
Kimmo
SEP 15, 2013 - 02:12 AM

Very Nice review. I also bought this kit. I've been looking through your masterpiece and how you made it. But I think there might be a bit of an issue...
JAN 06, 2015 - 01:09 PM
This was my first Dragon kit in 1/35. I think I'll stick with Tamiya 1/35...
JAN 08, 2015 - 08:58 AM
This was actually my first modern Dragon as well, there is definitely an adjustment to be made going from Tamiya to Dragon, or any of the other new manufacturers these days. Lots of detail, lots of potential to get frustrated. Patience is the key.
Kimmo
JAN 08, 2015 - 01:57 PM
Uh, no, thanks.
Tamiya kits are for the most part too simplified.
Kimmo, that's a very extensive review and a credit to the site. I like your yellow pre-shading under the Dunkelgelb.
JAN 09, 2015 - 02:40 AM
Thanks Bill. When I was writing it up, I thought it was far too lengthy but I wasn't really sure where to start trimming text so just left it as is. I was rather pleased with the end result of the dunkelgelb, and going over the pics again, I can't help but notice those tracks really don't do the kit justice.
Kimmo
JAN 09, 2015 - 06:44 PM
Copyright ©2021 by Kimmo Happonen. Images and/or videos also by copyright holder unless otherwise noted. The views and opinions expressed herein are solely the views and opinions of the authors and/or contributors to this Web site and do not necessarily represent the views and/or opinions of Armorama, KitMaker Network, or Silver Star Enterrpises. All rights reserved. Originally published on: 2013-09-10 22:05:54. Unique Reads: 35745

WEB HOSTING BY


Copyright ©2021 Armorama and Kitmaker Network, a subsidiary of Silver Star Enterprises
All Rights Reserved. Please read our Conditions of Use and Privacy Policy.
All Rights Reserved. Please read our Conditions of Use and Privacy Policy.