

1⁄35StuG.III Ausf.G Late Production Dec.1944
19
Comments
Just for the hull of it
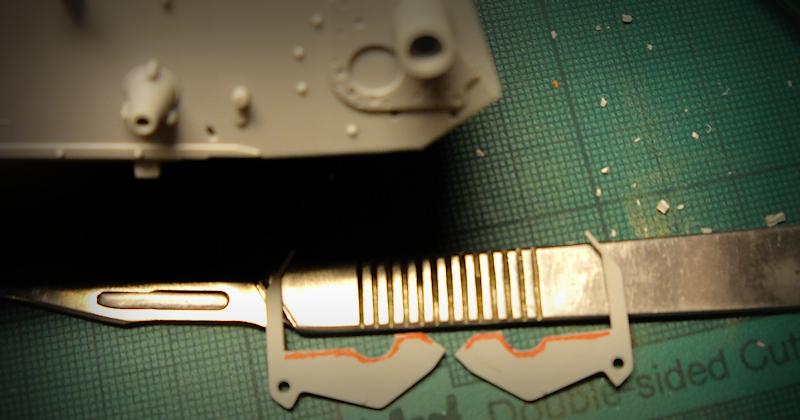
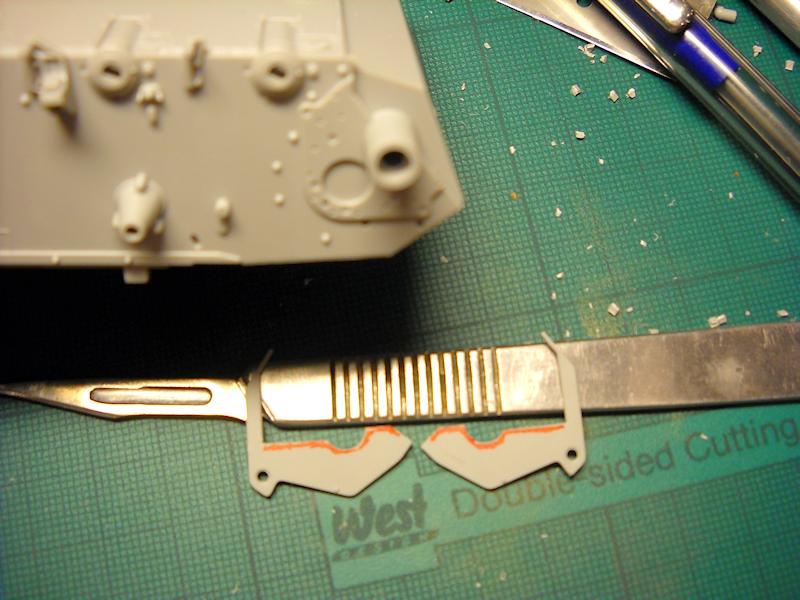
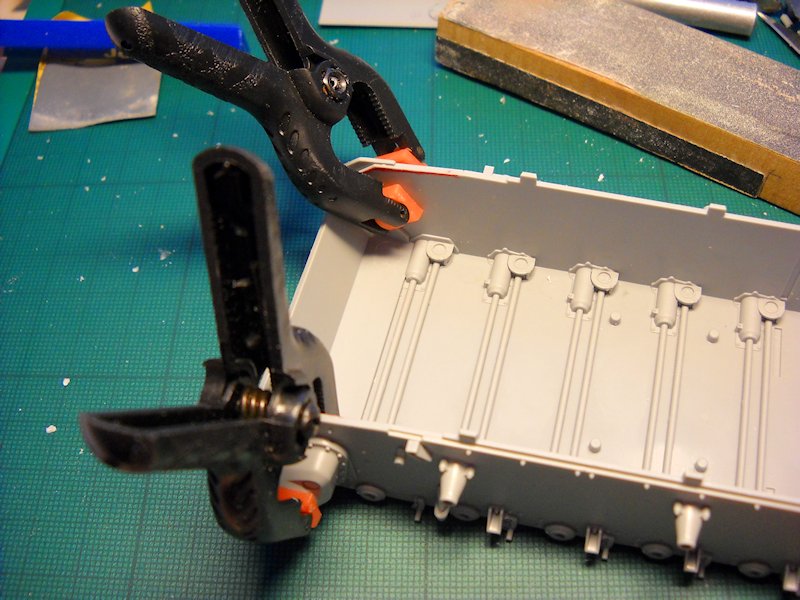
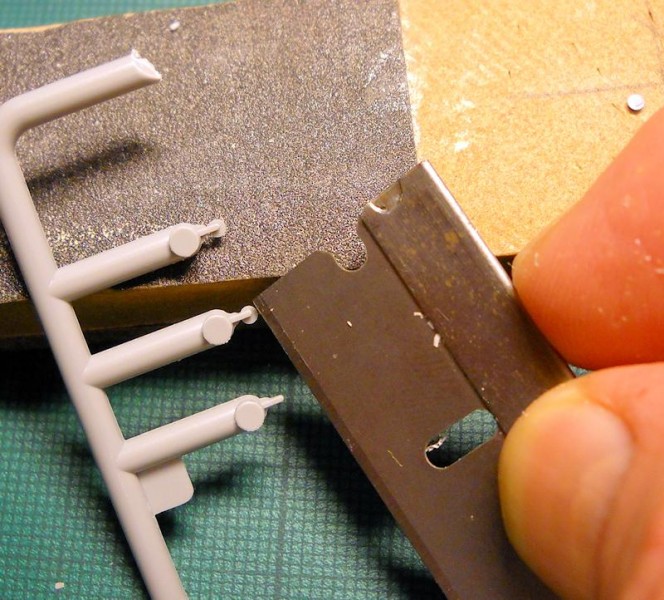
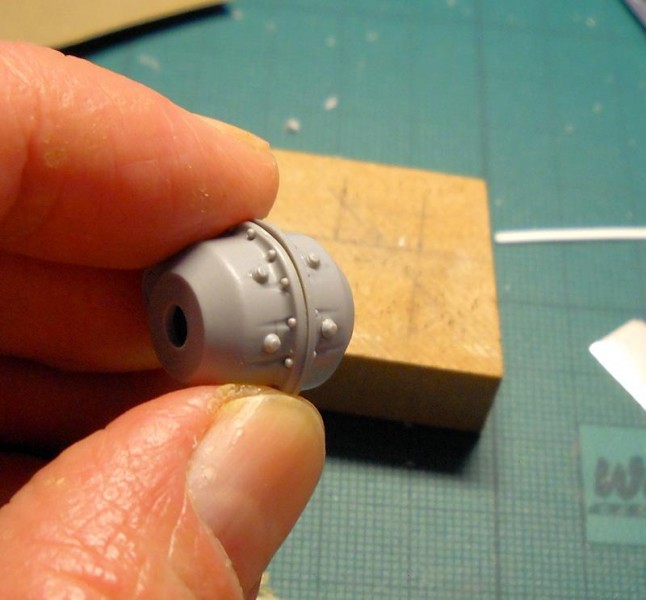
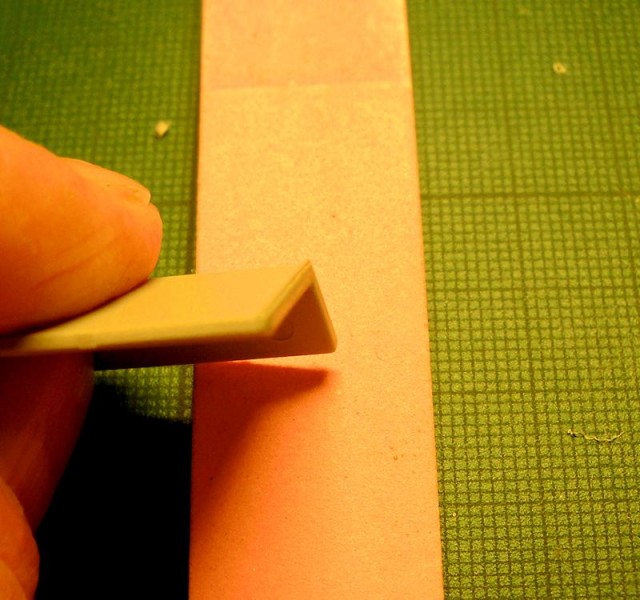
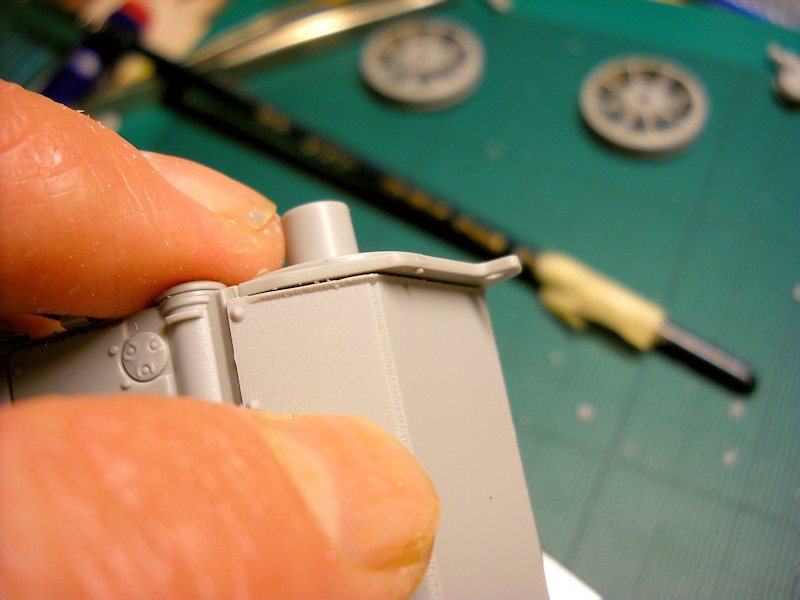
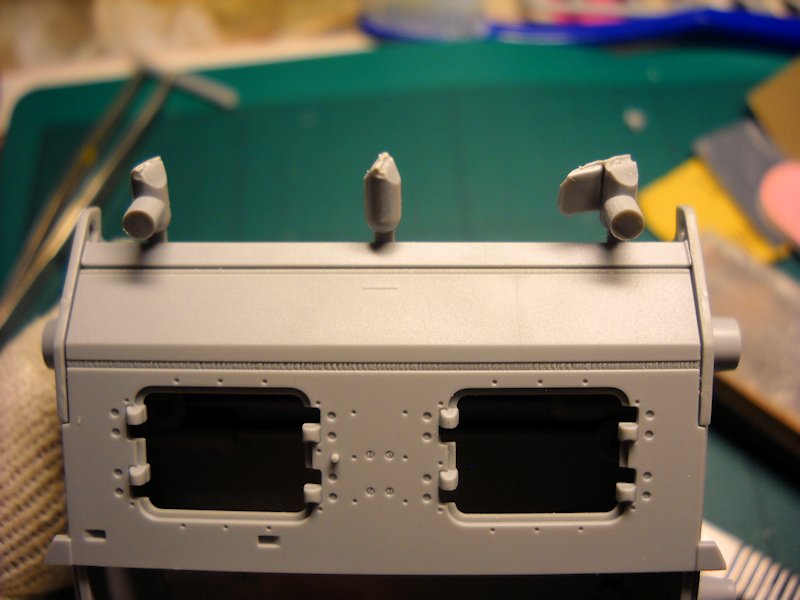
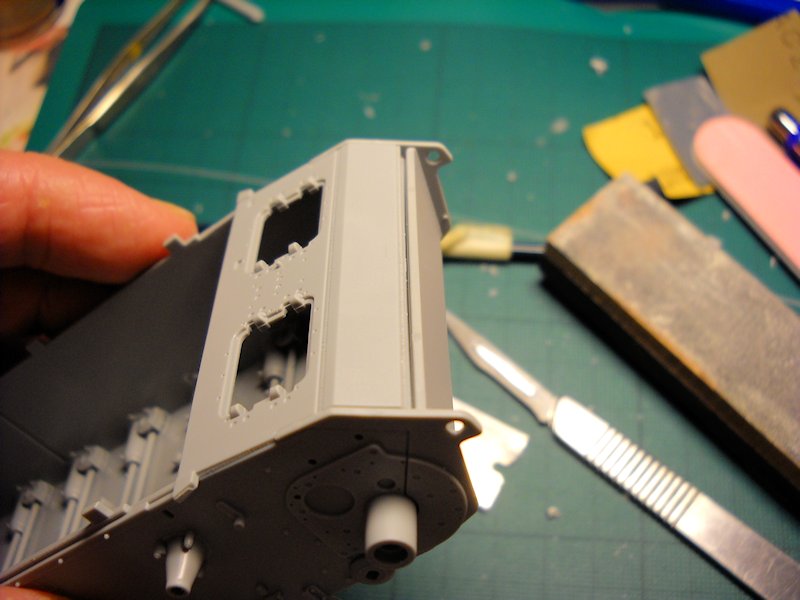
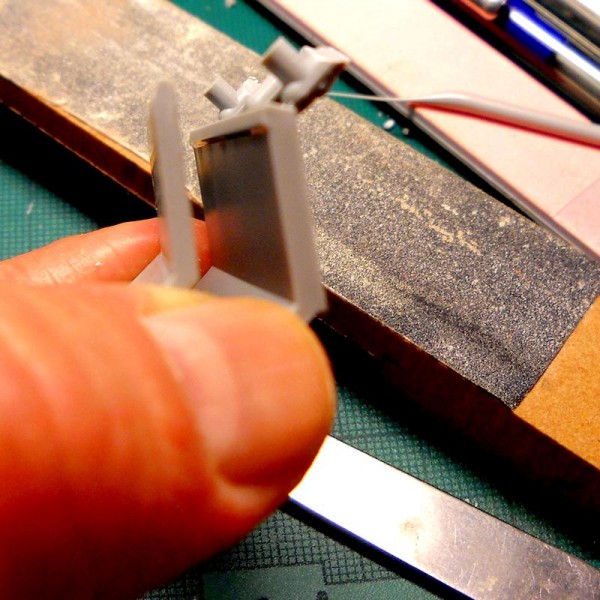
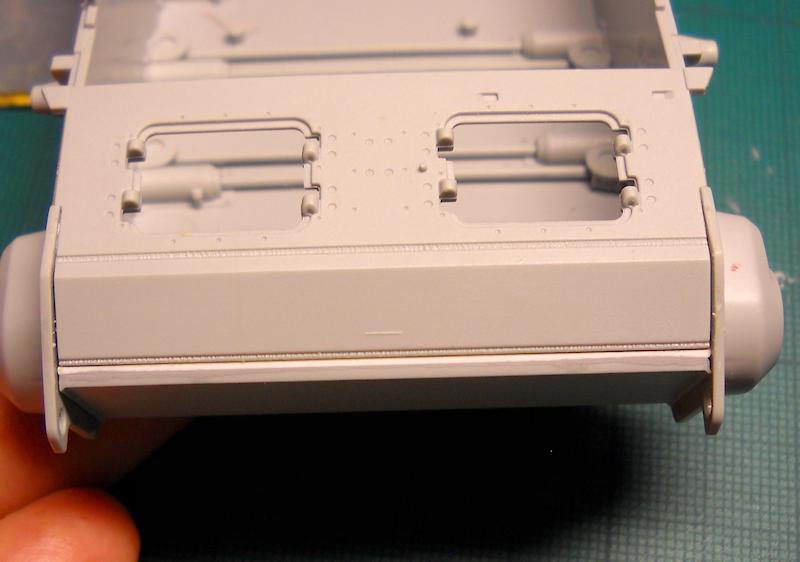
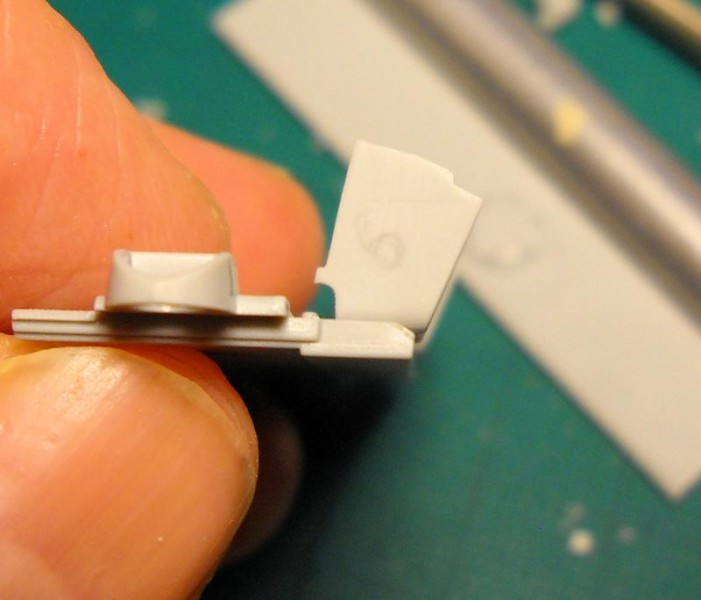
Dragon's ability to produce every major variant of Pz III lies partly in the way they produce the hull tubs. The tub itself is slide molded to produce great detail without assembly; the final drives, covers, hull front and rear are done as separate parts so the tub can be used over and over without major retooling. This approach is sensible from a production standpoint, not necessarily so sensible from a modeler's. In an ideal world, the interchangeable parts should just drop into place with only minor cleanup, if any. As we'll see, the definition of minor clean up will be open to interpretation. The final drive plates are again from the new late sprues. Fit here is so-so. After some dry fitting, I realized something wasn't quite right, there was too much of a gap and with all that nice detail, I didn't want to fill and sand, although you won't see any of it unless you have a maintenance scene in mind. After a think, I beveled the inside mating edges to get them to sit closer together - problem solved. I should have noticed the hair of a step on the face of the completed final drive, but didn't until the covers were glued in place. Grrr. After the glue dried, a light sanding took care of the step. One other thing I should have noticed was the towing point. A late model should have a reinforcement on the bottom - the instruction drawings got it right, the kit part didn't (oopsie). The drive covers are very nicely done as well. Dragon provides the drain plugs as separate pieces, a nice touch in a careful what you wish for sort of way. These things are teeny tiny with an attachment point in the most unhelpful place. To be fair, the only other option would be to mold them with a vertical butt join to cut off. Fortunately you get 6 pieces to try your luck with. As you can see in the picture, I took a razor blade to the attachment point. I held the sprue in one hand, then very, very, very, very gently applied the blade flush with the back face and slide it into the attachment point using practically no pressure. If you have a gentle touch, the part will just drop with a minor sliver of plastic from the attachment point which should dissolve when you glue it in place. The only other option is to try to scrape/slice the plastic off of the back, either before or after you remove it from the sprue. Good luck with whatever approach you take, and work over a clean area or piece of paper in case the part decides to go for a short flight. Moving on to the new front plate and transmission covers, things go from nice to an oopsie to an oh dear very quickly. The new cover piece and hatches fit well enough, but a quick dry fit of the nose plate showed a nasty gap on one side. To use filler here would obliterate the very nice weld seams molded in place. Examining the piece, there's a step in the plastic which is producing the gap (oopsie). Careful filing and sanding took care of most of the problem, but it still leaves a hairline gap that will need some filler. Plastic putty is perfect for these problems. Simply apply a little bit with a blade or with a brush, wait a minute or so, then wipe off excess with a damp cloth or q-tip. You may need to bevel some mating edges to get a good sit too. Now that the piece fits better, I noticed something decidedly oh dear. There's a section of nose plate missing. Not short shot, missing. Fixing this is nothing difficult, a piece of 20 x 40 thou strip on the back takes care of the gap. Glue the nose plate in place and add a strip of 10 x 60 thou strip on top to bring it up to level with the other armour plate, fill and sand if necessary, taking care to not cover weld detail. There's also a noticeable gap between the top plate and the transmission cover plate pieces added earlier. Fortunately, this is a straightforward putty job. I'd recommend not trying to squeeze the gap with clamps, as this may affect the fenders later. As a general rule, I do not advise squeezing gaps shut unless you are certain it won't affect construction later on. Remember, if you apply pressure to squeeze, you may produce a bow that would be difficult to fix. I have seen complaints about the fit of the back hull before. I found out why. If we go back to when we installed the idler supports, you'll remember there were some minor issues there. They continue on to the rear plate. Before I go into that, a tip or two: do not install the upper braces (parts A5 and A6) beforehand, they make fitting the rear plate difficult. I ended up trimming the notches off to help with the constant dry fitting; they should slip into place nicely after the plate is glued in place. I would go so far as to say do not glue anything onto the plate until it is fixed in place. There's enough room to work with after. Concentrate instead on getting the fit right by sanding/trimming the areas shown by the red arrows in the photo and check the mating areas on the rear plate. These areas are the reason the plate won't sit flush, an extra two minutes here is well worth the effort. Now that the plate sits nicely, attach the armoured covers from the idler assembly stage. Sand and fill as needed. As I understand it, the cover is a one piece casting and should not have any seams. Next, install the braces between the hull and extension, add the etch screen (this could probably be left off until the painting stage?) and then the towing mounts. There is a gap to be filled on each mount, two actually. Glue the pieces so that the resulting gap is in between the parts rather than on the outside faces. I'd also recommend leaving the exhausts and deflector plates off until after painting, just to make life easier. Remember to shave off the details as shown in the instructions. Dragon also forget to tell you to remove four plugs on the hull (oopsie) even though the instruction drawings show them missing. This seems a common occurrence with this family of kits, I'm not entirely sure if they are needed for any of the variants, or whether theyre remnants of the molding process. Take a sharp blade and score the plastic a few times and snap off the plugs, dress with a file or sandpaper.


About the Author


FROM: UUSIMAA, FINLAND
I got my first kit when I was about 7 or 8 and was immediately hooked. Magazines such as Fine Scale Modeler helped to push me to go beyond what kits had to offer before photo etch and resin were commonplace. I took a break of about 8 years and now I'm back at it making up for lost time. When I'm not...
Comments

Do you sometimes get the impression that Dragon has become so overconfident in their 3D modelling and prototyping that they actually don't bother sitting a guy down at a table with a tube of glue to test assemble one of these before they run the production and ship? I am seriously beginning to think so.
SEP 13, 2013 - 06:27 PM

Does a bear wear funny hats at birthday parties?
But in all seriousness, I am amazed, and not in a pleasant way, at the number of parts that have fit issues and it's not just with this kit either. The worst seem to be the simplest too. For instance, a simple drop in part will have a hole that needs filler. You would think that the CAD driver would check measurements against each other, but maybe that's just me. In contrast, I recently fiddled with a Griffon early smoke candle rack and the fit was impossibly bang on for pieces that small, taking into consideration that etch has a bit of give and take with the process used. While the issues can be overcome, they are issues that should not be present for a major player like Dragon. I can forgive cottage industry manufacturers with engineering and fit, but not so easily with a major manufacturer. Even the ancient Tamiya Leopard 1A4 I had started a while back fit well.
Kimmo
SEP 13, 2013 - 11:17 PM

nice review, I read for some place the only wrong in this kit is because is dont final production for some part in the ass of this tank. But is really nice kit (except for the tracks, I prefer the Tamiya tracks or old Dragon in plastic).
SEP 14, 2013 - 06:46 AM
Thanks. As I said in the review, I'm not a Stug expert so I can't say too much about what is and isn't correct. Fortunately, there are a lot of unused parts and I think one could practically make any variant of the G/40.
Kimmo
SEP 15, 2013 - 02:12 AM

Very Nice review. I also bought this kit. I've been looking through your masterpiece and how you made it. But I think there might be a bit of an issue...
JAN 06, 2015 - 01:09 PM
This was my first Dragon kit in 1/35. I think I'll stick with Tamiya 1/35...
JAN 08, 2015 - 08:58 AM
This was actually my first modern Dragon as well, there is definitely an adjustment to be made going from Tamiya to Dragon, or any of the other new manufacturers these days. Lots of detail, lots of potential to get frustrated. Patience is the key.
Kimmo
JAN 08, 2015 - 01:57 PM
Uh, no, thanks.
Tamiya kits are for the most part too simplified.
Kimmo, that's a very extensive review and a credit to the site. I like your yellow pre-shading under the Dunkelgelb.
JAN 09, 2015 - 02:40 AM
Thanks Bill. When I was writing it up, I thought it was far too lengthy but I wasn't really sure where to start trimming text so just left it as is. I was rather pleased with the end result of the dunkelgelb, and going over the pics again, I can't help but notice those tracks really don't do the kit justice.
Kimmo
JAN 09, 2015 - 06:44 PM
Copyright ©2021 by Kimmo Happonen. Images and/or videos also by copyright holder unless otherwise noted. The views and opinions expressed herein are solely the views and opinions of the authors and/or contributors to this Web site and do not necessarily represent the views and/or opinions of Armorama, KitMaker Network, or Silver Star Enterrpises. All rights reserved. Originally published on: 2013-09-10 22:05:54. Unique Reads: 35745

WEB HOSTING BY


Copyright ©2021 Armorama and Kitmaker Network, a subsidiary of Silver Star Enterprises
All Rights Reserved. Please read our Conditions of Use and Privacy Policy.
All Rights Reserved. Please read our Conditions of Use and Privacy Policy.