1⁄35Stug III Ausf A Build
11
Comments
Stage 4
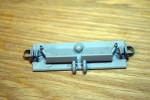
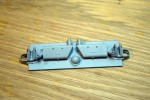
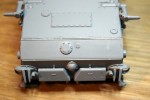
This area of the build concentrates on the rear of the hull. The build is surprisingly straight forward, but due to Dragon Models mixing and matching the sprues from previous models finding parts is a bit of a pain, another downside is that some parts need surgery for this build. With that out of the way the parts do fit together well and are correctly identified. The hitching points here are an area I really like as the securing pins are separate parts that will allow the modeller to add some detail of their own choosing if desired.
Stage 5
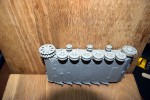
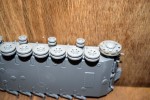
This covers the addition of the wheels to the model; I have provided a picture of them in place at this time, but I will not secure them until much later in the build. Unlike many other models from Dragon it is not possible to adjust the idler wheel and so I checked the Dragon Styrene tracks with the wheels fitted; it is not good news as I found them very tight to the point I needed to stretch them a bit and of course there is no room for track sag.
Stage 6
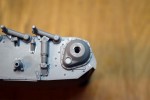
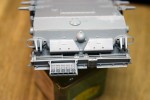
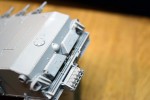
This covers adding the rear of the hull to the rest of the model. The fit of the parts are all very good, but I did find the instructions a little lacking in this area and a lot of checks needed to be made before securing a number of the parts. The photo etched chains for the fuel filler caps are very 2 dimensional and so lacking, but are better than nothing. I am giving thought to replacing these chains with some very fine chain I have.
Comments
Darren, nice to see you've been able to fit some "proper modelling" in among the unbelievable amount of work you put in on this site, and I hope you manage to get your plans for the diorama around this through to completion.
I know the feeling about having to go buy additional tracks for a review sample kit.
By the way, last sentence on page 11 - "I should also add..."
OCT 11, 2017 - 10:00 PM
Perfect timing! I was getting ready to start this one soon. Appreciate the tips & insights.
OCT 12, 2017 - 11:15 PM
Darren,
I really appreciate all the helpful tips. Very inspiring!
vr
Tim
OCT 13, 2017 - 04:53 PM
Well done build guide. I really appreciate showing those workable track links but for the many modelers who don't/can't manage aftermarket items, I would also like to see what the kit tracks look like on the model. Maybe just one side as an example, then pull them off?
OCT 14, 2017 - 10:41 PM
Darren, thank you for this excellent review. It's a StuG III building manual, if you ask me. Saved the link for further references - I have the CyberHobby edition which I intend to build one day.
Cheers!
Gabriel
OCT 25, 2017 - 06:44 PM
Thank you for a very inspiring approach, however Dragon made a big mistake, there's no radiorack on the backwall of the fighting compartment, leading to the motorroom, I don't know where they got this information from, I have the German workshop manual on the Stug 111 A-D, and on none of them there's any evidence o this radiorack.
APR 17, 2018 - 12:41 AM
Copyright ©2021 by Darren Baker. Images and/or videos also by copyright holder unless otherwise noted. The views and opinions expressed herein are solely the views and opinions of the authors and/or contributors to this Web site and do not necessarily represent the views and/or opinions of Armorama, KitMaker Network, or Silver Star Enterrpises. All rights reserved. Originally published on: 2017-10-12 05:20:00. Unique Reads: 20767


