1⁄35Stug III Ausf A Build
11
Comments
Workable PZ III/IV Tracks from MiniArt
Introduction
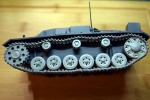
MiniArt has produced a small number of workable track sets, but I rarely see them utilised. I recently started a build review/feature of a Dragon Models Stug Ausf A, I found the Dragon Styrene tracks in the box had to be stretched to fit the wheels of the model and so did not look right to my eye. A quick search of the internet brought this track set to my attention as a cost effective solution to my issue. Please read on to see how I got on.Review
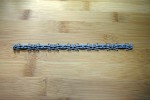
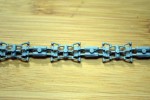
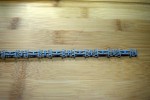
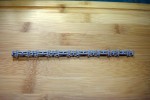
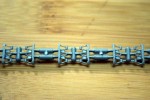
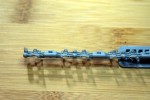
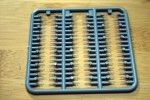
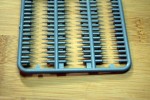
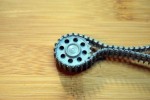
The product arrived in an end opening card box; not my favourite due to how easily it can be crushed in the postage system that said it did arrive in good order. On the front of the carton is an image of the tracks and how they are assembled; also present is an image of a panzer III, Stug and Panzer IV. On the rear of the box is a list of the suitable vehicles for these tracks are for and are as follows: Panzer III Ausf A, B, C and D 96 – 98 links per side Stug III Ausf A, E and F 94 links per side Panzer IV Ausf A, B, C, D and E 101 links per side The rear of the carton is also where the instructions for assembly of the track is located. Inside you will find 20 sprues that contain the track links and that give you 240 track links. There are 5 sprues that contain the pins for securing the tracks together and these are sided and provide 255 inner and outer pins. Finally there is a jig for assembling the tracks 8 links at a time. An examination of the contents reveals no major issues such as ejector pin marks, but there is some flash present on a few of the track links nothing excessive though. I also like that there are plenty of spare links and pins that can be used if you lose some or more likely as added armour on your build. The links have 5 gates which is something I am not keen on as it requires a lot of clean up, that said this high number has insured good moulding quality and so is a chore worth undertaking. The pins have been moulded perfectly spaced to insert into the pre moulded holes in the track links and so making assembly easier than it might have otherwise been. Other than remembering to add the pins on the correct side you should not need to worry about any other aspect. The fit of these tracks to the Dragon Models drive wheel indicates to me that MiniArt must have got the scale and measurements spot on or both companies would need to be out by exactly the same degree. The result can be seen in the last photograph that I hopes relays the look of the product in place.Conclusion
These tracks from MiniArt are very well detailed and go together easily, the only downside I can see is the amount of clean up required. In all other respects this is a well priced product costing me £12.99 and free postage. The detail on the track links matches that which I have found in my reference, but I cannot guarantee the suitability of the tracks for all the versions mentioned on the packaging. I very highly recommend this product to you and I have only removed 5% from the percentage rating is due to the clean up work.Comments
Darren, nice to see you've been able to fit some "proper modelling" in among the unbelievable amount of work you put in on this site, and I hope you manage to get your plans for the diorama around this through to completion.
I know the feeling about having to go buy additional tracks for a review sample kit.
By the way, last sentence on page 11 - "I should also add..."
OCT 11, 2017 - 10:00 PM
Perfect timing! I was getting ready to start this one soon. Appreciate the tips & insights.
OCT 12, 2017 - 11:15 PM
Darren,
I really appreciate all the helpful tips. Very inspiring!
vr
Tim
OCT 13, 2017 - 04:53 PM
Well done build guide. I really appreciate showing those workable track links but for the many modelers who don't/can't manage aftermarket items, I would also like to see what the kit tracks look like on the model. Maybe just one side as an example, then pull them off?
OCT 14, 2017 - 10:41 PM
Darren, thank you for this excellent review. It's a StuG III building manual, if you ask me. Saved the link for further references - I have the CyberHobby edition which I intend to build one day.
Cheers!
Gabriel
OCT 25, 2017 - 06:44 PM
Thank you for a very inspiring approach, however Dragon made a big mistake, there's no radiorack on the backwall of the fighting compartment, leading to the motorroom, I don't know where they got this information from, I have the German workshop manual on the Stug 111 A-D, and on none of them there's any evidence o this radiorack.
APR 17, 2018 - 12:41 AM
Copyright ©2021 by Darren Baker. Images and/or videos also by copyright holder unless otherwise noted. The views and opinions expressed herein are solely the views and opinions of the authors and/or contributors to this Web site and do not necessarily represent the views and/or opinions of Armorama, KitMaker Network, or Silver Star Enterrpises. All rights reserved. Originally published on: 2017-10-12 05:20:00. Unique Reads: 20767


