


Dioramas
Do you love dioramas & vignettes? We sure do.
Do you love dioramas & vignettes? We sure do.
Hosted by Darren Baker, Mario Matijasic
M1A1 Abrams "BOOM STICK"
CombatKrieg

Joined: January 19, 2008
KitMaker: 517 posts
Armorama: 382 posts

Posted: Monday, March 10, 2008 - 04:47 PM UTC
Very very impressive!

Pavlovsdog

Joined: June 05, 2006
KitMaker: 438 posts
Armorama: 352 posts

Posted: Monday, March 10, 2008 - 11:31 PM UTC
Matt,
I have been following this one for a while now Firstly may I congratulate you on the successfull completion of this beauiful project. I have learn't a lot form your posts so thank you for taking the time to do them , So what are you going to build next ?
Best wishes,
Jerry
I have been following this one for a while now Firstly may I congratulate you on the successfull completion of this beauiful project. I have learn't a lot form your posts so thank you for taking the time to do them , So what are you going to build next ?
Best wishes,
Jerry
CombatKrieg
Joined: January 19, 2008
KitMaker: 517 posts
Armorama: 382 posts
Posted: Tuesday, March 11, 2008 - 04:54 AM UTC
Btw Matt, what was the colour you painted onto yr Abrams?

f1matt

Joined: August 13, 2006
KitMaker: 1,021 posts
Armorama: 805 posts

Posted: Tuesday, March 11, 2008 - 04:48 PM UTC
Hi Russel. The original base coat has become a bit of a mystery to me. It's been a while. A long, long while actually. But when I had to re-spray the roof and wheels this is what I used.

Polly S hopper car beige. This is the main colour. Tamiya XF-59 desert yellow. Tamiya XF-60 dark yellow. And a little Tamiya XF-2 flat white mixed in for highlights. Mix it according to what looks right to you. But don't stop there. I sprayed many thin coats of paint to add variety. Mix in other colours with your base coat.

Add light colours for highlights like flat white or even straight yellow. For shadows add some khaki drab or a little NATO black. For some subtle weathering add deck tan. Play with your paint mixes. And don't spray one even layer over the whole thing each time. You want variety. Spray highlights in appropriate areas but in a splotchy pattern. Same with shadows. Or any colour. And if it looks like there is too much contrast add a thin layer of the base coat to get things back under control. Subtle done right can be very powerful. I've read that Model Master sand FS33531 is a great match for those that don't like acrylics. And for those that do another good match is Gunze Sangyo H313. These are both very similar to hopper car beige. I used the Polly S paint because that's what I could find. Of course as I just stated I didn't stop there. And always study your references. Have them with you as you paint.
When I started this blog I didn't expect I would get so much positive feedback. I want to say a big thank you to everyone for keeping me motivated during my longest, most challenging, and most enjoyable build yet. It's been a lot of fun. And I'm glad that's it's been helpful to many as well.
So after this what's next? Well I've been collecting bits for both an F-4E and P-47. I still haven't decided which is next. And yes there will be another diorama starting soon. How about some teasers?
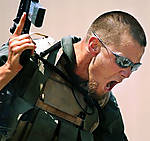
This guy will definitely be in the next one. Minus the kanji text of course.

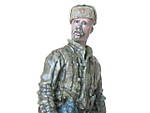
And maybe this one too.

A hint of what's to come?

And one question for any who might know. Is ice cream readily available in Iraq? Would you see people eating it at shops maybe?
Very well.

Stay tuned for the final post with lot's of pictures. Guess I'll have to whip something up to send in as a feature.
-Matt
Polly S hopper car beige. This is the main colour. Tamiya XF-59 desert yellow. Tamiya XF-60 dark yellow. And a little Tamiya XF-2 flat white mixed in for highlights. Mix it according to what looks right to you. But don't stop there. I sprayed many thin coats of paint to add variety. Mix in other colours with your base coat.
Add light colours for highlights like flat white or even straight yellow. For shadows add some khaki drab or a little NATO black. For some subtle weathering add deck tan. Play with your paint mixes. And don't spray one even layer over the whole thing each time. You want variety. Spray highlights in appropriate areas but in a splotchy pattern. Same with shadows. Or any colour. And if it looks like there is too much contrast add a thin layer of the base coat to get things back under control. Subtle done right can be very powerful.
I've read that Model Master sand FS33531 is a great match for those that don't like acrylics. And for those that do another good match is Gunze Sangyo H313. These are both very similar to hopper car beige. I used the Polly S paint because that's what I could find. Of course as I just stated I didn't stop there. And always study your references. Have them with you as you paint. When I started this blog I didn't expect I would get so much positive feedback. I want to say a big thank you to everyone for keeping me motivated during my longest, most challenging, and most enjoyable build yet. It's been a lot of fun. And I'm glad that's it's been helpful to many as well.
So after this what's next? Well I've been collecting bits for both an F-4E and P-47. I still haven't decided which is next. And yes there will be another diorama starting soon. How about some teasers?
This guy will definitely be in the next one. Minus the kanji text of course.
And maybe this one too.
A hint of what's to come?
And one question for any who might know. Is ice cream readily available in Iraq? Would you see people eating it at shops maybe?
Quoted Text
I don't know, Matt. It still looks incomplete. Shouldn't you add some flies buzzing around the tankers
seriously - amazing job!
Very well.
Stay tuned for the final post with lot's of pictures. Guess I'll have to whip something up to send in as a feature.
-Matt
CombatKrieg
Joined: January 19, 2008
KitMaker: 517 posts
Armorama: 382 posts
Posted: Wednesday, March 12, 2008 - 02:36 AM UTC
Quoted Text
Hi Russell. The original base coat has become a bit of a mystery to me. It's been a while. A long, long while actually. But when I had to re-spray the roof and wheels this is what I used.
Polly S hopper car beige. This is the main colour. Tamiya XF-59 desert yellow. Tamiya XF-60 dark yellow. And a little Tamiya XF-2 flat white mixed in for highlights. Mix it according to what looks right to you. But don't stop there. I sprayed many thin coats of paint to add variety. Mix in other colours with your base coat.
Add light colours for highlights like flat white or even straight yellow. For shadows add some khaki drab or a little NATO black. For some subtle weathering add deck tan. Play with your paint mixes. And don't spray one even layer over the whole thing each time. You want variety. Spray highlights in appropriate areas but in a splotchy pattern. Same with shadows. Or any colour. And if it looks like there is too much contrast add a thin layer of the base coat to get things back under control. Subtle done right can be very powerful.
Hmm... You seem to have switched your "Khaki Drab"''s paint cover...
Many thanks yea? I've tried MM Sand FS33531 and it became a bit glossy.


Airchalenged

Joined: October 21, 2006
KitMaker: 188 posts
Armorama: 121 posts

Posted: Wednesday, March 12, 2008 - 03:54 AM UTC
NOOOOOOOOO!!!!!!
It can't be over. Great Tank/Dio btw.
It can't be over. Great Tank/Dio btw.

ricknroll
Joined: September 02, 2005
KitMaker: 39 posts
Armorama: 31 posts
Posted: Wednesday, March 12, 2008 - 09:18 AM UTC
I'm certainly clapping my hands and playing my drums!!!!!! I'm so glad that I found your build...simply wonderful work.
The new piece looks to be very fun indeed, I'll be looking forward to the start.
talk to you soon,
RickLawler
The new piece looks to be very fun indeed, I'll be looking forward to the start.
talk to you soon,
RickLawler

DeskJockey
Joined: July 17, 2006
KitMaker: 1,558 posts
Armorama: 1,159 posts
Posted: Thursday, March 13, 2008 - 01:09 AM UTC
Bravo, Matt!!! This Abrams dio is one of the best I've seen. The attention to detail you've displayed on this project is phenomenal. You should definitely submit it as a feature. You may also want to consider writing an article for one of the print magazines--I'm sure they would eat it up. 

afv_rob

Joined: October 09, 2005
KitMaker: 2,556 posts
Armorama: 2,199 posts

Posted: Thursday, March 13, 2008 - 04:38 AM UTC
Wow!!!!!! Matt this is looking simply stunning, one of the best modern dio's ive seen in a long time. All the little details look stunning.
I must say however im a bit peeved with you next dio plans, ive been planning a dio of an M1 or a Merkava crushing a car for some time, I thought great-an original idea, surely no one will do anything like that. Haha seems im wrong, well, i'll probably never do mine anyway, your's will end up too awsome!
Those cars-are they tamiya? Where did you get them from?
Epi
Joined: December 22, 2001
KitMaker: 3,586 posts
Armorama: 2,556 posts
Posted: Thursday, March 13, 2008 - 05:20 AM UTC
Those are ARII kits Rob. I just did a search on Ebay for them and they are pretty cheap to get from Hong Kong, $7.99.

Erik67

Joined: July 31, 2005
KitMaker: 1,871 posts
Armorama: 1,423 posts
Posted: Thursday, March 13, 2008 - 06:59 AM UTC
That is simply the most impressive Abrams model I have ever seen!

Erik
Erik

AAVmarine1833
Joined: July 29, 2007
KitMaker: 63 posts
Armorama: 59 posts

Posted: Thursday, March 13, 2008 - 11:55 AM UTC
Nice diorama.m/  . Can wait to see the next one. Car smashing is fun take from a tracker. i ran over my share of cars.
  hell yeah!
. Can wait to see the next one. Car smashing is fun take from a tracker. i ran over my share of cars. hell yeah!f1matt
Joined: August 13, 2006
KitMaker: 1,021 posts
Armorama: 805 posts
Posted: Thursday, March 13, 2008 - 03:01 PM UTC
Hi Russel. I can't say that I've ever had that problem with MM paints. Not that I use them much. I like to use acrylics whenever I can. Since it'll need to be glossy for decals and washes it shouldn't be too much of a problem. As long as the paint goes on smooth and thin.
Hi Rick. I can't seem to post over at Planet Armor so I'll tell you here. The scratch fenders on your T-34 look great. After seeing how well yours came out I might try doing the same on my next M1. I'm always amazed by what you come up with. Looking forward to your next update.
Yes Lucas I will be sending in a feature. Hopefully some time next week. Thanks for your continued support.
Sorry for stealing your idea Rob. If anyone asks I'll just say you built it. And Pete answered your question perfectly. They are very nice little kits. I'm going to enjoy crushing at least one of them.
Thanks Erik. I'm going to try real hard and make the next one even better.
And Thanks Joseph. I wish I could have been there. Sounds like a lot of fun.
As you can see Matthew, it's not quite over yet. I thought the base needed one last detail. It just needed......something. There is just so much surface area. It's ok just flat black. But it's kinda dull. Like the wheels before the highlights were added. And like the wheels it's going to get some sprucing up. But how?
For a while I was hoping to add either a 3rd Infantry Division patch or a 4-64th Armoured patch to the front of the base. Of course if I could find a way to incorporate both designs that would be even better. I decided that instead of using patches I would make something myself. As you saw in a recent post, I had already made the "Tuskers" symbol into a decal. But I wasn't about to just slap it on the base. Using some sheet and strip styrene I put together what looked like a picture frame. The decal would go in the center and the border would be painted to match the symbol of the 3rd ID. The 3rd ID symbol had to be stretched to match the proportions of the Tuskers symbol. I printed out a picture to help guide me while placing the stripes. Here is my little scratch built piece already painted white. Masked up and ready for some blue.

A closer look. The sides were sanded to give them a rounded edge. Careful measuring is key to keeping everything square. Easier said then done.

Tamiya flat blue with a few drops of flat white.

Forgot to fix the white balance.

The whole piece was glossed over and the decal applied. Of course I later decided to touch up the stripes and had to re mask it.

More blue.

And start removing the tape. The stripes look better (still not perfect ) Don't damage the decal!

And here she is. Some of the clear coat came off but the decal was ok. So does it work?

I sprayed on more clear gloss. This looked really good. But I didn't want the symbol to overshadow the tank. So I sprayed on some clear flat to tone it down. It shouldn't be the first thing you notice. It was stuck on the base with some masking tape. This lets me adjust it before adding some CA (super glue). She ain't going anywhere now.

I think it looks better now. Not sure if it's perfectly lined up though. Not much I can do about that now. Accept it and move on!

And in case anyone is wondering.......it took three attempts to make the symbol.
Now I'm off to watch some F1 from Melbourne.
-Matt
Hi Rick. I can't seem to post over at Planet Armor so I'll tell you here. The scratch fenders on your T-34 look great. After seeing how well yours came out I might try doing the same on my next M1. I'm always amazed by what you come up with. Looking forward to your next update.
Yes Lucas I will be sending in a feature. Hopefully some time next week. Thanks for your continued support.
Sorry for stealing your idea Rob. If anyone asks I'll just say you built it.
And Pete answered your question perfectly. They are very nice little kits. I'm going to enjoy crushing at least one of them.Thanks Erik. I'm going to try real hard and make the next one even better.
And Thanks Joseph. I wish I could have been there. Sounds like a lot of fun.
As you can see Matthew, it's not quite over yet. I thought the base needed one last detail. It just needed......something. There is just so much surface area. It's ok just flat black. But it's kinda dull. Like the wheels before the highlights were added. And like the wheels it's going to get some sprucing up. But how?
For a while I was hoping to add either a 3rd Infantry Division patch or a 4-64th Armoured patch to the front of the base. Of course if I could find a way to incorporate both designs that would be even better. I decided that instead of using patches I would make something myself. As you saw in a recent post, I had already made the "Tuskers" symbol into a decal. But I wasn't about to just slap it on the base. Using some sheet and strip styrene I put together what looked like a picture frame. The decal would go in the center and the border would be painted to match the symbol of the 3rd ID. The 3rd ID symbol had to be stretched to match the proportions of the Tuskers symbol. I printed out a picture to help guide me while placing the stripes. Here is my little scratch built piece already painted white. Masked up and ready for some blue.
A closer look. The sides were sanded to give them a rounded edge. Careful measuring is key to keeping everything square. Easier said then done.
Tamiya flat blue with a few drops of flat white.
Forgot to fix the white balance.
The whole piece was glossed over and the decal applied. Of course I later decided to touch up the stripes and had to re mask it.
More blue.
And start removing the tape. The stripes look better (still not perfect
) Don't damage the decal!And here she is. Some of the clear coat came off but the decal was ok. So does it work?
I sprayed on more clear gloss. This looked really good. But I didn't want the symbol to overshadow the tank. So I sprayed on some clear flat to tone it down. It shouldn't be the first thing you notice. It was stuck on the base with some masking tape. This lets me adjust it before adding some CA (super glue). She ain't going anywhere now.
I think it looks better now. Not sure if it's perfectly lined up though. Not much I can do about that now. Accept it and move on!
And in case anyone is wondering.......it took three attempts to make the symbol.
Now I'm off to watch some F1 from Melbourne.
-Matt
JeepLC
Joined: June 20, 2007
KitMaker: 510 posts
Armorama: 469 posts

Posted: Thursday, March 13, 2008 - 03:24 PM UTC
Matt! this is really amazing. I am going to miss following your progress. I can't wait for your next project. Thanks for this build log. It has been a treat to follow!
-Mike
-Mike
Epi
Joined: December 22, 2001
KitMaker: 3,586 posts
Armorama: 2,556 posts
Posted: Thursday, March 13, 2008 - 04:48 PM UTC
Im so proud of you son, your going to make me cry, it's just so darn beutiful! 
The 3D patch just adds that perfect touch to a perfect dio.
The 3D patch just adds that perfect touch to a perfect dio.
f1matt
Joined: August 13, 2006
KitMaker: 1,021 posts
Armorama: 805 posts
Posted: Thursday, March 13, 2008 - 04:52 PM UTC
Thanks a bunch Mike. I've really enjoyed sharing this build with so many of you.
Pete your making me smile. Thanks.
My next blog will be over at Aeroscale with a P-47 Razorback. This will be my first natural metal finish so I'm excited about that one. Hopefully once she is complete I will be ready to start "yet to be named M1 Abrams tank diorama #2". I think I'm leaning to a more combat / action oriented diorama this time. Something with a very different feel to it. And I think it will need a better title too.
-Matt

Outerarm

Joined: September 20, 2007
KitMaker: 240 posts
Armorama: 233 posts

Posted: Friday, March 14, 2008 - 09:10 PM UTC
Fantastic build, Matt -- I've really enjoyed the ride!
This has given me a lot of inspiration for my M1A2 SEP build and I've picked up some great tips along the way. Good look on your next build and I'm already looking forward to your next Abrams!
Cheers,
Ian
This has given me a lot of inspiration for my M1A2 SEP build and I've picked up some great tips along the way. Good look on your next build and I'm already looking forward to your next Abrams!
Cheers,
Ian

18Bravo
Joined: January 20, 2005
KitMaker: 7,219 posts
Armorama: 6,097 posts
Posted: Friday, March 14, 2008 - 10:09 PM UTC
Excellent job man. Easily the most realistic finish I've ever seen. Not any of the "artsy" gimmick finishes, just a good old down and dirty tank.
Too easy, Matt.
Too easy...


Quoted Text
And one question for any who might know. Is ice cream readily available in Iraq? Would you see people eating it at shops maybe?
Too easy, Matt.
Too easy...


Frenchy

Joined: December 02, 2002
KitMaker: 12,719 posts
Armorama: 12,507 posts
Posted: Saturday, March 15, 2008 - 01:24 AM UTC
Quoted Text
And one question for any who might know. Is ice cream readily available in Iraq? Would you see people eating it at shops maybe?
Some pics on ViewImages
HTH
Frenchy
CombatKrieg
Joined: January 19, 2008
KitMaker: 517 posts
Armorama: 382 posts
Posted: Saturday, March 15, 2008 - 02:50 AM UTC
Quoted Text
Hi Russel. I can't say that I've ever had that problem with MM paints. Not that I use them much. I like to use acrylics whenever I can. Since it'll need to be glossy for decals and washes it shouldn't be too much of a problem. As long as the paint goes on smooth and thin.
-Matt
Haha! I prefer using acrylics too... What are the differences between enamels and acrylics?
SIRNEIL
Joined: July 30, 2007
KitMaker: 658 posts
Armorama: 599 posts

Posted: Saturday, March 15, 2008 - 11:35 AM UTC
hi matt
in the short time ive been veiwing armorama your abrams has got to be the most comprehensive build log i have seen yet.it truly is stunning as i have said before an inspiration.i don't know what you do for a day job but you must get a lot of holiday so you can concentrate more on the hobby that you take so much pride in.
all the best to you matt & looking forward to your next build.
neil.

jvazquez
Joined: September 26, 2006
KitMaker: 857 posts
Armorama: 811 posts
Posted: Saturday, March 15, 2008 - 02:53 PM UTC
Well you know what is so unique and inspirational about this build is not just the great detail and little things that are put into this project, but the amount of time and patience that he took to get here.
I may be speaking for others or maybe just for myself, but I know for me by now I'm already bored by what I'm doing, already to go on to the next project. To stay on the same one and to keep running with it as he has takes so much.
Truely an awe inspiring build and one that I looked forward to seeing everyday!
f1matt
Joined: August 13, 2006
KitMaker: 1,021 posts
Armorama: 805 posts
Posted: Saturday, March 15, 2008 - 06:46 PM UTC
Oh hot dog. I was just hoping someone would say yes to my question. But these pictures are absolutely fantastic. And the pictures of kids eating ice cream. Too perfect. I should keep my trap shut so some of this next build is a surprise. You guys made my day. Thanks Frenchy, 18 Bravo.
Thanks Ian. I'm glad you enjoyed it as much as I have. This has been by far my most enjoyable build to date. Mostly because I could share it all with so many of you.
Well Russel the reason why I prefer acrylics is because they can be cleaned up with water. Nice clean water. Heck if you run out of rubbing alcohol you can even use it to thin the paint (works better with some brands). And mostly because it ain't nearly as smelly as enamels. Although I still spray in a ventilated spray booth while wearing a mask. Safety first. And as I said even though I prefer to use acrylics I do use all types of paints. I simply prefer acrylics.
Thank you very much Neil, James. Part of the reason why this relatively simple diorama has taken so long is because I only worked on it a little bit each day for quite a while. There were only a few days where I would work on it for hours on end. I figured that there was no good reason to rush. As long I made some positive progress each day it would be finished at some point. And I can definitely relate to losing interest in a model. Especially when you are always thinking about "the next one" and when Tamigawa have just released their newest super kit that you have been waiting soooo long for. It has happened to me many times. I didn't have that problem with this one however because of this blog. I have received (and continue to receive) so much positive motivation from so many of you that I just had to finish it. Eventually.
I'm just so glad that I finally found this wonderful website. It has not only improved my modeling. But it has made it even more enjoyable.
-Matt
I was just hoping someone would say yes to my question. But these pictures are absolutely fantastic. And the pictures of kids eating ice cream. Too perfect. I should keep my trap shut so some of this next build is a surprise. You guys made my day. Thanks Frenchy, 18 Bravo. Thanks Ian. I'm glad you enjoyed it as much as I have. This has been by far my most enjoyable build to date. Mostly because I could share it all with so many of you.
Well Russel the reason why I prefer acrylics is because they can be cleaned up with water. Nice clean water. Heck if you run out of rubbing alcohol you can even use it to thin the paint (works better with some brands). And mostly because it ain't nearly as smelly as enamels. Although I still spray in a ventilated spray booth while wearing a mask. Safety first. And as I said even though I prefer to use acrylics I do use all types of paints. I simply prefer acrylics.
Thank you very much Neil, James. Part of the reason why this relatively simple diorama has taken so long is because I only worked on it a little bit each day for quite a while. There were only a few days where I would work on it for hours on end. I figured that there was no good reason to rush. As long I made some positive progress each day it would be finished at some point. And I can definitely relate to losing interest in a model. Especially when you are always thinking about "the next one" and when Tamigawa have just released their newest super kit that you have been waiting soooo long for. It has happened to me many times. I didn't have that problem with this one however because of this blog. I have received (and continue to receive) so much positive motivation from so many of you that I just had to finish it. Eventually.
I'm just so glad that I finally found this wonderful website. It has not only improved my modeling. But it has made it even more enjoyable.
-Matt
Golikell

Joined: October 25, 2002
KitMaker: 1,757 posts
Armorama: 914 posts

Posted: Monday, March 17, 2008 - 02:29 AM UTC
Matthew,
I've been referred to this great thread by the Dutch branch of Kitmaker and is took me almost a whole day to read it from A-Z. And boy, that was no punishment. I'm pretty awe-struck seeing the product of you creativity...
All the detail, all th research. Some people simply slap on some chippings because they've been told to, even if there should not be any chipping at all... But you seem to copy any scratch and chip from pictures of real live vehicles.
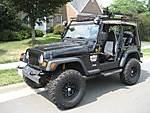
I'm glad you did not include the jeep on the base: it would have been too crowed.
On one of the pictures of the commanders(?) helmet (the one with the text) it seems as if there is a hair under the decal, or did I see that wrong?
And I would try to get rid of the glue stains on on the base, where you glued on the shield...
I love this dio and could go on and on with praisal but I think I leave it with this...
Regards,
I've been referred to this great thread by the Dutch branch of Kitmaker and is took me almost a whole day to read it from A-Z. And boy, that was no punishment. I'm pretty awe-struck seeing the product of you creativity...
All the detail, all th research. Some people simply slap on some chippings because they've been told to, even if there should not be any chipping at all... But you seem to copy any scratch and chip from pictures of real live vehicles.
I'm glad you did not include the jeep on the base: it would have been too crowed.
On one of the pictures of the commanders(?) helmet (the one with the text) it seems as if there is a hair under the decal, or did I see that wrong?
And I would try to get rid of the glue stains on on the base, where you glued on the shield...
I love this dio and could go on and on with praisal but I think I leave it with this...
Regards,

f1matt
Joined: August 13, 2006
KitMaker: 1,021 posts
Armorama: 805 posts
Posted: Monday, March 17, 2008 - 04:16 AM UTC
Hello Erwin. Lately I've been trying to look at my references anytime I work on a model. I try to closely study the image as I'm working. Especially during painting and weathering. For instance . Where do I see paint chips in this particular picture of a certain part? What colour are the chips? Are they long scratches or flakes of paint coming off? If you don't look at the real thing you are trying to copy you are simply guessing. Of course the amount of references you have entirely depends on what you are building and what you have access to.
I'm working on the final touch ups today which include the area of the base you mentioned. I didn't notice that particular hair but since I usually forget to dust before taking pictures It's quite possible one is there. I need to make sure the diorama is looking it's best as I'm taking it out in public for the first time tonight. IPMS Winnipeg has a meeting tonight and I have to bring it with me to show the guys. Prove to them I have actually been modeling all this time.
I think you made your point. I'm very glad you like it. Thank you.
[Edit] Ok I think I now see the "hair" you were referring to. I'm pretty sure it is actually just some paint that is a slightly brighter colour then what it is next to. It took a while to find but I can see how it would look like a fine hair.
-Matt
I'm working on the final touch ups today which include the area of the base you mentioned. I didn't notice that particular hair but since I usually forget to dust before taking pictures It's quite possible one is there. I need to make sure the diorama is looking it's best as I'm taking it out in public for the first time tonight. IPMS Winnipeg has a meeting tonight and I have to bring it with me to show the guys. Prove to them I have actually been modeling all this time.
Quoted Text
I love this dio and could go on and on with praisal but I think I leave it with this...
I think you made your point. I'm very glad you like it. Thank you.
[Edit] Ok I think I now see the "hair" you were referring to. I'm pretty sure it is actually just some paint that is a slightly brighter colour then what it is next to. It took a while to find but I can see how it would look like a fine hair.
-Matt
 |

WEB HOSTING BY


Copyright ©2021 Armorama and Kitmaker Network, a subsidiary of Silver Star Enterprises
All Rights Reserved. Please read our Conditions of Use and Privacy Policy.
All Rights Reserved. Please read our Conditions of Use and Privacy Policy.