

Matt this build is really inspiring. After following this build as well as seeing all the M1's I posted photos of, I went down to the Hobby Lobby, used a 40% coupon and picked up a Tamiya M1A2. I've never built an Abrams, so this will be a new experience for me. Thanks for the inspiration.
Patrick
Dioramas
Do you love dioramas & vignettes? We sure do.
Do you love dioramas & vignettes? We sure do.
Hosted by Darren Baker, Mario Matijasic
M1A1 Abrams "BOOM STICK"

PLMP110

Joined: September 26, 2002
KitMaker: 1,318 posts
Armorama: 837 posts
Posted: Wednesday, November 28, 2007 - 02:19 PM UTC


mazyen

Joined: June 21, 2007
KitMaker: 112 posts
Armorama: 79 posts
Posted: Wednesday, November 28, 2007 - 09:05 PM UTC
Hi Matt
I agree with Roel. Your vission blocks looks too colourful & toy like. Maybe you should stick them behind the clear vision blocks to give them some depth. Anyway, I have been following your built. Fantastic work
I agree with Roel. Your vission blocks looks too colourful & toy like. Maybe you should stick them behind the clear vision blocks to give them some depth. Anyway, I have been following your built. Fantastic work

f1matt

Joined: August 13, 2006
KitMaker: 1,021 posts
Armorama: 805 posts

Posted: Thursday, November 29, 2007 - 09:38 PM UTC
Well my vision blocks sure got some attention. These are a tricky item to model realistically. How they appear depends on how you look at them. After looking at my references some more I agree that the more subdued, darker colours like purple and red are more common. But other bright colours like gold, orange, blue and even green can be found. You just have to look closer. I found a picture with a pinkish purple and green coloured vision blocks on an M1A2.

This is a more common shade. Albeit with uncommon battle damage.

This driver's hatch not only has orange, but the center block is almost pink. Note the wipers have cleaned away some of the dust leaving clean arcs on the center block.

I think this is an area where the modeler has a lot of choice in how to best attempt to simulate these odd blocks of glass. Sometimes they look fairly clear almost like tinted glass. Other times they look like a colourful mirror. I simply went with what I liked. They aren't perfect, but they'll do. And thanks for all the comments. I feel they all help me build a better model.
And good luck with your build Patrick. If you have any questions feel free to ask.
-Matt

This is a more common shade. Albeit with uncommon battle damage.
This driver's hatch not only has orange, but the center block is almost pink. Note the wipers have cleaned away some of the dust leaving clean arcs on the center block.
I think this is an area where the modeler has a lot of choice in how to best attempt to simulate these odd blocks of glass. Sometimes they look fairly clear almost like tinted glass. Other times they look like a colourful mirror. I simply went with what I liked. They aren't perfect, but they'll do. And thanks for all the comments. I feel they all help me build a better model.
And good luck with your build Patrick. If you have any questions feel free to ask.
-Matt
ADNeate
Joined: July 29, 2007
KitMaker: 93 posts
Armorama: 92 posts

Posted: Friday, November 30, 2007 - 06:57 AM UTC
People tend to fall back on a simple thought, "when in doubt tone it down." On my C2 project (I'm building another one) I was thinking of using either mylar or film negatives for those particular types of vision blocks. The ones on more modern tanks have that werid anti-reflective laser coating stuff, so it's an extremely difficult effect to emulate. The only thing about you vision blocks that strike me as a wee bit wonky (If I can use the term) is that the transition from one colour to the next is too drastic. To soften the effect it would help to add some of the previous colour to the next one and so on and so on, the transition will seem more natural. I think you got the colours spot on almost, they just need some blending. Just my thoughts!
JeepLC
Joined: June 20, 2007
KitMaker: 510 posts
Armorama: 469 posts

Posted: Saturday, December 01, 2007 - 05:26 AM UTC
There is a company you can order the lenses from. I'll have to track it down for you.
-Mike
-Mike

xFOX_HOUNDx
Joined: May 03, 2007
KitMaker: 249 posts
Armorama: 230 posts

Posted: Saturday, December 01, 2007 - 06:12 AM UTC
Great work up! I went to my LHS yesterday and picked up the Dragon M1A1 AIM. What a beauty!
f1matt
Joined: August 13, 2006
KitMaker: 1,021 posts
Armorama: 805 posts
Posted: Thursday, December 06, 2007 - 01:44 PM UTC
Thanks Mike. I am curious to see what is out there. Not for this project but for my next Abrams. No update right now but I thought I would share this picture which caught my eye.

I believe it's a Marine tank but what caught my eye is what appears to be a WWII era German tank jack. Am I wrong? Not to mention the Hallowe'en mask that sits on top of it.

So is this really what I think it is? I guess the only logical explanation is this is a rare German Abrams from WWII. Hope somebody out there can shed a little light on this.
-Matt
I believe it's a Marine tank but what caught my eye is what appears to be a WWII era German tank jack. Am I wrong? Not to mention the Hallowe'en mask that sits on top of it.
So is this really what I think it is? I guess the only logical explanation is this is a rare German Abrams from WWII. Hope somebody out there can shed a little light on this.
-Matt

slodder
Joined: February 22, 2002
KitMaker: 11,718 posts
Armorama: 7,138 posts
Posted: Thursday, December 06, 2007 - 01:49 PM UTC
I sure does look like one to me. I have very limited modern knowledge so I wouldn't know how long the jacks served.
The mask would be cool touch to go with the dice.
The mask would be cool touch to go with the dice.

f1matt
Joined: August 13, 2006
KitMaker: 1,021 posts
Armorama: 805 posts
Posted: Thursday, December 06, 2007 - 09:12 PM UTC
With all the guys telling me they are now going out and buying this kit I feel I should get some royalties from Dragon. Ya, I wish. Dave you are gonna love this one.
Well strap in guys cause I have a 1/35 scale ton of pictures to show you all today. No big additions. Simply a lot of little details that were added. Actually I'll be impressed if I remember all the small touches I added today.
While at first you don't notice much paint chipping on M1's (or any modern tank) it is there. You just have to look close enough. There tends to be a lot around the Commander's cupola and where stowage is strapped on. Also you will find the usual scrapes and scratches all over. It also simply depends on which tank you are looking at. Some are nearly immaculate even well into the war, while others are absolutely filthy. I chose a tank somewhere in between. Not brand new, but still in running order. The paint chipping applies to some stowage too like the large ammo bins on the BER.

For the pant chips I first apply a small amount of MM Sand FS33531. This represents light scratches where only the dirt has been removed. it also acts as a highlight for deeper scratches. Next for a deeper paint chip where the base green has been exposed, some Aircraft Colors Slate Grey which is actually a dark green. Now for the deepest and older paint chips a small amount of Polly S U.S. Earth Red is added. This represents rust. Use only a tiny amount. All my paint chips were applied with a 10/0 brush. Make most of them so small that you almost don't see them at first. At least that's what I tried to do. Silver was only added to the large scrapes along th barrel and to the CIP's to match my references.


The exhaust deflector looked kinda dull and needed something. Going over my pictures I noticed many M1's have dark brown and heavily weathered deflectors. This was achieved by first painting on some burnt sienna and black oil paint. No thinner. Over this was several layers of pigments. Raw Umber and Gulf Dust were the main pigment colours used. These were set with a small amount of thinner. The CIP received some paint chips in silver as well as lots of small dirty finger print marks. These were made by applying very small dots of Payne's Grey oil paint and then lightly blending them with a soft brush. The large green crew tent got a light layer of dust and then the shadows were darkened with a wash of Payne's Grey oil paint.


To replicate the application of touch up paint (which according to my references looked like a darker and slightly grey-er version of the base coat) A mix of Gunze H313 was mixed with Tamiya Desert Yellow and Tamiya Grey. This was sprayed on at very low pressure with the airbrush only a couple of centimeters away from the surface. Be very careful as it is too easy to apply too much paint. Don't ask how I know. Again according to my references the majority of the touch up paint is found on the side skirt armour at the front of the tank.
The barrel received some wear and tear too.


Can't forget the fenders.


Another little neat detail I noticed was an M2 50.cal MG that had two small spots of rust on the barrel. I first added two small spots of a dark shade of rust. Polly S U.S. Earth Red. And over this went a brighter shade of rust.

Well I decided to change out a couple of my vision blocks in the TC's cupola and replace them with darker ones. I think it does look better.


I was very disappointed with how my paint chips turned out the first time around the cupola. I had no choice but to remove the paint. Re-spray the area. And re-do the chips and other weathering. I really like it the second time around. A 10/0 brush is a must. Keep cleaning it as you work. Unfortunately I got a little water on the map so it is now lightly distorted. I think I will leave it as is as it still looks like a map. Of course If I'm ever navigating through Baghdad with this tank as my guide I'm screwed!
A close up of my now dirty and much more interesting looking CIP.

Some subtle highlights were airbrushed on to my large tarp.

Shadows were accentuated with a wash of Payne's Grey only where I thought it would help. It wasn't applied over the whole tarp.
And finally (I think) I weathered the exhaust. This again was based on a real tank.

First the brown stains were added with dark umber oil paint. Very little is needed. Feather the brown with a soft brush. Over this comes the black. Acrylic is used for most of it but where it needs to be a softer edge, oil paint is used. Finally, pigments are used to bring it all together. Also for any one building an Abrams with razor wire. Don't add it till near the end! Otherwise you will keep damaging it. I'd remove it and re-do it but that would cause too much damage. Live and learn.
Before I go here are some overall shots.


As you can see the weathering is still fairly subtle looking (to me anyway). Most Abrams look like they are in pretty good condition so I don't want to go overboard with the weathering.
Oh and as far as adding the jack and wrestling mask (It reminds me of what Jack Black wore in "Nacho libre") I will save those two details for my next Abrams. I have always wanted a Marine M1A1 and with Echelon's latest decal set I can model the specific tank I want. "War Pig". It is the same tank you fight along side in the new game "Call of Duty 4". The game's version even has the correct barrel art. And it will be another diorama. Albeit slightly smaller. But much more dramatic.
-Matt
Well strap in guys cause I have a 1/35 scale ton of pictures to show you all today. No big additions. Simply a lot of little details that were added. Actually I'll be impressed if I remember all the small touches I added today.
While at first you don't notice much paint chipping on M1's (or any modern tank) it is there. You just have to look close enough. There tends to be a lot around the Commander's cupola and where stowage is strapped on. Also you will find the usual scrapes and scratches all over. It also simply depends on which tank you are looking at. Some are nearly immaculate even well into the war, while others are absolutely filthy. I chose a tank somewhere in between. Not brand new, but still in running order. The paint chipping applies to some stowage too like the large ammo bins on the BER.
For the pant chips I first apply a small amount of MM Sand FS33531. This represents light scratches where only the dirt has been removed. it also acts as a highlight for deeper scratches. Next for a deeper paint chip where the base green has been exposed, some Aircraft Colors Slate Grey which is actually a dark green. Now for the deepest and older paint chips a small amount of Polly S U.S. Earth Red is added. This represents rust. Use only a tiny amount. All my paint chips were applied with a 10/0 brush. Make most of them so small that you almost don't see them at first. At least that's what I tried to do. Silver was only added to the large scrapes along th barrel and to the CIP's to match my references.
The exhaust deflector looked kinda dull and needed something. Going over my pictures I noticed many M1's have dark brown and heavily weathered deflectors. This was achieved by first painting on some burnt sienna and black oil paint. No thinner. Over this was several layers of pigments. Raw Umber and Gulf Dust were the main pigment colours used. These were set with a small amount of thinner. The CIP received some paint chips in silver as well as lots of small dirty finger print marks. These were made by applying very small dots of Payne's Grey oil paint and then lightly blending them with a soft brush. The large green crew tent got a light layer of dust and then the shadows were darkened with a wash of Payne's Grey oil paint.
To replicate the application of touch up paint (which according to my references looked like a darker and slightly grey-er version of the base coat) A mix of Gunze H313 was mixed with Tamiya Desert Yellow and Tamiya Grey. This was sprayed on at very low pressure with the airbrush only a couple of centimeters away from the surface. Be very careful as it is too easy to apply too much paint. Don't ask how I know. Again according to my references the majority of the touch up paint is found on the side skirt armour at the front of the tank.
The barrel received some wear and tear too.
Can't forget the fenders.
Another little neat detail I noticed was an M2 50.cal MG that had two small spots of rust on the barrel. I first added two small spots of a dark shade of rust. Polly S U.S. Earth Red. And over this went a brighter shade of rust.
Well I decided to change out a couple of my vision blocks in the TC's cupola and replace them with darker ones. I think it does look better.
I was very disappointed with how my paint chips turned out the first time around the cupola. I had no choice but to remove the paint. Re-spray the area. And re-do the chips and other weathering. I really like it the second time around. A 10/0 brush is a must. Keep cleaning it as you work. Unfortunately I got a little water on the map so it is now lightly distorted. I think I will leave it as is as it still looks like a map. Of course If I'm ever navigating through Baghdad with this tank as my guide I'm screwed!
A close up of my now dirty and much more interesting looking CIP.
Some subtle highlights were airbrushed on to my large tarp.
Shadows were accentuated with a wash of Payne's Grey only where I thought it would help. It wasn't applied over the whole tarp.
And finally (I think) I weathered the exhaust. This again was based on a real tank.
First the brown stains were added with dark umber oil paint. Very little is needed. Feather the brown with a soft brush. Over this comes the black. Acrylic is used for most of it but where it needs to be a softer edge, oil paint is used. Finally, pigments are used to bring it all together. Also for any one building an Abrams with razor wire. Don't add it till near the end! Otherwise you will keep damaging it. I'd remove it and re-do it but that would cause too much damage. Live and learn.
Before I go here are some overall shots.
As you can see the weathering is still fairly subtle looking (to me anyway). Most Abrams look like they are in pretty good condition so I don't want to go overboard with the weathering.
Oh and as far as adding the jack and wrestling mask (It reminds me of what Jack Black wore in "Nacho libre") I will save those two details for my next Abrams. I have always wanted a Marine M1A1 and with Echelon's latest decal set I can model the specific tank I want. "War Pig". It is the same tank you fight along side in the new game "Call of Duty 4". The game's version even has the correct barrel art. And it will be another diorama. Albeit slightly smaller. But much more dramatic.
-Matt

HazZaRd

Joined: May 25, 2006
KitMaker: 291 posts
Armorama: 288 posts
Posted: Friday, December 07, 2007 - 03:18 AM UTC
Looks very Great!!
i realy like the paint touch ups at the front side of the tank
also the rest of the details are stunning
i see you also play CoD4 'i realy like the story of the singleplayer could be almost reality'
nice detail on the tank would be the battlemap the team drawed on the side of the tank
Keep up the great work
,Gijs


RoelGeutjens

Joined: March 17, 2005
KitMaker: 410 posts
Armorama: 383 posts

Posted: Friday, December 07, 2007 - 08:30 AM UTC
Hey Matt
Great update! You are putting a lot of work in this model I can tell you that! It looks good to me. And your vision blocks look great now much better then before
Keep us updated
Grtz Roel
Great update! You are putting a lot of work in this model I can tell you that! It looks good to me. And your vision blocks look great now much better then before
Keep us updated
Grtz Roel
DeskJockey
Joined: July 17, 2006
KitMaker: 1,558 posts
Armorama: 1,159 posts
Posted: Sunday, December 09, 2007 - 02:58 PM UTC
Matt--your Abrams is looking quite stunning. I really like how you've done the paint chips and the weathering. Congrats! Can't wait to see it and the rest of the diorama finished. 
f1matt
Joined: August 13, 2006
KitMaker: 1,021 posts
Armorama: 805 posts
Posted: Tuesday, December 11, 2007 - 05:09 PM UTC
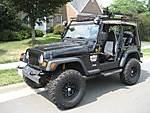
Well as far as the rest of the diorama, I was wondering what to do about the empty corner opposite the tall grass. I really wanted to incorporate my Tamiya Jeep ever since I saw this picture of one in Iraq still going strong. I thought it would be neat to see a modern Abrams next to a WWII era Jeep.

The only catch is ... it's a perfect fit for the corner. Too perfect. It took up the whole corner and was almost touching the M1. What to do? Well I remembered some pictures of the aftermath of a car bomb that I have.


As you can see this is an effective way to creatively reduce the size of one's automobile. To any size and shape you want. Perfect. I have "blown up" my Jeep thanks to my Dremel, side-cutters, x-acto blade, and my own two hands. Still not quite sure how I want to place the Jeep in the corner. Here's my my first idea. I thought I'd see how a little overhang would work.


I think it's okay. Here's another position.


Some close up shots. I used a candle to soften the tire and give it a flat look. Unfortunately I also deformed the wheel a little. Not much I can do about that. I think the wheel simply got deformed in the explosion. Ya that's it.


I haven't done much work on the Jeep. I only came up with the idea today and wanted to get some feedback from you guys on how it looked.
I think I prefer the second position. The overhanging Jeep is interesting but the other angle looks a little nicer. The overhang might wind up looking like it was a sloppy afterthought too. Here's a few parting pics of what it could roughly look like.


So what do you guys think? Is the blown up Jeep a good way to fill the space? I don't think it's too big a detail now that it has shrunk by over 50%. I just want something to fill the dead space in the corner. Also I could spread some debris over the rest of the base and add a little more interest to the whole thing. I was thinking I could even toss a wheel into the water (when I add some eventually) and have it sticking out partially.
-Matt
The only catch is ... it's a perfect fit for the corner. Too perfect. It took up the whole corner and was almost touching the M1. What to do? Well I remembered some pictures of the aftermath of a car bomb that I have.
As you can see this is an effective way to creatively reduce the size of one's automobile. To any size and shape you want. Perfect. I have "blown up" my Jeep thanks to my Dremel, side-cutters, x-acto blade, and my own two hands. Still not quite sure how I want to place the Jeep in the corner. Here's my my first idea. I thought I'd see how a little overhang would work.
I think it's okay. Here's another position.
Some close up shots. I used a candle to soften the tire and give it a flat look. Unfortunately I also deformed the wheel a little. Not much I can do about that. I think the wheel simply got deformed in the explosion. Ya that's it.
I haven't done much work on the Jeep. I only came up with the idea today and wanted to get some feedback from you guys on how it looked.
I think I prefer the second position. The overhanging Jeep is interesting but the other angle looks a little nicer. The overhang might wind up looking like it was a sloppy afterthought too. Here's a few parting pics of what it could roughly look like.
So what do you guys think? Is the blown up Jeep a good way to fill the space? I don't think it's too big a detail now that it has shrunk by over 50%. I just want something to fill the dead space in the corner. Also I could spread some debris over the rest of the base and add a little more interest to the whole thing. I was thinking I could even toss a wheel into the water (when I add some eventually) and have it sticking out partially.
-Matt
JeepLC
Joined: June 20, 2007
KitMaker: 510 posts
Armorama: 469 posts
Posted: Tuesday, December 11, 2007 - 06:34 PM UTC
I like it as a space filler. The only problem I see is debris. When a VBIED goes off there is crap EVERYWHERE. Not to mention a crater. It could work if you blacken the earth around it a little and add alot of small pieces everywhere.
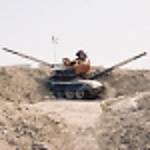
The alternative is to make it a piece of junk rotting on the side of the road from Desert Storm. I have seen pics of crap just sitting there. A buddy of mine said that one night they accidently called in an airstrike on a blown T-55. So you can solve that issue by throwing in some more grass and alot of rust. Either way it might be alot of added work to get it semi-right.
I like the dio thus far, but I agree that the space in question needs some sprucing. Good luck.
_Mike

yufkey70
Joined: July 16, 2005
KitMaker: 264 posts
Armorama: 263 posts

Posted: Wednesday, December 12, 2007 - 08:51 AM UTC
Most impressive work I have seen in along time. Outstanding work and attention to detail. I 'm going to have to use some of your methodes. Hopefully my Abrams turns out as good as yours 
DeskJockey
Joined: July 17, 2006
KitMaker: 1,558 posts
Armorama: 1,159 posts
Posted: Thursday, December 13, 2007 - 03:01 PM UTC
I agree-the overhang doesn't look quite right, while the second position works better. I also think Mike's idea of having the jeep be a rusting hulk would work better, since you plan on having the crew and locals in relatively relaxed position (not likely after a car bomb).
JeepLC
Joined: June 20, 2007
KitMaker: 510 posts
Armorama: 469 posts
Posted: Thursday, December 13, 2007 - 05:44 PM UTC
Matt- I also just noticed this... the tailgate on your jeep would be open if it was indeed blown. You can notice the lines. Kind of random, i know. But anyway, if you are looking for realism thats whatcha gotta do. Might be nit-picky though... I don't know. It's late and I have to drive to Boston from Va tomorrow. 
Thanks anyway,
Mike C
Thanks anyway,
Mike C

guygantic
Joined: August 19, 2006
KitMaker: 7,084 posts
Armorama: 970 posts

Posted: Thursday, December 13, 2007 - 07:18 PM UTC
Matthew :
First I'll tell you the truth, I'm not into modern armor, but...when I saw this thread, I became interested, and more, I even liked it a lot at the end ! Your paintwork is just super, nothing looks overdone, a fine build, very well detailed, nice stowage...May be time has come to put aside my WW2 kits and get into this for a while ? Thank you for the inspiration your topic has given me ! G.
First I'll tell you the truth, I'm not into modern armor, but...when I saw this thread, I became interested, and more, I even liked it a lot at the end ! Your paintwork is just super, nothing looks overdone, a fine build, very well detailed, nice stowage...May be time has come to put aside my WW2 kits and get into this for a while ? Thank you for the inspiration your topic has given me ! G.
f1matt
Joined: August 13, 2006
KitMaker: 1,021 posts
Armorama: 805 posts
Posted: Sunday, December 16, 2007 - 02:15 PM UTC
Hey mike. I actually like the idea of adding a lot of debris. It should help make the base more interesting. Also I agree that the vehicle remains should not look to fresh. Hopefully I can blend it into the rest of the base so it doesn't stick out too much. I don't want to take the focus of the diorama away from the main characters. I thought about the tailgate and had a closer look at my Jeep. Turns out it doesn't have one. The back of this Jeep is one piece. I did warp the back slightly to indicate the force of the explosion. Also I have added lots of little dents and holes to indicate damage and years of use.
I agree Lucas. I won't have the jeep hanging over the edge. It just didn't look right.
Thanks Yufkey. I'm in love with your Abrams actually.
G, you are too kind. If you are going to get into modern armour for a change this is certainly a great time to do it. There has never been so much to choose from. Seems like there is something new almost every day.
Okay so not a huge update but any progress is still progress!
Finally got around to replacing the crew steps on both sides of the skirt armour. I didn't like the look of the kit steps. They looked too simple. The real thing is made of a cable designed to be flexible in case it comes in contact with the ground. To make the cable attachment points I stretched some sprue to the correct diameter (according to my Mk. 1 eyeball anyway) and this was hollowed out with a very fine twist drill bit. I've never attempted to drill into something only about three quarters of a millimeter across before. The sprue was cut into four segments. The now hollow sprue did collapse a little during the cutting process but it can be fixed by re inserting the twist drill. The skirt armour had holes drilled to accept the pieces of sprue. This will make the step much stronger. The cable itself was going to be a Karaya copper cable but it was too big. To solve this I simply unwound the various wires that made up the cable. I wound two of the thinner cables together and I now had something that looked right. My new copper cable was cut to length and inserted into the pieces of sprue. Now just paint, add a wash of raw umber and it's all done. The step anyway.


I also added the wipers to the drivers hatch. Two extremely small pieces of sprue were used for the wiper blades. I lost about two dozen before I got them glued in place. The original center vision block got too much glue on it so I replaced it. The wipers were attached with two small drops of white glue and painted black. They looked okay but the black was too strong against the pink VB. I painted grey highlights on both wiper blades to tone down the black.


-Matt
I agree Lucas. I won't have the jeep hanging over the edge. It just didn't look right.
Thanks Yufkey. I'm in love with your Abrams actually.
G, you are too kind. If you are going to get into modern armour for a change this is certainly a great time to do it. There has never been so much to choose from. Seems like there is something new almost every day.
Okay so not a huge update but any progress is still progress!
Finally got around to replacing the crew steps on both sides of the skirt armour. I didn't like the look of the kit steps. They looked too simple. The real thing is made of a cable designed to be flexible in case it comes in contact with the ground. To make the cable attachment points I stretched some sprue to the correct diameter (according to my Mk. 1 eyeball anyway) and this was hollowed out with a very fine twist drill bit. I've never attempted to drill into something only about three quarters of a millimeter across before. The sprue was cut into four segments. The now hollow sprue did collapse a little during the cutting process but it can be fixed by re inserting the twist drill. The skirt armour had holes drilled to accept the pieces of sprue. This will make the step much stronger. The cable itself was going to be a Karaya copper cable but it was too big. To solve this I simply unwound the various wires that made up the cable. I wound two of the thinner cables together and I now had something that looked right. My new copper cable was cut to length and inserted into the pieces of sprue. Now just paint, add a wash of raw umber and it's all done. The step anyway.
I also added the wipers to the drivers hatch. Two extremely small pieces of sprue were used for the wiper blades. I lost about two dozen before I got them glued in place. The original center vision block got too much glue on it so I replaced it. The wipers were attached with two small drops of white glue and painted black. They looked okay but the black was too strong against the pink VB. I painted grey highlights on both wiper blades to tone down the black.
-Matt

DCJnr123
Joined: May 07, 2007
KitMaker: 51 posts
Armorama: 49 posts
Posted: Sunday, December 16, 2007 - 06:42 PM UTC
Matt this the work your putting into this is amazing,
well done.
David.
well done.
David.
slodder
Joined: February 22, 2002
KitMaker: 11,718 posts
Armorama: 7,138 posts
Posted: Sunday, December 16, 2007 - 11:38 PM UTC
Nice updates on the tank.
The jeep should not go over the edge, the tall clean vertical lines of the base don't support the overhang. I do like the jeep though. Add as much care and attention to the jeep as the M1 got and you'll be golden.
The jeep should not go over the edge, the tall clean vertical lines of the base don't support the overhang. I do like the jeep though. Add as much care and attention to the jeep as the M1 got and you'll be golden.

markVI

Joined: November 26, 2006
KitMaker: 118 posts
Armorama: 101 posts

Posted: Tuesday, December 18, 2007 - 07:25 AM UTC
This is insane! I've never seen so much attention to detail, precision, attention to detail, detailed attention, did I mention attention and detail???
Seriously though, this is amazing and you've nailed every little thing I could've thought about and then some more. You should have a length of service medal for this!!!
GOOD WORK!!
Seriously though, this is amazing and you've nailed every little thing I could've thought about and then some more. You should have a length of service medal for this!!!
GOOD WORK!!
f1matt
Joined: August 13, 2006
KitMaker: 1,021 posts
Armorama: 805 posts
Posted: Tuesday, December 18, 2007 - 08:26 PM UTC
I think you guys are trying to make me blush with all of your kind comments.
Stuart, you made me laugh when I read your reply. And yes I think you mentioned detail.
I'm glad so many of you seem to be enjoying my first build blog. I certainly get a kick out of reading many other blogs here on armorama. A truly fantastic website. I'm here almost everyday.
To be honest I was going to delay my next Abrams build for a while after this one, but I've gotten so excited about it I think will start it right after I finish this diorama. If you guys like this one so far I think you will get an even bigger kick out of my next dio. At least I hope so. I plan on it being much more dramatic. Not a battle scene but one that should be fun to look at. And I will make sure to make it into another blog. Once again I will need everyone's help to guide me and tell me when I've mounted something backwards.
Right now I'm focusing my efforts back on the base. One of my original ideas was to make a "green" diorama. Usually when you see a diorama based in Iraq it is always sand or concrete or both. I wanted to do something brighter and greener. I'm working on how to incorporate more colour into the base. I was inspired by my references (I have many pictures of a very green Iraq) and by Scott Lodder's diorama he's currently working on. The buildings just look so cool. I was thinking, I have to do something colourful like that!
Thanks for reading and thanks for the inspiration.
-Matt
f1matt
Joined: August 13, 2006
KitMaker: 1,021 posts
Armorama: 805 posts
Posted: Tuesday, December 25, 2007 - 05:30 PM UTC
Well I hope everyone had a merry Christmas this year. I know I did. Here's what I got.


I'm not gonna start it until after I finish Boom Stick. I need time anyway because now I have to choose which specific tank to model. I'd like this model to depict a real tank this time. Also I might convert it to an MCD equipped Marine tank. I'm still undecided. Either way.
Merry Christmas
-Matt
I'm not gonna start it until after I finish Boom Stick. I need time anyway because now I have to choose which specific tank to model. I'd like this model to depict a real tank this time. Also I might convert it to an MCD equipped Marine tank. I'm still undecided. Either way.
Merry Christmas
-Matt

docdios

#036

Joined: December 01, 2001
KitMaker: 1,998 posts
Armorama: 1,236 posts

Posted: Wednesday, December 26, 2007 - 08:56 AM UTC
Hi Matt
its coming along very well, and i'm really looking forward to seeing it finished. As much as i like the jeep idea i think it may take a little away form your current build, as the base just doesn't quite carry it (or need it) i would save it and use it in the next build.
cheers
keith
its coming along very well, and i'm really looking forward to seeing it finished. As much as i like the jeep idea i think it may take a little away form your current build, as the base just doesn't quite carry it (or need it) i would save it and use it in the next build.
cheers
keith

 |

WEB HOSTING BY


Copyright ©2021 Armorama and Kitmaker Network, a subsidiary of Silver Star Enterprises
All Rights Reserved. Please read our Conditions of Use and Privacy Policy.
All Rights Reserved. Please read our Conditions of Use and Privacy Policy.