

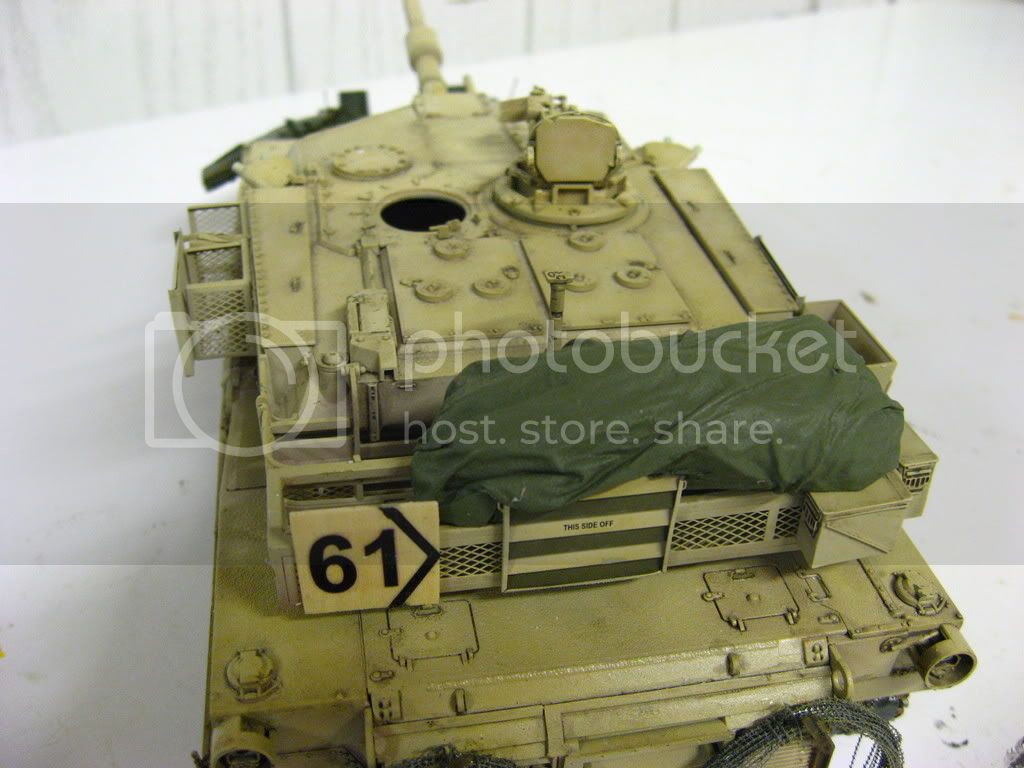
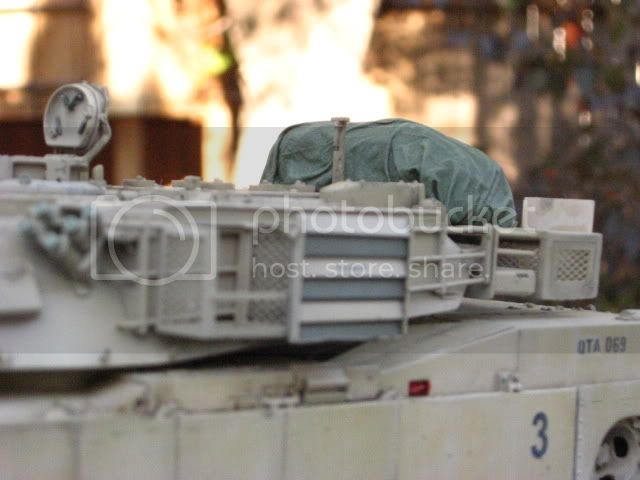
The stowage came out great, was a bit worried at first when I saw seam lines and ridged edges, but it turned out great as I scrolled down.
The dice are fantastic additions, I would like to see them in a wide shot. The tight close shots aren't the best in showing off the white dots. Are you using string or wire as the thread around the dice? I would try to go with very fine wire. Maybe if you get a white marker from ACMoores it will help symetry. Or go with a white bead, paint it black then use a pinvice bit and 'drill' out the paint.
Dioramas
Do you love dioramas & vignettes? We sure do.
Do you love dioramas & vignettes? We sure do.
Hosted by Darren Baker, Mario Matijasic
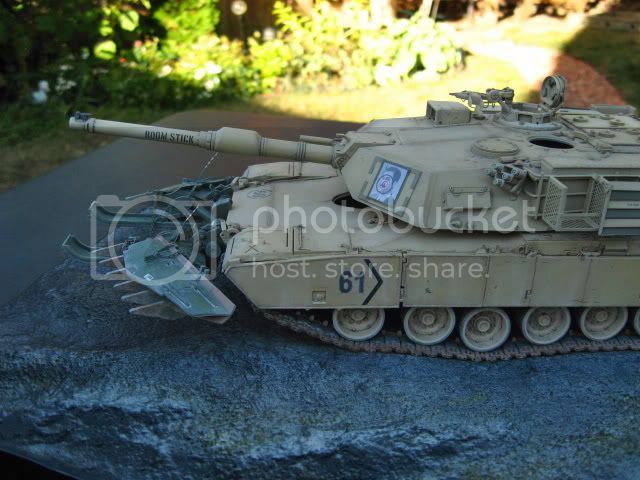
M1A1 Abrams "BOOM STICK"

slodder

Joined: February 22, 2002
KitMaker: 11,718 posts
Armorama: 7,138 posts
Posted: Wednesday, September 12, 2007 - 10:25 PM UTC


f1matt

Joined: August 13, 2006
KitMaker: 1,021 posts
Armorama: 805 posts

Posted: Thursday, September 13, 2007 - 07:16 PM UTC
Hey Scott.
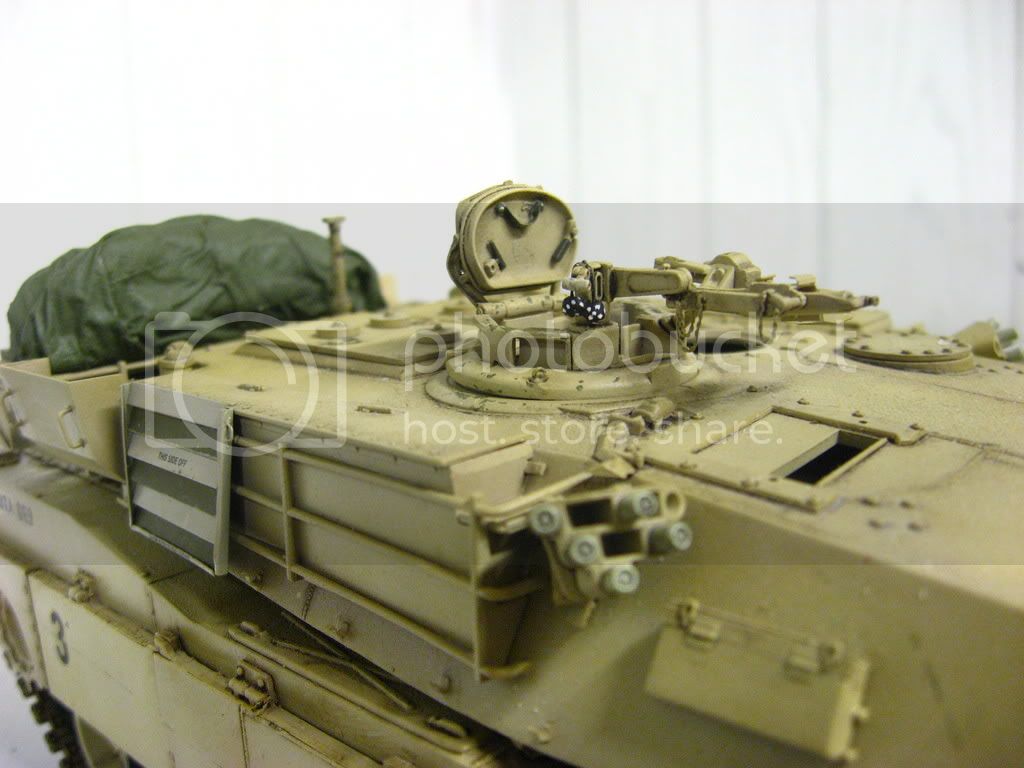
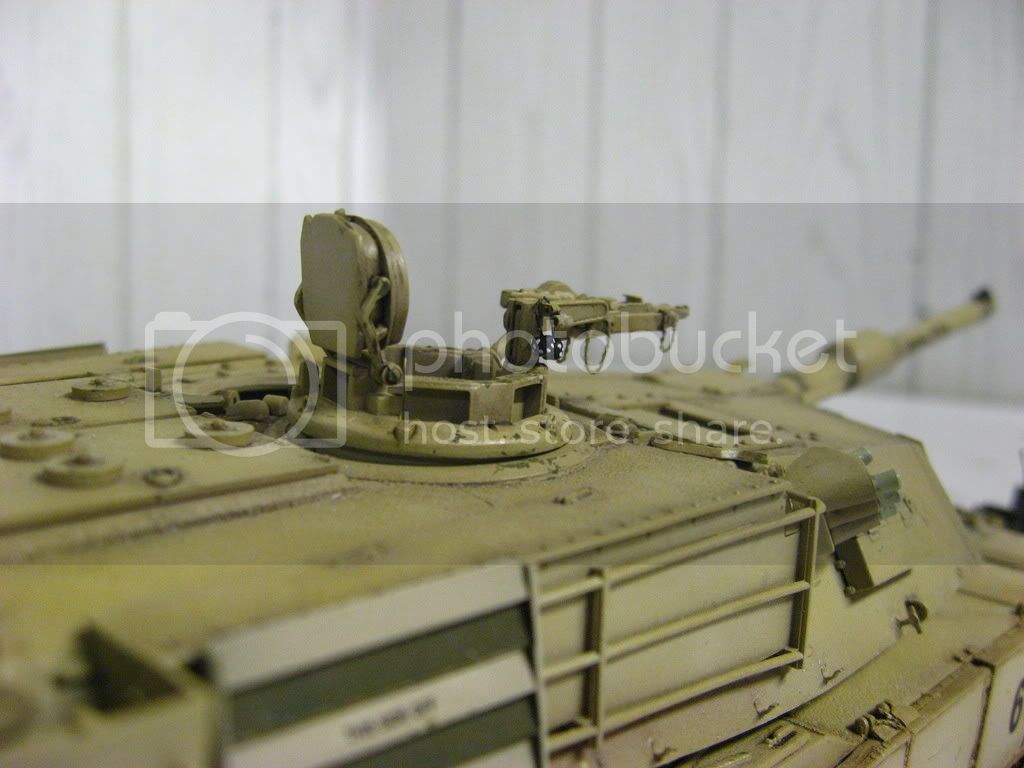
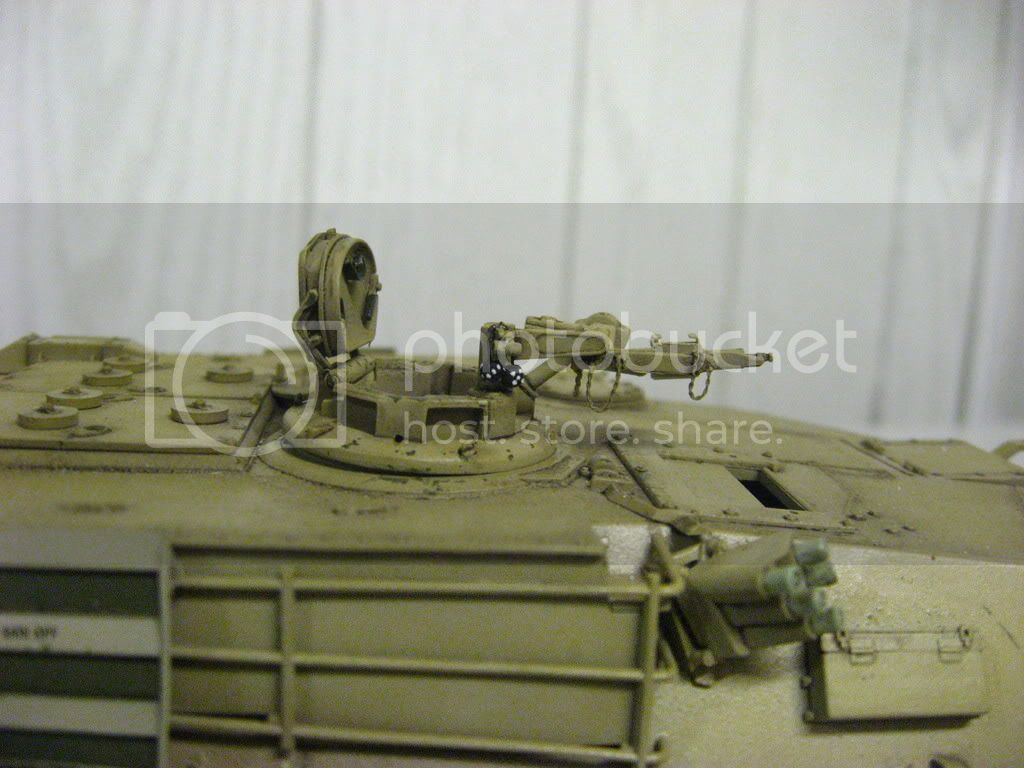
I tried using fine wire at first but the beads kept popping off. I found the glued bonded better to fine fishing line. Honestly I think that the beads are so tiny that it would be hard to find a fine enough marker to make dots. Same goes for the drilling technique. Good idea but the beads are just so gosh darned teency-weency. They are about 1.5mm across.
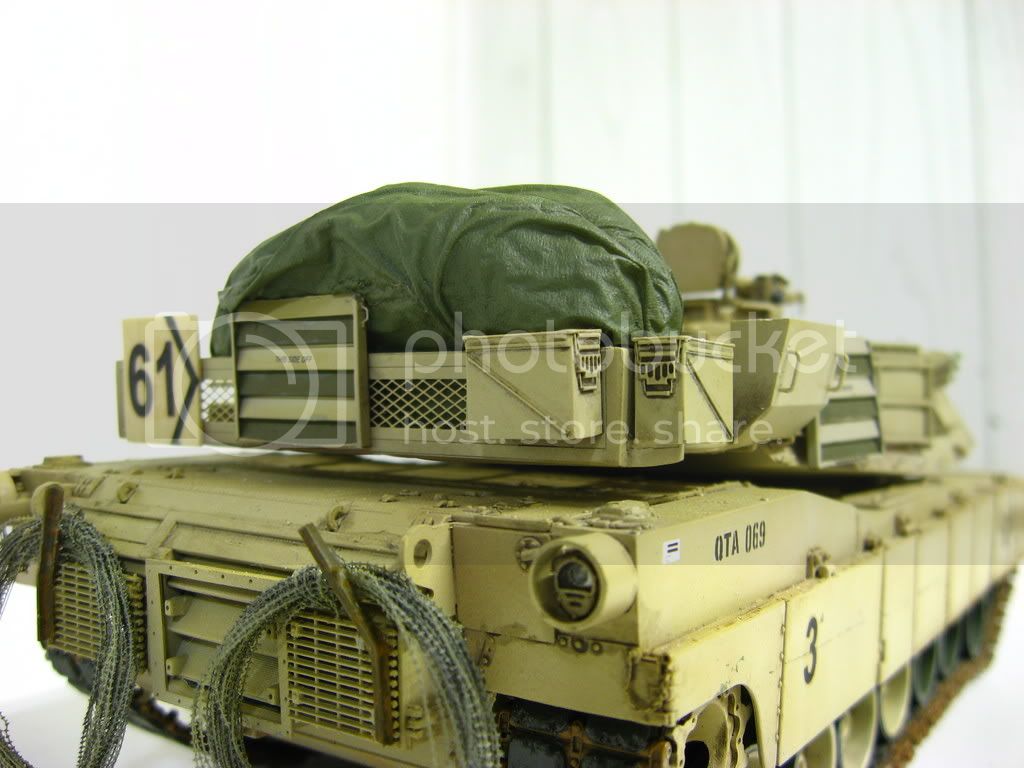
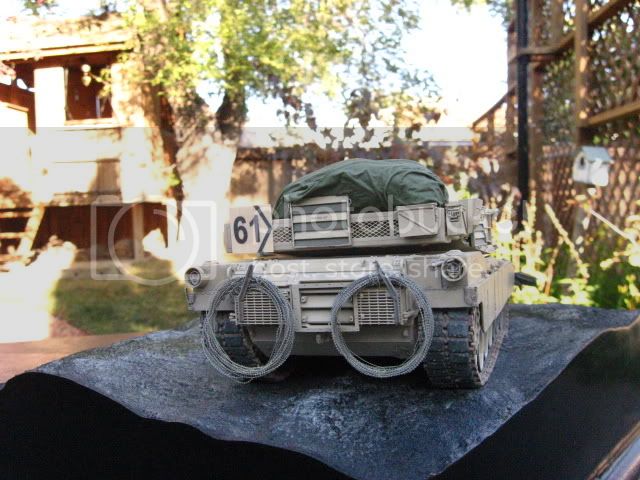
Also the lump of stowage I made the other day has now received a base coat of green and is waiting to be shaded. I am now working on detailing my Verlinden cooler (a must for any OIF vehicle) and will be doing more with the base. Here are some wider angle shots of the dice in action.
I must admit I am now learning to really appreciate quality photos of models. It's harder than I thought to get everything in focus and to get the lighting just right.
Thanks for looking.
I tried using fine wire at first but the beads kept popping off. I found the glued bonded better to fine fishing line. Honestly I think that the beads are so tiny that it would be hard to find a fine enough marker to make dots. Same goes for the drilling technique. Good idea but the beads are just so gosh darned teency-weency. They are about 1.5mm across.
Also the lump of stowage I made the other day has now received a base coat of green and is waiting to be shaded. I am now working on detailing my Verlinden cooler (a must for any OIF vehicle) and will be doing more with the base. Here are some wider angle shots of the dice in action.
I must admit I am now learning to really appreciate quality photos of models. It's harder than I thought to get everything in focus and to get the lighting just right.
Thanks for looking.
slodder
Joined: February 22, 2002
KitMaker: 11,718 posts
Armorama: 7,138 posts
Posted: Thursday, September 13, 2007 - 10:27 PM UTC
I was afraid of the dice problems. From a wider shot they look ok. So I'd leave them. In a wide shot with the whole diroama they will be that little detail that make the whole thing 'real' and you'll get great response.
f1matt
Joined: August 13, 2006
KitMaker: 1,021 posts
Armorama: 805 posts
Posted: Friday, September 14, 2007 - 04:00 PM UTC
That's exactly what I was hoping. Just as long as they look right.They don't need to be perfect. I'm satisfied with how they turned out.
I have airbrushed on a layer of dust and have completed my modifications to the cooler. Plan on working mostly on the base this weekend.
I have airbrushed on a layer of dust and have completed my modifications to the cooler. Plan on working mostly on the base this weekend.

sgtreef
Joined: March 01, 2002
KitMaker: 6,043 posts
Armorama: 4,347 posts
Posted: Friday, September 14, 2007 - 11:22 PM UTC
Quoted Text
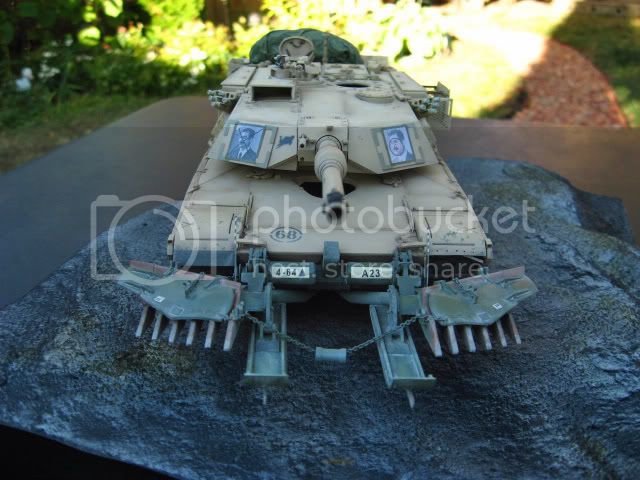
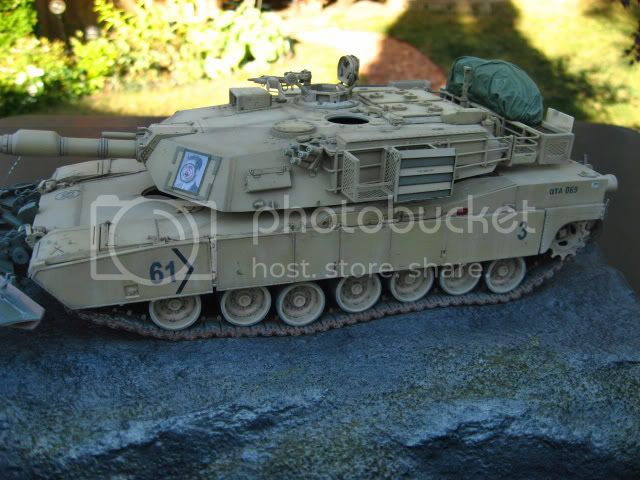
As far as the CIP's are concerned I found a few pictures with Abrams from A cpy, 4-64th arm that had both green and sand coloured CIP's. As to why they did this on some of their tanks I don't have the foggiest idea. I like it cause it helps break up an otherwise dull camo scheme.
Thanks for all the comments.
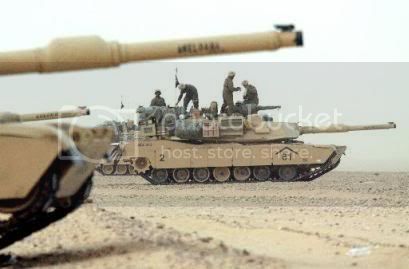
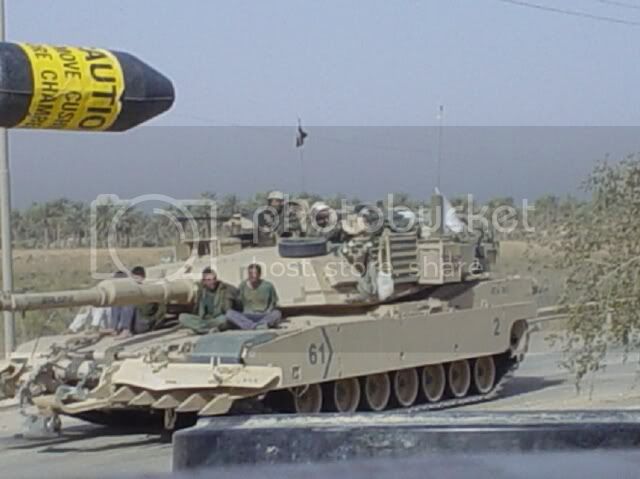
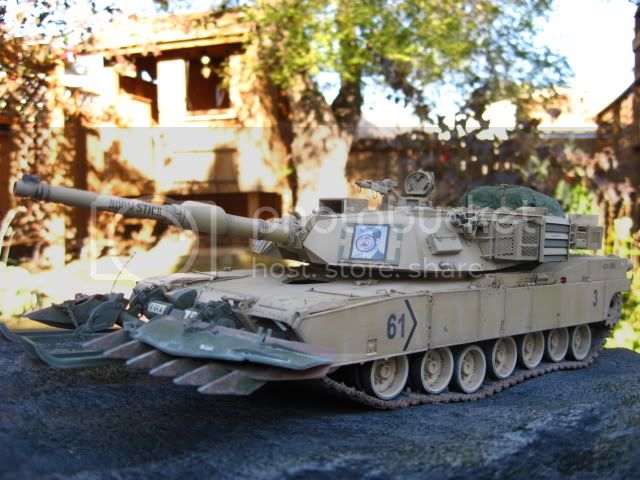
Nice to see some Insurgents getting a free ride.
At least I think they are as to me looks like their hands are tied behind their backs.
Now all you have to do is stop quick then accelerate.


Nice job on the Tank my man real nice yes those pads look the part.
Mind if I borrow that idea on the Next one?
Removed by original poster on 09/16/07 - 01:46:16 (GMT).
f1matt
Joined: August 13, 2006
KitMaker: 1,021 posts
Armorama: 805 posts
Posted: Saturday, September 15, 2007 - 06:45 AM UTC
Well thank you Jeff. To weather the tracks I simply used a fine grinding bit in my dremel. I then cleaned up the track pads with an x-acto. To save time I only damaged the track pads that would be visible. Actually I only assembled just enough track links that would be visible. I only used about 2/3 of what came with the kit. Well it's saturday so off to the LHS I go.

CSachjen
Joined: September 10, 2007
KitMaker: 34 posts
Armorama: 22 posts

Posted: Saturday, September 15, 2007 - 10:47 AM UTC
This build inspired me to go out and get a Tamiya M1A2 from my LHS. Not sure which way i'll build it but im impressed with the kit. Its only my second model so im getting my brain worked, its fun.
Great work.
Great work.
f1matt
Joined: August 13, 2006
KitMaker: 1,021 posts
Armorama: 805 posts
Posted: Saturday, September 15, 2007 - 11:23 AM UTC
Thanks for the kind words Chris and welcome to the hobby. If you have any questions about the kit or about the hobby in general feel free to ask. This is my second time building this kit as I really enjoy putting it together. I have at least a couple more planned for the furture.
Well I applied a layer of dust last night. Model Master FS33531 sand enamel. This was applied all over the vehicle. Focusing more where the crew would walk and along the sides and back of the hull. This looked good except for the sides of the hull. It looked too "nice" and even. Turns out it was a good idea to use an enamel paint for this layer. About two hours after spraying on the dust I couldn't stand it anymore. I had to do something about it. I got out the Testors airbrush thinner and using an old medium size brush, began applying the thinner with verticle strokes to the sideskirts. This softened the paint and it began to streak. I got very excited as at first I just wanted to remove the paint. But the dust, er paint, looked like it had been streaked by rain. I kept on applying thinnner with vertcle strokes and began to play with the paint. This did not effect the underlying coats as they were protected by a layer of acryilic gloss. I now had rain streaked dust! It is very very subtle but that was my new goal for the night. In fact this may become a standard technique for me. Spray on a light layer of enamel dust. Let it sit for an hour or so and let her streak. You have a lot of control over how it will look. It can be removed completely or you can spray on more paint to make the streaks heavier.
Well I applied a layer of dust last night. Model Master FS33531 sand enamel. This was applied all over the vehicle. Focusing more where the crew would walk and along the sides and back of the hull. This looked good except for the sides of the hull. It looked too "nice" and even. Turns out it was a good idea to use an enamel paint for this layer. About two hours after spraying on the dust I couldn't stand it anymore. I had to do something about it. I got out the Testors airbrush thinner and using an old medium size brush, began applying the thinner with verticle strokes to the sideskirts. This softened the paint and it began to streak. I got very excited as at first I just wanted to remove the paint. But the dust, er paint, looked like it had been streaked by rain. I kept on applying thinnner with vertcle strokes and began to play with the paint. This did not effect the underlying coats as they were protected by a layer of acryilic gloss. I now had rain streaked dust! It is very very subtle but that was my new goal for the night. In fact this may become a standard technique for me. Spray on a light layer of enamel dust. Let it sit for an hour or so and let her streak. You have a lot of control over how it will look. It can be removed completely or you can spray on more paint to make the streaks heavier.
DeskJockey
Joined: July 17, 2006
KitMaker: 1,558 posts
Armorama: 1,159 posts
Posted: Saturday, September 15, 2007 - 12:46 PM UTC
I just found this thread. Your Abrams is looking great, Matt! How are the figures progressing?
f1matt
Joined: August 13, 2006
KitMaker: 1,021 posts
Armorama: 805 posts
Posted: Saturday, September 15, 2007 - 07:00 PM UTC
Havn't started the figures just yet. Will probably get them started with primer tommorrow.

Canjuaan

Joined: June 08, 2007
KitMaker: 228 posts
Armorama: 223 posts

Posted: Sunday, September 16, 2007 - 12:07 AM UTC
I'm curious to see pictures of the streaked model 
f1matt
Joined: August 13, 2006
KitMaker: 1,021 posts
Armorama: 805 posts
Posted: Sunday, September 16, 2007 - 11:36 AM UTC
Ask and you shall receive.

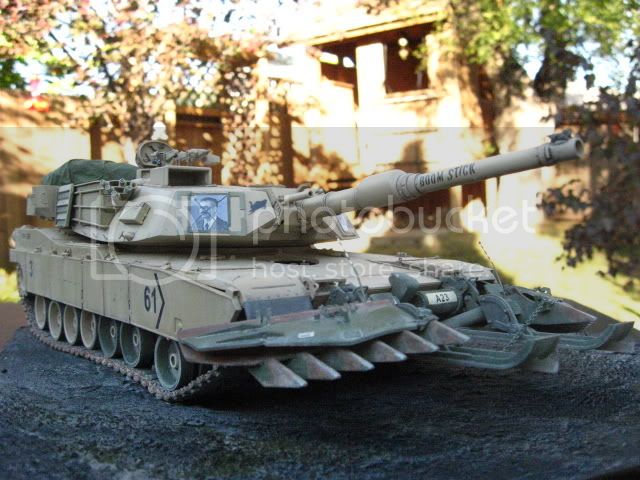
Like I mentioned before the "streaking" is very subtle but I think I will leave it as is. I do plan on playing with my pigments after the model is completed and has received a coat of flat clear.
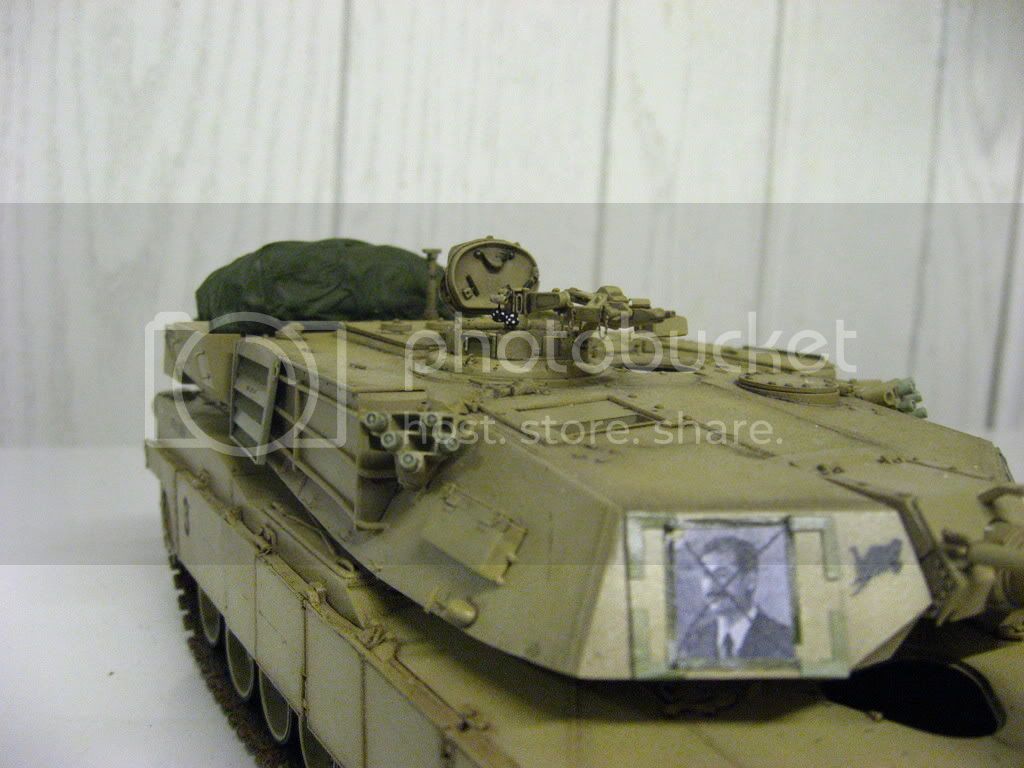
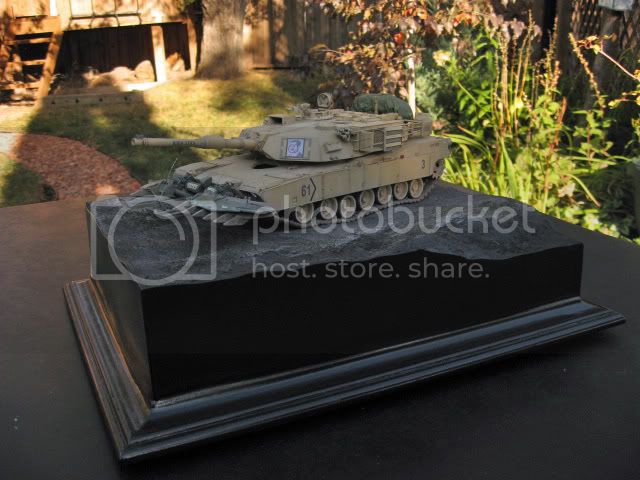
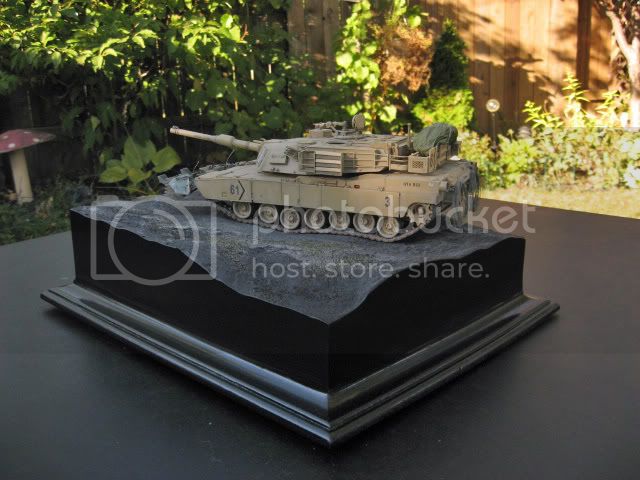
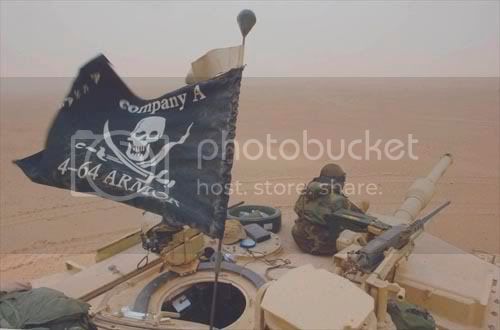
The base has received three coats of black (Krylon acrylic) and three coats of gloss (Varathane). As soon as this is fully dry the sand/soil will receive some paint. At first I was going to go with a more satin finish for the base but the wet black paint looked so nice I decided to go with gloss. The stowage "lump" has received some shadows and highlights. I also spent a few hours using photoshop to create the flag flown by A company of 4-64.
I will print my design onto white decal paper and this will be placed onto lead foil and shaped.
Like I mentioned before the "streaking" is very subtle but I think I will leave it as is. I do plan on playing with my pigments after the model is completed and has received a coat of flat clear.
The base has received three coats of black (Krylon acrylic) and three coats of gloss (Varathane). As soon as this is fully dry the sand/soil will receive some paint. At first I was going to go with a more satin finish for the base but the wet black paint looked so nice I decided to go with gloss. The stowage "lump" has received some shadows and highlights. I also spent a few hours using photoshop to create the flag flown by A company of 4-64.
I will print my design onto white decal paper and this will be placed onto lead foil and shaped.
DeskJockey
Joined: July 17, 2006
KitMaker: 1,558 posts
Armorama: 1,159 posts
Posted: Sunday, September 16, 2007 - 12:30 PM UTC
Wow! The streaked dust effect came out looking really good! You're turning out quite a stunning model. What other stowage items will you be piling on?
f1matt
Joined: August 13, 2006
KitMaker: 1,021 posts
Armorama: 805 posts
Posted: Sunday, September 16, 2007 - 03:21 PM UTC
Thank you Lucas. The streaked dust was kind of a happy accident. Just glad all that thinner didn't eat through the layers of paint.

Stowage from Legends LAV-25 set, Verlindens Humvee set. Water bottles and soda cans from Accurate Armor. Water and soda drink boxes from Real Model. Maybe a couple of items from Tamiyas modern stowage set. MRE cartons from the kit as well as the kit supplied jerry cans. Plus I will probably add a couple of magazines. The reading kind, not bullet containing kind. Here is a picture of a HMMWV with a copy of a model mag inside.
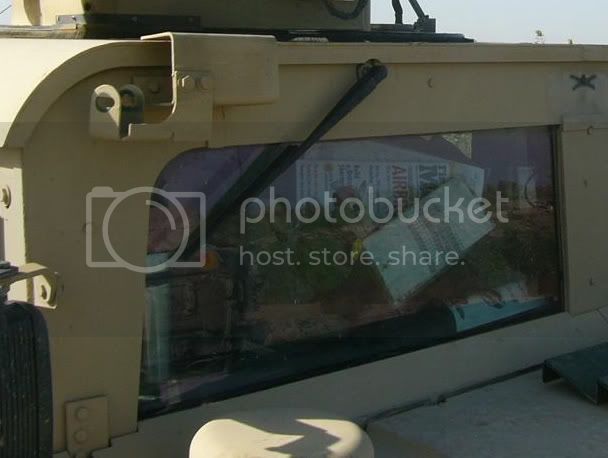
Stowage from Legends LAV-25 set, Verlindens Humvee set. Water bottles and soda cans from Accurate Armor. Water and soda drink boxes from Real Model. Maybe a couple of items from Tamiyas modern stowage set. MRE cartons from the kit as well as the kit supplied jerry cans. Plus I will probably add a couple of magazines. The reading kind, not bullet containing kind. Here is a picture of a HMMWV with a copy of a model mag inside.
f1matt
Joined: August 13, 2006
KitMaker: 1,021 posts
Armorama: 805 posts
Posted: Monday, September 17, 2007 - 05:41 PM UTC
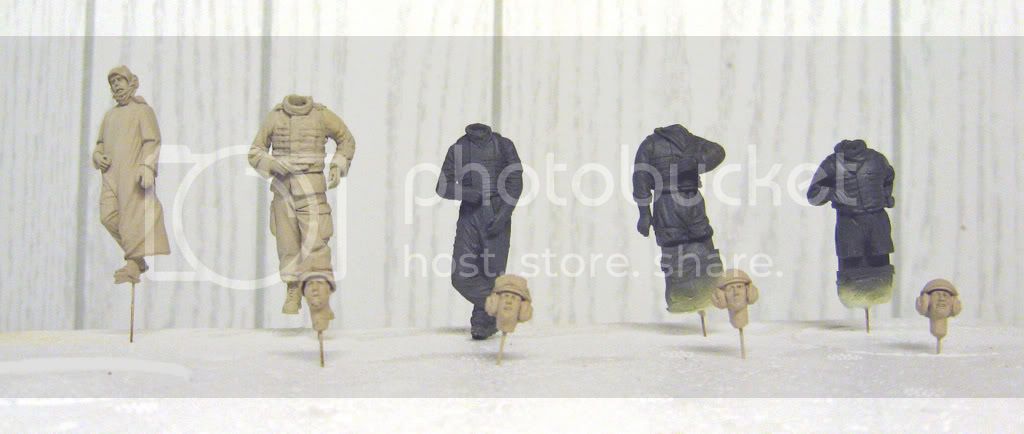
Well I finally got started on the figures. Everyone say hello to the fellas at armorama.
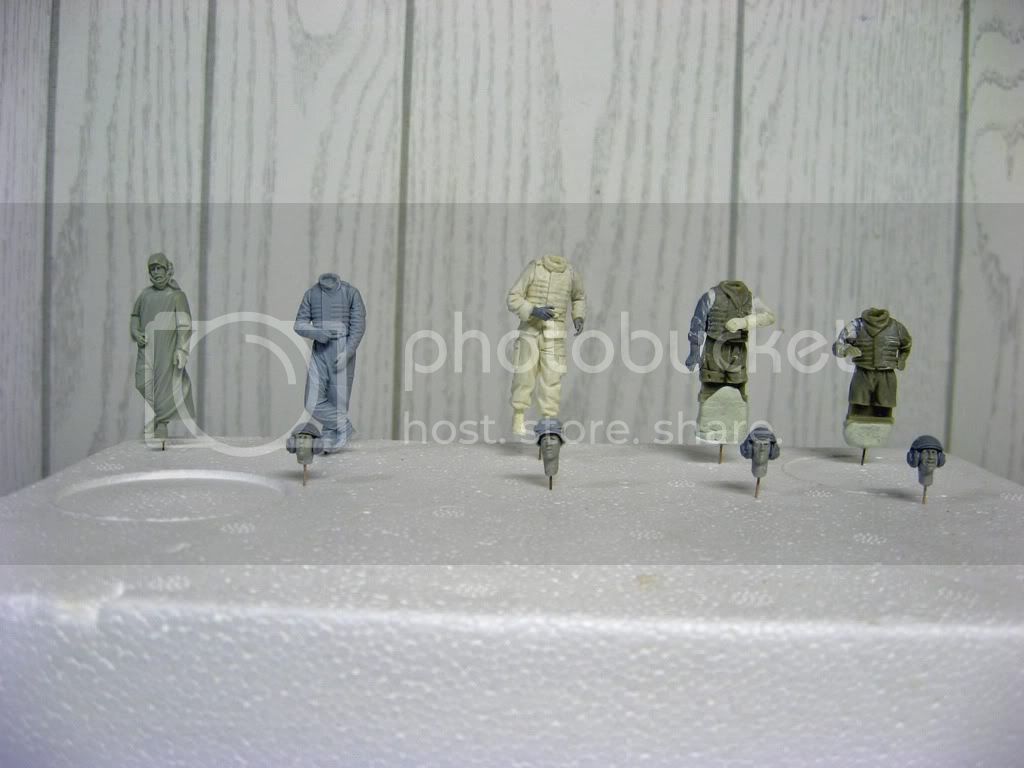
Okay so they aren't very chatty.
Time for row call.
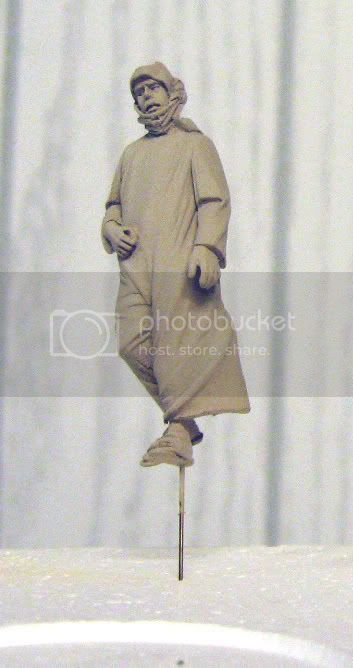
Think 180's arab farmer. I believe this figure is now sold by Mig. A wire was inserted to have something to hold onto while painting.

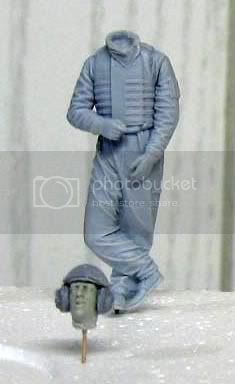
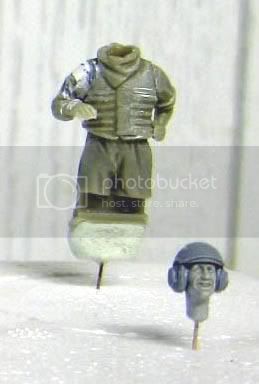
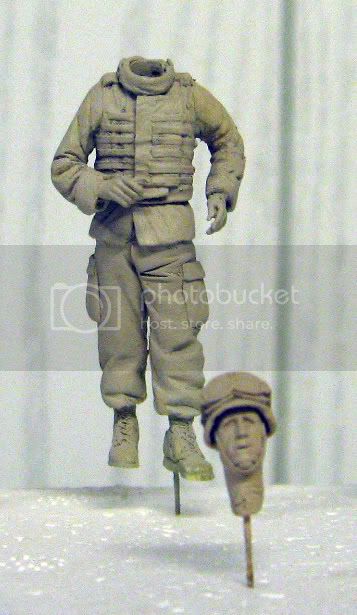
Next up tank crewman #1. He is from Alpine with a Hornet head. the CVC helmet is from Dragon's tank crew set. I have no problems with how detailed the head was. I simply wanted a different expression then what he came with originally. The head will be added after painting so I don't have to do any masking while spraying the base coats.
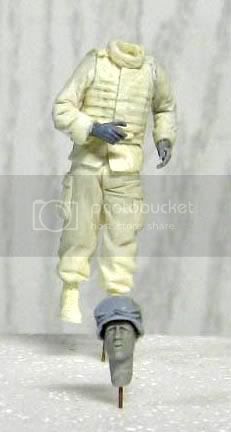
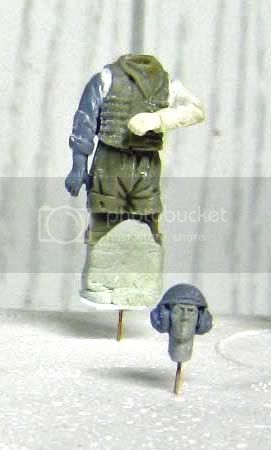
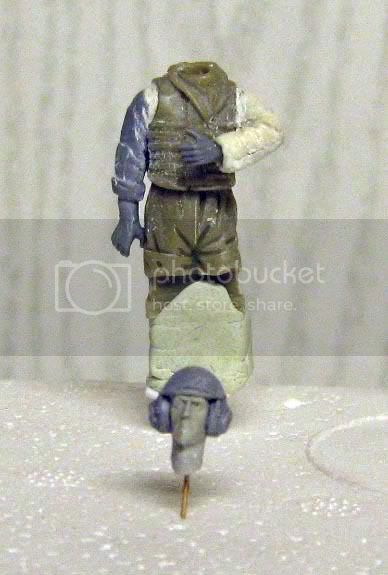
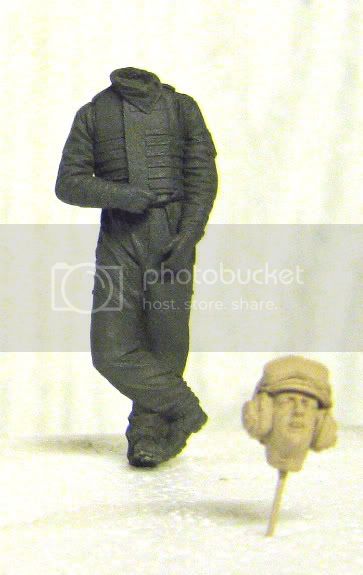
The grunt is from Warriors' LAV-25 crew that was released not to long ago. The arm on the right was cut at the elbow and bent a little more. The pockets were removed from his sleeves as he will be wearing a DCU and not an ACU. I hope that's correct. The hand on the left came from a Dragon Gen2 German infantry set.Those Gen2 figure sets have to be seen to be believed. Absolutely stunning. They actually give you seperate hands. The hand on the right came from Hornet. The helmet came from the Alpine tanker by grinding away the head. In a time of war sacrifices must be made!
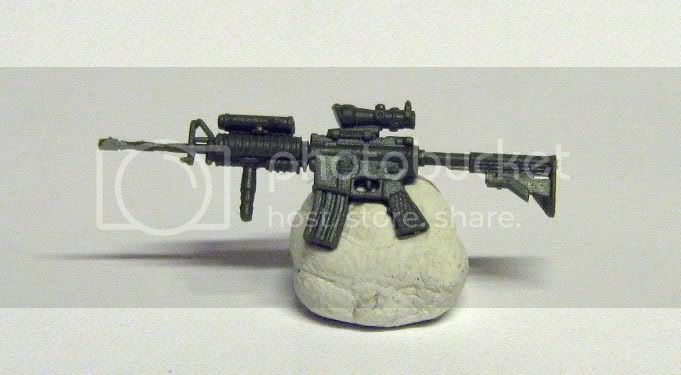
He will be carrying an M-16. No wait. I should give him one of those gorgeous M-4's from my Stryker kit. Ah heck why don't I let you guys decide.
Will it be:
#1
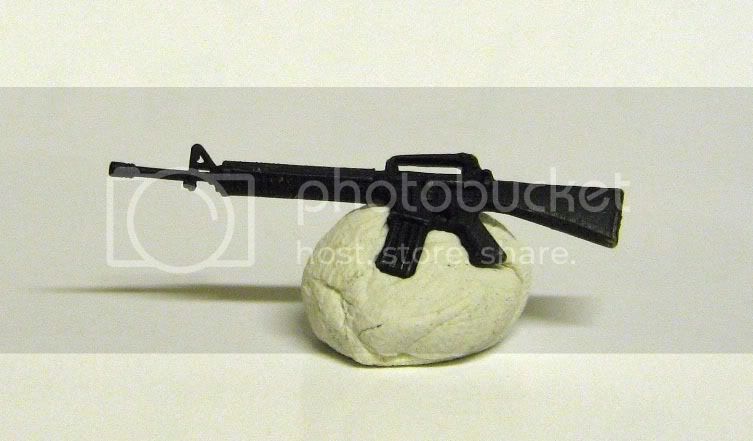
#2
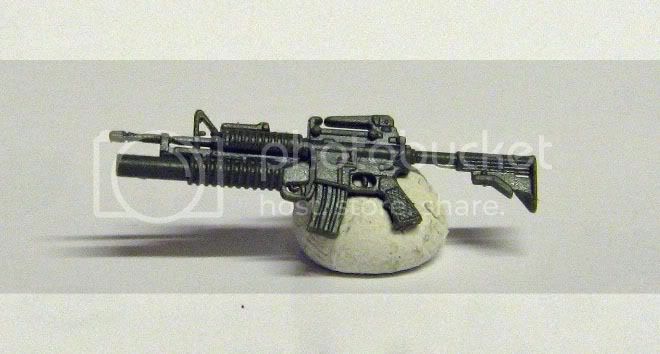
or #3
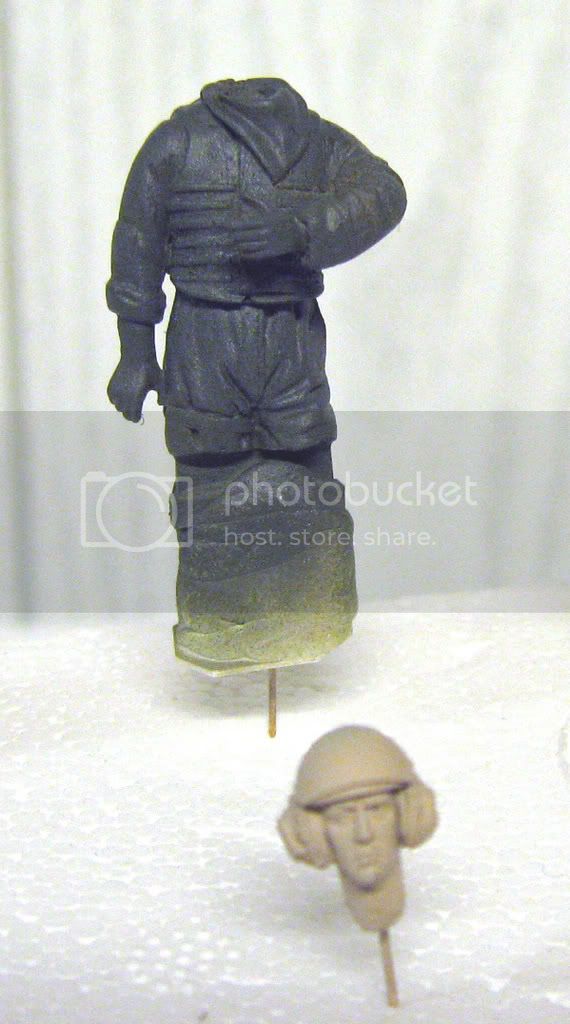
Back to the figures. The tank commander. He is from Verlinden's recent "US tank crew Iraq" set. The arm on the right is from the the LAV-25 crew set. The arm on the left is from Dragon's modern tank crew. The head is from Hornet and the helmet is again from Dragon.
I think I am going to change out his hand on the right.
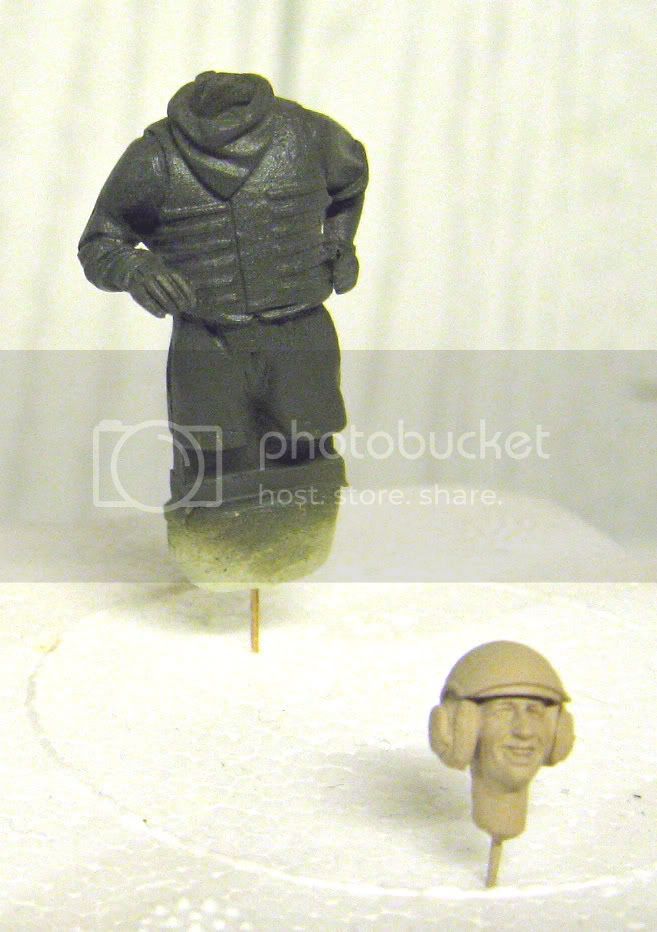
That's better. His new hand is now from that Gen2 set. He will be holding an Accurate Armor soda can. Hey I paid for it so I better use them.
Last but not least the... well I'm not sure. I guess he is either the gunner or loader. Doesn't matter. He is also from the Verlinden tank crew and again sports a Hornet head with Dragon supplied helmet. The arms came from the Verlinden set although the one on left wasn't meant for him. Some putty and grinding was needed to make the surgery a success. I love his expression.
I guess the grunt will need both an American flag patch for one shoulder and a 3rd ID patch on the other. Does anyone know if the tankers wear shoulder patches on their uniforms? Ranks? I will probably give one or two of the tankers goggles to strap on to their helmets. I should probably add a helmet strap to the grunt too.
Well I guess tomorrow the primer goes on. Thanks for looking.
Okay so they aren't very chatty.
Time for row call.
Think 180's arab farmer. I believe this figure is now sold by Mig. A wire was inserted to have something to hold onto while painting.
Next up tank crewman #1. He is from Alpine with a Hornet head. the CVC helmet is from Dragon's tank crew set. I have no problems with how detailed the head was. I simply wanted a different expression then what he came with originally. The head will be added after painting so I don't have to do any masking while spraying the base coats.
The grunt is from Warriors' LAV-25 crew that was released not to long ago. The arm on the right was cut at the elbow and bent a little more. The pockets were removed from his sleeves as he will be wearing a DCU and not an ACU. I hope that's correct. The hand on the left came from a Dragon Gen2 German infantry set.Those Gen2 figure sets have to be seen to be believed. Absolutely stunning. They actually give you seperate hands. The hand on the right came from Hornet. The helmet came from the Alpine tanker by grinding away the head. In a time of war sacrifices must be made!
He will be carrying an M-16. No wait. I should give him one of those gorgeous M-4's from my Stryker kit. Ah heck why don't I let you guys decide.
Will it be:
#1
#2
or #3
Back to the figures. The tank commander. He is from Verlinden's recent "US tank crew Iraq" set. The arm on the right is from the the LAV-25 crew set. The arm on the left is from Dragon's modern tank crew. The head is from Hornet and the helmet is again from Dragon.
I think I am going to change out his hand on the right.
That's better. His new hand is now from that Gen2 set. He will be holding an Accurate Armor soda can. Hey I paid for it so I better use them.
Last but not least the... well I'm not sure. I guess he is either the gunner or loader. Doesn't matter. He is also from the Verlinden tank crew and again sports a Hornet head with Dragon supplied helmet. The arms came from the Verlinden set although the one on left wasn't meant for him. Some putty and grinding was needed to make the surgery a success. I love his expression.
I guess the grunt will need both an American flag patch for one shoulder and a 3rd ID patch on the other. Does anyone know if the tankers wear shoulder patches on their uniforms? Ranks? I will probably give one or two of the tankers goggles to strap on to their helmets. I should probably add a helmet strap to the grunt too.
Well I guess tomorrow the primer goes on. Thanks for looking.
Canjuaan
Joined: June 08, 2007
KitMaker: 228 posts
Armorama: 223 posts
Posted: Monday, September 17, 2007 - 09:01 PM UTC
Very cool!
I'd go for gun #2 =)
I'd go for gun #2 =)
slodder
Joined: February 22, 2002
KitMaker: 11,718 posts
Armorama: 7,138 posts
Posted: Monday, September 17, 2007 - 10:20 PM UTC
Very nice update. One thing that always gets my notice is the new gun sling, the one that almost looks like a loop on a straight strap. Are you doing those?

Tankrider
Joined: October 07, 2002
KitMaker: 1,280 posts
Armorama: 1,208 posts
Posted: Tuesday, September 18, 2007 - 12:17 AM UTC
Quoted Text
I guess the grunt will need both an American flag patch for one shoulder and a 3rd ID patch on the other. Does anyone know if the tankers wear shoulder patches on their uniforms? Ranks? I will probably give one or two of the tankers goggles to strap on to their helmets. I should probably add a helmet strap to the grunt too.
Well I guess tomorrow the primer goes on. Thanks for looking.
Matt,
The Infantryman needs 3ID patches on both sides of his helmet under the Toggle strap. Remember thatthe 3ID patch will go on the right side and the US flag will go on the left shoulder. Yes, the vehicle crew would also have 3ID patches on their NOMEX coveralls. The rank would be on the Inteceptor Tactical vest, either on the left side above the heart or in the center of the chest. It would also be correct if there was no rank worn. A couple more tips. Make sure that the vests are in Woodland Camo, and the NOMEX coveralls caould be in either sand or olive green. All of the helmets, Kevlars or CVCs, need chinstraps. As for the weapons, either the tricked out M4 or the M16A2 will work. If you can swing it, put another M4 close to the TC's hatch, as they were used as much as the .50 or M240 MGs during the close fights.
HTH
John
Epi
Joined: December 22, 2001
KitMaker: 3,586 posts
Armorama: 2,556 posts

Posted: Tuesday, September 18, 2007 - 06:48 AM UTC
John,
Sorry to correct you sir, but the flag is on the right side and the 3rd ID patch is on the left. Now if you want them wearing the 3rd ID patch as a combat patch too, it goes above the flag on the right shoulder sleeve.
You probably did mean to write it the way I said it, just a brain fart as I would say.
Either or, John, I have your back.


bananaJOE
Joined: July 12, 2007
KitMaker: 71 posts
Armorama: 68 posts

Posted: Tuesday, September 18, 2007 - 07:56 AM UTC
Matt... so far an outstandig job you did on this one!!! 
really impressed by your work and in which time you get in done
go on with #2...think it looks best
can't wait to see it when finished
cheers Alex
really impressed by your work and in which time you get in done
go on with #2...think it looks best
can't wait to see it when finished
cheers Alex
Tankrider
Joined: October 07, 2002
KitMaker: 1,280 posts
Armorama: 1,208 posts
Posted: Tuesday, September 18, 2007 - 08:05 AM UTC
Quoted Text
John,
Sorry to correct you sir, but the flag is on the right side and the 3rd ID patch is on the left. Now if you want them wearing the 3rd ID patch as a combat patch too, it goes above the flag on the right shoulder sleeve.
You probably did mean to write it the way I said it, just a brain fart as I would say.
Either or, John, I have your back.
Brainfart... I was too lazy to get up off of my fat butt and look at a uniform. Serves me right... Listen to Pete, he is spot on.
Pete,
How goes the PSD detail??? Need anything???
John
DeskJockey
Joined: July 17, 2006
KitMaker: 1,558 posts
Armorama: 1,159 posts
Posted: Tuesday, September 18, 2007 - 01:47 PM UTC
Looking good, Matt. The figure mods came out well. I like #3 for the grunt's weapon. I think #2 is short-shot--If I'm not mistaken, the carry handle on top of the receiver should not have a small gap near the front.
f1matt
Joined: August 13, 2006
KitMaker: 1,021 posts
Armorama: 805 posts
Posted: Tuesday, September 18, 2007 - 04:15 PM UTC
Thanks for all the feed back guys. Helps me out a lot.
Well I have sprayed the figures with primer. Done some sanding. Primed again. Found a few more areas in need of fixing. About ready to spray some more. As far as "grunts" weapon I think I will go with #2 with the M203. I will fix the handle on the receiver. Good eye Lucas. Hadn't even noticed. One reason I like posting pictures is you see things that you would never otherwise notice. I will place the other M4 near the tank commander. The Alpine tanker received a pair of goggles with strap. Grunt then received a strap for his helmet. Both were fashioned from lead foil. I noticed in my references that during a lull in the action a lot of tankers undo their helmet straps so I will add this detail after painting and assembly. Otherwise I would probably end up damaging the small straps hanging down from the helmets. I like your idea about the sling Scott. I think I will give grunt a nice modern sling as you suggested.
Thanks again Lucas, Alex, John, Scott, Johannes, Pete.
Well time to get spraying again.
f1matt
Joined: August 13, 2006
KitMaker: 1,021 posts
Armorama: 805 posts
Posted: Tuesday, September 18, 2007 - 06:19 PM UTC
Well the final coat of primer went on. Now I can get the proper colors sprayed on. Note to self. Schedule a trip to the LHS in the morning.
This guy is gonna be a piece of cake to paint.
You can see th added on helmet strap.
The full figured tanker (no offense) now comes with goggles.
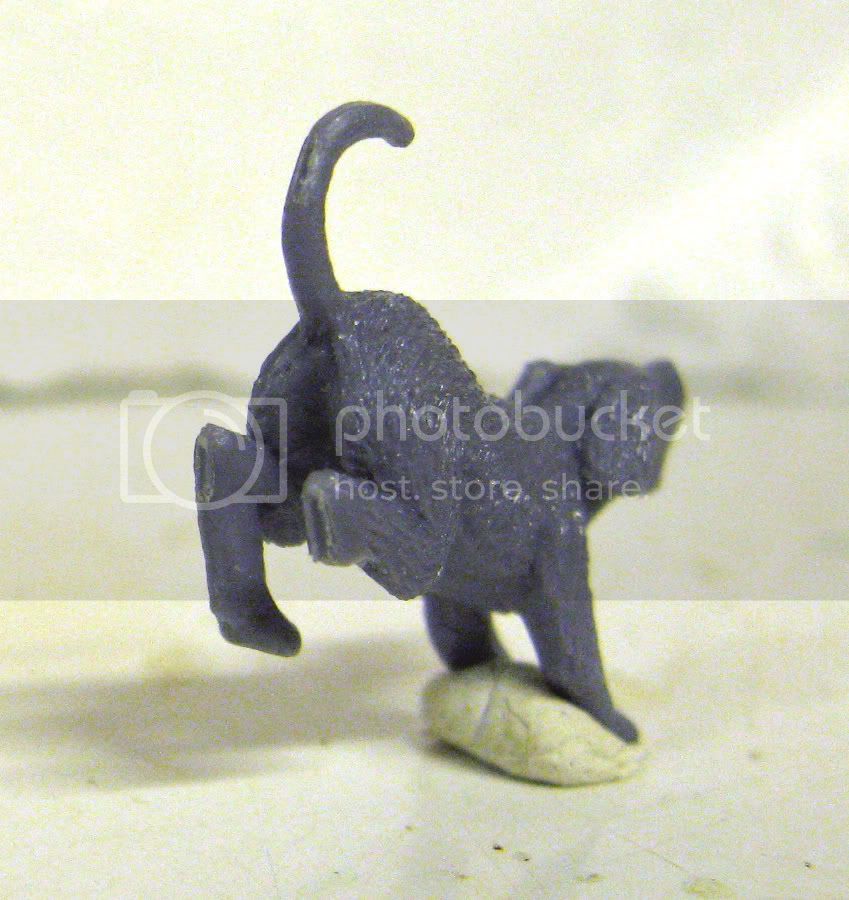
I haven't done any more work on the animals yet. Here they are before they get touched up with some putty. Unfortunately my dog came missing part of his hind leg. Guess this will need to be rebuilt by first inserting a wire into his leg and then building up some epoxy putty. Might have to strategically place a little grass or weeds to hide his leg depending on how the surgery comes out.
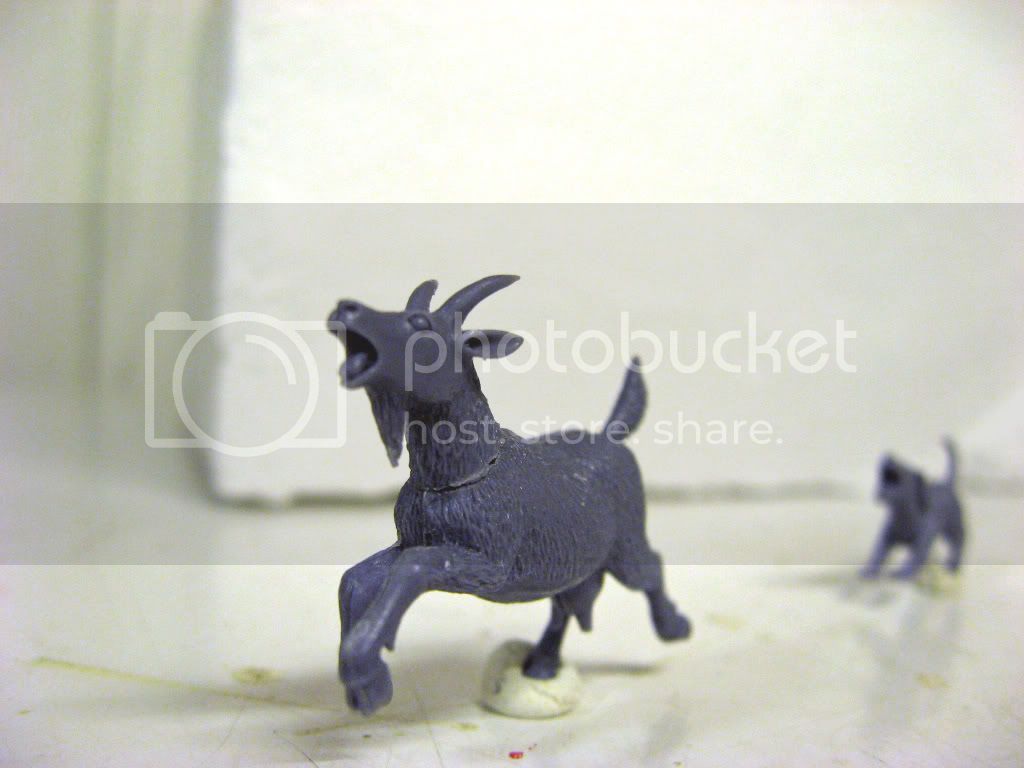
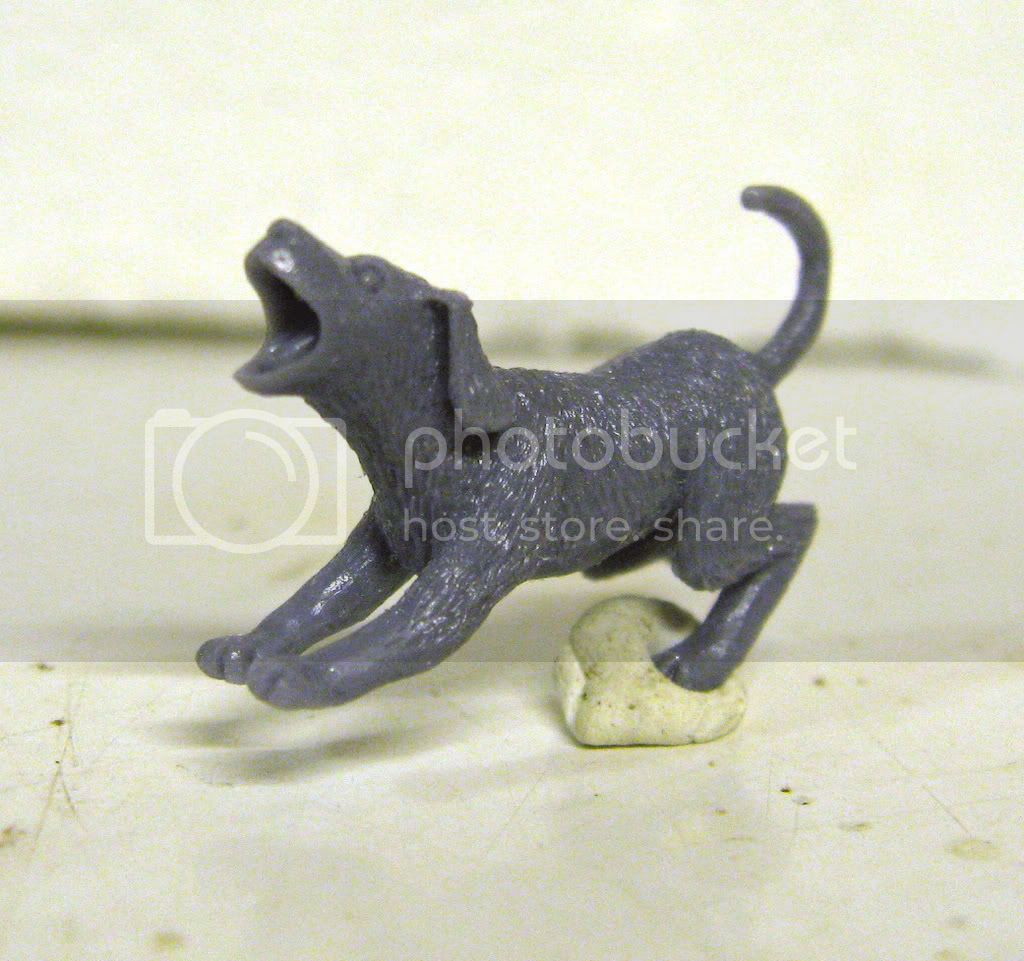
My three legged dog. Hopefully not for too much longer.
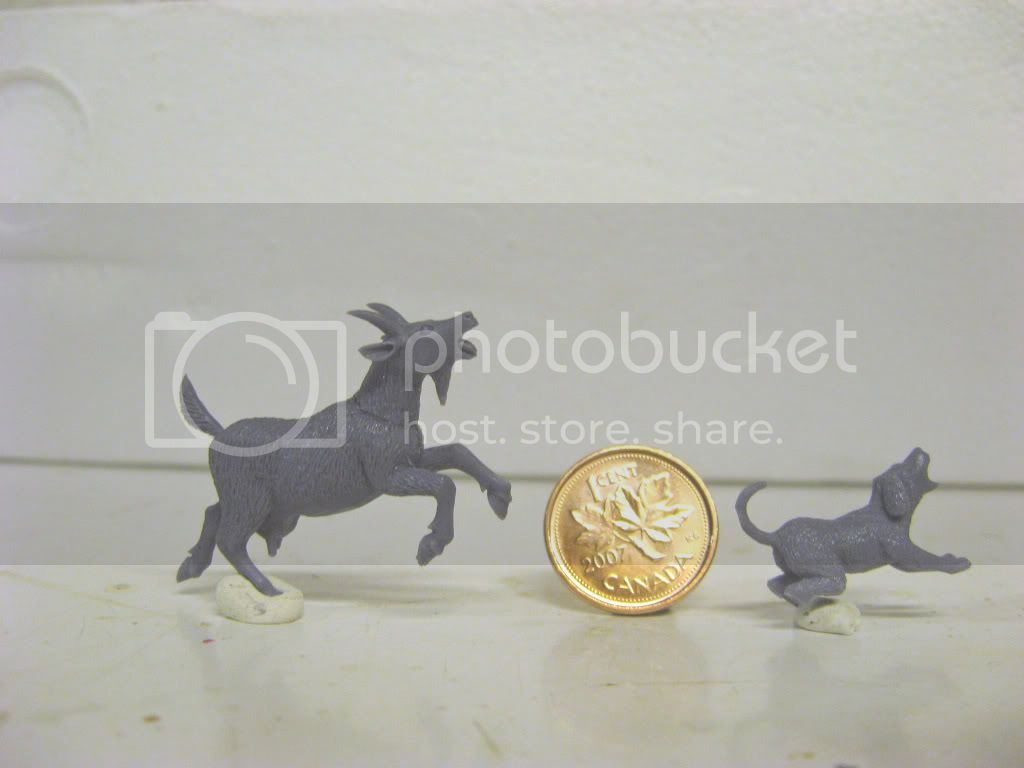
These two really are small. For a different project (that ended in disaster) I scratch-built a tiny little goat skull to put on a humvee hood. Turned out it was still way to big and I couldn't use the damn thing when it was all finished!
That's all for now.
This guy is gonna be a piece of cake to paint.
You can see th added on helmet strap.
The full figured tanker (no offense) now comes with goggles.
I haven't done any more work on the animals yet. Here they are before they get touched up with some putty. Unfortunately my dog came missing part of his hind leg. Guess this will need to be rebuilt by first inserting a wire into his leg and then building up some epoxy putty. Might have to strategically place a little grass or weeds to hide his leg depending on how the surgery comes out.
My three legged dog. Hopefully not for too much longer.
These two really are small. For a different project (that ended in disaster) I scratch-built a tiny little goat skull to put on a humvee hood. Turned out it was still way to big and I couldn't use the damn thing when it was all finished!
That's all for now.
 |

WEB HOSTING BY


Copyright ©2021 Armorama and Kitmaker Network, a subsidiary of Silver Star Enterprises
All Rights Reserved. Please read our Conditions of Use and Privacy Policy.
All Rights Reserved. Please read our Conditions of Use and Privacy Policy.