

Dioramas
Do you love dioramas & vignettes? We sure do.
Do you love dioramas & vignettes? We sure do.
Hosted by Darren Baker, Mario Matijasic
M1A1 Abrams "BOOM STICK"
DeskJockey

Joined: July 17, 2006
KitMaker: 1,558 posts
Armorama: 1,159 posts
Posted: Monday, October 01, 2007 - 09:08 AM UTC
Matt--I think you're being a bit hard on yourself, the faces came out mostly fine. Then again, when you've redone stuff during this build, the improvements have been quite noticeable (and good!) so I'm looking forward to your newly painted heads.

f1matt

Joined: August 13, 2006
KitMaker: 1,021 posts
Armorama: 805 posts

Posted: Tuesday, October 02, 2007 - 05:43 PM UTC
Well Lucas I tend to be very picky with my work. Guess that's a good thing and a bad thing.
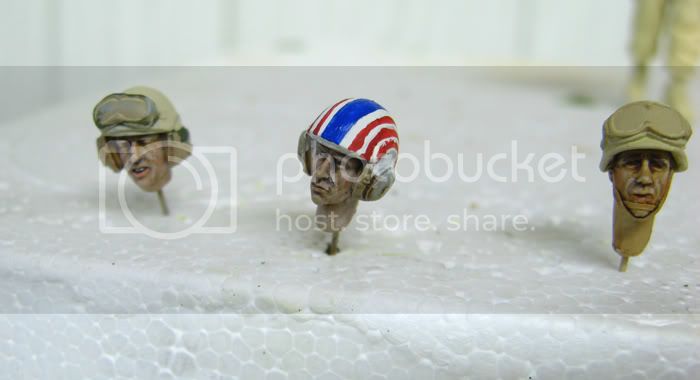
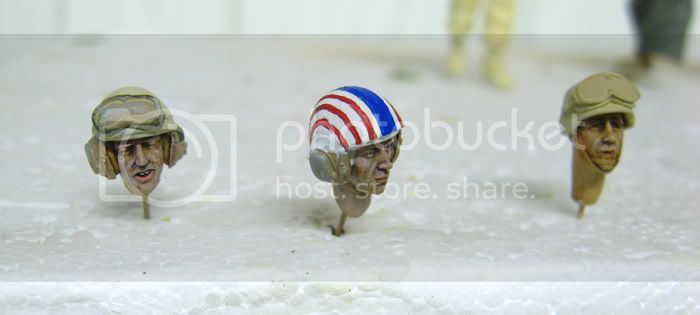
Well here is round two with a couple of heads. They looked good initially but when I saw the pictures. Yikes. Not impressed. Also they should be a little more pink. Look kinda dead right now.


I wish the heads really were this big. They would be a heck of a lot easier to paint. Guess I will strip 'em and try again tomorrow with some different fleshy shades. I am determined to get them right. The detail of these Hornet heads cry out for a decent paint job. Also the faces will be the focal point of the whole diorama. I have a lot of respect for people that can paint figures well.
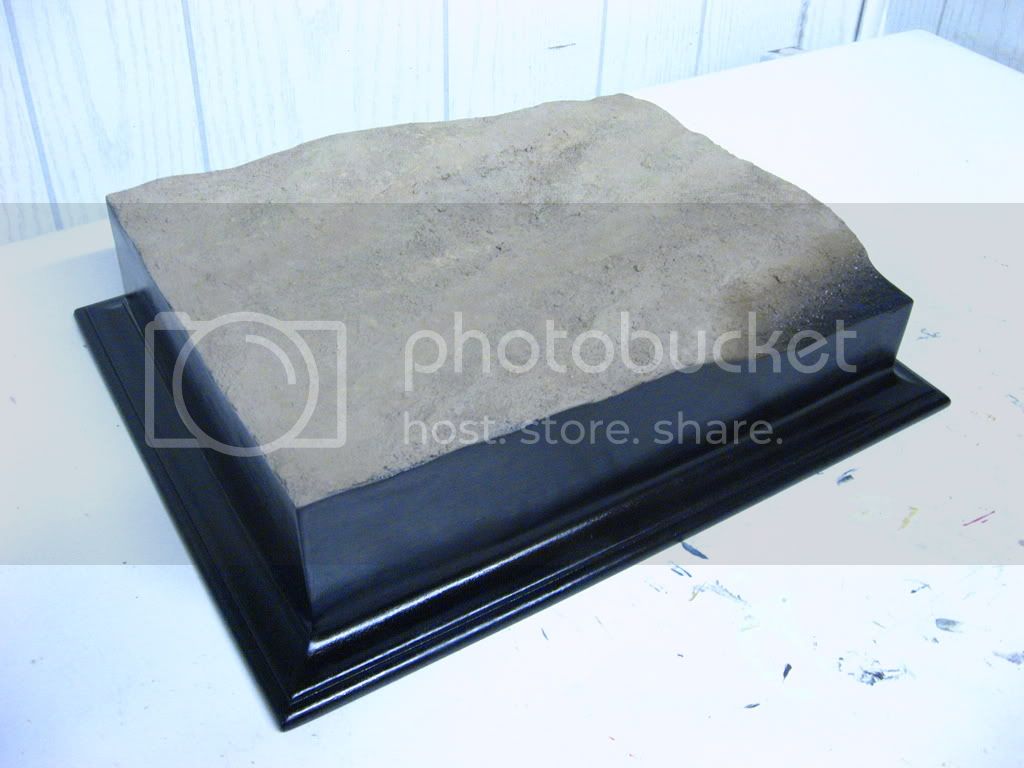
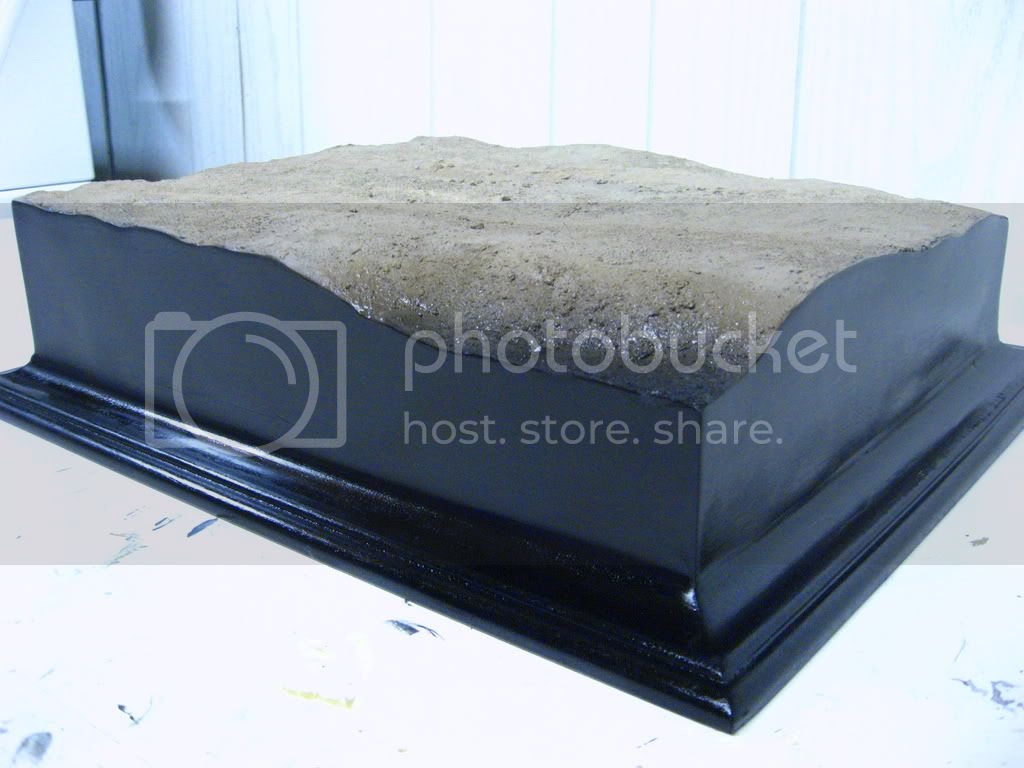
I did get some work done on the base. I think it is ready for some vegetation now. I have given the base another coat of black and clear gloss. Touched up the dirt as well as began making a corner look "wet". I plan on making the corner look like part of a stream. I think I should spray some dark blue to lighten up the shadow a bit.
Well lets see how round three goes for the faces.
Well here is round two with a couple of heads. They looked good initially but when I saw the pictures. Yikes. Not impressed. Also they should be a little more pink. Look kinda dead right now.
I wish the heads really were this big. They would be a heck of a lot easier to paint. Guess I will strip 'em and try again tomorrow with some different fleshy shades. I am determined to get them right. The detail of these Hornet heads cry out for a decent paint job. Also the faces will be the focal point of the whole diorama. I have a lot of respect for people that can paint figures well.
I did get some work done on the base. I think it is ready for some vegetation now. I have given the base another coat of black and clear gloss. Touched up the dirt as well as began making a corner look "wet". I plan on making the corner look like part of a stream. I think I should spray some dark blue to lighten up the shadow a bit.
Well lets see how round three goes for the faces.
f1matt
Joined: August 13, 2006
KitMaker: 1,021 posts
Armorama: 805 posts
Posted: Friday, October 05, 2007 - 06:44 PM UTC
I have been reading everything I can on painting faces with acrylics and oils and enamels. I am learning. Still practicing. I am determined to do a decent job on the faces.
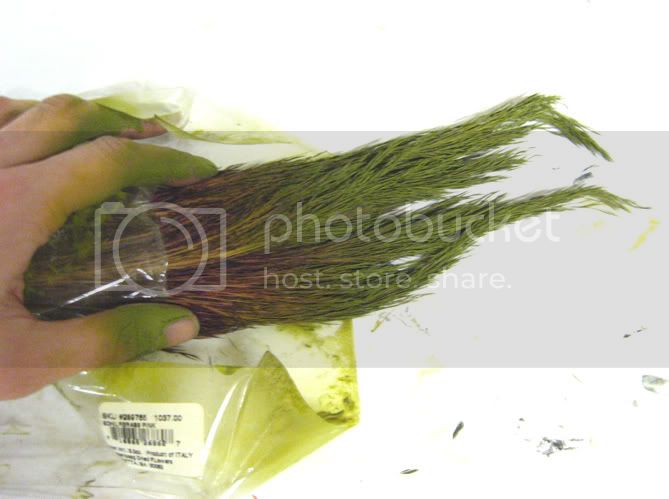
I have started to put some green stuff on my base. The tufts of grass are from a company called Mininatur (yes that is how you spell it) that specializes in railroad products. But of course you can use them for anything. Neat stuff. Just peel it off the backing paper and apply a little white glue. I am using two different colored sheets of grass. The grass is a little too perfect though. I will take a pair of scissors to it to vary the lengths of grass a bit. Course since the tufts of grass are only about 6mm tall they have limited use. I will be using dried plant products available from Michaels for the longer grass.
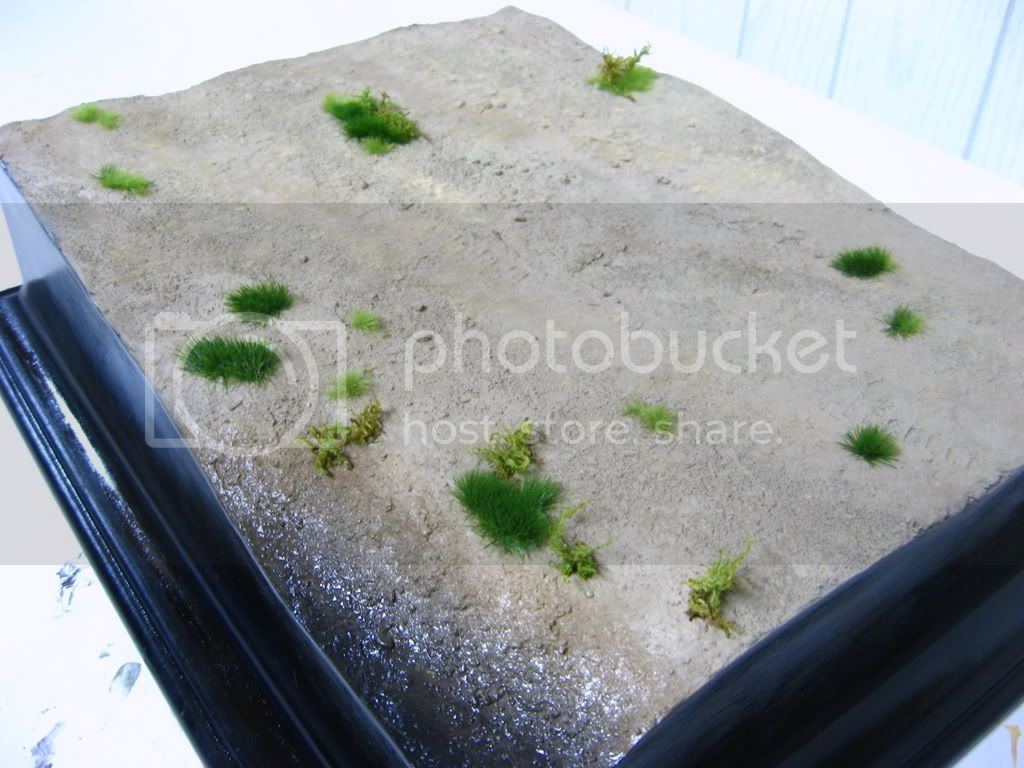
About a hundred or so holes have been drilled into the "wet" corner in preparation for the tall grass. The opposite corner will also have tall grass. I want to have a lot of bright green in the base. This will hopefully give it some "pop".
Thanks for looking.
I have started to put some green stuff on my base. The tufts of grass are from a company called Mininatur (yes that is how you spell it) that specializes in railroad products. But of course you can use them for anything. Neat stuff. Just peel it off the backing paper and apply a little white glue. I am using two different colored sheets of grass. The grass is a little too perfect though. I will take a pair of scissors to it to vary the lengths of grass a bit. Course since the tufts of grass are only about 6mm tall they have limited use. I will be using dried plant products available from Michaels for the longer grass.
About a hundred or so holes have been drilled into the "wet" corner in preparation for the tall grass. The opposite corner will also have tall grass. I want to have a lot of bright green in the base. This will hopefully give it some "pop".
Thanks for looking.

slodder
Joined: February 22, 2002
KitMaker: 11,718 posts
Armorama: 7,138 posts
Posted: Friday, October 05, 2007 - 11:17 PM UTC
The grasses are very bright, do you plan to tone them down with a dusting or pigment or pastels?

f1matt
Joined: August 13, 2006
KitMaker: 1,021 posts
Armorama: 805 posts
Posted: Saturday, October 06, 2007 - 07:18 AM UTC
Yes I do. With both paint and pigments. Hopefully this will help blend things together a bit.
f1matt
Joined: August 13, 2006
KitMaker: 1,021 posts
Armorama: 805 posts
Posted: Saturday, October 06, 2007 - 03:26 PM UTC
Got a present from Eduard in the mail. The new M7 120mm mortar ammunition can. No my Abrams does not have a mortar. But almost any Abrams involved in the initial invasion of Iraq had a mortar ammo can attached. Some had two.
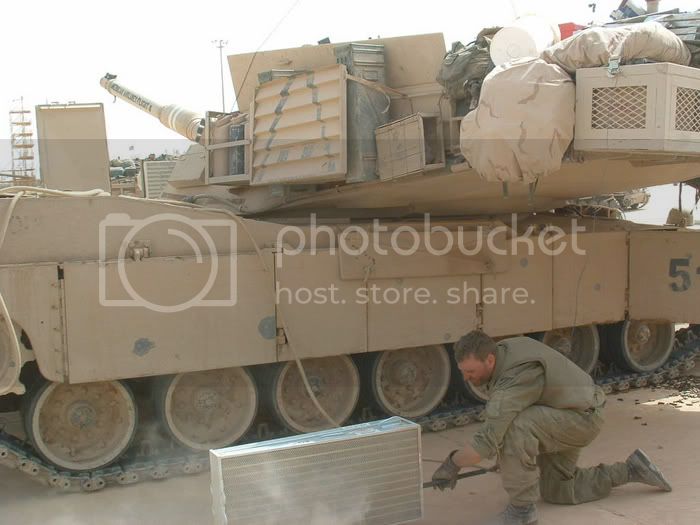
I believe it was simply used to carry stowage. In war time those tanks must have an extra tons worth of stowage on em.
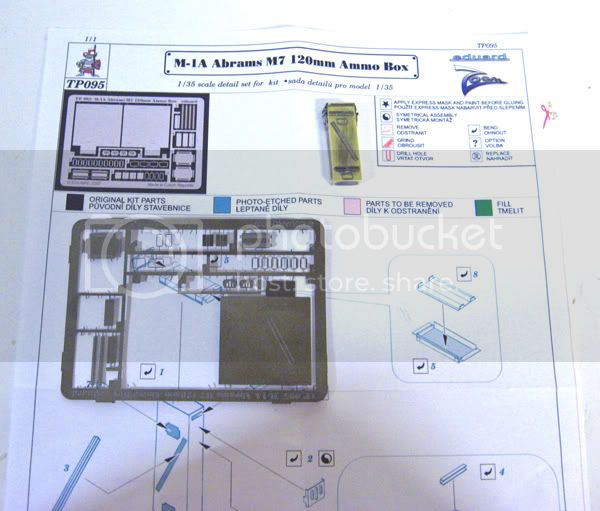
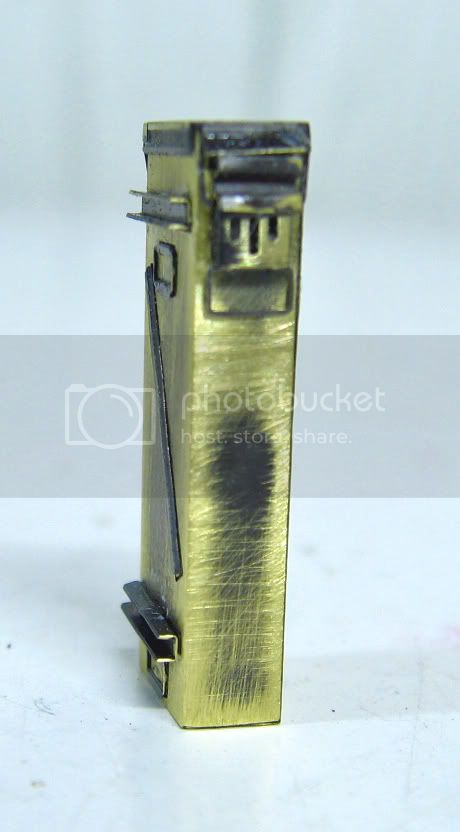
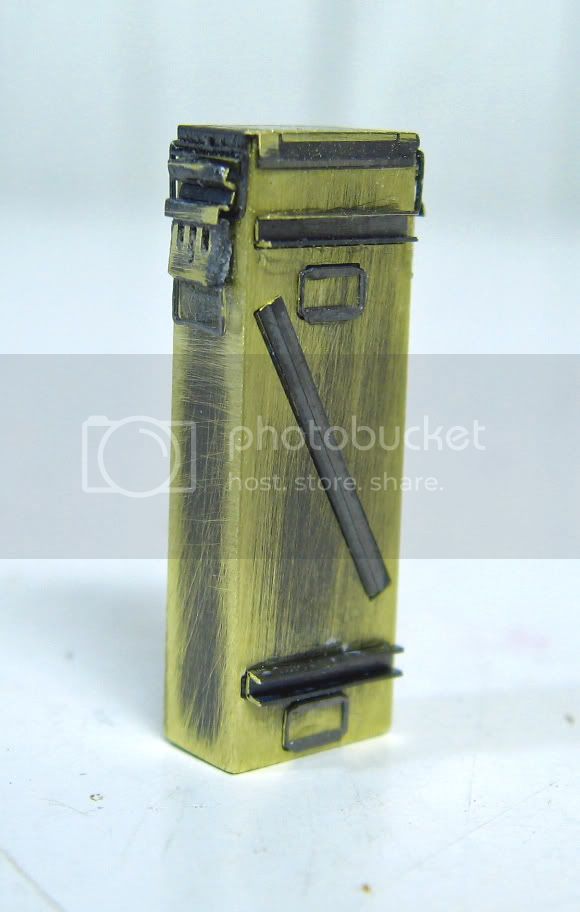
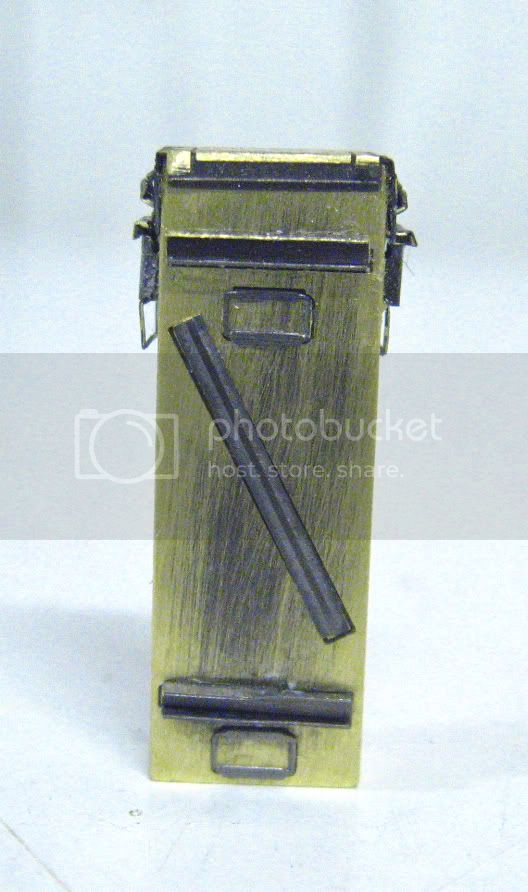
A little tricky to assemble with all those small parts (more than I expected) but it's not to bad. How about some paint.
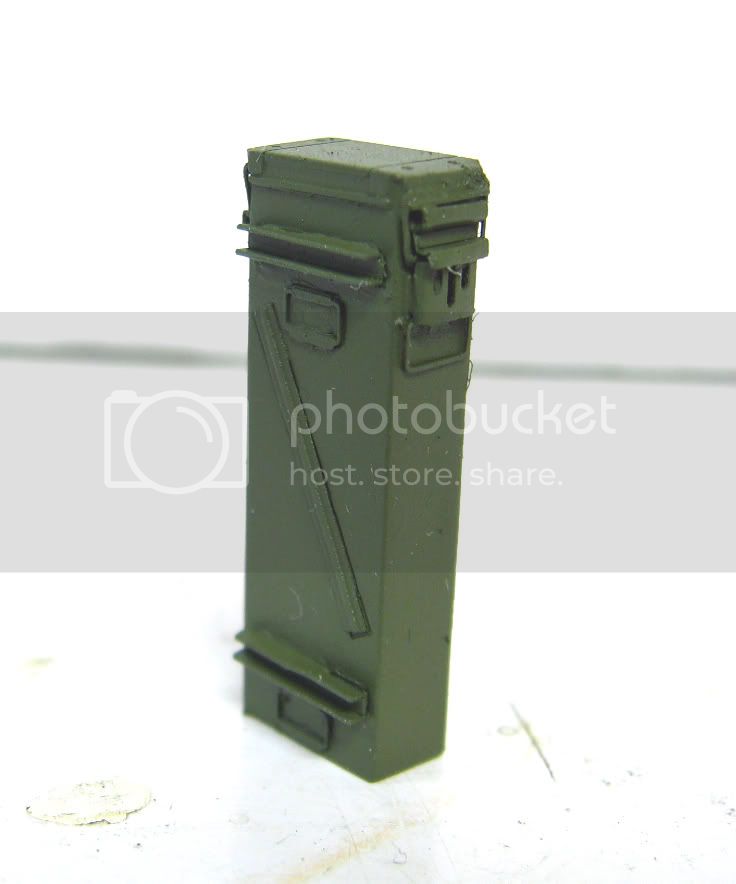
I will only be adding one. This way I already have one for my next M1. I have seen pictures where they appear to be painted in a sand color but this may simply be a heavy coating of dust.
Went out and bought some nice new brushes and some oil paints today. The figures heads got a new fleshy base coat today mixed from Tamiya dark yellow, Gunze flat white, and Aircraft Colors U.S. sand (3052). Wish me luck on my latest attempt at faces.
I believe it was simply used to carry stowage. In war time those tanks must have an extra tons worth of stowage on em.
A little tricky to assemble with all those small parts (more than I expected) but it's not to bad. How about some paint.
I will only be adding one. This way I already have one for my next M1. I have seen pictures where they appear to be painted in a sand color but this may simply be a heavy coating of dust.
Went out and bought some nice new brushes and some oil paints today. The figures heads got a new fleshy base coat today mixed from Tamiya dark yellow, Gunze flat white, and Aircraft Colors U.S. sand (3052). Wish me luck on my latest attempt at faces.
Removed by original poster on 10/08/07 - 13:54:11 (GMT).
f1matt
Joined: August 13, 2006
KitMaker: 1,021 posts
Armorama: 805 posts
Posted: Sunday, October 07, 2007 - 06:52 PM UTC
Well I mounted the mortar ammo can.
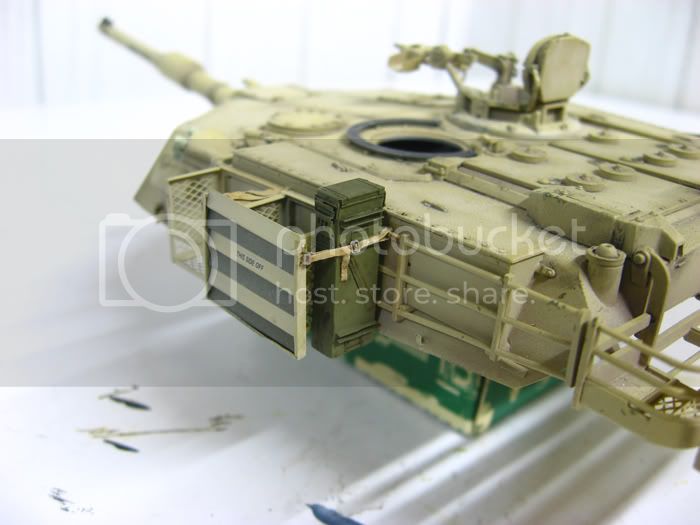
The only tricky part was adding the straps that attach the CIP to the turret.
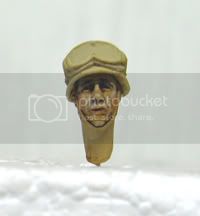
Well here is attempt number 5 at this particular head. He is my guinea pig of sorts for learning to paint heads. First a base coat of Tamiya dark yellow, Gunze white and Aircraft Colors U.S. sand.
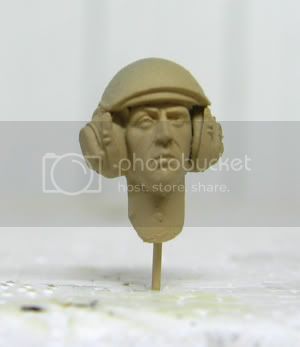
Next comes a wash of raw umber and burnt sienna. This outlines fine detail as well as adding some basic shadows.
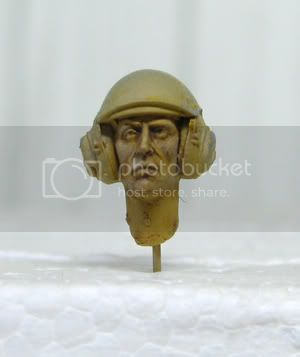
This dries for about an hour and is gently blended. Next comes some highlights. Winsor and Newton white, flesh and yellow.
Again this sits for about an hour and is carefully blended. After blending, I added a little pink to the cheeks. Darkened the deeper shadows a bit. And of course blended some more.
As long as I don't screw him up he's gonna be a keeper. Still need to do a little touch up work as well as paint his lips, eyes and eyebrows. And then of course, paint four more faces. As well as some animals. Should have him all done tomorrow. Should.
Also try to keep in mind his head is about the size of a small pea. He looks a lot rougher in these big pictures.
The only tricky part was adding the straps that attach the CIP to the turret.
Well here is attempt number 5 at this particular head. He is my guinea pig of sorts for learning to paint heads. First a base coat of Tamiya dark yellow, Gunze white and Aircraft Colors U.S. sand.
Next comes a wash of raw umber and burnt sienna. This outlines fine detail as well as adding some basic shadows.
This dries for about an hour and is gently blended. Next comes some highlights. Winsor and Newton white, flesh and yellow.
Again this sits for about an hour and is carefully blended. After blending, I added a little pink to the cheeks. Darkened the deeper shadows a bit. And of course blended some more.
As long as I don't screw him up he's gonna be a keeper. Still need to do a little touch up work as well as paint his lips, eyes and eyebrows. And then of course, paint four more faces. As well as some animals. Should have him all done tomorrow. Should.
Also try to keep in mind his head is about the size of a small pea. He looks a lot rougher in these big pictures.
Pavlovsdog

Joined: June 05, 2006
KitMaker: 438 posts
Armorama: 352 posts

Posted: Monday, October 08, 2007 - 03:41 AM UTC
Matthew,
Can I take this oppertunity to thank you and say how outstanding your project "boom stick" looks, I really love the way you delt with the external stowage, and the furry dice and details on the coupila are fantastitic, the is so much first class work here I could go on and on , I really love watching the progress of the crew figures , the woodland camo is out standing , I will lookforward to see this one progress further. Best wishes,
Jerry
Erik67

Joined: July 31, 2005
KitMaker: 1,871 posts
Armorama: 1,423 posts
Posted: Monday, October 08, 2007 - 03:53 AM UTC
I have been following your thread with great interest. This will be one Hell of an Abrams. Excellent work.
Erik
Erik
DeskJockey
Joined: July 17, 2006
KitMaker: 1,558 posts
Armorama: 1,159 posts
Posted: Monday, October 08, 2007 - 05:38 AM UTC
The ammo can came out looking great, and the face is definitely better than your previous ones. That guy looks like one pissed-off bloke in the close-up picture. What did you use to make the buckles for the CIP strap?

Lee-Enfield
Joined: February 25, 2007
KitMaker: 272 posts
Armorama: 222 posts

Posted: Monday, October 08, 2007 - 06:15 AM UTC
What can I say but... dang!
I'm watching... and looking forwards to the end result!
I'm watching... and looking forwards to the end result!

f1matt
Joined: August 13, 2006
KitMaker: 1,021 posts
Armorama: 805 posts
Posted: Monday, October 08, 2007 - 03:19 PM UTC
Thank you for the kind words Lucas, Lewis. Erik and Jerry. You guys really keep me motivated.
I can't wait to see it finished either. Partly cause I'm getting excited about my idea for my next Abrams dio. I know I know. Get this one done first.
The straps came from the Eduard CIP set. They have photo-etch straps with buckles. Although for part of the straps I used lead foil as it is easier to bend and shape.
This project is taking a little longer than I had anticipated (originally built for the OIF campaign) but I decided I won't rush anything. I want this to be my best model yet.
Still working on the rest of the faces. Will show you guys more as soon as there is more to show. I think while the paint is drying between stages I will give my goat a new tail from copper wire and epoxy putty. One thing about dioramas, you always have something to work on.
See you guys later
JeepLC
Joined: June 20, 2007
KitMaker: 510 posts
Armorama: 469 posts

Posted: Tuesday, October 09, 2007 - 02:59 AM UTC
Great work so far. I have been following this thread as well. I asked around and did not get a definative answer on those ammo cans. A friend of mine who was a tanker with the Marines said that they did not carry any ammo cans they did not need for space issues. He said he did know of other tanks that used them for extra storage space and such, but he also said some did, in fact, carry mortar shells for some odd reason.
-Mike
-Mike
f1matt
Joined: August 13, 2006
KitMaker: 1,021 posts
Armorama: 805 posts
Posted: Tuesday, October 09, 2007 - 05:39 AM UTC
Interesting Mike. So far I have only seen pictures of tanks from the Army that have had the ammo cans. Thanks for asking around though.
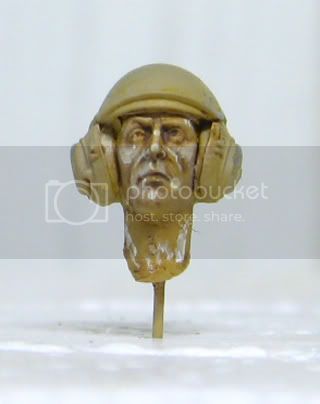
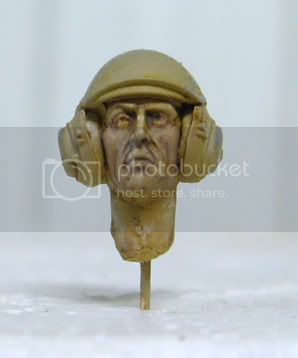
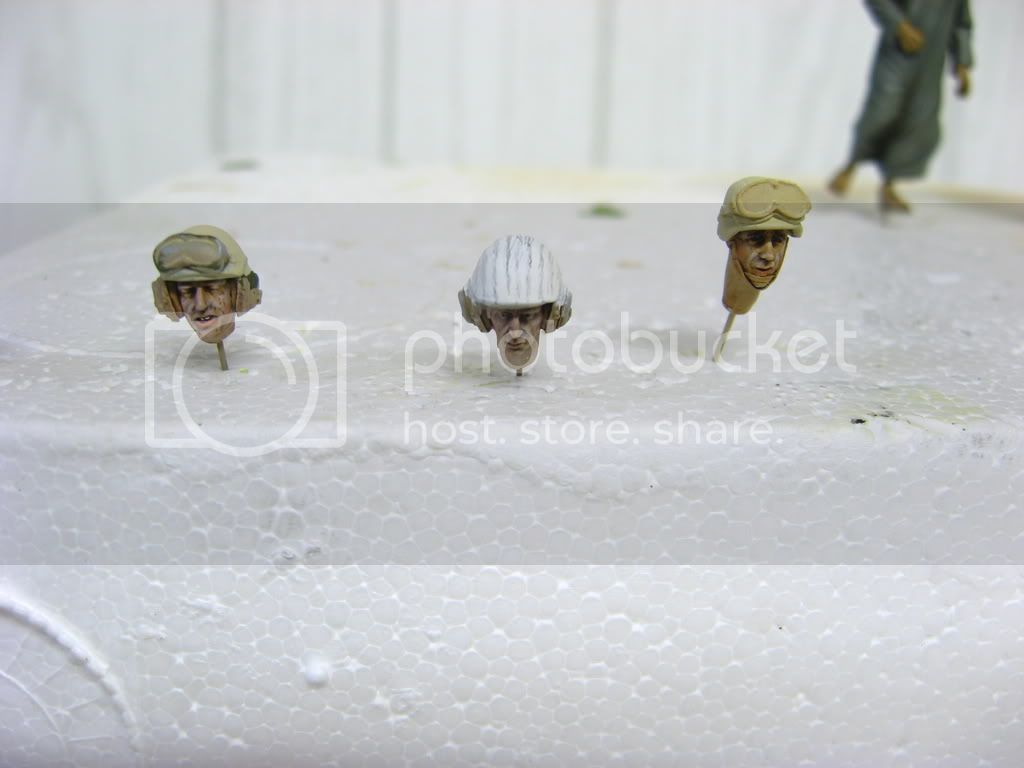
I have (relatively) successfully painted two of my faces. They might get tweaked a little but they are essentially done. Minus the helmets of course.
As well as...
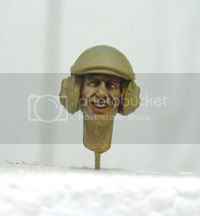
I love his expression. I had wanted to paint the eyes as well but after several failed attempts I decided a simple dark wash will suffice. I want to get this thing done already! Should get the other faces painted today as well as their helmets. I won't glue the heads onto the bodies until the tank has been positioned on the base. This way I should be able to make sure all the heads are pointing in the right direction.
Finally. Some progress!
I have (relatively) successfully painted two of my faces. They might get tweaked a little but they are essentially done. Minus the helmets of course.
As well as...
I love his expression. I had wanted to paint the eyes as well but after several failed attempts I decided a simple dark wash will suffice. I want to get this thing done already! Should get the other faces painted today as well as their helmets. I won't glue the heads onto the bodies until the tank has been positioned on the base. This way I should be able to make sure all the heads are pointing in the right direction.
Finally. Some progress!
Removed by original poster on 10/10/07 - 08:47:27 (GMT).
f1matt
Joined: August 13, 2006
KitMaker: 1,021 posts
Armorama: 805 posts
Posted: Tuesday, October 09, 2007 - 01:47 PM UTC
Well my goat is whole once again. Ha-zaa! Re-constructive surgery began by drilling a small hole where the tail will go. Fine copper wire was inserted into this hole and super glued in place. This gives the tail its basic shape. It will make the tale a little stronger too. A small amount of fine white Milliput epoxy putty was mixed up and gently wrapped around the wire. This was shaped using my finger nail, an exacto knife and a panel scribing tool. Whatever works.
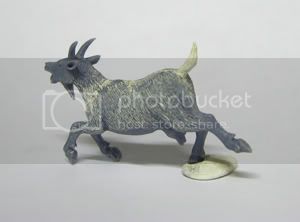
I am glad I took pictures of the goat while it was still whole. These pictures guided me during the operation. It only took about 15 minutes to shape the tail. After the putty has set for an hour or so I will add a fur texture with an old airbrush needle. I am also glad I picked up Douglas Lee's book on military dioramas. Lot's of great information on sculpting figures and animals. Not to mention all the amazing pictures of his work.
Guess now I have to finish off the figures and paint the animals. As well as add all the tall grass to the base. It's getting there.

Yoni_Lev
Joined: September 20, 2007
KitMaker: 861 posts
Armorama: 394 posts

Posted: Tuesday, October 09, 2007 - 03:41 PM UTC
I'm glad to see the old boy is in one piece again. (Are the goat and the dog both in post-op now?)
Lost parts are a pain, but sometimes it's fun to exercise a little creativity and fix our goofs.
Sometimes.
Lost parts are a pain, but sometimes it's fun to exercise a little creativity and fix our goofs.
Sometimes.
f1matt
Joined: August 13, 2006
KitMaker: 1,021 posts
Armorama: 805 posts
Posted: Tuesday, October 09, 2007 - 04:16 PM UTC
Yes Yoni, both are doing well in recovery and barring any infection, should remain in stable in condition. I was nervous to sculpt the tail at first but I think the finished item looks close to the original. Close enough any way. Now to paint! 
f1matt
Joined: August 13, 2006
KitMaker: 1,021 posts
Armorama: 805 posts
Posted: Friday, October 12, 2007 - 05:20 PM UTC
Time for an update already!
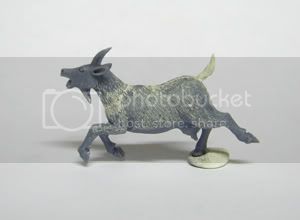
Goat has received her base colors. Needs a little touch up but is basically ready for highlights, shadows, then detail painting.
Dog is at the same stage of painting as goat. Am I great with names or what?
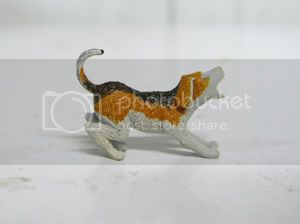
Don't mind the dot of black on the tip of the tail. Will touch that up too.
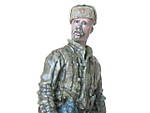
The gang's all here.
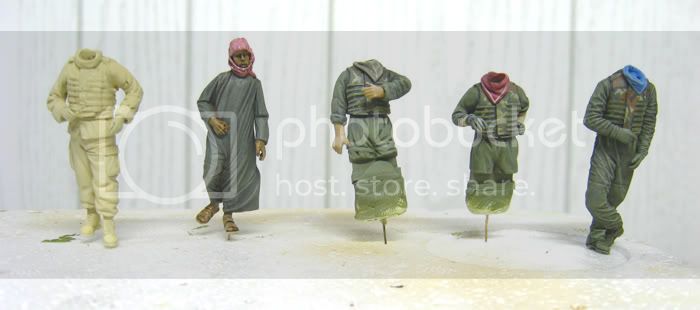
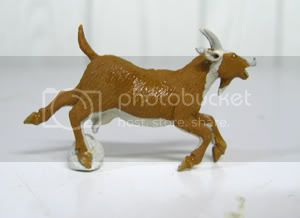
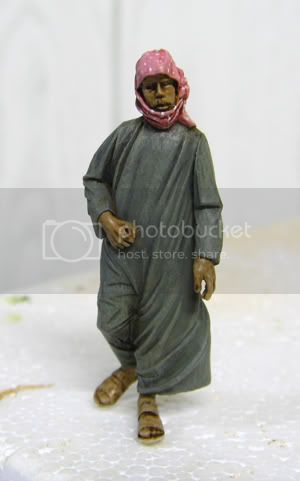
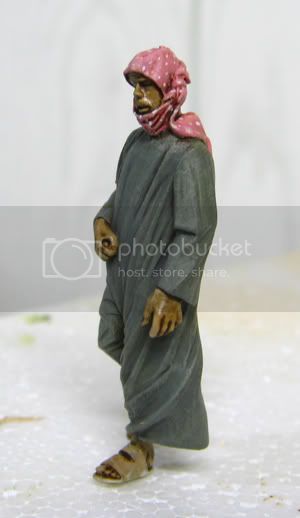
Soldier is only at the base coat stage. He was all painted and shaded but it turned out not so great. So here we go again. You may have noticed I am not afraid to re-do my own work. It is a habit I get in to on a lot of my builds. Not sure if it is a good thing or not. Oh well. On with the build. Farmer Bob is nearing completion. He still needs highlights on his fleshy bits as well as his mustache and eyebrows need painting. Actually I need to paint his sandals too. He will also receive a walking stick that he came with. I decided to paint him as he appears on the box top. Not very original but I really like how it looks.
The grass is ready to be installed. It was painted Polly S dark slate gray with an orangey-yellow mixed in. This was applied via my airbrush. I got this from Micheal's and it came purple. Didn't think that would be very appropriate.
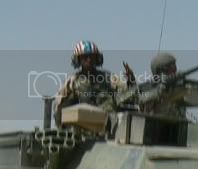
How about some more inspiration.
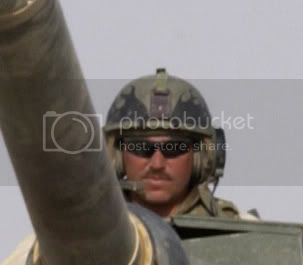
You can barely see the TC in the full picture. But here he his with his custom helmet. Flames on a TC's helmet. Do you think I could resist?
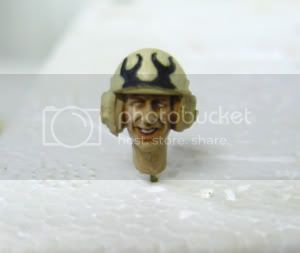
Guess not. Needs a little more work but I like it.

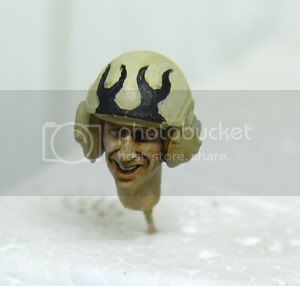
I gave him a sand colored helmet to help the flames stand out a bit more.
Here we go again...
I actually did a similar design an my last Abrams build and it was a very popular detail. Grant V, if you are out there you might remember. Anyway first thing is a flat white base coat. A few actually since it went on with a brush. Then draw on some guide lines.
The stripes are rough right now. When it dries I will clean up the stripes and add some stars (dots of white paint) down the center.
Later
Goat has received her base colors. Needs a little touch up but is basically ready for highlights, shadows, then detail painting.
Dog is at the same stage of painting as goat. Am I great with names or what?
Don't mind the dot of black on the tip of the tail. Will touch that up too.
The gang's all here.
Soldier is only at the base coat stage. He was all painted and shaded but it turned out not so great. So here we go again. You may have noticed I am not afraid to re-do my own work. It is a habit I get in to on a lot of my builds. Not sure if it is a good thing or not. Oh well. On with the build. Farmer Bob
is nearing completion. He still needs highlights on his fleshy bits as well as his mustache and eyebrows need painting. Actually I need to paint his sandals too. He will also receive a walking stick that he came with. I decided to paint him as he appears on the box top. Not very original but I really like how it looks.The grass is ready to be installed. It was painted Polly S dark slate gray with an orangey-yellow mixed in. This was applied via my airbrush. I got this from Micheal's and it came purple. Didn't think that would be very appropriate.
How about some more inspiration.
You can barely see the TC in the full picture. But here he his with his custom helmet. Flames on a TC's helmet. Do you think I could resist?
Guess not. Needs a little more work but I like it.
I gave him a sand colored helmet to help the flames stand out a bit more.
Here we go again...
I actually did a similar design an my last Abrams build and it was a very popular detail. Grant V, if you are out there you might remember. Anyway first thing is a flat white base coat. A few actually since it went on with a brush. Then draw on some guide lines.
The stripes are rough right now. When it dries I will clean up the stripes and add some stars (dots of white paint) down the center.
Later

bananaJOE

Joined: July 12, 2007
KitMaker: 71 posts
Armorama: 68 posts

Posted: Friday, October 12, 2007 - 09:40 PM UTC
Matt, sometimes it can be helpful to be your hardest critic 
like how the figures turned out so far and can't wait to see them finished
helmet looks stunning...go on like this, will look awesome i think
good luck with the stars and go on like this
cheers Alex
like how the figures turned out so far and can't wait to see them finished
helmet looks stunning...go on like this, will look awesome i think
good luck with the stars and go on like this
cheers Alex

yufkey70
Joined: July 16, 2005
KitMaker: 264 posts
Armorama: 263 posts

Posted: Friday, October 12, 2007 - 11:56 PM UTC
I must admit you are very creative. I like your work. I hope mines comes out just as good
yufkey
yufkey
slodder
Joined: February 22, 2002
KitMaker: 11,718 posts
Armorama: 7,138 posts
Posted: Saturday, October 13, 2007 - 12:55 AM UTC
Love the detailed helmets. Awwww come'on why not purple grass
Great updates - keep'em comin
Great updates - keep'em comin
DeskJockey
Joined: July 17, 2006
KitMaker: 1,558 posts
Armorama: 1,159 posts
Posted: Saturday, October 13, 2007 - 01:58 AM UTC
The helmets are really looking good, Matt. Have you thought of using decals for the stars on the helmet? I think you could use the insignia from a 1/144 or 1/72 aircraft decal sheet.
GVoakes
Joined: September 04, 2007
KitMaker: 193 posts
Armorama: 132 posts
Posted: Saturday, October 13, 2007 - 10:25 AM UTC
Matt,
Yep, I`m here. Following this build with great interest. If you`re coming out on Monday night, I deifinitely want to talk figure painting with you...Those are absolutely amazing!
Yep, I`m here. Following this build with great interest. If you`re coming out on Monday night, I deifinitely want to talk figure painting with you...Those are absolutely amazing!
 |

WEB HOSTING BY


Copyright ©2021 Armorama and Kitmaker Network, a subsidiary of Silver Star Enterprises
All Rights Reserved. Please read our Conditions of Use and Privacy Policy.
All Rights Reserved. Please read our Conditions of Use and Privacy Policy.