Constructive Feedback
For in-progress or completed build photos. Give and get contructive feedback!
761st Sherman project
ProfessorP
Visit this Community
Minnesota, United States
Joined: February 20, 2007
KitMaker: 339 posts
Armorama: 325 posts
Posted: Tuesday, January 04, 2011 - 06:01 PM UTC
Hi Guys. I'm making some slow progress on my Sherman of the 761st Tank Battalion. This is the Dragon M4A3(76) Premium Kit and I'm throwing some resin and etch at it as well. I haven't built a "historical" kit in about 20 years but I've built and painted many, many Warhammer and WH40K figs and models during that time. Nevertheless, I'm finding this build a real challenge and working with the etch is particularly nerve-wracking! Anyway, here's a look at what's been done so far...


Made sure to drill the holes in the bogies...


and used Mr. Surfacer 500 on the transmission cover and turret.


Also followed Steve Zaloga's advice and faired in the trunnion and reshaped the turret behind the mantlet...


More etch shown here but there's plenty more still to add...


Added brass rod for engine hatch handles. In retrospect they may be a bit too thick but it's too late now...


I picked up the "older" Lion Marc metal 76mm barrel but it's noticeably shorter (about 8mm actual) than the plastic one from the kit. Unfortunately I don't have scale drawings against which to measure these so I don't know which is more accurate. I saw that Lion Marc recently released another 76mm barrel for "DML & Tasca" but their site doesn't say what the difference is between the new release and the one I have. Anyone know?


Finally, here's the crew so far. These are DML bodies with the African heads from Hornet. I've got a set of Nemrod tank crew on order so hopefully I'll have a nice mix of poses once all the head swaps are done.


Any and all feedback is welcome! Thanks in advance.

Regards,
Don
shopkin4
Visit this Community
Illinois, United States
Joined: March 29, 2009
KitMaker: 1,135 posts
Armorama: 1,030 posts
Posted: Tuesday, January 04, 2011 - 06:05 PM UTC
Very nice work!

I am working on (put on the side) a Tasca M4A3 (76)W for the 761st and I have to say that I am very impressed with your work. The small details make it stand out.
ProfessorP
Visit this Community
Minnesota, United States
Joined: February 20, 2007
KitMaker: 339 posts
Armorama: 325 posts
Posted: Tuesday, January 04, 2011 - 06:10 PM UTC
Thanks much Sean. I thought I recalled you were doing one for the 761st as well. In retrospect, almost wish I would have picked up the Tasca kit instead...
Plasticbattle
#003
Visit this Community
Donegal, Ireland
Joined: May 14, 2002
KitMaker: 9,763 posts
Armorama: 7,444 posts
Posted: Tuesday, January 04, 2011 - 07:39 PM UTC
Nice work on the Sherman. Its those extra little details that make all the difference. I particularily like what you did to the figures. Looking forward to more.
Dangeroo
#023
Visit this Community
Zurich, Switzerland
Joined: March 13, 2009
KitMaker: 2,058 posts
Armorama: 1,656 posts
Posted: Tuesday, January 04, 2011 - 07:57 PM UTC
Nice work so far Don! I like the cast effect. What Resin parts are you using? Formations? The figures are looking great too!

As for the barrel: Here's a PMMS review of your barrel: http://www.perthmilitarymodelling.com/reviews/vehicles/lionmarc/lm20003.htm Unfortunately it has no numbers, just says the barrel length is correct...

Cheers!
Stefan
210cav
Visit this Community
Virginia, United States
Joined: February 05, 2002
KitMaker: 6,149 posts
Armorama: 4,573 posts
Posted: Wednesday, January 05, 2011 - 02:15 AM UTC
Don-- outstanding workmanship! What size brass wire did you use for the communications hook-up on the figure?
thanks
DJ
clovis899
#155
Visit this Community
California, United States
Joined: May 05, 2002
KitMaker: 774 posts
Armorama: 605 posts
Posted: Wednesday, January 05, 2011 - 06:11 AM UTC
Don,
Looks great so far and I love the figures. One thing you might want to check on, or maybe someone else can chime in with definitive information, but I think that the grab handles on the rear deck do not stand proud, I believe they are meant to fall back into the deck and ride fairly flush until needed. If i'm correct it is a pretty easy fix.

Rick Cooper
shermadude
Visit this Community
United States
Joined: December 03, 2007
KitMaker: 161 posts
Armorama: 53 posts
Posted: Wednesday, January 05, 2011 - 07:21 AM UTC
Hi Don,
The barrel length w/o the muzzle brake should be eight feet from the mantlet to the tip of the barrel. That doesn't include anything inside the mantlet. The DML barrel is too long, but it can be shortened by cutting at the end that goes in the mantlet. The Lionmarc barrel is the correct length, but not if inserted inside the mantlet! They tell you this in their instructions. They also tell you how to mount it to get the correct length. Hope this helps.
Regards, Bob C.
ProfessorP
Visit this Community
Minnesota, United States
Joined: February 20, 2007
KitMaker: 339 posts
Armorama: 325 posts
Posted: Wednesday, January 05, 2011 - 02:30 PM UTC
Many thanks to those who have commented. I appreciate your input.

Dangeroo: Yes, using Formations resin bits. Besides what's shown, I'll also be adding their pioneer tools and antenna. Thanks for sharing the review on the barrel.

210cav: Thanks! Don't know what size copper wire that is. It's been in the parts box for years...the labels have long since fallen off the end of the spool!

clovis899: Thanks for the tip on the engine deck handles. According to the reference photos I have for both period and post-war M4A43s the handles do indeed protrude from the deck although I can see your point about how having them drop down when not in use would be beneficial. Since the holes are already drilled, I'd likely make a bigger mess removing the current handles to replace them with ones more accurate in size. It's just a mistake I'll have to live with on this build but now I know better for the next one!


Shermadude: Thanks for the tip. That explains my confusion...I didn't get any instructions with my Lion Marc barrel. I suppose that's the result of having ordered it off of ebay rather than purchasing from my reputable local hobby retailer! Seems like it would be easy enough to insert a piece of styrene rod just big enough and deep enough to fill in the mantlet hole and allow the barrel to be mounted flush with the end of the mantlet collar.

Cheers all!
samkidd
Visit this Community
Alaska, United States
Joined: January 06, 2006
KitMaker: 530 posts
Armorama: 450 posts
Posted: Wednesday, January 05, 2011 - 10:10 PM UTC


Absolutely fantastic work and the subject matter is inspirational. The 761st has always been a favorite of mine and it's great to see a model depicting such a proud unit done to such amazing detail. Keep up the great work!

Jim
Large Scale Armory
shermadude
Visit this Community
United States
Joined: December 03, 2007
KitMaker: 161 posts
Armorama: 53 posts
Posted: Friday, January 07, 2011 - 07:16 AM UTC
Hi Don,
Sorry,I didn't realize you lacked the instructions. They recommend doing pretty much what you said. Cut off the base of the kit barrel,insert it into the collar and then attach their barrel. I plan to try this with my Tasca M4A3 since I hate two piece plastic barrels! I can never get them to be round again after I sand the seams off! Hope this is more helpful.
Regards, Bob
ProfessorP
Visit this Community
Minnesota, United States
Joined: February 20, 2007
KitMaker: 339 posts
Armorama: 325 posts
Posted: Friday, January 07, 2011 - 10:59 AM UTC
DUH! Why didn't I just think of that? Using the base of the kit barrel saves me trying to find the right size styrene rod. Thanks for the clarification.

Planning to finish the "Ma Deuce" tonight with all its associated etch parts and whatever else I can get done this weekend. More posts soon.

Thanks again everyone.
ProfessorP
Visit this Community
Minnesota, United States
Joined: February 20, 2007
KitMaker: 339 posts
Armorama: 325 posts
Posted: Saturday, January 08, 2011 - 01:02 PM UTC
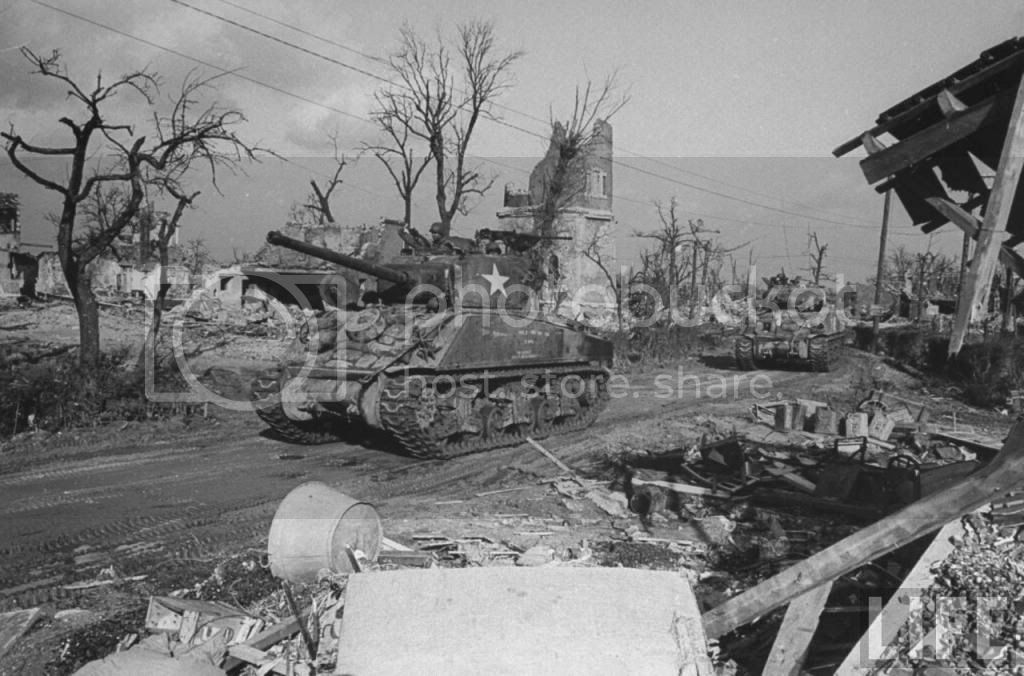
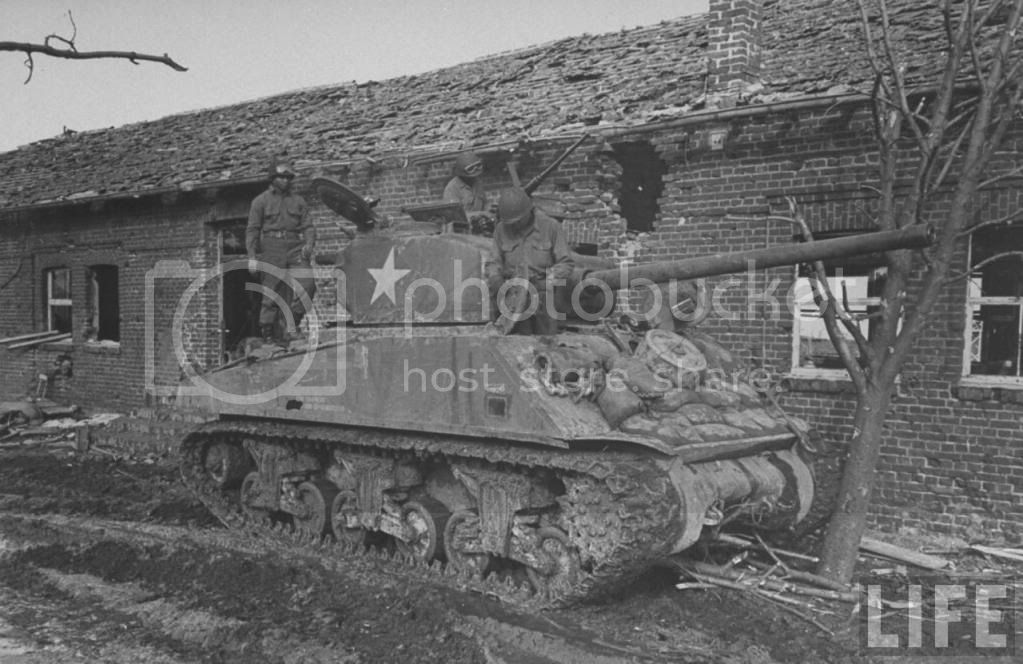
UPDATE: Many of you are already familiar with the 761st but there are some that aren't and I'd just like to share why I chose this project in the first place. The 761st Tank Battalion was the first African American armored unit to see combat duty. They were committed to combat in November of '44 and fought for 183 straight days through France, Belgium and Germany, where they linked up with elements of the Soviet Army (Ukranians) at the River Steyr in Austria. The Battalion eventually received the Presidential Unit Citation in 1978 after many years of lobbying for the recognition that had been denied them for their outstanding combat record. When I heard about this unit, I really wanted to model them as I had never before seen African American WWII troops represented in 1/35 models. (Not to say no one had ever done it, I just hadn't ever seen it.) Anyway, history lesson over...on to the project.

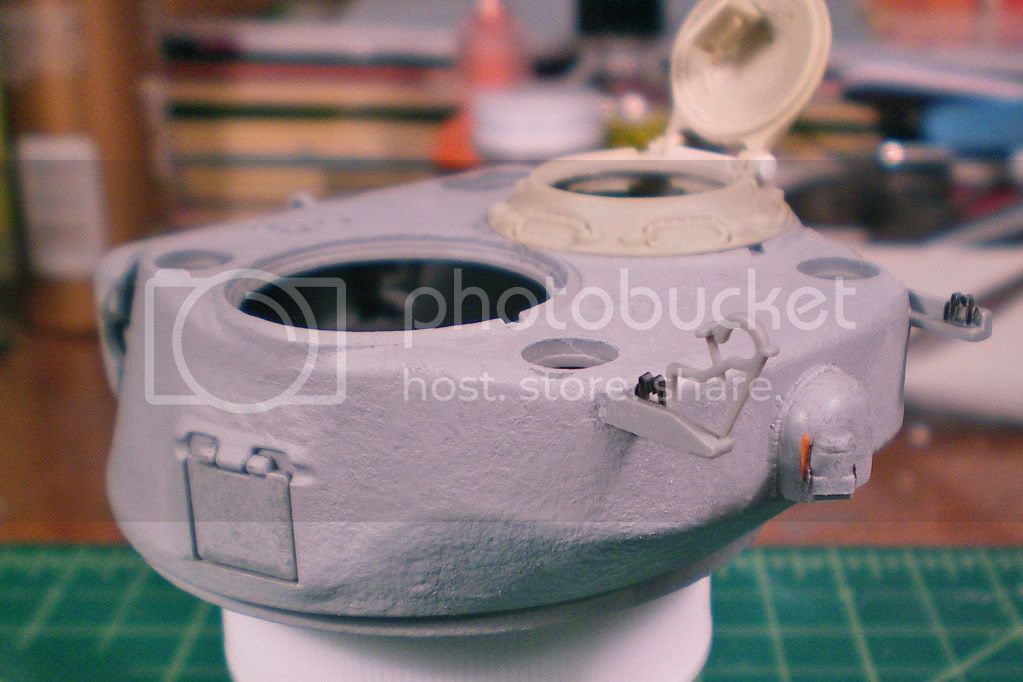
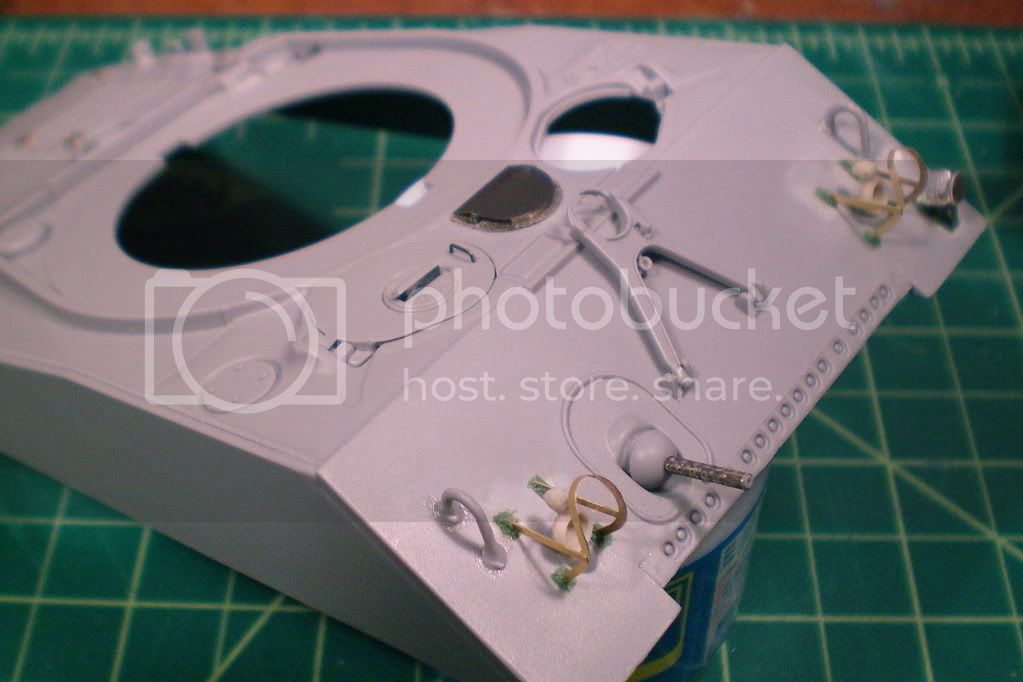
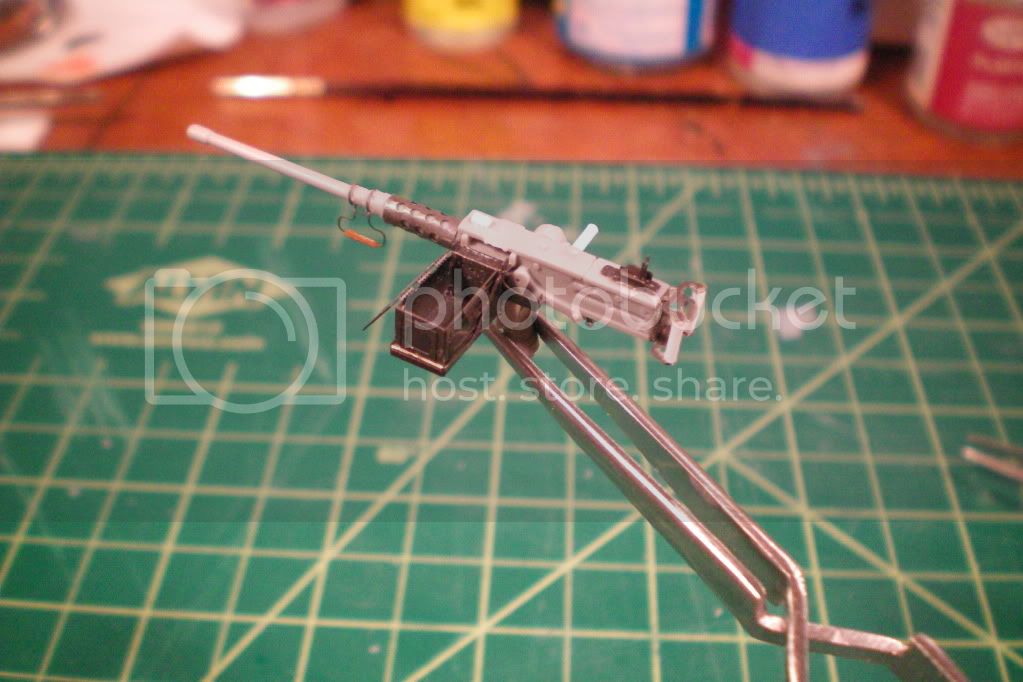
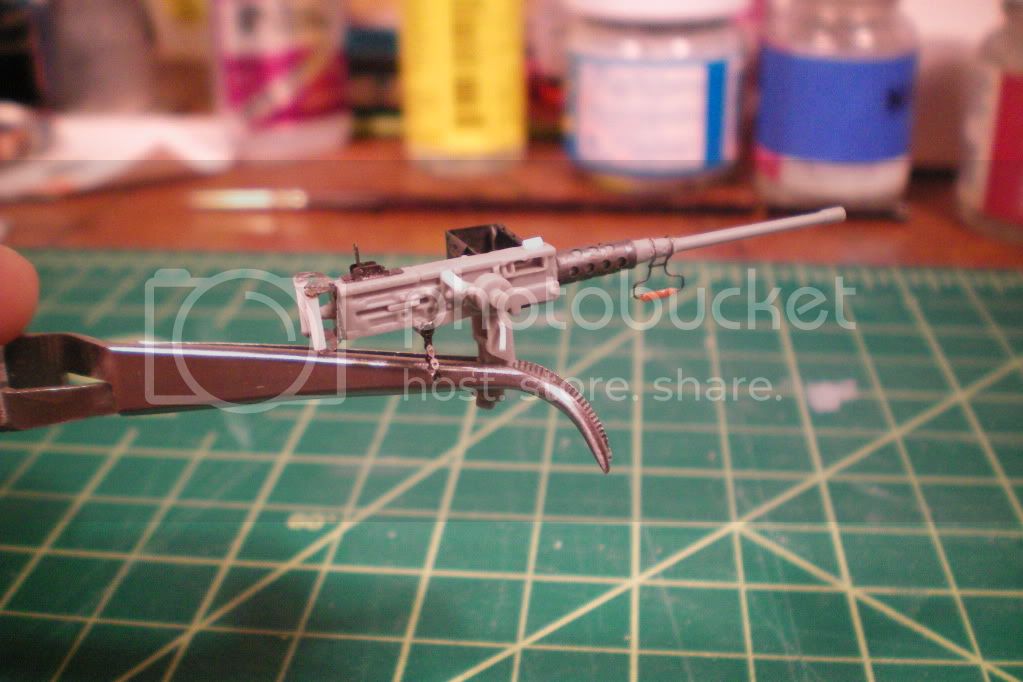
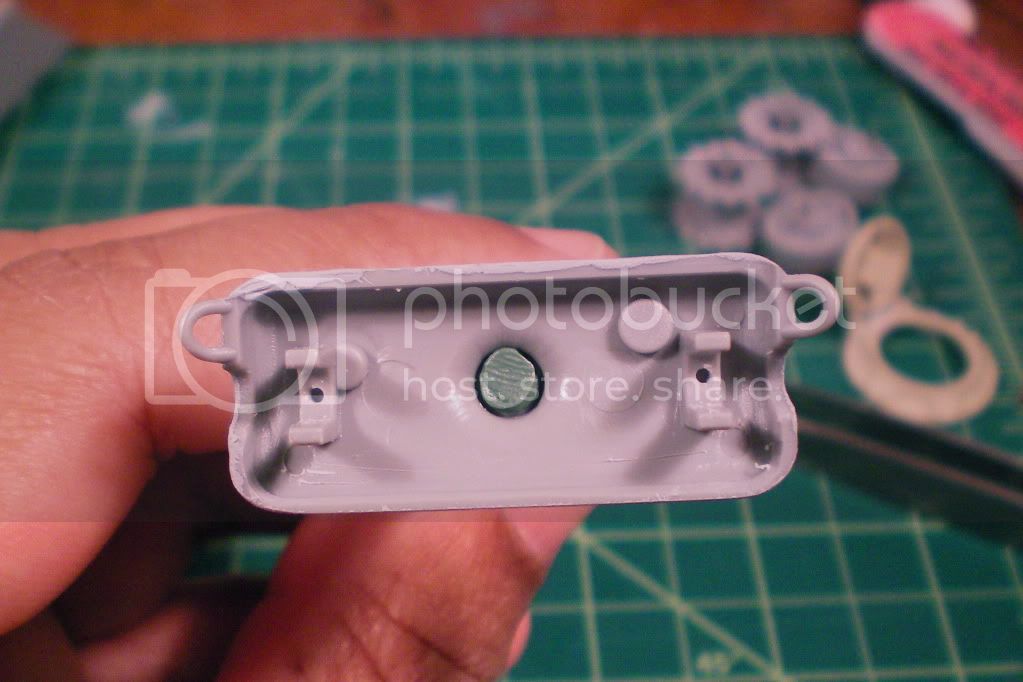
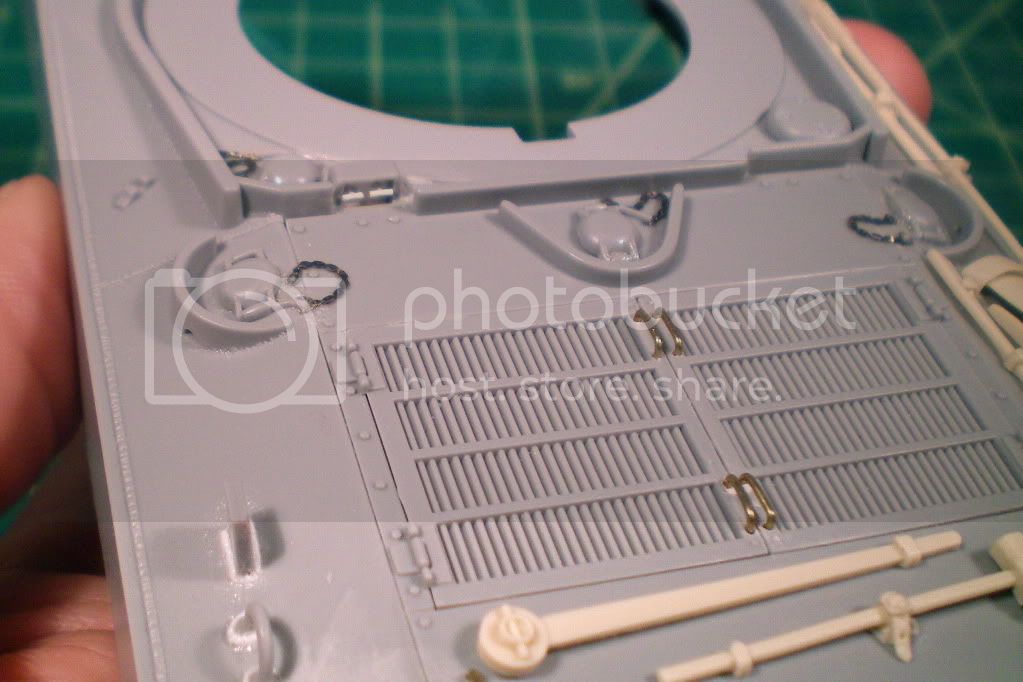
I worked on the PE parts for the .50 cal last night. Haven't put the whole thing together yet but here's all the components that make up the assembly:


I'm using the Eduard set for the Dragon M4A3 and the parts for the .50 were included as part of that set. I haven't soldered anything yet...I'm going to try to get the tray and the ammo box to stay together with super glue since the folding went pretty well and everything is lining up OK. I haven't done much soldering before and especially not on parts so delicate. After getting the pieces folded to the right shapes without much trouble, I'd hate to muck them up with big globs of solder while I "learn" how to do it correctly.

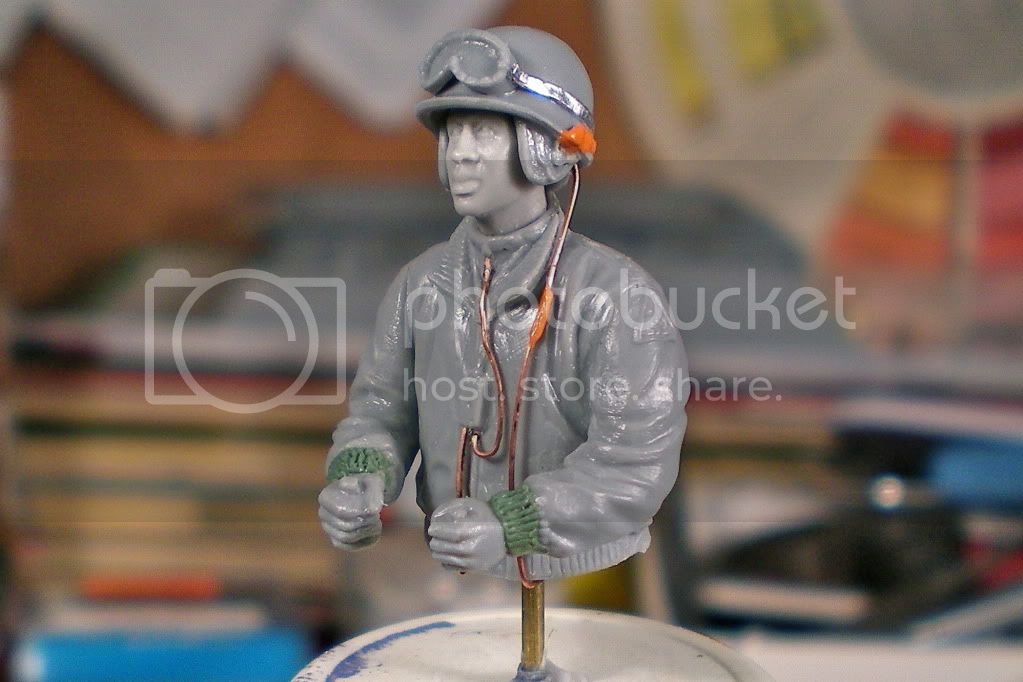
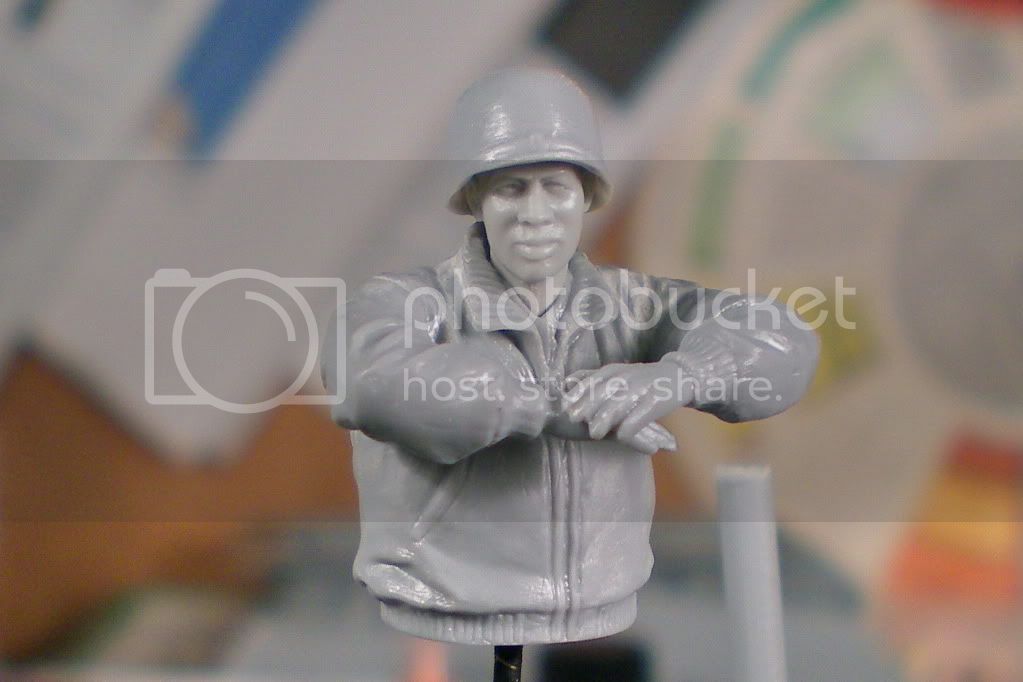
I also got this in the mail today:


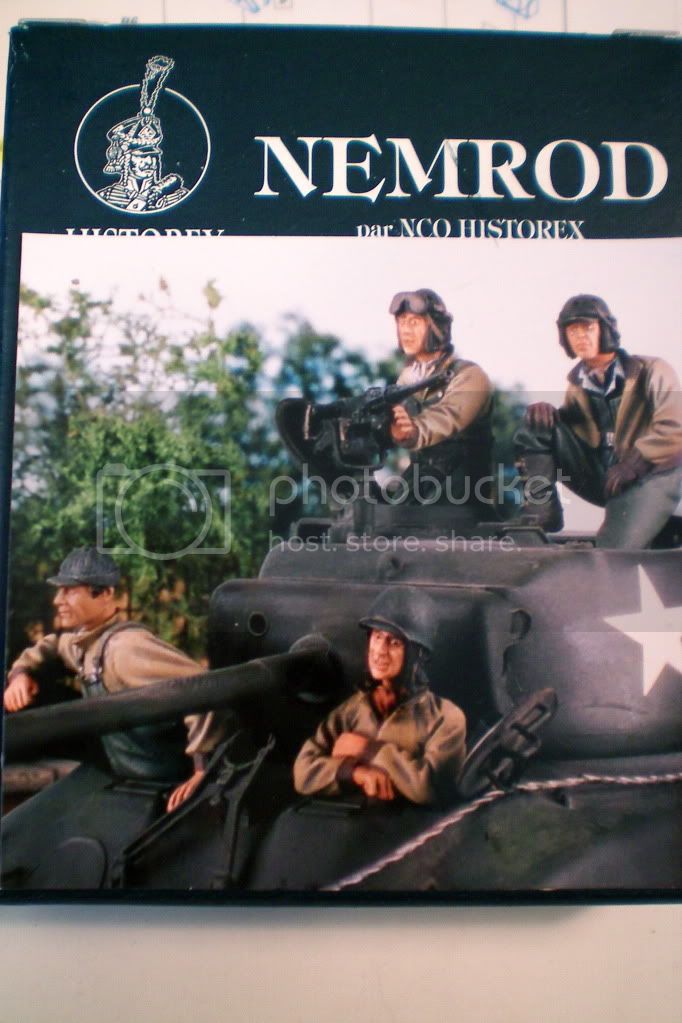
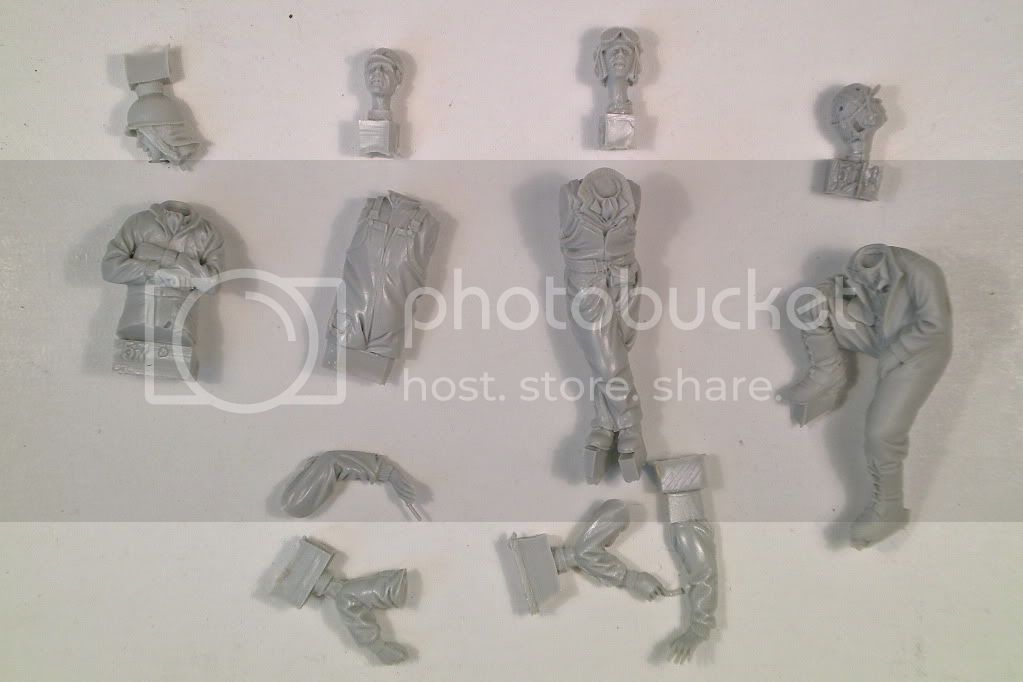
They're very nicely done and even though I haven't examined them too closely yet I don't see any obvious air bubbles or blemishes. It's also a bonus that the heads are all separate so swapping in the Hornet African heads will be a snap.

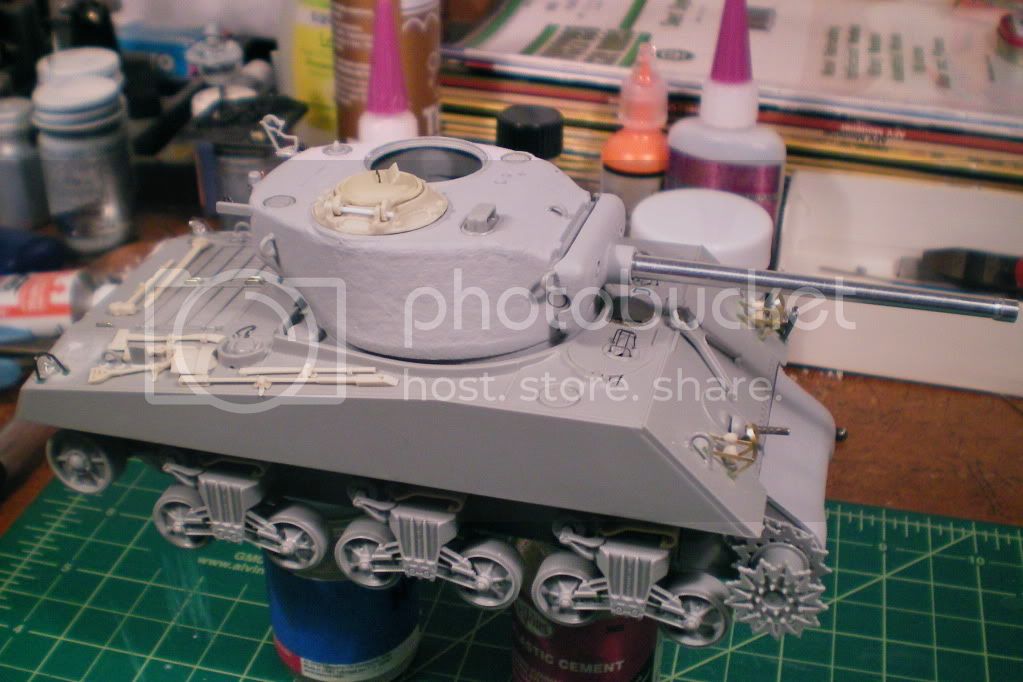
With the arrival of these, I've been seriously considering putting the "build" on hold so I can get started painting the figures. I've got a much stronger background in that area anyway and it's where my idea for the project actually started. But I know I really need to keep plowing forward on the model itself before I get too sidetracked painting figs.

Well, maybe I'll do just one...
ProfessorP
Visit this Community
Minnesota, United States
Joined: February 20, 2007
KitMaker: 339 posts
Armorama: 325 posts
Posted: Thursday, January 13, 2011 - 03:53 PM UTC
Well, couldn't bring myself to abandon the tank and start painting figures afte all so here's a few updates I've been able to get done this week:

Got the .50 cal mostly completed. Still needs ammo belt and spring holder attached but before I do that I want to try adding some dimensional paint to the PE shells so they have a more rounded shape.


Also got the main barrel installed after getting some help from you guys with making sure it was the right scale and finding the right method for attachment. I ended up using EpoxyRibbon to attach it since this provided me approximately 1.5mm of thickness I needed between mounting it flush into the mantlet collar. Cutting off the back end of the plastic barrel to use as a shim proved to be not worth it since so little actually needed to be cut off.


Also wanted to show the fire extinguisher handles I made out of styrene sheet and rod. The PE version was really ugly so I opted for this instead.


So, this is what I have so far:


It's a long way off but I still need to decide how I'm going to display this beast when it's done. Right now I'm shooting for something very close to this as the final incarnation:


Since the crew will be prominently displayed, I think the first photo is a good target to shoot for. I also like the setting a lot with the detritus of artillery shelling and destroyed trees.

As usual, comments and suggestions welcome!

Thanks.
panamadan
Visit this Community
Minnesota, United States
Joined: July 20, 2004
KitMaker: 1,513 posts
Armorama: 1,449 posts
Posted: Thursday, January 13, 2011 - 04:05 PM UTC
Don,
Great looking 'A3 that you have there! Are you going to add some sandbags, etc on the front slope?
Dan
ProfessorP
Visit this Community
Minnesota, United States
Joined: February 20, 2007
KitMaker: 339 posts
Armorama: 325 posts
Posted: Friday, January 14, 2011 - 11:08 AM UTC
Thanks for the compliments. Yes, I plan to get it as close to the photos as possible so sandbags, spare idler, mud, shipping marks etc. Which reminds me, does anyone know what the small dark square is on right hull side below the co-driver's hatch in the second photo above is? I think it's just a "clean" spot from something that's been removed but it may be a stamp or stencil of some type. Any ideas?

Also swapping out the kit supplied T-48 rubber tracks w/grousers to the steel chevron T-54E1 w/grousers made by Panda Plastics.

Uuugh!... I just realized how much assembly those are going to need!
retiredyank
Visit this Community
Arkansas, United States
Joined: June 29, 2009
KitMaker: 11,610 posts
Armorama: 7,843 posts
Posted: Friday, January 14, 2011 - 11:35 AM UTC
With all the extras you've put into this model has a lot of character. Can't wait to see how you weather it.
AgentG
Visit this Community
Nevada, United States
Joined: December 21, 2008
KitMaker: 1,109 posts
Armorama: 1,095 posts
Posted: Friday, January 14, 2011 - 03:54 PM UTC
I showed your thread to my lovely wife. Her comment, made with that thick Chicago accent, was classic:

" Oh my that's nice, honey he's as nuts as you............................"

Looking good!

G

ProfessorP
Visit this Community
Minnesota, United States
Joined: February 20, 2007
KitMaker: 339 posts
Armorama: 325 posts
Posted: Friday, January 14, 2011 - 08:29 PM UTC

Please inform your wife that I will take that as the highest compliment Wayne!

Cheers!
exer
Visit this Community
Dublin, Ireland
Joined: November 27, 2004
KitMaker: 6,048 posts
Armorama: 4,619 posts
Posted: Saturday, January 15, 2011 - 05:32 AM UTC
I really like what you've done so far Don and look forward to seeing more

Quoted Text

does anyone know what the small dark square is on right hull side below the co-driver's hatch in the second photo above is? I think it's just a "clean" spot from something that's been removed but it may be a stamp or stencil of some type. Any ideas?


Could it be a photo- I've seen some photos of tanks with photos or pin-ups there- just a suggestion
MajorPete
Visit this Community
North Carolina, United States
Joined: March 27, 2005
KitMaker: 56 posts
Armorama: 49 posts
Posted: Saturday, January 15, 2011 - 08:14 PM UTC
Nice work!
AlanL
Visit this Community
England - East Anglia, United Kingdom
Joined: August 12, 2005
KitMaker: 14,499 posts
Armorama: 11,675 posts
Posted: Saturday, January 15, 2011 - 08:26 PM UTC

Quoted Text

I showed your thread to my lovely wife. Her comment, made with that thick Chicago accent, was classic:

" Oh my that's nice, honey he's as nuts as you............................"

Looking good!

G


Excelent work Don.

Al
TimStreeter
Visit this Community
Minnesota, United States
Joined: October 19, 2008
KitMaker: 91 posts
Armorama: 80 posts
Posted: Saturday, January 15, 2011 - 08:45 PM UTC
Hey Don, this is looking verrrrry nice. I especially like your texturing of the turret and differential cover. Get this Shermy finished and bring it to the next club meeting!

Tim
ProfessorP
Visit this Community
Minnesota, United States
Joined: February 20, 2007
KitMaker: 339 posts
Armorama: 325 posts
Posted: Wednesday, January 19, 2011 - 05:19 PM UTC
Thanks for the encouragement Tim. I'll definitely be bringing it to the next meeting, but it probably won't be finished! Still a LOOOOOONG way to go on this project.
Big-John
Visit this Community
Ohio, United States
Joined: August 12, 2010
KitMaker: 731 posts
Armorama: 711 posts
Posted: Monday, January 24, 2011 - 02:12 PM UTC
Hi Don,

I have been following this build for some time. Nice clean work on the build. I like the figures as well. Keep up the good work and looking forward to seeing more of this one.