Dioramas
Do you love dioramas & vignettes? We sure do.
Clervaux River
adisak
Visit this Community
Chiang Mai, Thailand / ไทย
Joined: January 23, 2010
KitMaker: 87 posts
Armorama: 86 posts
Posted: Thursday, April 28, 2011 - 02:00 AM UTC
Hello! Claude

topmost the project , come back already , I will have studied good techinque , your with thank you very much at build good works comes to apportion.

adisak

jrutman
Visit this Community
Pennsylvania, United States
Joined: April 10, 2011
KitMaker: 7,941 posts
Armorama: 7,934 posts
Posted: Thursday, April 28, 2011 - 02:56 AM UTC
I realize from what you said that the last picture shows work yet to be completed but I am still in awe. It is one of the most life like pieces of groundwork that I have ever clapped eyes on. That riverbank is just astounding man!
J
roudeleiw
Visit this Community
Luxembourg
Joined: January 19, 2004
KitMaker: 2,406 posts
Armorama: 2,224 posts
Posted: Friday, April 29, 2011 - 09:26 PM UTC
@Holger, Jerry , Adisak

Thank you very much for your appreciation. As there is around double the vegetation yet to be planted around the river, i like to hear that i am on the right path.

Claude

VLADPANZER
Visit this Community
Lebanon
Joined: December 20, 2010
KitMaker: 568 posts
Armorama: 549 posts
Posted: Friday, April 29, 2011 - 10:40 PM UTC
Hi Claude,

Beautiful work as usual!! Can’t wait to see the water on the diorama. May I ask how you make the vegetation look so real (on the cliff side).
Regards,
:)
roudeleiw
Visit this Community
Luxembourg
Joined: January 19, 2004
KitMaker: 2,406 posts
Armorama: 2,224 posts
Posted: Saturday, April 30, 2011 - 12:12 AM UTC

Quoted Text

Hi Claude,

Beautiful work as usual!! Can’t wait to see the water on the diorama. May I ask how you make the vegetation look so real (on the cliff side).
Regards,
:)


Hi Vladimir,

Than you very much.

LOL, how i make it to look real? Thanks for the compliment!

I don't know what to say. Let me say first that i am often out in the nature. I simply to replicate what i see. As you saw on a picture before (on side 1 of this thread) i also use reference pictures to keep focused.

Any area of nature you look at is composed of millions of individual grass pieces, leaves, hedges, bad herbs, twigs, branches, moss and whatever to give it the look it has. To replicate that you have to do the same, plant and incorporate a lot and more plants and vegetation until it gets boring. Then you ad even more. :-)
Most modellers don't do that or they stop early because they lack material and vegetation to go further and more detailed.
(see all those tufts of grass in most dioramas. Most have simply not the patience to double the amount of grass and avoid those tufts!)


So to answer your question shortly i believe it is all a thing of having the patience to do it right.

Glad you like it all, this make the hard work worth.

Claude


Gorizont
Visit this Community
Sachsen, Germany
Joined: November 28, 2007
KitMaker: 1,462 posts
Armorama: 1,289 posts
Posted: Saturday, April 30, 2011 - 01:04 AM UTC
Great work so far!
The mixed-material terrain looks very natural.
Perhaps I can learn a bit from this for my actual (german) diorama.

I´m also interested to see it with water.
I had plans to make a sea-mine under water... but perhaps the model-mine would not exist very long.

A friend got me the hint/tip, to pour the "water" (transparent resin or silicone) in very thin slices. (1mm or fewer)

But on your diorama this is much more complicated.
Good luck with your waterbed!

Hmm, if you will open the "Clervaux-diorama-museum", I´m sure that I will visit it and to meet you personally!

greetings...
Soeren

roudeleiw
Visit this Community
Luxembourg
Joined: January 19, 2004
KitMaker: 2,406 posts
Armorama: 2,224 posts
Posted: Saturday, April 30, 2011 - 02:16 AM UTC

Quoted Text


A friend got me the hint/tip, to pour the "water" (transparent resin or silicone) in very thin slices. (1mm or fewer)


Hmm, if you will open the "Clervaux-diorama-museum", I´m sure that I will visit it and to meet you personally!

greetings...
Soeren


Soeren, the "tip " to pour in thin slices is a necessity, otherwise it will not dry. But it is possible to do slices of 2-3 mm. Just follow the manual of your choosen material.
It will not be much different for me. The only thing here, and due to the size of my piece and to the contrary , again, to a normal dio, i have a real denivalation on my 1.5 meters. So i will need to raise one side of my module a bit to get it somewhat level.

Haha Soeren, i am still hopefull to display it in Clervaux in a few years.
Perhaps you can also find an exhibition in Germany who is willing to invite me (at my usual conditions). With the dead of the organizer of the GMM in Nürnberg, my only contact in Germany has vanished.

Greets
Claude
Alessandro_Iug
Joined: March 04, 2011
KitMaker: 31 posts
Armorama: 26 posts
Posted: Wednesday, May 04, 2011 - 07:00 AM UTC
Dear Claude
first of all let me say that I admire your work, it is really inspiring for me and I think for all of us modellers.

In your work I had the opportunity to see a thing that does not fit in reality.
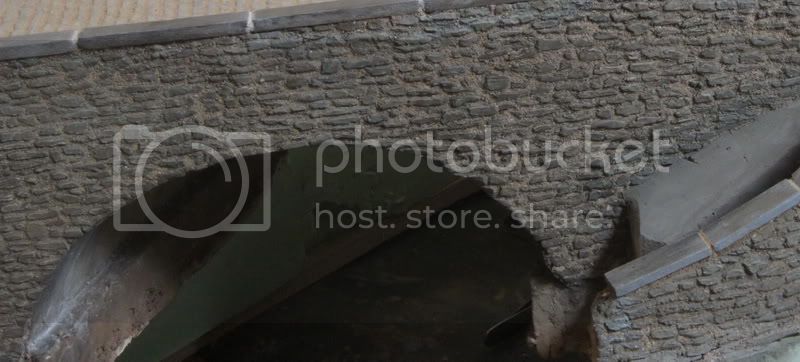
The bridge arch has some static problems.
In reality the arch is made of a group of stones put togheter one near the other and they actually form the arch (see red circle).
This is made because the load of the bridge is discharged from the top to the flanks of the arch (see red arrows).


I hope you can fit this detail, in this wich I consider a great diorama!

Cheers
Alessandro
Gorizont
Visit this Community
Sachsen, Germany
Joined: November 28, 2007
KitMaker: 1,462 posts
Armorama: 1,289 posts
Posted: Wednesday, May 04, 2011 - 07:30 AM UTC
Hello Allessandro, in my opinion, the bridge also has these bigger stones for "spread the mass/ load".
I think, these are under the small stones-layer... so that the small stones are a "covering" only and were made, to fit into the same style as the surrounded buildings.

In one of the shown images, there is a mixture of both techniques. (stability mixed with the "small and different looking stones -look")

greetings...
Soeren
roudeleiw
Visit this Community
Luxembourg
Joined: January 19, 2004
KitMaker: 2,406 posts
Armorama: 2,224 posts
Posted: Wednesday, May 04, 2011 - 08:58 AM UTC
Hi Alessandro

Thanks for your input!

Inded, the technique you mentioned is the right one. I even used it on the small arch on the side of the bridge.
I don't know why i did not use on the bridge immediately .
(no photo exists where you can clearly distinguish the sides of the bridge)
I noticed it a few days ago and hmm, well, did nothing.

I now googled for stone bridges in the slight hope to see an exception, but no, no chance :-)

Now my friend, do you know what this means. The bridge is fixed and everything is adapted to the sides!
You will cost me about 10-20 hours of work to get this fixed!

Of course i will fix it, thanks for the observation, just in time as i am about to start with the water.
I will need to lay half over my dio in ackward positions, dremel away (if the dremel fits, not sure about that) about a cm and half of the existing stones, redo new stones with clay, repaint it (please with the same color as the rest) and remake the joints ( a lot more difficult as i can not lay in on the sides)

I am sure the look will change also, to the better.

Well well , nobody's perfect! Thanks again Alessandro.

@Soeren, thanks also, for a very short moment i thought about using this excuse (smaller stones over the arch ones) , but i would probably not sleep well any more.

Better fix it now and be happy. With a few tousand hours spend on this dio, 20 more will not hurt..

Claude (who knows what to do tomorrow instead of playing with a new technique to make birch trees)

Alessandro_Iug
Joined: March 04, 2011
KitMaker: 31 posts
Armorama: 26 posts
Posted: Wednesday, May 04, 2011 - 09:47 AM UTC

Quoted Text


Better fix it now and be happy. With a few tousand hours spend on this dio, 20 more will not hurt..

Claude


Hi Claude
I was feared to pointing out, but if I did not it would have been a pity, your project is outstanding!!!

Cheers
Alessandro
Gorizont
Visit this Community
Sachsen, Germany
Joined: November 28, 2007
KitMaker: 1,462 posts
Armorama: 1,289 posts
Posted: Wednesday, May 04, 2011 - 10:49 PM UTC
Allessandro´s thoughts are correct... but I meant, that the original bridge also would have this static, which is possibly covered by the smaller stones.

Claude, I didn´t meant, that you have to rebuild the bridge and cover it later with smaller stones.
But if you have no photos from the sides of the bridge, perhaps there are some images of other bridges in the area.
But also Allessandro´s idea looks good.

greetings...
Soeren
retiredyank
Visit this Community
Arkansas, United States
Joined: June 29, 2009
KitMaker: 11,610 posts
Armorama: 7,843 posts
Posted: Thursday, May 05, 2011 - 12:04 AM UTC
I could never tackle something like this. I would have stopped at putting three goats on the bridge and one troll underneath it. Simply amazing craftsmanship. Looks like this is going to be a labor of love.
roudeleiw
Visit this Community
Luxembourg
Joined: January 19, 2004
KitMaker: 2,406 posts
Armorama: 2,224 posts
Posted: Thursday, May 05, 2011 - 01:11 AM UTC
[quote]I could never tackle something like this. I would have stopped at putting three goats on the bridge and one troll underneath it. quote]

LOL you guys keep me going, even doing it two times
ivanhoe6
Visit this Community
Wisconsin, United States
Joined: April 05, 2007
KitMaker: 2,023 posts
Armorama: 1,234 posts
Posted: Thursday, May 05, 2011 - 04:31 AM UTC
Claude, the photo of the river bed and bank through the bridge at first glance looked like a1to1 scale picture, Awesome ! I hope to see a Volume 2 on day soon ! Keep up your great work and please keep sharing fotos & tips. Thank You ! Tom
sfctur1
Visit this Community
California, United States
Joined: December 12, 2007
KitMaker: 643 posts
Armorama: 497 posts
Posted: Thursday, May 05, 2011 - 07:25 AM UTC
Claude,
Excelent work like always. Look foward to your updates.

Tom
roudeleiw
Visit this Community
Luxembourg
Joined: January 19, 2004
KitMaker: 2,406 posts
Armorama: 2,224 posts
Posted: Saturday, May 07, 2011 - 08:07 AM UTC
Thanks guys, book No. 2 will come, after i finished the dio!

Ok, fixing the bridge was not so time consuming after all. It took my around 5 hours to redo it.
Before


and now


I notice that i need to work a bit to harmonize the look of the grout, but i think it is way better now.

Pictures of other modellers workroom are very populat in forums,so i show how i set up the module for a good access to the sides of the bridge


I put it upright and had the bridge at eye height. Perfect!

Notice the mess on the right side with some resin river testing ground and also the start of a birch tree.
I have a lot of space (the room behind is even bigger and is for my dirty work, but sometimes i would need even more!

Next stop, the river!

Have a nice sunday

Claude
hulkster
Visit this Community
Alicante, Spain / España
Joined: November 26, 2009
KitMaker: 78 posts
Armorama: 76 posts
Posted: Sunday, May 08, 2011 - 12:19 AM UTC
hola Claude,
this looks far better now...
can u show us some of that birchtree progress too please...
txs
Holger
slodder
Visit this Community
North Carolina, United States
Joined: February 22, 2002
KitMaker: 11,718 posts
Armorama: 7,138 posts
Posted: Sunday, May 08, 2011 - 02:46 AM UTC
Really solid work, the bridge is really natural and well done. The fixes are frustrating, but worth the effort in the end. If nothing else "YOU" know they are they are there and they are done right.

Well done, glad I cought up on this project again.
Alessandro_Iug
Joined: March 04, 2011
KitMaker: 31 posts
Armorama: 26 posts
Posted: Monday, May 09, 2011 - 01:43 AM UTC
Hi Claude
it came out really nice, well done!
Cheers
Alessandro
callmehobbes
Visit this Community
England - North West, United Kingdom
Joined: April 17, 2005
KitMaker: 751 posts
Armorama: 740 posts
Posted: Monday, May 09, 2011 - 02:21 AM UTC
Looks good. Fingers crossed that the water works out. (I've tried resin pools twice and failed both times!)
Plasticbattle
#003
Visit this Community
Donegal, Ireland
Joined: May 14, 2002
KitMaker: 9,763 posts
Armorama: 7,444 posts
Posted: Monday, May 09, 2011 - 04:37 AM UTC
Good progress Claude. It was the right thing to do to add the arch support. You would have regretted this later. I enjoyed the photo of the module standing on its edge .... you really get an idea of the true scale of the section. Looking forward to more.
roudeleiw
Visit this Community
Luxembourg
Joined: January 19, 2004
KitMaker: 2,406 posts
Armorama: 2,224 posts
Posted: Tuesday, May 10, 2011 - 01:33 AM UTC
Thank you guys!

@Holger


Quoted Text

can u show us some of that birchtree progress too please


Yes and no! :-)
A little modelelrs story now:
In fact, on this picture you saw the base of a tree, an armature i made a long time ago already from steelwire. In the meantime i added more copperwire to shape my desired tree. I meant to glue a new kind of plant to the wire to simulate the twigs of weeping birch tree (betula pendula).
Yesterday , after a few hours more of twisting and shaping, having added already some putty to disguise the wire i figured that i actually do not like the shape at all. There was no point in continuing with something i don't endorse and, very importantly, will be very prominently placed and certainly be on a lot of pictures from the dio. So it went back in the corner where it was already since a few years, perhaps to be remodelled when my mood is right.
I replaced it with a nice natural root. I just started to add somne more branches before i will add the twigs. Pics to come
Regarding the water, i am still preparing the field for that. As this is 1.50 meter long i really need to convince myself that i am ready for it and that i did not forget anything important. Is everything in place, can I reach other places later without spoiling the water. Should I do that before the pour or later? What about the next module, should i already prepare this or that?

Thanks for looking

Claude


PS.: The sale of my book is still going good, selling a few copies every month. I would like to thank everybody who choose to buy already it and of course invite the others to take a look at it in case you would like to pass the time until No.2 gets published
sfctur1
Visit this Community
California, United States
Joined: December 12, 2007
KitMaker: 643 posts
Armorama: 497 posts
Posted: Tuesday, May 10, 2011 - 04:51 AM UTC
Claude
Your work is outstanding as ever. I am glad to hear that you are going to do a second book. Can't wait untill it comes. Any luck with finding a permanent place to display it. When you talked abou the hieght issue to show more can you make a section to raise the hieght and put it in seperate?
Tom
roudeleiw
Visit this Community
Luxembourg
Joined: January 19, 2004
KitMaker: 2,406 posts
Armorama: 2,224 posts
Posted: Tuesday, May 10, 2011 - 05:33 AM UTC

Quoted Text

When you talked abou the hieght issue to show more can you make a section to raise the hieght and put it in seperate?
Tom


Thanks Tom,

First i would need the commitment from someone to display it because i don't have the space for an additional 2 meters.
Imagine that i calculated all this with the actual dio already lowered down to only 0.50 cm above ground (people would need to crouch to get a view inside the castle's cellars).

So the total height of the next modules still need to be at this very high height.
I could of course omit some of the slope and start a bit higher.?

Another problem is that i really do not know if i would be the right man to tackle a hundred german soldiers and about 10 more vehicles, that in a quality similar to the buildings? I do not think that figure and Panzerpainting is my destiny in this hobby.

But you never know! I am already playing with the ides to build an additional small module behind the river (perhaps only 20 cm large over the whole length), be it only to give a propper background (high trees) for pictures including the river.

Let me finish all this first as it will take at least 2 years. We will see for the rest later.

Claude