

Finally got the time to read your thread here...so mutch progress I see!
Your still the master in vegetation! Stunning work on the riverbed and the sides of it.
Keep following closer from now on...
Greetz Nico


 , and do moulds for the waves.


 ) so slowly getting back into the swing of things...


 .
.Hmmm...if you had started this whole diorama in 1/72 you could have modeled the entire Ardennes Offensive in the same space


Thanks Bradley,
Saw your start to another mud dio and wait for a bit more progress. Nice to see you back building.
While you mention sculpting a figure, what's going on with your commercial sculpting career? Any traction there?
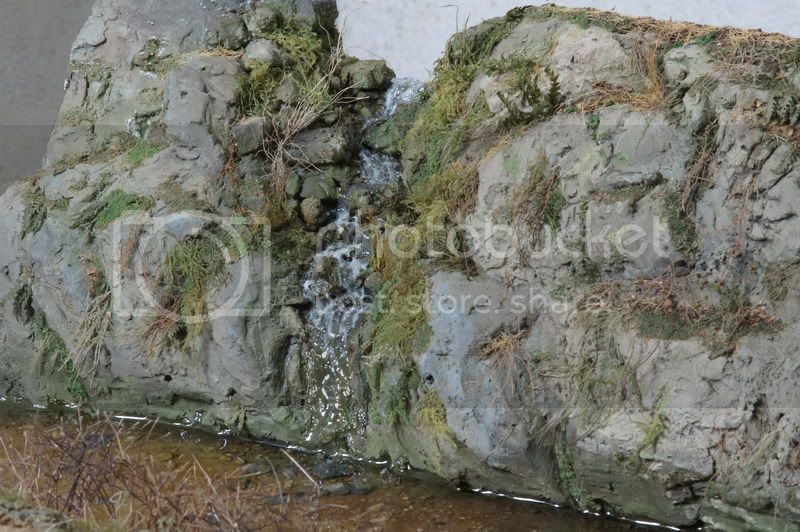


I think the advantage of this method is the more three dimensional look it has as the base where the wave starts to rise is not always at the same level to the contrary of acrylic waves starting from the resin bed. ( i doubt that anyyone understands what i want to say here)
So you make a mould, resin over it and glue it on the scene...
Greetz Nico


 |


