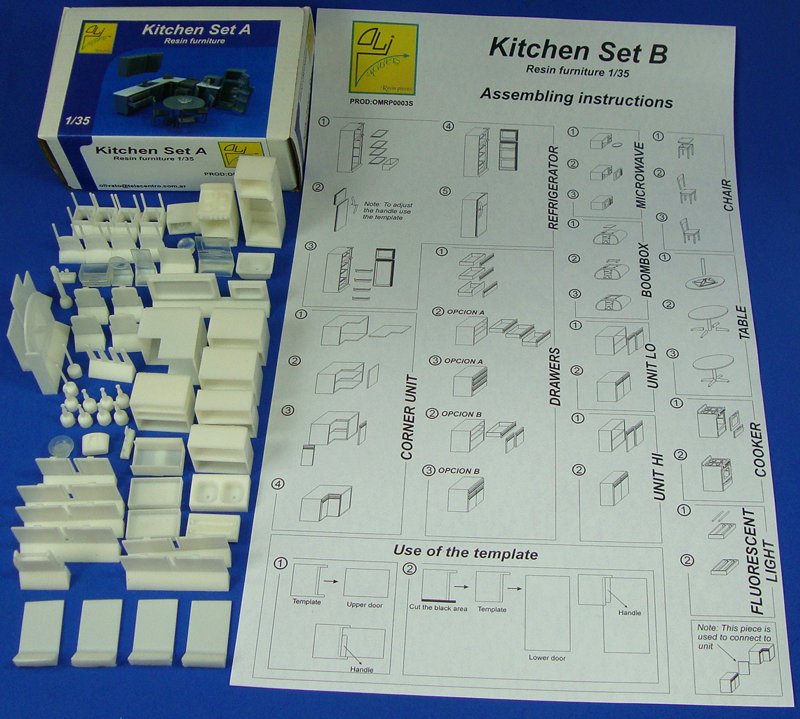
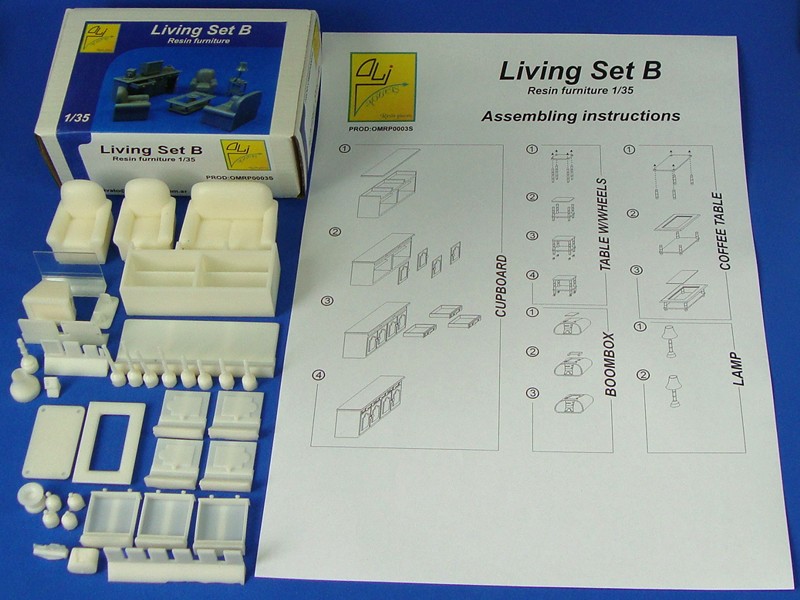
Euan: Thank you for seeing my project.
About the resin, I use two types of resin. An epoxy resin (Grey, in fact it is transparent and I dye it grey) and polyurethane resin (The beige one. This is the original color, but you can dye it too)

I started using the epoxy, but it is very aggressive with the molds, so you can make very few copies (8-10) before the molds start to get destroyed. The time to extract the piece from the mold is about 4-24 hs, depending on the atmospheric temperature. I use the one with the lowest viscosity. On the other hand, it is very hard and it doesn't have any contraction, so the copy is exactly the same as your master. At the moment I am using this one to make copies of things like doors, drawers, etc, that will be masters, but not to produce.
To produce I´m going to use the polyurethane resin. It´s super fast (About 15-60 min) to extract from the mold (again, the temperature is the key) but it´s not so hard as the epoxy. It has a little contraction, but it´s insignificant. It has very low viscosity, so it´s like water.
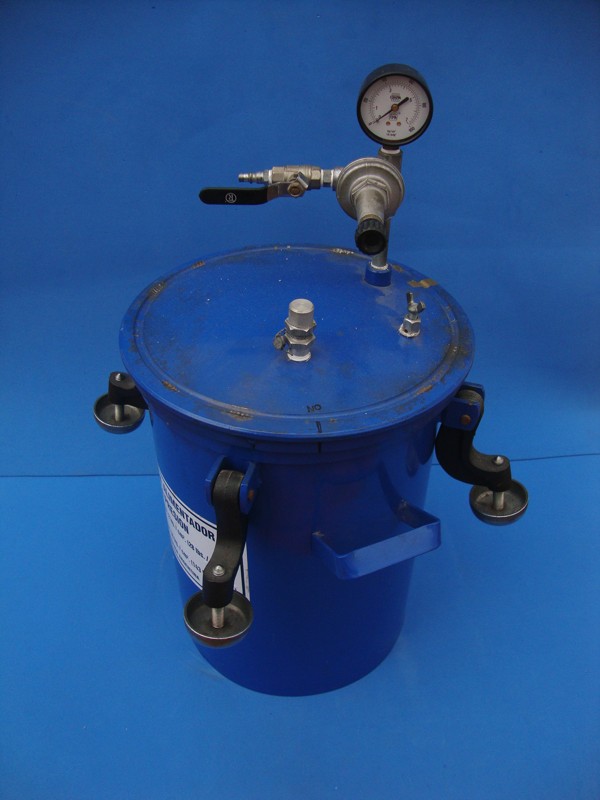
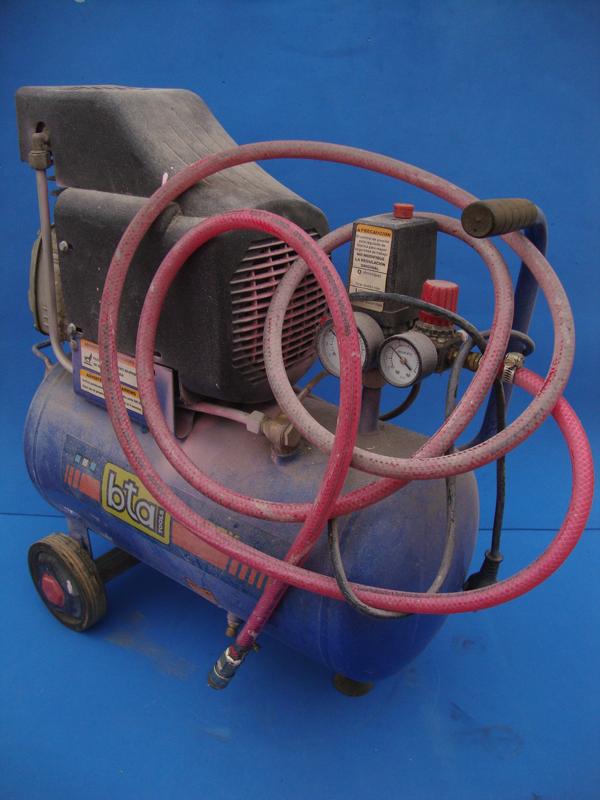
The equipment I use is this.
A pressure pot: I bought this one from a company that produces them for paint, but the idea is the same. Some resin companies produce their own. I recommend that you look for a serious company and not try to make your own, remember the pressure is very dangerous and the pot can explode.
A compressor: Mine has 25 lt. so with the tank full of air, I can fill the pressure pot in less than 1 min and reach the 80 lbs of pressure.
A vacuum pump: I use it to make the molds. The viscosity of the silicon rubber depends on the hardness (the harder it is, the more viscosity, but you can make more copies before the mold breaks), but when you mix it with the catalyzer you introduce a lot of bubbles, so with the vacuum pump you extract all this air, and your mold will be perfect.
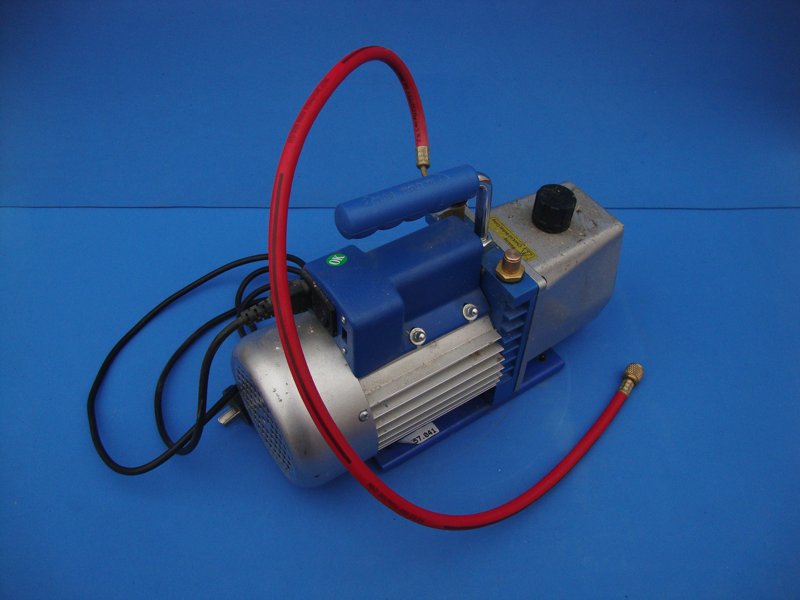
A vacuum chamber: If you have the pressure pot, you can easily convert this one into a vacuum chamber, like mine (making vacuum is not as dangerous as making pressure, nothing is going to explode)

To cast the resin, I mix the component (the mix ratio depends on each resin, so look in the specification sheet) I fill the mold and put it in the pressure pot with about 80 lbs. (I read only 40 lbs are necessary to compress the bubbles). As the epoxy resin takes more time to cure, it´s very simple to make the pieces, because with the pressure and the long time, in almost all the cases, the mold is completely filled in.
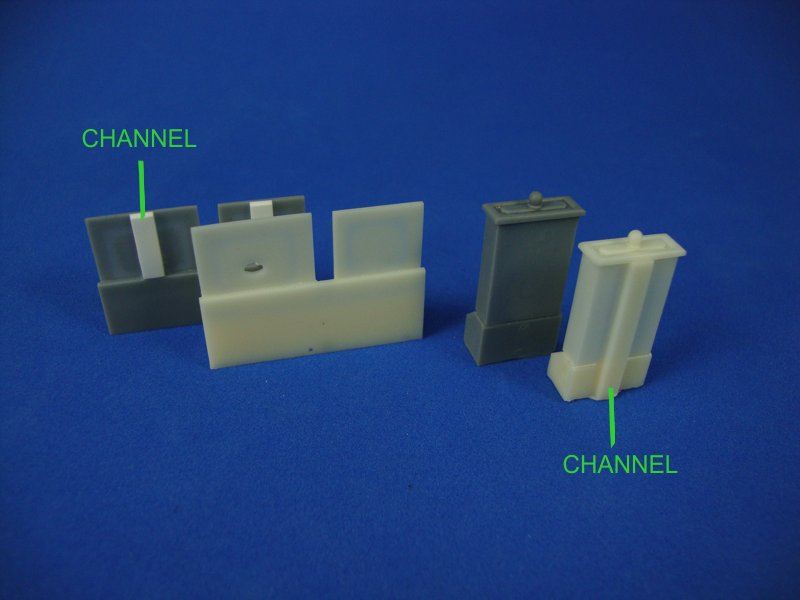
With the polyurethane resin it´s different. It´s so fast, that if air is trapped inside the mold when you fill it in with resin, not even the pressure will help. I add some channels to help the air go out of the mold and a mix of vacuum and pressure.
First make vacuum to help the air go out, and right after that change the top of the pot and make pressure... all of this in 5 min... if you see the movie "Over the edge", I look very similar to Hammy in this process...

All of this is based on my experience, with the materials I find in Argentina, but I´ve seen there are much better materials for example in USA (www.alumilite.com), so I recommend you find out what you can find in your country and see how it works.
I´m not an expert, so surely some of the things I do are wrong, I´m learning all the time. Make your own tests, ask to other people too.
Hope this answers your question, but if there is any other thing I can help you with or, if any of the explanations aren´t clear enough, please ask me. I am very happy to share what I have learned in this process.


For instance, make tiny P/E spirals for the heat elements on the electric stove, etc.