Dioramas: Buildings & Ruins
Ruined buildings and city scenes.
Hosted by Darren Baker
An ambitious project
olivato
Visit this Community
Distrito Federal, Argentina
Joined: August 16, 2005
KitMaker: 127 posts
Armorama: 107 posts
Posted: Monday, July 04, 2011 - 04:26 PM UTC
Hi everyone!
Here is my next project. I hope to finish it in time, as it is going to be presented in a contest in Argentina. The scene consists of 14 soldiers (including 2 tankers) and four dead rebels (and if everything goes well, a few Iraqis demonstrating). The idea is a group of American soldiers who are ambushed by Iraqi rebels fighting from the terrace and the top floor of the block of flats well as the shop downstairs. Reinforcement arrive and join in the fight with a tank and an apc. If I have enough time (and money) I may include some angry Iraqi citizens complaining from their balconies for the damage to their homes.

Gorizont
Visit this Community
Sachsen, Germany
Joined: November 28, 2007
KitMaker: 1,462 posts
Armorama: 1,289 posts
Posted: Monday, July 04, 2011 - 04:43 PM UTC
Nice project so far, looks good!
I saw only a very few near-eastern dioramas, so this is a good addition.

I wait for the next steps.

greetings...
Soeren
GSPatton
Visit this Community
California, United States
Joined: September 04, 2002
KitMaker: 1,411 posts
Armorama: 609 posts
Posted: Monday, July 04, 2011 - 05:34 PM UTC
Hello great idea but Be careful of your time period. That can make all the difference and might I suggest a humvee instead of an abrams. Why I say this is bradleys work more with infantry than with armor...Overall good idea hope to see more pics SOON
bill1
Visit this Community
West-Vlaaderen, Belgium
Joined: August 14, 2005
KitMaker: 3,938 posts
Armorama: 520 posts
Posted: Tuesday, July 05, 2011 - 06:03 AM UTC
Yo Victor,

Nice mok up for your dioramaproject.

It's quite a big project, be sure you work with the right quality...so you say that it has to be done for a contest...always turn the quality of the work down when your work has a deadline...

Good start!

Greetz Nico
stansmith
Visit this Community
England - North West, United Kingdom
Joined: July 18, 2010
KitMaker: 611 posts
Armorama: 584 posts
Posted: Wednesday, July 06, 2011 - 05:01 AM UTC
this looks very interesting!
callmehobbes
Visit this Community
England - North West, United Kingdom
Joined: April 17, 2005
KitMaker: 751 posts
Armorama: 740 posts
Posted: Wednesday, July 06, 2011 - 05:50 AM UTC
Nice looking building -I'll be following this one.
Spiderfrommars
Visit this Community
Milano, Italy
Joined: July 13, 2010
KitMaker: 3,845 posts
Armorama: 3,543 posts
Posted: Wednesday, July 06, 2011 - 07:54 AM UTC
It looks intersting. The base may be a little bit small in my opinion but anyway the composition looks cool so far

What did you use for the building?

I think I'll follow this thread

cheers and congrats
Hisham
Visit this Community
Al Qahirah, Egypt / لعربية
Joined: July 23, 2004
KitMaker: 6,856 posts
Armorama: 6,363 posts
Posted: Wednesday, July 06, 2011 - 09:05 AM UTC
I really like the building.. do you have any in-progress pics showing how you made it and what materials you used?

I Will definitely follow this thread

Hisham
olivato
Visit this Community
Distrito Federal, Argentina
Joined: August 16, 2005
KitMaker: 127 posts
Armorama: 107 posts
Posted: Wednesday, July 06, 2011 - 04:47 PM UTC
Hi!

Thank you Gorizont, GSPatton, Bill1, Stansmith, Callmehobbes, Spiderfrommars and Hisham for taking the time to see this project and give me your opinions.
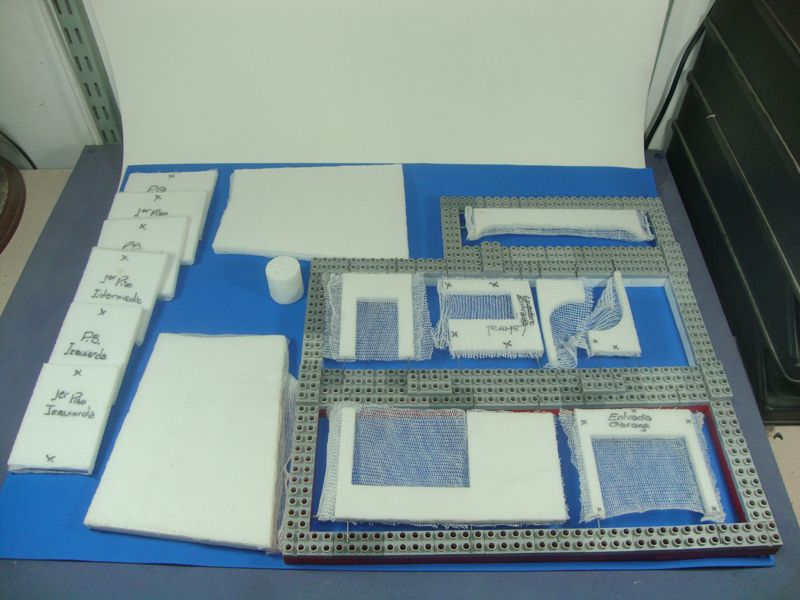
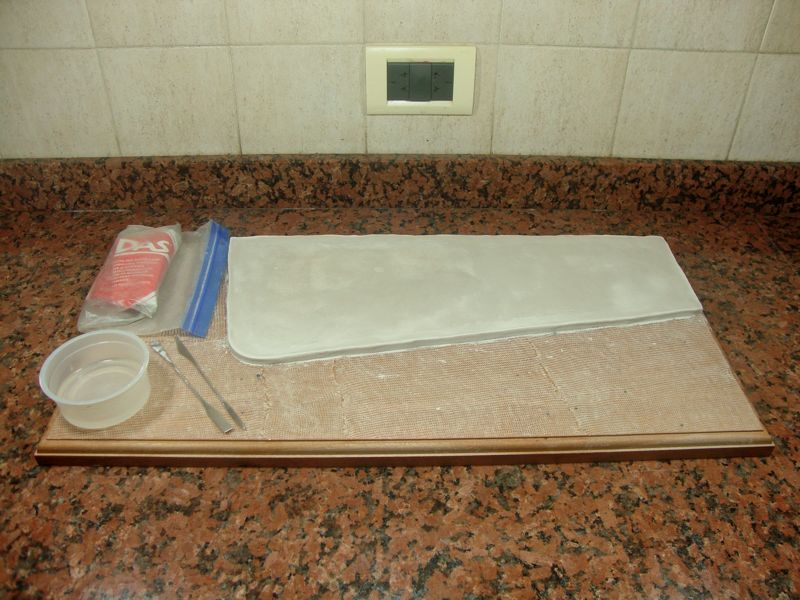
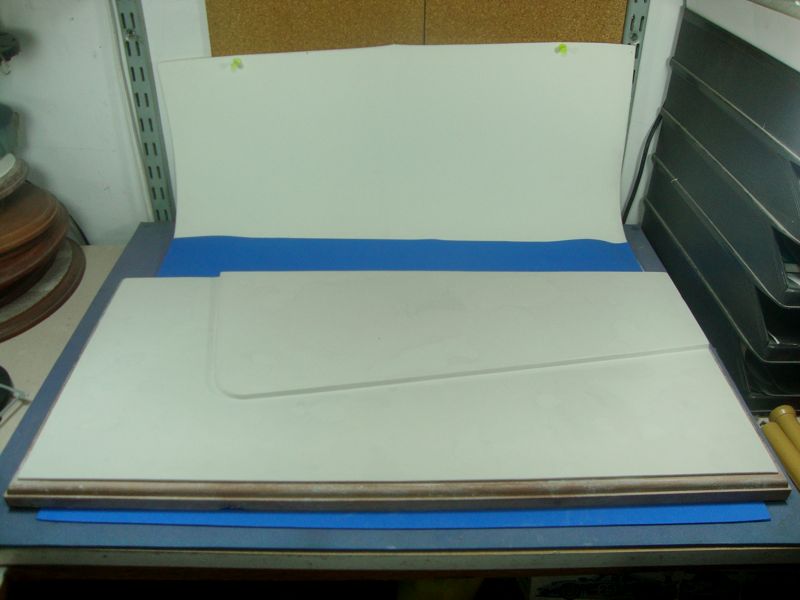
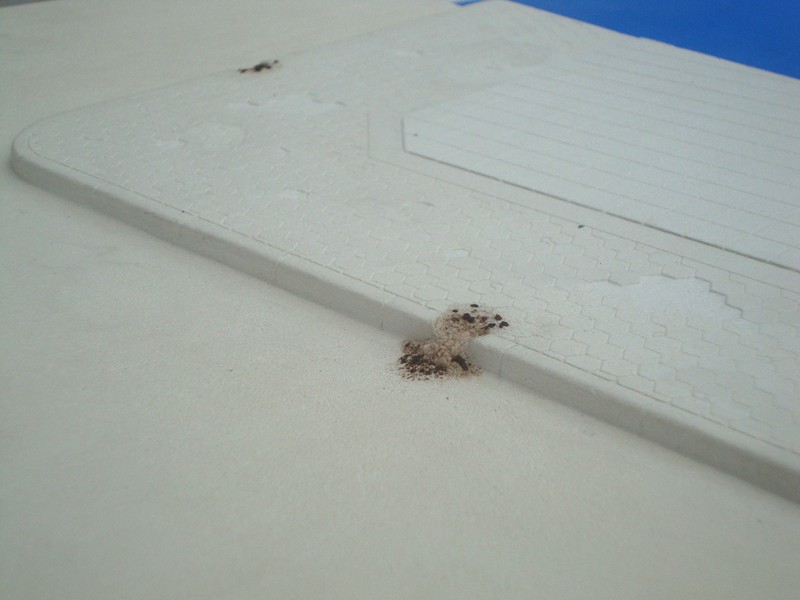
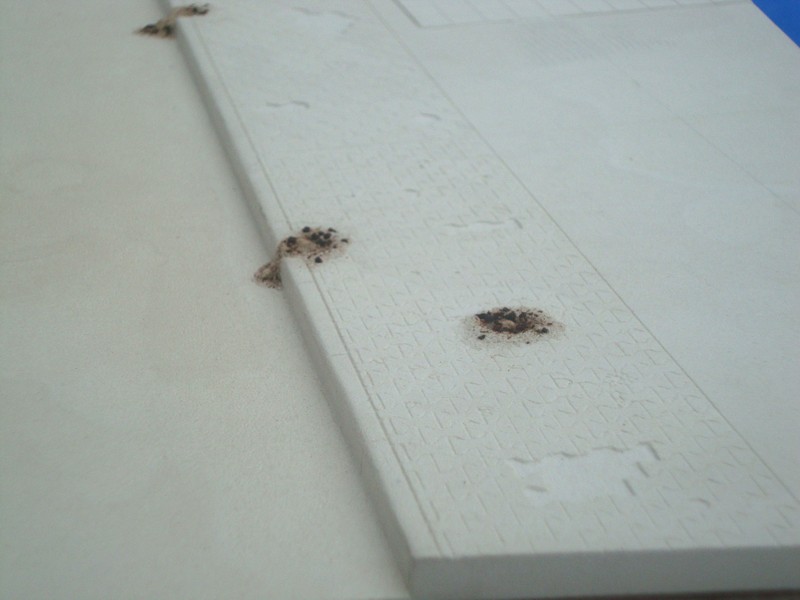
I am now in what I call the "intensive care" stage, as I have to cover everything with gauze so that the modeling putty "bites" every surface (otherwise the putty doesn't remain attached to polystyrene or wood). This is a really boring stage but it makes sense in the end, as everything ends up being harder and lighter than a solid construction.
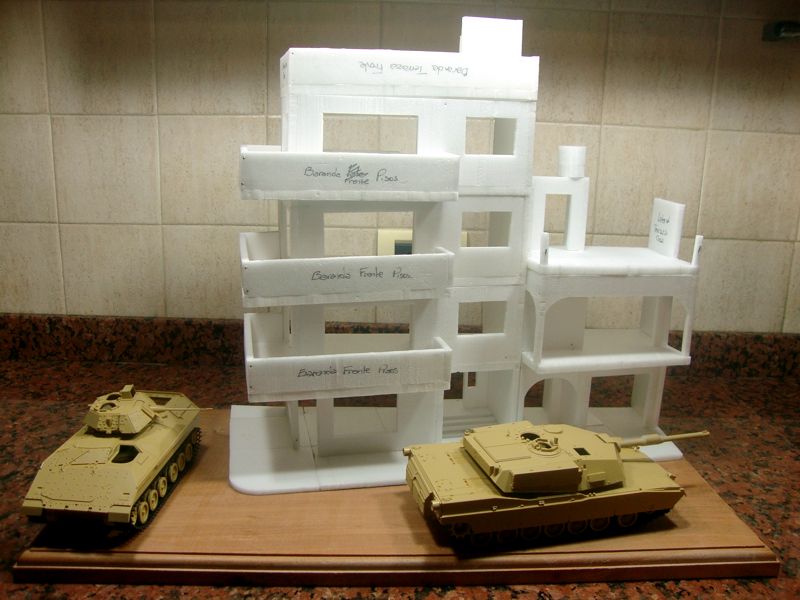
GSPatton, the tank will act as a shield for the soldiers leaving the apc, who are moving forward behind tank in the battlefield. It also appears in the scene because of the rebel's firepower (RPG, bombs, etc.). At least that is how I pictured it.
Bill1, I agree with you, but in my case, unless I have a deadline I can be working on the same project for too long, so I end up getting bored and then I move on to a new project, leaving the first one unfinished. I am not very consistent.
Spiderfrommars, it is my wife who agrees with you (so do I!) but I already had the piece of wood and the glass cabinet where I keep them is not much wider. As for the material, I use high density polystyrene. I buy it in sheets and cut it according to the design.
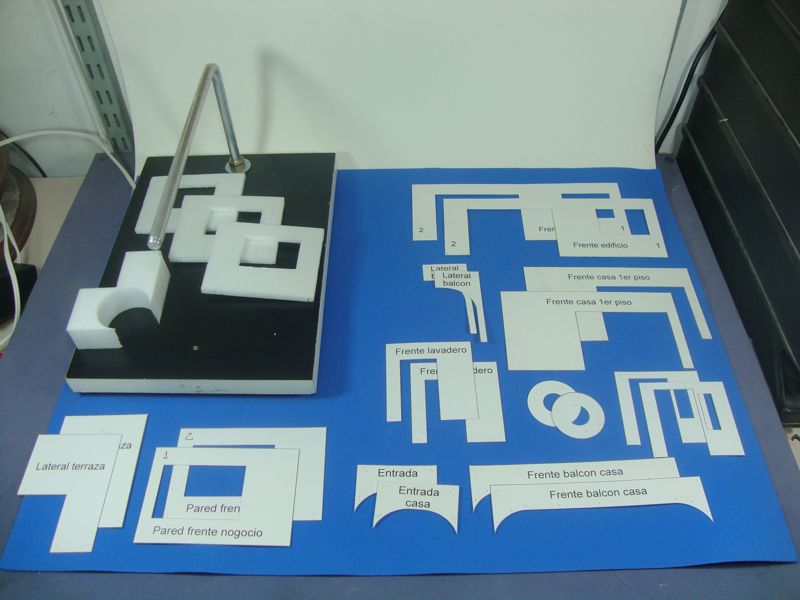
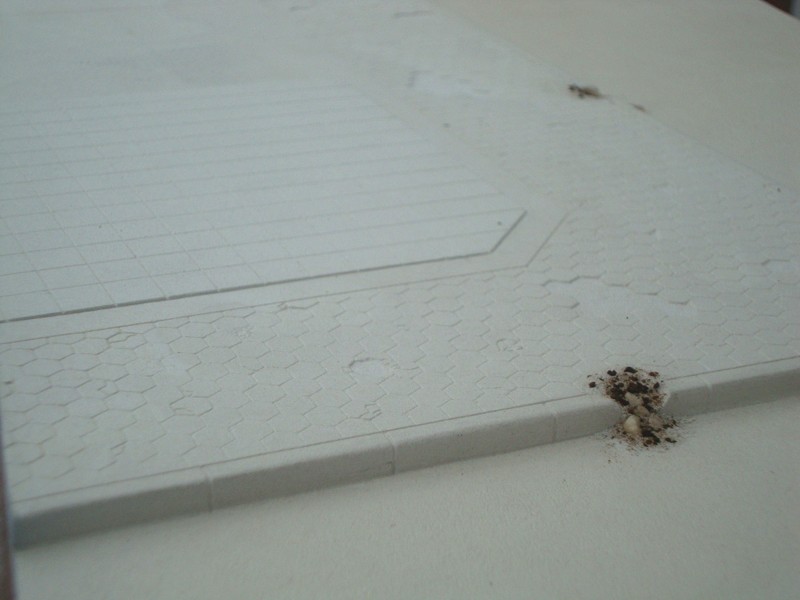
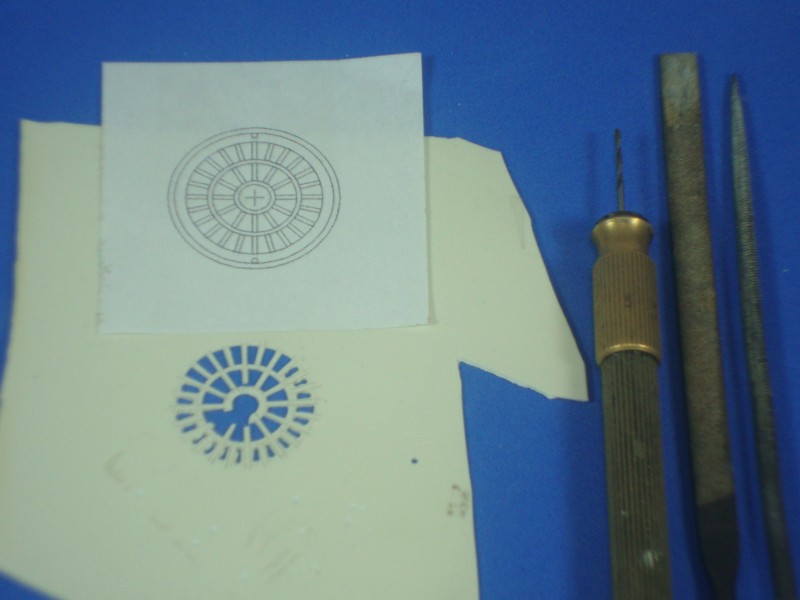
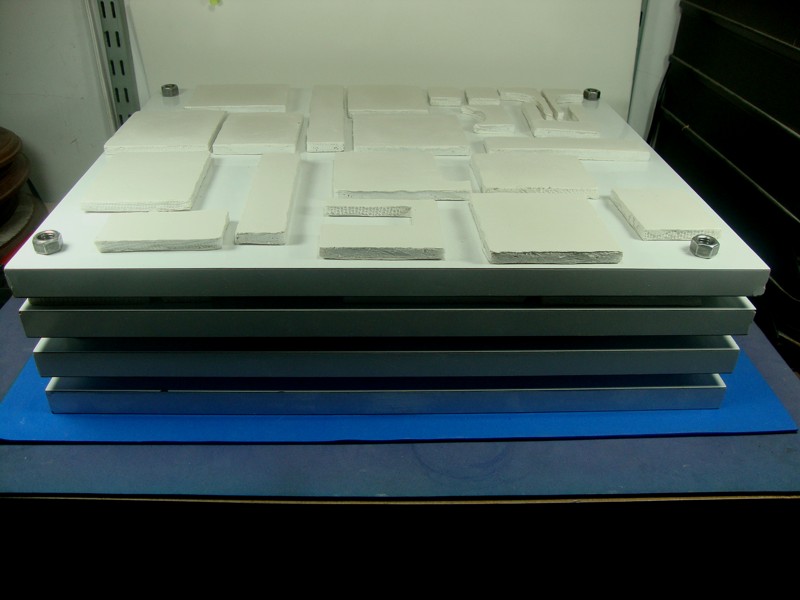
Hisham, I design the buildings in Corel, previewing how each part will fit in the final scheme, then I print them in thin cardboard, taking out the 1,5 mm (0.6 inch) that till be covered with gauze and putty, and some other adjustment that may be necessary. I cut out the printed template and put one on each side of the polystyrene sheet, so as to cut them as straight as possible. In my case, I have been using a 2,5 mm (one inch) sheet of polystyrene so I get four pieces for each template, which is very useful in the case of buildings (walls of 0.6mm (0.2) aprox. with the gauze and putty they will be 0.8 (0.3) equivalent to 30 cm (11. 
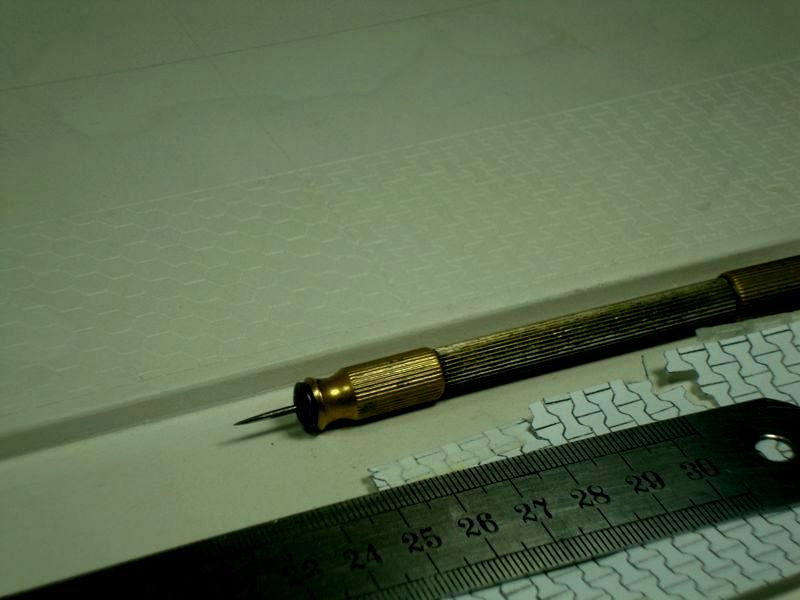
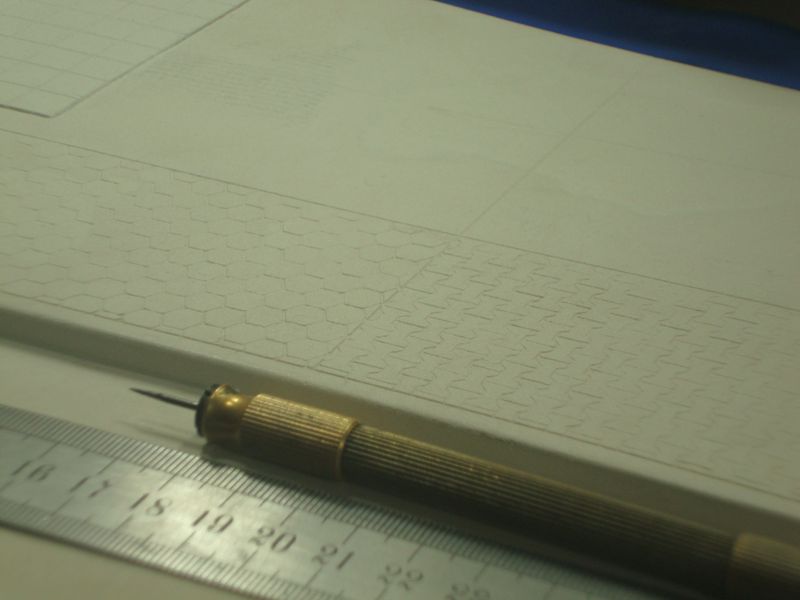
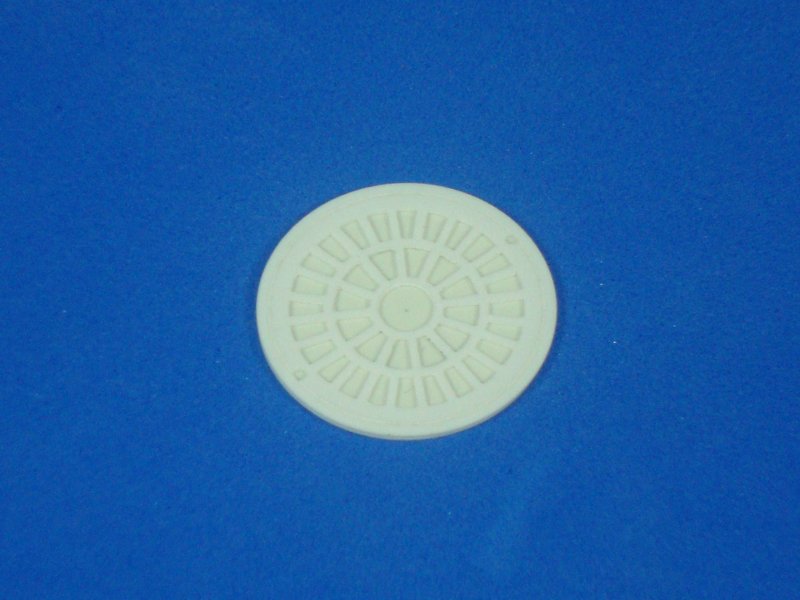
aprox in real life size, thick enough for modern buildings). Then I go on with the stage that I am posting right now. I am uploading some pictures of the templates and the tool I use to cut the polystyrene, I hope it is clear enough, but if it isn't let me know and I will try to explain it better and with more details. If you are interested in any of the buildings, I can send you the Corel files with the drawings and the templates.


Hisham
Visit this Community
Al Qahirah, Egypt / لعربية
Joined: July 23, 2004
KitMaker: 6,856 posts
Armorama: 6,363 posts
Posted: Friday, July 08, 2011 - 09:39 AM UTC
Thanks a lot, Victor, for the pics and the explanation.. although I can't say I fully understand the part about the gauze.. but it'll definitely be interesting to follow how your project develops... so, keep the updates coming

Hisham
WARDUKWNZ
Visit this Community
Auckland, New Zealand
Joined: June 01, 2011
KitMaker: 1,716 posts
Armorama: 1,638 posts
Posted: Friday, July 08, 2011 - 07:56 PM UTC
Like where this is going Victor .. keep it going matey ..can't wait to see this one done

Phill
olivato
Visit this Community
Distrito Federal, Argentina
Joined: August 16, 2005
KitMaker: 127 posts
Armorama: 107 posts
Posted: Thursday, August 04, 2011 - 03:02 PM UTC
Hi everyone!
While I go on with the boring process of putting gauze and the putty on the buildings, I have been working on other parts that will later be added to the whole.
While I was looking for photos of Iraq, I found out that modern buildings stand side by side with older, more traditional buildings, so I tried to show some of that in this diorama.
As a result, I focused on the water tanks and I decided to make two types of tanks, a older, cement one, and a more modern one for the block of flats.
Making them was quite similar to the process I followed for the walls: polystyrene, gauze, putty and to sand!
I had already prepared some sheets of putty, where I cut the circles from and some other details I added to the tanks, which you can see in the pictures.
Hisham, when I have the pictures of the walls with the putty I believe it will be easier to understand. I apologise for the poor explanation. Give me one more chance when I have the photos.
Wardunkwnz, thanks for your interest in my project.

Simon
Visit this Community
Kobenhavn, Denmark
Joined: January 16, 2005
KitMaker: 878 posts
Armorama: 697 posts
Posted: Thursday, August 04, 2011 - 07:00 PM UTC
Hi there,
It looks impressive. Cant wait to see how this progresses.
Good work.
spoons
Visit this Community
England - East Anglia, United Kingdom
Joined: January 09, 2008
KitMaker: 527 posts
Armorama: 500 posts
Posted: Thursday, August 04, 2011 - 08:42 PM UTC
Hello Victor
you speak of putty (and not plaster),what putty do you use?
This project has now turned my way of building dios upside down
olivato
Visit this Community
Distrito Federal, Argentina
Joined: August 16, 2005
KitMaker: 127 posts
Armorama: 107 posts
Posted: Friday, August 05, 2011 - 03:48 PM UTC
Hi every one,
Another little detail for later: bottles, some broken, some in one piece.
I have used Pierre Piveteau´s method (https://armorama.kitmaker.net//features/360) only that I used the plane canopy´s trees.
Simon Thank you for your comments.
Spoons I´m not really sure "putty" is the right word. The product I use is called DAS and it is made in Italy. In the packaging it says "Modelling material" and in some websites it is called "Modelling clay".
spoons
Visit this Community
England - East Anglia, United Kingdom
Joined: January 09, 2008
KitMaker: 527 posts
Armorama: 500 posts
Posted: Saturday, August 06, 2011 - 12:10 PM UTC
Ahhhhhhhhhhhh DAS
thanks for the reply victor now i know why you use gauze.
we have das here in uk really brittle stuff !
PolishBrigade12
Visit this Community
Washington, United States
Joined: January 31, 2009
KitMaker: 380 posts
Armorama: 366 posts
Posted: Saturday, August 06, 2011 - 06:07 PM UTC
Victor, looks great. Keep er rolling!


Cheers, Ski.
olivato
Visit this Community
Distrito Federal, Argentina
Joined: August 16, 2005
KitMaker: 127 posts
Armorama: 107 posts
Posted: Wednesday, August 10, 2011 - 01:27 AM UTC
Hi!

I have at last something interesting to show you.
The base has already been through the gauze and modeling putty phase so I will now start a more entertaining stage, at least for me.
After smoothing all the surfaces with sandpaper and applying some more putty.

I am beginning to give it textures. In a photograph I found this pattern of tiles and I thought it was really interesting. With Corel I scaled it and drew the tiles. After several attempts to transfer the pattern, I ended up printing it, placing it on top of the putty and with a sewing pin I transferred the pattern carving it into the putty.


Finally, I make it more realistic by breaking some tiles, the curb and adding some dirt. I make the dirt by pricking the putty with a wire brush and the debris with grinded coffee and the gravel you put in fishbowls. I will add later the debris from the building, but I am leaving that for the end, to make sure where they will finally be. The asphalt texture was made with a harder brush and I hit it with a hammer on the base. It looks good.


PolishBrigade12: Thank you for taking the time to see this project.
littlebear573
#016
Visit this Community
England - East Anglia, United Kingdom
Joined: March 18, 2009
KitMaker: 142 posts
Armorama: 138 posts
Posted: Saturday, August 13, 2011 - 12:13 AM UTC
hey looking good so far like the pavement style very time consuming and mind bending i would imagine
olivato
Visit this Community
Distrito Federal, Argentina
Joined: August 16, 2005
KitMaker: 127 posts
Armorama: 107 posts
Posted: Friday, August 19, 2011 - 02:35 PM UTC
Hi!

A little project inside the big one: a cooker.
When I designed the block of flats in the corner, the room with the little window was going to be a kitchen, so from the beginning I was going to need a cooker.
Some years ago, I researched about resin and how to repeat pieces with silicone rubber. From that time I still have some resin blocks that I have used to sculpt the originals models.
From there is the red and nude material that I have used as a base for the cooker. The rest is plastic from the trees -stretched with heat- and plastic sheets.
I hope you like it.
Littlebear573: By transferring a previously printed pattern, it is not so time-consuming as one may have thought, but you do need to be really focused or you may easily miss a line.

pdelsoglio
Visit this Community
Mendoza, Argentina
Joined: November 13, 2005
KitMaker: 561 posts
Armorama: 553 posts
Posted: Friday, August 19, 2011 - 03:07 PM UTC
Victor.
So far a sor interesting project you have there.
The carved street pattern looks very convincing. And that stove really looks the part.
Can't wait to see more of your project.

PS: Are you assisting to V.Gral Belgrano convention?

Saludos amigo.

Pablo
olivato
Visit this Community
Distrito Federal, Argentina
Joined: August 16, 2005
KitMaker: 127 posts
Armorama: 107 posts
Posted: Saturday, August 20, 2011 - 01:53 PM UTC
Hi!

Another little project: A manhole
I want to give the asphalt a little touch to break the uniformity, so I thought of a manhole for that. (I don´t know if it was a good idea...).
I´ve searched on the Internet and found this interesting pattern, so I scaled and drew it in Corel and printed it.
1st attempt: I repeated the method for the pavement in the manhole - not good enough.

2nd attempt: Transfer the drawing in a plastic sheet an try to do some fretwork. First drill and then smooth with the file. They broke with the movement of the metal file.

3rd attempt: Similar to the 2nd attempt but this time I used a new X-acto blade instead of metal file - Good enough for me.


When I decided to display my work here, it was with the idea of to receiving your feedback, something to improve, or something you don´t like, or whatever you want to say, so feel free to write what you want, everything is going to be important to me.
Thank you.
Pdelsoglio: Thanks for your reply. My idea is to go to the contest in Mar del Plata (IPMS Argentina 2011), but I don´t know if I will finish in time. Un abrazo.
bill1
Visit this Community
West-Vlaaderen, Belgium
Joined: August 14, 2005
KitMaker: 3,938 posts
Armorama: 520 posts
Posted: Sunday, August 21, 2011 - 09:16 AM UTC
Yo Petro,

Nice update...need scratchwork.

Keep up I follow!

Greetz Nico.

olivato
Visit this Community
Distrito Federal, Argentina
Joined: August 16, 2005
KitMaker: 127 posts
Armorama: 107 posts
Posted: Sunday, August 28, 2011 - 01:04 PM UTC
Hi!

An another little project: An air conditioner
As you can see in any picture of a city in the Middle East every house has an air conditioner, so I had to do one for my buildings.
I designed it in a way to have two types with the same mold, one in the front, an another if you turn it upside down, as you can see in the pictures.
I suppose that these two types, plus two types of grill, a circular and a square one, are going to have enough variety for my buildings.


If you are asking what happened with the constructions, the answer is this:

In each layer of wood are drying the parts (where I previously put gauze) with DAS. I put the parts between two pieces of wood because I want the parts to be as straight as possible.
The DAS has a problem when it dries because it curves everything that you use as a "soul"
This is the first time I have used this system, so far the problem I can see, is that they take much more time to dry, but I expect to save time in the end.
Bill1: Sorry, my English is not so good, what do you mean by "need scratchwork"?
vonHengest
Visit this Community
Texas, United States
Joined: June 29, 2010
KitMaker: 5,854 posts
Armorama: 4,817 posts
Posted: Sunday, August 28, 2011 - 02:37 PM UTC
I am really enjoying your scratchbuilding of the base and and apartment complex. I look forward to further progress