Dioramas: Buildings & Ruins
Ruined buildings and city scenes.
Hosted by Darren Baker
Sunday Service Canceled!
roudeleiw
Visit this Community
Luxembourg
Joined: January 19, 2004
KitMaker: 2,406 posts
Armorama: 2,224 posts
Posted: Monday, December 19, 2011 - 07:21 AM UTC

Quoted Text

Claude, thanks for the comments. I am unsure as to how to add a new post without using the reply button?


I said that you can add more picture in the same post, but i see with your last post that you got it already :-)

[quote]BTW I have been absolutely amazed at the Castle project! much of what I have learned and tried to apply to this diorama have been through the pages of your posts. I always have tried to " improve" on the ideas of those I have seen do something before me, and as my old bible college professor used to say about sermon ideas: " the 3 laws of good sermon ideas are 1. steal, 2. steal, & 3. steal.."
[quote/]

Go ahead and thanks for the praise


So the church is scratch also, that is what we want to know i think.
Good door build also! You are doing very well!

Claude

ahandykindaguy
Visit this Community
Alberta, Canada
Joined: August 20, 2008
KitMaker: 1,295 posts
Armorama: 1,191 posts
Posted: Monday, December 19, 2011 - 08:40 AM UTC
Yes Claude. Everything but the tanks and some of the detail pieces are scratchbuilt. To me it is one of the most exciting parts of any build. trying to duplicate in small scale something I see in real life. The piano, the church, the bell tower structures the tree in the courtyard will all be scratched together in some form or fashion.

can you quickly enlighten me as to how I post new updates without using the reply button. I think that last one was just a fluke. And another question if I may? do you always format your posts in a word processing program, along with photo links and then just cut and paste sections of the document to the forum?
ahandykindaguy
Visit this Community
Alberta, Canada
Joined: August 20, 2008
KitMaker: 1,295 posts
Armorama: 1,191 posts
Posted: Tuesday, December 20, 2011 - 03:38 AM UTC
Here are some images of the actual church building in my diorama.
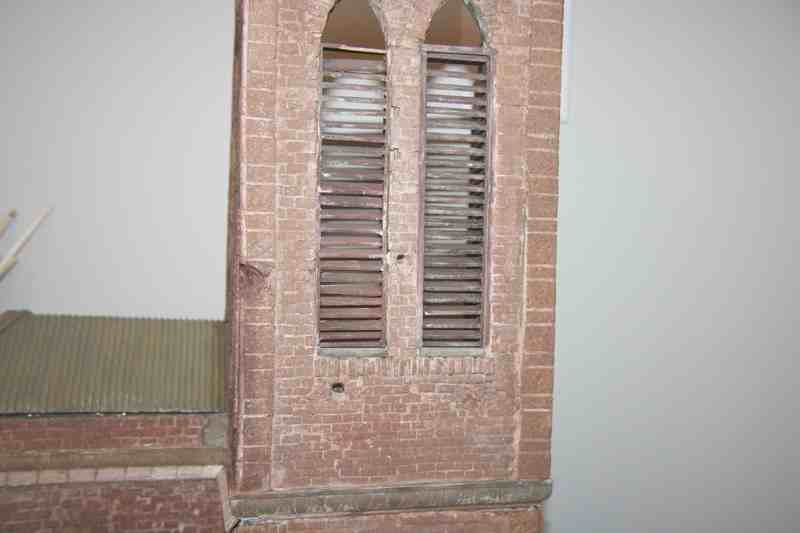
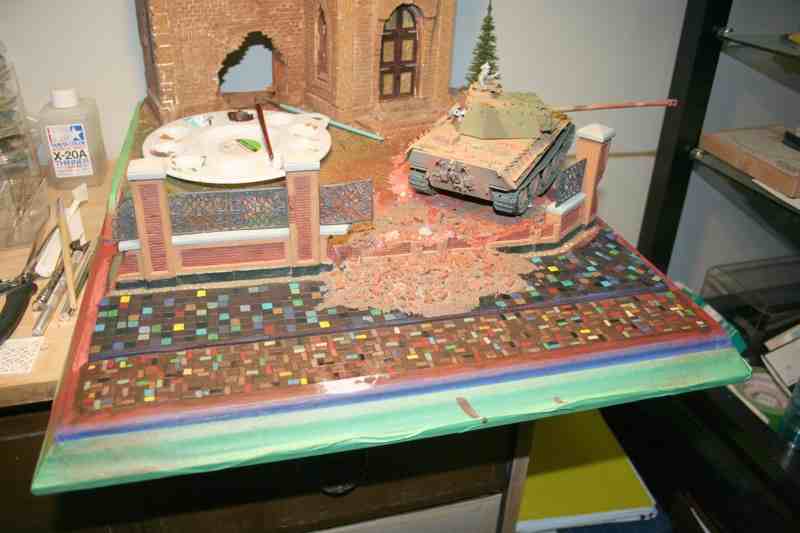
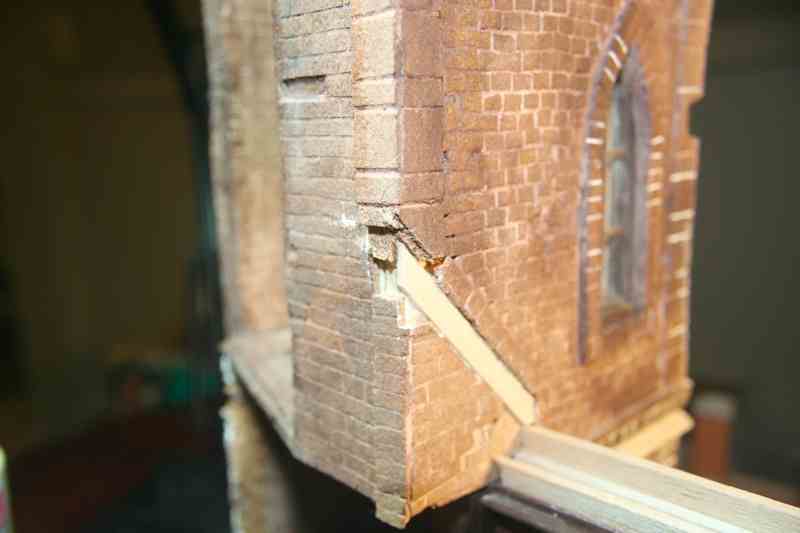


The basic construction is similar to many builds here on the site, and therefore I will only make a few comments about its make up which may explain more about my particular techniques used.

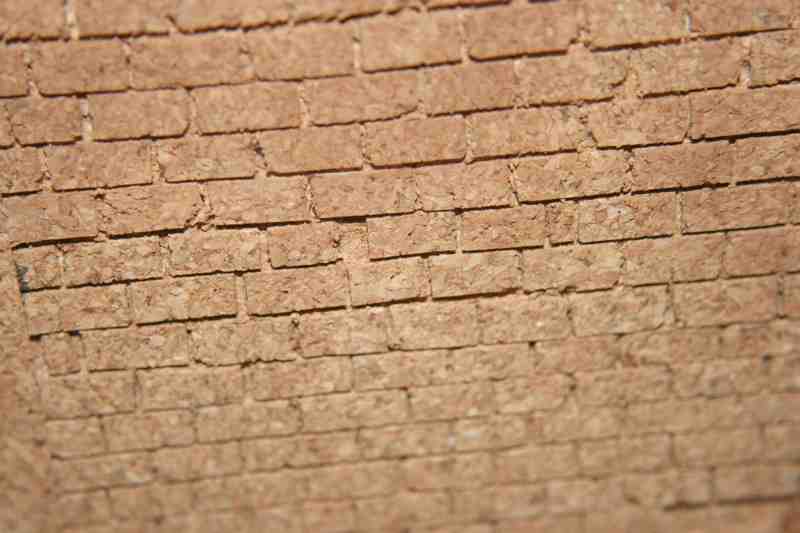
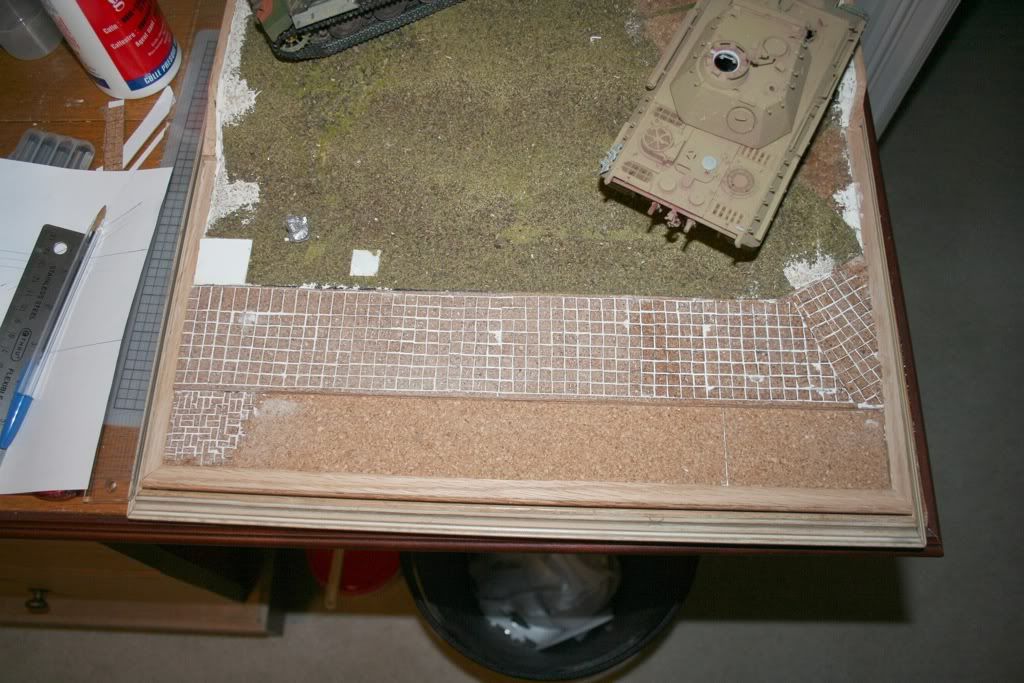
I started with a sheet of ¼ inch Foamcore board. This has been covered with cork, which has been covered with drywall Spackle, in this case a product found here in Alberta known as Dap Dry-dex Spackling. This is a fairly common compound here and is premixed in a reseal able container.

As it is drying like most of you fellow builders I wiped most of it off to leave just a faint mortar line.

The technique I have used to obtain the results you see here is slightly different then the accepted norm found in the posts of many diorama builders here on this site. My favorite Bible college professor used to tell us that a good preacher uses a simple guideline when preparing sermon illustrations and examples to include in their sermons. This guideline was: Steal, steal, and steal. Steal ideas, steal examples, steal patterns etc.

Now to be fair, he always said to steal but give credit where credit is due.

So when it came to my church building I looked at many examples in this forum and learned the basic principles of the illusion process in the scale representation of large-scale buildings.

I have and continued to study the work of the master of Clervaux, Claude Joachim, Blochaus, my fellow Albertan Meaty_ hellhound and many others and decided that this is the medium I would use from now on in my dioramas.

Now I do have some real life contracting experience, framing, concrete pouring and such which have always helped me in building dioramas. Having been out of the loop for a while, I was immediately intrigued by this cork process.

Very realistic results, but it appeared to be extremely labor intensive and since I like to work smart & not hard, and being of higher than average intelligence I decided there must be a better, quicker and easier way to do it. Bear with me; I am not as arrogant as I may have just sounded.

So I began my quest for a better way.

Like all good stories this one began with a trip to my favorite hobby supply store, “ The Dollar Store”. There I found not just cork, but sheets of thin cork backed by an adhesive tape. That seemed to me to be the ideal answer to a problem that plagues many a man, and a few women in my condition.

That is slightly ADHD, and rather lazy!

Instead of cutting up huge masses of thick bricks made out of expensive sheets of cork, only to cover them with drywall paste of some sort and thereby hide almost all of the thickness of the cork anyway, I decided to use this adhesive backed cork and cut it into long strips which would totally speed up the work and also cost way less!

Sounds simple doesn’t it?

In the words of Paul Harvey, here is the rest of the story.

My biggest problem wasn’t the thinness of the cork, or cutting it or anything to do with the process. No my problems came from a character flaw found in most of us adult males. I chose to dash headlong into a place where even angels fear to tread, with out taking the proper precautions.

Simply I did not plan my work, and then work my plan. I soon found myself running footloose & fancy-free in the tiny world of cork construction with no blueprint for the church that was quickly taking shape and evolving almost faster then my semi-ADHD mind could dream up new things to try.

Abandoning everything I learned as a builder, and obviously not paying close attention to some of your build logs, I started peeling the backing of my great sheets of cork and covering my Foamcore church, without once taking a pencil to a sheet of graph paper or a ruler and sharpie marker to the foamcore board.

Well it didn’t take long for things to begin to unravel. Maybe I am not the only one to try to cut a doorway or an oddly shaped window out of a piece of ¼ inch foamcore without a solid frame or pattern to guide the edge of the knife?

Or to come to said window frame, after cutting it out only to find you neglected to measure the distance between it and the corner of the building or doorway and now you don’t have the proper spacing for the size of bricks you are using?

I am sure I am not alone here gentleman, but if I am then have a good laugh at my expense and I will continue.

So the basic building is not quite level and not quite square, which since I didn’t do my due diligence at the beginning has bit me in the butt at every stage of the build since. Let that be a lesson to you.

Let us just say I hope I have learned my lesson and the next project will begin with a much higher level of pre-planning and forethought.

The cork itself I think works quite well. I have found it relatively easy to use and because I cut it into lines and place it on the wall this way I can line it up quite well and most of the columns are straight to the naked eye. The problem of course, and one I did not plan well enough this time was of course getting the first course absolutely level. From there you merely have to do what I say and not as I do, & check, check and recheck as your building, wall or street takes shape.


The biggest issues honestly with doing things in this manner are these I think. One is that the building comes out thinner than if a thicker cork brick is used. At this scale it might not be a big thing. I don’t have much experience with old world buildings having never been to Europe, but many of the buildings I see here seem to be quite thick. However I do know from the research I have done that building with brick and especially stone, the building naturally become thicker then the traditional wood framed housing of the nature found here across the pond.
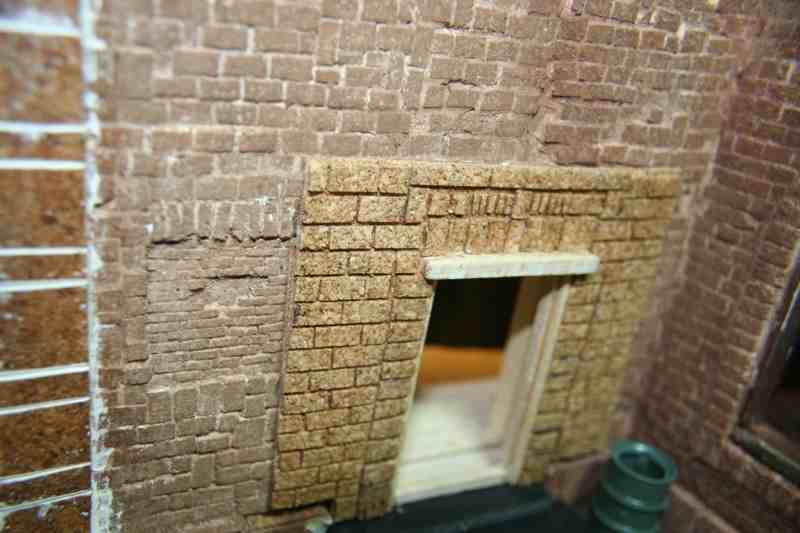
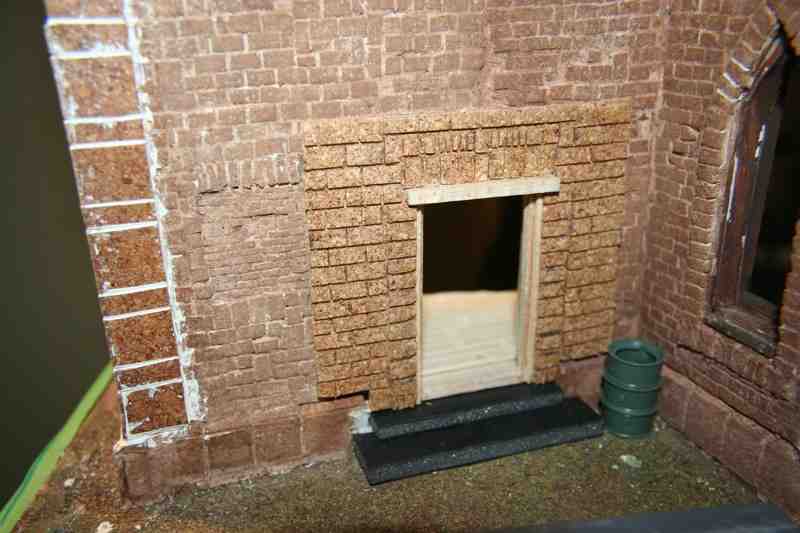
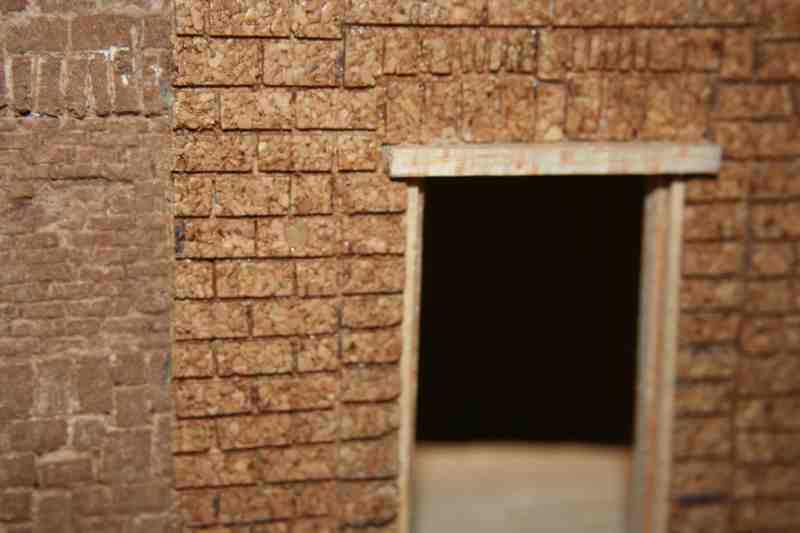


The second issue is that where by using separately cut bricks of thicker stock cork may be indeed time consuming and tedious, using the very cutters that aid in the process allow for exacting copies… every time. This ensures the proper spacing between bricks and that the mortar lines will be consistent both horizontally AND vertically. My method is a little harder to keep the brick size consistent so the vertical mortar lines don’t always line up as methodically as they should.
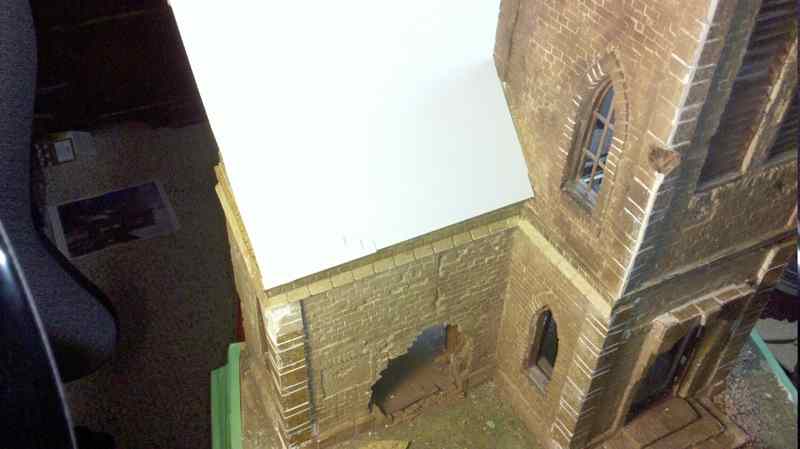
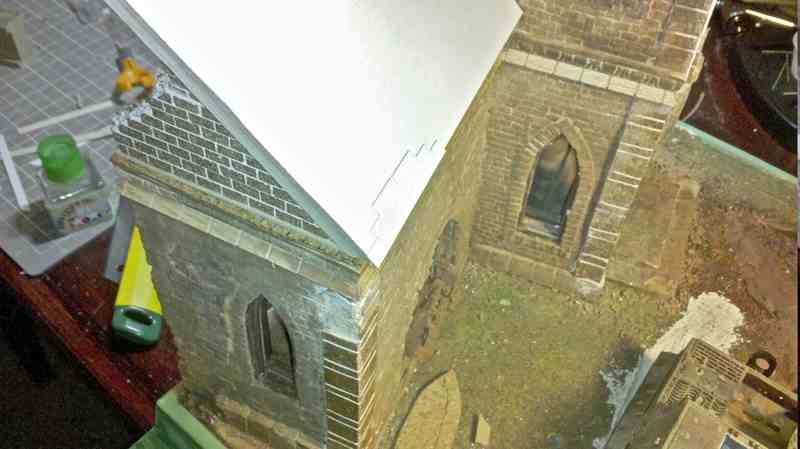


In the end I don’t know if my slant on the commonly used method of building saved me any time. It did for sure save me some money as the sheets were quite cheap, but at the end of the day I think I will give the traditional way a go on my next build.

Another thing I should mention is that after I had stuck the bricks onto the structure I would usually "paint" them with a watered down mixture of white carpenters glue, and sometimes for the really tiny bricks I would use CA as I found that especially on the edges of certain corners when i tried to spackle them some of the smaller pieces of cork did not have enough adhesive power to stay put. Another lesson learned...
Removed by original poster on 12/20/11 - 19:56:04 (GMT).
GregCopplin
Visit this Community
United States
Joined: September 06, 2011
KitMaker: 212 posts
Armorama: 201 posts
Posted: Tuesday, December 20, 2011 - 09:26 AM UTC
Another title could of been, Oh come all yeee, PANZERS!!!!
ahandykindaguy
Visit this Community
Alberta, Canada
Joined: August 20, 2008
KitMaker: 1,295 posts
Armorama: 1,191 posts
Posted: Tuesday, December 20, 2011 - 02:23 PM UTC
except that they do not look to be either Joyful or triumphant... the Sturmtiger is eventually going to have it's new engine being lowered into its engine bay... I have a verlinden set to use on this build, and some various crewman in high maintenance mode to add to the rear of the deck.

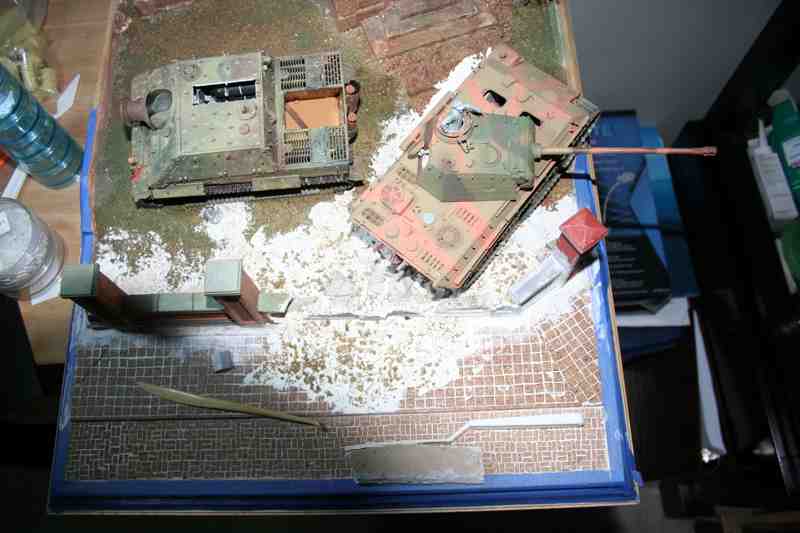
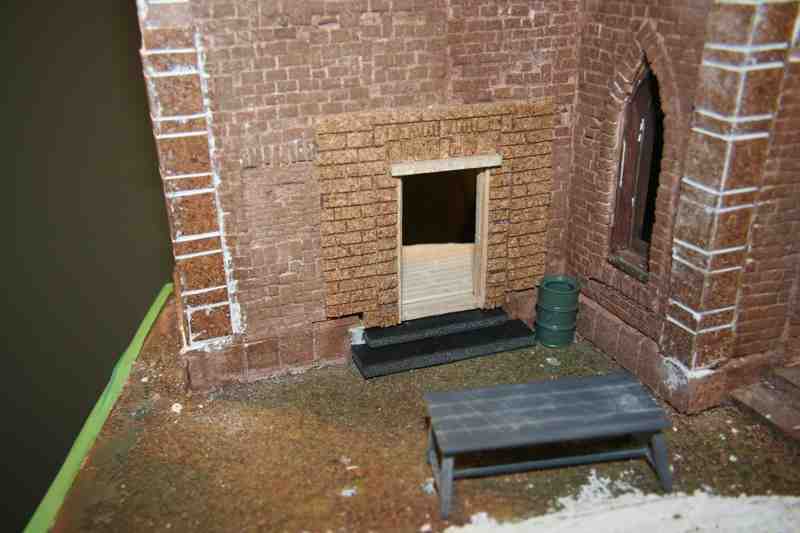
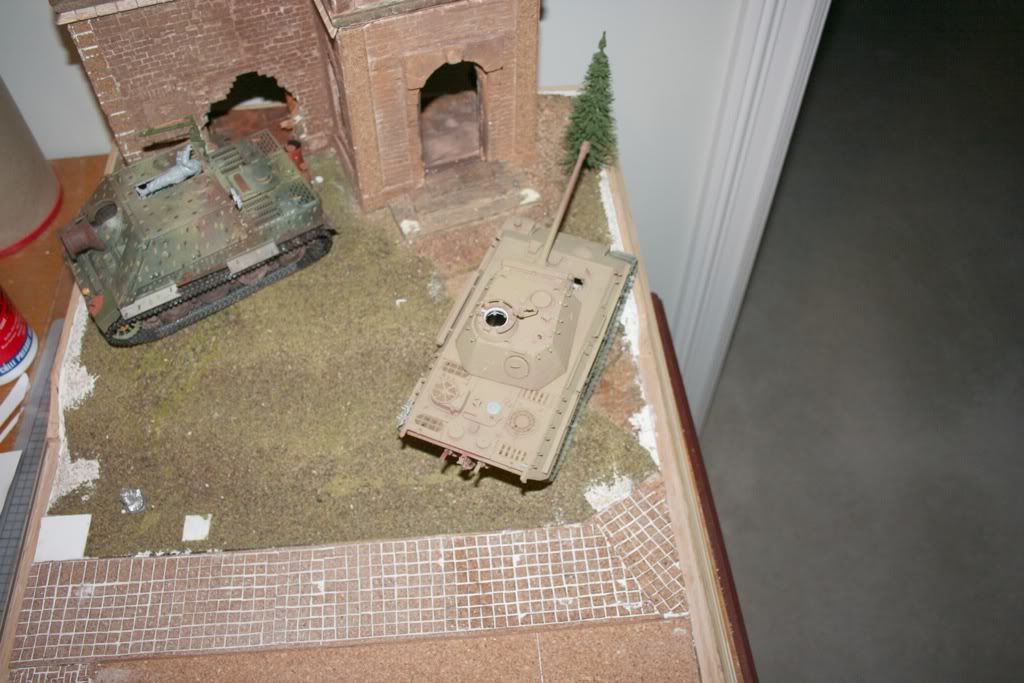
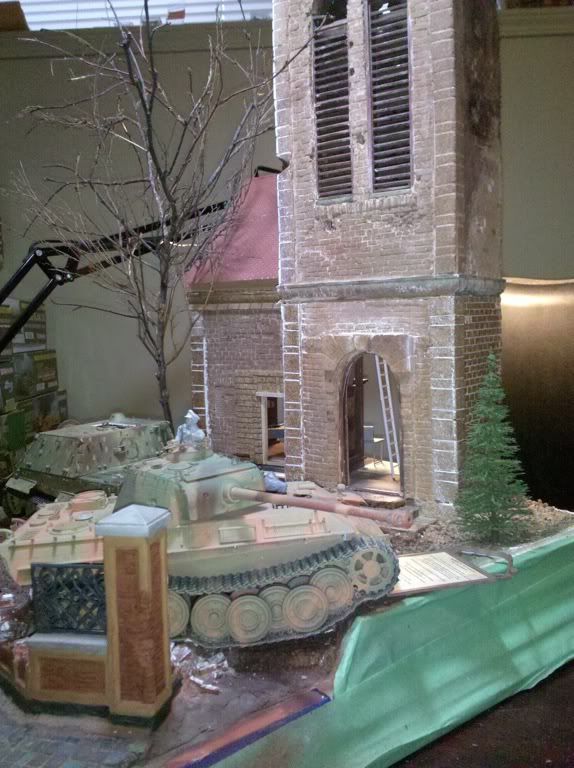
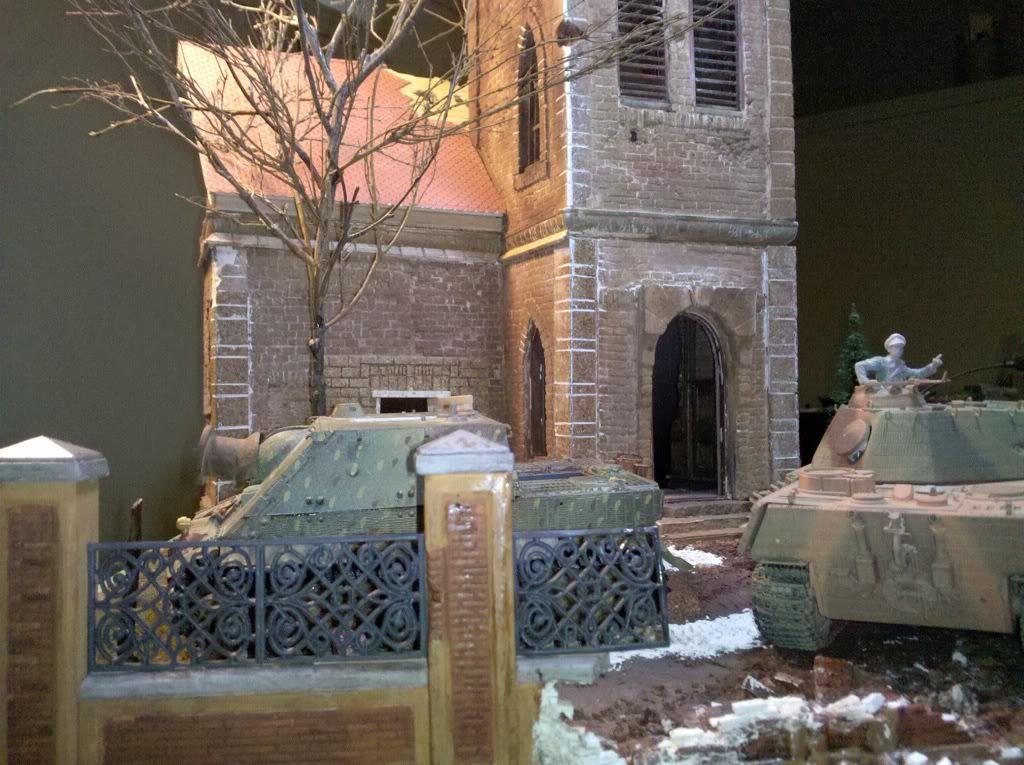
Here are some pics of the basic building & layout.


The final word on the locations of all of the sub sets to be include in this diorama are as follows:

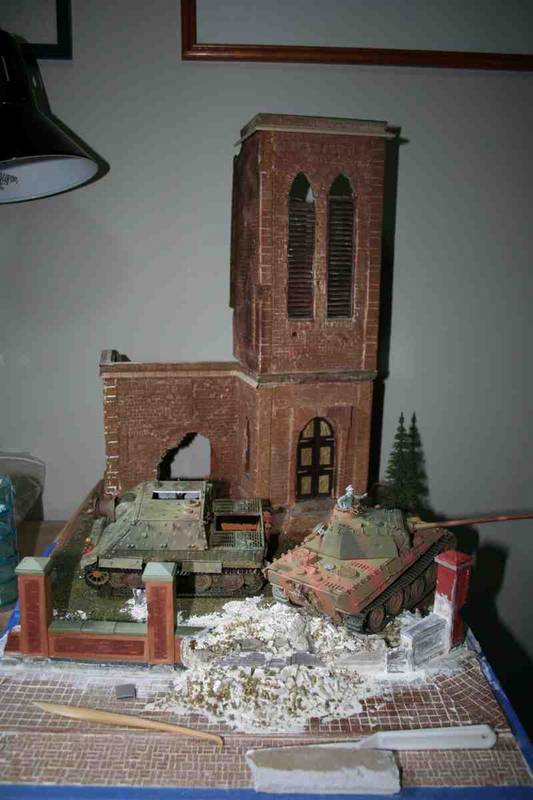
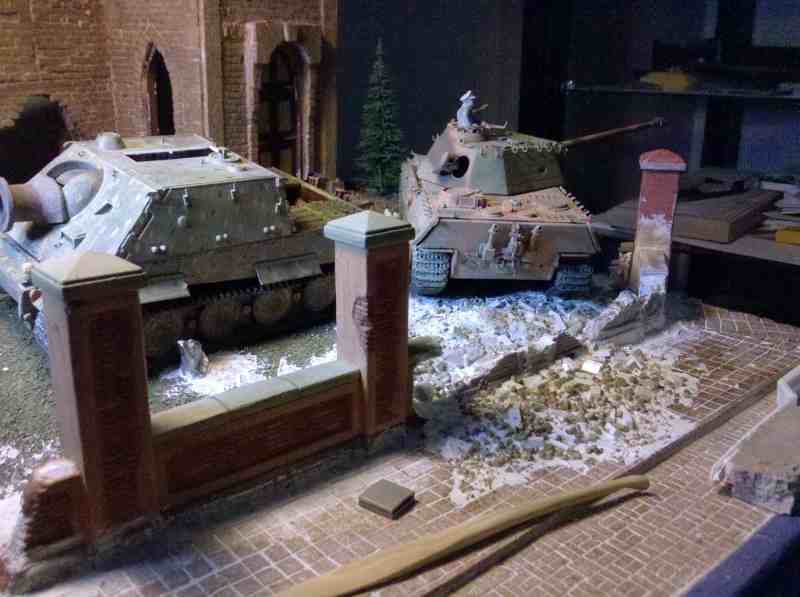
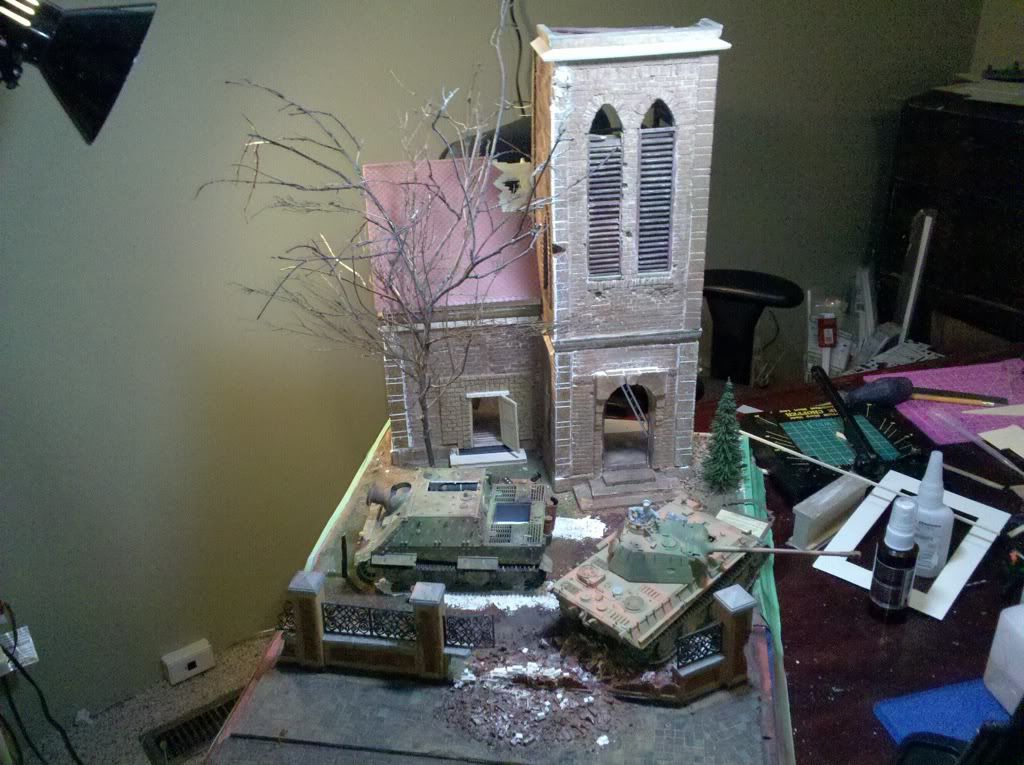
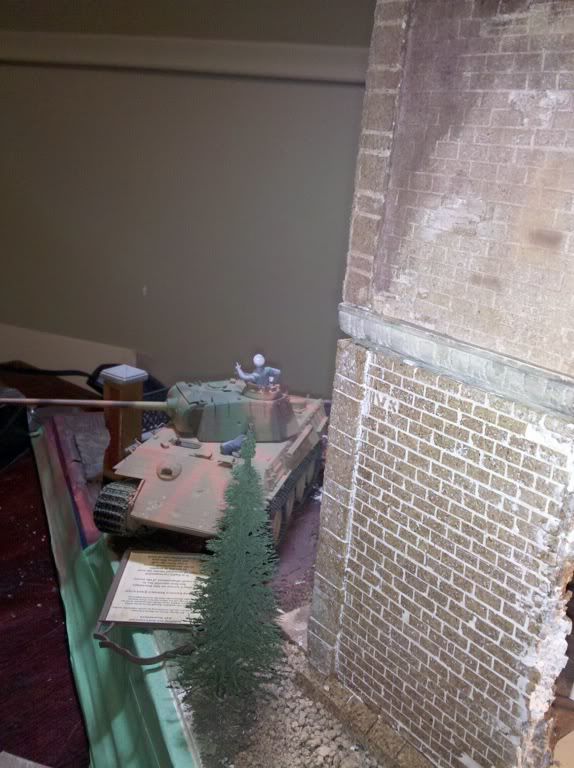
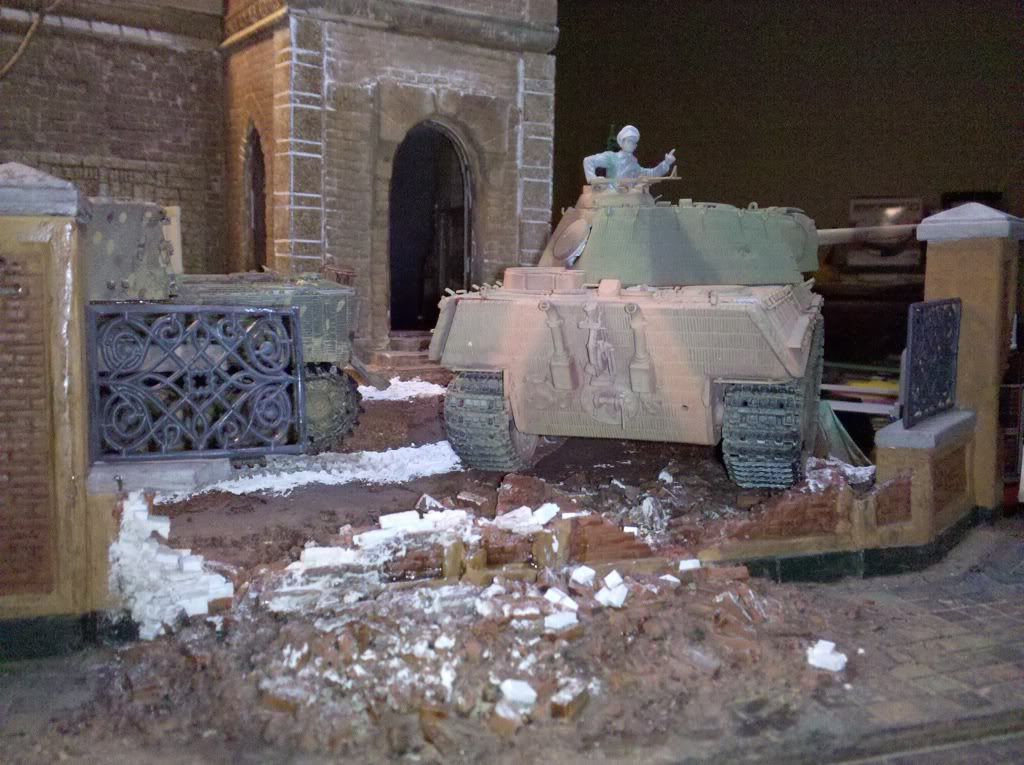
A late model steel wheeled Panther G ( DML 6730) breaking through the front walls of the church Courtyard to alert the mechanics & crew of the Sturmtiger ( Testors 80th anniversary edition), which is receiving a new engine via a small crane and winch.

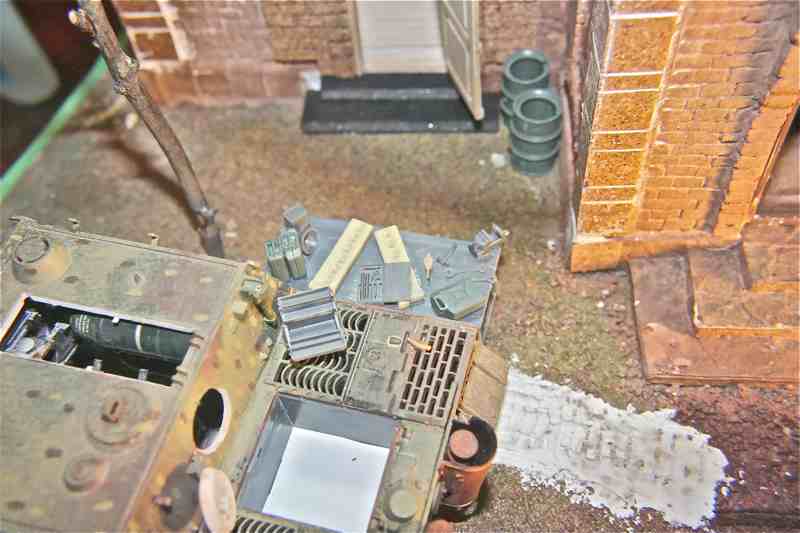
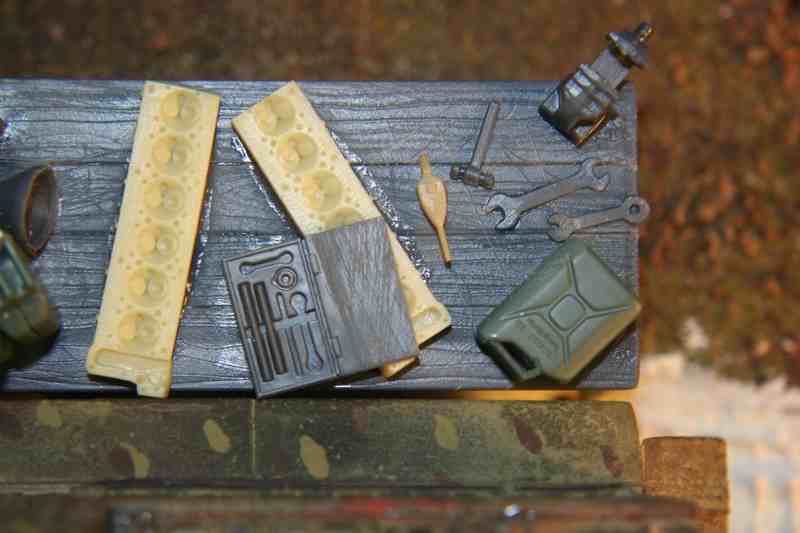
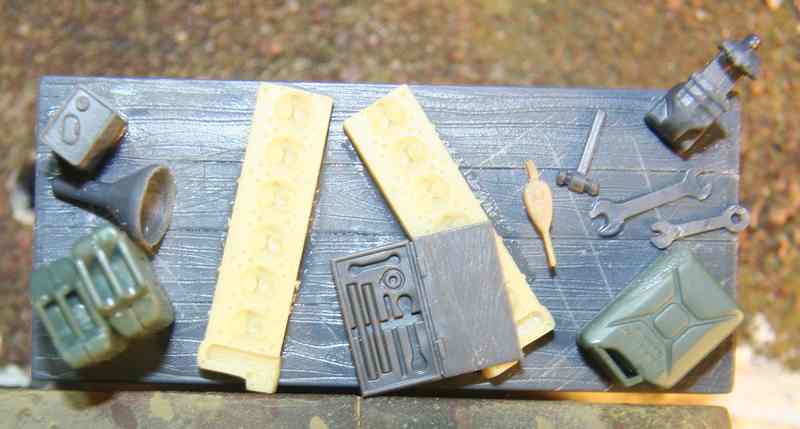
Behind the Sturm sits a table full of parts and tools, surrounded by fuel drums and jerry cans and assorted paraphernalia. The Sturmtiger has broken down under a large deciduous tree devoid of nearly all its leaves, which are scattered around the courtyard.

From the side entrance can be seen a soldier from the communications centre set up in the back of the church who is coming to investigate the noise made as the Panther has rammed through the wall.

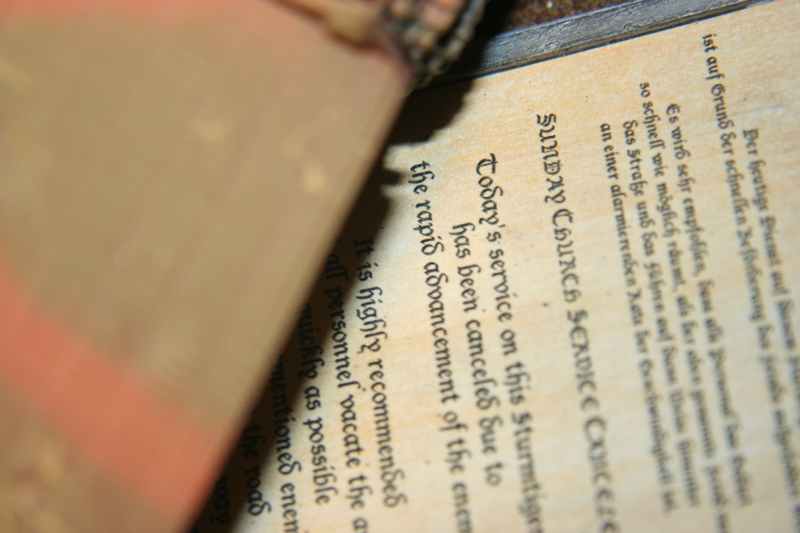
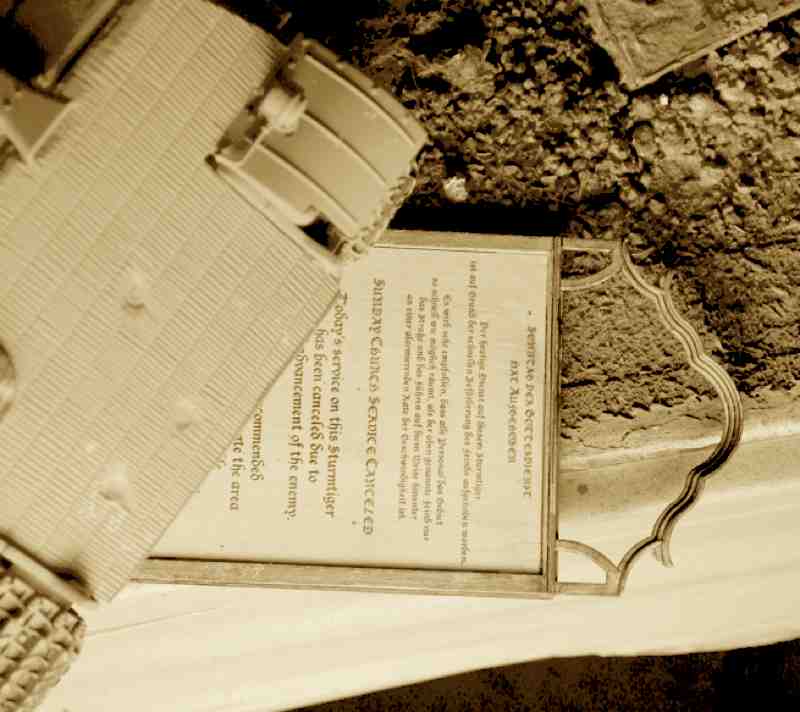
Underneath the front end of the Panther can be seen the church’s welcome sign that doubles as the name plate for my diorama. Yep I know. Sneaky. What can I say.

The panther will be a focus of several infantrymen trying to ascertain how many & from which direction the enemy is coming from.

Additional soldiers will be coming down the street, some in due haste and others apparently oblivious to the oncoming peril. Altogether I expect to have about 15 personnel total.


ahandykindaguy
Visit this Community
Alberta, Canada
Joined: August 20, 2008
KitMaker: 1,295 posts
Armorama: 1,191 posts
Posted: Wednesday, December 21, 2011 - 04:08 AM UTC


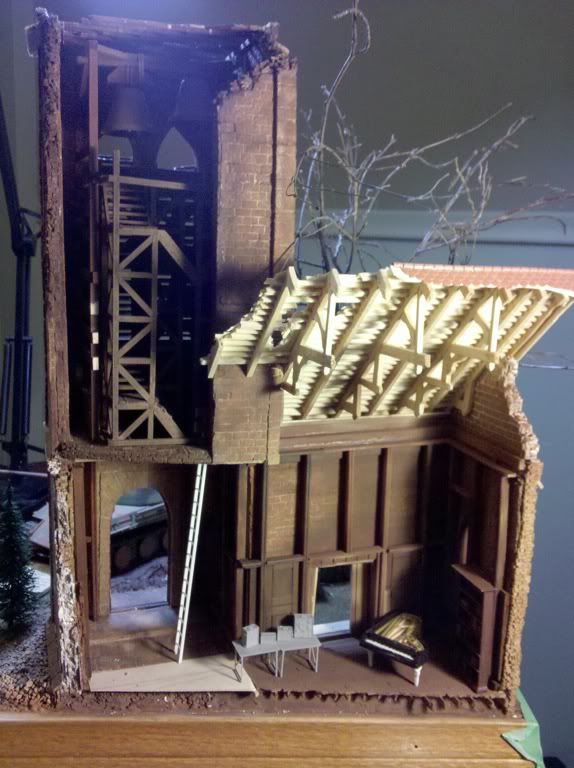
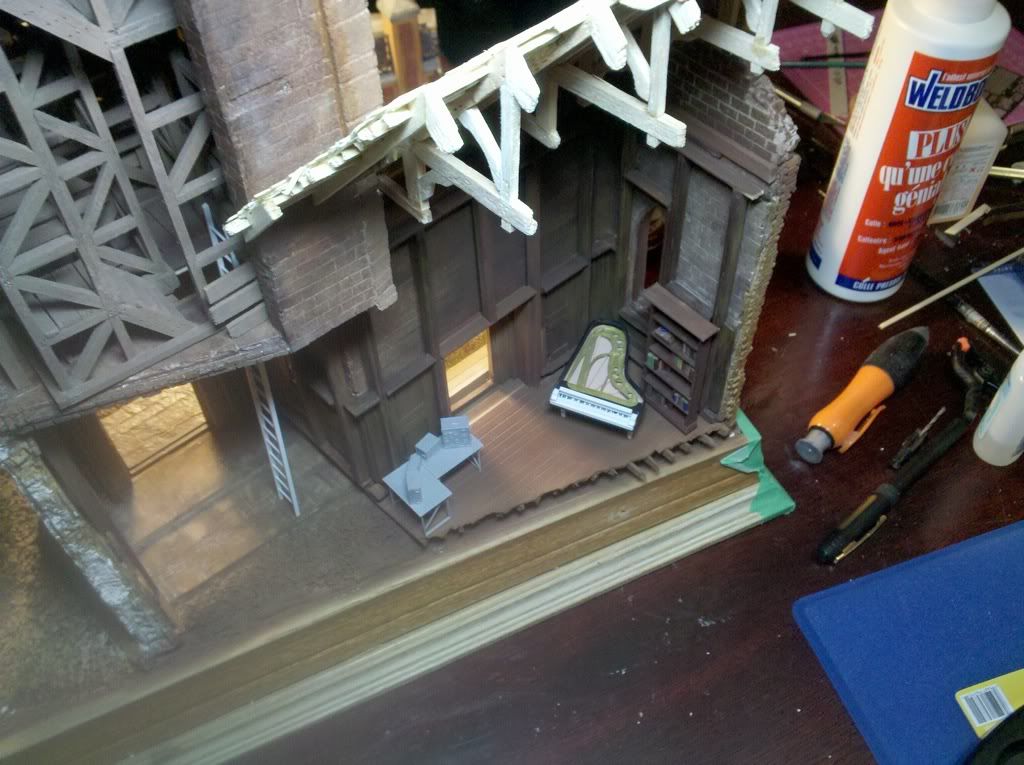
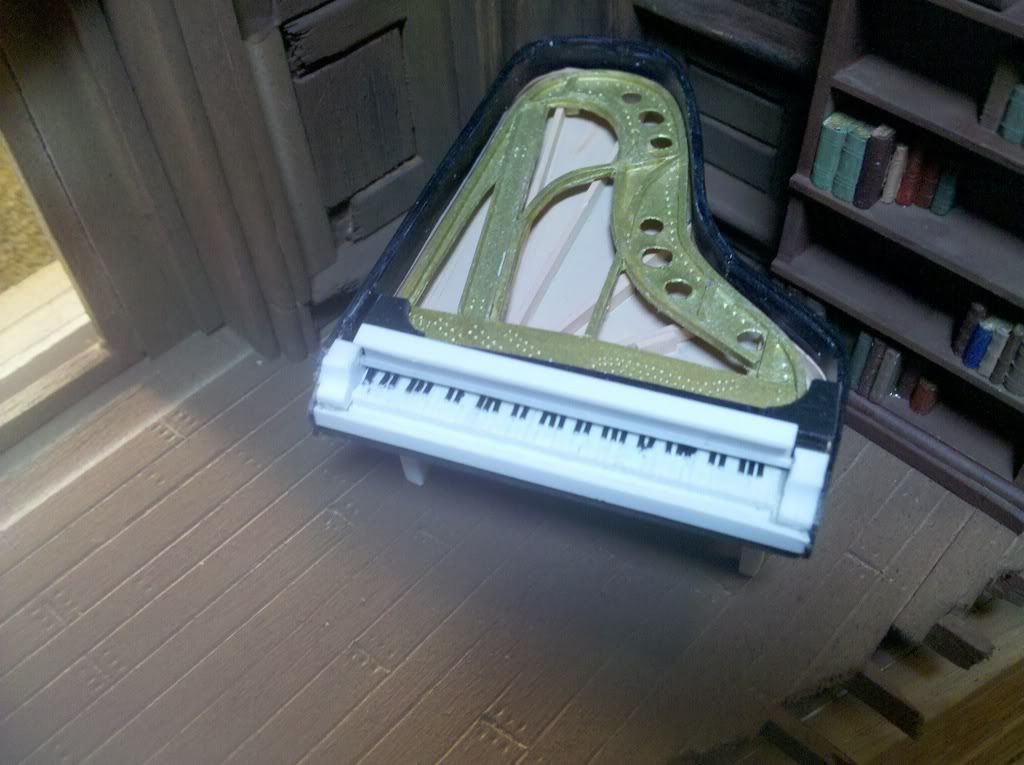
here is a picture of the piano as it sits right now, I still have to redo the hinge for the top & put the pedals on as well as the strings. Then some final paint and she's ready for her big debut!


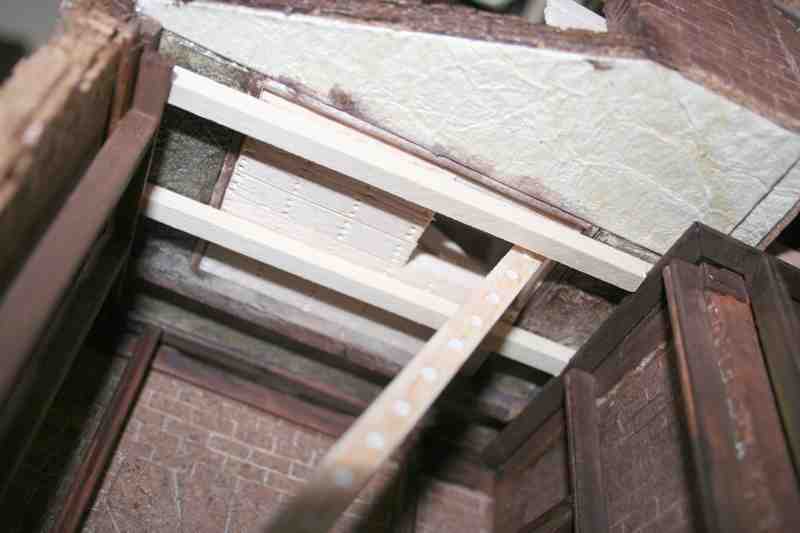
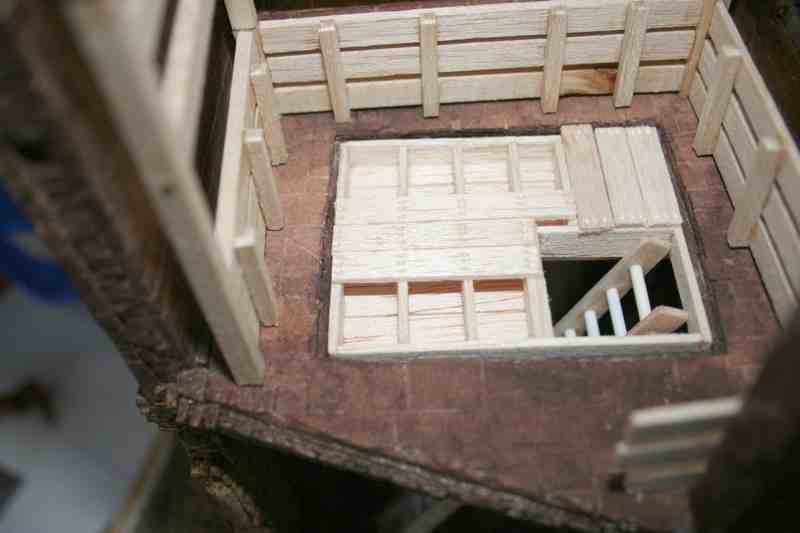
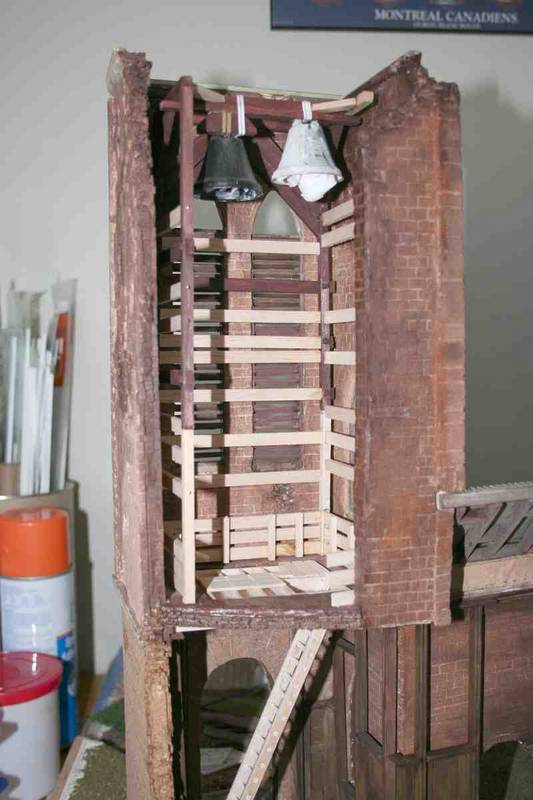
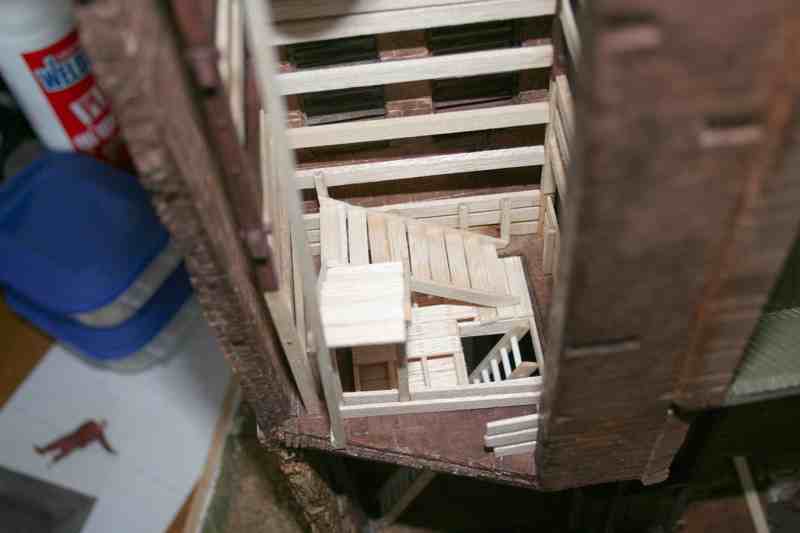
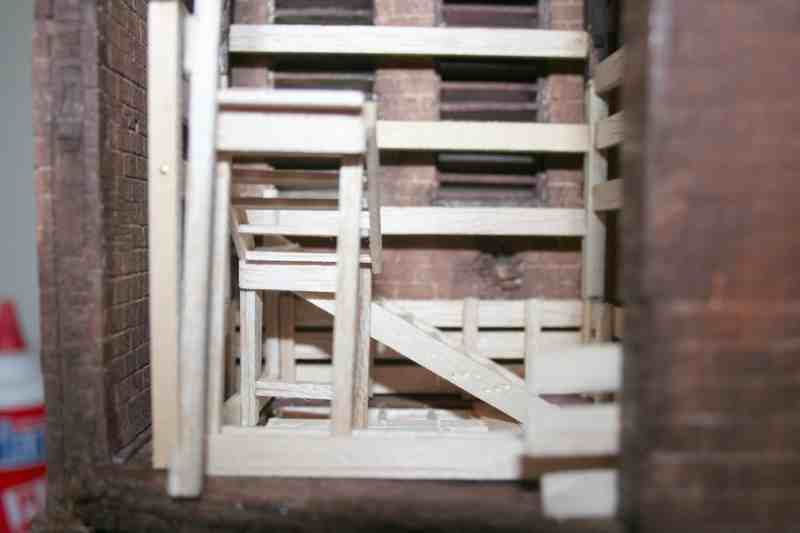
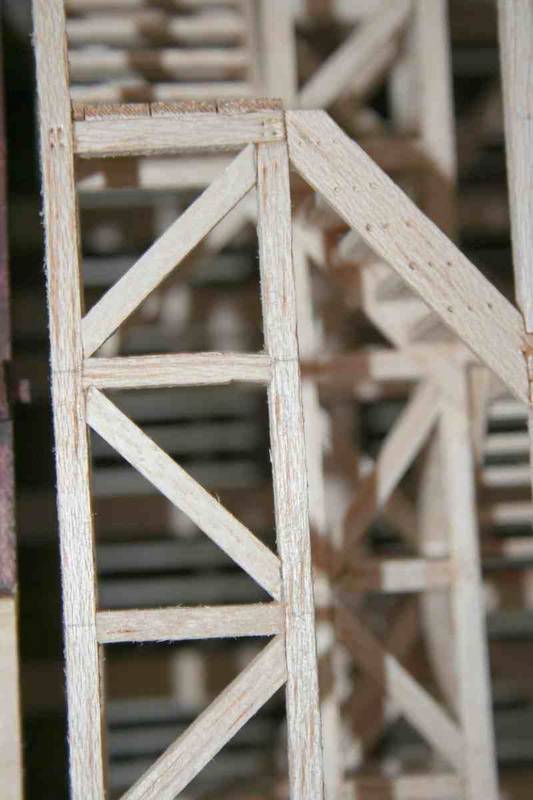
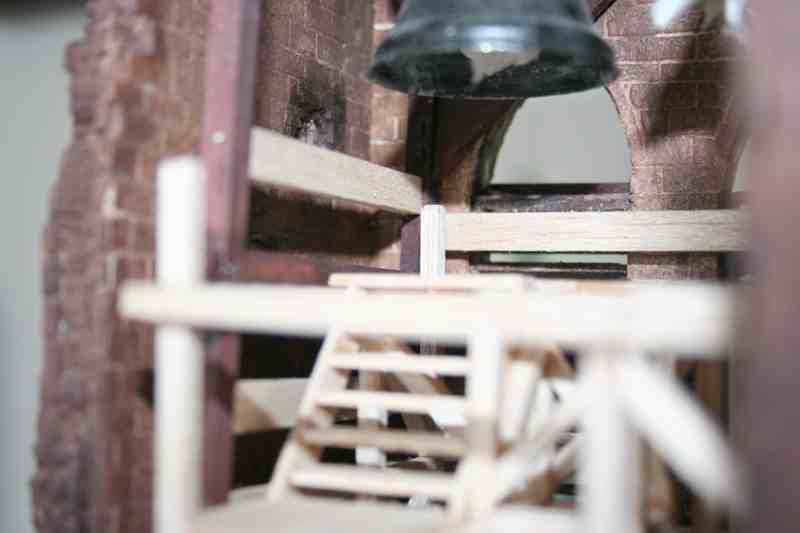
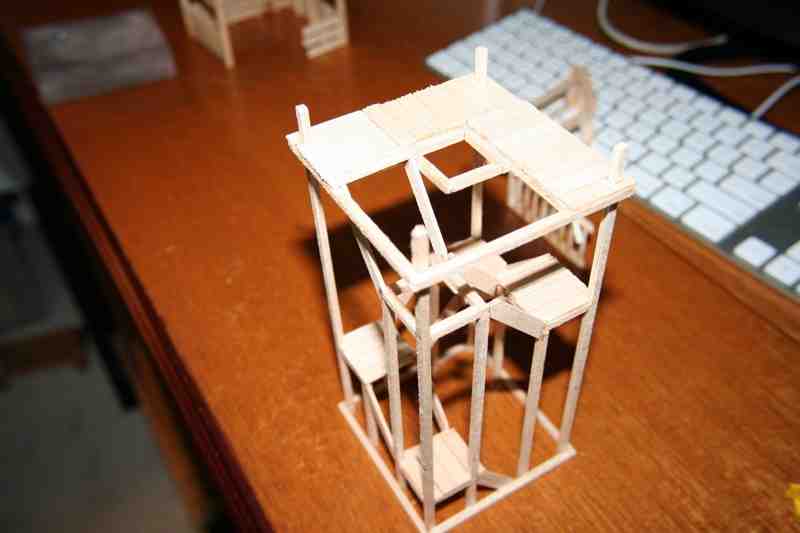
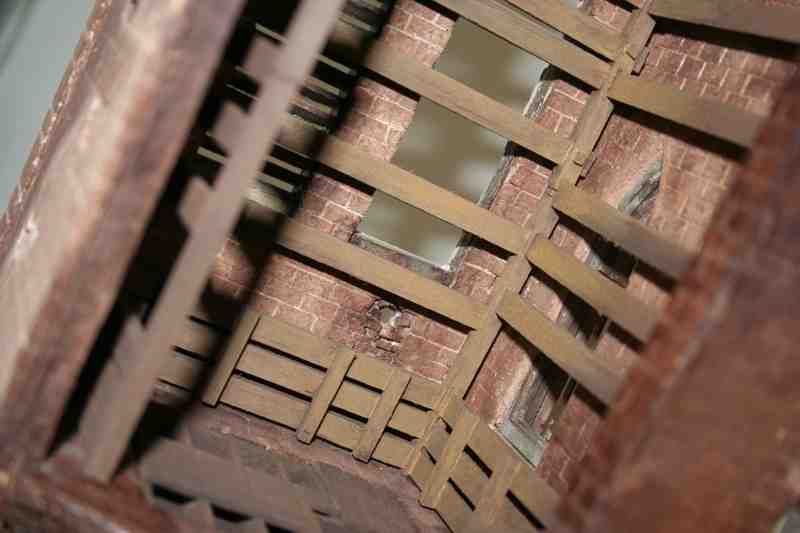
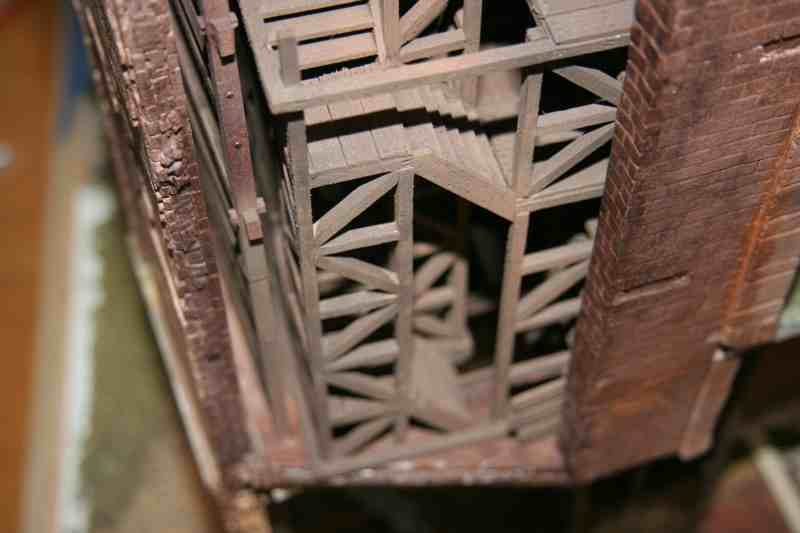
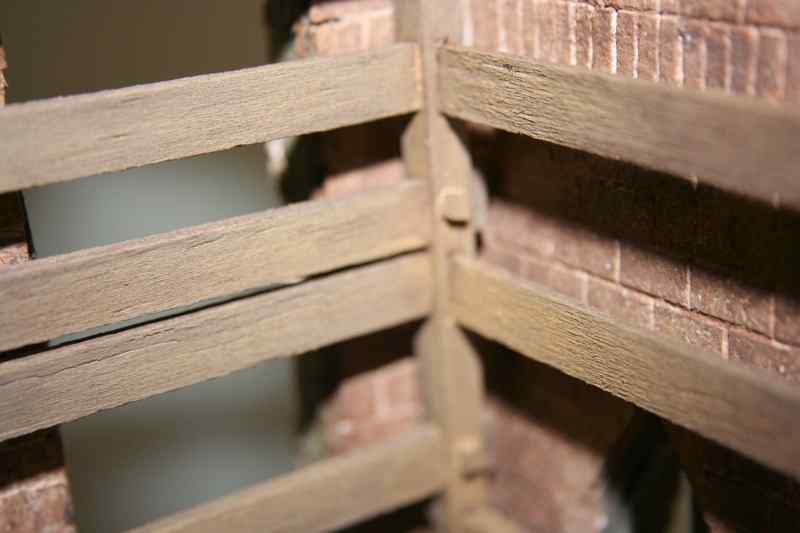
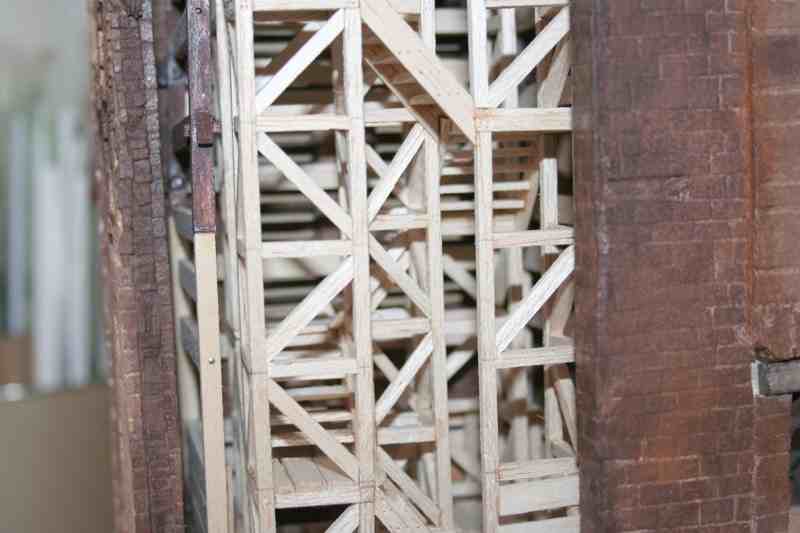
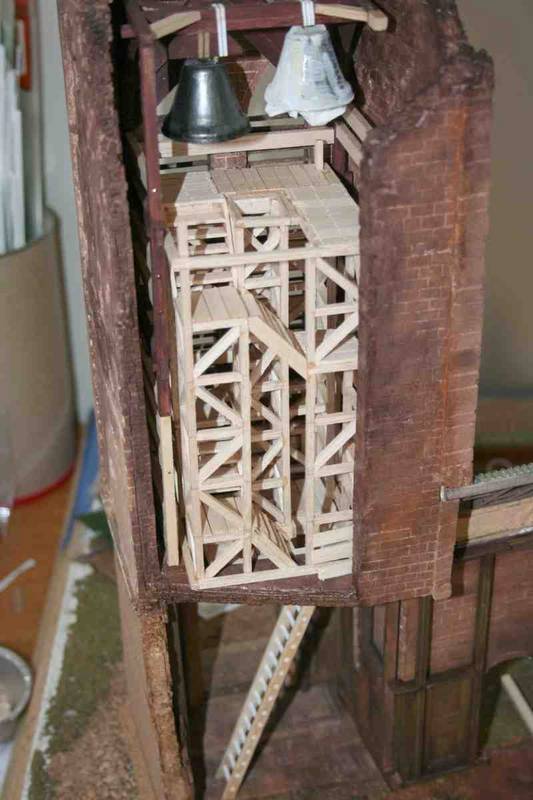
After I had the basic structure up, I began the task of putting together the interior of the bell tower. All my research told me they were usually very heavy wooden timber affairs, so I got out my supply of wood and my cutter and started to construct...


I spent alot of time making sure things stayed as plum & as square as i could keep things as a result of my failure to do so in the wall sections.


well, 4 days till Christmas and I'm home with a sick toddler but still needing to begin my present shopping expedition... what's a guy to do?

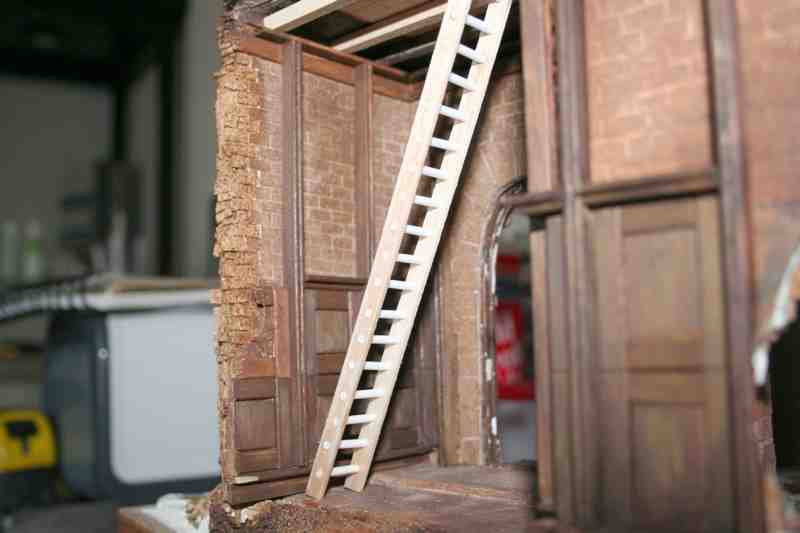
here is a shot of the original ladder i built to gain access to the tower. I thought it was a bit to chunky for the scale, so I have replaced it with a section of Plastruct product. this new ladder has a better scale representation I believe.


while I am at it and the car warms up... Diesels ya gotta love them. here are a few more pics...


you may have noticed the different desks I have been modeling on in some of these pictures. I moved my family to four locations during the course of this build, settling down this spring to sunny southern alberta, it is snowing this morning here, but i think the temperature is a balmy -2 C.

okay going to walmart to pick up some more diapers. see you guys later...


here is a pic of how the back of the church originally looked like. Do you guys change things up as much as I seem to do?


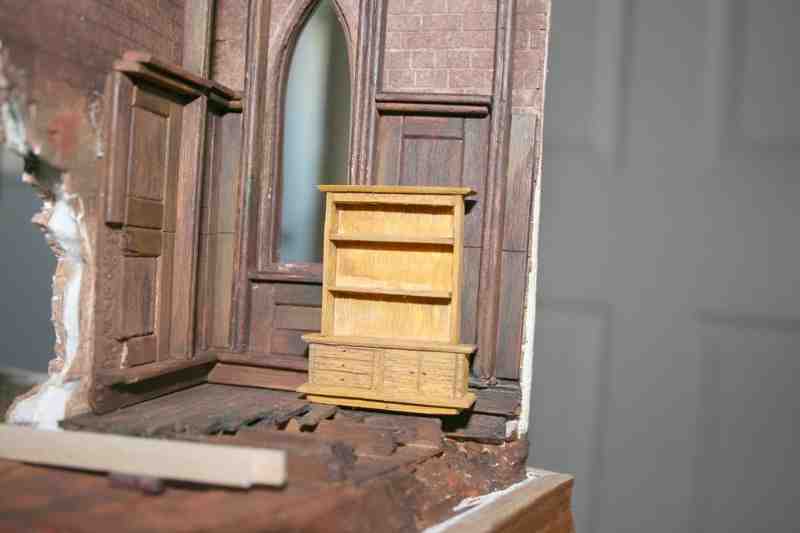
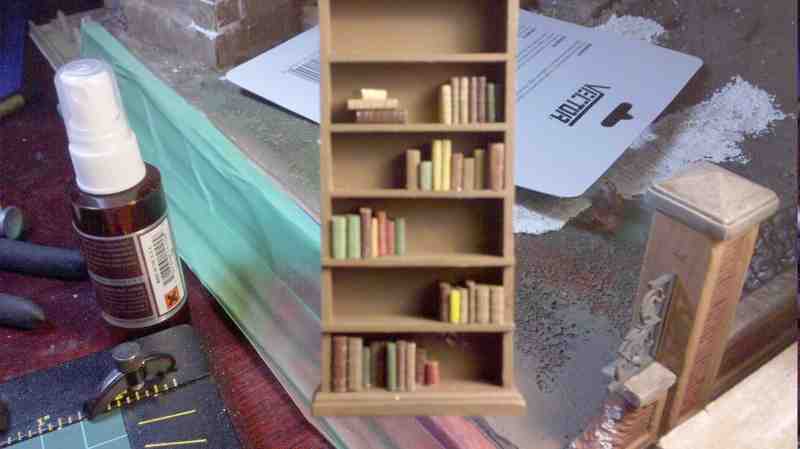
I built this book shelf unit out of scraps of real oak! thin strips left over from some bead detail I put on my last hobby desk. it looks okay, but when I played around with legs or no legs I decided it was either to short or too tall for any of the locations... so I will use it somewhere else, maybe a rubble pile or another diorama


stansmith
Visit this Community
England - North West, United Kingdom
Joined: July 18, 2010
KitMaker: 611 posts
Armorama: 584 posts
Posted: Wednesday, December 21, 2011 - 06:07 AM UTC
great job dave, the level of detail is outstanding.
don't know why but makes me think of brothers in arms road to hill 30
stan
ahandykindaguy
Visit this Community
Alberta, Canada
Joined: August 20, 2008
KitMaker: 1,295 posts
Armorama: 1,191 posts
Posted: Wednesday, December 21, 2011 - 06:36 AM UTC
thanks Stan. I am not familiar with the program, or series. Wartime shows are way too graphic these days for my wife's eyes. Saving Private Ryan was the straw that broke that camel's back! is it part of the Band of Brothers series?

here a a few more shots. Doing a little updating while my poor little teething toddler is taking a nap...


and another...


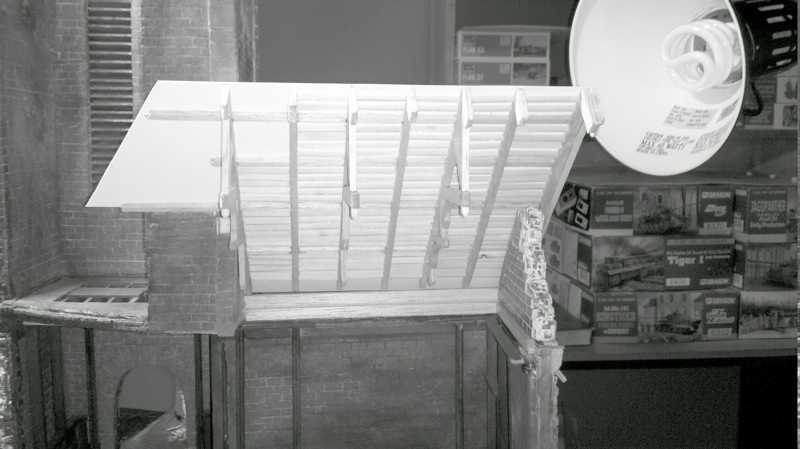
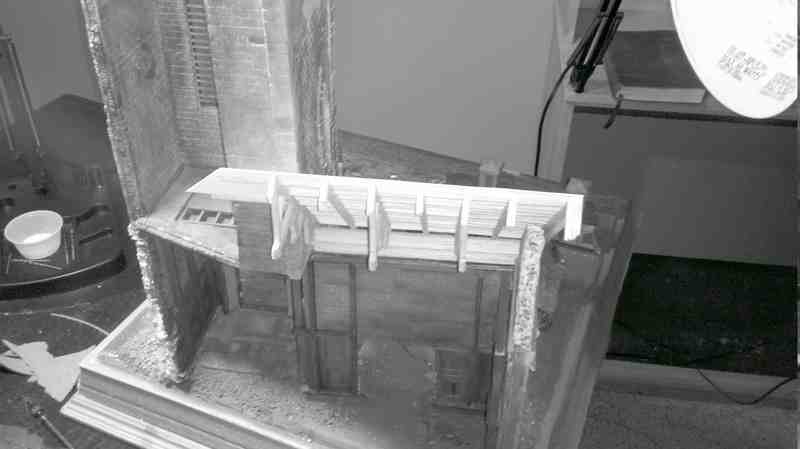
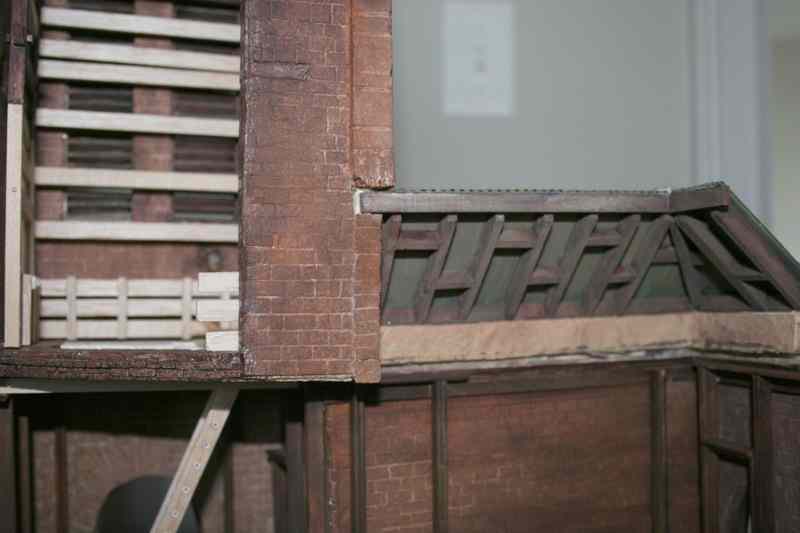
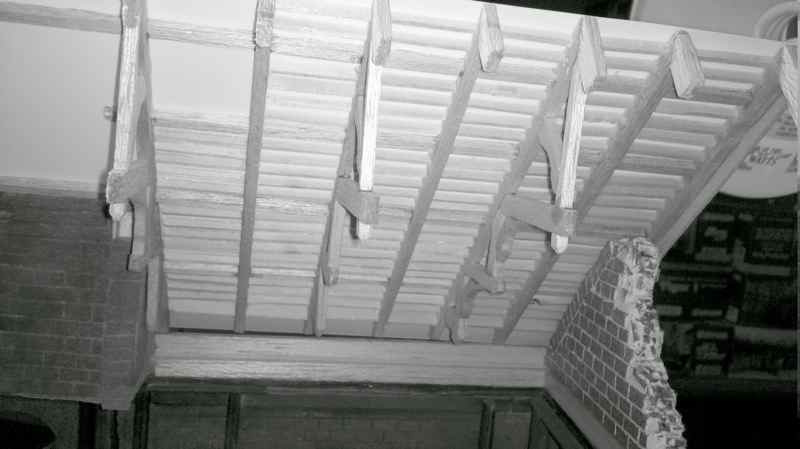
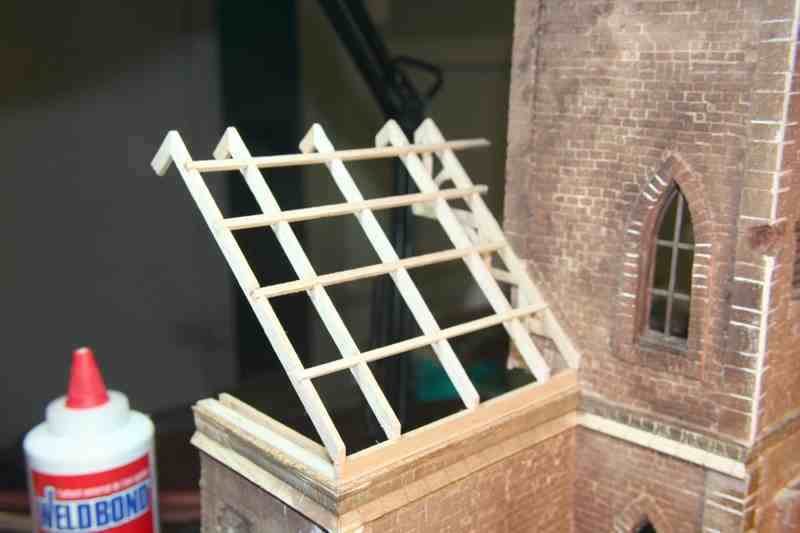
here are a few of the new roof section i am going to use to replace the first one. I didn't like how it turned out.


ahandykindaguy
Visit this Community
Alberta, Canada
Joined: August 20, 2008
KitMaker: 1,295 posts
Armorama: 1,191 posts
Posted: Wednesday, December 21, 2011 - 07:42 AM UTC


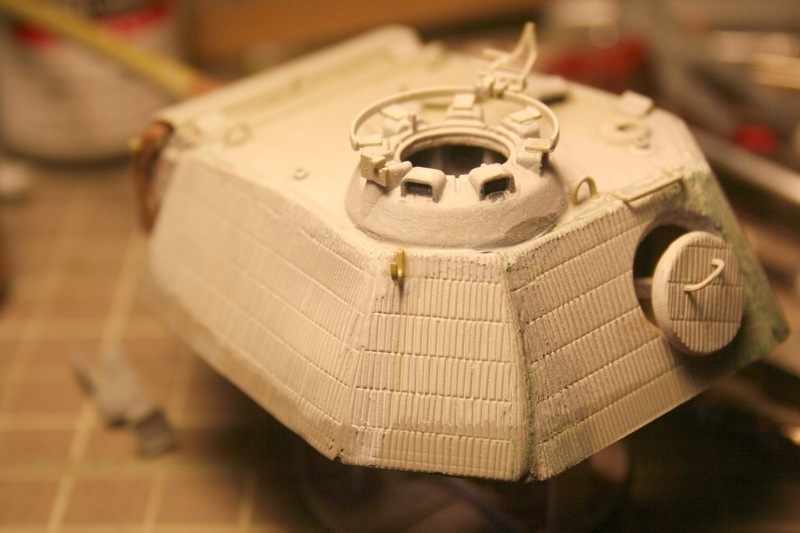
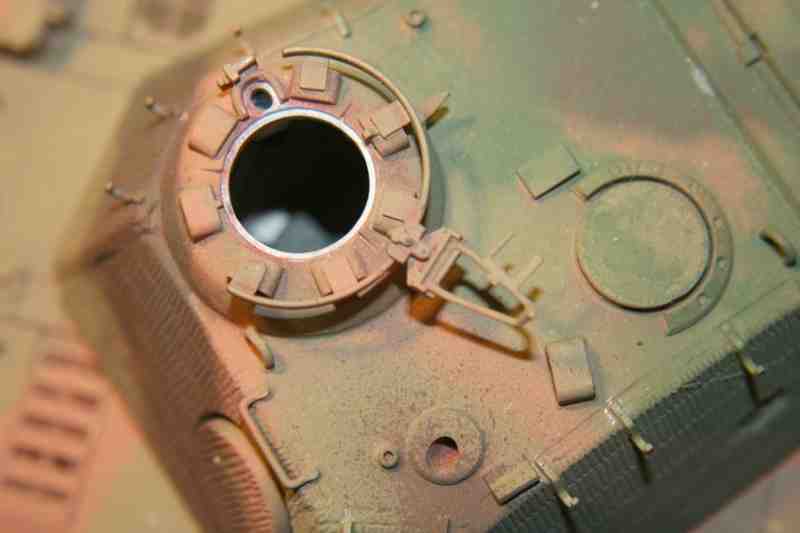
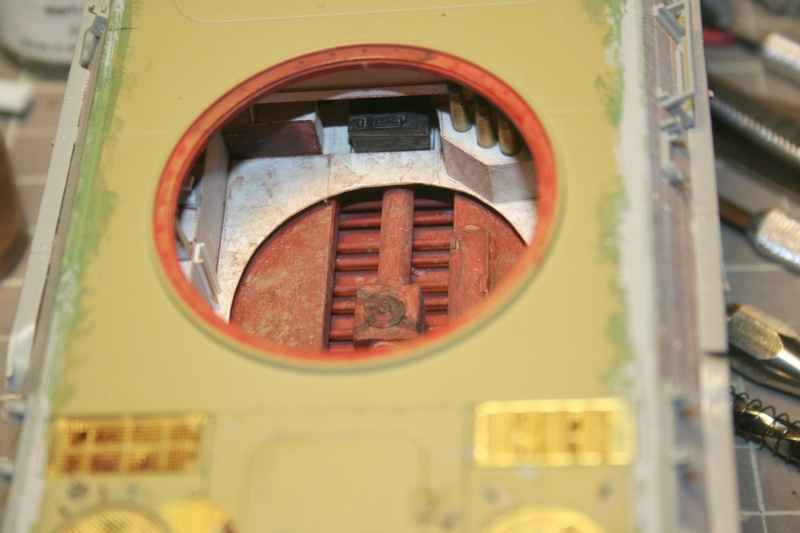
and for the tank builders here are 3 of the Panther during the course of its construction:


The zimmerit is from an old Italeri kit, for German tank accessories. The interior details while they will be hidden, were scratched for the practice.
ahandykindaguy
Visit this Community
Alberta, Canada
Joined: August 20, 2008
KitMaker: 1,295 posts
Armorama: 1,191 posts
Posted: Wednesday, December 21, 2011 - 10:31 AM UTC
well I have uploaded a bunch more photos to my Kitmaker gallery, so I can post some new shots of my build.... the daughter is finally napping by the lack of signing coming from her room. I hope the server doesn't give me too much grief today.


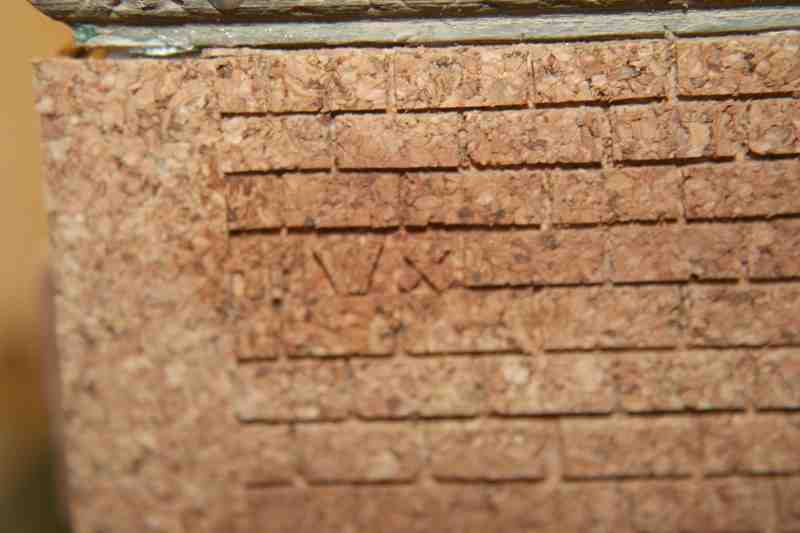
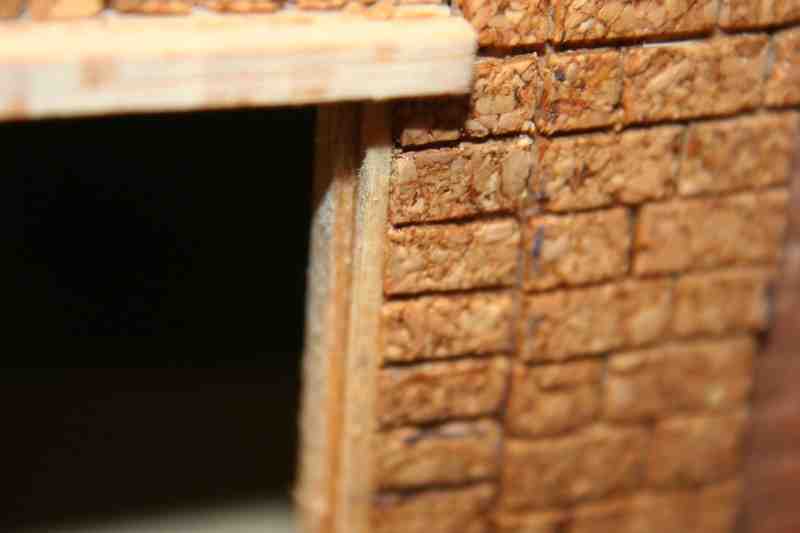
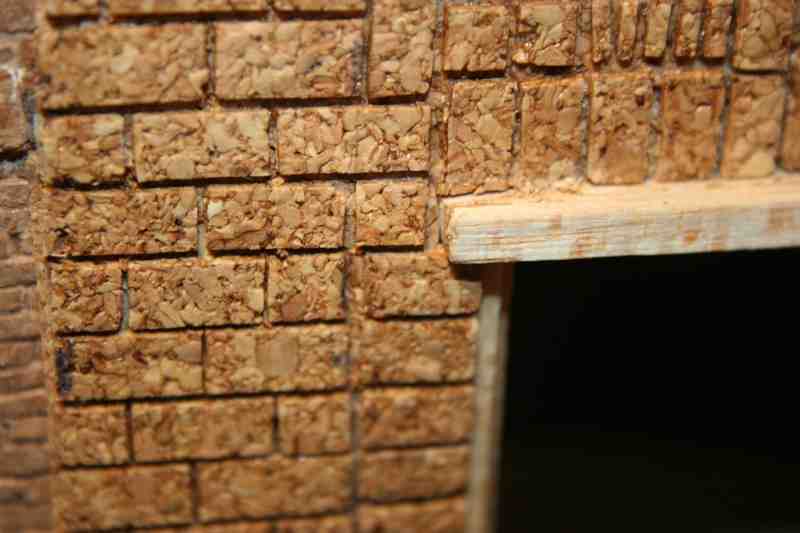
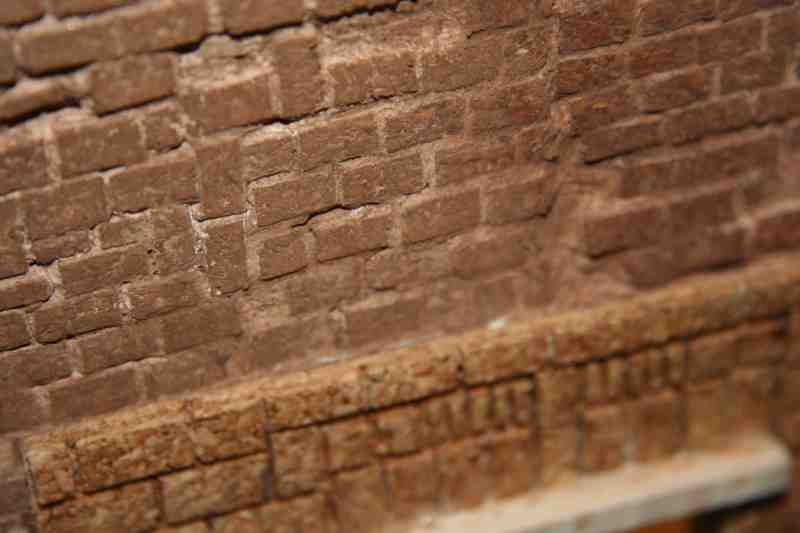
here are some more detailed examples of how thin the cork is that i use. It is backed with an adhesive backing sheet. just peel off the covering and stick it down! I always press fairly hard. just to be sure.


sometimes to change up the monotony I would cut individual brick sized pieces from a long line, cutting through the cork just enough to go past the glue layer. Then I could slide the brick off the backing sheet onto my knife and use my trusty #11 blade to place the bricks.


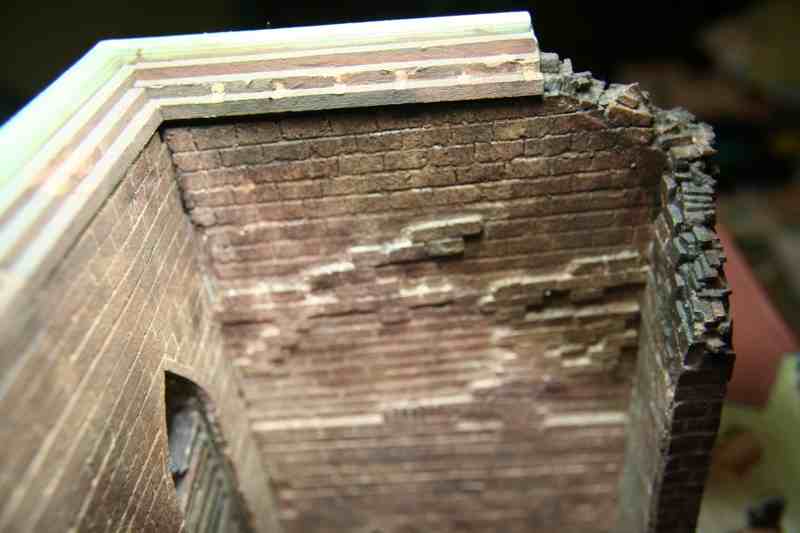
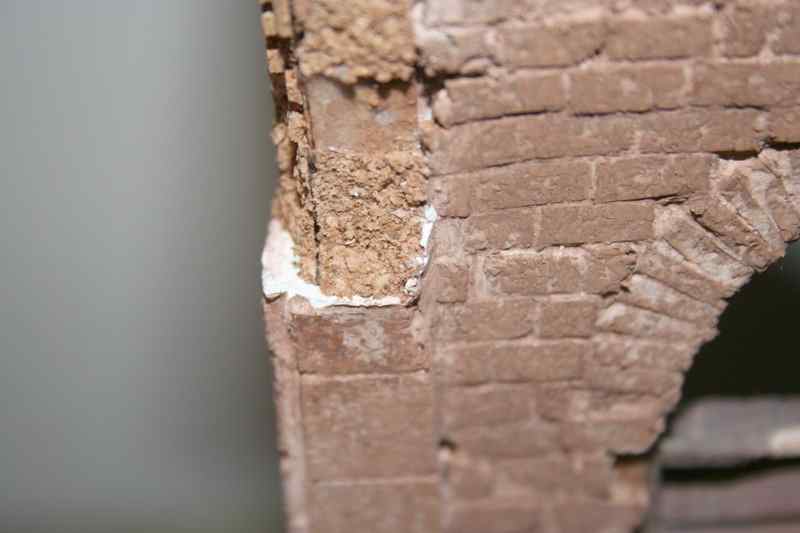
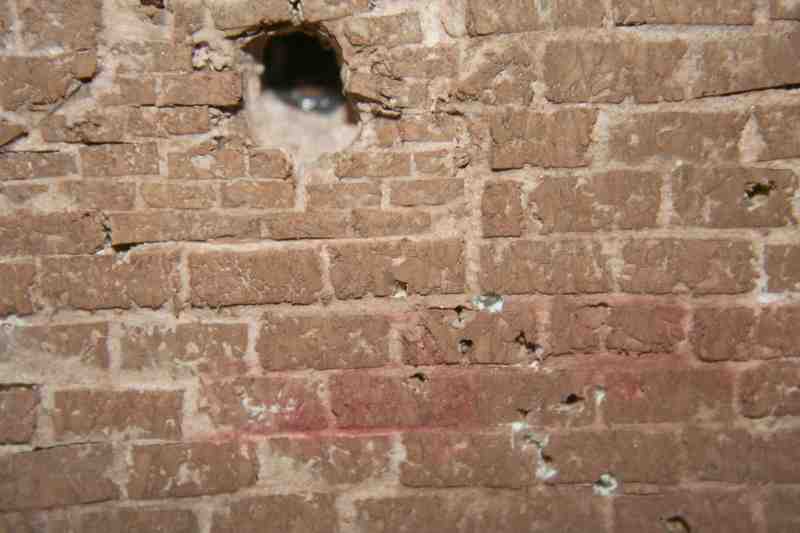
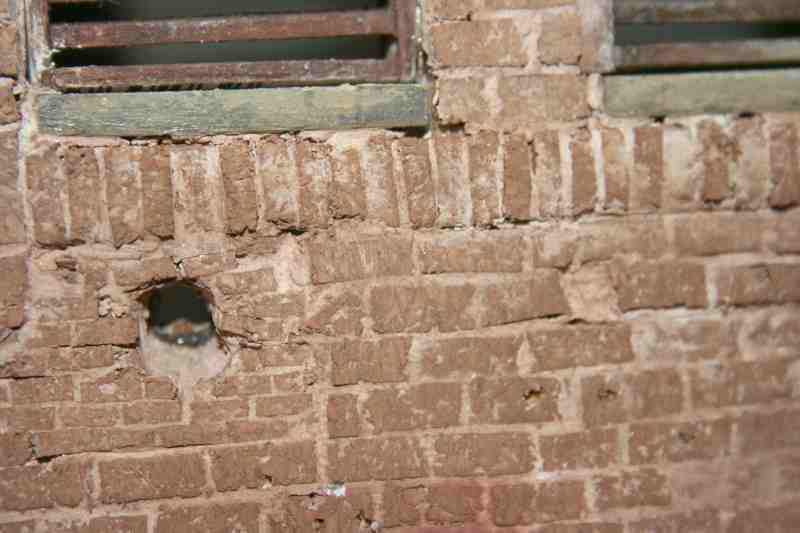
Damage was added by punching a pencil through the surface. Then mortar was spread in the gap and small fragments of brick added. all this was sealed with carpenters glue and left to dry before painting up.


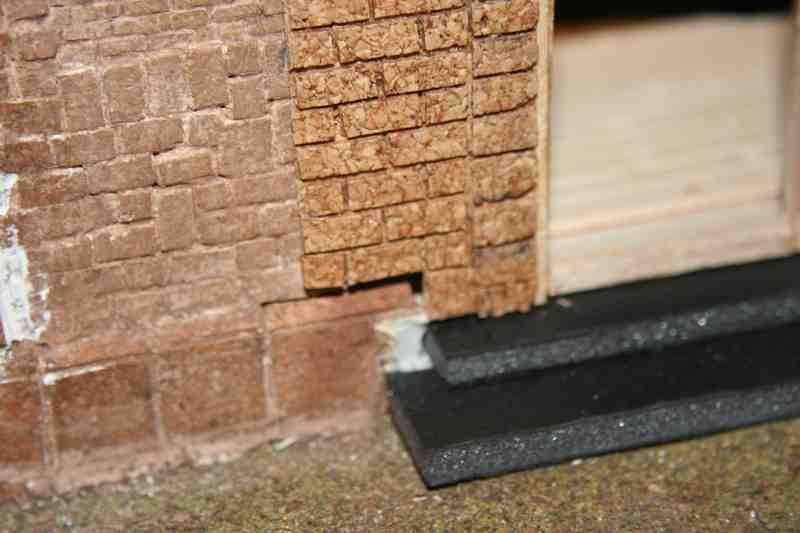
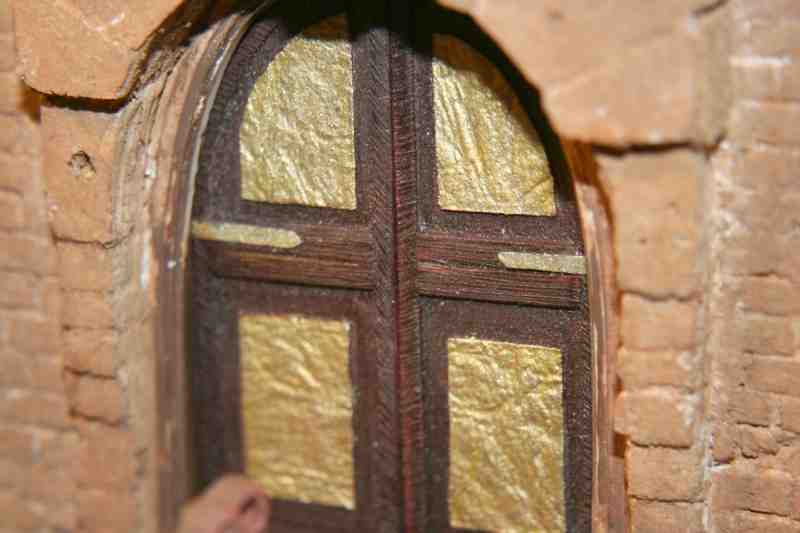
2 good shots of the new doorway detail of the cork. the good thing about my cork sheets here was that i just cut a piece the size I needed to cover the old damaged wall area, and then layered another group of brick lines on top of that one. Then when i had cut out the individual bricks I just peeled the backing off the whole thing and Presto... a new wall section complete with door!


here is a picture of the old copper roof. As you can see the color looks ok but the roof tiles just don't cut it IMHO.


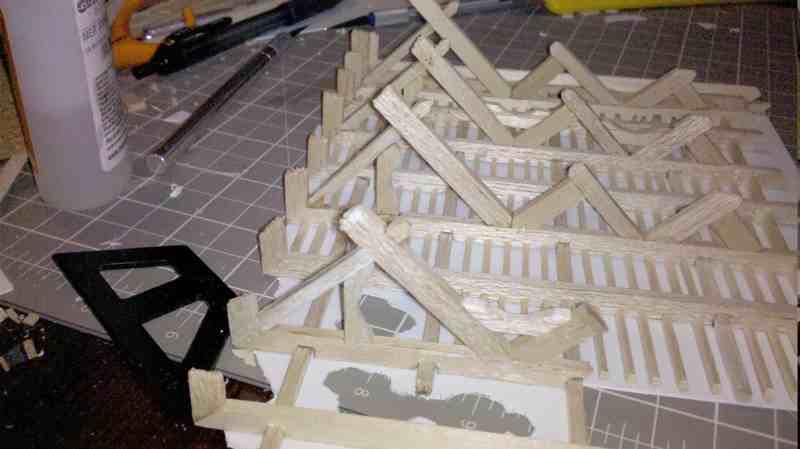
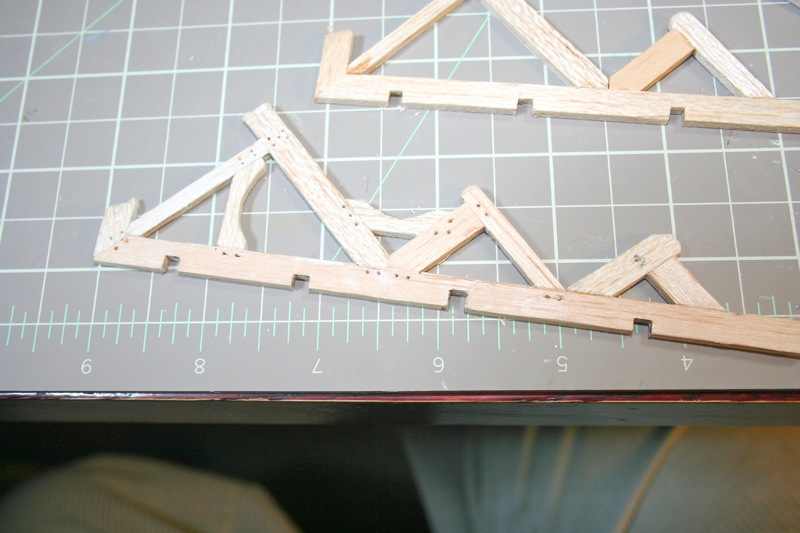
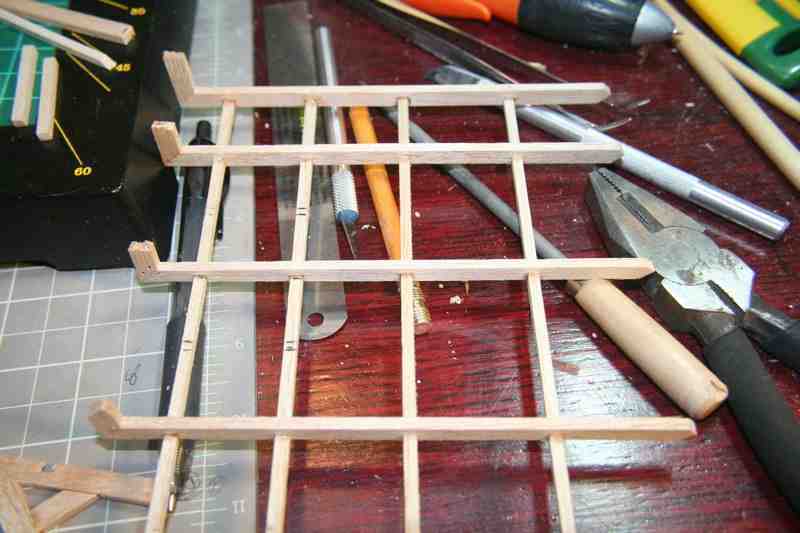
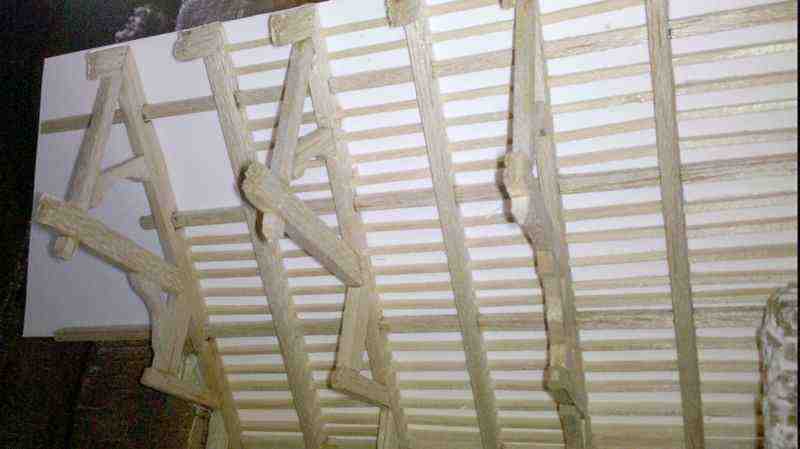
here are 2 of the trusses for the new roof in progress.


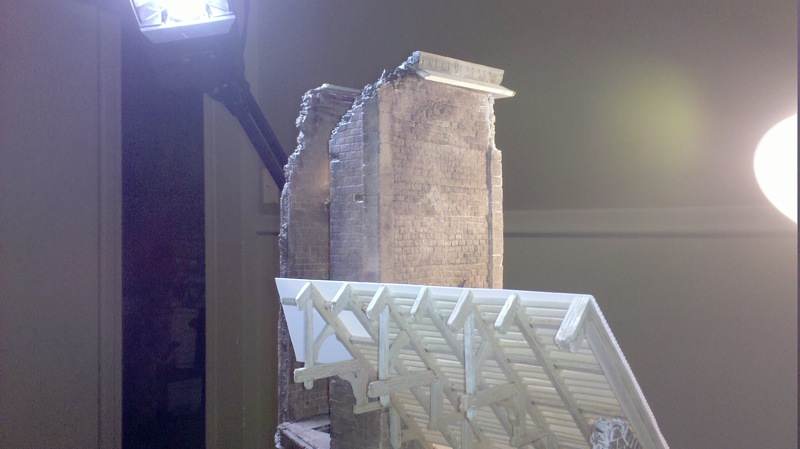
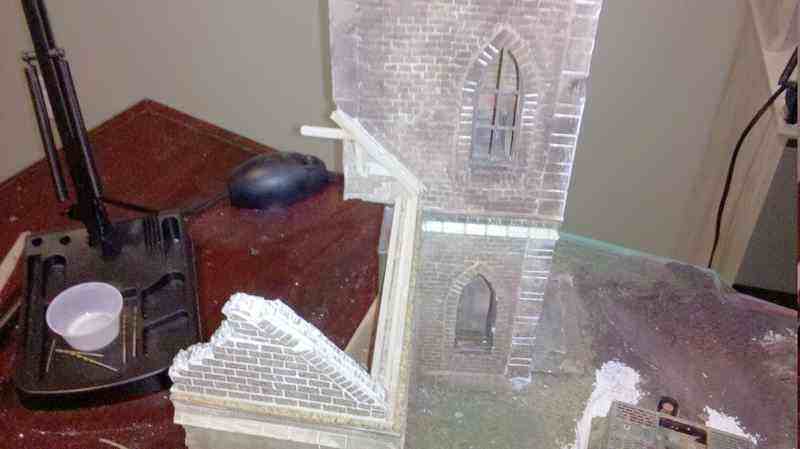
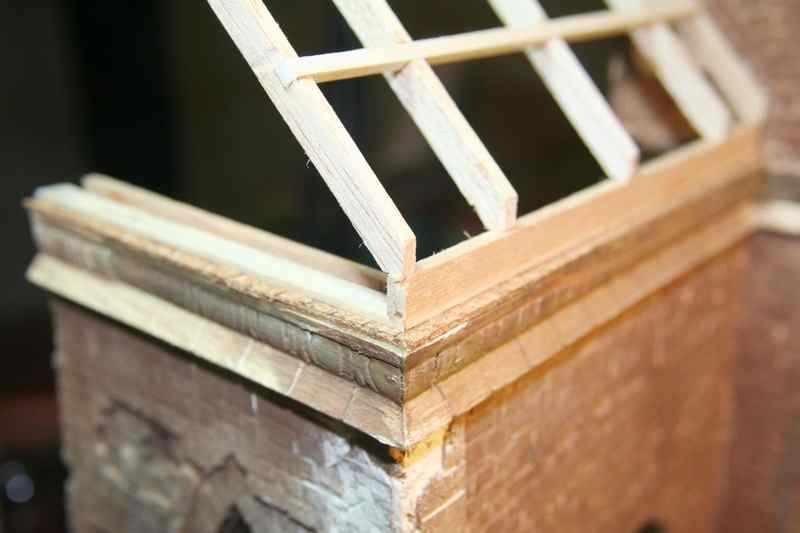
anew brick end to the church wall to support the new roof section.


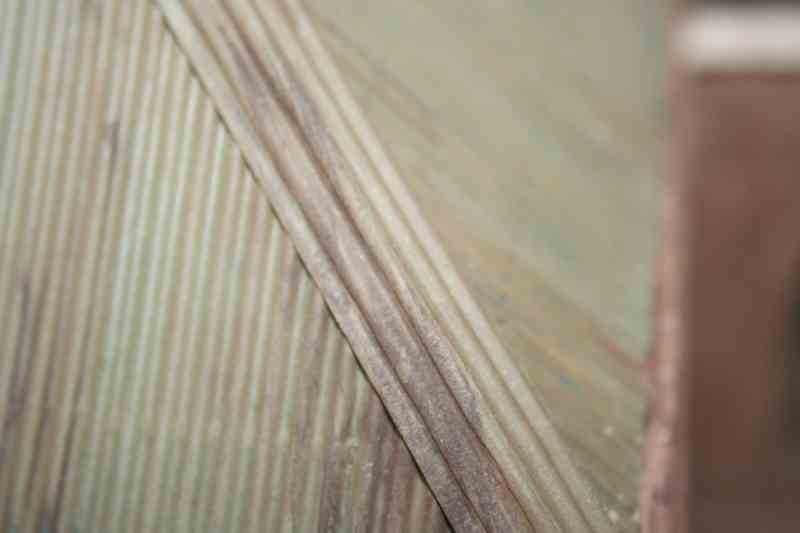
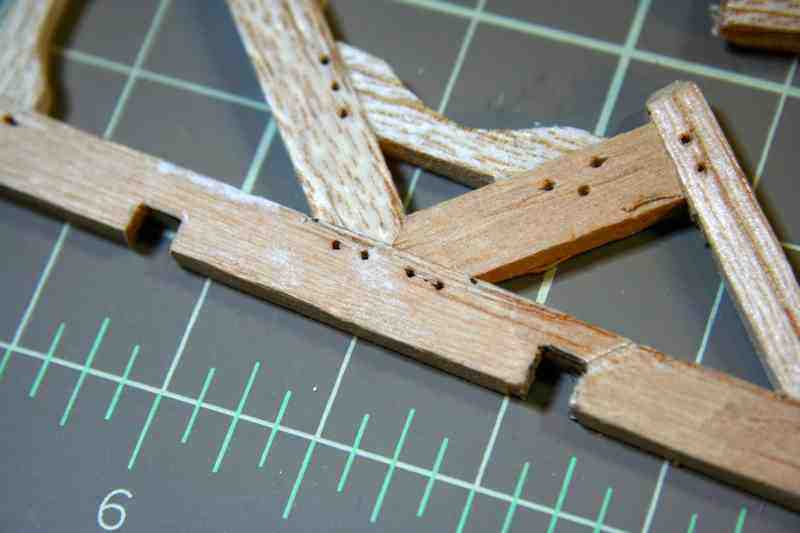
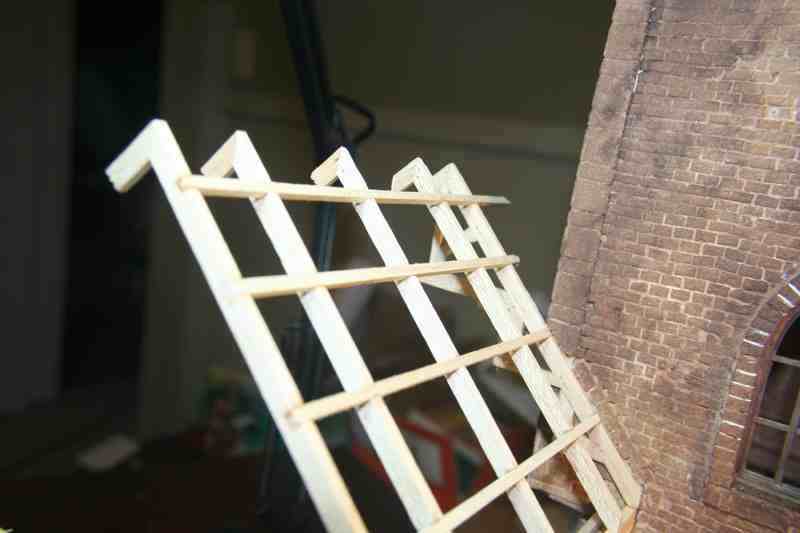
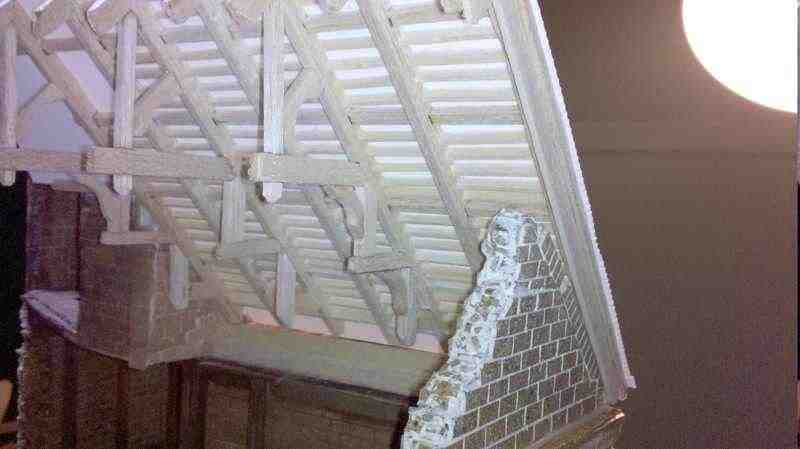
more trusses being put together to support the new roof. Interlocking the wood can be tricky to cut correctly, but if you check the fitting, and use a sharp knife you can do a pretty good job. This makes for a stronger roof i think.


Nothing glued down just yet, still checking the fit as I go since the walls went together not plum or square.

extra details have been added to the roof after i glued on a sheet of thin plastic stock. this detail adds bulk & structure to the roof and seemed to me to be easier than cutting a bunch of stringers into the truss works...


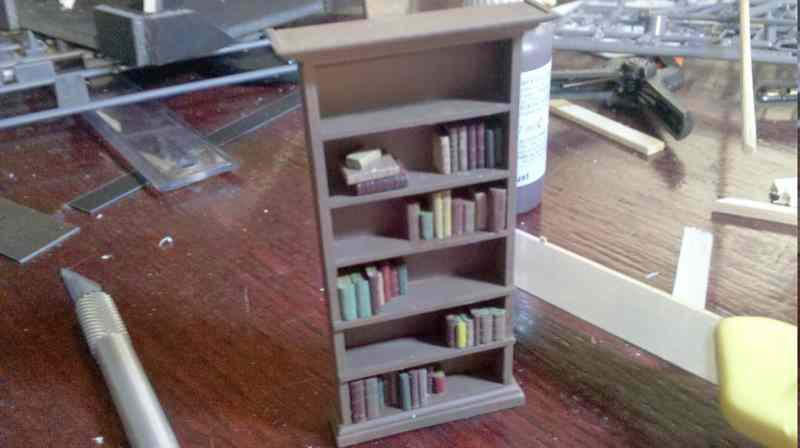
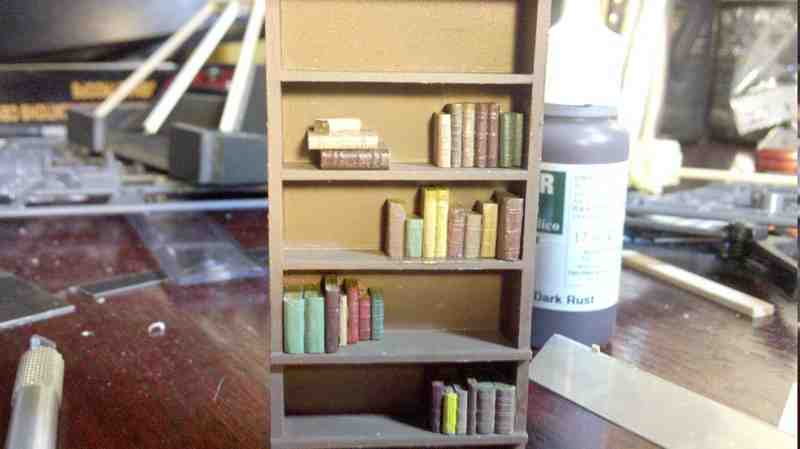
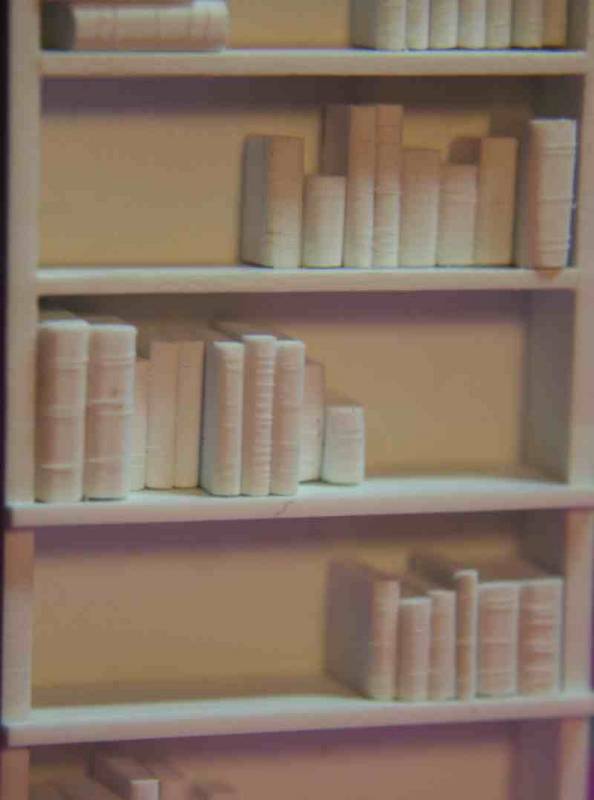
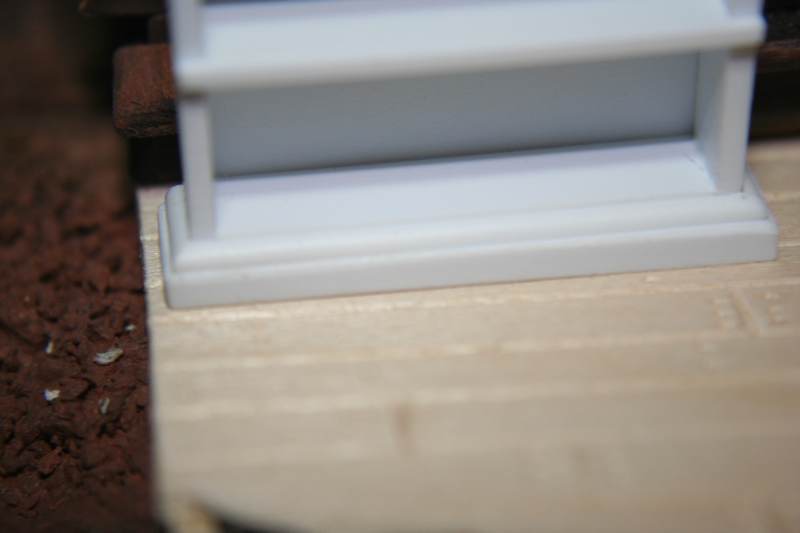
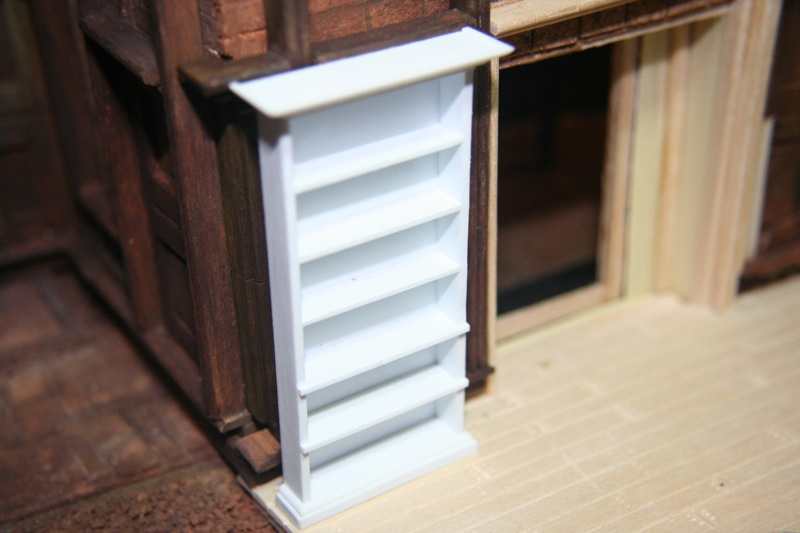
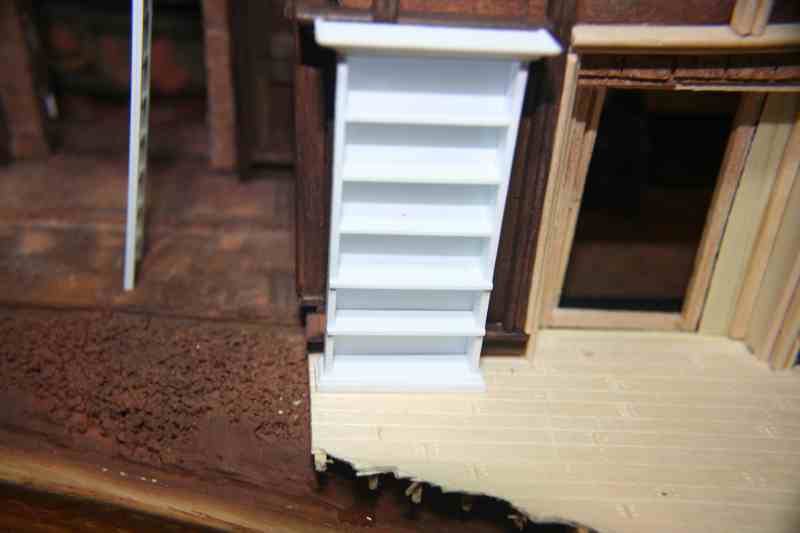
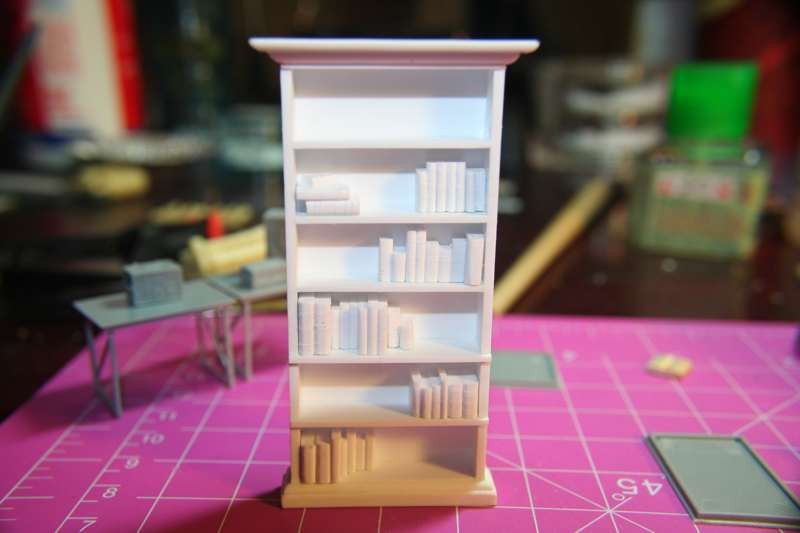
while I was rethinking things the other day i built this new bookshelf. here are a couple shots of it after some paint.


i just remembered i have more of this mini project still on my Canon. I will post some more tomorrow. I have uploaded my allotment on Kitmaker for the day.
ahandykindaguy
Visit this Community
Alberta, Canada
Joined: August 20, 2008
KitMaker: 1,295 posts
Armorama: 1,191 posts
Posted: Wednesday, December 21, 2011 - 02:14 PM UTC


these are 3 pictures of the tree that will sit just between the church and the Sturmtiger. It hangs up over the new roofline, and over the back of the diorama just a fraction, to push the imaginary boundary of the limits set by the picture frame base. Out front on the Side of the church the Panther does the same as it bowls over the wall and welcome sign. I really am satisfied with the overall composition and the placement of the elements.


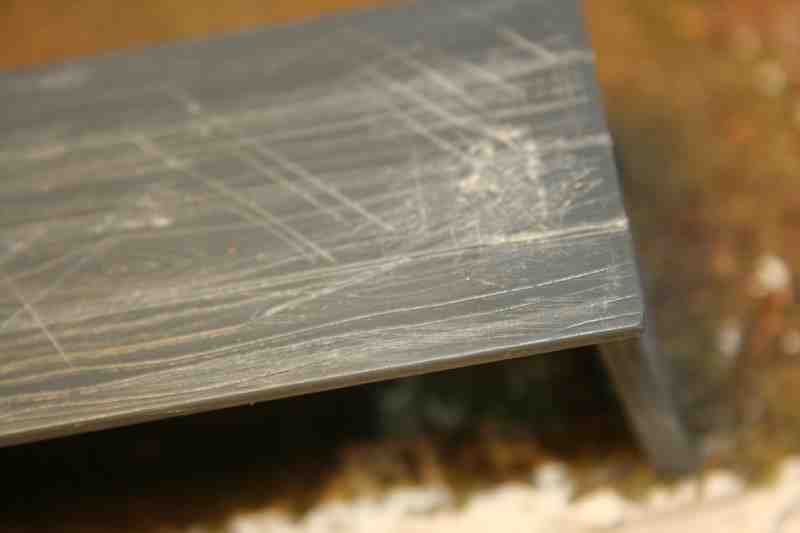
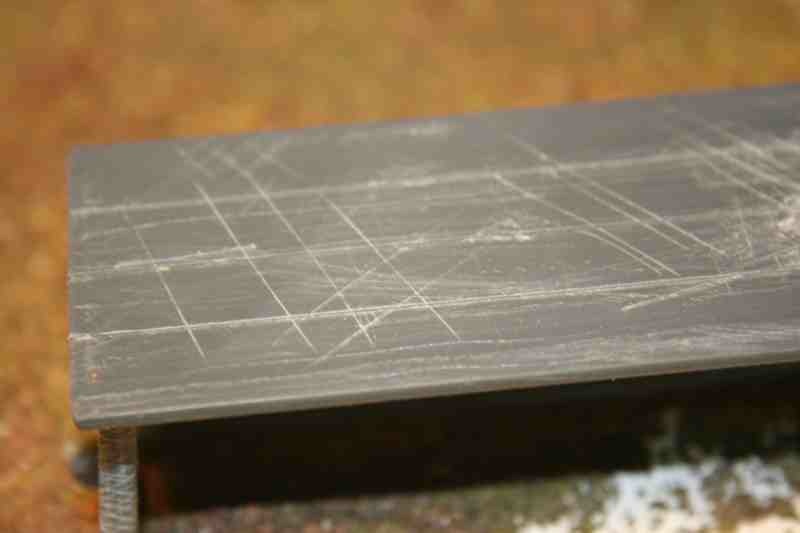
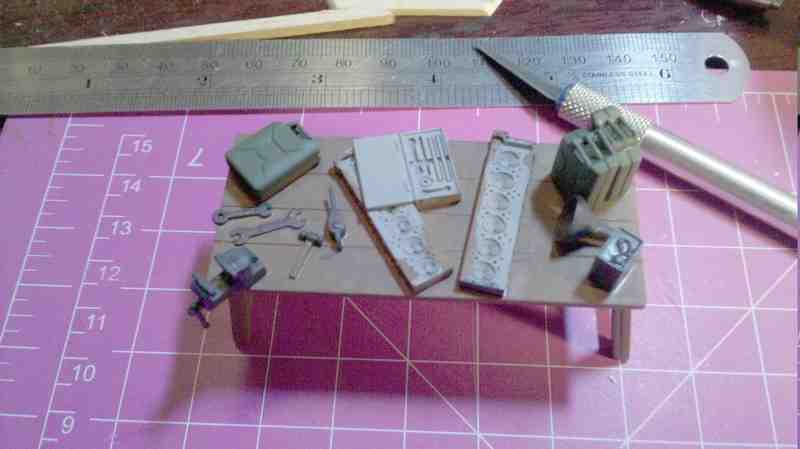
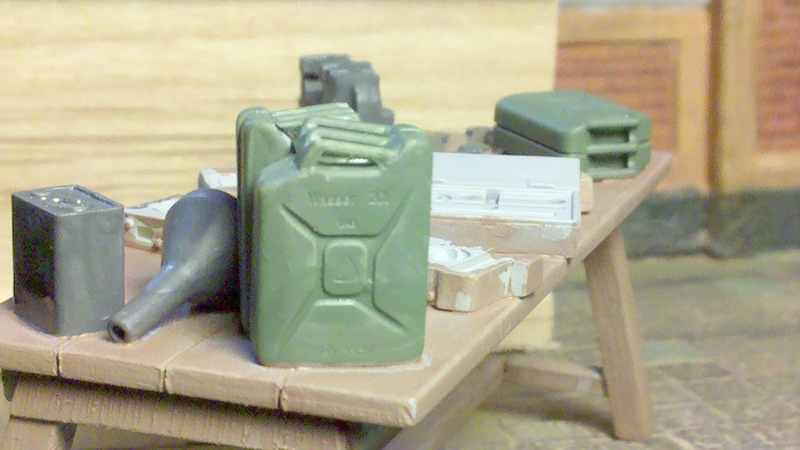
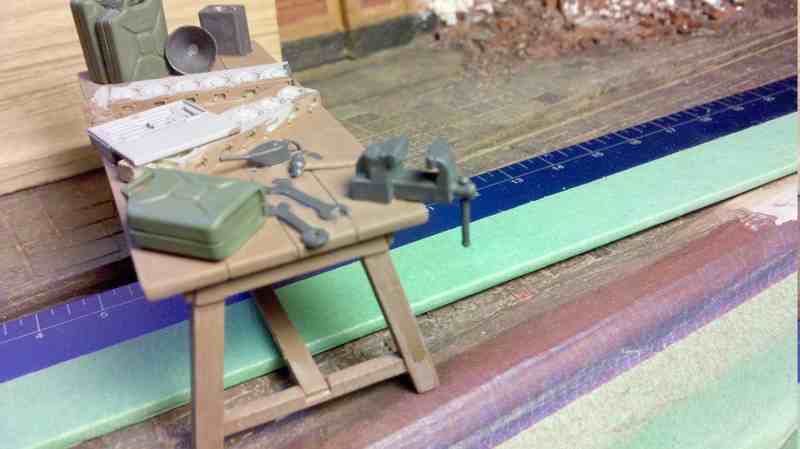
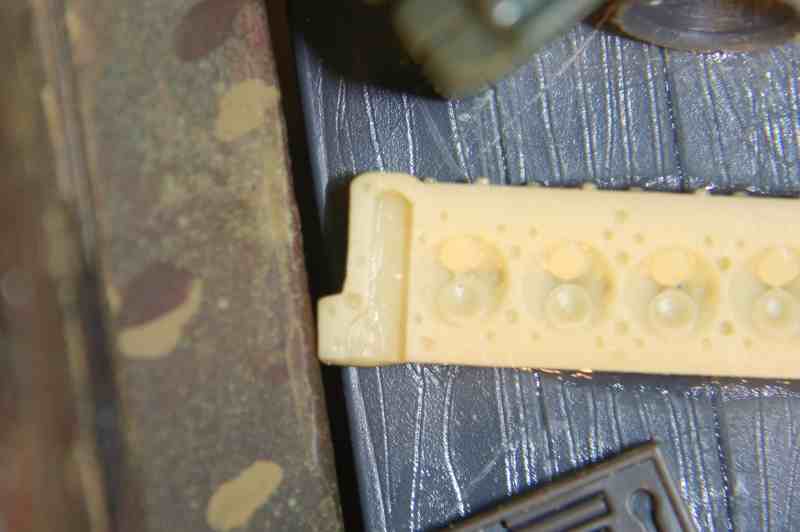
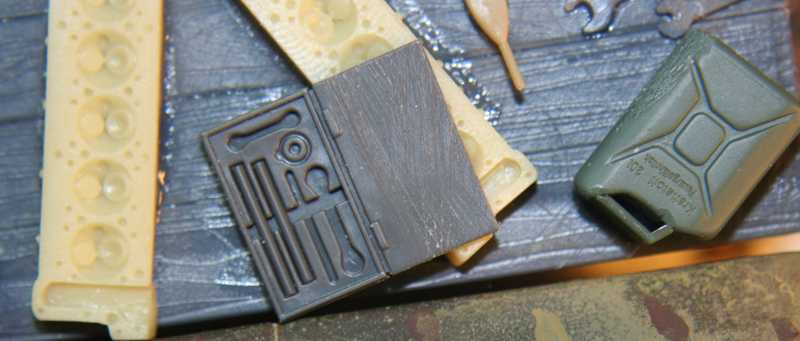
The worktable and its position behind the rear quarter of the Sturmtiger. You can just make out the depression I made by cutting out the foam from the area where the tracks will be. The real tank weighs close to 60 tons fully loaded so in the church courtyard in the fall or early winter the ground would suffer as the big beasts drove through.

some details on the worktable being painted.


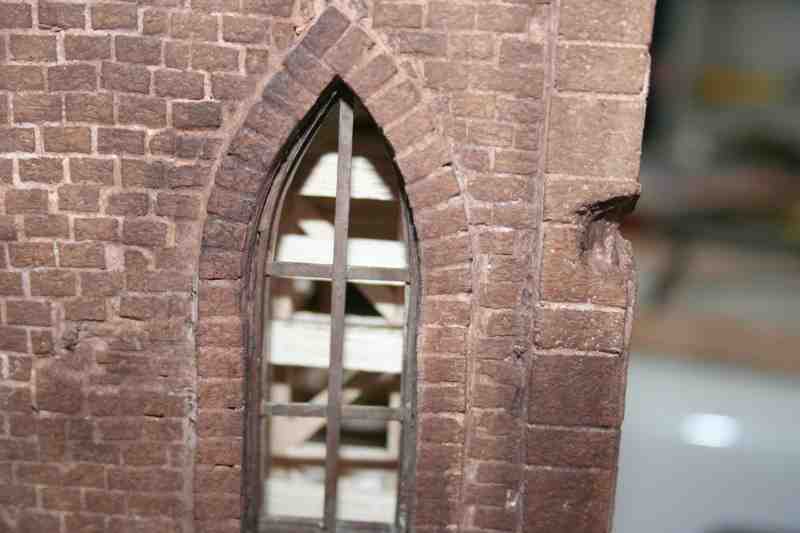
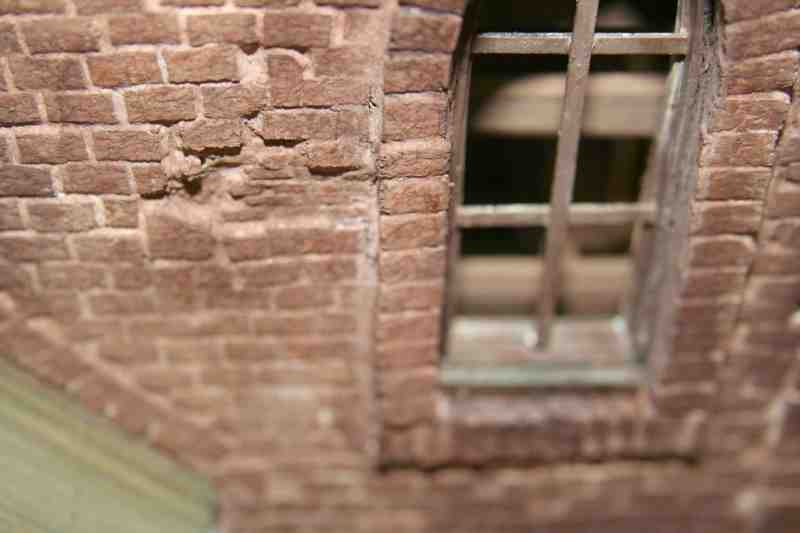
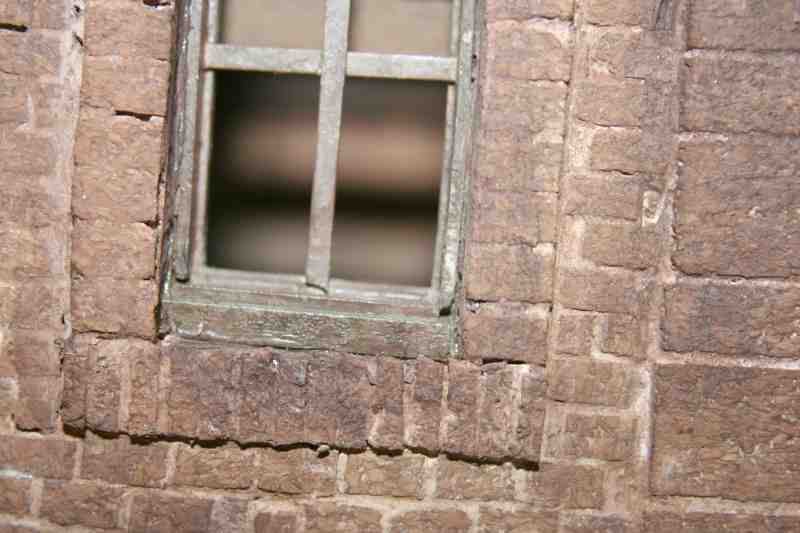
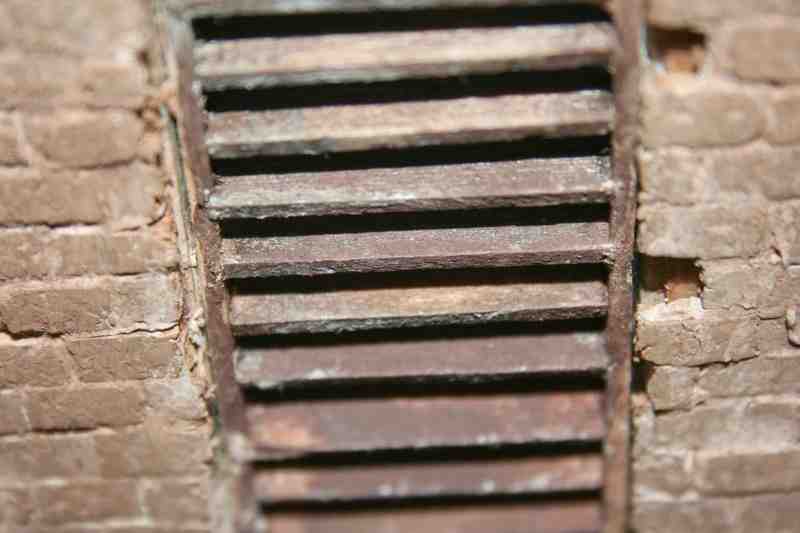
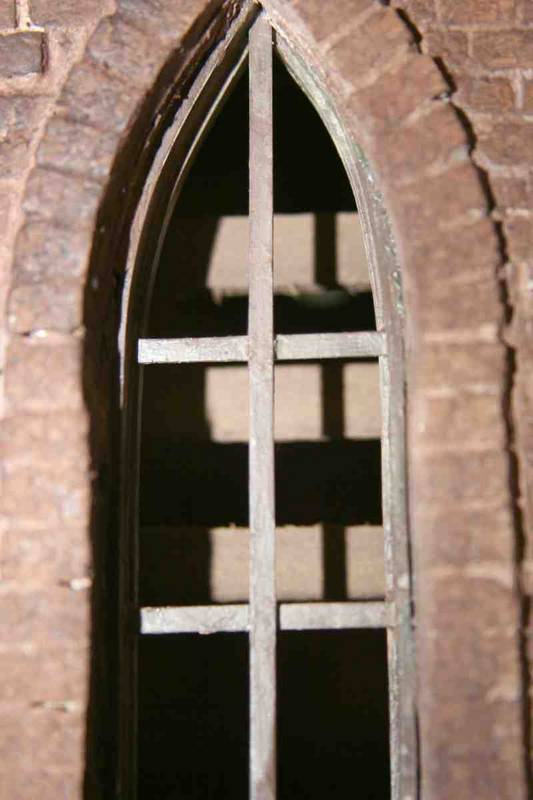
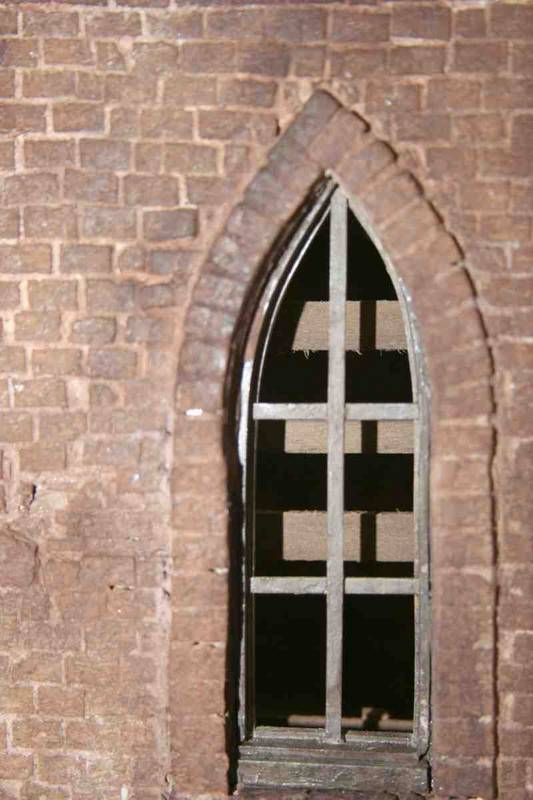
2 shots of the windows, one on the side of the upper portion of the bell tower, two one the main level of the church.


stansmith
Visit this Community
England - North West, United Kingdom
Joined: July 18, 2010
KitMaker: 611 posts
Armorama: 584 posts
Posted: Thursday, December 22, 2011 - 09:45 AM UTC
more great work dave
no it's not a tv programme, it's a game and one of my favourites to play when i'm not doing homework
ahandykindaguy
Visit this Community
Alberta, Canada
Joined: August 20, 2008
KitMaker: 1,295 posts
Armorama: 1,191 posts
Posted: Thursday, December 22, 2011 - 12:35 PM UTC
homework? Boy am I glad those days are over! Thanks again Stan. I appreciate the compliments.
ahandykindaguy
Visit this Community
Alberta, Canada
Joined: August 20, 2008
KitMaker: 1,295 posts
Armorama: 1,191 posts
Posted: Thursday, December 22, 2011 - 06:11 PM UTC
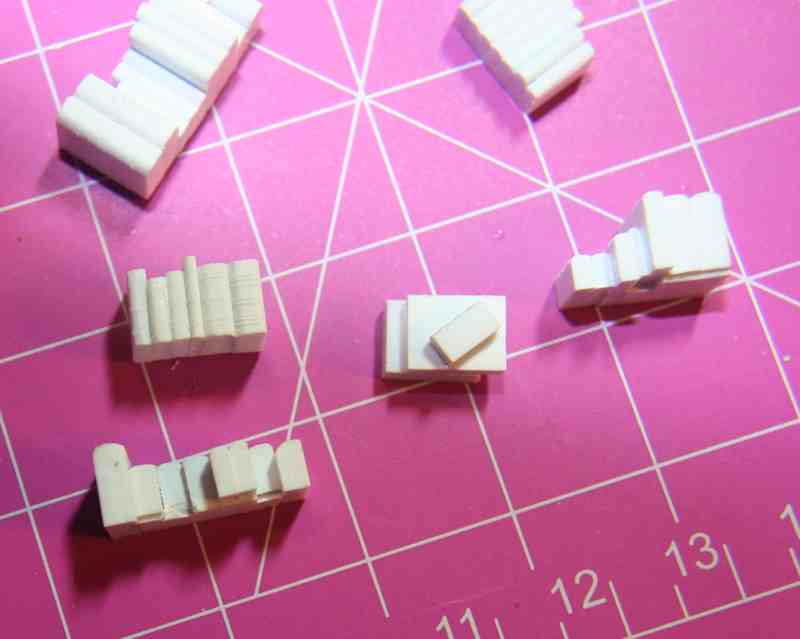
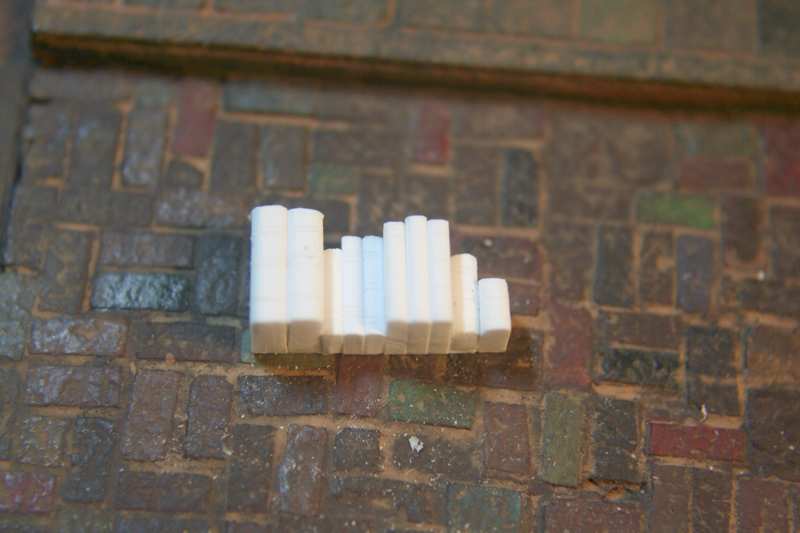
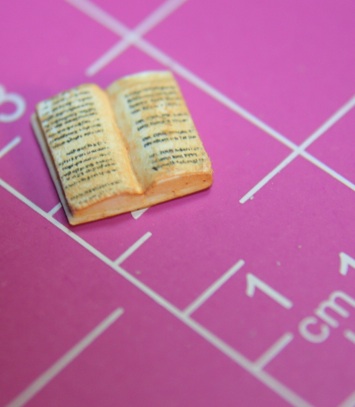
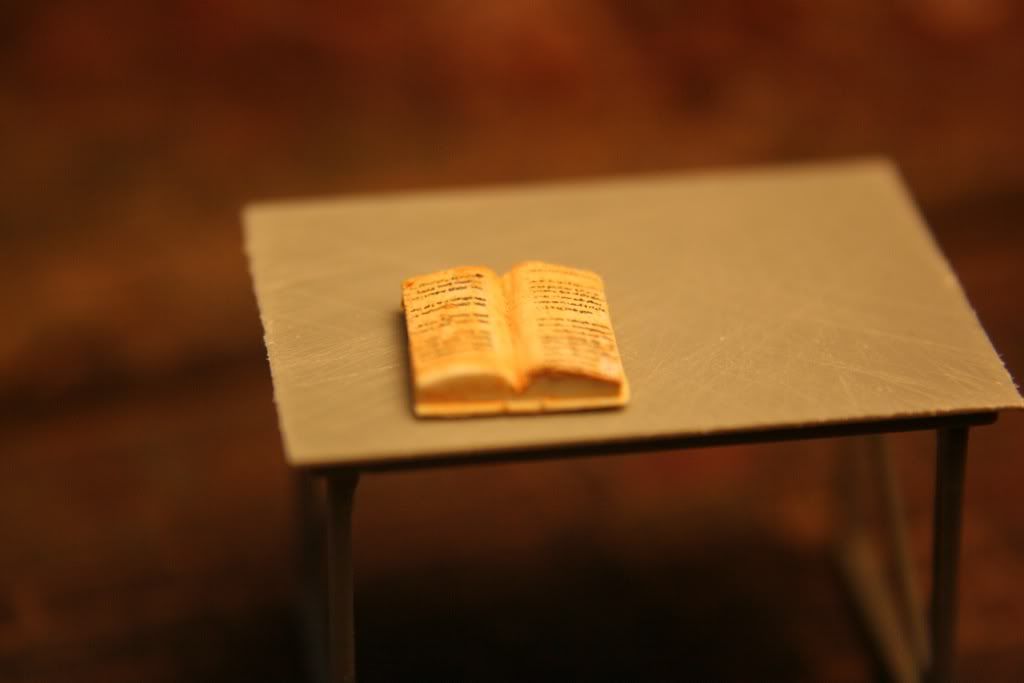
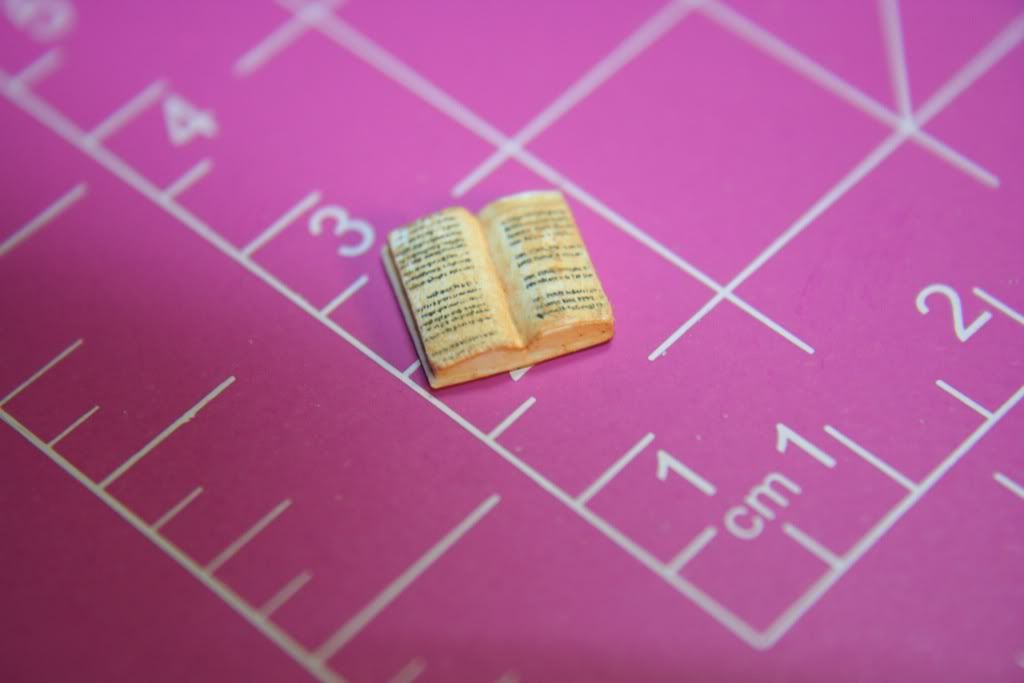
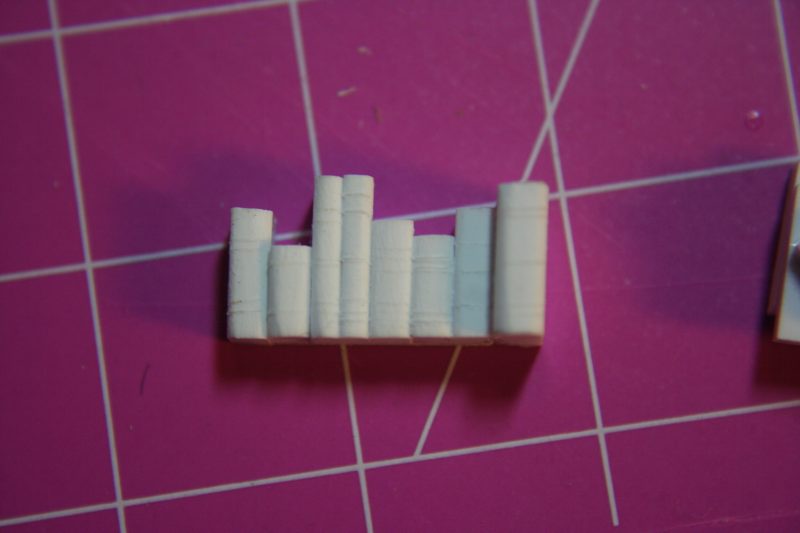
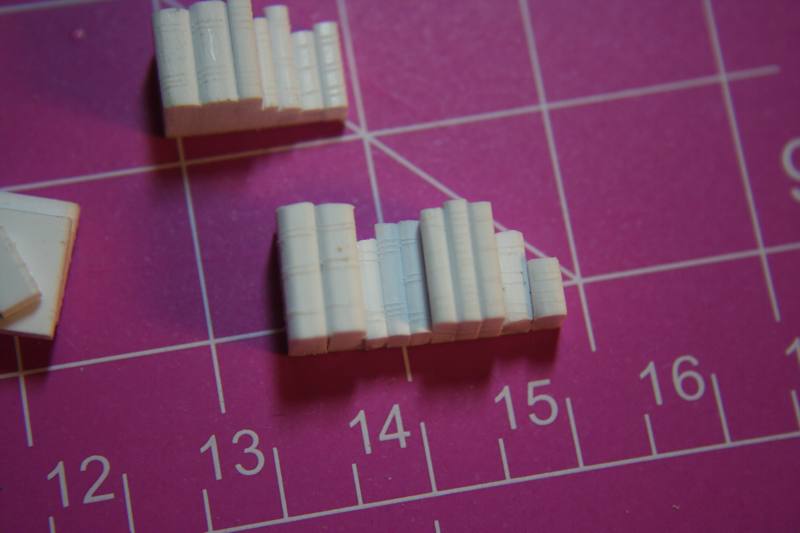
Something to fill the new bookshelf...


And the bookshelf to hold the books:


where it will sit:


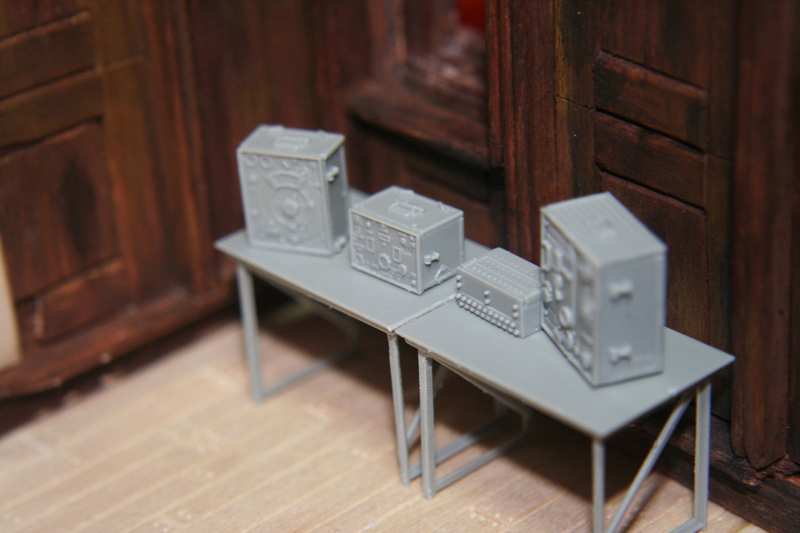
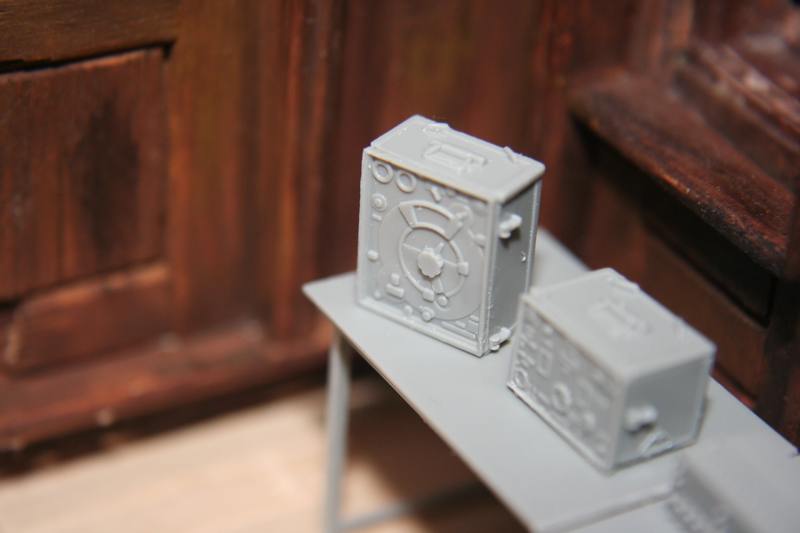
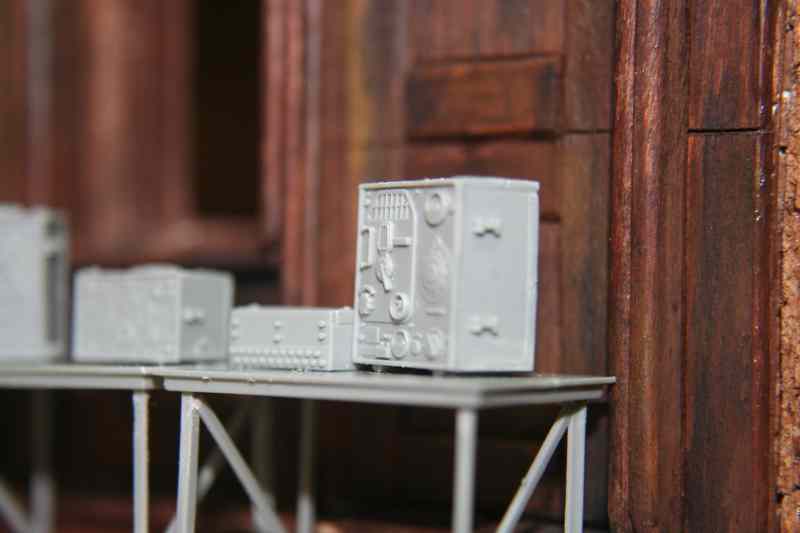
The other side of the floor, the radio command post tables and radio gear...


and two more shots of the books etc....


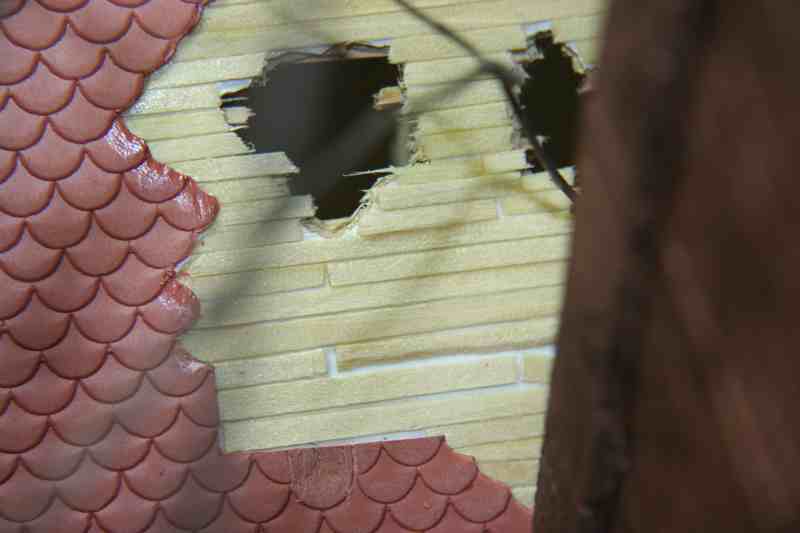
here is a look at the damage I inflicted upon the new roof section.


and 2 of the nameplate for my diorama, which I have decided to place underneath the Panther. It was the welcome sign for the church before the tank commander broke through the courtyard wall.


these are some angles of the layout at the back of the Sturmtiger. The engine will be lifted into the bay by a makeshift winch of some kind... I am still toying with ideas for it and saw a very cool looking small hoist in a reference photo online today that I might try to scratch.


That is all for today, going to wrap some Christmas presents while I still have some energy...
callmehobbes
Visit this Community
England - North West, United Kingdom
Joined: April 17, 2005
KitMaker: 751 posts
Armorama: 740 posts
Posted: Thursday, December 22, 2011 - 10:45 PM UTC
Wow -what great thread. I love the attention to detail, with the timbers, the brick work, all of it. Thanks for sharing and I'll keep following this one.
Merry Christmas
Paul
ahandykindaguy
Visit this Community
Alberta, Canada
Joined: August 20, 2008
KitMaker: 1,295 posts
Armorama: 1,191 posts
Posted: Friday, December 23, 2011 - 03:17 AM UTC
Thanks Paul. I have been on a bit of a roll with the posting of photos the last few days, but have fallen off the mark as to the actual build.

The good news is my wife is off for a week after Christmas so I should have time to get almost finished by the new year. All I will need to do in 2012 I hope is assemble & modify and paint 15 or twenty soldiers!!!

Merry Christmas
ahandykindaguy
Visit this Community
Alberta, Canada
Joined: August 20, 2008
KitMaker: 1,295 posts
Armorama: 1,191 posts
Posted: Monday, December 26, 2011 - 07:21 AM UTC
Photobucket
Photobucket


hey hope everyone had a great Christmas and that Santa was good too you all as well... no coal, unless you needed it for a railroad diorama!
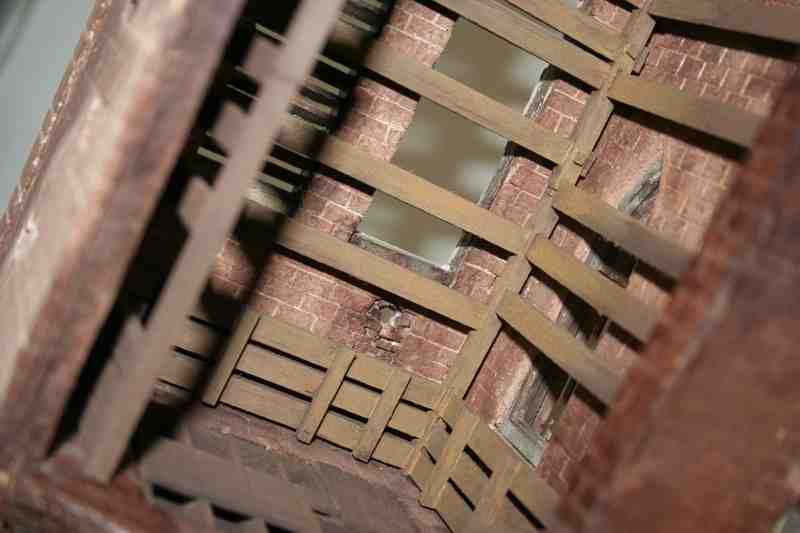
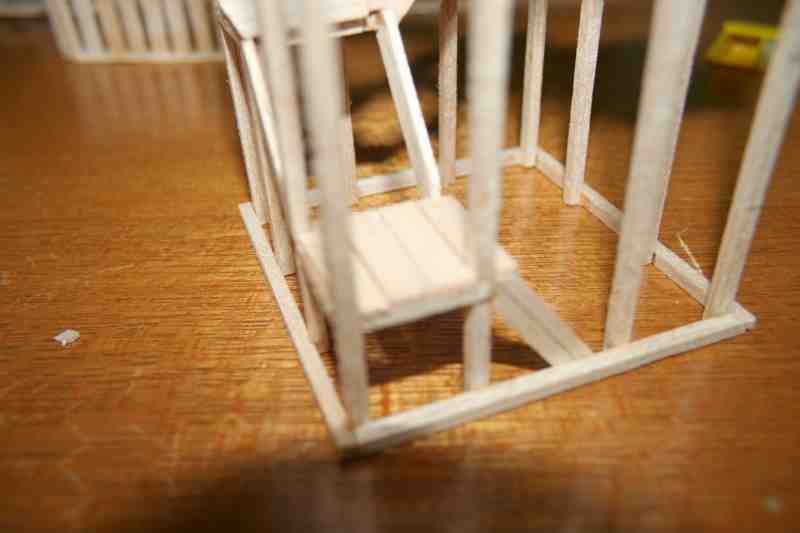
I have posted some pictures from my photobucket account. They are quite a bit larger than the ones we can post from Kitmaker. I hope none of you mind.
ahandykindaguy
Visit this Community
Alberta, Canada
Joined: August 20, 2008
KitMaker: 1,295 posts
Armorama: 1,191 posts
Posted: Monday, December 26, 2011 - 05:55 PM UTC
here are some photos to show the layout as it stands at Christmas 2011, and is most likely the way everything will end up, with the exception of the figures which I have not really yet begun to contemplate other then to calculate there will be about 15-20 needed to properly convey the scene...


GregCloseCombat
Visit this Community
California, United States
Joined: June 30, 2008
KitMaker: 2,408 posts
Armorama: 2,394 posts
Posted: Monday, December 26, 2011 - 07:10 PM UTC
Love the church - fantastic stuff! Also, the idea of the tank smashing through the brick wall was awesome. I enjoyed the show
stansmith
Visit this Community
England - North West, United Kingdom
Joined: July 18, 2010
KitMaker: 611 posts
Armorama: 584 posts
Posted: Monday, December 26, 2011 - 11:40 PM UTC
some more great work going on here dave! where did you get the pine tree?
ahandykindaguy
Visit this Community
Alberta, Canada
Joined: August 20, 2008
KitMaker: 1,295 posts
Armorama: 1,191 posts
Posted: Tuesday, December 27, 2011 - 03:53 AM UTC
Thanks gentlemen, it is indeed coming along. I don't think I am going to do anything else in the way of refinements on the build now, just the piecing together of the details to tie it all together.

The tree is a composite I have built by using several branches I took from some trees we have pruned on my golf course as well as some portions of a wicker broom I purchased from Michael's Craft store. I have been drilling small holes and crazy glueing individual limbs onto the sturdy main line, working my way up as i go. I think I will have to add at least twenty branches to get the shape and fullness I envisioned when I started.

Right now I am putting another tool box full of tools together, and a bunch of Jerry cans and fuel drums to fill the space up around the Sturmtiger. And getting the Hoist read for the engine.

Have a great week all, and remember that it is almost 2012 so Happy New Year!
parrot
Visit this Community
Ontario, Canada
Joined: March 01, 2002
KitMaker: 1,607 posts
Armorama: 1,581 posts
Posted: Tuesday, December 27, 2011 - 06:55 AM UTC
Exellent piece of work Dave.
The work alone on the bell tower is amazing.I don't think I would have the patience to accomplish that.

Tom
ahandykindaguy
Visit this Community
Alberta, Canada
Joined: August 20, 2008
KitMaker: 1,295 posts
Armorama: 1,191 posts
Posted: Tuesday, December 27, 2011 - 07:07 AM UTC
Thanks Tom, I am glad to show off my work. I have been inspired by many on this website and thought I would repay the kindness. With a good cutter, and a scale ruler it isn't to frustrating to build a structure like my tower... but it does try ones patience from time to time.
VLADPANZER
Visit this Community
Lebanon
Joined: December 20, 2010
KitMaker: 568 posts
Armorama: 549 posts
Posted: Tuesday, December 27, 2011 - 08:32 AM UTC
Great build, really cool and original!! Been thinking of a church setting but always found it too daunting a task for me to undertake! Looking forward to more.

Regards,