


Яusso-Soviэt Forum: Cold War Soviet Armor
For discussions related to cold war era Russo-Soviet armor.
For discussions related to cold war era Russo-Soviet armor.
Hosted by Jacques Duquette
T-72 M1

Spiderfrommars

Joined: July 13, 2010
KitMaker: 3,845 posts
Armorama: 3,543 posts
Posted: Wednesday, December 19, 2012 - 04:15 AM UTC
Guitar strings can be useful for lots of things. They're always straight and stiff. You can use for wiring, aerials and so on

asmodeuss

Joined: November 19, 2011
KitMaker: 1,389 posts
Armorama: 1,388 posts

Posted: Wednesday, December 19, 2012 - 02:36 PM UTC
Tattos from guitars strings....  Cmon! yeeeeouch! Master Boggs don`t fear pain as I can see
I`m gonna stick using them to make sounds or as Mauro told us hehe. Bejezzz, Gary that must have BURRRRRNED bro.
 or am I just a wuss?

Cmon! yeeeeouch! Master Boggs don`t fear pain as I can see I`m gonna stick using them to make sounds or as Mauro told us hehe. Bejezzz, Gary that must have BURRRRRNED bro.
or am I just a wuss? 
Braille

#135

Joined: August 05, 2007
KitMaker: 1,501 posts
Armorama: 1,485 posts

Posted: Wednesday, December 19, 2012 - 03:06 PM UTC
@asmodeuss Philippe,
Merry Christmas to you Philippe, and also to everyone too! Enjoy!
Philippe, I went ahead and asked Santa to update Netflix with better movies, hihi!
~ Eddy
Merry Christmas to you Philippe, and also to everyone too! Enjoy!
Quoted Text
And just for kicks...What did you ask for Christmas you all?
Philippe, I went ahead and asked Santa to update Netflix with better movies, hihi!
~ Eddy
asmodeuss
Joined: November 19, 2011
KitMaker: 1,389 posts
Armorama: 1,388 posts
Posted: Wednesday, December 19, 2012 - 03:54 PM UTC
Haha! Nice one there Eddy.
Me I went for soldering iron or flexible arm and pen for the dremel.
Me I went for soldering iron or flexible arm and pen for the dremel.

BBD468
Joined: March 08, 2010
KitMaker: 2,465 posts
Armorama: 2,383 posts

Posted: Wednesday, December 19, 2012 - 05:27 PM UTC
Quoted Text
Tattos from guitars strings....
I`m gonna stick using them to make sounds or as Mauro told us hehe. Bejezzz, Gary that must have BURRRRRNED bro.
Hello Phil,
I do have a high tolerance for pain, but i must say this tattoo HURT like a SOB!!!
 It was TENDER!!!
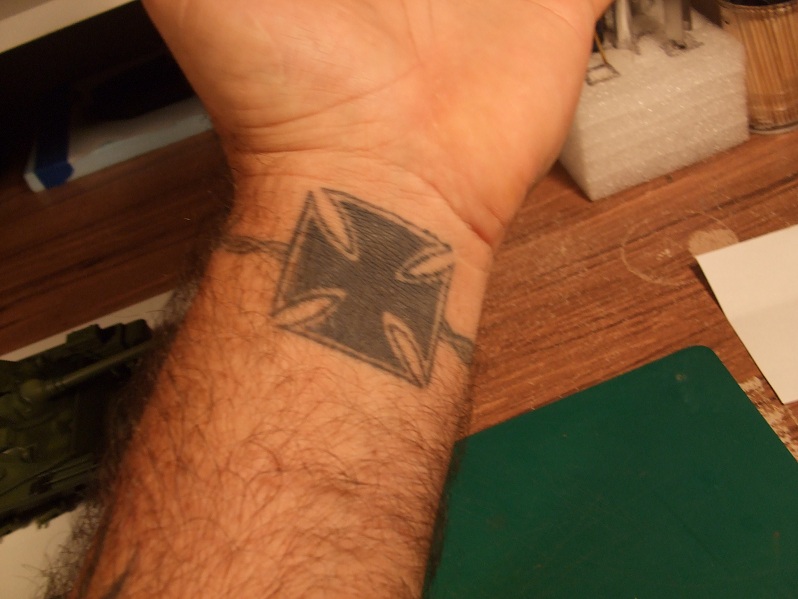
This one is only 4-5 inches away from the wrist and it felt completely different, though it still hurt.
I wont explain what the tattoos mean as it was back in an angry time of my life, And when i was in tha slammer!
 It was a long time ago and im a different fella now.
Hmmm...what i want for christmas....well i already got a SHAWEET figure set and lionroar fuel drum and pump set from a great friend of mine!
 Guess ill leave it to santa - i gave him an extencive list and its impossible for him to come through on all of it as it would leave alot of you guys short on your own kit list!
 Later Brother,
Gary

Spiderfrommars
Joined: July 13, 2010
KitMaker: 3,845 posts
Armorama: 3,543 posts
Posted: Wednesday, December 19, 2012 - 08:57 PM UTC
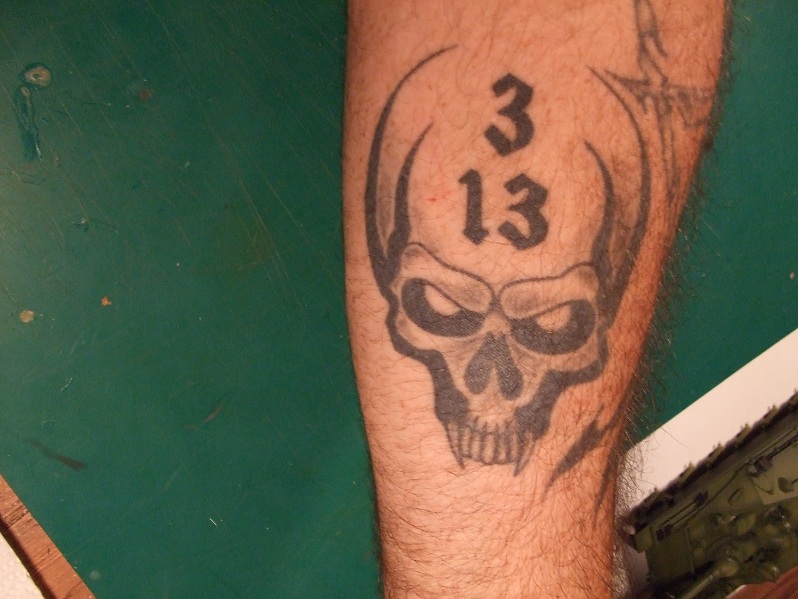
Wow!...what a "friendly" skull Gary!
Joking aside, I think that's a stunning tattoo....and I'd like to know what it means 3-13 but I won't ask you
Regarding Christmas...I really would like a "Red Army invasion" of my workbench!


Joking aside, I think that's a stunning tattoo....and I'd like to know what it means 3-13 but I won't ask you
Regarding Christmas...I really would like a "Red Army invasion" of my workbench!
asmodeuss
Joined: November 19, 2011
KitMaker: 1,389 posts
Armorama: 1,388 posts
Posted: Thursday, December 20, 2012 - 02:31 AM UTC
Nice Tattoos Gary! It really gets your teady bear like personality out 
Mauro, This is a sweet selection! hope you all get what you want! hehe
here is a small update:
I`ve worked on the right head lamp, got the horn on it my camera can`t get close enough to show it well but its there!
Also started the spring locks on the tow hooks, one up, one to go!
I got my tow cables together thanks voyageer for the nice resin loops. But I must admit to this: Once you went with eureka xxl for cables you can`t get anything else
thanks for watching and sharing christmas list hehe.
Or should I say hohoho
Phil.
asmodeuss
Joined: November 19, 2011
KitMaker: 1,389 posts
Armorama: 1,388 posts
Posted: Friday, December 21, 2012 - 02:26 AM UTC
Ok I was feeling good this morn so I went and build myself a tiny tow cable clamp.
Step one: hole in PE.
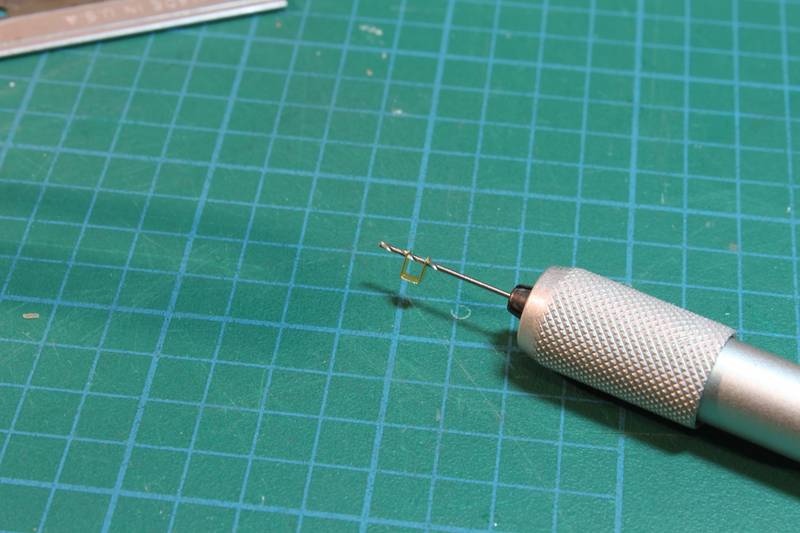
Step two: get a spring done
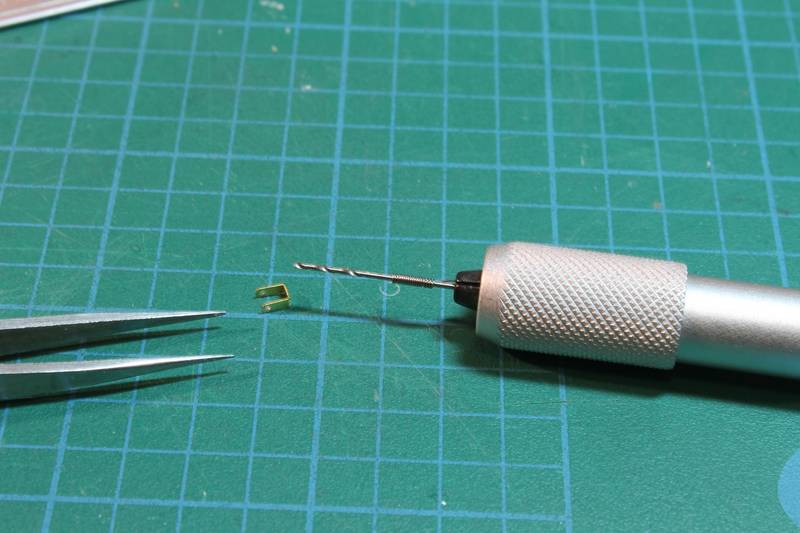
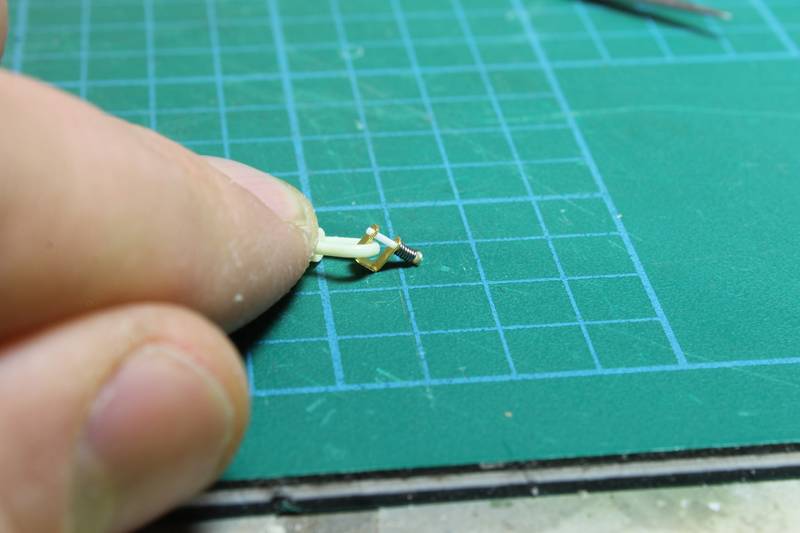
Step three: glue a cap on a 0.5 styrene rod and assemble.
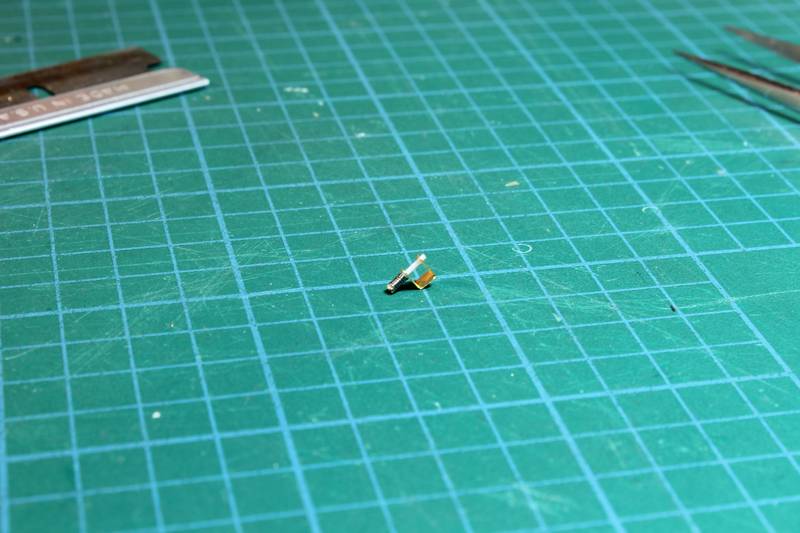
Then get that shackle in place! I`m going to paint the cables on the model so it is glued closed on the shackle so I don`t loose the pieces
 <
<
Thx for watching peeps!
Philippe
Step one: hole in PE.
Step two: get a spring done
Step three: glue a cap on a 0.5 styrene rod and assemble.
Then get that shackle in place! I`m going to paint the cables on the model so it is glued closed on the shackle so I don`t loose the pieces
<Thx for watching peeps!
Philippe
BBD468
Joined: March 08, 2010
KitMaker: 2,465 posts
Armorama: 2,383 posts
Posted: Friday, December 21, 2012 - 03:56 AM UTC
WOW Phil!!! Thats Damn impressive brother! VERY nice!
Gary
Gary
Spiderfrommars
Joined: July 13, 2010
KitMaker: 3,845 posts
Armorama: 3,543 posts
Posted: Friday, December 21, 2012 - 06:03 AM UTC
I agree with Gary! Really inmpressive job!
Merry christmas to you guys!
Merry christmas to you guys!

flugwuzzi

Joined: November 02, 2007
KitMaker: 633 posts
Armorama: 599 posts
Posted: Saturday, December 22, 2012 - 12:01 AM UTC
Nice detail work.
cheers
Walter
cheers
Walter
asmodeuss
Joined: November 19, 2011
KitMaker: 1,389 posts
Armorama: 1,388 posts
Posted: Saturday, December 22, 2012 - 04:27 AM UTC
Thanks a lot gents! comming from big dogs like yourselfs, it is always pleasing to read  I`m still working on the front glacis slowly moving from left to right.
More soon!
Phil.
I`m still working on the front glacis slowly moving from left to right.More soon!
Phil.
asmodeuss
Joined: November 19, 2011
KitMaker: 1,389 posts
Armorama: 1,388 posts
Posted: Monday, December 24, 2012 - 01:26 AM UTC
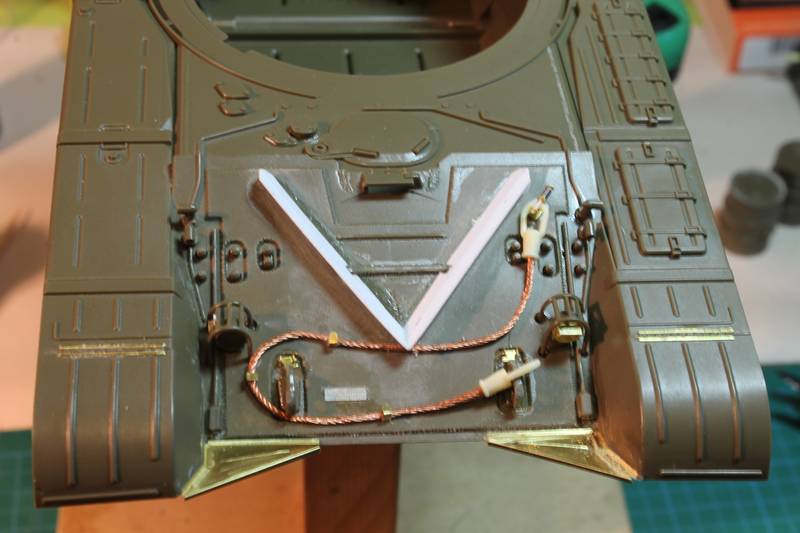
There you go! I had time yesterday to do some modeling on the front glacis. I know it a little dirty but I will clean it up... Still fighting a little with CA but, we started a relation, you know, getting to know each other
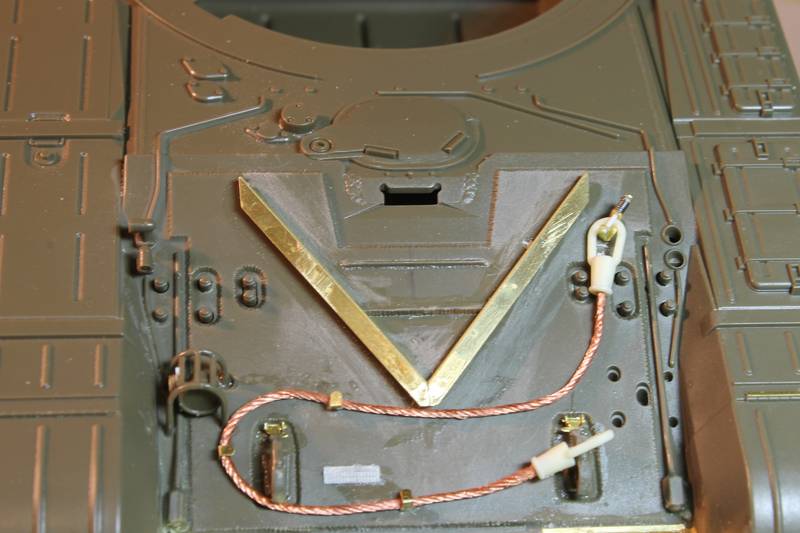
The one thing that I`m not happy with is the splash guard being 90 degre... tried to give it an angle but it wasn,t working...Have someone seen a 90 deg. splash guard?
thanks for watching and comments.
Phil.
The one thing that I`m not happy with is the splash guard being 90 degre... tried to give it an angle but it wasn,t working...Have someone seen a 90 deg. splash guard?
thanks for watching and comments.
Phil.

Kharkov
Joined: April 09, 2011
KitMaker: 181 posts
Armorama: 175 posts
KitMaker: 181 posts
Armorama: 175 posts
Posted: Monday, December 24, 2012 - 08:39 AM UTC
Try making the splash guards from very thin plastic card/strip, you will be able to set the angle very easy, mainly because you will then not be forced to use CA, simply cut an angle on each end of the plastic strips that in effect hold them both at the correct angle on the hull, then with slow dry cement you can adjust slightly.
Looking at your picture I do kinda wonder if you have them the right way round ?, or upside down ?, hard to tell from the picture angle, or am I going bonkers (probably), do a side shot/angle shot.
PE is overated, but it brings in the Money.

Tiger_213
Joined: August 10, 2012
KitMaker: 1,510 posts
Armorama: 1,443 posts
Posted: Monday, December 24, 2012 - 08:57 AM UTC
Someone just did a T-90 and used the silver/plastic label/seal from a coffee can for the mudguards. Though I think he still had to use CA glue but it holds a very nice shape.
asmodeuss
Joined: November 19, 2011
KitMaker: 1,389 posts
Armorama: 1,388 posts
Posted: Tuesday, December 25, 2012 - 06:32 AM UTC
Matt and Christopher, Thanks guys!
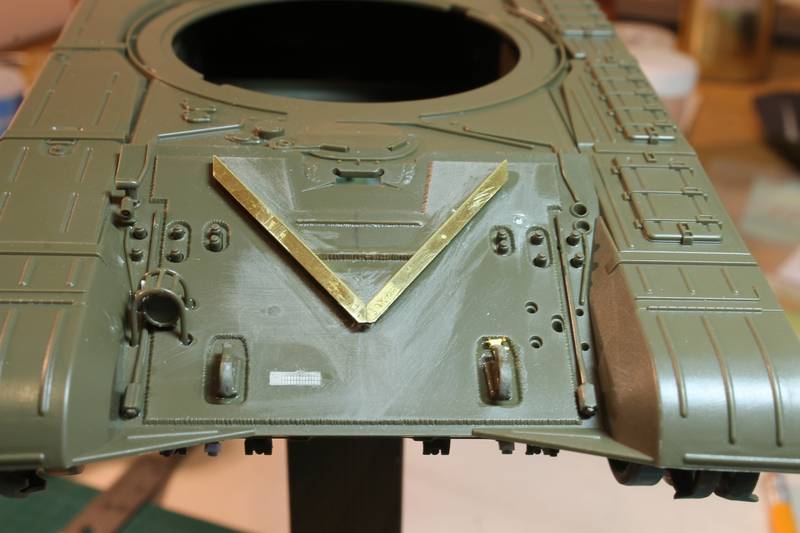
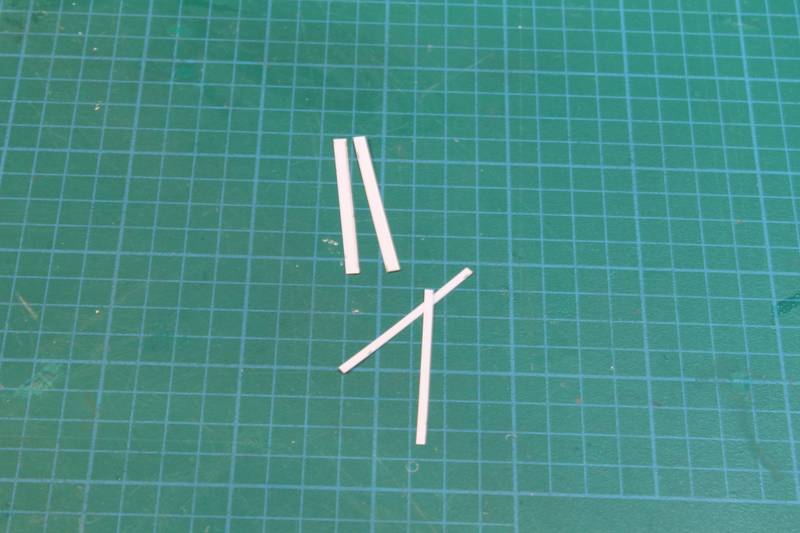
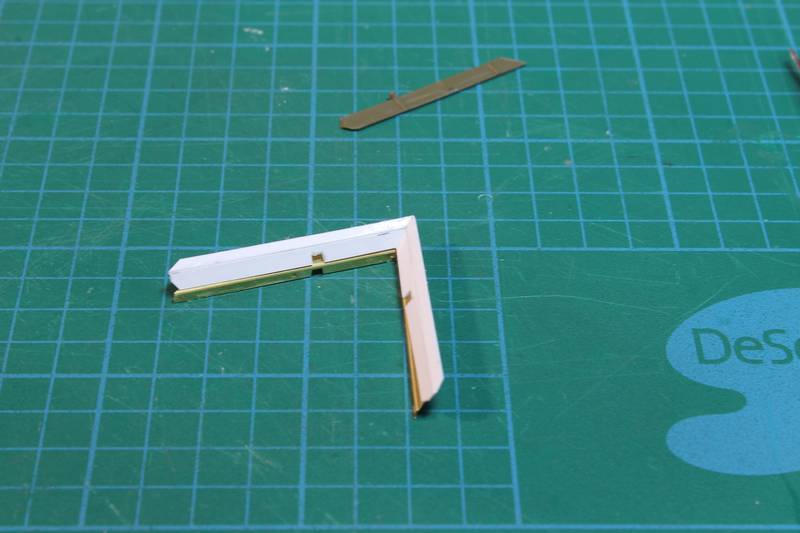
I followed your advice and went for scratchbuilt splashguard. here what it looks like (The last pic is a little fuzzy but i'll post more when done.)
cut some styrene:
sed the pe part as a jig:
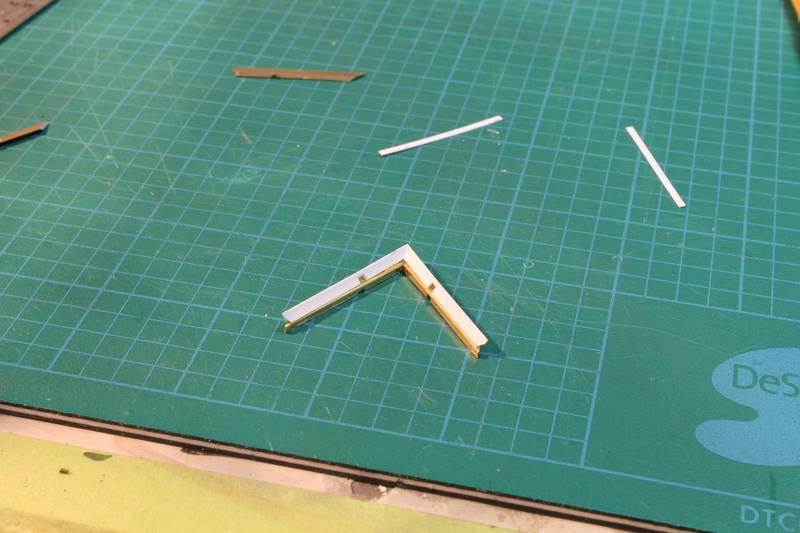
Finished part:
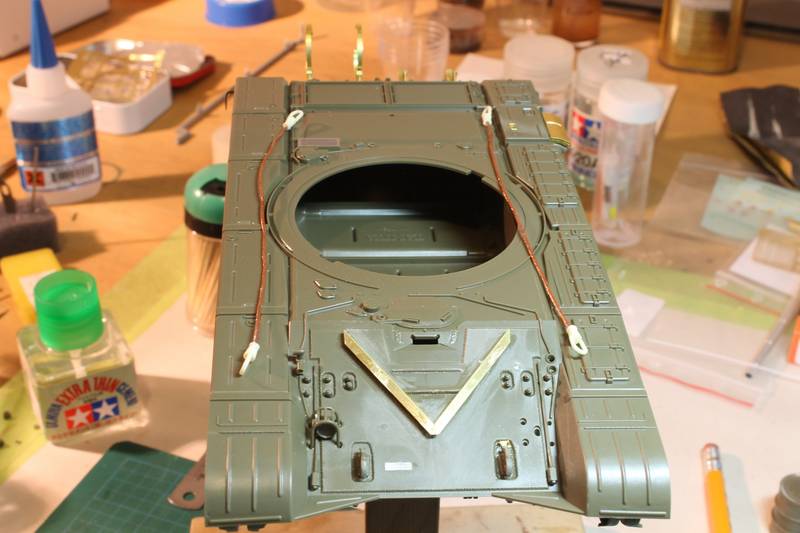
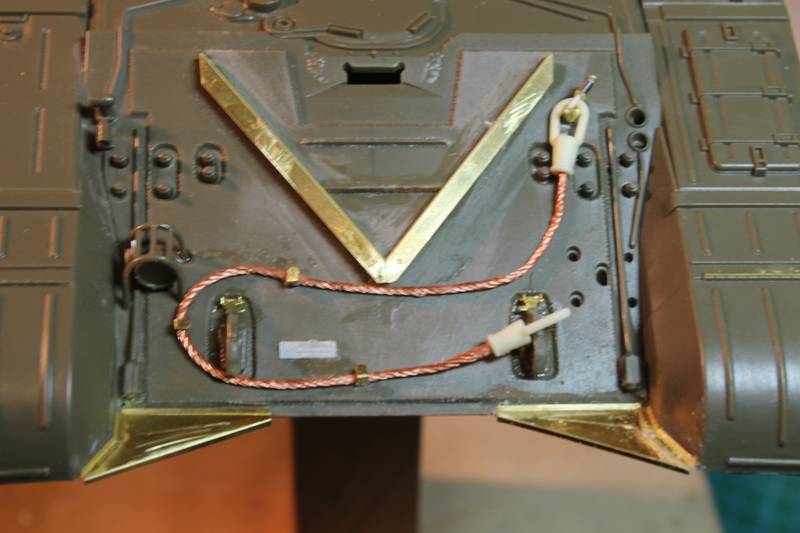
and on the front glacis:
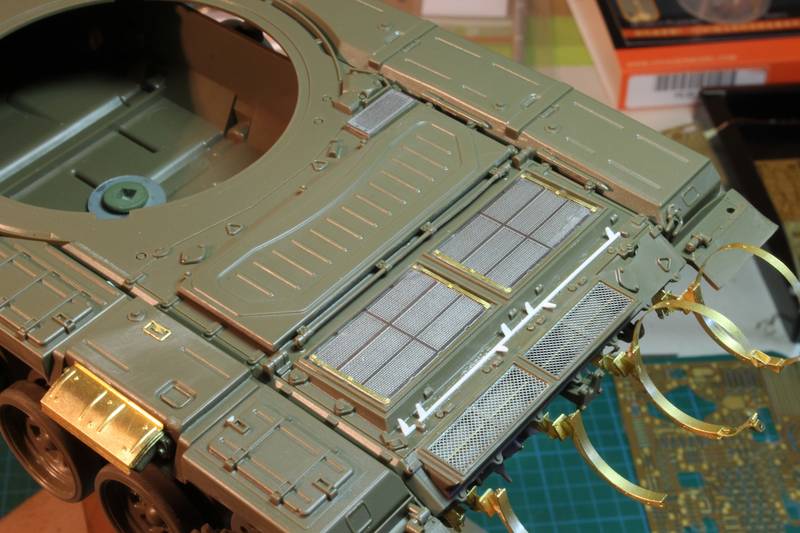
Then I got on the engine bay for some mesh fun...Looks great imo The only question is:where should I position the pe part circled in red? I`ve just dropped it there near the position on the plan...
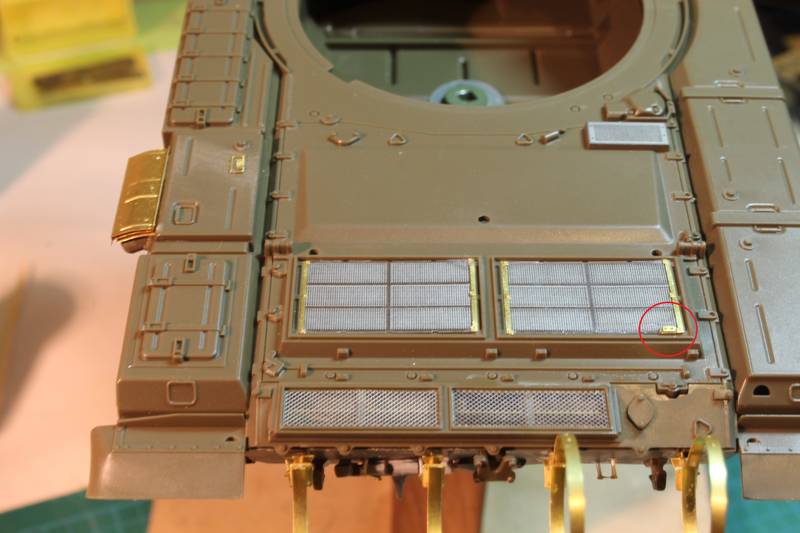
Anyone can help? I got pics with the cover on...
Thx for watching, merry x-mas.
Philippe.
I followed your advice and went for scratchbuilt splashguard.
here what it looks like (The last pic is a little fuzzy but i'll post more when done.)cut some styrene:
sed the pe part as a jig:
Finished part:
and on the front glacis:
Then I got on the engine bay for some mesh fun...Looks great imo
The only question is:where should I position the pe part circled in red? I`ve just dropped it there near the position on the plan...Anyone can help? I got pics with the cover on...
Thx for watching, merry x-mas.
Philippe.
Kharkov
Joined: April 09, 2011
KitMaker: 181 posts
Armorama: 175 posts
KitMaker: 181 posts
Armorama: 175 posts
Posted: Tuesday, December 25, 2012 - 06:50 AM UTC
Your Splash Guard looks much better now it's done in plastic, like it, plastic is so much easier when you're playing with angles.
I can't help with the part circled in red, not even sure what it is, it looks like some kinda little bracket/bolt plate, Spider will probs have a picture that shows where it goes, when he comes back.
Tiger_213
Joined: August 10, 2012
KitMaker: 1,510 posts
Armorama: 1,443 posts
Posted: Tuesday, December 25, 2012 - 07:11 AM UTC
Didn't realize you were talking about the one on the glacis plate.
Spiderfrommars
Joined: July 13, 2010
KitMaker: 3,845 posts
Armorama: 3,543 posts
Posted: Tuesday, December 25, 2012 - 08:07 AM UTC
Iìve always preferred working with plastic card. It isn't as thin than the metal parts but they are a far easier to glue
Regarding your part. It must be that one (below on the left). It looks like a sort of padlock:

i like a lot the job you've done so far
Regarding your part. It must be that one (below on the left). It looks like a sort of padlock:
i like a lot the job you've done so far

Tanksami

Joined: August 06, 2011
KitMaker: 1,314 posts
Armorama: 1,217 posts

Posted: Tuesday, December 25, 2012 - 09:40 AM UTC
@ Phil great looking work indeed sir!! All this Cold War wonder is very inspiring I must say!!
@ Gary nice ink sir & I can have an estimated guess at the meaning, but did I read correct that you got it done with guitar string?
Now that would have been different lol
Hope everyone got what they wanted from the short round red fat man...the one that has the sleigh....as I have a car lol 
Cheers Mike
@ Gary nice ink sir & I can have an estimated guess at the meaning, but did I read correct that you got it done with guitar string?
Now that would have been different lol
Hope everyone got what they wanted from the short round red fat man...the one that has the sleigh....as I have a car lol
Cheers Mike

asmodeuss
Joined: November 19, 2011
KitMaker: 1,389 posts
Armorama: 1,388 posts
Posted: Wednesday, December 26, 2012 - 03:12 AM UTC
@Matt
Thank you for the kind words! I hope I did you justice with my plastic scratching .
@Christopher
Were you talking about the side skirts or the front mud guard? Because the skirt that comes with the kit are acceptable but...you know, if you have seen some mods on those send me a link
@Mauro
Mauro, Mauro, Mauro. What would I be without you bro?!
Matt was right you had the picture needed. Thanks mate I should have look into the finnish t-72....You did sent the link! I can be so lazy sometime hehe.
Now I`ll be detailling the engine bay.
Thanks for all the help people.
Phil.
Thank you for the kind words! I hope I did you justice with my plastic scratching
.@Christopher
Were you talking about the side skirts or the front mud guard? Because the skirt that comes with the kit are acceptable but...you know, if you have seen some mods on those send me a link
@Mauro
Mauro, Mauro, Mauro. What would I be without you bro?!
Matt was right you had the picture needed. Thanks mate
I should have look into the finnish t-72....You did sent the link! I can be so lazy sometime hehe.Now I`ll be detailling the engine bay.
Thanks for all the help people.
Phil.
asmodeuss
Joined: November 19, 2011
KitMaker: 1,389 posts
Armorama: 1,388 posts
Posted: Wednesday, December 26, 2012 - 04:51 AM UTC
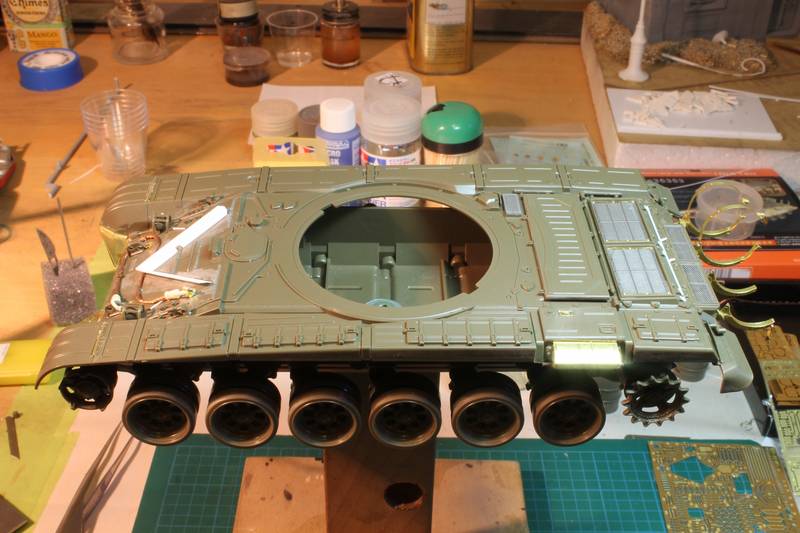
some progres.
The front glacis is detailed to my lieking.
I`ll do a torough clean prior painting.
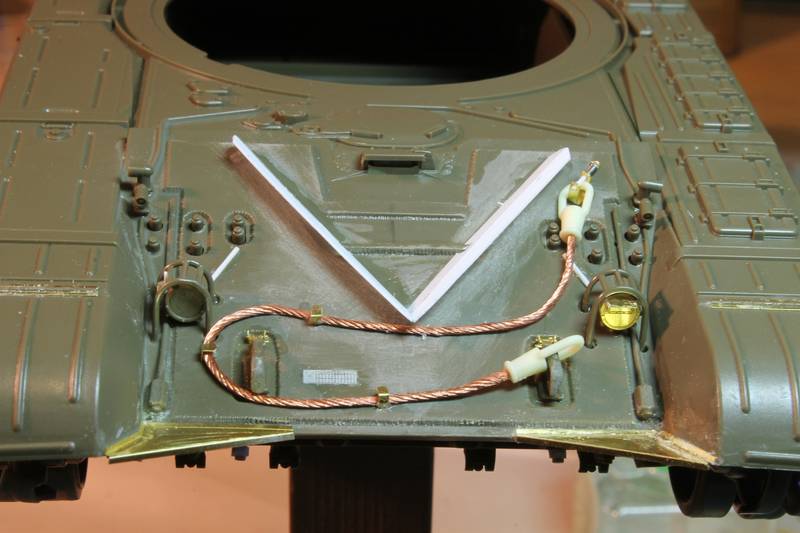
Started detailing the engine bay.
here is where I am. With some flare
Thanks for watching and comments.
Phil.
The front glacis is detailed to my lieking.
I`ll do a torough clean prior painting.
Started detailing the engine bay.
here is where I am. With some flare
Thanks for watching and comments.
Phil.
flugwuzzi
Joined: November 02, 2007
KitMaker: 633 posts
Armorama: 599 posts
Posted: Wednesday, December 26, 2012 - 07:10 AM UTC
Philippe,
nice work on the details ... congrats.
cheers
Walter
nice work on the details ... congrats.
cheers
Walter
BBD468
Joined: March 08, 2010
KitMaker: 2,465 posts
Armorama: 2,383 posts
Posted: Thursday, December 27, 2012 - 12:49 PM UTC
Hey Brother Phil,
WOW...you been busy my friend and i must say your doing some brilliant work there too! It all looks fantastic so far Phil.
Bro, i havent had any bench time or browsing the site time either since family started arriving last week end, but as of today their all gone and maybe i can get me some bench time tomorrow!
Gary
BTW, PM'ing you now.

PantherF
Joined: June 10, 2005
KitMaker: 6,188 posts
Armorama: 5,960 posts

Posted: Thursday, December 27, 2012 - 12:59 PM UTC
Wow... you must be in a band Gary, with those tats!
Oh, and nice work Phil... as usual!
~ Jeff
Oh, and nice work Phil... as usual!
~ Jeff

 |

WEB HOSTING BY


Copyright ©2021 Armorama and Kitmaker Network, a subsidiary of Silver Star Enterprises
All Rights Reserved. Please read our Conditions of Use and Privacy Policy.
All Rights Reserved. Please read our Conditions of Use and Privacy Policy.