Desertised, don't forget your water bottle!
Jakarta Raya, Indonesia
Joined: May 06, 2014
KitMaker: 59 posts
Armorama: 58 posts
Posted: Friday, May 30, 2014 - 07:53 PM UTC
More on the work

Should be totally done by next week
Singapore / 新加坡
Joined: March 05, 2010
KitMaker: 81 posts
Armorama: 79 posts
Posted: Saturday, May 31, 2014 - 04:35 AM UTC
Hello fellow Group Builders,
I'll be building Italeri's 1/72 Valentine Mk.I:

Here's what's inside the box:

Will be doing the version that fought in the Gazala Battle during May 1942...
England - East Anglia, United Kingdom
Joined: March 21, 2012
KitMaker: 1,673 posts
Armorama: 1,640 posts
Posted: Saturday, May 31, 2014 - 05:42 AM UTC
Anthony I picked the kit up cheap two years ago at a model show in Germany

. I also have some goodies to add to it now, nothing much just stowage items and a Live resin GPMG.
Alvin welcome in here mate,and the F2 will fit the bill perfectly
Fernanda nice progress dude
Marcos welcome on board mate, and a cool choice there too

Paul
"Lord Raglan wishes the cavalry to advance rapidly to the front, follow the enemy & try to prevent the enemy carrying away the guns. Troop horse artillery may accompany. French cavalry is on your left. Immediate. R Airey."
Western Australia, Australia
Joined: December 31, 2013
KitMaker: 338 posts
Armorama: 121 posts
Posted: Saturday, May 31, 2014 - 11:55 PM UTC
In the Hangar:
- 1/48 Hasegawa P-38J/L
In the Workshop
-1/35 Tamiya Mobelwagen
France
Joined: February 20, 2012
KitMaker: 1,932 posts
Armorama: 1,907 posts
Posted: Sunday, June 01, 2014 - 02:50 AM UTC
Hello, I've just enlisted for this campaign.
I will make a M998A1 from Italeri with DEF Model wheels and a few replacement parts from a Tamiya kit.

England - East Anglia, United Kingdom
Joined: March 21, 2012
KitMaker: 1,673 posts
Armorama: 1,640 posts
Posted: Sunday, June 01, 2014 - 03:16 AM UTC
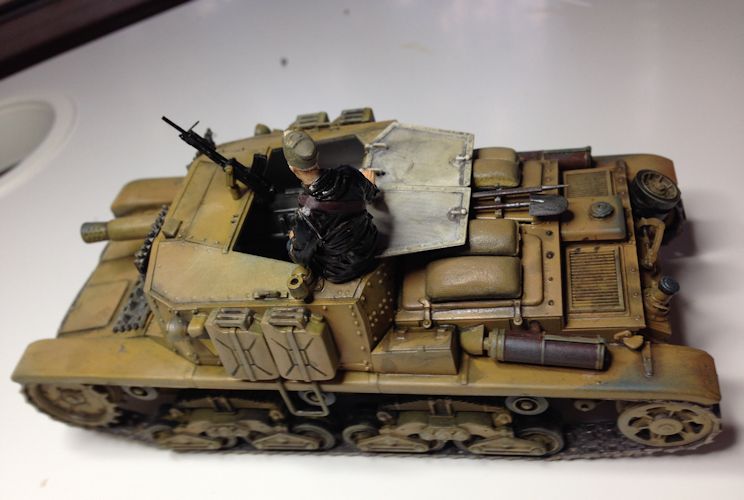
Pricklehead great looking shiny new factory Semovente there

, she will look even better with desert dusty-oily makeup on

 Alex (terminators)
 welcome in here and nice choice you bring with you to
I still haven't started yet


.
Paul
"Lord Raglan wishes the cavalry to advance rapidly to the front, follow the enemy & try to prevent the enemy carrying away the guns. Troop horse artillery may accompany. French cavalry is on your left. Immediate. R Airey."
Western Australia, Australia
Joined: December 31, 2013
KitMaker: 338 posts
Armorama: 121 posts
Posted: Sunday, June 01, 2014 - 03:18 AM UTC
Yep she gets her decals tomorrow then some weathering.
In the Hangar:
- 1/48 Hasegawa P-38J/L
In the Workshop
-1/35 Tamiya Mobelwagen
France
Joined: February 20, 2012
KitMaker: 1,932 posts
Armorama: 1,907 posts
Posted: Sunday, June 01, 2014 - 03:50 AM UTC
Thank you Paul. Have fun with your Challenger 2. The Tamiya kit is nice.
South Carolina, United States
Joined: December 03, 2009
KitMaker: 2,160 posts
Armorama: 1,906 posts
Posted: Tuesday, June 03, 2014 - 07:24 AM UTC
I added some stowage from the spares. Most pictures of the Rangers' version shows little stowage being carried.
I drybrushed it with MM USMC Armor Sand and then used ash from the grill as pigment.
The rope on the front is a length of brown thread from a piece of canvas. I soaked it in white glue to get it to retain its shape.


And an artsy shot with the RSOV placed out in the ash pile.

And with that I am calling this one done. I just seem like I am forgetting something...hmm what could it be? Anyway, I'll upload some pictures to the gallery in a bit.
North Carolina, United States
Joined: June 06, 2006
KitMaker: 4,691 posts
Armorama: 3,509 posts
Posted: Thursday, June 05, 2014 - 08:51 AM UTC

#152
Texas, United States
Joined: December 07, 2002
KitMaker: 487 posts
Armorama: 441 posts
Posted: Thursday, June 05, 2014 - 03:25 PM UTC
Here is my startup photo of the Cyber Hobby SAS Jeep
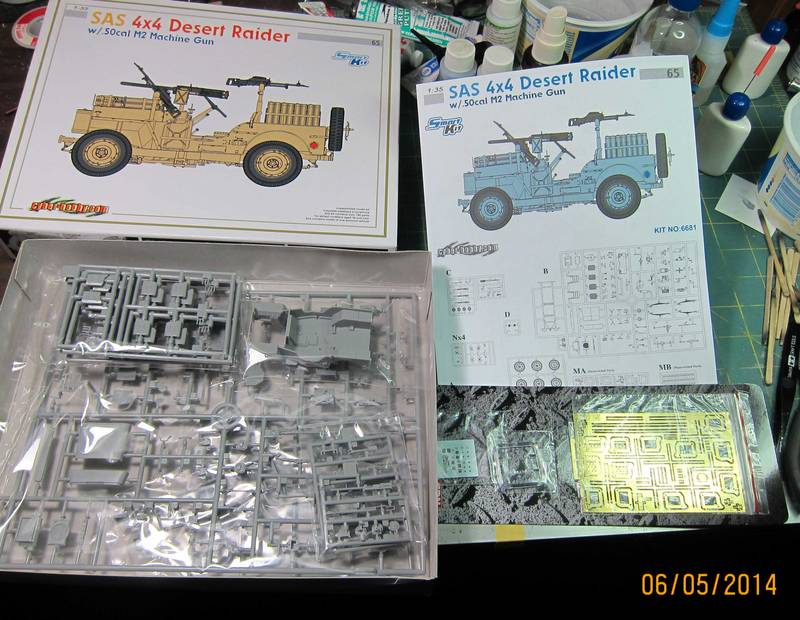
Tom
Long time modeller. Starting when I was a teenager, then I found out about girls and college and work and kids. But now that I have one girl, no school, no work and the kids are grown, I'm back to full time modelling. My prime area of interest is armor, b
England - East Anglia, United Kingdom
Joined: March 21, 2012
KitMaker: 1,673 posts
Armorama: 1,640 posts
Posted: Friday, June 06, 2014 - 03:04 AM UTC
"Lord Raglan wishes the cavalry to advance rapidly to the front, follow the enemy & try to prevent the enemy carrying away the guns. Troop horse artillery may accompany. French cavalry is on your left. Immediate. R Airey."
France
Joined: February 20, 2012
KitMaker: 1,932 posts
Armorama: 1,907 posts
Posted: Friday, June 06, 2014 - 04:09 AM UTC
Quoted Text
I added some stowage from the spares. Most pictures of the Rangers' version shows little stowage being carried.
I drybrushed it with MM USMC Armor Sand and then used ash from the grill as pigment.
The rope on the front is a length of brown thread from a piece of canvas. I soaked it in white glue to get it to retain its shape.
And an artsy shot with the RSOV placed out in the ash pile.
And with that I am calling this one done. I just seem like I am forgetting something...hmm what could it be? Anyway, I'll upload some pictures to the gallery in a bit.
Nice work on your RSOV. I like the dust effect and finally details are visible even in black color.
South Carolina, United States
Joined: December 03, 2009
KitMaker: 2,160 posts
Armorama: 1,906 posts
Posted: Friday, June 06, 2014 - 05:14 AM UTC
Paul,
It took months of neglect to get the hood of my truck to get that particular visual affect. If I washed it I'd lose my photography background. Actually, I rarely drive it except when I need a truck to move something...or I have to move it to cut grass. It's black and really shows dust and dirt. We're still dealing with some pollen here so that doesn't help much. Besides, it seemed quite fitting that a dusty black Landy is sitting on a dusty black Toyota truck.
Anyway, thanks for the comments on the RSOV...and for a great campaign. It's a sweet little kit and went together pretty well. Hobby Boss continues to impress me with their subjects and their engineering. I might do a British version at some point so I can go sand color and load it with gear. Interested to see what your next campaign idea will be.
And yes I did intentionally leave out the water bottle.
Thessaloniki, Greece / Ελλάδα
Joined: April 23, 2012
KitMaker: 402 posts
Armorama: 394 posts
Posted: Friday, June 06, 2014 - 07:03 PM UTC
People are already finishing their builds and i haven't even started!

Time to fix that.
Alex nice work there mate. The last pic especially puts things into prospective.
Anthony nice looking Semovente.
Steph looking good mate.
Quoted Text
but I'm sure if you just nip over to Corfu you could get some fine sand from Sidari or Lefkimmi . Just watch out for those crazy sunburned Brits
Paul i'd love to just nip over to Corfu since i've never been there!
As for the sunburned Brits, no worries mate they are just having fun as they are supposed to do at their vacations.


Now regarding the antislip coating, any ideas or techniques? Never done that before. Kit will be started today, so probably a progress post tonight.
Have fun people! and a few cold ones....
My work.
http://johnsprint79.wix.com/jkb-modelling
North Carolina, United States
Joined: June 06, 2006
KitMaker: 4,691 posts
Armorama: 3,509 posts
Posted: Friday, June 06, 2014 - 11:38 PM UTC
Paul and John,thanks for the kind words
England - East Anglia, United Kingdom
Joined: March 21, 2012
KitMaker: 1,673 posts
Armorama: 1,640 posts
Posted: Saturday, June 07, 2014 - 03:26 AM UTC
John I will either go for chinchilla sand or textured paint

.
I know the textured paint is expensive and difficult to use

,
apparently it comes out of the can with something like 8 bar pressure. SO I recon the sand is the safest way and cheap too
SO then here we go, I sure can't let everyone else pass the finish line without even starting (lol)


Paul
"Lord Raglan wishes the cavalry to advance rapidly to the front, follow the enemy & try to prevent the enemy carrying away the guns. Troop horse artillery may accompany. French cavalry is on your left. Immediate. R Airey."
Thessaloniki, Greece / Ελλάδα
Joined: April 23, 2012
KitMaker: 402 posts
Armorama: 394 posts
Posted: Saturday, June 07, 2014 - 07:27 PM UTC
Good morning everyone. Started working on the kit and just saw that Trumpeter has attempted to recreate anti slip surface. So the question for the guys that have better knowledge than me on the Chally 2, does it look the part?

My work.
http://johnsprint79.wix.com/jkb-modelling
Isere, France
Joined: April 23, 2011
KitMaker: 735 posts
Armorama: 606 posts
Posted: Saturday, June 07, 2014 - 08:49 PM UTC
hello,
thank you, John
Alex, great job
Anthony, beautiful realization
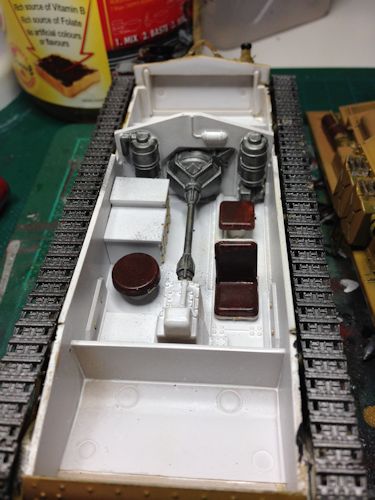
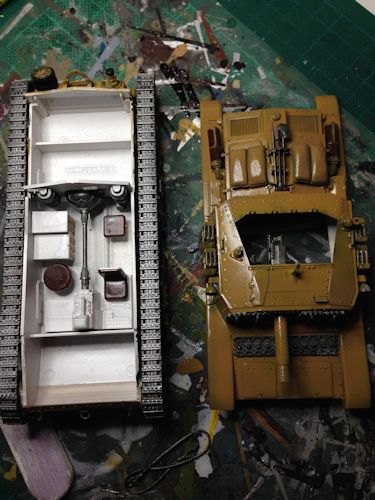
here is my progress with the cargo party almost completed
steph


Western Australia, Australia
Joined: December 31, 2013
KitMaker: 338 posts
Armorama: 121 posts
Posted: Saturday, June 07, 2014 - 10:33 PM UTC
In the Hangar:
- 1/48 Hasegawa P-38J/L
In the Workshop
-1/35 Tamiya Mobelwagen
North Carolina, United States
Joined: June 06, 2006
KitMaker: 4,691 posts
Armorama: 3,509 posts
Posted: Saturday, June 07, 2014 - 10:43 PM UTC
Thank you Steph,your Long Range Raider finished up quite nicely,great contribution
England - East Anglia, United Kingdom
Joined: March 21, 2012
KitMaker: 1,673 posts
Armorama: 1,640 posts
Posted: Sunday, June 08, 2014 - 05:52 AM UTC
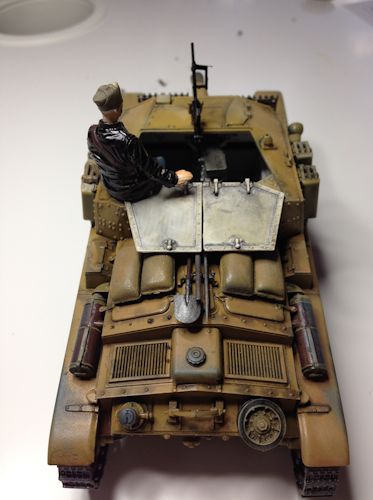
Steph almost done I see, looking great there
PrickleHead and another great looking Semovente
Nice work there also a very clean build, well executed
Only one thing I would change, the leather jacket on the figure
may need a little toning down, it appears a bit shiny. But that is only my 2 cents
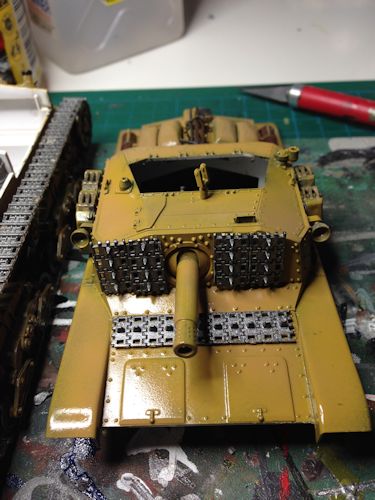
John here's a close up of the Chally 2:

IMHO the stuff looks very coarse, so I'm going for the sand
. Even if it's a bit rough.
Paul
"Lord Raglan wishes the cavalry to advance rapidly to the front, follow the enemy & try to prevent the enemy carrying away the guns. Troop horse artillery may accompany. French cavalry is on your left. Immediate. R Airey."
South Australia, Australia
Joined: February 20, 2014
KitMaker: 26 posts
Armorama: 26 posts
Posted: Wednesday, June 11, 2014 - 02:24 AM UTC
Finally got the base paint on the model. I made the mistake of using my usual dark grey primer, this meant that it took three coats of Vallejo "Middlestone" to finally get a solid colour. While this may not be much hassle for airbrush users, for hand-painters like me, it sure does take some time!
Attached photos are just after the first wash, I've started with Vallejo "oiled earth wash", which I hoped would bring out some of the edges. I'll do a second wash on the horizontal surfaces with Desert dust wash.


#152
Texas, United States
Joined: December 07, 2002
KitMaker: 487 posts
Armorama: 441 posts
Posted: Thursday, June 12, 2014 - 04:12 AM UTC
Here are a couple of in process photos of the SAS Jeep
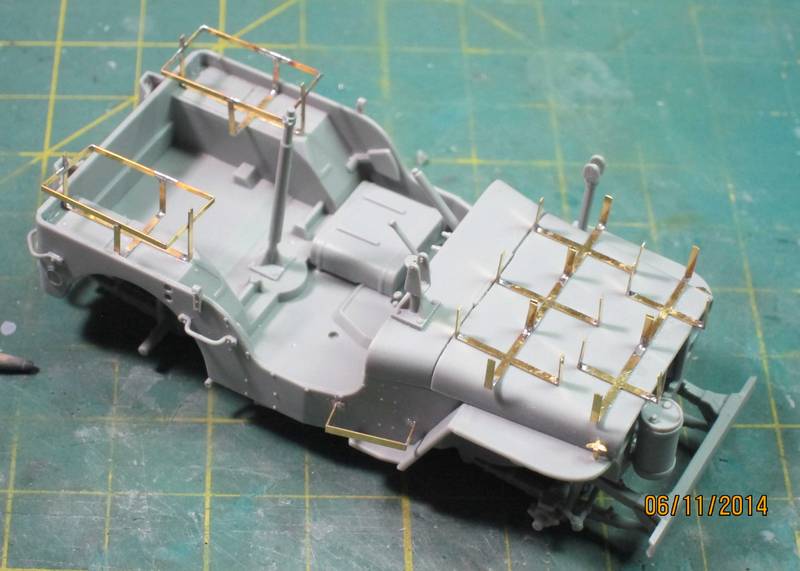
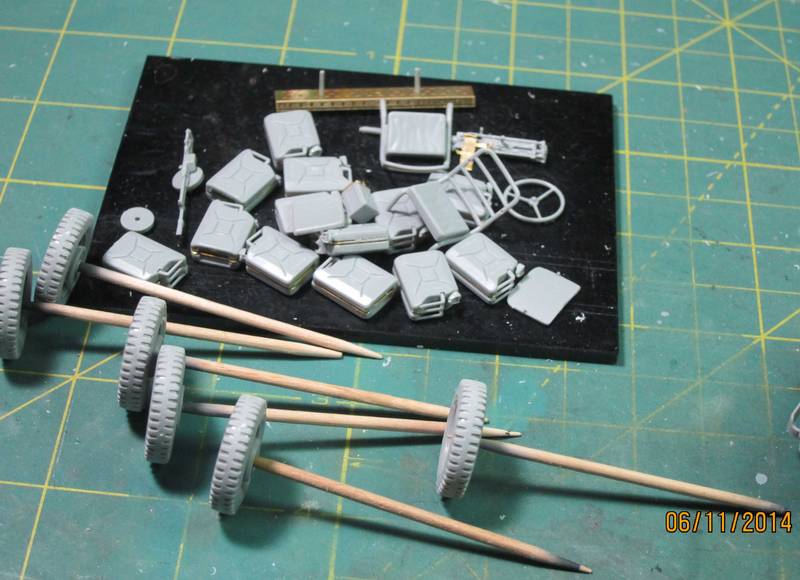
Thanks,
Tom
Long time modeller. Starting when I was a teenager, then I found out about girls and college and work and kids. But now that I have one girl, no school, no work and the kids are grown, I'm back to full time modelling. My prime area of interest is armor, b
Tasmania, Australia
Joined: December 19, 2011
KitMaker: 92 posts
Armorama: 88 posts
Posted: Friday, June 13, 2014 - 02:57 PM UTC
Start pic.
Hopefully I'll get motivated enough to finish this and the other campaigns I've signed up for. Despite it's flaws it will be built OOB.


