Thessaloniki, Greece / Ελλάδα
Joined: April 23, 2012
KitMaker: 402 posts
Armorama: 394 posts
Posted: Tuesday, October 08, 2013 - 01:38 AM UTC
Quoted Text
Nice work going on everyone. John 3 models!!! Stalin won't have you executed yet haha
Haha, i think that with the double offering...eeehhhh builds i meant, i got my self the best sit in the
GULAG!!!!!!!!!!!!!


.
The two kits destined for this campaign have their basic color on, if i have more time at night i'll start putting on on some shades, plus the interior details of the ASU.

My work.
http://johnsprint79.wix.com/jkb-modelling
Thessaloniki, Greece / Ελλάδα
Joined: April 23, 2012
KitMaker: 402 posts
Armorama: 394 posts
Posted: Tuesday, October 08, 2013 - 01:52 AM UTC
Quoted Text
Question about the red primer use: Is it a personal preference for the product or does it help in weathering.
I know some armor modelers use red on german tanks to later chip away at top coats to reveal the german red primer underneath. Did the Soviet made tanks of that era use red primer?
Micheal although i'm not an expert, i can tell you that it is a little bit of both in my case. The specific spray works excellent on all plastic surfaces without any problems plus that tanks that were produced under ''normal'' circumstances did have a red primer underneath.
In cases like Stalingrand tanks were often seen going to battle in natural metal finish without anything applied on them. But those were desperate times for the Soviets.
From personal experience on tanks i can tell you that before bare metal appears under the worn paint, usually the red primer can be seen at those spots before that, except with dents depending on the depth of them.
Now concerning WW II German tanks it is a rather long discussion that i will leave to the experts with better knowledge of English than me.

My work.
http://johnsprint79.wix.com/jkb-modelling
New York, United States
Joined: March 08, 2010
KitMaker: 3,662 posts
Armorama: 3,078 posts
Posted: Wednesday, October 09, 2013 - 03:36 AM UTC
Hi Guys Some really nice progress by everyone

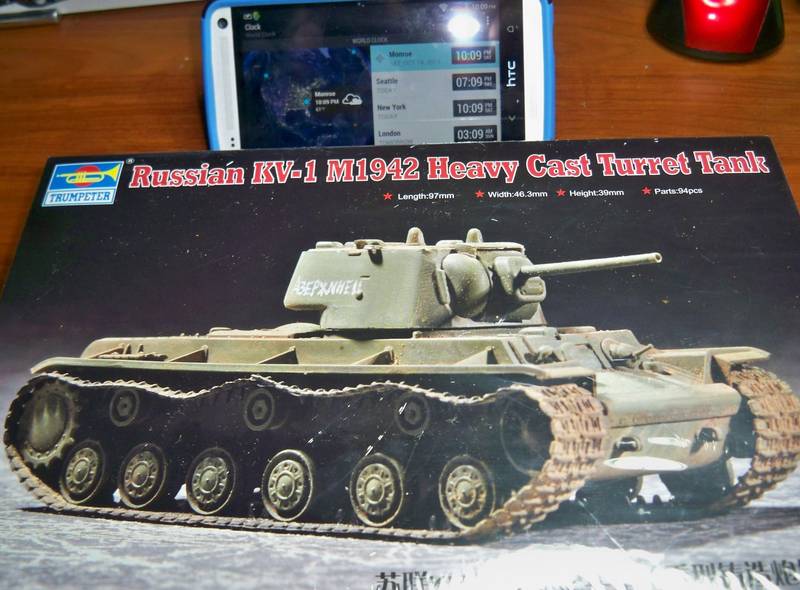
I was gonna do a Cyberhobby JS I but then I received this kit for a review


A quick look through the box and it looks like a really nice kit, I should be starting by the end of the week

Active Campaigns on the bench:
Operation Fall Gelb - Pz.Kpfw. IV Ausf. C
Engineering the Future - M-26 Recovery Vehicle
115 Campaigns completed
New York, United States
Joined: March 08, 2010
KitMaker: 3,662 posts
Armorama: 3,078 posts
Posted: Friday, October 11, 2013 - 03:06 AM UTC
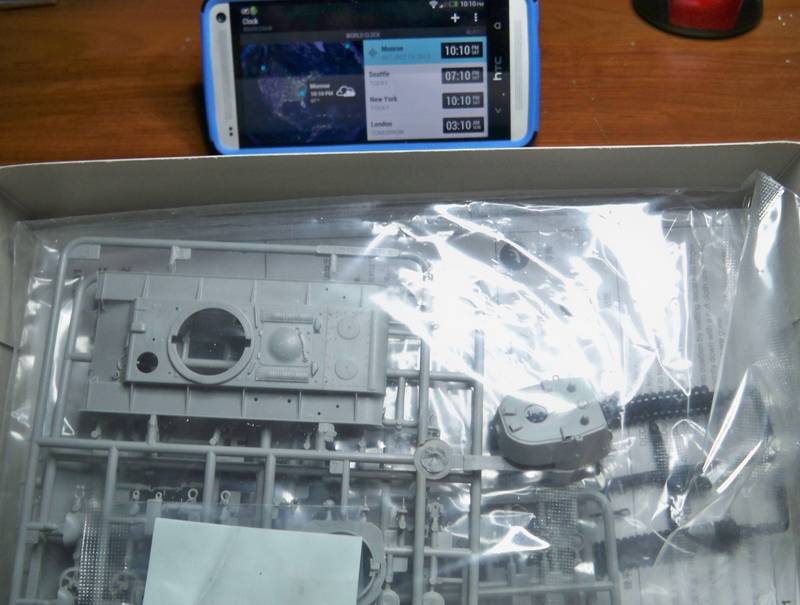
Ok I got started earlier than I thought

I 1st compared the instruction sheet to that of Trumpeters KV-2 kit #312 from 2005. This kit has completely different spruces so I would guess that this is an all new retooled version of their KV series
I got to work with the Step 1 PE

and then the 1st half of step 1

Step 1 complete

I had to use clamps to hold the sides of the hull on and a tight rubber band to get a good fit with the rear and the upper deck

Then I was also able to clean up 2 spruces of the 12 tracks

More to come this weekend
Active Campaigns on the bench:
Operation Fall Gelb - Pz.Kpfw. IV Ausf. C
Engineering the Future - M-26 Recovery Vehicle
115 Campaigns completed
Indiana, United States
Joined: June 10, 2005
KitMaker: 6,188 posts
Armorama: 5,960 posts
Posted: Friday, October 11, 2013 - 06:17 AM UTC
New York, United States
Joined: March 08, 2010
KitMaker: 3,662 posts
Armorama: 3,078 posts
Posted: Friday, October 11, 2013 - 07:01 AM UTC
Thanks Jeff, I didnt think that mesh looked like it was in the right place
Guess the instructions are not that clear that will be corrected
Active Campaigns on the bench:
Operation Fall Gelb - Pz.Kpfw. IV Ausf. C
Engineering the Future - M-26 Recovery Vehicle
115 Campaigns completed
Niedersachsen, Germany
Joined: May 12, 2013
KitMaker: 128 posts
Armorama: 125 posts
Posted: Friday, October 11, 2013 - 07:54 AM UTC
John The fit is pretty good considering the simplicity of the kit, some very small seems had to be filled with putty at the front of the hull and on the turret but I feel that this will be different from kit to kit due to light warpign of large parts.
I'll post some picks later tonight to show exactly the areas I mean and some progress.
As always some great builds going on in here! The community on this website is truely inspiring.
Currently Building:
too many kits to list hehe
Niedersachsen, Germany
Joined: May 12, 2013
KitMaker: 128 posts
Armorama: 125 posts
Posted: Friday, October 11, 2013 - 10:07 AM UTC
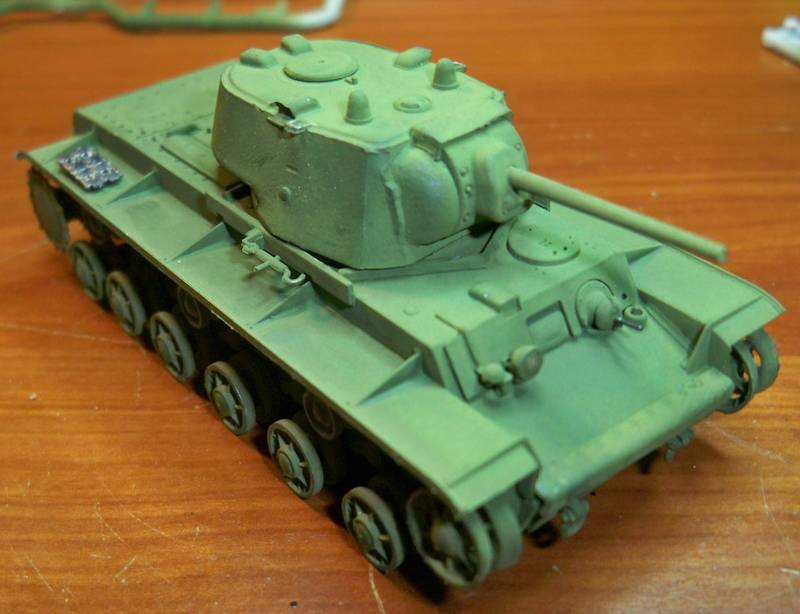
So here are the two areas so far where I thought some filling was really needed on the KV-2
Firstly on the front upper portion of the hull:

and secondly on the right front side of the turret:

Other than that the kit has been really chilled to go through in the evenings and at this rate should land infront of the airbrush soon.
Cheers
Tristan
Currently Building:
too many kits to list hehe
Indiana, United States
Joined: June 10, 2005
KitMaker: 6,188 posts
Armorama: 5,960 posts
Posted: Friday, October 11, 2013 - 11:30 PM UTC
Don't worry... I didn't get mine right either as I put it in that void just above. Later I'll buy a PE set and fix it because I want my KV-122 perfect.

My hat is off to you for going with the PE deflector. Those tiny little brackets stayed on the sheet and I just used the styrene part!
Jeff
New York, United States
Joined: March 08, 2010
KitMaker: 3,662 posts
Armorama: 3,078 posts
Posted: Sunday, October 13, 2013 - 02:42 AM UTC
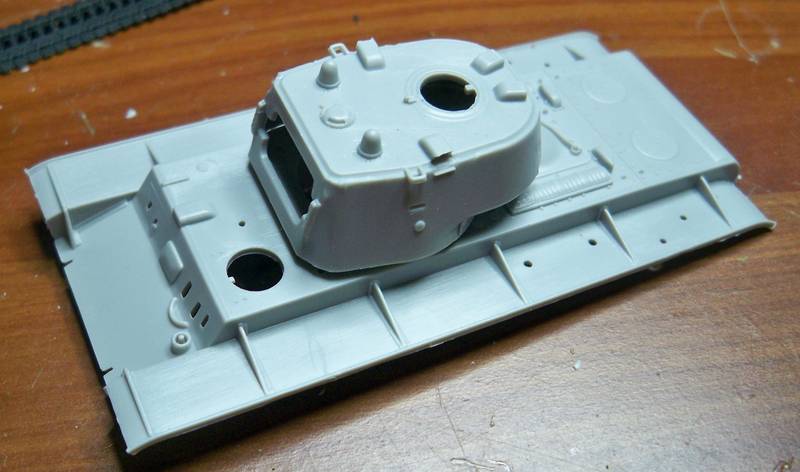
Ok I have fixed the mesh PE I think


and moved on to step 2 this is the 1st half of step 2

I would have like to see some PE provided for those engine vents
Step 2 completed

so far its a fairly easy build typical Trumpeter quality however there was no option on the instructions to leave the hatches open even though the inside of the hatches had molded in detail

Active Campaigns on the bench:
Operation Fall Gelb - Pz.Kpfw. IV Ausf. C
Engineering the Future - M-26 Recovery Vehicle
115 Campaigns completed
New York, United States
Joined: March 08, 2010
KitMaker: 3,662 posts
Armorama: 3,078 posts
Posted: Monday, October 14, 2013 - 02:13 PM UTC
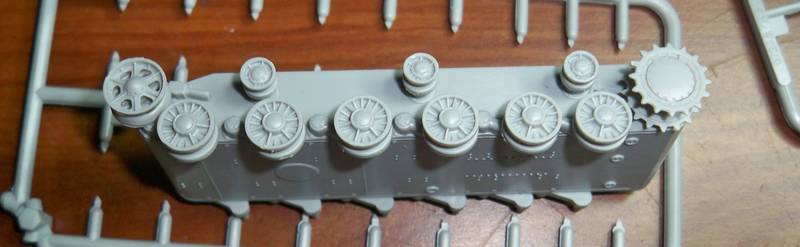
A little more progress today

Step 3 was the road wheels assembly and step 4 was some additional work on the hull

Sept 5 is the treads the instructions give the illustration of the link and length tracks used in the earlier kits but says to use 88 track links
I usually do the tracks last so I will jump to step 6
Active Campaigns on the bench:
Operation Fall Gelb - Pz.Kpfw. IV Ausf. C
Engineering the Future - M-26 Recovery Vehicle
115 Campaigns completed
California, United States
Joined: June 30, 2008
KitMaker: 2,408 posts
Armorama: 2,394 posts
Posted: Wednesday, October 16, 2013 - 11:00 AM UTC
Hi Everyone. Great builds progressing here. Sal - I am so not a fan of single track links so have fun with that
. I've done absolutely no modelling lately as the twins have zapped all my energy. Hope to get paint soon though on the SU76i
North Carolina, United States
Joined: August 28, 2013
KitMaker: 148 posts
Armorama: 108 posts
Posted: Wednesday, October 16, 2013 - 11:24 AM UTC
Well, I'm going to strip my KV-1E of all it's current paint on Friday. Got the first coat on it and just wasn't real happy with some of the weld lines and areas where I had to use green putty to solve gaps. Not a complete reboot but close. Also didn't like the way the paint that I used was ending up. I tried to use a product that I use in my day to day business on real firearms. Sadly, it didn't translate well to a smaller scale so now back to my old faithful Tamiya acrylics.
www.tanktracktools.com
Individual track link tools
Indiana, United States
Joined: June 10, 2005
KitMaker: 6,188 posts
Armorama: 5,960 posts
Posted: Thursday, October 17, 2013 - 06:02 AM UTC
Hmmmm... I wonder if this will fit with what I am building?

I know the JS-3M wasn't around for WWII, but if I backdate it?
Or not.
Jeff
England - East Anglia, United Kingdom
Joined: March 21, 2012
KitMaker: 1,673 posts
Armorama: 1,640 posts
Posted: Thursday, October 17, 2013 - 06:27 AM UTC
Sal I have just completed the building phase of my SU 152 on the Trumpeter campaign. I can tell you this, use 88 on the left hand side and 87 on the right. The right hand side will
end up with two links that have guide horns next to each other, but you can hide this with a road wheel and no-one will notice.
You could of coarse just leave the 88 on both sides but the sag will be massive on the right if you do.
This reminds me that I must start my twin guild here soon
the T60 and T70 light tanks
Paul
"Lord Raglan wishes the cavalry to advance rapidly to the front, follow the enemy & try to prevent the enemy carrying away the guns. Troop horse artillery may accompany. French cavalry is on your left. Immediate. R Airey."
North Carolina, United States
Joined: August 28, 2013
KitMaker: 148 posts
Armorama: 108 posts
Posted: Saturday, October 19, 2013 - 05:31 PM UTC
www.tanktracktools.com
Individual track link tools
North Carolina, United States
Joined: August 28, 2013
KitMaker: 148 posts
Armorama: 108 posts
Posted: Saturday, October 19, 2013 - 06:48 PM UTC
done for the night......
www.tanktracktools.com
Individual track link tools
New York, United States
Joined: March 08, 2010
KitMaker: 3,662 posts
Armorama: 3,078 posts
Posted: Sunday, October 20, 2013 - 11:58 AM UTC
Quoted Text
Sal I have just completed the building phase of my SU 152 on the Trumpeter campaign. I can tell you this, use 88 on the left hand side and 87 on the right. The right hand side will
end up with two links that have guide horns next to each other, but you can hide this with a road wheel and no-one will notice.
You could of coarse just leave the 88 on both sides but the sag will be massive on the right if you do.
Paul thanks for the heads up I'm not really looking forward to these tracks
But here is the progress
Step 6 fenders are dry fit for now


lots of school work the next few weeks so progress will slow down
Active Campaigns on the bench:
Operation Fall Gelb - Pz.Kpfw. IV Ausf. C
Engineering the Future - M-26 Recovery Vehicle
115 Campaigns completed
Singapore / 新加坡
Joined: April 05, 2009
KitMaker: 120 posts
Armorama: 67 posts
Posted: Tuesday, October 22, 2013 - 01:03 AM UTC
Nice work everyone!
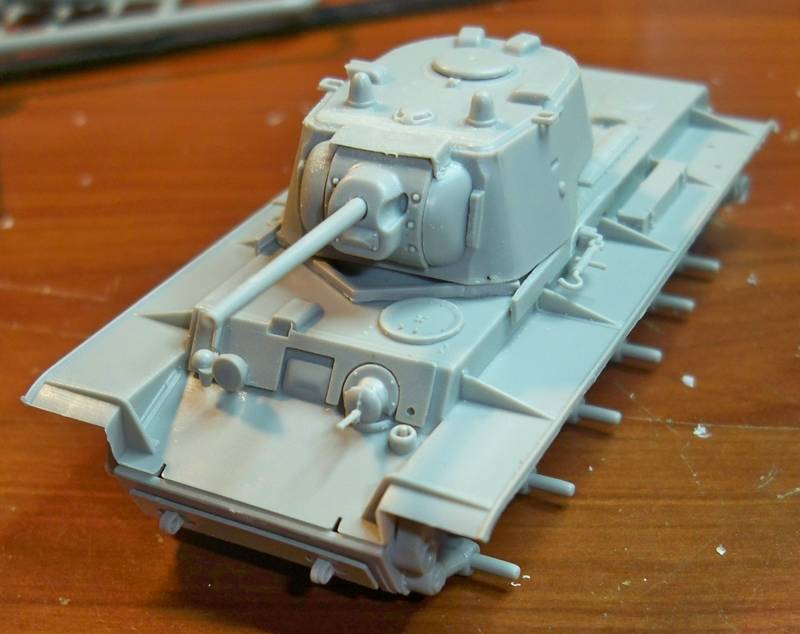
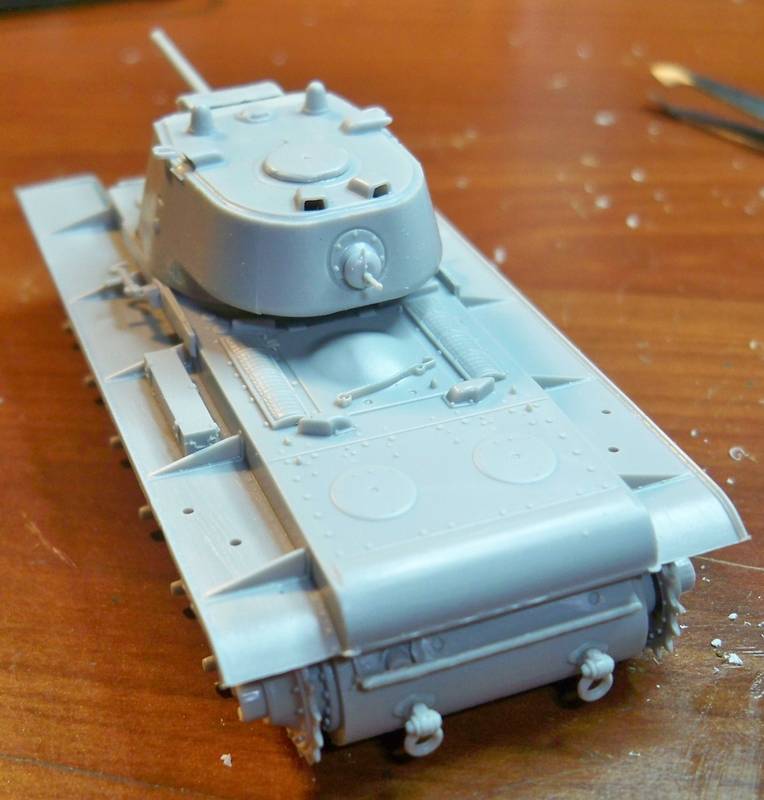
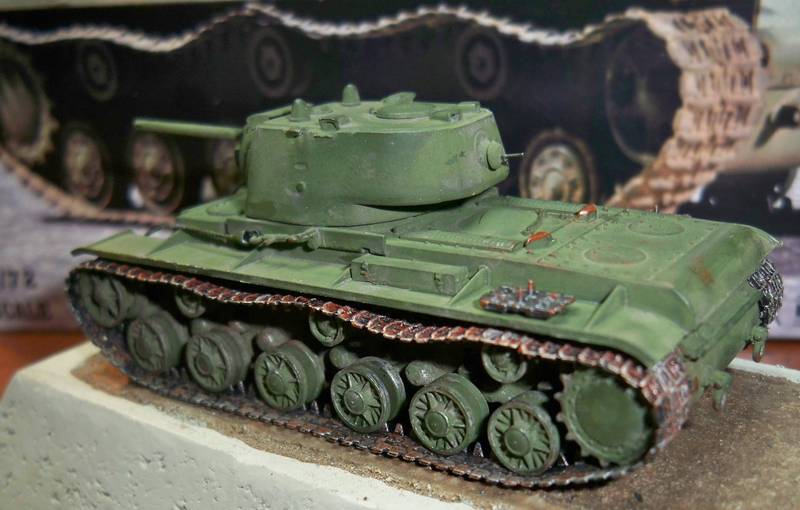
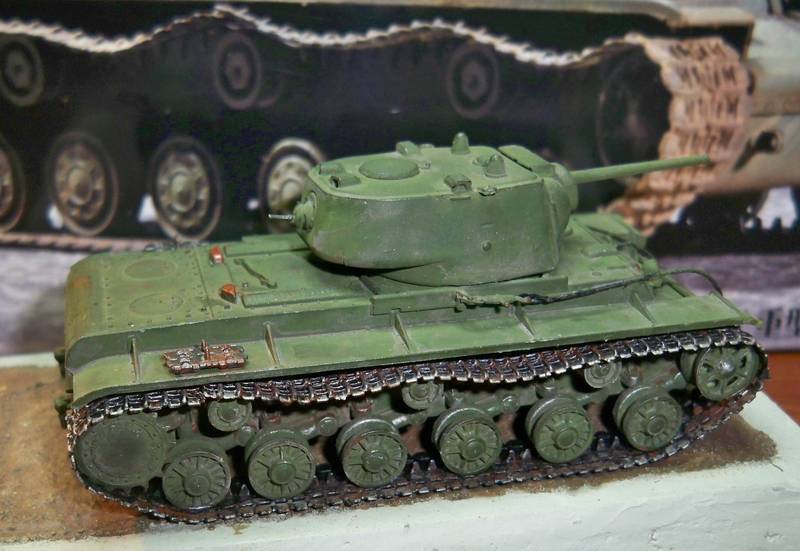
My progress so far...


The kit doesn't go together very well... had difficulties in fitting the top half with the bottom half (the front pike nose portion dun quite match up), and also aligning the wheels, sprocket and tracks
Nonetheless, manage to reach this stage; will be weathering over the weekend, and most probably consider it done after that
Cheers
Lawrence
North Carolina, United States
Joined: August 28, 2013
KitMaker: 148 posts
Armorama: 108 posts
Posted: Tuesday, October 22, 2013 - 02:19 AM UTC
www.tanktracktools.com
Individual track link tools
Indiana, United States
Joined: June 10, 2005
KitMaker: 6,188 posts
Armorama: 5,960 posts
Posted: Tuesday, October 22, 2013 - 02:44 AM UTC
Those tracks look wicked Smokey!
I'm getting back on mine after lunch... I think.
Jeff
North Carolina, United States
Joined: August 28, 2013
KitMaker: 148 posts
Armorama: 108 posts
Posted: Tuesday, October 22, 2013 - 01:34 PM UTC
www.tanktracktools.com
Individual track link tools
California, United States
Joined: June 30, 2008
KitMaker: 2,408 posts
Armorama: 2,394 posts
Posted: Tuesday, October 22, 2013 - 01:58 PM UTC
Congrats and good job Smokey.
It should always be fun!
Victoria, Australia
Joined: June 14, 2005
KitMaker: 247 posts
Armorama: 129 posts
Posted: Tuesday, October 22, 2013 - 02:06 PM UTC
Great work Smokey, those 72nd scale are a lot of fun aren't they? The only thing that I can't handle these days are those tiny link 'n' length tracks on some kits. The old eyes aren't what they used to be.
North Carolina, United States
Joined: August 28, 2013
KitMaker: 148 posts
Armorama: 108 posts
Posted: Tuesday, October 22, 2013 - 02:45 PM UTC
@Greg- thank you much sir
@Darson- I am quickly falling in love with these 1/72 armor kits. I only did this to take a break from all of the PE and individual track links that are currently going on with my other 1/35 builds. I have 9 builds going on right now and everyone of them is at the stage of me having to get the wheels and tracks completed before I can advance. I was lucky with this little Russian because it came with rubber tracks instead of link & length because like you, my eyes aren't what they were a few years ago. A trip to the Optometrist is in order for me very soon.
www.tanktracktools.com
Individual track link tools