Campaigns: Completed Campaigns
Campaigns that are completed should be grouped here.
Hosted by Richard S.
The 251 Campaign
SpeedyJ
Visit this Community
Bangkok, Thailand / ไทย
Joined: September 17, 2013
KitMaker: 1,617 posts
Armorama: 1,150 posts
Posted: Tuesday, April 01, 2014 - 06:30 PM UTC
Hi.
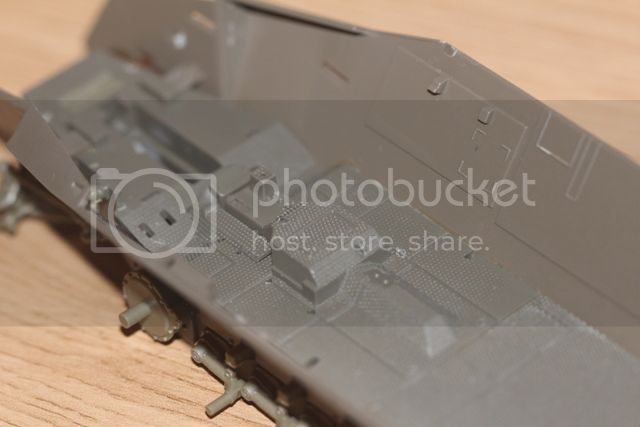
I did a real bargainhunt last week. This old Tamiya kit I bought together with a AFV 35043 conversionkit. Didn't fit but was usefull for my old Tamiya 251/D version, which is not part of this campaign.

A lot of scratchbuilding needed to make good model out of this kit. But that's what I like the most about modeling, make something out of nothing.

Have a nice day,

RJ
robw_uk
Visit this Community
England - North East, United Kingdom
Joined: June 22, 2010
KitMaker: 1,224 posts
Armorama: 1,207 posts
Posted: Tuesday, April 01, 2014 - 07:18 PM UTC
didnt get any building done yesterday - maybe tonight. 1 quick question, does anyone have any photos or instructions on how to build vision ports OPEN? the kit instructions only show how to do them closed - i assume the inner part swings through pushing the outer up, but any photos/instructions on how you guys have done it would be much appreciated....
SpeedyJ
Visit this Community
Bangkok, Thailand / ไทย
Joined: September 17, 2013
KitMaker: 1,617 posts
Armorama: 1,150 posts
Posted: Tuesday, April 01, 2014 - 08:05 PM UTC
Hi.
The link shows a history a some very nice examples from all kinds of Sd.Kfz 251. It's a little search to find the detail you need. But the Austin Museum has some good reference in color.
Although he's Dutch, the site is in English.

http://www.pietvanhees.nl/251/

Good luck,

RJ
SpeedyJ
Visit this Community
Bangkok, Thailand / ไทย
Joined: September 17, 2013
KitMaker: 1,617 posts
Armorama: 1,150 posts
Posted: Tuesday, April 01, 2014 - 09:42 PM UTC
Robert,

What colors do I have to paint the bridges. My resin kit has no color guide. What material is on top?
Thanks in advance.

RJ
robw_uk
Visit this Community
England - North East, United Kingdom
Joined: June 22, 2010
KitMaker: 1,224 posts
Armorama: 1,207 posts
Posted: Tuesday, April 01, 2014 - 11:01 PM UTC

Quoted Text

Robert,

What colors do I have to paint the bridges. My resin kit has no color guide. What material is on top?
Thanks in advance.

RJ


RJ - looking at the box art (am not at home at the moment so will check later) I believe it is wood with the "ramp" (ie the pointy ends) being metallic. I will confirm in a couple of hours when I get home
panzerbob01
Visit this Community
Louisiana, United States
Joined: March 06, 2010
KitMaker: 3,128 posts
Armorama: 2,959 posts
Posted: Wednesday, April 02, 2014 - 02:18 AM UTC
This may be one of those "art versus reality" questions...

Those bridges were factory-made stock equipment items. I would expect that they came fully-painted without any naked wood showing - they almost certainly came painted in the prevailing regulation base color of the issue year (blah. I LIKE the wood look!).

So... I would suggest painting them thusly - with your vehicle base-color. BUT, as these were made of wood with metal fittings, a used bridge could have both chipping and metal-exposure on those parts AND gouged up wood on those areas!

Also, IF you are doing the track up with a camo scheme, which likely was applied by the crew or a small front-area shop team, you might consider whether your "paint crew" removed the bridges before painting on the camo, or whether they simply sprayed over everything. You could plausibly have bridges in base color while the track is camo'd.

Just my opinion and suggestions, of course!

Bob
robw_uk
Visit this Community
England - North East, United Kingdom
Joined: June 22, 2010
KitMaker: 1,224 posts
Armorama: 1,207 posts
Posted: Wednesday, April 02, 2014 - 02:23 AM UTC

Quoted Text

This may be one of those "art versus reality" questions...

Those bridges were factory-made stock equipment items. I would expect that they came fully-painted without any naked wood showing - they almost certainly came painted in the prevailing regulation base color of the issue year (blah. I LIKE the wood look!).

So... I would suggest painting them thusly - with your vehicle base-color. BUT, as these were made of wood with metal fittings, a used bridge could have both chipping and metal-exposure on those parts AND gouged up wood on those areas!

Also, IF you are doing the track up with a camo scheme, which likely was applied by the crew or a small front-area shop team, you might consider whether your "paint crew" removed the bridges before painting on the camo, or whether they simply sprayed over everything. You could plausibly have bridges in base color while the track is camo'd.

Just my opinion and suggestions, of course!

Bob


all makes sense - i like the thought behind it, all makes for variation

EDIT - of course, if you look at the photo I have posted of the echelon decals, the bridge units are camo'd as well... BUT it does open up to "salvaging 1 of the 2 pieces form another vehicle that was painted differently" - now that DOES appeal to the "art over accuracy" geek in me ;-)
SpeedyJ
Visit this Community
Bangkok, Thailand / ไทย
Joined: September 17, 2013
KitMaker: 1,617 posts
Armorama: 1,150 posts
Posted: Wednesday, April 02, 2014 - 02:48 AM UTC
Hi all,
Wood and metal. So they had to fix that together. Bolts, means weak spots on the wooden parts. when running over such a 'bridge' with tracks, there will be no paint left I think.
All kind of weathering to be done.
I've decided to make the wood out very thin bamboe grass (Asia shop placemat). Easy to cut and has some fine grain too.
Later on I will post some pics on the work I've done today.

Cheers,

RJ
robw_uk
Visit this Community
England - North East, United Kingdom
Joined: June 22, 2010
KitMaker: 1,224 posts
Armorama: 1,207 posts
Posted: Wednesday, April 02, 2014 - 05:07 AM UTC

Quoted Text

Hi all,
Wood and metal. So they had to fix that together. Bolts, means weak spots on the wooden parts. when running over such a 'bridge' with tracks, there will be no paint left I think.
All kind of weathering to be done.
I've decided to make the wood out very thin bamboe grass (Asia shop placemat). Easy to cut and has some fine grain too.
Later on I will post some pics on the work I've done today.

Cheers,

RJ


niec idea RJ - i was toying with "breaking" part of mine to show damage but....

anyway the instructions have the end parts in steel and the rest wood (on mine there are 2 "boards" that would be steel and then the rest wood.....
SpeedyJ
Visit this Community
Bangkok, Thailand / ไทย
Joined: September 17, 2013
KitMaker: 1,617 posts
Armorama: 1,150 posts
Posted: Wednesday, April 02, 2014 - 05:16 AM UTC
Thanks Robert.
Removed by original poster on 04/02/14 - 22:05:14 (GMT).
Removed by original poster on 04/02/14 - 22:32:46 (GMT).
Removed by original poster on 04/02/14 - 22:52:57 (GMT).
Removed by original poster on 04/02/14 - 23:03:34 (GMT).
wrenchy
Visit this Community
Saskatchewan, Canada
Joined: April 23, 2006
KitMaker: 140 posts
Armorama: 46 posts
Posted: Wednesday, April 02, 2014 - 03:37 PM UTC
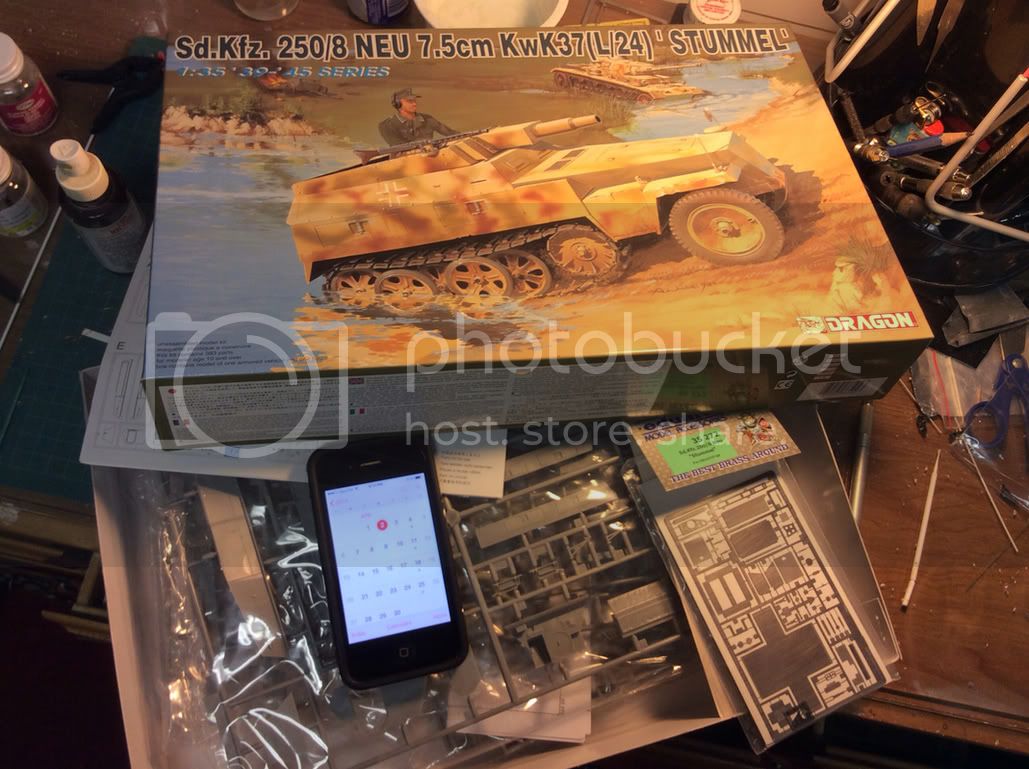
Well, since 250s are allowed, I'm in with this one. It'll be pretty much straight outta the box except for the Eduard pe. I'm planning on giving it an "abandoned" look to fit in a dio I have planned for the future.
corsair924
Visit this Community
New Hampshire, United States
Joined: August 11, 2008
KitMaker: 403 posts
Armorama: 322 posts
Posted: Thursday, April 03, 2014 - 07:46 AM UTC
All these kits look great

Man Wrenchy, that little 5 tonner must have bucked like hell when the 75 fired.
SpeedyJ
Visit this Community
Bangkok, Thailand / ไทย
Joined: September 17, 2013
KitMaker: 1,617 posts
Armorama: 1,150 posts
Posted: Thursday, April 03, 2014 - 07:54 AM UTC
I've got a question.
What does the ammo look like for a 7.5 like Wrenchy is building?
I want to order some for my 251.

Cheers,

RJ
3rdArmoredVet
Visit this Community
North Carolina, United States
Joined: August 28, 2013
KitMaker: 148 posts
Armorama: 108 posts
Posted: Thursday, April 03, 2014 - 02:07 PM UTC
Entering with this old jewel that I just won off of ebay for $5 and free shipping. Didn't have a complete box but did bless me with 2 broken axles. At least the pins were still in the bottom of the box and are now fixed. Nothing outrageous on this build, just wanting to compare my results to the nearly 30 year old built version of this kit that I still have. Hope I have gotten a little better since then.


Bluestab
Visit this Community
South Carolina, United States
Joined: December 03, 2009
KitMaker: 2,160 posts
Armorama: 1,906 posts
Posted: Thursday, April 03, 2014 - 03:00 PM UTC
Robert, Dragon's (6142) StuG Crew Reloading figure set has a few short 75mm rounds included. I used mine to fill out a scratchbuilt ready round rack on an old Tamiya Kanonenwagen. I think the figure set has four rounds. I'm not sure if that's enough to justify picking up a set, though there are some pretty nice posed figures there as well.
Tiger_213
Visit this Community
California, United States
Joined: August 10, 2012
KitMaker: 1,510 posts
Armorama: 1,443 posts
Posted: Thursday, April 03, 2014 - 05:40 PM UTC
Might be of interest;

http://www.sdkfz251.com/index.html

Personally thinking of building this;

http://www.cgtrader.com/3d-models/vehicle/military/sd-kfz-251-1-ausf-c-half-track-winterkit

Wanted do do 'Grief' but I think there will be a few of those. Maybe build one of the armored sleds that occasionally got towed into combat too.
robw_uk
Visit this Community
England - North East, United Kingdom
Joined: June 22, 2010
KitMaker: 1,224 posts
Armorama: 1,207 posts
Posted: Thursday, April 03, 2014 - 06:42 PM UTC
next question (sorry)... the "cab" part of the 251 - would that be painted the base exterior colour in the same way as the main crew compartment? am assuming so....

photos later but progress has begun - have the bottom & suspension built up. Plan is to do the upper & lower interior as individual parts, paint and weather, then put it together and do the exterior once all that is together
Tiger_213
Visit this Community
California, United States
Joined: August 10, 2012
KitMaker: 1,510 posts
Armorama: 1,443 posts
Posted: Thursday, April 03, 2014 - 06:49 PM UTC

Quoted Text

next question (sorry)... the "cab" part of the 251 - would that be painted the base exterior colour in the same way as the main crew compartment? am assuming so....

photos later but progress has begun - have the bottom & suspension built up. Plan is to do the upper & lower interior as individual parts, paint and weather, then put it together and do the exterior once all that is together


Interior of the drivers compartment should be German interior white. Interior of the fighting compartment is base color of the vehicle; likely panzergrau or dunkelgelb.

Unless someone else knows something I don't?
SpeedyJ
Visit this Community
Bangkok, Thailand / ไทย
Joined: September 17, 2013
KitMaker: 1,617 posts
Armorama: 1,150 posts
Posted: Thursday, April 03, 2014 - 08:16 PM UTC
The links are great Chris.
Helps me out to find the right position of the Maybach HL42 TUKRM engine. I will add the little beauty to my AFV kit.
Needs a little surgery, but it's no big deal, as far as I,ve seen.
Great Wall has a great kit, with very nice details. Only the plumbing is not to been on the boxart. So I'll have to find me the right pictures and engine. Maybach HL42 TUKRM is a 6 cilinder with a double fan cooler.
Later today I'll show some progress on my builds.
There are 2 Sd.Kfz.251 type C on my bench.
With the PE from Voyager, Azimut resin parts and spares I'm trying to make the best out of 2 kits to update the poor detailed Tamiya and build the AFV with an open engine compartment.

Cheers,

RJ
robw_uk
Visit this Community
England - North East, United Kingdom
Joined: June 22, 2010
KitMaker: 1,224 posts
Armorama: 1,207 posts
Posted: Thursday, April 03, 2014 - 08:58 PM UTC
yep - thats a great resource on the 251... think i will do the interior all dunkelgelb... seems to be what the reconstruction has....
robw_uk
Visit this Community
England - North East, United Kingdom
Joined: June 22, 2010
KitMaker: 1,224 posts
Armorama: 1,207 posts
Posted: Thursday, April 03, 2014 - 09:18 PM UTC
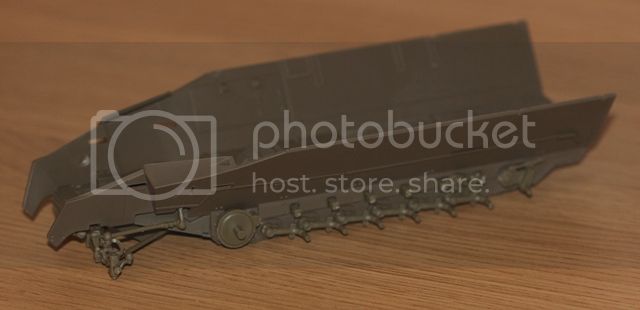
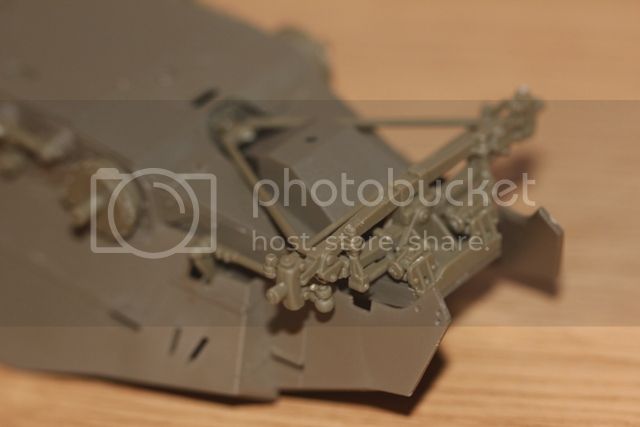
as promised - update photos... not much done, sides on, suspension on... of and done the 2 bridges and the wheels (well the ones that need to be together rather than the ones in & out) (no photos)....